Branches
Branches menu allows you to maintain the branch / branches that are linked to an entity in Aura.
The following are the tabs in Branch:
Adding a Branch
To add a Branch
- From Admin menu, click Branches, and then Maintain. The Branch Search page appears. All Branches available in Aura appear on the page, sorted alphabetically based on their names.
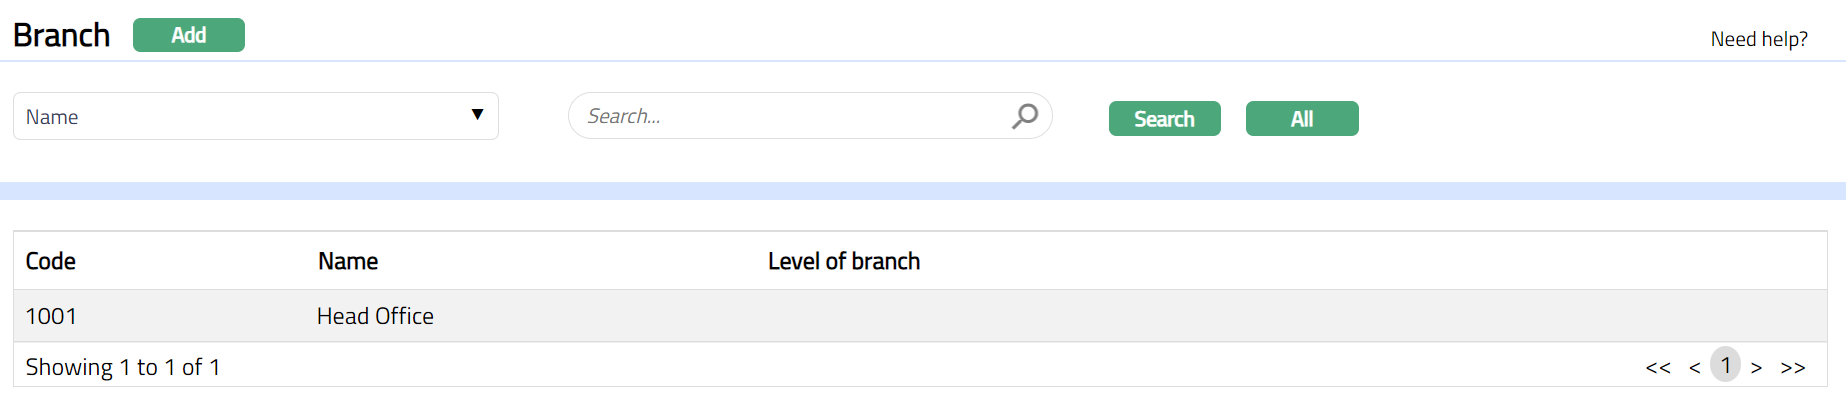
- Click Add. New Branch -- General (1/3) page appears.
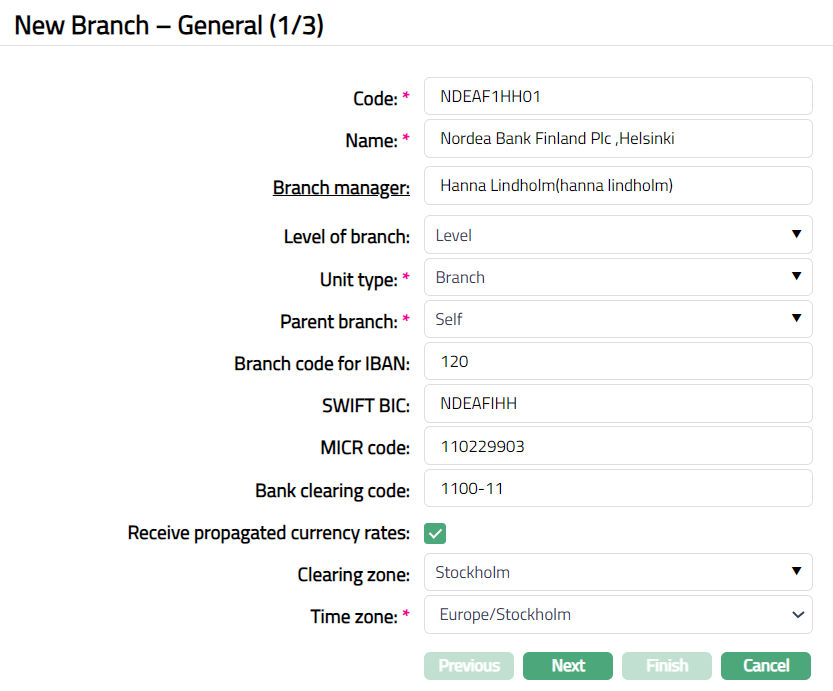
Enter unique Code to be assigned to the new Branch. This is a unique identification code and should not exceed 10 (ten) characters.
Enter descriptive Name of the Branch.
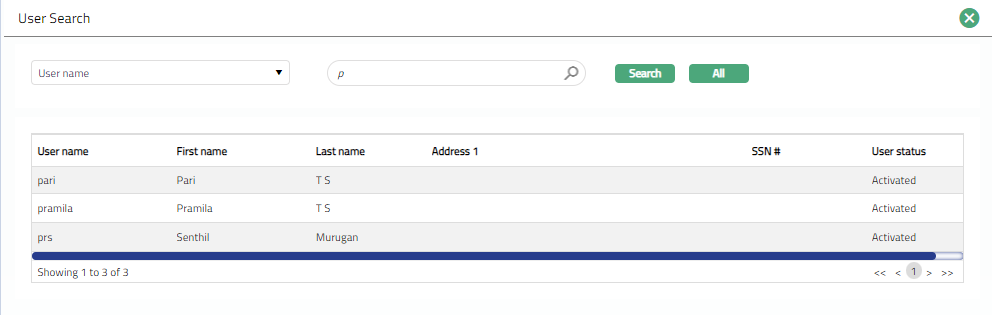
Click Branch manager hyperlink, which opens up a new screen called User Search (as shown below). This allows you to select one of the existing User records as manager of the Branch.
Select Level of branch from the list of available dropdown options. The level should have been created using the Branch Level Maintenance option.
Select Unit type from the list of available dropdown options. The options available are Branch / ATM / Satellite Office. An Satellite Office is a retail location or an external agency, where it can perform certain actions of the bank. A branch or an ATM can be independent units. For a Satellite Office, the parent branch has to be a Branch.
Select Parent branch from the list of available dropdown options. The Parent branch should have already been created with the same option i.e., Branches Maintenance. You may choose Self, if this branch does not report to any other branch.
Enter Branch code for IBAN. This code will depend upon the IBAN format maintained for the country in Entity Maintenance option.
Enter SWIFT BIC for the branch. It is possible for a Branch not to have a separate SWIFT BIC, in which case, the country SWIFT BIC for the bank can be used.
MICR (Magnetic Ink Character Recognition) code is a 9-digit unique code that is used for the cheque clearing process to identify the branch.
Enter Bank clearing code of the financial institution / intermediary. A Bank clearing code is a code assigned by central bank, a bank supervisory body or a Bankers Association in a country to all its licensed member banks.
Check Receive propagated currency rates check box so that the new branch can receive any changes in the currency rates from other branches and apply the same. If the specific rate type or currencies are not maintained for the branch, the currency rates will not be propagated.
Select Clearing Zone from the drop-down list of values maintained under Admin > Generic definition > Clearing Zone. It specifies the area where the financial institutions clear the Instrument types (like Cheques, Demand Draft etc).
Select Time Zone from the drop-down list of pre- shipped values. Time Zone indicates the time zone of the country in which the branch is located.
Click Next. New Branch -- Accounting Settings (2/3) page appears.
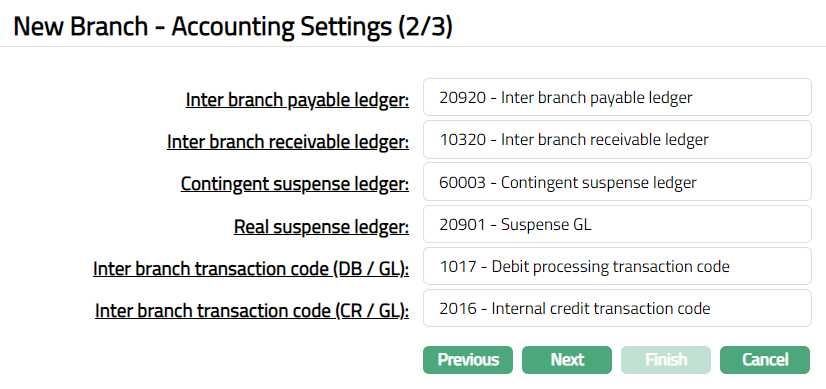
Inter branch payable ledger field is a hyperlink. On click of the hyperlink, Aura will display the GL account search window. All the GL accounts belonging to ledger type Liability are shown. You can select the required account that will be used to account all the inter-branch payable entries for this branch.
Inter branch receivable ledger field is a hyperlink. On click of the hyperlink, Aura will display the GL account search window. All the GL accounts belonging to ledger type Asset are shown. You can select the required account that will be used to account all the inter-branch receivable entries for this branch.
Contingent suspense ledger field is a hyperlink. On click of the hyperlink, Aura will display the GL account search window. All the GL accounts belonging to ledger type contingent Liability are shown. You can select the required account that will be used to account the contingent suspense entries for this branch.
Real suspense ledger field is a hyperlink. On click of the hyperlink, Aura will display the GL account search window. All the GL accounts belonging to ledger type Liability are shown. You can select the required account that will be used to account the real suspense entries for this branch.
Select Inter branch Transaction Code (GL/DB) from the list of available dropdown options. This is used to select the transaction code for general ledger debit transfer; and should have been created using the General Ledger Transaction Code Maintenance option.
Select Inter branch Transaction Code (GL/CR) from the list of available dropdown options. This is used to select the transaction code for general ledger credit transfer; and should have been created using the General Ledger Transaction Code Maintenance option.
Click Next. New Branch -- Confirmation (3/3) page appears.
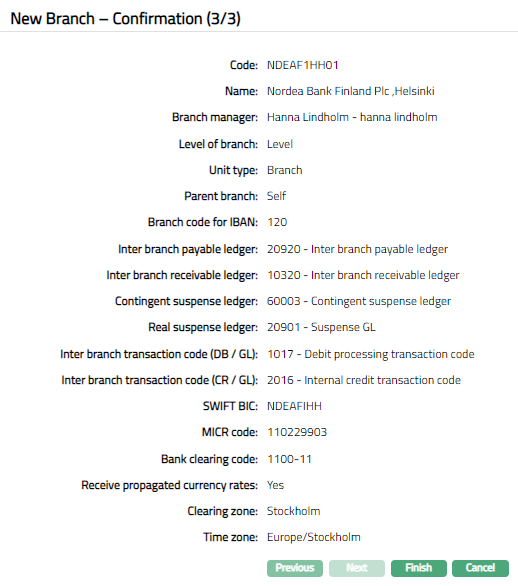
- Click Finish. Branch page appears displaying the added details of the Branch in Profile tab.
 Function: Add, Delete, Search
Delete: To delete the existing branch, click Delete. You can delete the branch only if it is not in use.
Note: If the custom field is mapped to Branch under Admin > System Codes > Custom fields > Field mapping, then an additional screen will appear before the confirmation screen. The custom fields will be mandatory or non-mandatory based on the rules set at the Field mappings. For more detail on custom field functionality please refer Admin > System codes > Custom fields > Field mappings manual.
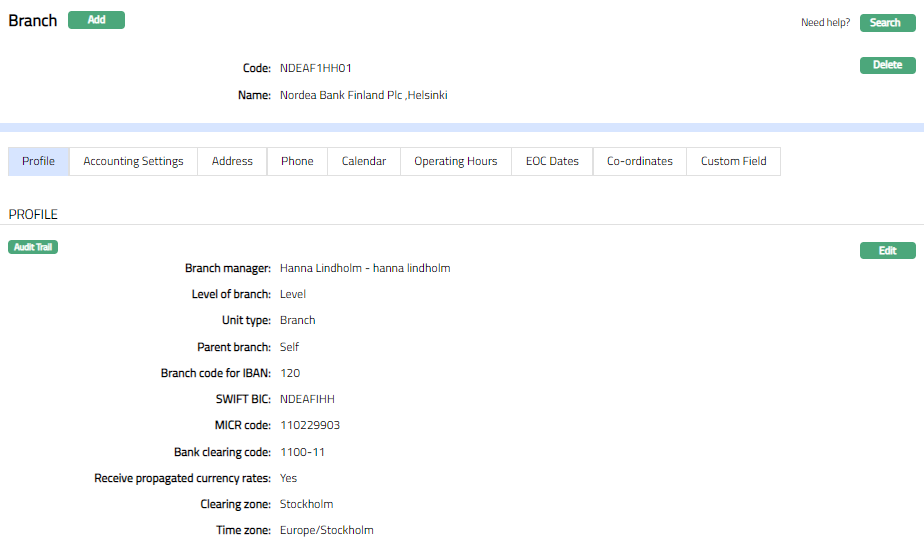
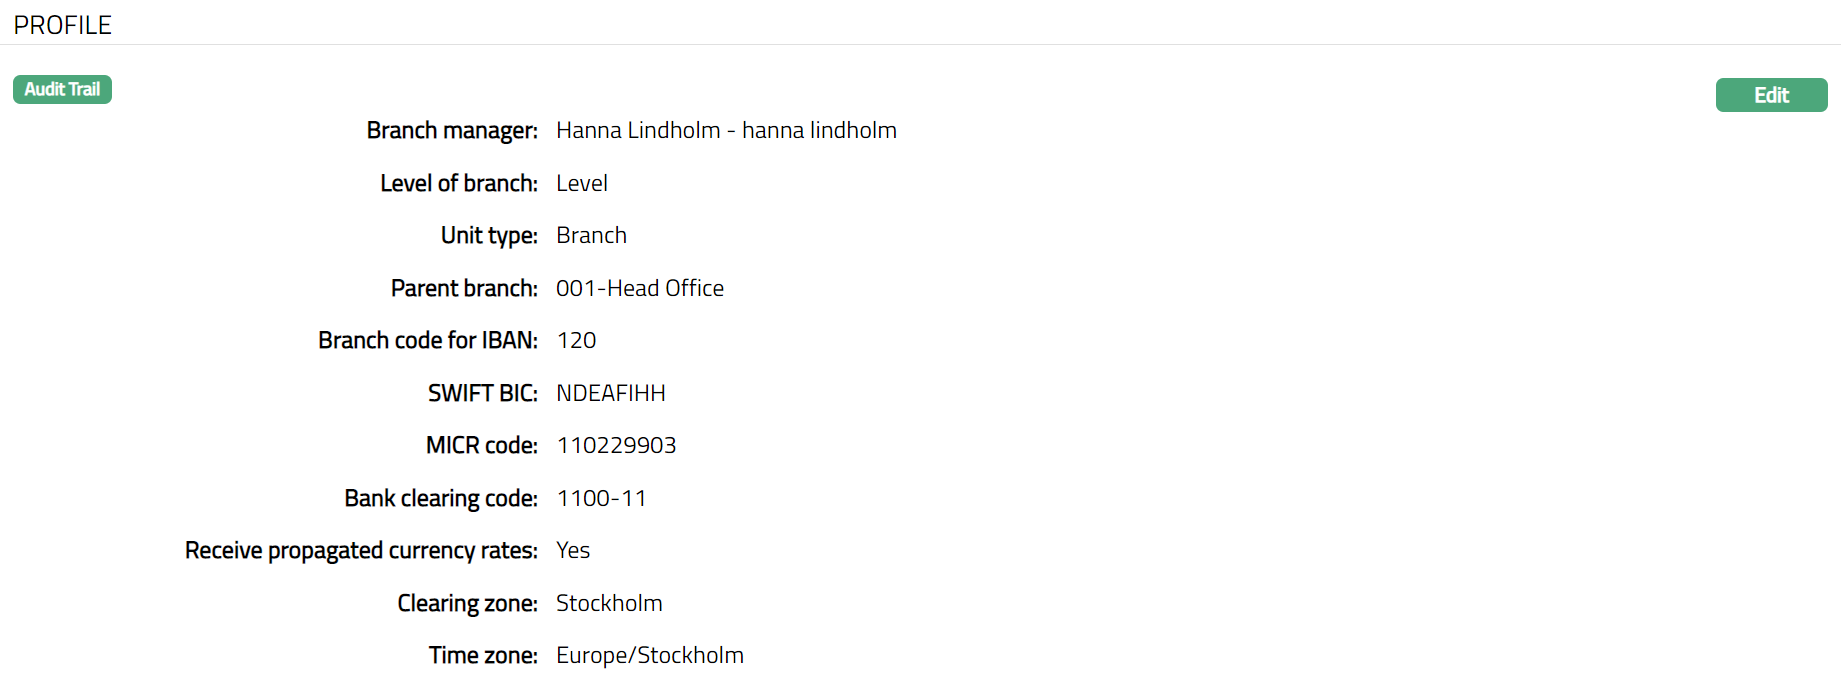
Profile
The Profile tab, which is the default tab in the Branch screen, shows the basic details of the branch. Refer to New Branch -- General (1/3) for detailed explanation.
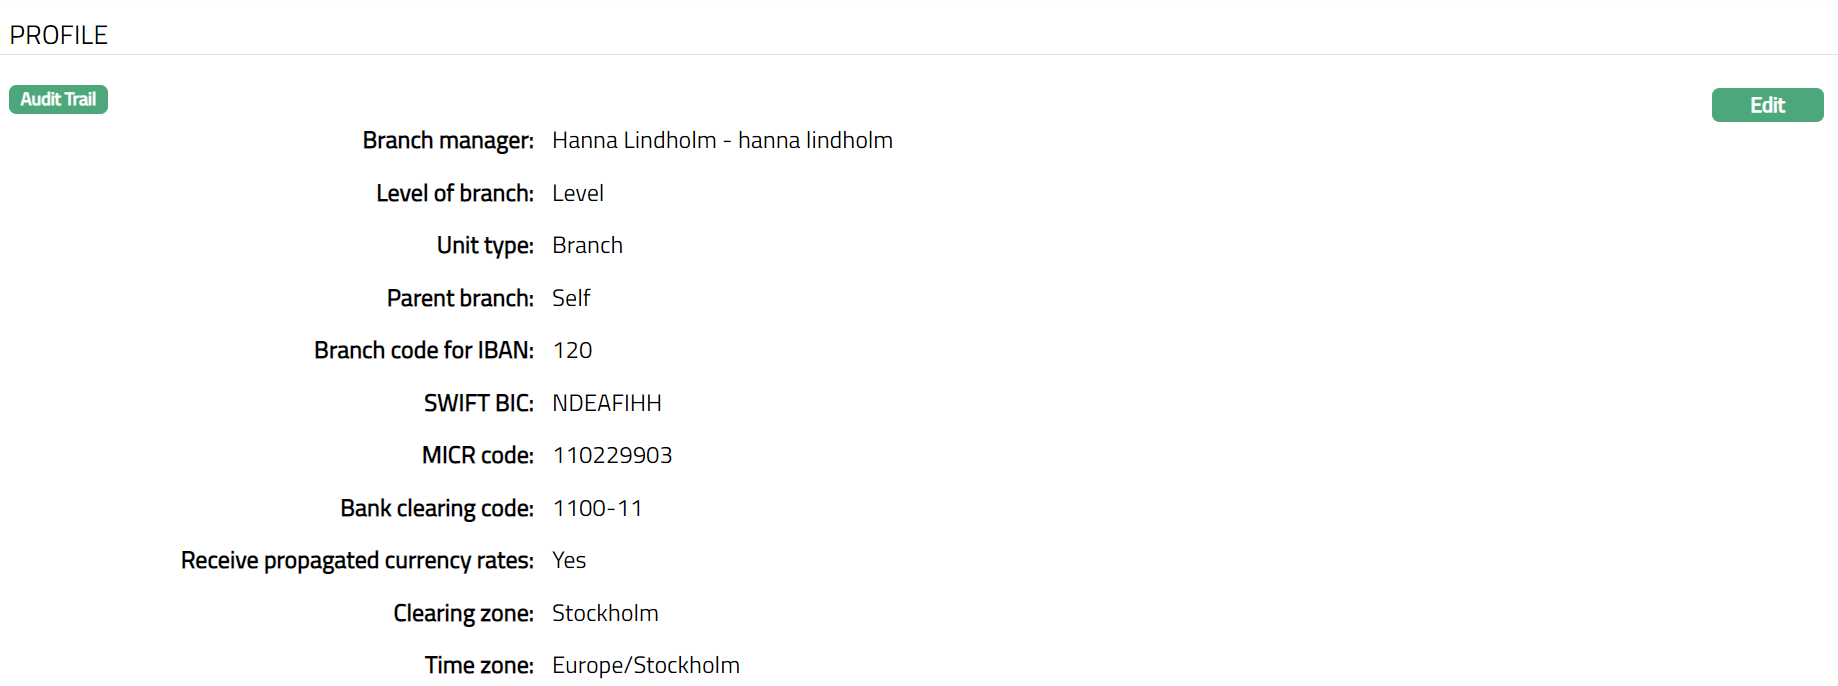
A sample of the Profile tab is shown below:
To view / edit Profile.
- Access Branch page and click Profile tab.
- Click Edit. Edit Branch page will be displayed.
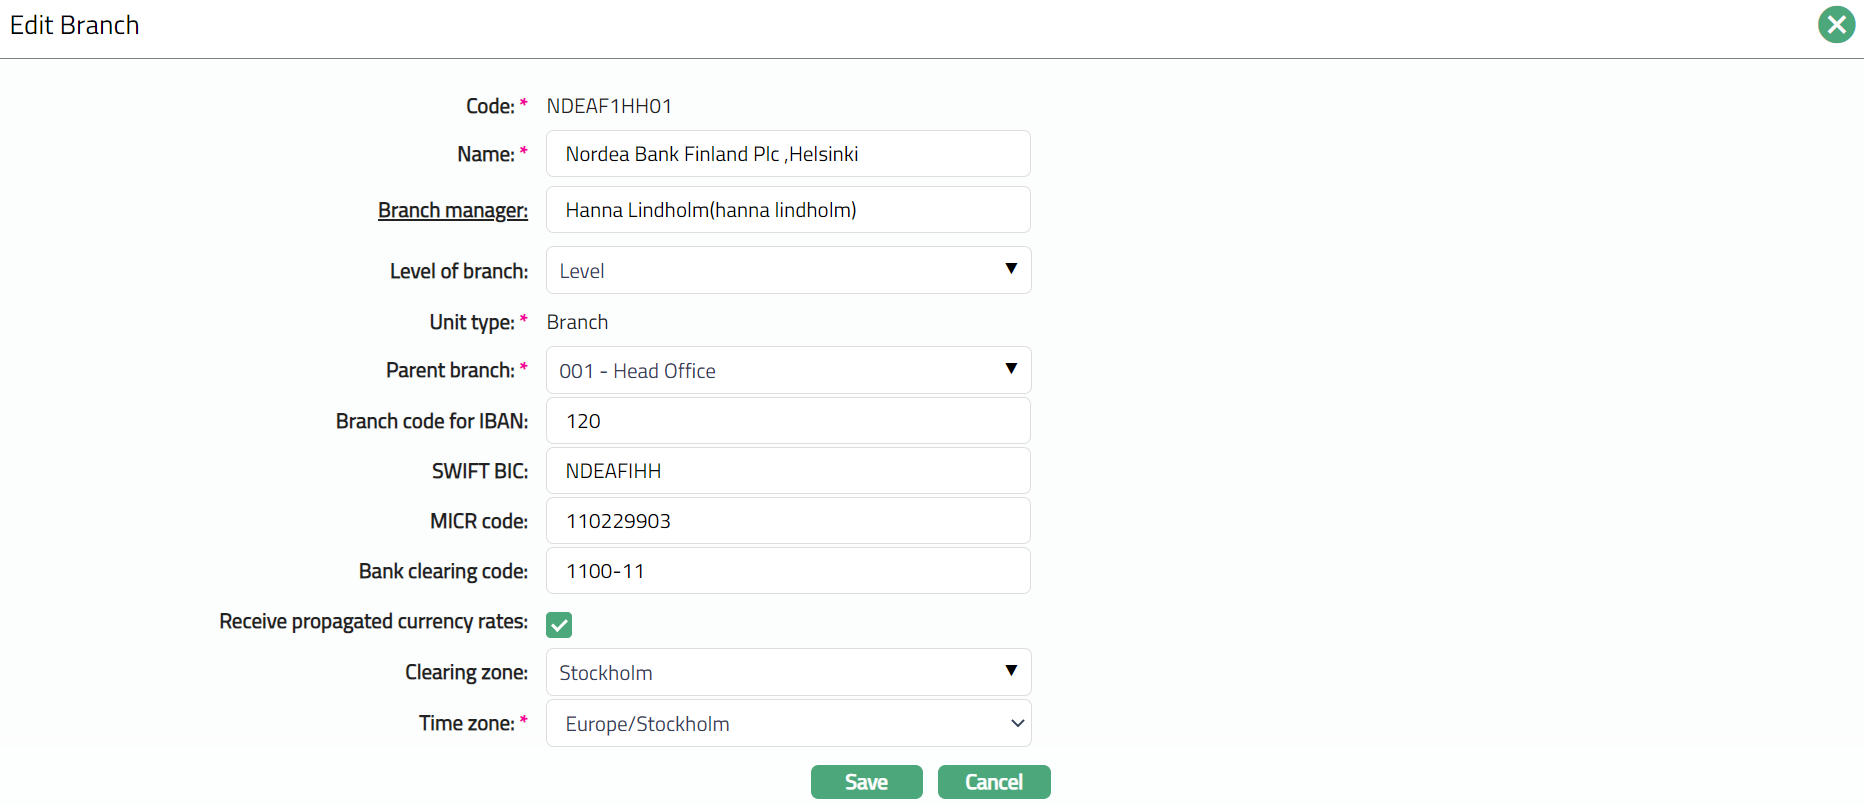
Note: Except Code and Unit type all other fields are editable.
- Click Save. Profile page appears with the edited details.
Function: Edit
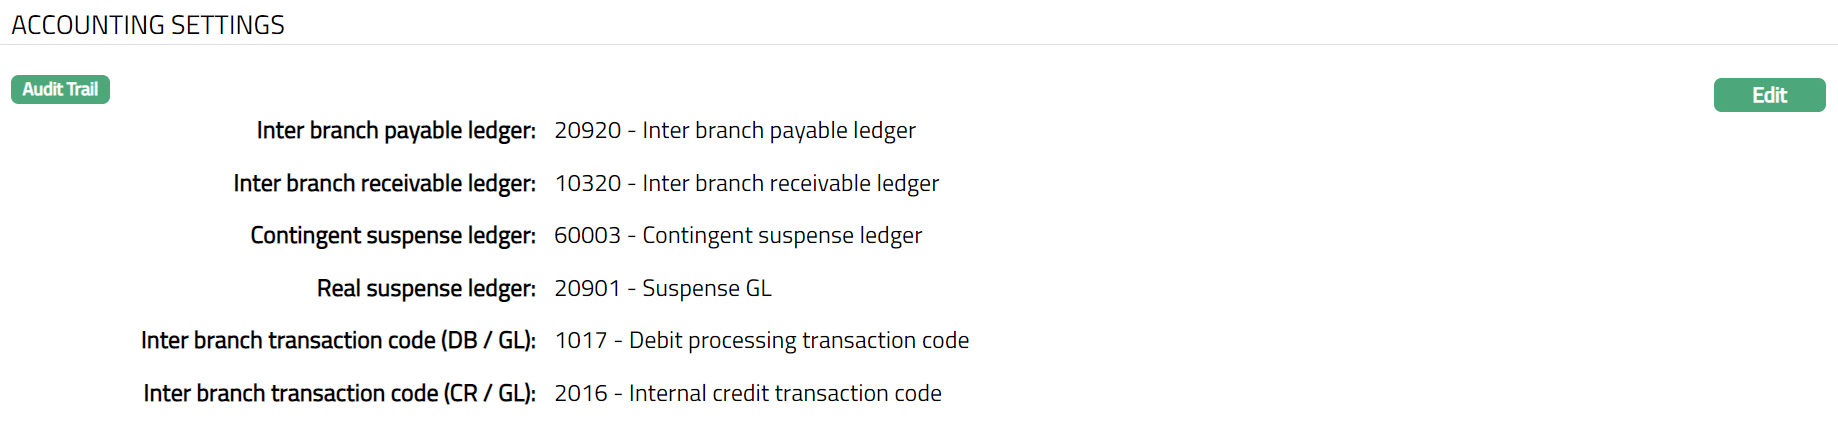
Accounting Settings
The Accounting Settings tab allows you to maintain the GLs and the Transaction codes that are used for posting the inter branch transaction entries.
To View / Edit Accounting Settings,
- Access Branch page and click Accounting Settings tab.
- Click Edit. Edit Account Settings page is displayed.
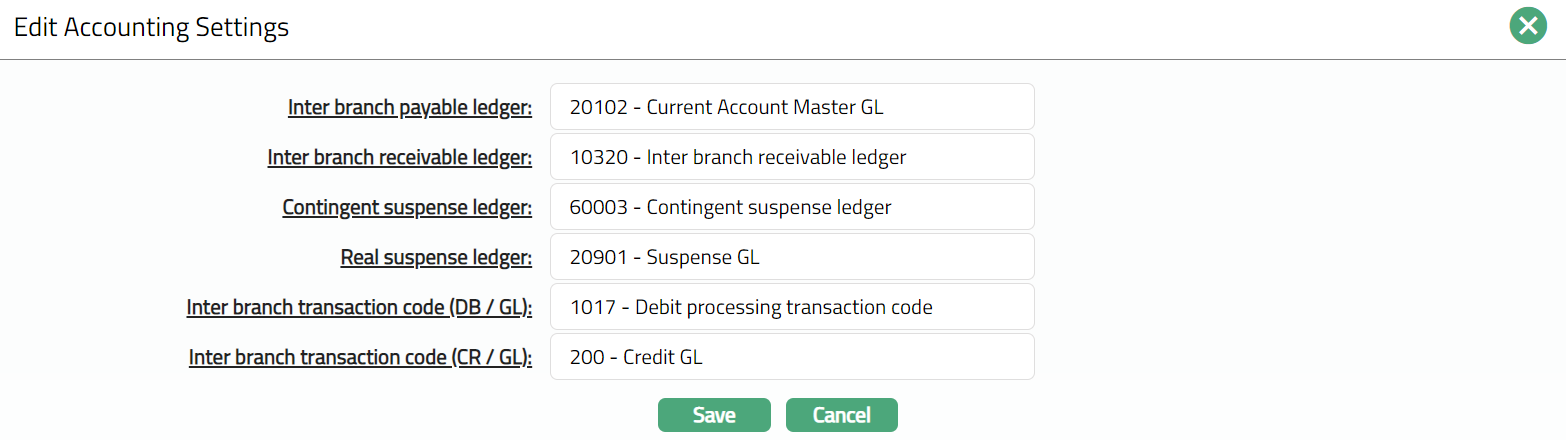
Note: All fields are editable.
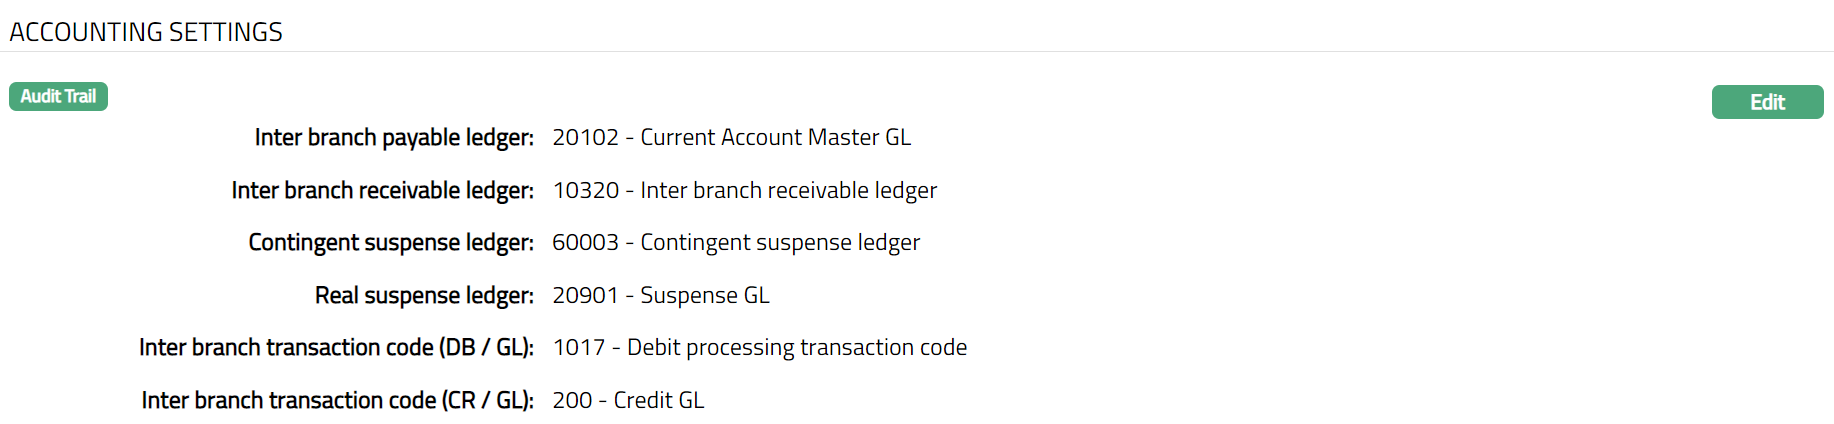
- Click Save. Accounting page appears with the edited details.
 Function: Edit
Address
The Address tab allows you to maintain the address details of the Branch.
For a new Branch record, the Address fields will not be available by default (as shown below) and therefore, need to be added.
To add the Address details
- Access Branch page and click Address tab.

- Click New. New Address page opens up.
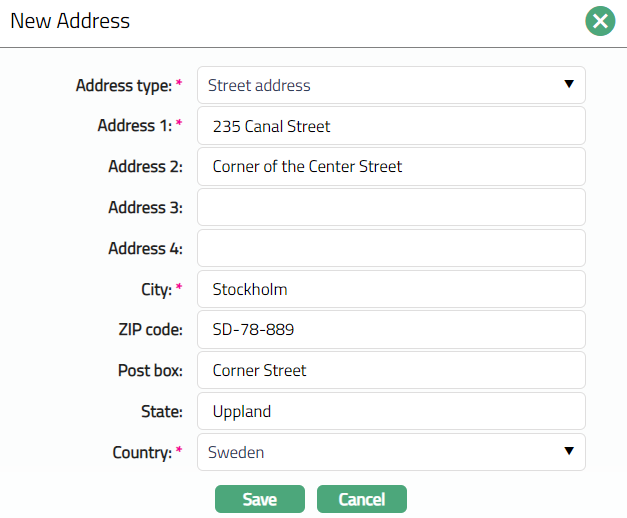
Select Address type from the list of available dropdown options. The Address type should have been created using Admin > System Codes > Address Details > Address Types option.
Enter address details of the Branch in Address 1, Address 2, Address 3 and Address 4 fields.
Enter City or the town of the Branch's address as designated by the post office.
Enter Zip code or postal code in full, if used in the Branch's address.
Enter Post box of the branch address.
Enter State in which the address exists, if applicable.
Select Country from the list of available dropdown options. The Country should have been created using the Countries Maintenance option.
Click Save. Address page appears with the added details.
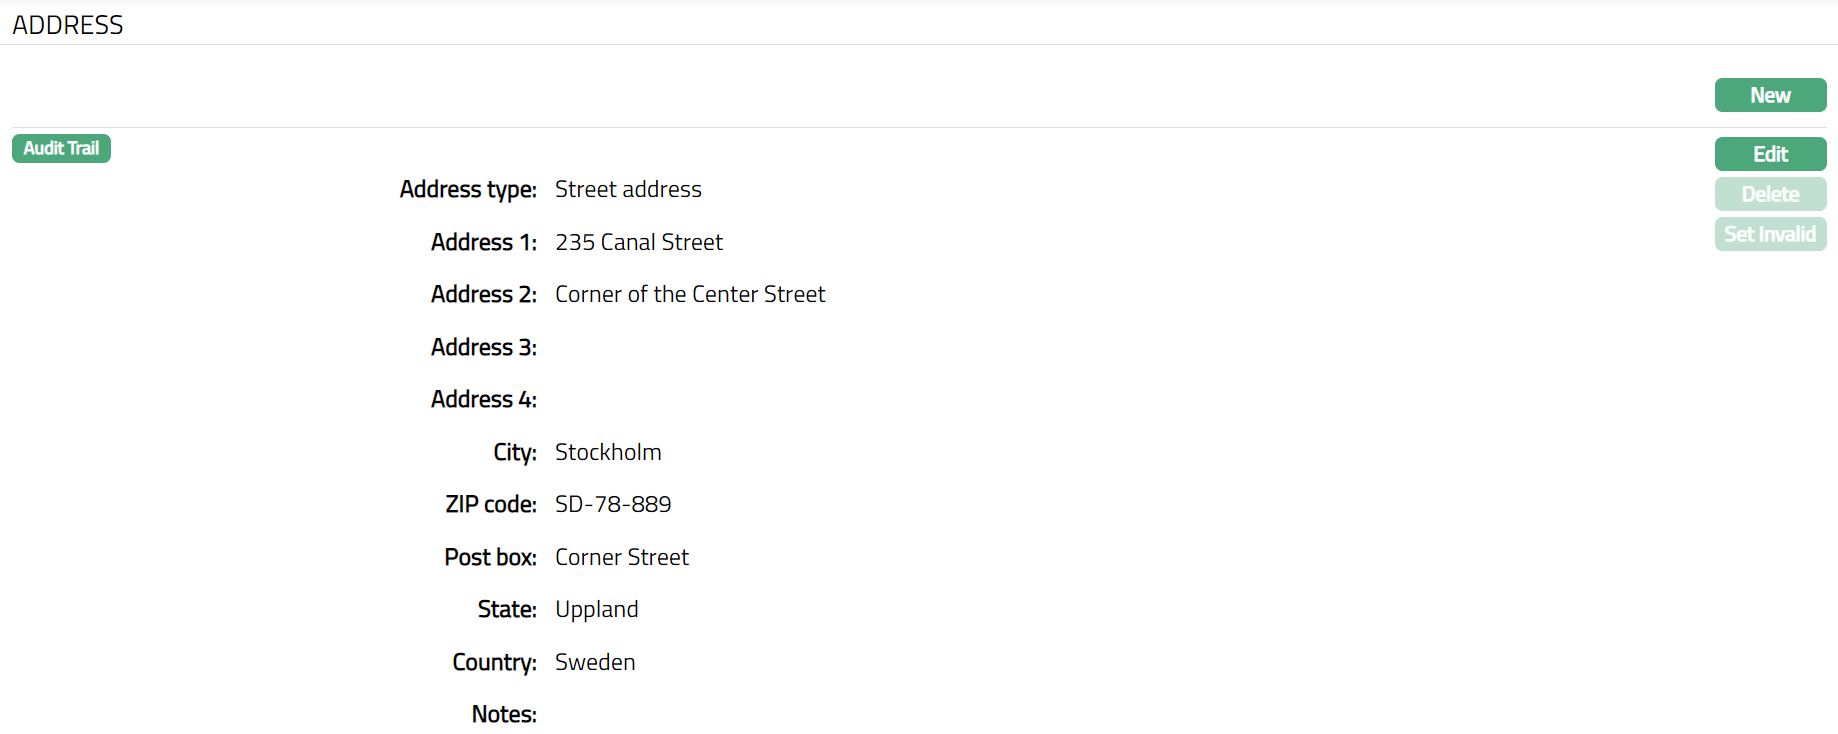
Functions: New, Edit, Delete, Set Invalid, Set Valid
Note: When you create multiple address records, you can set one of them as the default address using the Set Default function. When there is only one address, the same is taken as the default address. Once saved, there will be an additional field -- Notes, with which you can add any additional information that you wish regarding the Address record (using Edit function).
Delete: You can delete the Address saved in Aura by clicking on Delete button. Aura will ask for confirmation, on approving which selected record will be deleted.
Set Invalid: You can set the selected address as invalid by clicking on Set Invalid button. When you click on Set Invalid button, Aura will ask for confirmation. On confirmation Aura will set the address as invalid and Set Valid button will appear in place of Set Invalid button.
Set valid: If you want to set the address as valid, then click on Set valid button. Aura will ask for confirmation. On confirmation Aura will set the address as valid and Set Invalid button will appear in place of Set valid button
To edit Address
- Click Edit. Edit Address page is displayed.
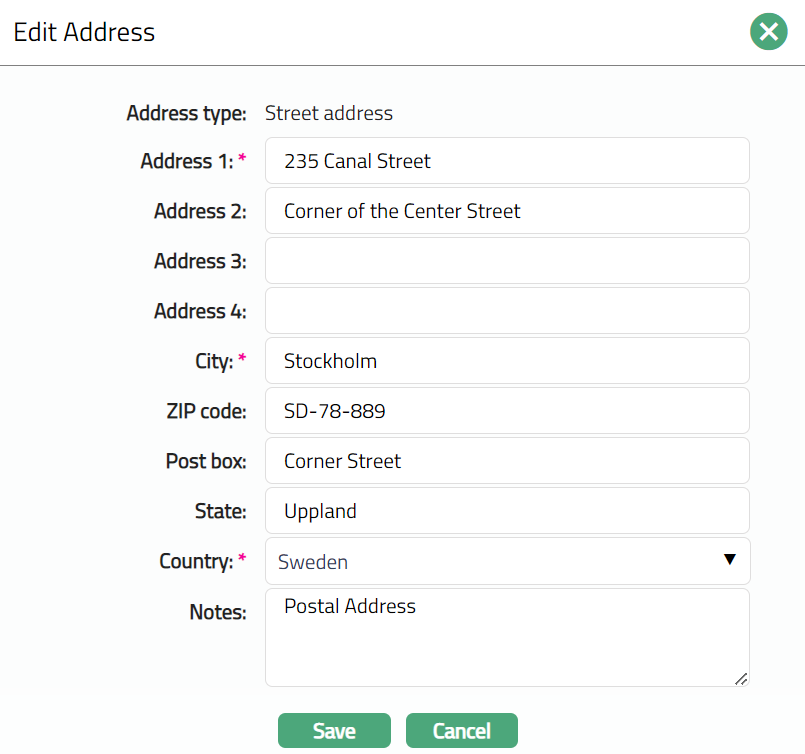
Note: All fields, except Address Type, are editable.
- Click Save. Address page appears with the edited details.
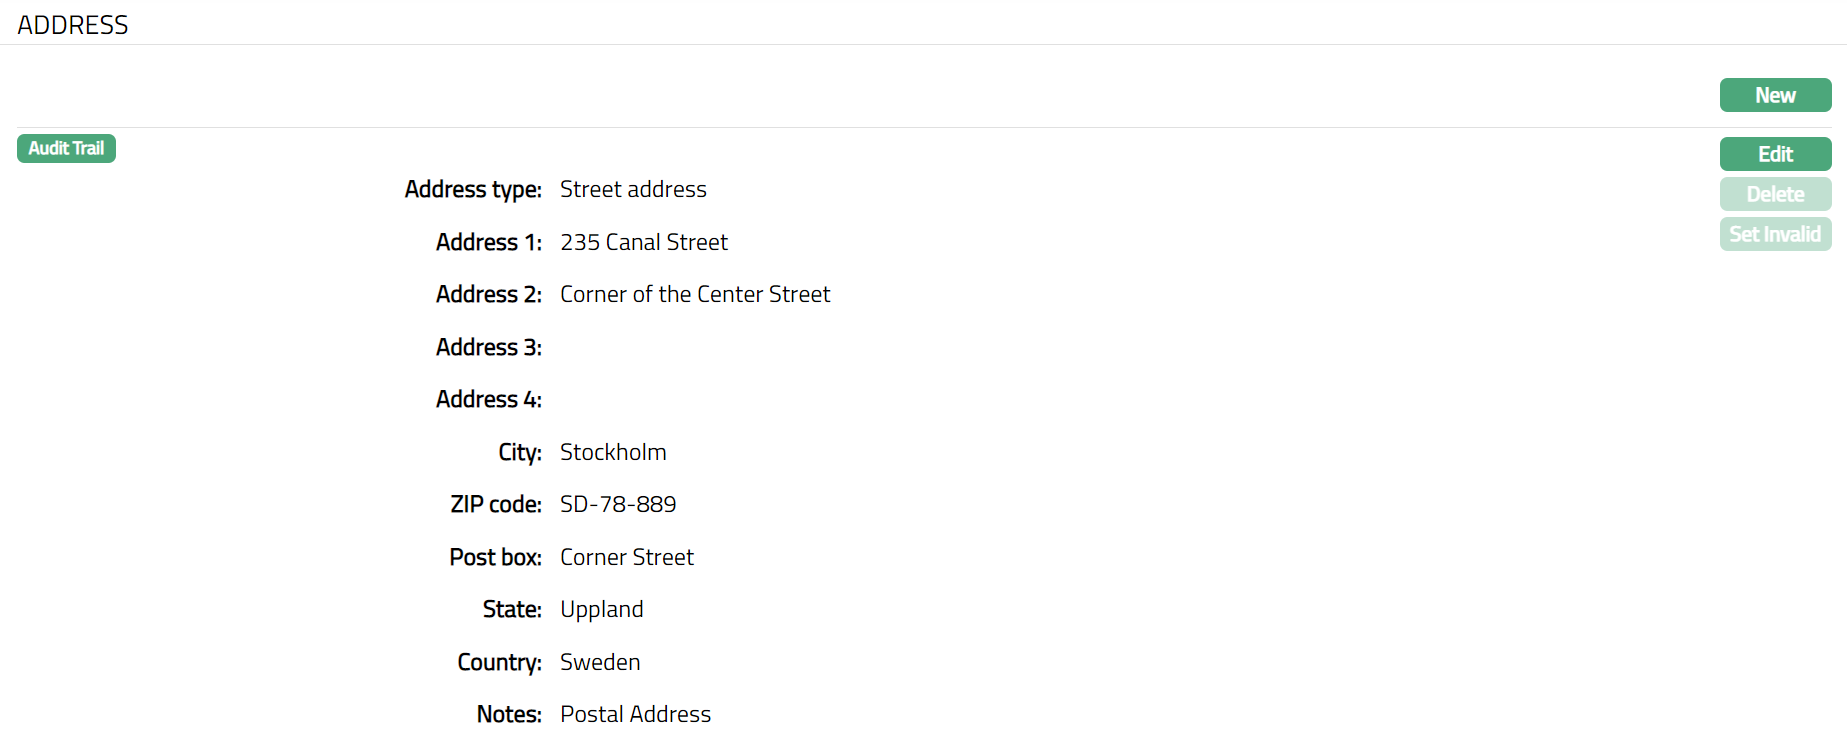
Functions: New, Edit, Delete, Set Invalid, Set Valid
Phone
The Phone tab allows you to maintain the phone number(s) of the Branch.
For a new Branch record, the Phone fields will not be available by default (as shown below) and therefore, need to be added.
To Add Phone details
- Access Branch page and click Phone tab.

- Click New. New Phone page appears.
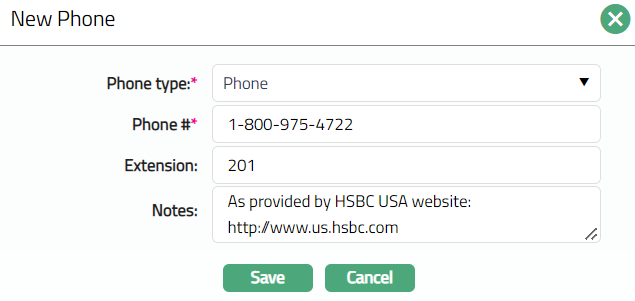
Select Phone type from the list of available dropdown options. The Phone type should have been created using the admin > System Codes > Address Details > Phone type option.
Enter Phone # i.e., the actual phone number to contact the Branch.
Enter Extension for the Phone #, if applicable.
Enter Notes if there is any additional information that you wish to capture regarding the new phone record.
Click Save. Phone page appears with the added details.
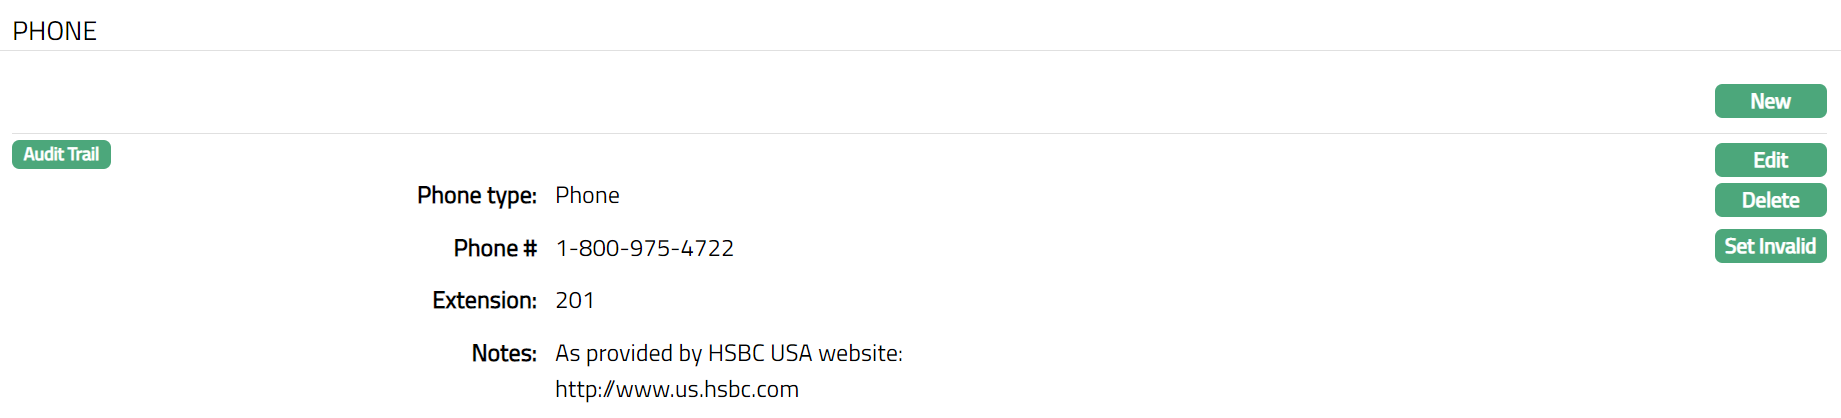
Functions: New, Edit, Delete, Set Invalid, Set Valid
Note: When you create multiple phone records, you can set one of them as the default phone using the Set Default function. When there is only one phone, the same is taken as the default phone.
Delete: You can delete Phone record saved in Aura by a clicking on Delete button. Aura will ask for confirmation, on approving which the selected record will be deleted.
Set Invalid: You can set the selected Phone details as invalid by clicking on Set Invalid button. When you click on Set Invalid button, Aura will ask for confirmation. On confirmation Aura will set the address as invalid and Set Valid button will appear in place of Set Invalid button.
Set valid: If you want to set the Phone details as valid, then click on Set valid button. Aura will ask for confirmation. On confirmation Aura will set the address as valid and Set Invalid button will appear in place of Set valid button
To Edit Phone
Click Edit. Edit Phone page appears.

Note: All fields are editable.
Click Save. Phone page appears with the edited details.
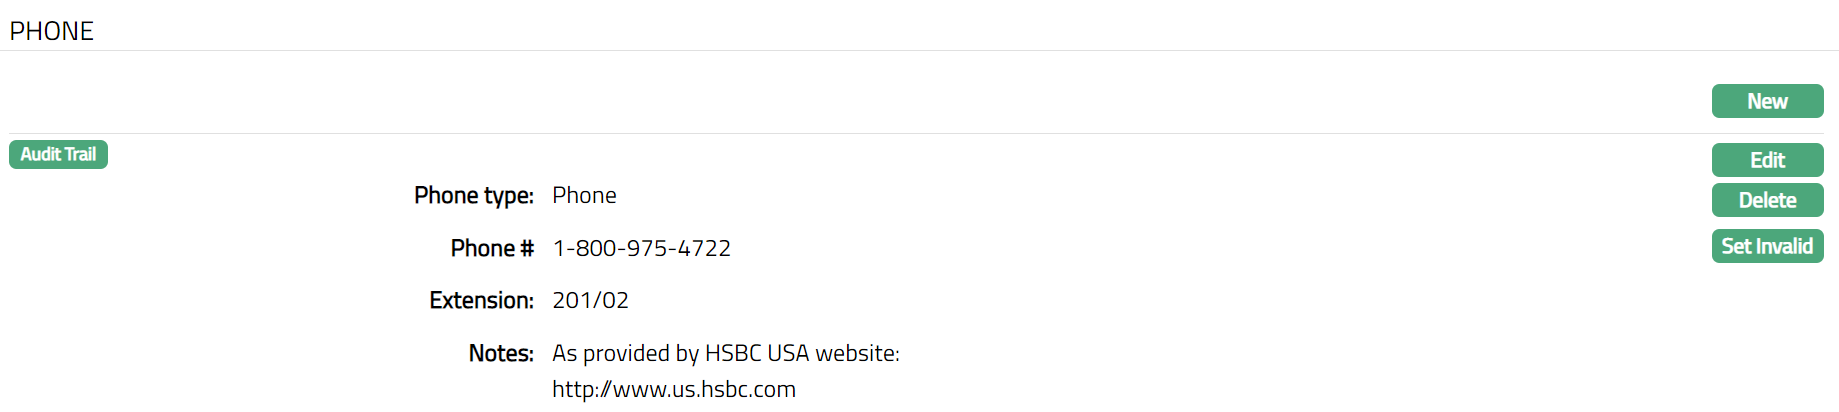
Functions: New, Edit, Delete, Set Invalid, Set Valid
Calendar
The Calendar tab allows you to maintain the holiday(s) for the Branch.
This consists of two sub-tabs:
Calendar
Holiday List.
Note: The Calendar sub-tab displays the holidays created in the Holiday List sub-tab.
For a new Branch record, the Holiday records will not be available under the Holiday List sub-tab (as shown below) and therefore, need to be added.
Calendar:
To view Calendar
- Access Branch page and click Calendar tab.
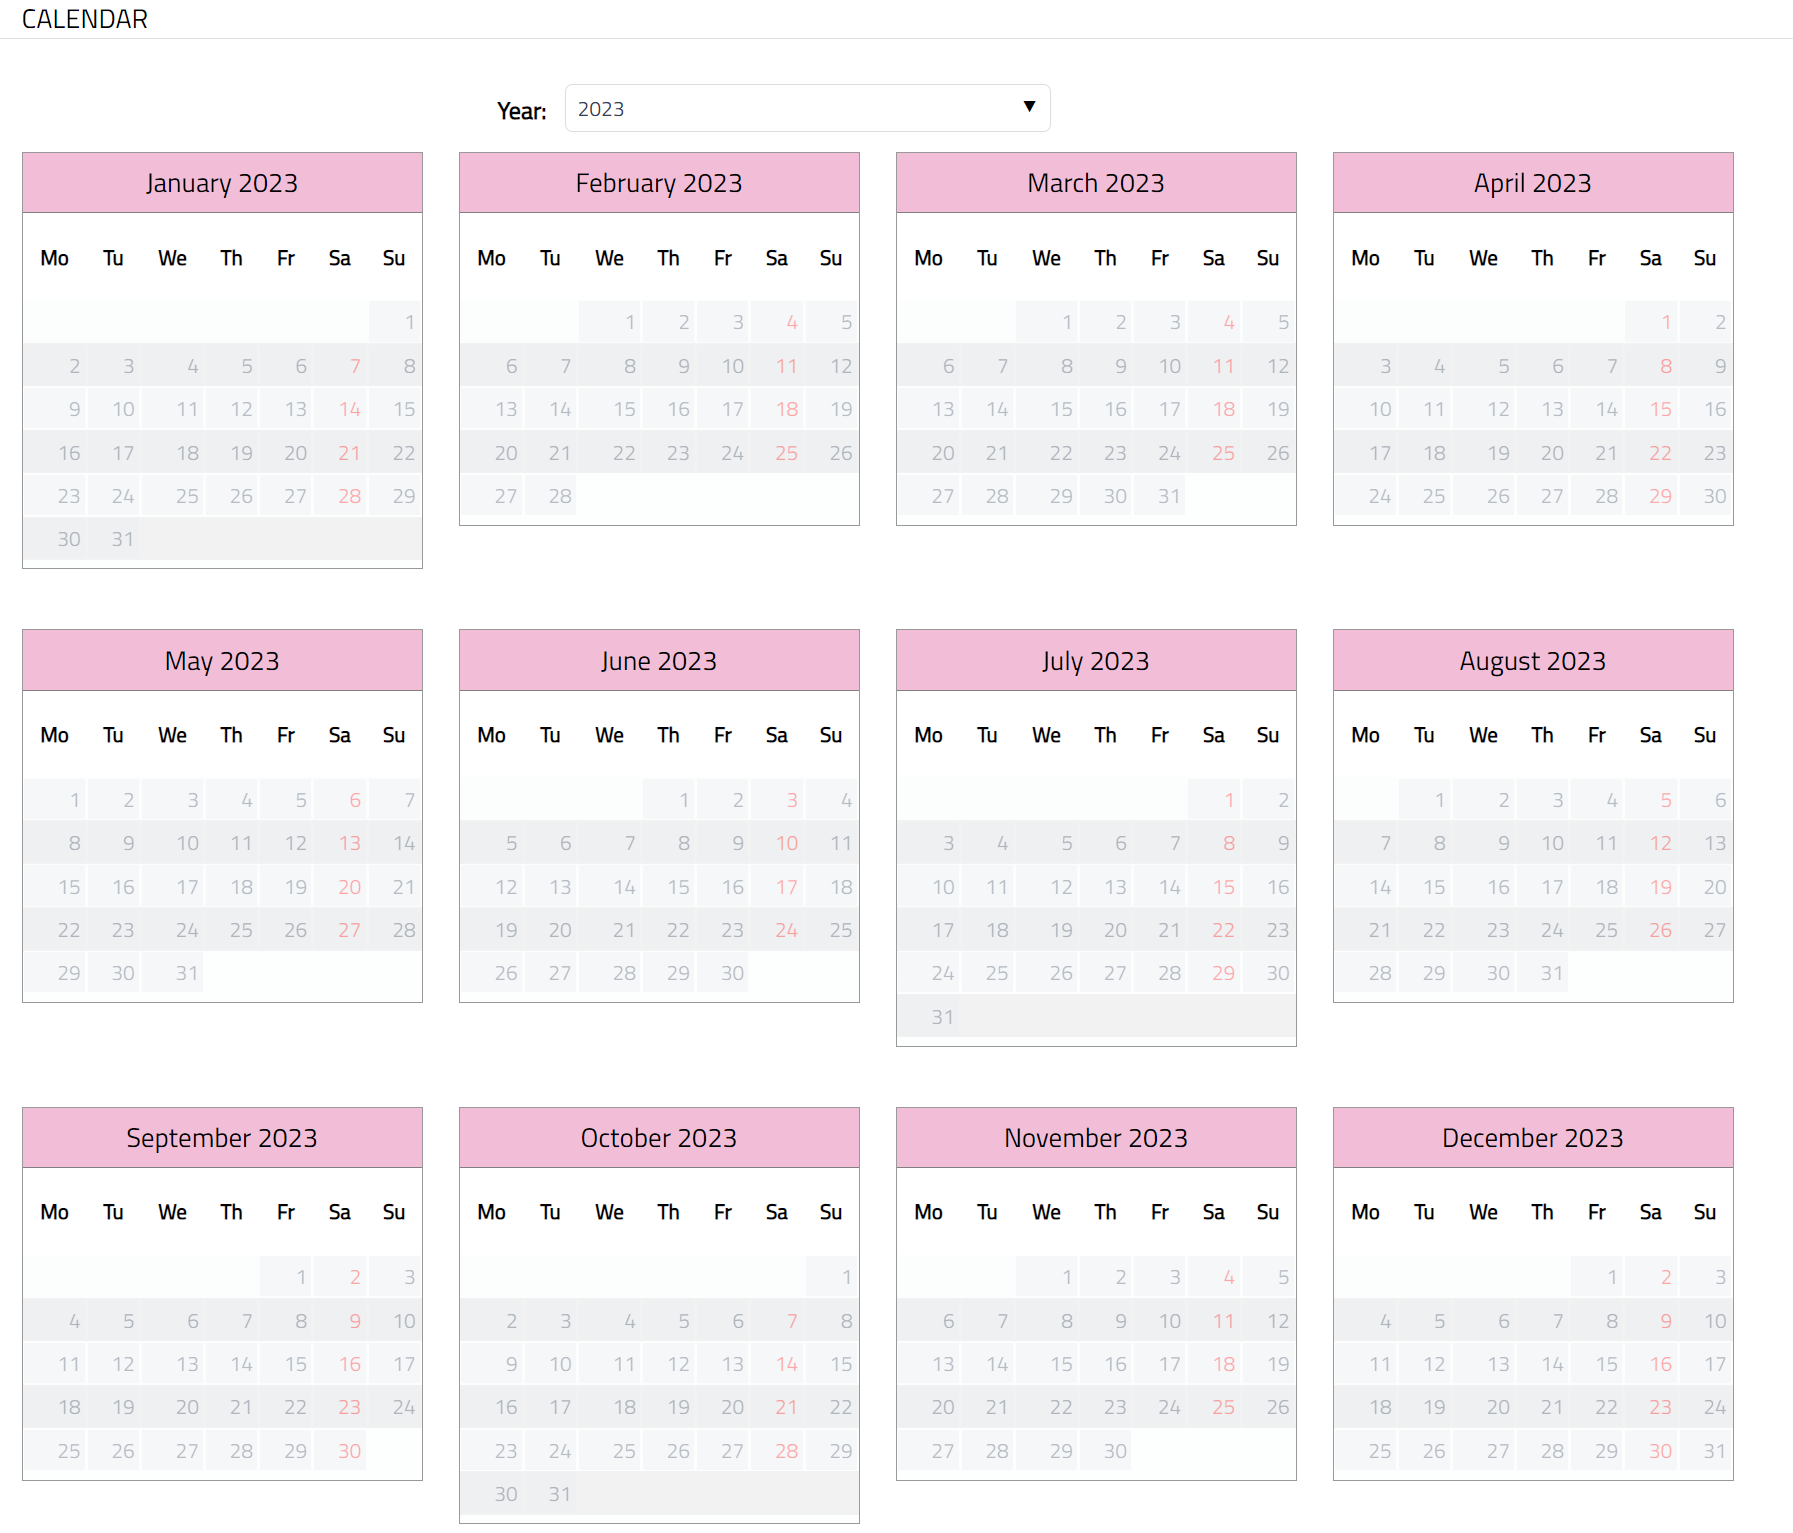
Note: All Holidays in Aura will be displayed in red for different years chosen in the Calendar sub-tab. For this example, all Saturdays will be displayed in red font.
Holiday List:
To Add holiday list,
- Access Branch page and click Calendar tab and then click Holiday list tab.

- Click New. New Holiday page opens up.
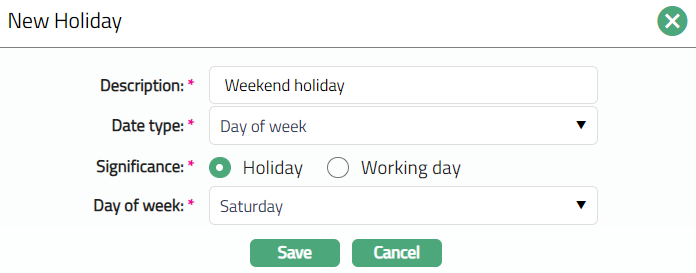
Enter Description for the new Holiday record.
Select Date type from the available list of dropdown options.
| Day of Week | Recurrence for that day of all the weeks |
| Month and Day | Recurrence for that day of the month every year |
| Date | One-time holiday/working day for this particular date |
| End of Month | Recurrence for every month end |
- Based on the Date Type selected above, the following additional field(s) will open up. Input the details as required:
Date type = Day of week; new field Day of week is added, which has the dropdown options from Monday to Sunday.
Date type = Month and day; new fields Month and Date are added, which have dropdown options from January to December (for Month) and 1 to 31 (for Date).
Date type = Date; new field Date is added, which allows you to select any date from a date picker.
Date type = End of month, new field Month is added, which has the dropdown options from January to December
Select the Significance of the day / date specified from the radio button options -- either Holiday or Working day.
Click Save. Holiday List page appears with the added details.

Functions: New, Delete
Operating Hours
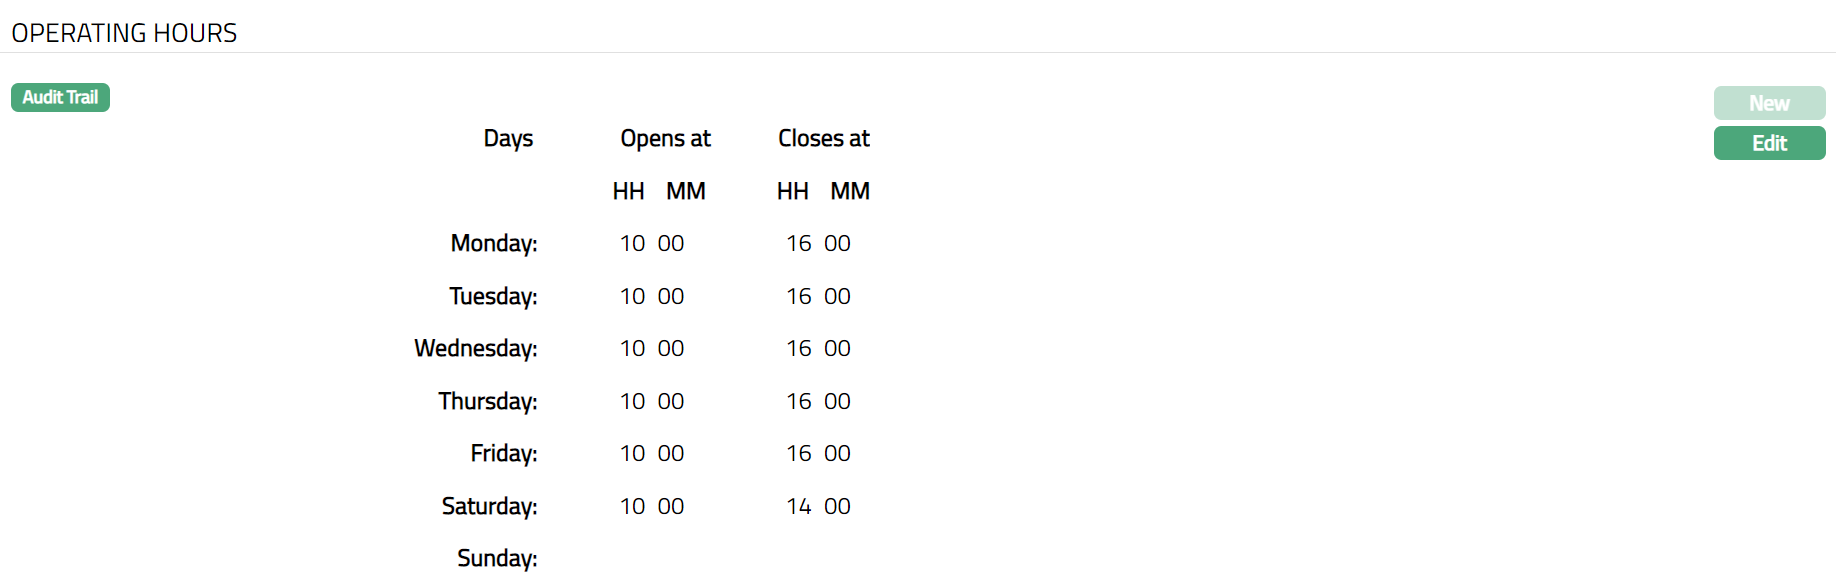
The operating hours tab allows you to maintain the operating hours for the Branch on all working days. The details mentioned here will be available to be viewed by customers on the Internet banking option.
For a new Branch record, the Operating hours details will not be available by default (as shown below) and therefore, need to be added.
To Add Operating hours,
- Access Branch page and click Operating Hours tab.

- Click New. New Operating Hours page appears. Monday to Saturday is checked and Sunday is not checked by default. The operating hours for Monday to Friday are shown from 0900 hours to 2000 hours and for Saturday as 1000 hours to 1400 hours by default. Checked indicates that it is a working day; unchecked indicates that it is not a working day.
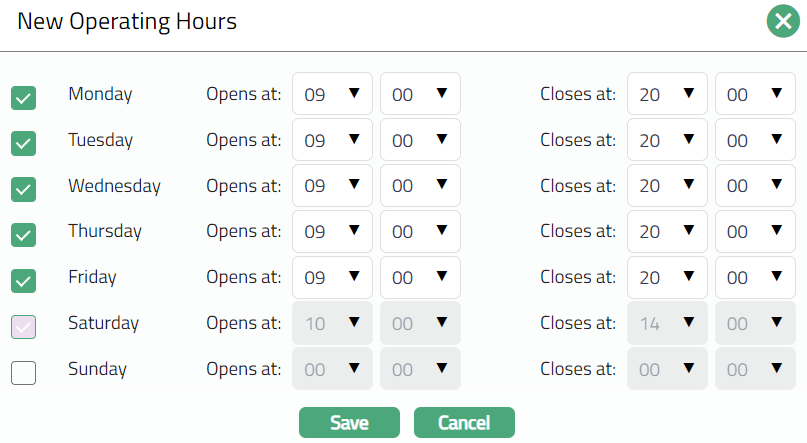
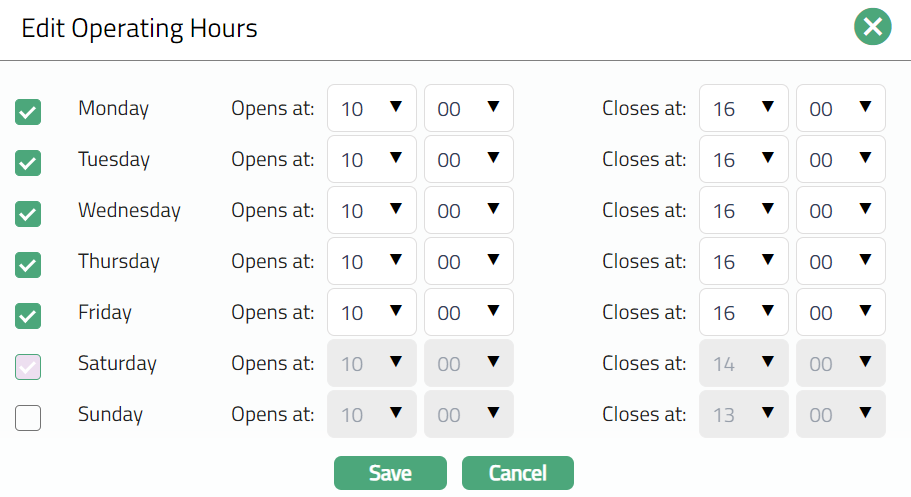
- Check the check boxes for all days on which the branch is working. Then enter the corresponding opening time and closing time. The value of Opens at field should be less than that of Closes at field. For example, Monday is checked as working day and the working hours on that day are from 1000 hours to 1600 hours.
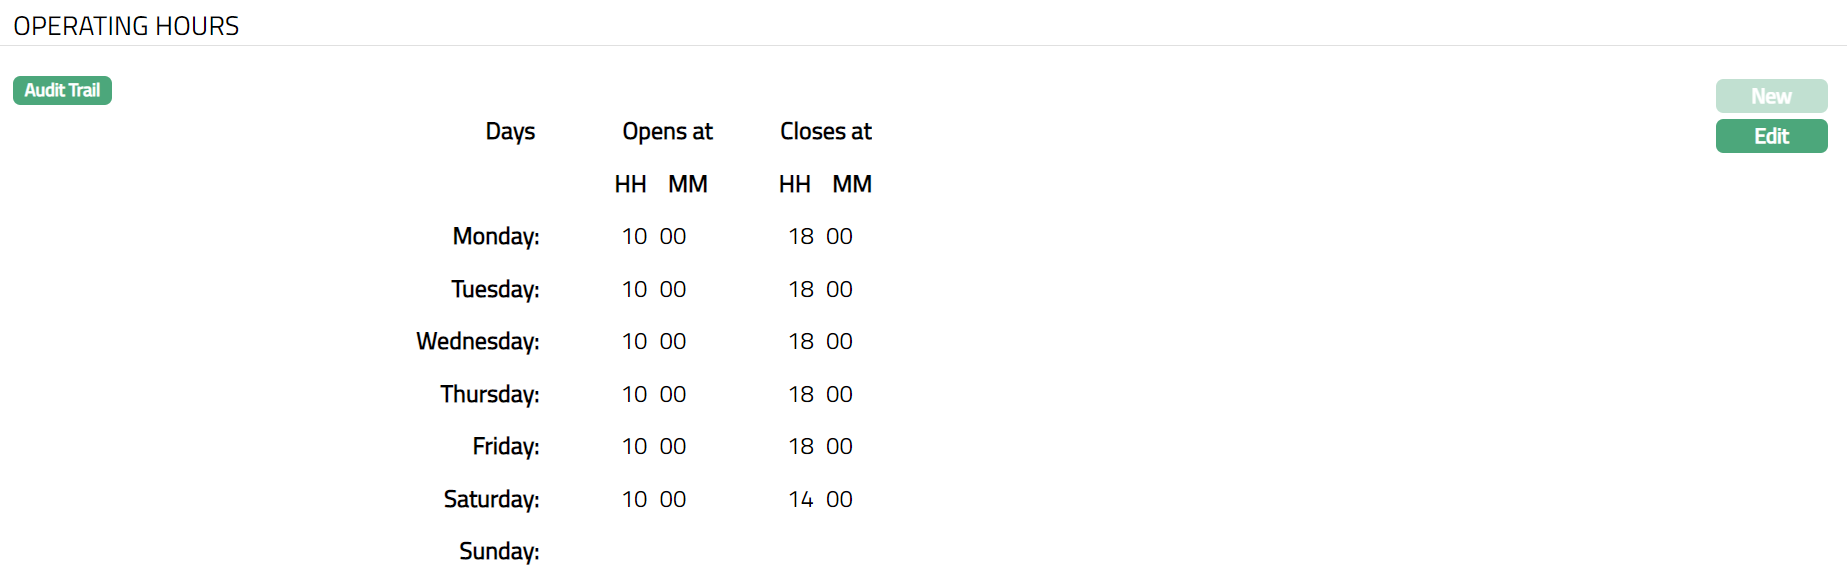
- Click Save. Operating hours page appears with the added details, displaying the operating hours of all days.
Functions: New, Edit
Note: If the calendar maintenance has a particular Day of the week marked as Holiday, then in the Working hours tab, the corresponding day field will be disabled. Similarly, if the operating hours for a day have already been maintained, Aura will not allow you to set that day of the week as a holiday in the Calendar > Holiday List tab.
To Edit Operating hours
- Click Edit. Edit Operating Hours page appears.
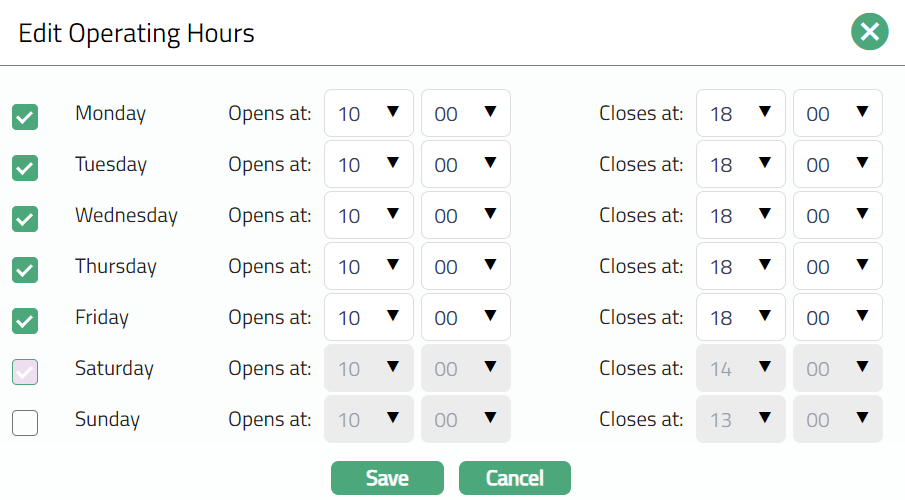
Note: All fields are editable.
- Click Save. Operating Hours page appears with the edited details.
Function: New, Edit
EOC Dates
EOC dates allow you to capture the End Of Cycle configuration information and allow you to edit the Next booking date and Next execution time.
While adding a new branch, EOC details are not captured. When a new branch is created, by default, Aura will create a default EOC configuration with the fields having the values as mentioned below.
System state -- BOD complete
Booking date -- Current booking date
Next booking date -- Current booking date + 1
Last Execution - Null
Next execution -- 00.00
To view / edit EOC dates.
- Access Branch page and click EOC Dates tab.

- Click Edit. Edit EOC Dates page appears.
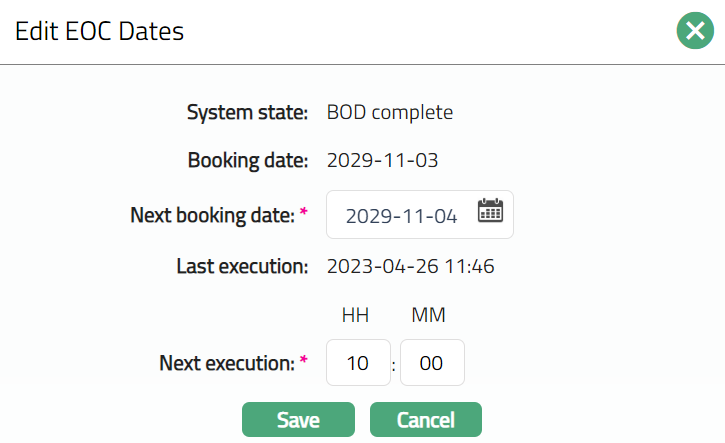
System State: It displays the status of EOC. By default, BOD complete is displayed. The EOC status changes only when EOC runs. It is non-editable.
Booking date: It displays the booking date after the last EOC was run. By default, current booking date is displayed when the record is created. It is non-editable.
Next Booking date: This is the business date to which Aura will reach when the next EOC run is executed. Current booking date + 1 is displayed by default when record is created. However, you can edit the next booking date. Based on the same, that many End of cycle runs will be completed.
Last execution: It displays the date and time when last EOC was completed. Null values are displayed by default on creation of the record. It is non-editable.
Next Execution: It displays the time when the EOC is scheduled for next run. 00:00 value is displayed by default on creation of the record. However, you can edit the Next execution time.
- Click Save. EOC dates page appears with the edited details.
 Function: Edit
Co-ordinates
The Co-ordinates tab allows you to specify the exact location of the branch in terms of the latitude and longitude of the location. It follows the Google map convention of specifying position as an integer with 2 or 3 digits depending on latitude and longitude, followed by 6 decimal points, rather than the conventional degrees and minutes. You can also upload the picture of the branch.
For a new Branch record, the Co-ordinates fields will not be available by default (as shown below) and therefore, need to be added.
To Add Co-ordinates,
- Access Branch page and click Co-ordinates tab.

- Click New. New Co-ordinates page appears.
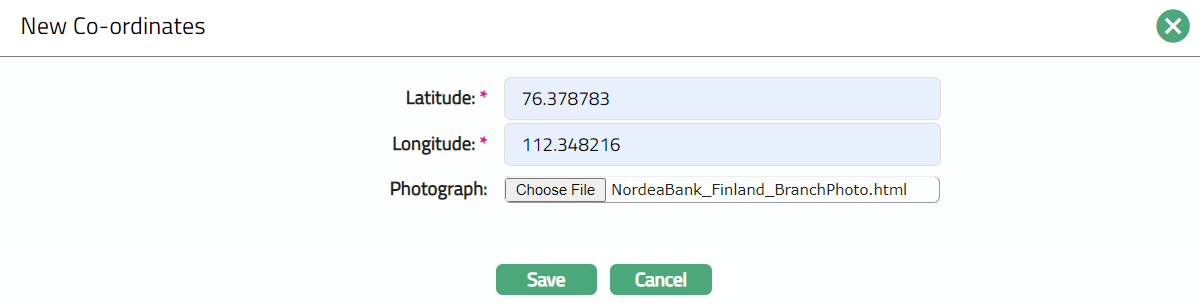
Enter Latitude location of the branch. The Latitude range should be between 90 and -90. The number of decimals should not exceed 6 digits.
Enter Longitude location of the branch. The Longitude range should be between 180 and -180. The number of decimals should not exceed 6 digits.
Click Choose file button to select the Photograph of the branch. The photograph can either be the image of the branch or any other image related to it.
Click Save. Co-ordinates page appears with the added details.

Functions: New, Edit
To Edit Co-ordinates
- Click Edit. Edit Co-ordinates page appears.

Note: All fields are editable.
Click Save. Co-ordinates page appears with the edited details.
 Functions: New, Edit.
Custom Field
This option provides you the flexibility to define fields apart from those that are already available in the standard version of Aura. Thus, it enables you to customize additional data storage and use as required to suit your specific business needs.
Using the Custom Field tab you can maintain the custom fields mapped to the Branch. Depending on the custom fields created and mapped to Branches module (using Admin > System Codes > Custom Fields), the fields will be displayed on this tab. In the following illustration, one custom field, Head Office have been mapped to the Branch, as shown below:
To Edit Custom Field
- Access Branch page and click Custom Field tab.

- Click Edit. Edit Custom Field page opens up.

Enter Head Office for the new Branch created.
Click Save. The Custom Field page appears with the edited details.

Functions: Edit