STP Configuration
Straight Through Processing (STP) is an essential component of the Payment System. The STP Configuration allows you to provide automatic routing of the payments based on the business rules. Using this functionality, you can set up rules for Incoming and Outgoing payments. Once the rule is satisfied, the Product is picked, and all the settings maintained for the Product will be resolved by CC-PG.
In case of Incoming Transactions, if there is no STP rule matching the transaction or if STP rule is not maintained, Product resolution fails and hence the transaction will be displayed as an STP exception in CC-PG.
In case of Outgoing Transactions, if there is no STP rule matching the transaction or if STP rule is not maintained, Product resolution fails, and an error is displayed in the Core Bank system.
STP can be configured once for each Message Mode -- Incoming and Outgoing. However, there can be multiple rules for each Configuration.
There are two sub-tabs in STP Configuration record.
To add STP Configuration
- From PaymentGrid menu, click Settings and then STP configuration STP Configuration Search page appears.

- Click Add. New STP Configuration - Rules (1/2) page appears.
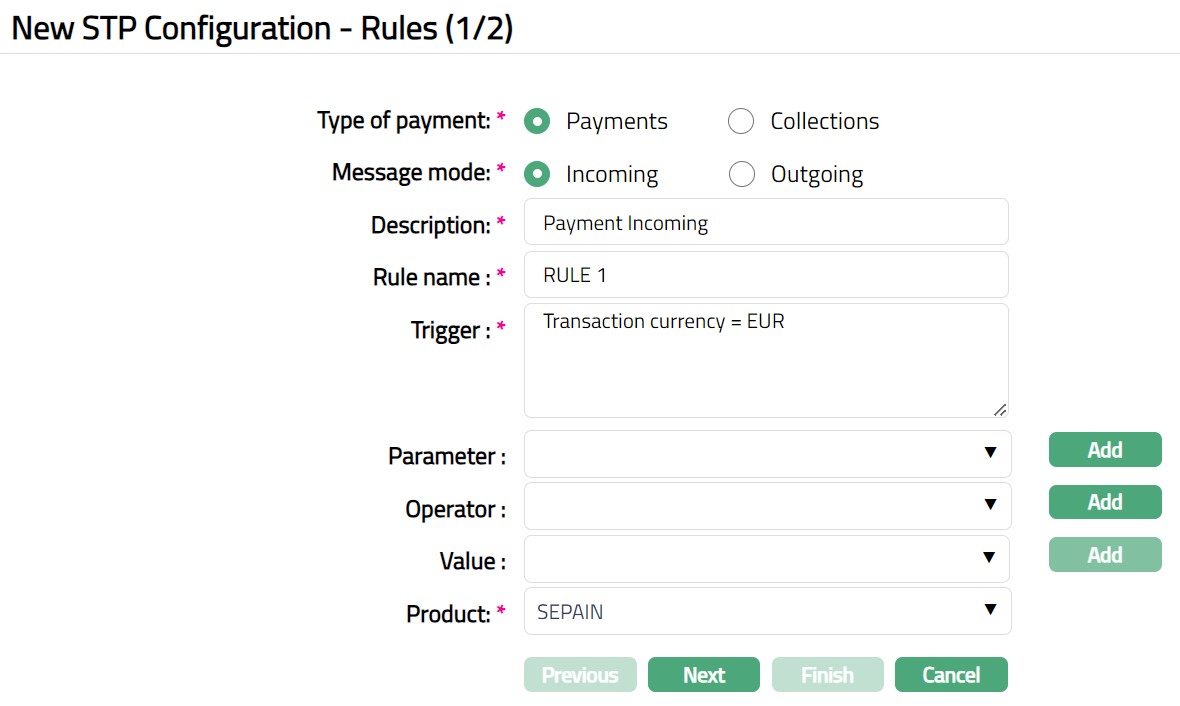
Payments - Incoming
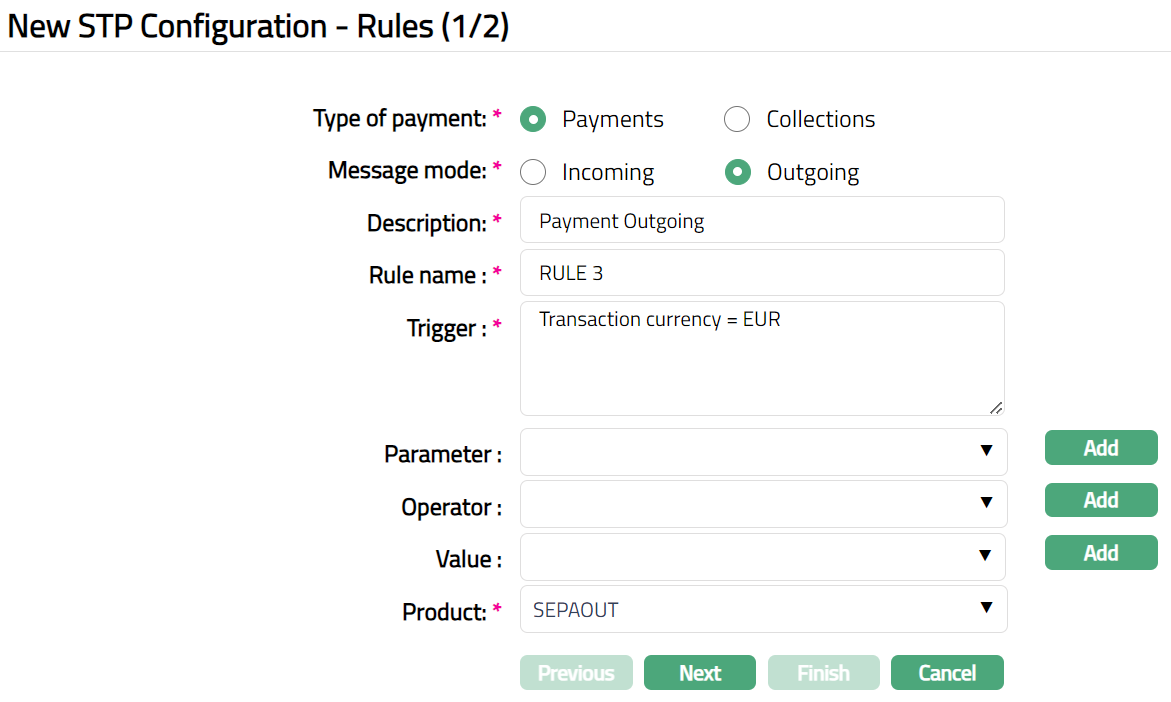
Payments -- Outgoing
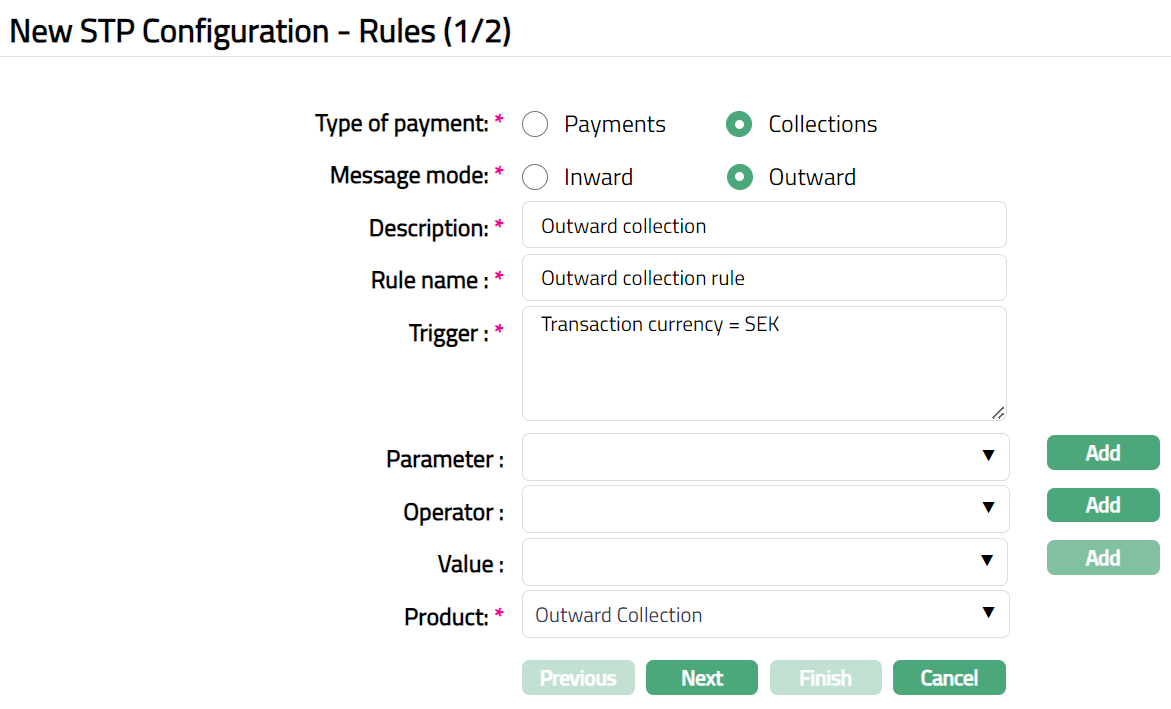
Collections- Outward
Select Message mode. The mode can be Incoming or Outgoing. By default, Incoming will be selected.
Enter Description for the STP configuration rule setup.
Enter Rule name. It is the name of the rule for STP configuration.
Enter Trigger details. Each trigger will constitute a collection of individual conditions joined by an Operator. The Trigger details can be built using the Parameter, Operator and Value.
Select Parameter from the pre-shipped list and click Add. CC-PG will push the selected value of Parameter into the Trigger text area above. Based on the Parameter selected, the Operator and Values will change. See detailed explanation below.
Select Operator from the pre-shipped list and click Add. CC-PG will push the selected value of Operator into the Trigger text area above. See detailed explanation below.
Enter required Value for the Parameter and click Add. CC-PG will push the selected value into Trigger text area above. See detailed explanation below. Details of the Parameter, Operator and Values
Account with institution: It specifies the financial institution which provides services for the beneficiary client's account. If this parameter is chosen, Value field becomes a text box where you can enter the required BIC code.
Bank Operation Code: If this parameter is chosen, Value field becomes a text box where you can enter the Bank operation Code. For example: 23B: SPAY is the tag for the Bank Operation Code and SPAY is the code. You can give a trigger as Bank Operation Code = SPAY.
Beneficiary Client: If this parameter is chosen, Value field becomes a text box where you can enter the client's name.
Beneficiary Country: If this parameter is chosen, Value field becomes a drop down where you can select the country from the available dropdown list of countries maintained under Admin > System codes > Generic definition > Countries.
Beneficiary institution: If this parameter is chosen, Value field becomes a text box where you can enter the Beneficiary institution BIC.
Charge account: If this parameter is chosen, the Value field becomes a text box, and you can enter the account number.
Charge bearer: If this parameter is chosen, Value field becomes a textbox. You can enter the codes in the value field based on the clearing network, as per examples given below:
Clearing Network Values SWIFT/TARGET2 SHA/BEN/OUR SEPA DEBT/CRED/SHAR/SLEV
Clearing network: If this parameter is chosen, then select the option for Clearing network from the drop-down list in the Value field. The available options are RTGS, SEPA, TARGET2, BANKGIRO, SWIFT, and PLUSGIRO
Clearing number: If this parameter is chosen, Value field becomes a text box where you can enter the clearing number. For example, Autogiro network, the standard number is 9900. Each bank will have their respective clearing number.
Credit account: If this parameter is chosen, Value field becomes a text box where you can enter the credit account number of the client.
Creditor BIC: If this parameter is chosen, Value field becomes a text box where you can enter the Creditors BIC number.
Creditor Giro number: If you choose this parameter, Value field becomes a text box where you can enter the Creditor Giro number.
Creditor reference: If you choose this parameter, Value field becomes a text box where you can enter the reference number of the creditor.
Debit account: If this parameter is chosen, Value field becomes a text box where you can then enter the Debit account number.
Debtor BIC: If this parameter is chosen, Value field becomes a text box where you can enter the Debtor's BIC number.
Debtor Giro number: If you choose this parameter, Value field becomes a text box where you can enter the Debtor Giro number.
External source: If you choose this parameter, Value field becomes a text box where you can specify the external source system.
Instructed amount: This amount is provided for instruction purpose. If you choose this parameter, Value field becomes a text box where you can enter the instructed amount.
Instructed currency: It is the currency of the Instructed amount. If you choose this parameter, Value field becomes a drop down where you can then select the currency from the available drop-down list of active currencies maintained under Admin > System codes > Currencies > Currencies.
Intermediary institution: It is the financial institution through which the transaction passes to reach the Account with Institution. If you choose this parameter, Value field becomes a text box where you can enter the BIC code of the Intermediary institution.
Message Priority: If you choose this parameter, Value field becomes a drop down where you can select the option for the Message Priority from the drop-down list. The available options are System, Normal, and Urgent.
Ordering customer: It is the customer who orders the transaction. If this parameter is chosen, Value field becomes a text box where you can enter the ordering customer's name.
Ordering institution: It is the financial institution of the ordering customer. If this parameter is chosen, Value field becomes a text box where you can enter the BIC code of the Ordering Institution.
Pay by cash: If a customer, who does not have an account with the bank, walks in for a transaction, you can apply a charge on that transaction by using this option. If this option is chosen as a parameter, Value field becomes a drop down where you can select Yes or No option from the drop-down list.
Receiver charges amount: It is the amount of transaction charges payable by the receiver. If this option is chosen as a parameter, Value field becomes a text box where you can enter the amount.
Receiver charges currency: It is the currency of transaction charges amount payable by the receiver. If you choose this parameter, Value field becomes a drop down where you can then select the currency from the available drop-down list of active currencies maintained under Admin > System codes > Currencies > Currencies.
Receiver's correspondent: It is the branch of the receiver or another financial institution at which the funds will be made available to the receiver. If this option is chosen as a parameter, Value field becomes a text box where you can enter the BIC code of the Receiver correspondent in the Value field.
Remittance information: It specifies the details of the individual transaction or a reference to another message containing the details which are to be transmitted to the beneficiary customer. If this option is chosen as a parameter, Value field becomes a text box where you can enter the code (like INV, IPI, RFB).
Sender to receiver info: It specifies additional information for the Receiver or other party specified. If this option is chosen as a parameter, Value field becomes a text box where you can enter the code (like ACC, INS, INT).
Sender's charges amount: It specifies the amount of the transaction charges deducted by the Sender and by previous banks in the transaction chain. If this option is chosen as a parameter, Value field becomes a text box where you can enter the Senders charge amount.
Sender's charges currency: It is the currency of transaction charges deducted by the Sender and by previous banks in the transaction chain. If you choose this parameter, Value field becomes a drop down where you can select the currency from the available drop-down list of active currencies maintained under Admin > System codes > Currencies > Currencies.
Sender's correspondent: When two financial institutions do not have direct relationship and communicate via correspondent, then the financial institution associated with sender is the Sender's Correspondent. If this option is chosen as a parameter, Value field becomes a text box where you can enter the BIC code of the Senders correspondent.
Sender's reference: It specifies the reference assigned by the Sender to unambiguously identify the message. If this option is chosen as a parameter, Value field becomes a text box where you can enter the reference number.
Sending institution: It identifies the Sender of the message. If this option is chosen as a parameter, Value field becomes a text box where you can enter the Sending institution BIC code.
Service identifier: It specifies the character values of SWIFT/TARGET2 network. If this option is chosen as a parameter, Value field becomes a text box where you can enter the code for the service identifier. For example: 01, 03, 021 (as mentioned in Block 1)
Service delivery channel: It is the mode/medium through which the customers interact with the financial institutions and by which the financial institution delivers its products and services to the customers. If you choose this parameter, Value field becomes a drop down where you can select the Service delivery channel from the available drop-down list maintained under Admin > System codes > Categories > Service delivery channel.
TAG 119: If this parameter is chosen, Value field becomes a text box. If the condition satisfies, then product attached to the TAG 119, will be picked and Charge is applicable. For example:
If TAG 119 = COV, then it is a Cover message
If TAG 119 = TGT, then it is a TARGET2 message.
Third reimbursement institution: It specifies the Receiver's branch, when the funds are made available to this branch through a financial institution other than that indicated in field 53a. If this option is chosen as a parameter, Value field becomes a text box where you can enter the BIC code of the institution.
Transaction amount: It specifies the amount of the subsequent transfer to be executed by the receiver. If this option is chosen as a parameter, Value field becomes a text box where you can enter the amount.
Transaction code: It specifies the nature of, purpose of, and/or reason for the individual transaction. For example, salaries, pensions, dividends. If this option is chosen as a parameter, Value field becomes a text box where you can enter the code. For example: 26T:K90
Transaction currency: It specifies the currency of the Transaction Amount. If you choose this parameter, Value field becomes a drop down where you can select the currency from the available drop-down list of active currencies maintained under Admin > System codes > Currencies > Currencies.
Transaction date: It specifies the date of the transaction. If this parameter is chosen, Value field becomes a text box where you can enter the date in the Value field.
Transaction reference: It specifies the reference number that is generated by CC-PG for the individual transaction. If this option is chosen as a parameter, Value field becomes a text box where you can enter the reference number in the Value field.
Transfer type: It specifies the type of transfer, whether the transfer is made to the bank or to the customer. If this parameter is chosen, Value field becomes a drop down where you can select the Transfer type from the drop-down list. The pre-shipped options are Customer and Bank.
Value date: It specifies the value date of the transaction. If this parameter is chosen, Value field becomes a text box where you can enter the value date from the date picker.
Bank clearing Code: It specifies the clearing code of the Bank. If this parameter is chosen, Value field becomes a text box where you can enter the value. For example, IFSC
Branch clearing code: It specifies the clearing code of the Branch. If this parameter is chosen, Value field becomes a text box where you can enter the value. For example, MICR code
Clearing Zone: It specifies the zone for clearance, where the financial institutions clear the Instrument types like Cheques, Demand Draft etc If this parameter is chosen, Value field becomes a text box where you can enter the value.
Select Product from the available drop-down list. Based on the selection of the Message mode, the relevant products maintained under PaymentGrid > Settings > Product will be displayed in the drop-down list. If the Message mode is selected as Incoming, then all the active Incoming products will be available in the drop-down list. If the Message mode is selected as Outgoing, then all the active Outgoing products will be available in the drop-down list. If the transaction matches with the rule, then it will be processed using the settings defined for this Product.
Click Next. New STP Configuration -- Confirmation (2/2) page appears.
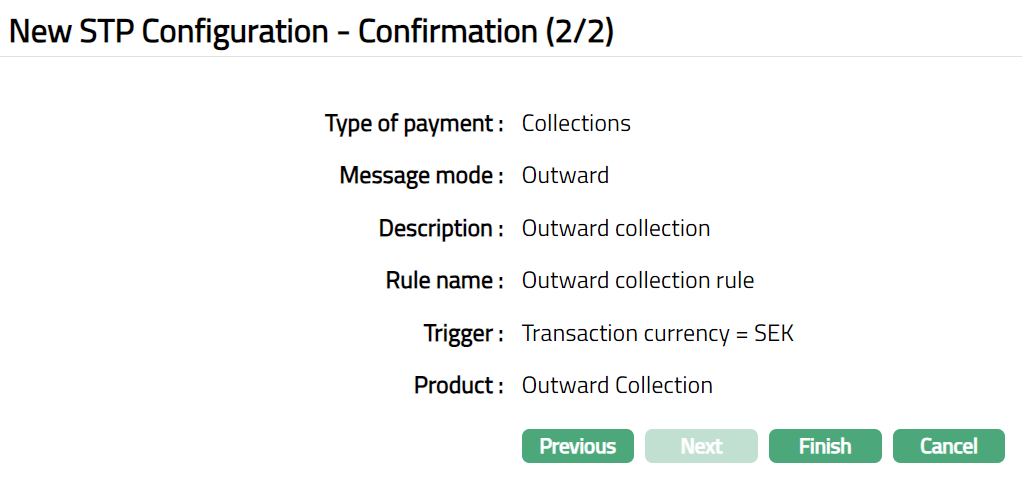
- Click Finish. STP Configuration page appears. The new rule is created, and you can see the Rules tab by default and the Status of the STP configuration will be active.

Functions: Add, Search, Edit, Delete, Approve, Suspend, Activate.
Note: On creation of a new STP configuration, the Status by default will be Active, the record status will be Pending, and a blue bubble appears on the Rules tab. Only on Approval, the record Status gets changed to Approved and the blue bubble disappears.
Delete: You can delete a STP configuration rule by clicking on Delete button. When you click on Delete button, CC-PG will ask for confirmation. On confirmation selected record will be deleted.
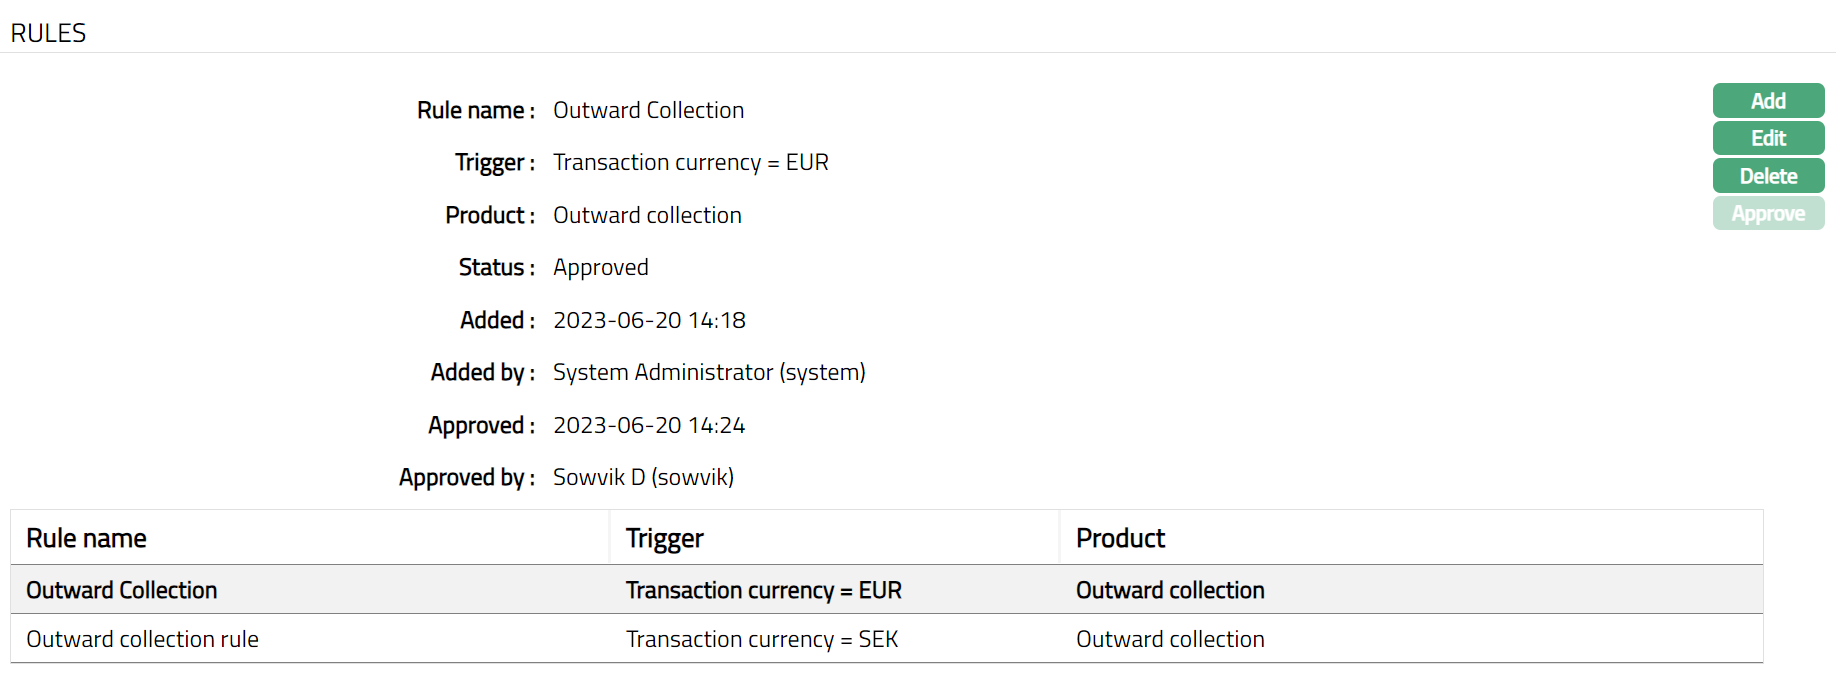
Approve: If you want to approve a rule, then retrieve the record and click on Approve. CC-PG will ask for confirmation. Once the rule is approved, status gets changed from Pending to Approved.
Suspend: You can suspend a STP configuration by clicking on Suspend button. When you click on Suspend button, CC-PG will ask for confirmation. On confirmation CC-PG will suspend the STP configuration and Activate button will appear in place of the Suspend button. If STP configuration is Suspended, then all the rules maintained under STP configuration (Incoming/Outgoing) will also be Suspended.
Activate: If you want to activate a suspended STP configuration then click on Activate button. CC-PG will ask for confirmation. On confirmation CC-PG will Activate the STP configuration and Suspend button will appear in place of Activate button. If a STP configuration is Activated, then all the rules maintained under STP configuration (Incoming/Outgoing) will also be Activated.
Rules
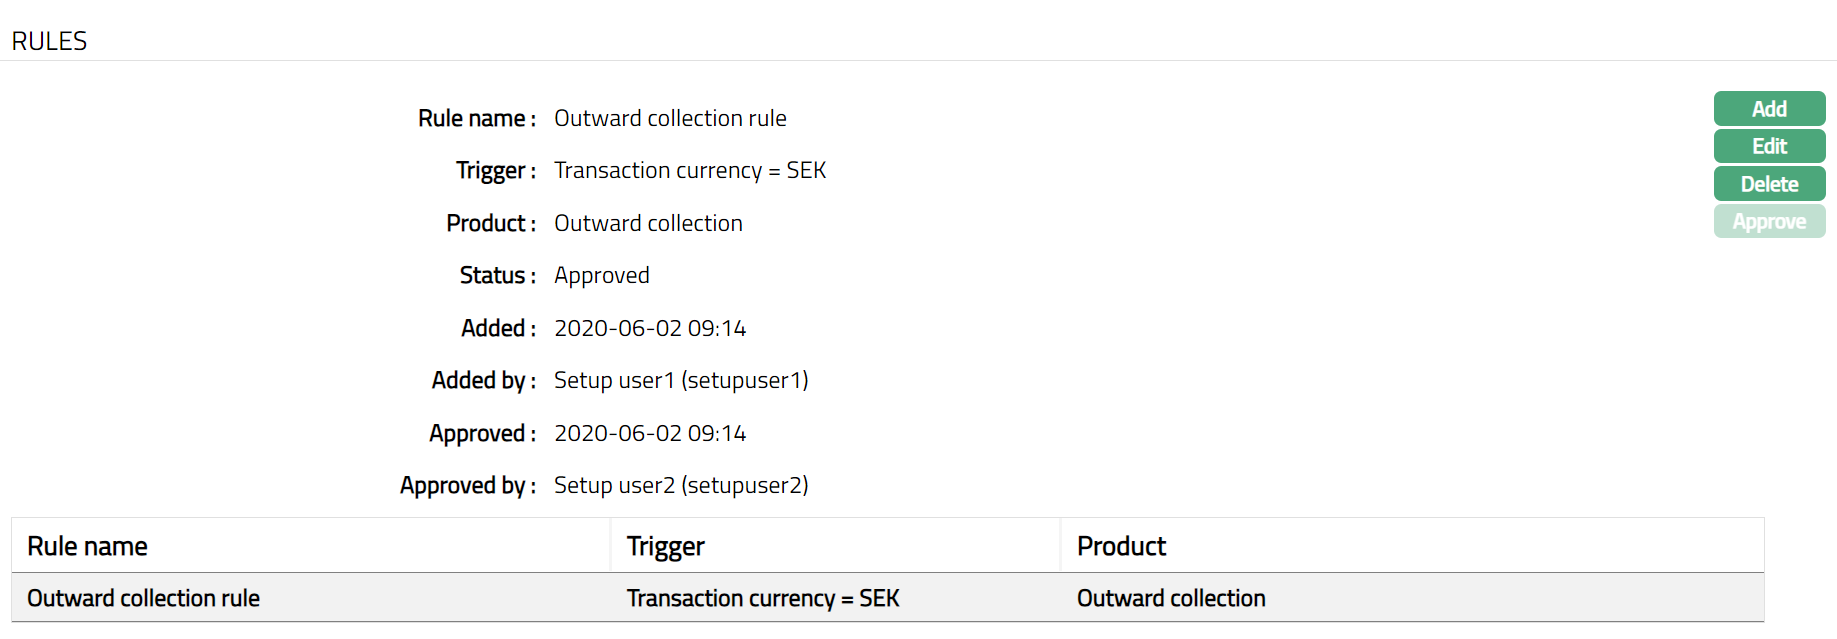
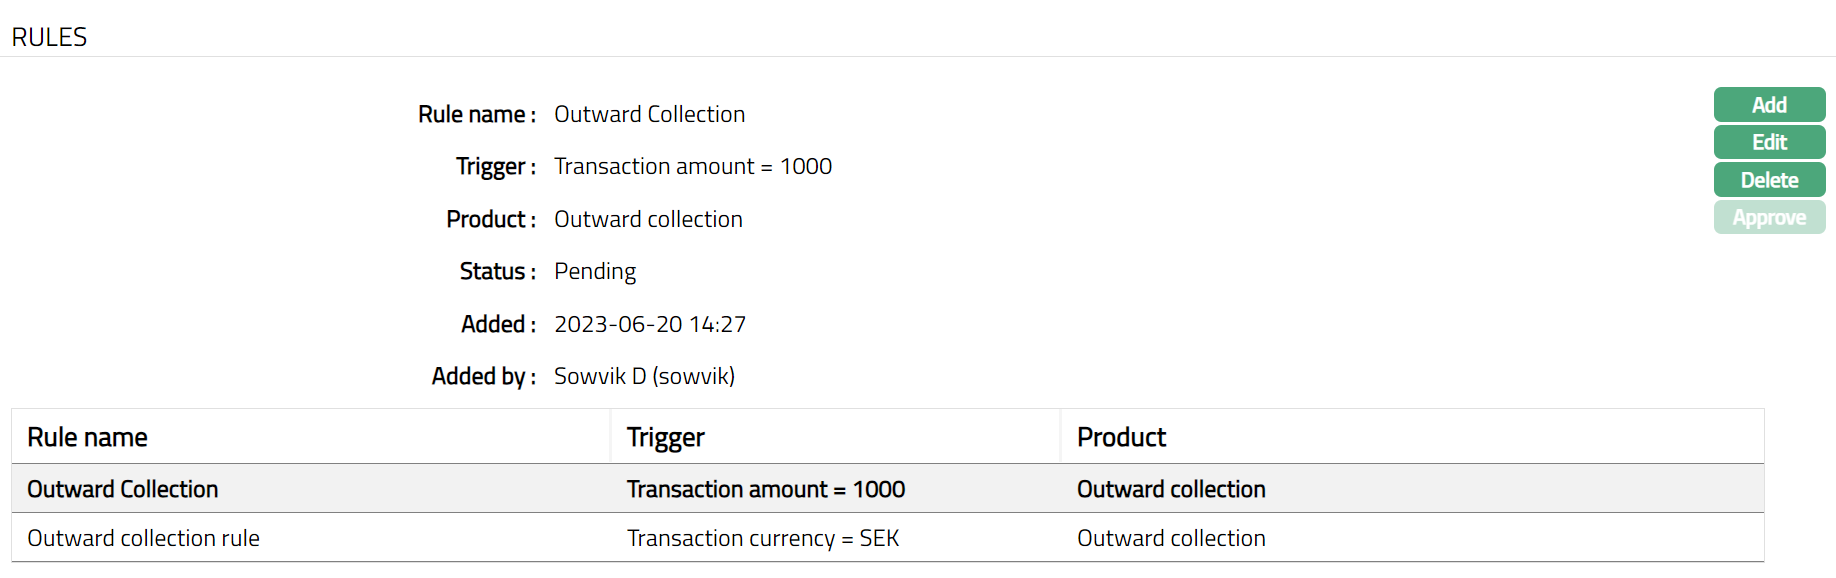
The Rules tab which is the default tab in the STP Configuration Maintenance screen shows the basic details of the rule. If you need to add / change / delete any rules for any Message Mode (incoming / outgoing), you can do so using this tab.
- Access STP Configuration page and click Rules tab to view the details as per sample below. The details are defaulted from the entries that you made during New Rule Setup. For details refer to New STP Configuration - Rules (1/2) page.
- Click Add. Add STP Rule page appears.
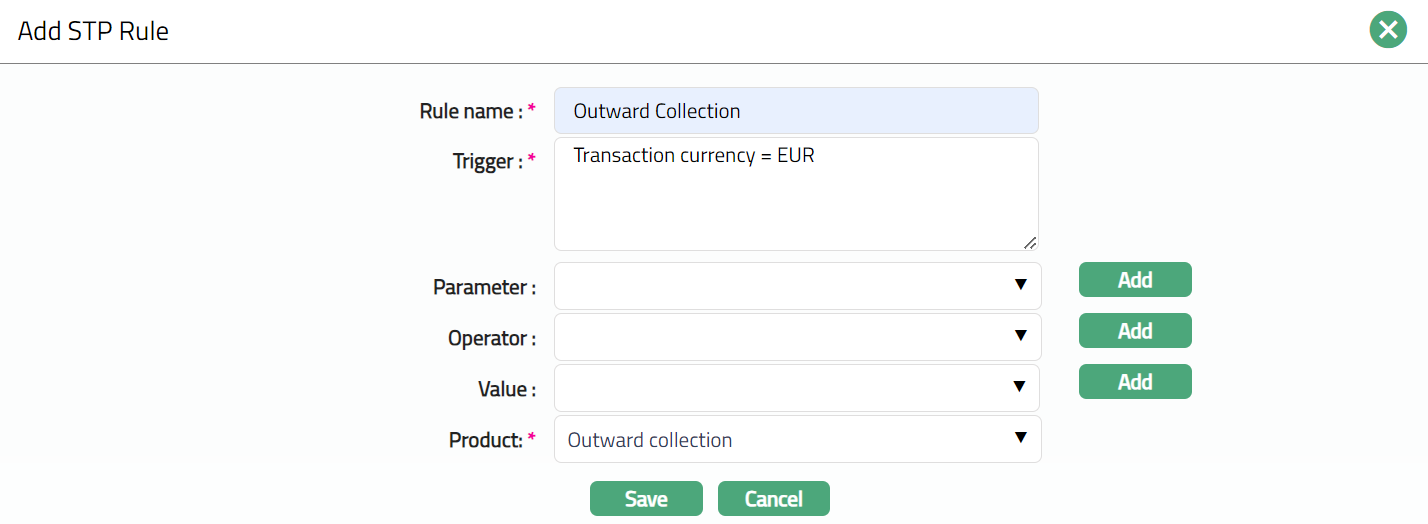
Note: Please refer to the above section for the details regarding the fields.
- Click Save. Rules tab appears with the added details.
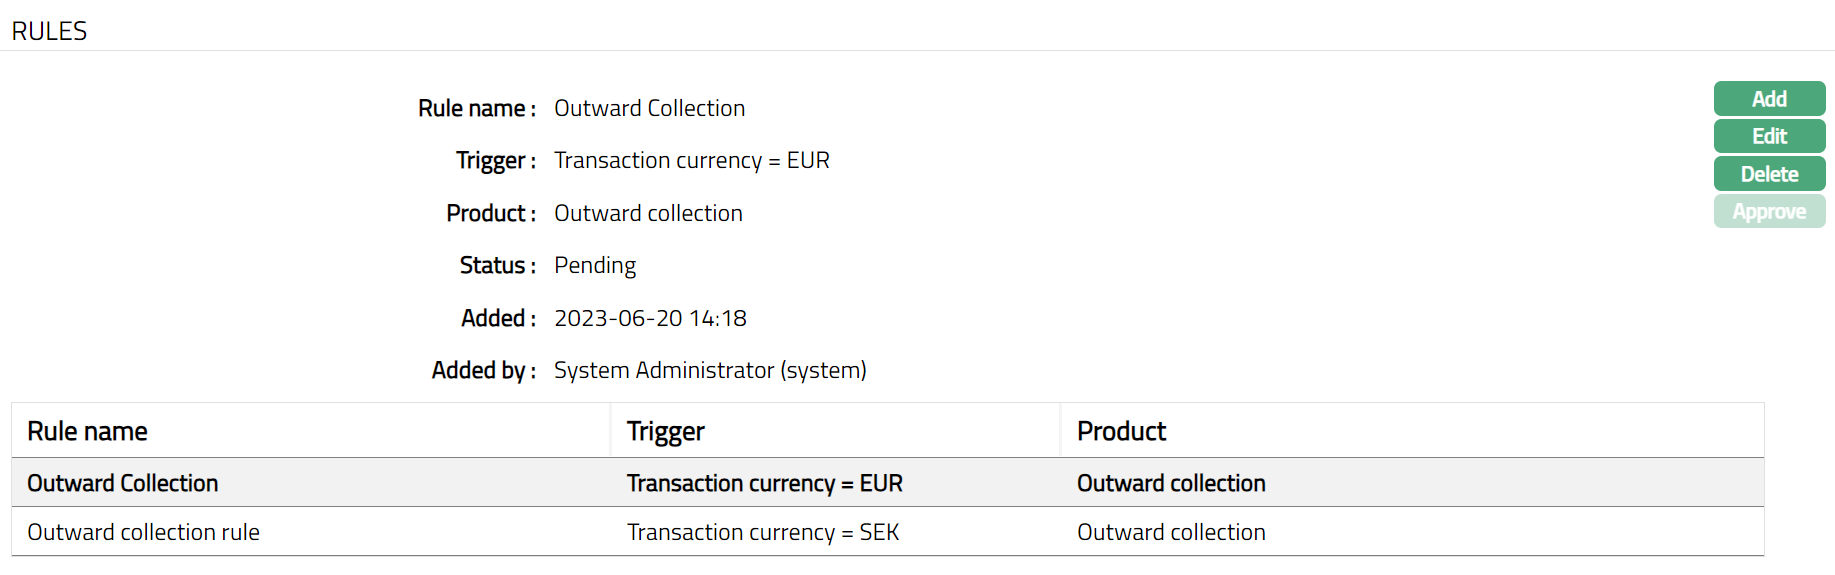
Note: Once Added/ Edited, Status of the Rules tab will be Pending, On Approval, the Status gets changed to Approved.
Functions: Add, Edit Delete, Approve.
The additional fields that you can view in the Rules tab are as follows:
Status field denotes the status of the record.
Added field denotes the date on which the record was added.
Added by field denotes the name of the user who created the record.
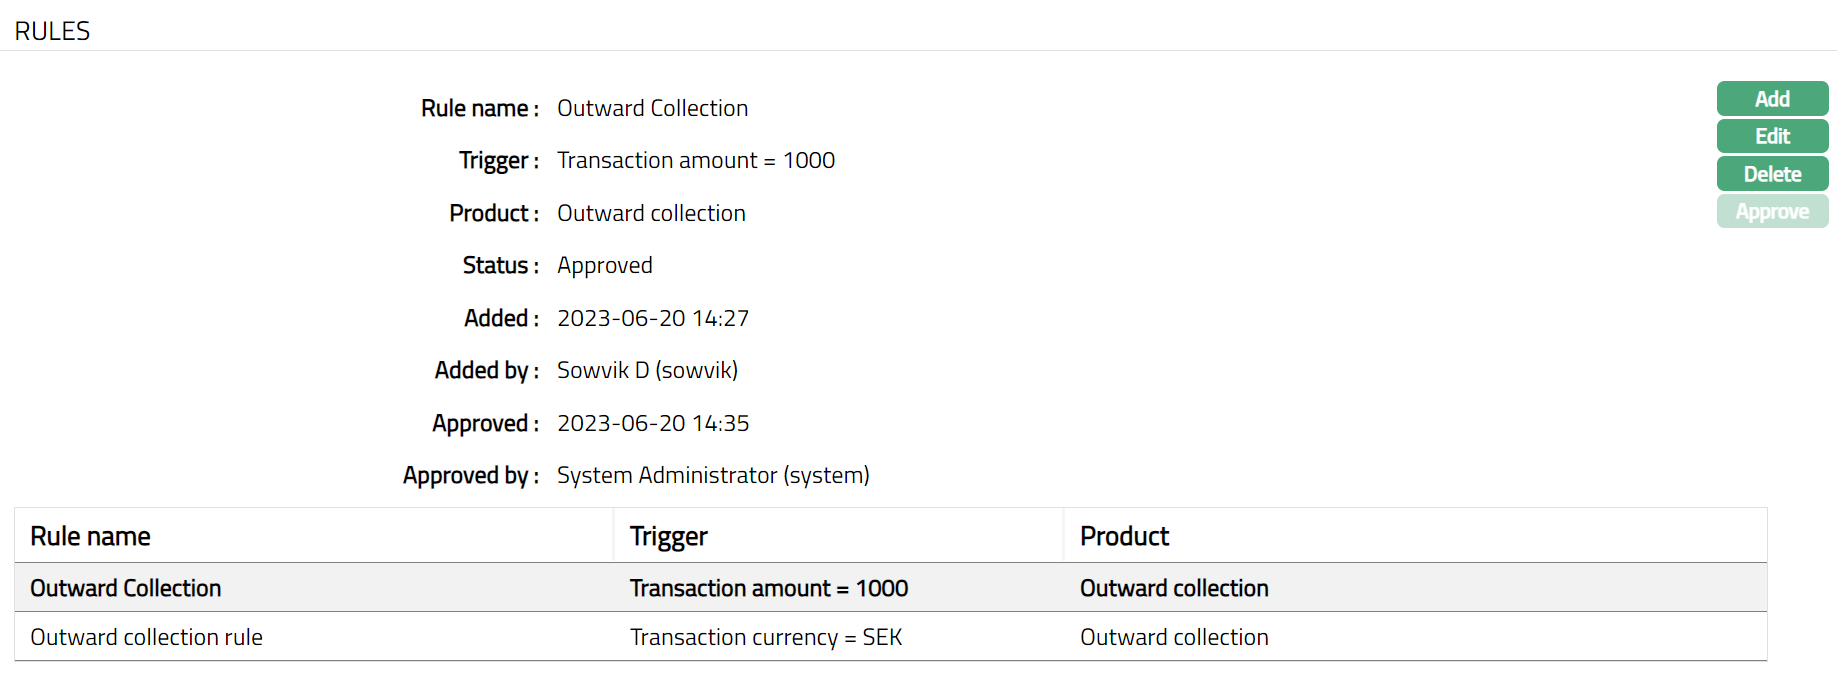
Approved field denotes date on which the record was approved and is displayed only for approved records.
Approved by field denotes name of the user who approved the record and is displayed only for approved records.
To edit Rule
- Click Edit. Edit STP Rule page appears.
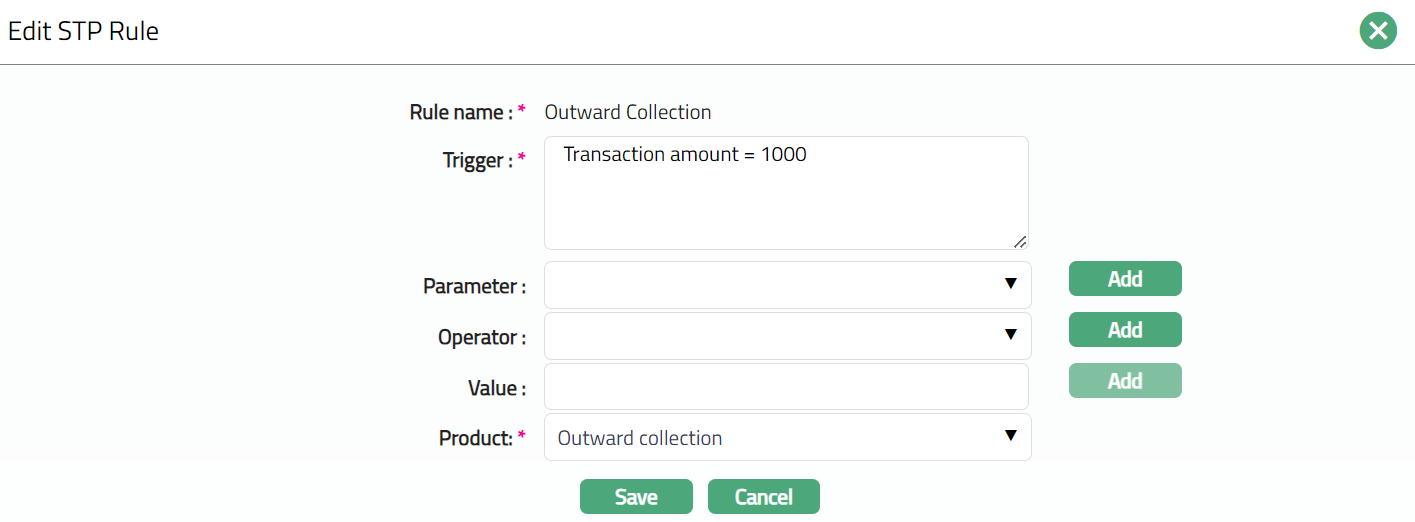
Note: Except Rule name field rest all other fields are editable.
- Click Save. Rules tab appears with the edited details. STP Configuration page appears with the updated details.
Note: Once edited Status of the tab will be Pending. Only on Approval, the Status gets changed to Approved Only the rule maintained under STP configuration will be updated. Sample Screen shown below.
Functions: Add, Edit Delete, Approve.
Rule Sequence
You can define the order in which the rules have to be executed using the Rule Sequence tab. By default, it will contain all the maintained Rule names. It will be displayed in ascending order and will have the provision to manipulate the sequence, as you require.
To define Rule Sequence,
- Access STP Configuration page and click Rule Sequence tab.

- All available Rules are displayed. Select any Rule Name as required and click Up or Down button. Sample screen shots shown below.
Up

After Changing Sequence

Down

After Changing Sequence

Functions: Up and Down
Up: If you click Up button, then CC-PG will move the selected Rule Name to the next higher order of preference and interchange the position between the source and destination. For the topmost Rule Name, the Up button will be disabled.
Down: If you click Down button, then CC-PG will move the selected Rule Name to the next lower order of preference and interchange the position between the source and destination. For the bottom most Rule Name the Down button will be disabled.