Notification Settings
Notification Settings allows you to configure the required setup in order to send notification to customer / other systems on the occurrence of an event or transaction. The required Notification can be sent through E-Mail, SMS and Webhook either immediately on the happening of the event or transaction, or at a specified later time. Based on the Settings configured, Aura will trigger communication to the customer / designated recipient / other system on the occurrence of the Event or Transaction. For example: Account creation, Account activation, Payment, Loan sanctioned or disbursed etc.
Following are the tabs under Notification Settings.
To add Notification Settings
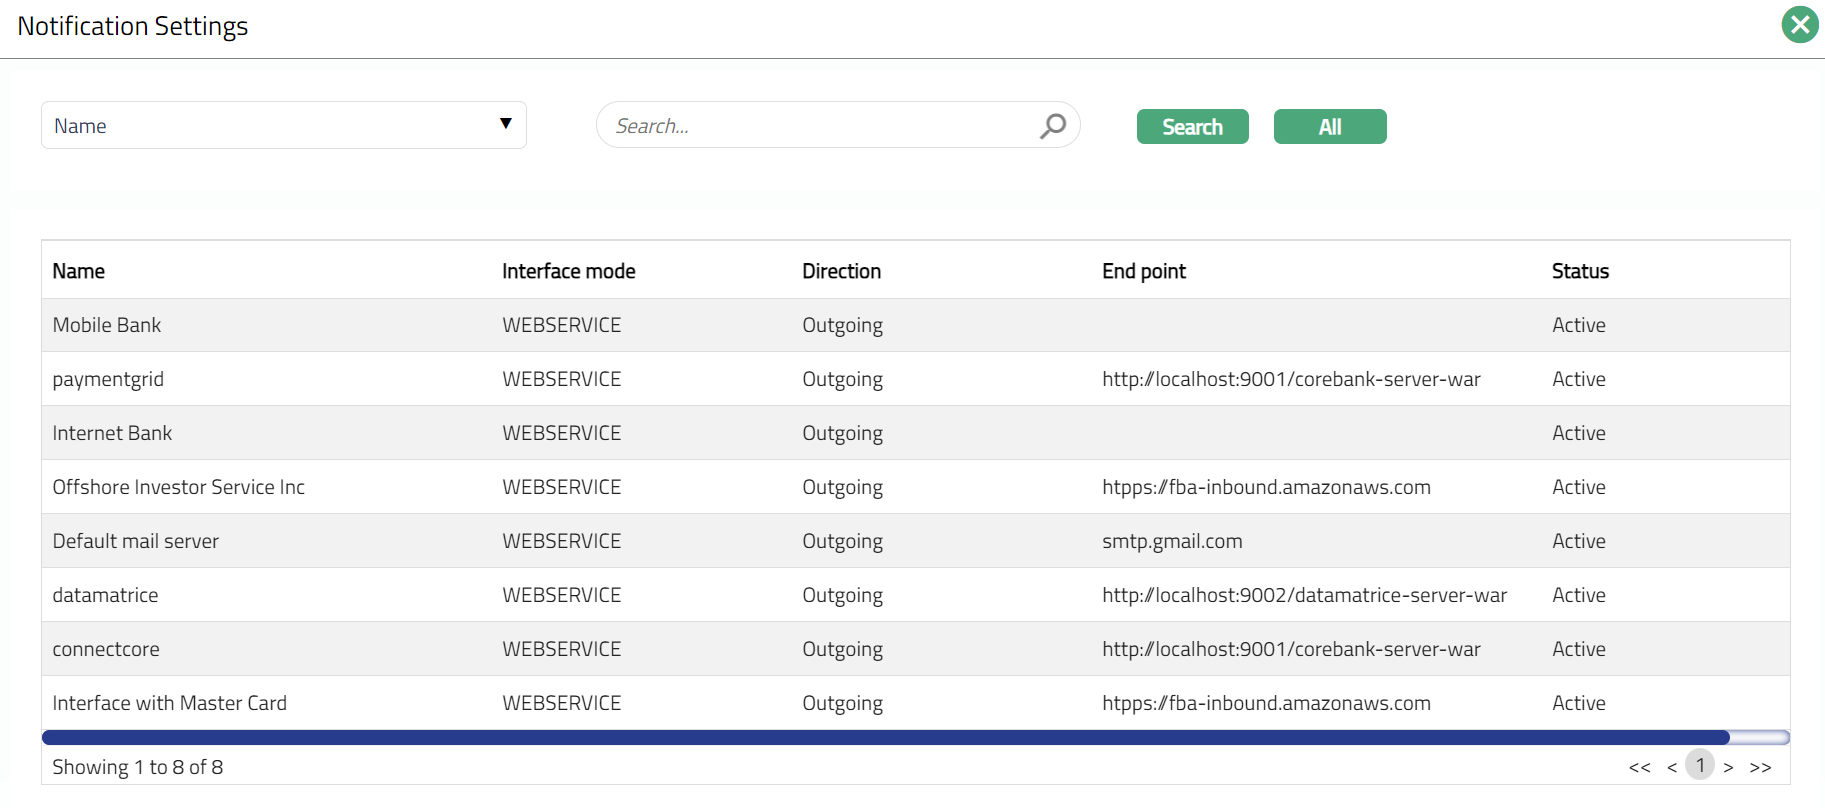
Access Admin menu, click Notifications, then Notification Settings and then Maintain. The system will display the Notification Settings Search screen. You can search for all or any specific Notification Settings.

Click Add. Notification Settings -- Profile (1/3) page will be displayed.
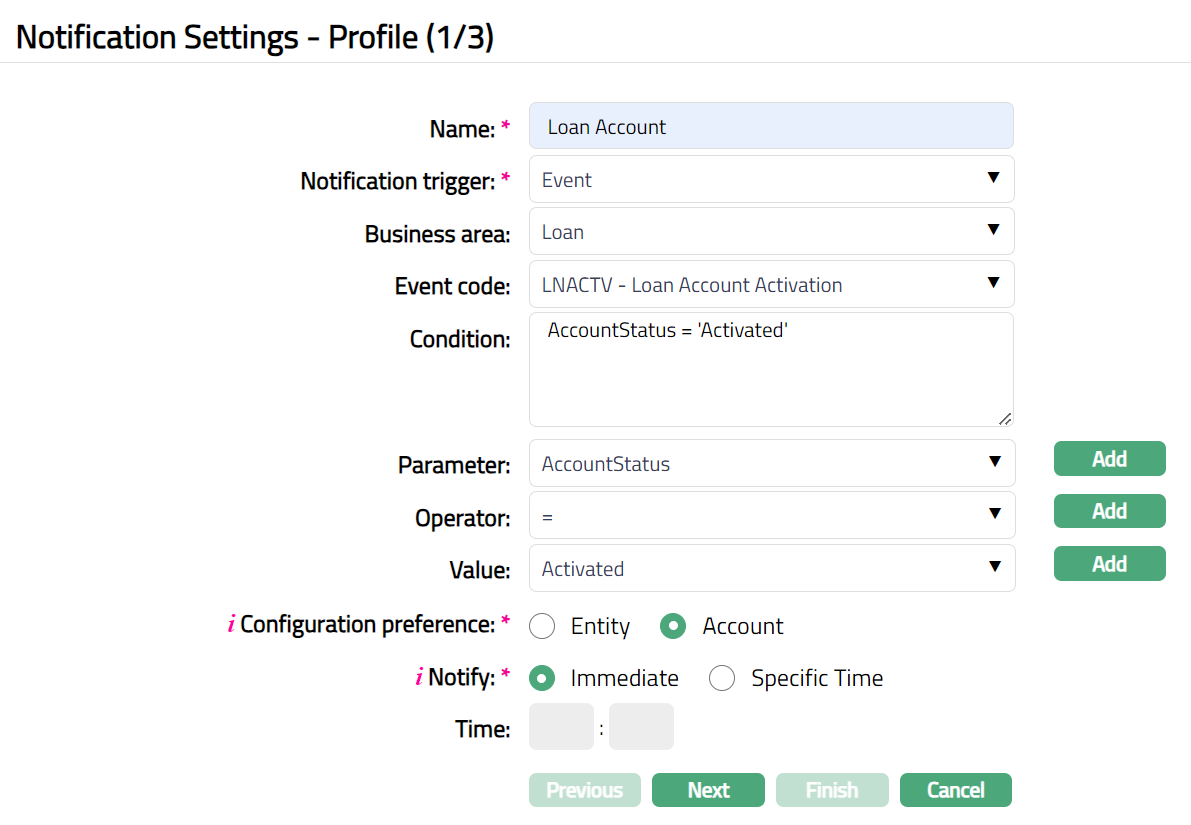
Provide Name for the Notification setting.
Select Notification trigger from the available predefined drop-down list: Event, Generic and Transaction.
Business Area is enabled only when you have chosen Event for the Notification trigger above. You can select the required option from the available predefined drop-down list: Client Account, Foreign Exchange, Term Deposit, Nostro Account, Payments, Loans, Limits, Credit Cards, Standing Instruction, Charge Bundle, Cards, Acquiring, Peer-to-Peer.
If Notification trigger is Transaction, then label name will be displayed as Transaction code with a hyperlink of all Transaction Codes maintained under General Ledger > Settings > Transaction Code. You can choose the required Transaction Code using the hyperlink or by entering the first few digits of code. If Notification trigger is Event or Generic, then label name will be displayed as Event code with a drop-down of events specific to the Business Area selected above.
Note: Only Transaction codes with Trigger notification = Yes (where the checkbox is checked) will be listed in the hyperlink.
Enter Condition details. Each condition will constitute a collection of individual conditions joined by AND / OR operator. The Condition details can be built using the Parameter, Operator and Values. If Notification trigger = Generic, then Condition will be disabled.
Select Parameter from the pre-shipped list and click Add. Aura will push the selected value of Parameter into the Condition text area above. Based on the Parameter selected, the Operator and Values will change. If Notification trigger = Event then Parameter drop down will have Product Code, Account Status and Payment Status. If Notification trigger = Transaction then Parameter drop down will have Product Code, Amount and Currency. If Notification trigger = Generic, then Parameter field will be disabled.
Select Operator from the pre-shipped list and click Add. Aura will push the selected value of Operator into the Condition text area above. If Notification trigger = Generic, then Operator field will be disabled.
Enter required Values for the Parameter and click Add. Aura will push the selected value into the Condition text area above. If Notification trigger = Generic, then Values field will be disabled.
Details of the Parameter, Operator and Values
- Account Status / Payment Status: If you select this parameter, then the Value field will display all the active and suspended Account statuses maintained under Admin > Status, where Consider status as is equal to Account Status or Payment Status respectively. It will also display the pre-shipped Account Statuses and user defined value + Any.
Note:
a. If you select Business area as Loan, then value field will display the Loan statuses which are pre-defined and user-defined + Any.
b. If you select Business area as Credit card account, then value field will display the Credit card account statuses which are pre-defined and user-defined + Any.
c. If you select Business area as Client account, then value field will display the Client account statuses which are pre-defined and user-defined + Any.
Product Code: If you select this parameter and based on the business area you selected earlier, you can select the required value from the available drop-down list of values.
Amount: If you select this parameter, then the field becomes a textbox for you to enter the amount.
Currency: If you select this parameter, then the Values field will display all the active 3**-character** ISO codes maintained under Admin > System codes > Currency > Currency.
Select Configuration preference by clicking on the Entity or Account radio button. Note:
If Entity: Notification [will always] be sent using Notification Settings setup.
If Account: Event / Transaction notification will be sent based on preference set at account level. If Notification mode in configuration does not match with Mode at account level preference, then Notification will not be sent.Use Notify to define when notification should be actually sent to the Client. If you want to send the notification immediately on the happening of the event / transaction, choose Immediate. If you would like the notification to be sent only at a specific time of the Client's time zone, choose Specific time. This field is enabled only in case of Notification Trigger = Event or Transaction. For Generic, it is defaulted to Immediate and disabled.
Enter the actual Time when you would like the notification to be sent to the customer if you had selected Specific Time above. If you had selected Immediate in the above field, the Time field will be disabled.
Click Next. Notification Settings -- Mode (2/3) page will appear.
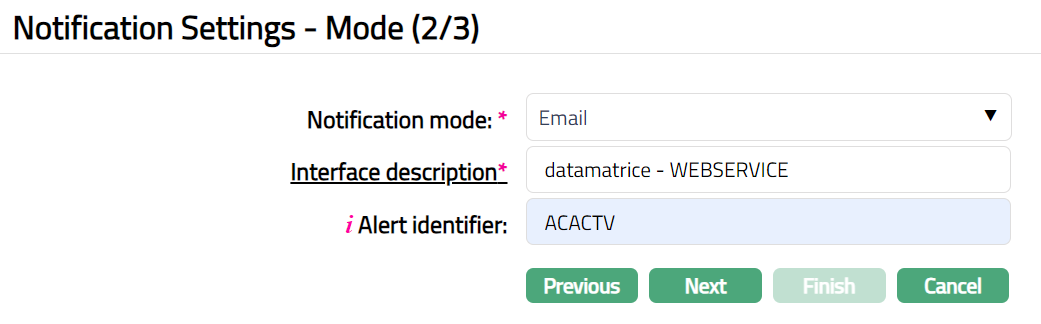
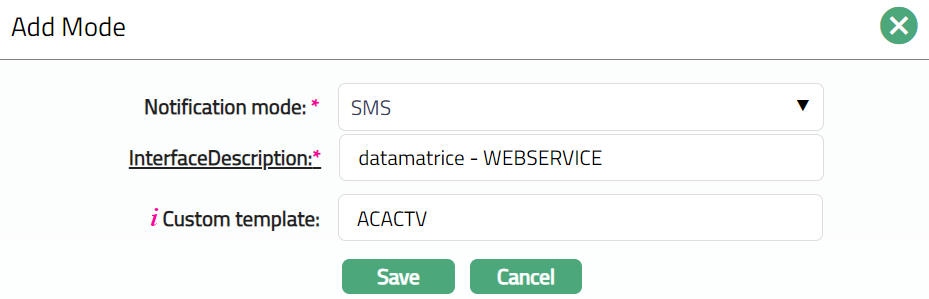
Select Notification mode from the available predefined drop-down list Email, SMS and Webhook depending on whether you would like the notification to be sent by email, SMS or to another system.
Select Interface description that should be used for this Notification Setting. Click on the hyperlink to see the list of active Interface definition descriptions maintained under Admin > System codes > Interface definition > Maintain and select the required record.
Based on Notification mode, the next field will be displayed as Alert Identifier or Custom template. If Notification mode = Email, input the required Alert Identifier as configured in Aura Data Management > Configurations > Alert > Maintain. If Notification mode = SMS, input the Custom template as configured in Aura Data Management > Configurations > Settings > Custom Template. If Notification mode = Webhook, this field will not be displayed.
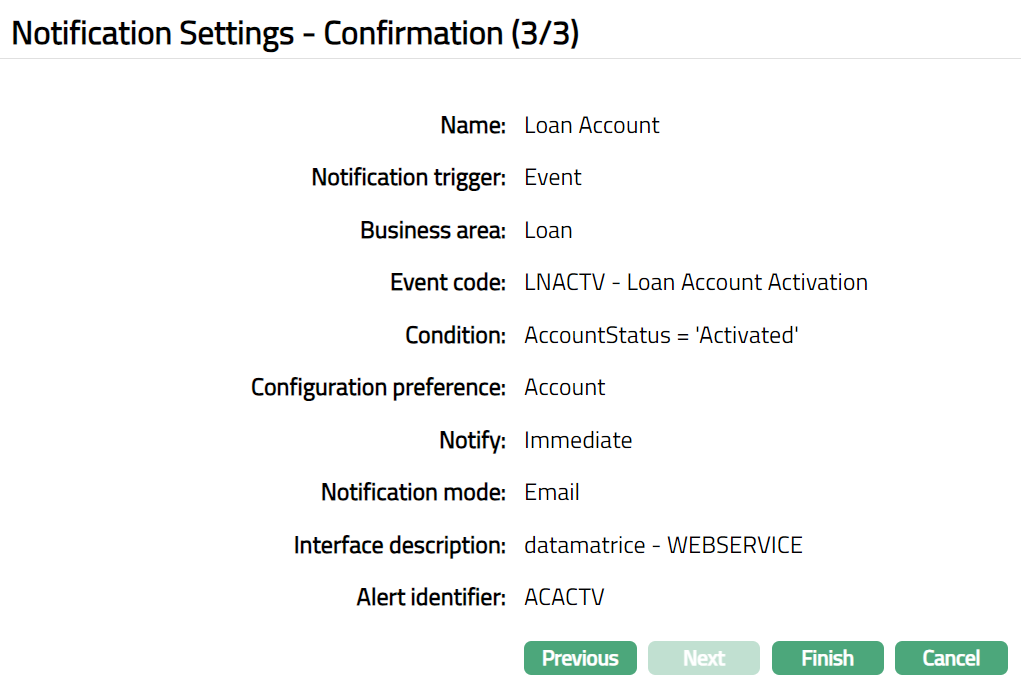
Click Next. Notification Settings -- Confirmation (3/3) page appears.
Note: There will be an additional step in case custom fields have been mapped to the function.
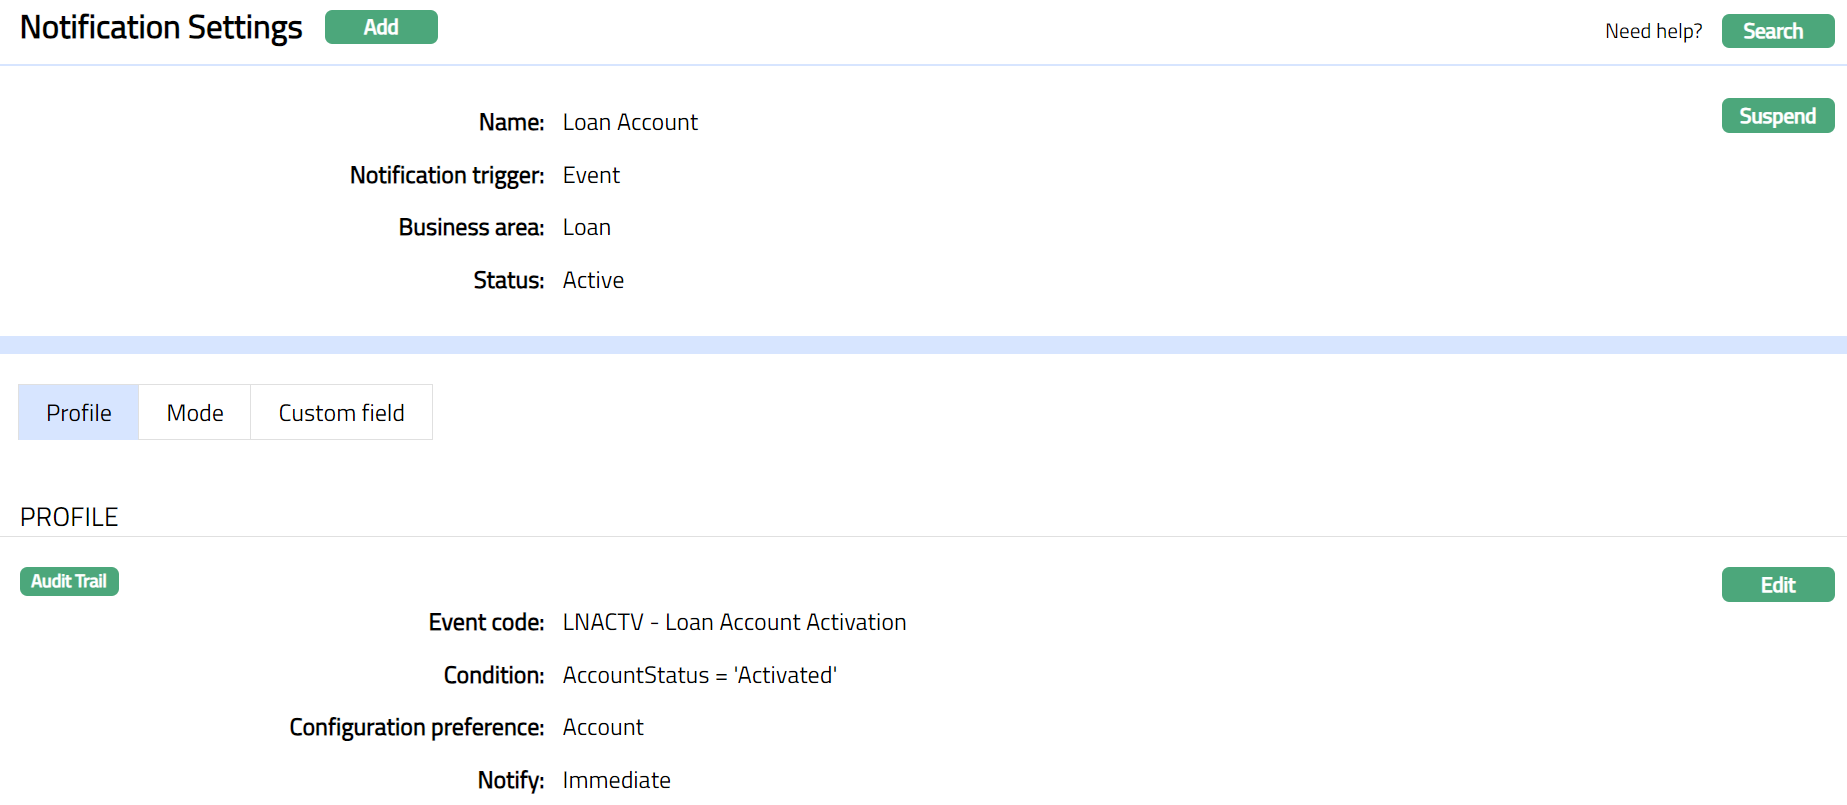
Click Finish. Notification Settings page will appear with all the added details and Profile tab will be displayed by default. Status of the Notification Setting will be Active.
Functions: Add, Search, Suspend
Profile
Profile tab, which is the default tab in Notification Settings screen, shows the basic details of the Notification Settings.
A sample of Profile tab is shown below:
To View / Edit Profile.
- Access Notification Settings page. By default, Profile tab will be displayed.

To edit Profile,
Click Edit. Edit Profile page is displayed.
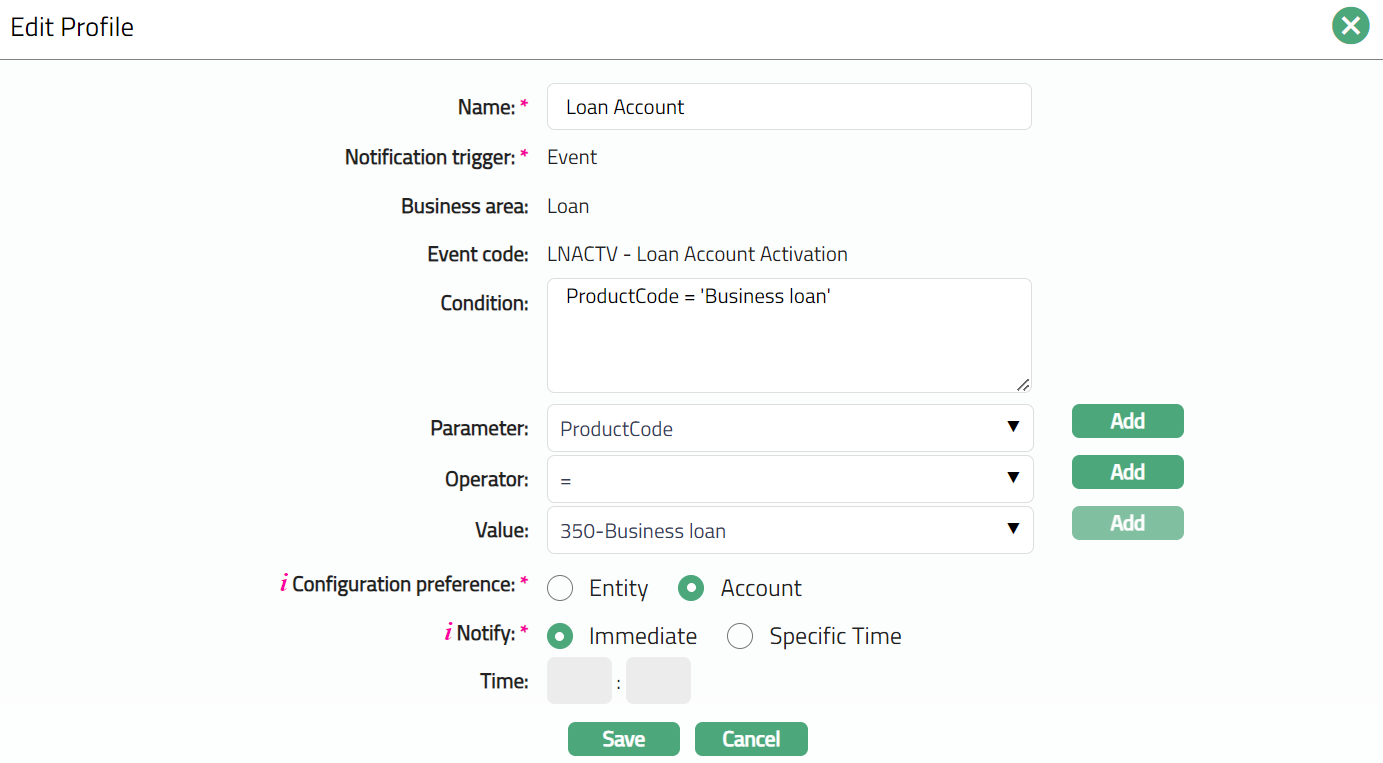
Note: Except Notification trigger, Business area and Event code all other fields are editable.
Make required changes and click Save. Profile tab appears with the edited details.

Function: Edit
Mode
The Mode tab allows you to view, add and edit different types of Notification mode like E-Mail, SMS and Webhook.
To View Mode.
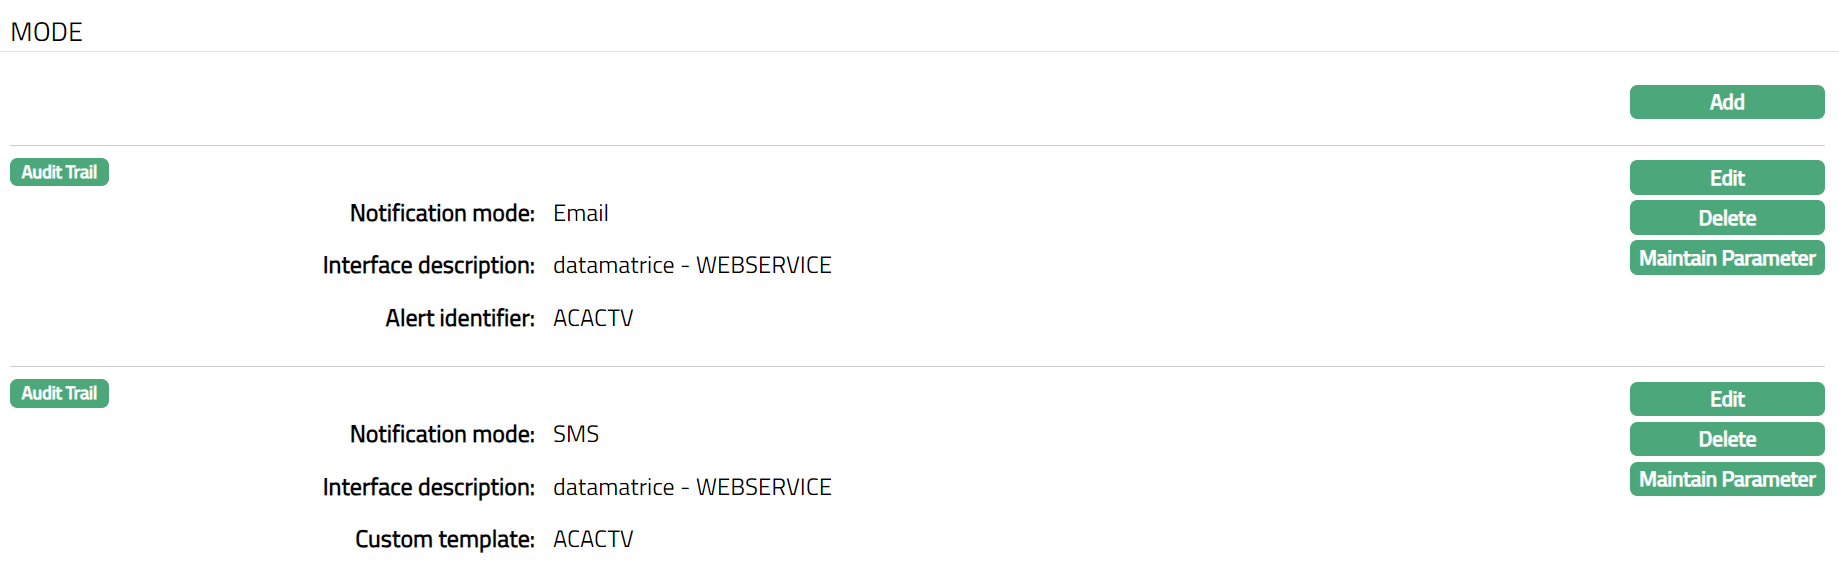
Access Notification Settings page, then click Mode tab to see all the available Notification Modes as configured.

Click Add. Add Mode page appears.
Note: For details refer to Notification Settings -- Mode (2/3) page
Click Save. Mode page appears with the new added mode.
Function: Add, Edit, Delete,Maintain Parameter.
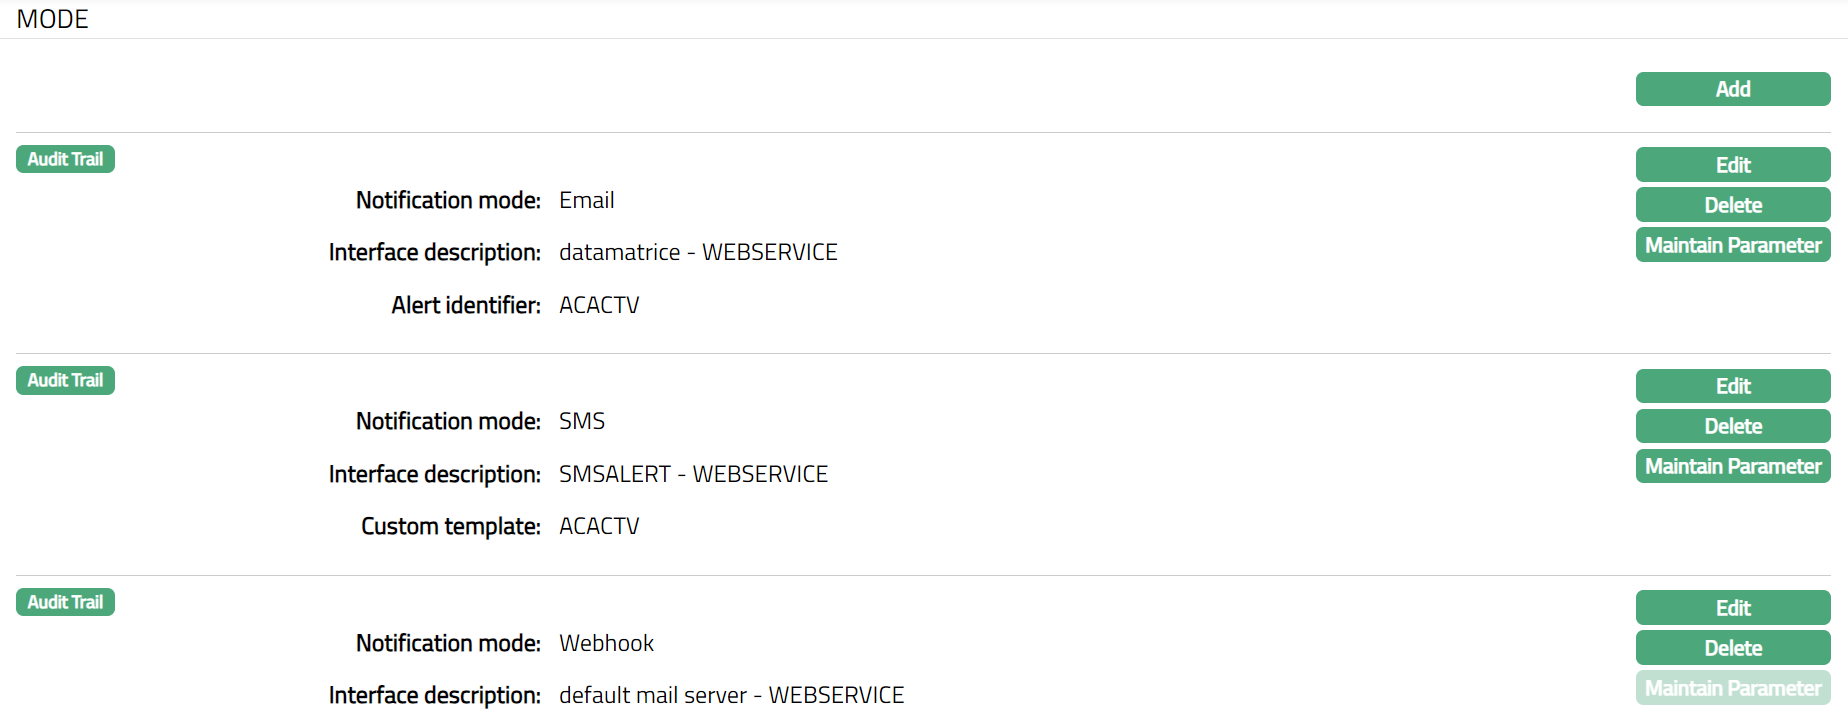
Note: Similarly, you can add multiple notification modes as required, as shown in the screen shot below.
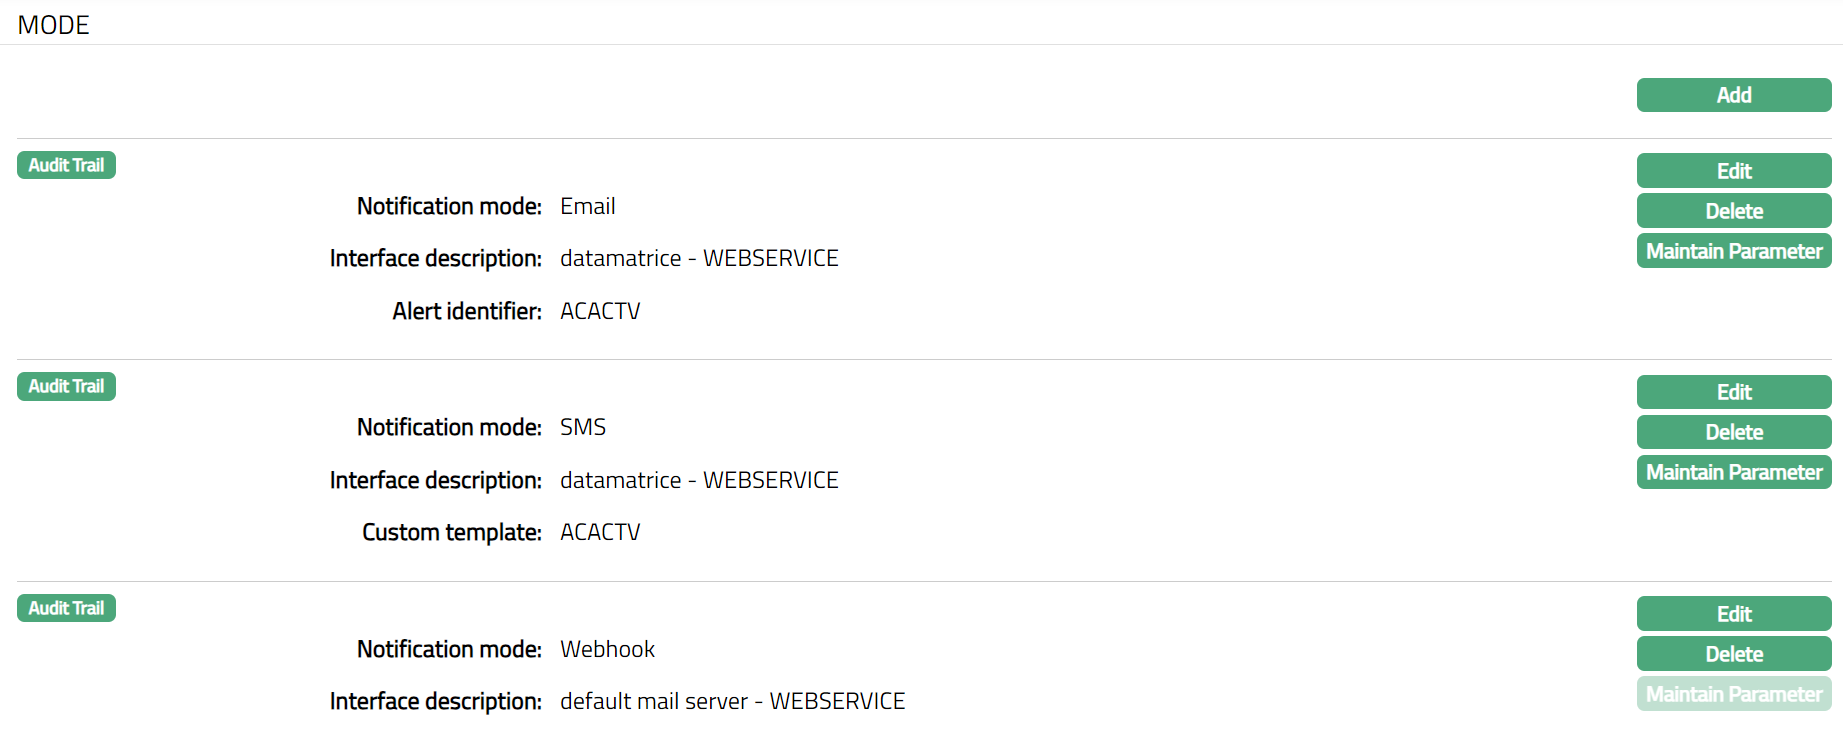
Function: Add, Edit, Delete, Maintain Parameter.
Note: Except for Webhook notification mode, all other notification modes have Maintain Parameter button enabled.
To Edit Mode
Click Edit for the mode which you want to edit. Edit Mode page appears.
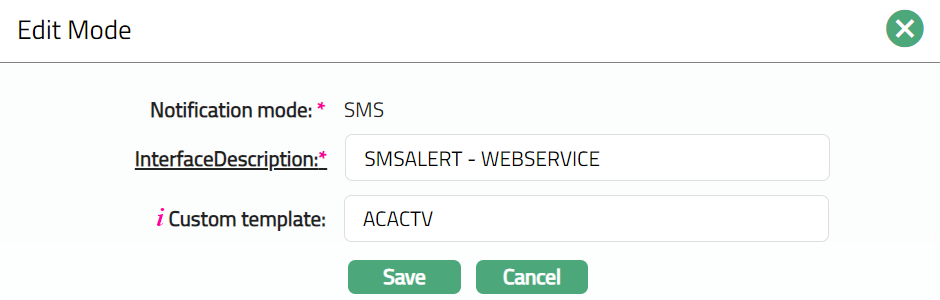
Note: Except Notification Mode field, all other fields are editable.
Make required changes and click Save. Mode tab appears with the edited details.
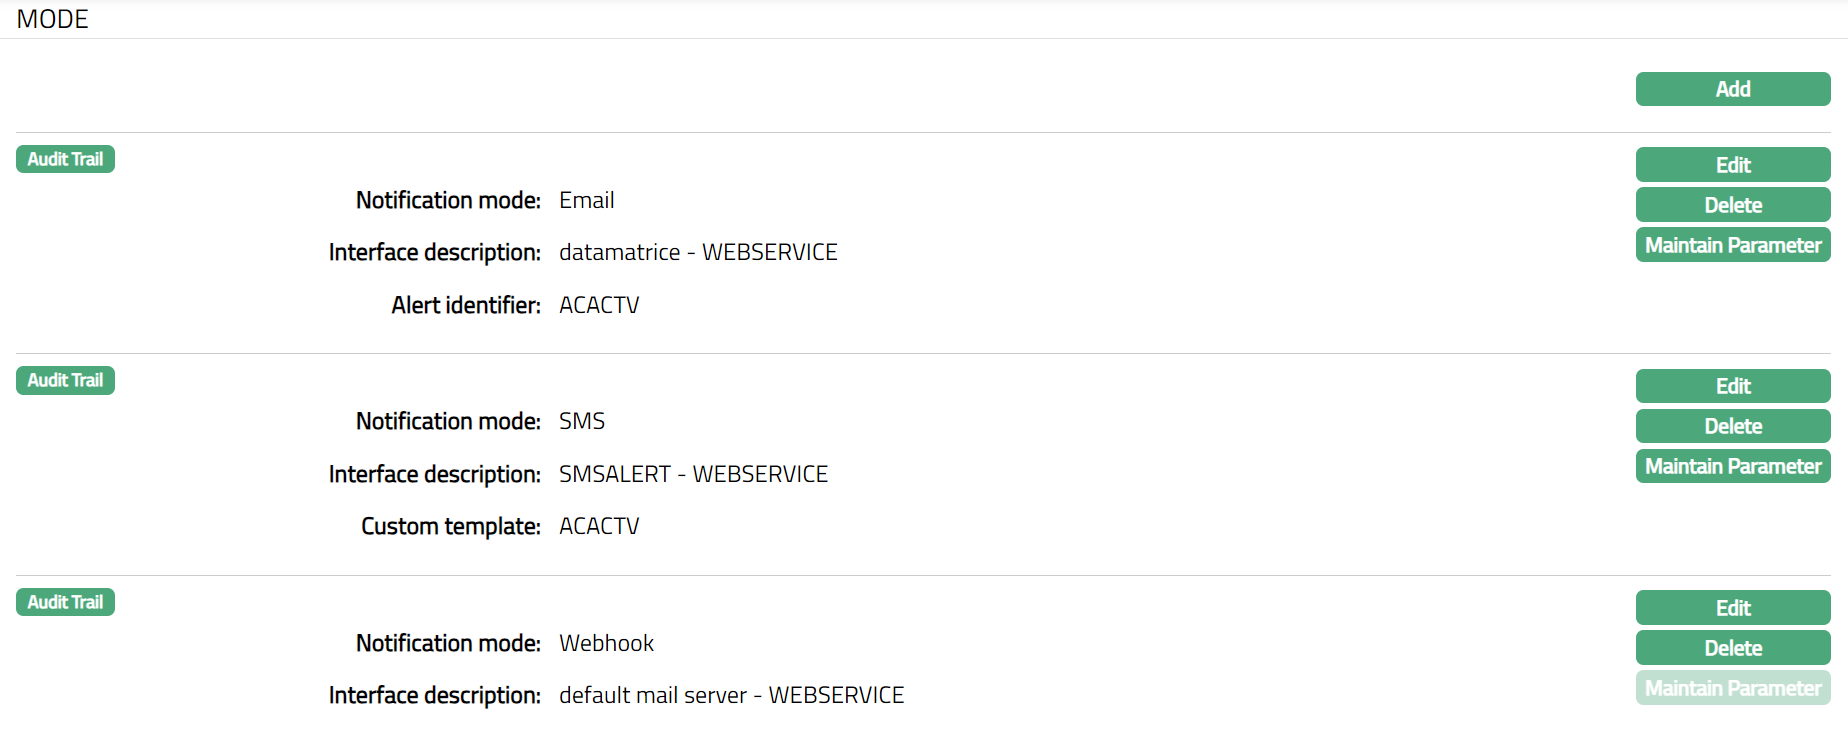 Function: Edit, Delete, Maintain Parameter.
To delete Mode
Click Delete for the mode you wish to delete. Confirmation screen pops up. Note: If there is only one mode, Delete button will be disabled. Delete button will be enabled only when there is more than one mode of notification.
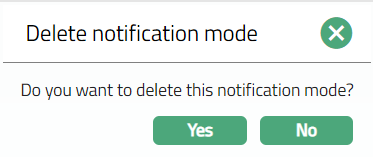
Click Yes. Mode will get deleted.
Parameter
Maintain Parameter
This function is used to maintain the mapping for different parameters for a specific Mode so that dynamic values can be used in the notification. Using the parameters mapped, Aura will generate the E-mail / SMS / webhook notification with the required values for that particular event / transaction.
To add / view different Parameters
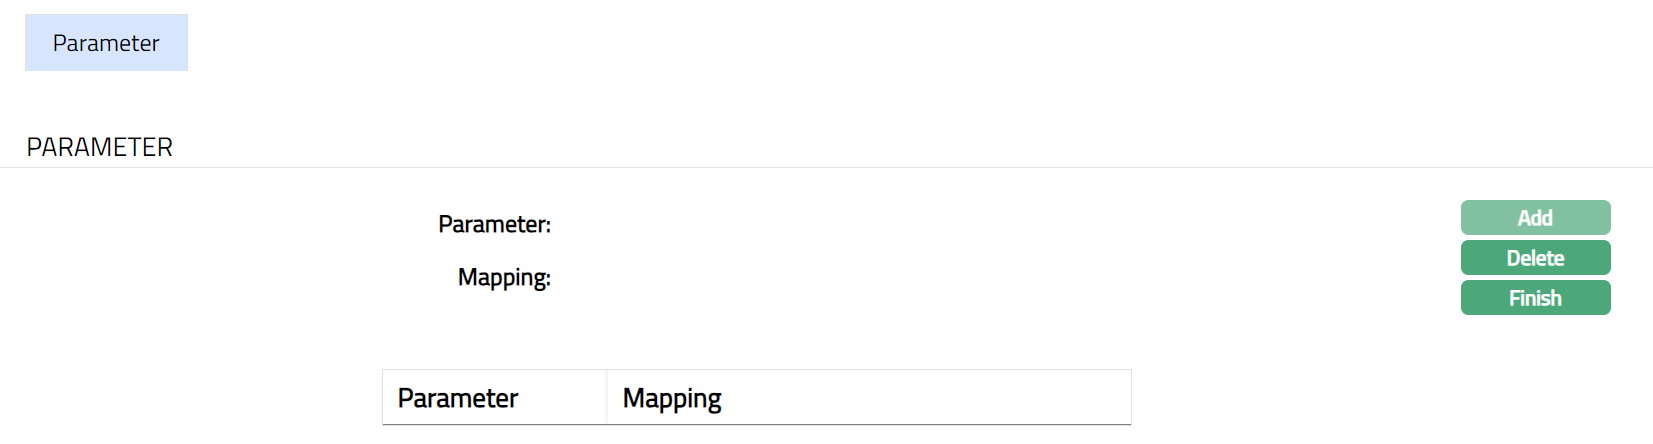
Click Maintain Parameter. Parameter page appears displaying the list of parameters already mapped.
Click Add. Add Component page appears.
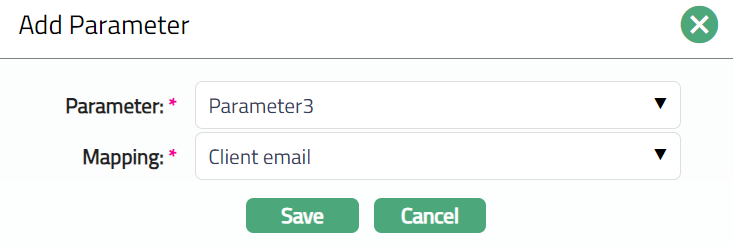
Select Parameter from the available predefined drop-down list between 1 and 15. The list will show only those parameters that are not yet used for this Mode. You can use as many parameters as required for the Notification. If the same dynamic value has to be used in multiple places in the final notification, the same parameter mapping can be re-used.
Example: If Last Name has to be used in different sections of the final Notification, it is enough to map the Parameter (say Parameter 1) once to Last Name. In the Template that is defined in Data Management, make sure that Parameter 1 is specified in all the sections where the Last Name has to be used.
Select required Mapping from the available predefined drop-down list. The values in the list will be based on the Notification Trigger and Business Area (if any). Based on the mapping, the values for the selected parameters will be passed on to the Custom Template on the Data Management layer so that the notification mail / sms / webhook will have the corresponding dynamic values as required. The available values are as follows:
If Notification Trigger = Transaction, the available list of values is mentioned below:
Transaction reference \
Contract reference \
Account \
Account branch
Transaction branch
Account Currency
Transaction Amount
LCY equivalent
Booking date
Value Date
Transaction Currency
Base Currency
Entity Name
Client Email
Client First Name
Client Last Name
Client Middle Name
Client Full Name
Client SMS To
SSN
Registration \
Name for statement
Organization
Transaction description
If Notification Trigger = Event, the list of values will depend on the Business Area chosen. The list of parameters for Business Areas currently available are listed below:
Business Area: Loan
Book Date
Value Date
Amount
Email
First Name
Last Name
Middle Name
Client Full Name
SMS To
Organization
Account \
Account Currency
Account Status
Amount Sanctioned
Interest Amount Overdue
Principal Amount Overdue
Product Code
Product Description
SSN
Registration \
Maturity Date
Tenor
Total Amount Overdue
Overdue Days
Name for statement.
Interest Rate
Annuity Amount
Tenor Unit
Current Balance
Base Currency
Entity Name
Event Description
Business Area: Client Account
Amoun+RC:R: R: R [220]Ct Blocked
Uncleared funds - Debit
Uncleared funds - Credit
Book Date
Value Date
Amount
Client Email
Client First Name
Client Last Name
Client Middle Name
Client Full Name
Client SMS To
Account \
Account Currency
Account Status
Product Code
Product Description
SSN
Registration \
Current Balance
Available Balance
Name for statement.
Organization
Book Balance
Base Currency
Entity Name
Event Description
Business Area: Card Account
Overdue Days
Amount Blocked
Uncleared funds - Debit
Uncleared funds - Credit
Given Limit
Cash Limit
Current Cycle Payment Due Date
Creation Date
Amount Requested
Amount Required
Overdue Amount
Overlimit amount
Current Cycle Start Date
Previous Cycle Start Date
Current Cycle End Date
Previous Cycle End Date
Previous Cycle Payment Due Date
Book Date
Value Date
Amount
Client Email
Client First Name
Client Last Name
Client Middle Name
Client Full Name
Client SMS To
Account \
Account Currency
Account Status
Product Code
Product Description
SSN
Registration \
Value Dated Balance
Name for statement.
Organization
Book Balance
Account Balance
Base Currency
Entity Name
Event Description
Business Area: TD Account
Deposit Amount
Maturity Amount
Remaining Deposit Amount
Amount Blocked
Maturity Date
Tenor
Book Date
Value Date
Amount
Client Email
Client First Name
Client Last Name
Client Middle Name
Client Full Name
Client SMS To
Account \
Account Currency
Account Status
Product Code
Product Description
SSN
Registration \
Tenor Unit
Current Balance
Available Balance
Name for statement.
Organization
Base Currency
Entity Name
Event Description
Click Save. Parameter page appears with the added details.
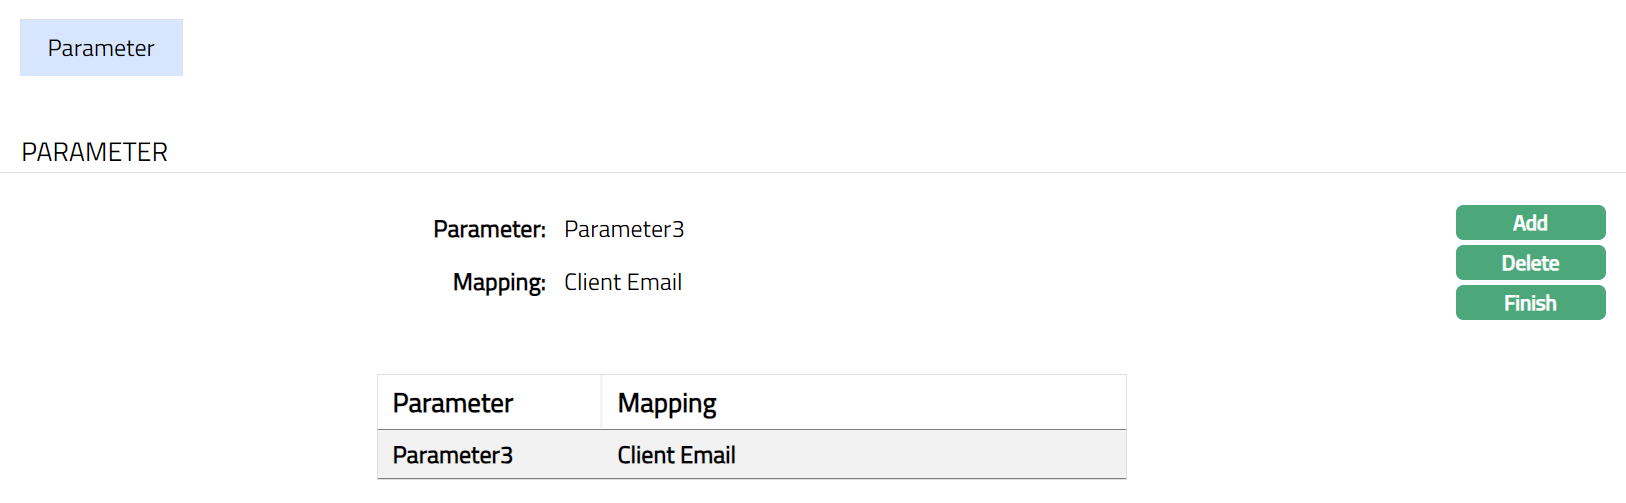 Function: Add, Delete, Finish
Note: You can add multiple parameters as required. Sample screen shot shown below.
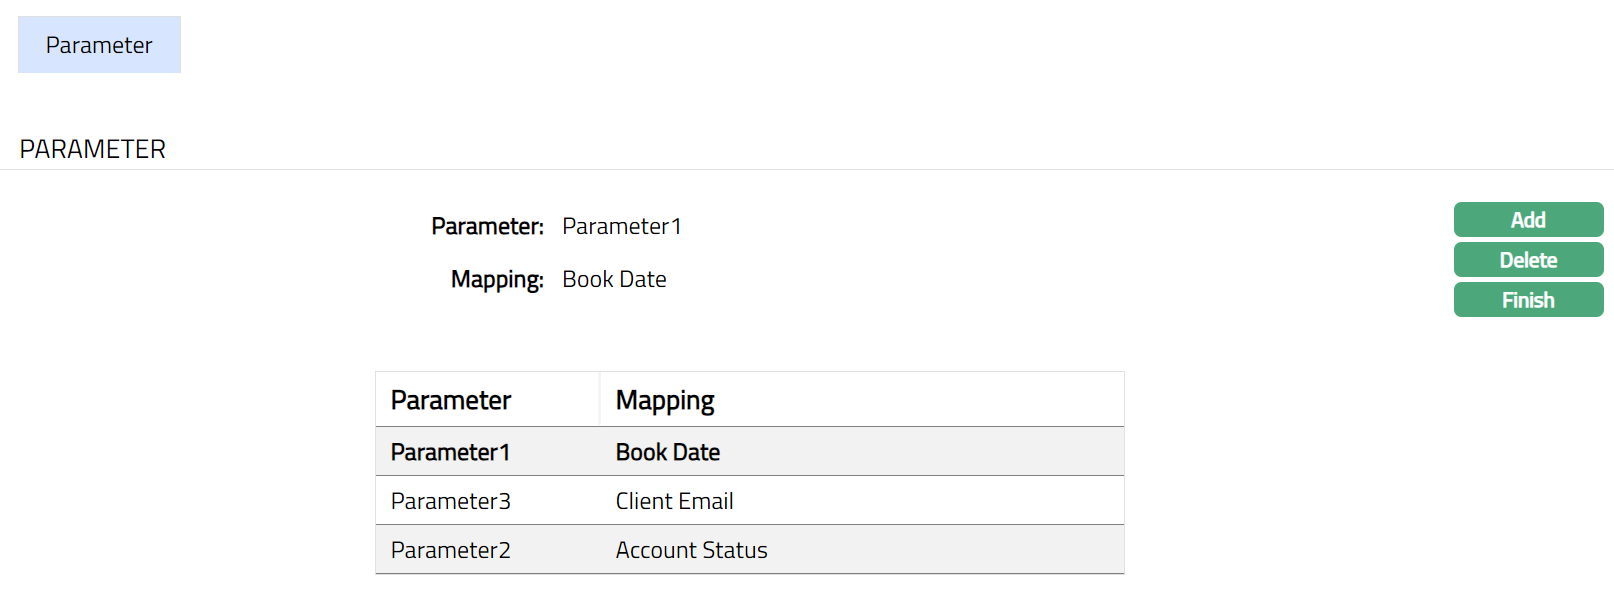 Function: Add, Delete, Finish
Click Finish. Mode page appears as shown below.
 Function: Add, Delete, Finish
Delete: This option is used to delete the required Notification mode. Once you click on Delete button, Aura will ask for confirmation; on confirmation the Notification mode will be deleted.
Custom Field
This menu option allows you to define fields apart from those that are already available in the standard version of Aura. Thus, it enables you to customize additional data storage and use as required to suit your specific business needs.
To maintain Custom Field
- Access Notification Settings page, then Click CustomField tab. Initially the tab will be blank as per the sample screen shot shown below.

The field appears only when it is created in Admin > System codes > Custom fields > Custom fields and linked to Notification Settings option in Admin > System codes > Custom fields > Field mappings.
Click Edit. Edit Custom Field page appears. In the following illustration, one custom field has been mapped as shown below.

Enter Communication details to be associated with the Notification Settings.
Click Save. Custom Field tab appears with the edited details.
 Function: Edit