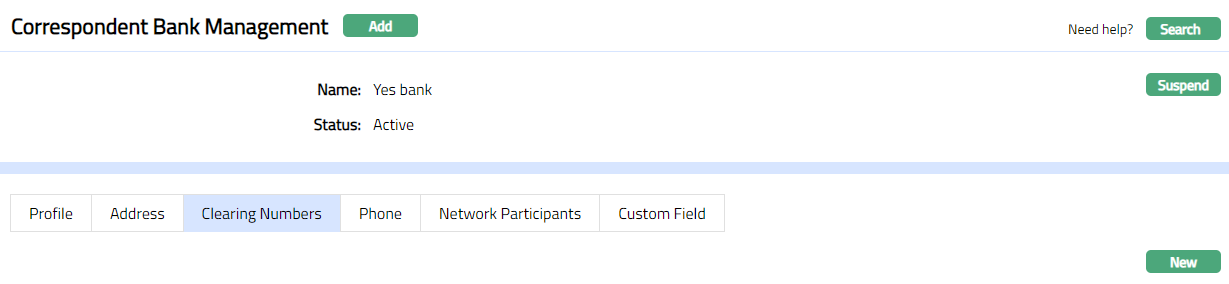
Correspondent Bank Management
Correspondent Bank Management allows you to maintain details of financial institutions / intermediaries for use in settlement of local / cross border payments. In general, these details would be uploaded from SWIFT BIC directory.
Following are the various tabs that appear on the Correspondent Bank Management page:
To add Correspondent Bank Management record
- From Admin menu, click Correspondent Bank Management, and then Maintain. Correspondent Bank Management Search page appears.
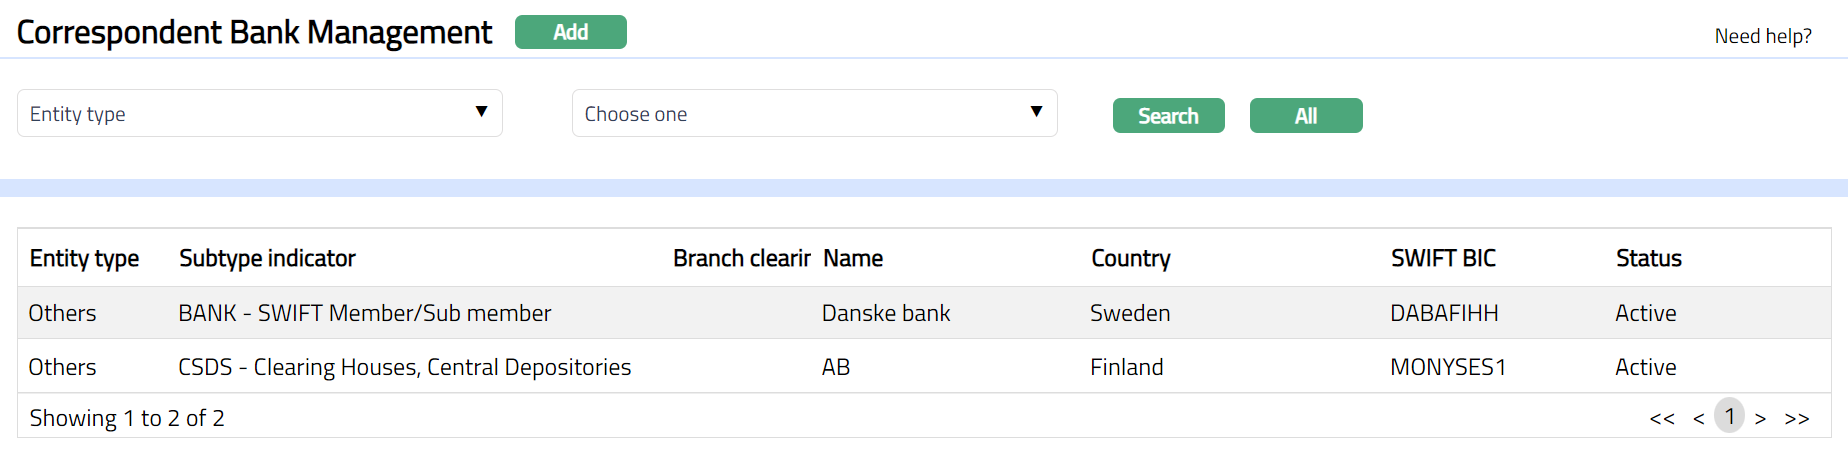
- Click Add. New Correspondent Bank Management - General (1/2) page appears.
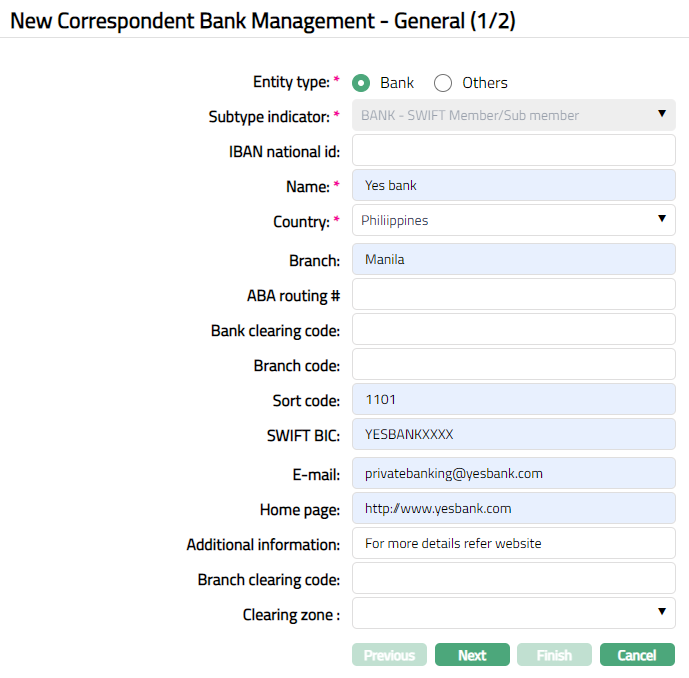
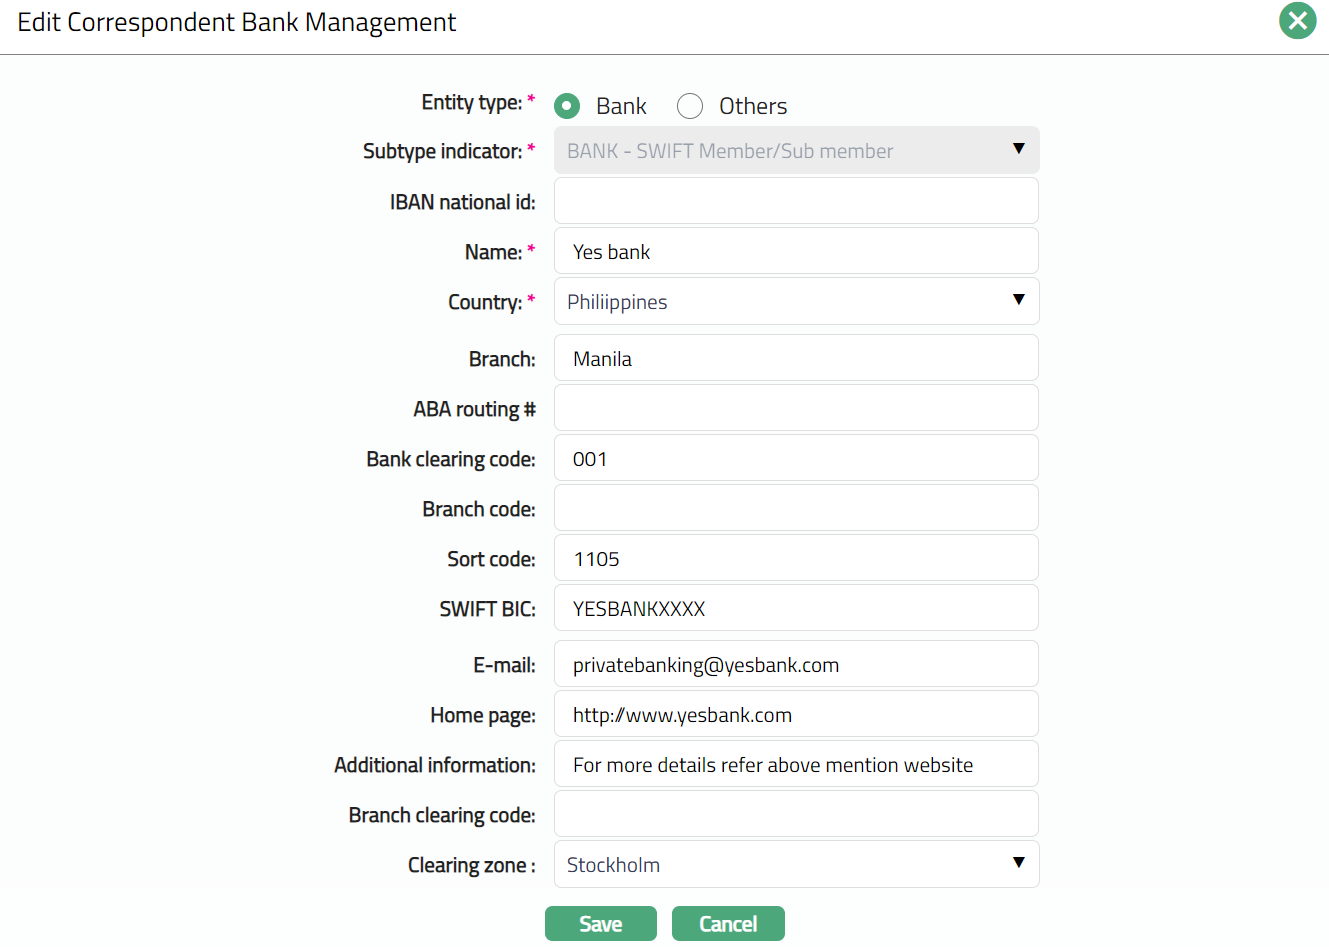
Select Entity type as Bank or Others.
Subtype indicator depends on the Entity type that you have chosen.
If you have selected Bank as an Entity type, then the subtype indicator will be disabled and the pre-shipped value BANK -- SWIFT Member/Sub member is defaulted by Aura.
If you have selected Others as an Entity type then the subtype indicator will be enabled, and you can select the required value from the drop down. The available subtypes are pre-shipped and as per the SWIFT BIC Code Directory.
Enter IBAN national id. National ID is the value provided by the national provider (central bank or national banking association) to identify a bank on the domestic market. However, for some countries, the value used in the IBAN can be different (for example, in Sweden, the national code is 4 characters, but they only use the first 3 characters in the IBAN), hence the IBAN NATIONAL ID field.
Enter Name of the financial institution / intermediary.
Select Country from the drop-down list of countries maintained under Admin > System codes > Generic definitions > Countries.
Enter ABA routing # of the financial institution / intermediary. The ABA (American Bankers Association) routing number identifies the specific financial institution responsible for the payment of a negotiable instrument. It should not exceed 9 characters.
Enter Bank clearing code of the financial institution / intermediary. A Bank clearing code is a code assigned by central bank, a bank supervisory body or a Bankers Association in a country to all its licensed member banks.
Enter Branch code of the financial institution / intermediary. The Branch code should be unique identification code for every branch of a bank.
Enter Sort code of the financial institution / intermediary. A sort code used to route money transfers between banks within their respective countries via their respective clearance organizations. It identifies both the bank and the branch where the account is held.
Enter SWIFT BIC of the financial institution / intermediary. It is a standard format of approved by the International Organization for Standardization (ISO) under ISO 9362. It is a unique identification code for both financial and non-financial institutions.
Enter E-mail address of the financial institution / intermediary.
Enter Home page link of the financial institution / intermediary.
Enter Additional information about the financial institution / intermediary.
Enter Branch clearing code. It is the clearing code of the branch.
Select Clearing Zone from the drop-down list maintained under Admin > System codes > Generic Definition > Clearing Zone. Clearing Zone is the zone where the financial institute participates for clearing.
Click Next. Correspondent Bank Management - Confirmation (2/2) page appears.
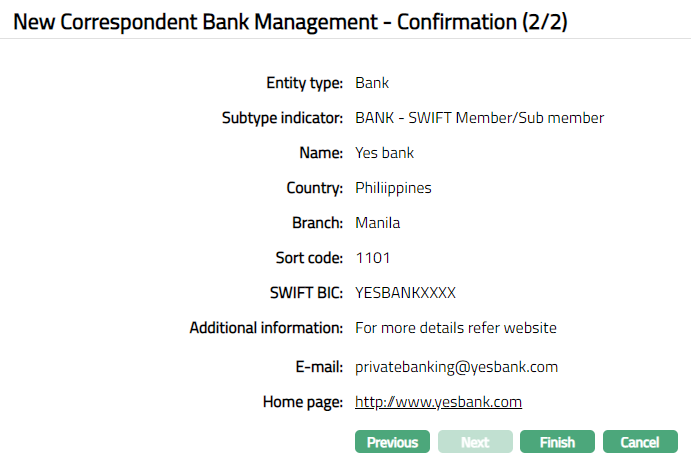
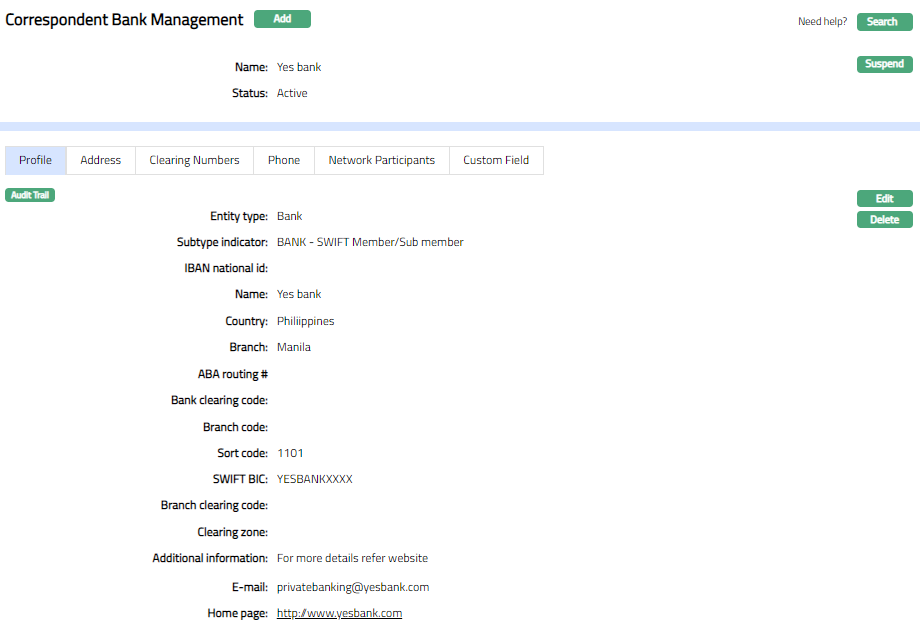
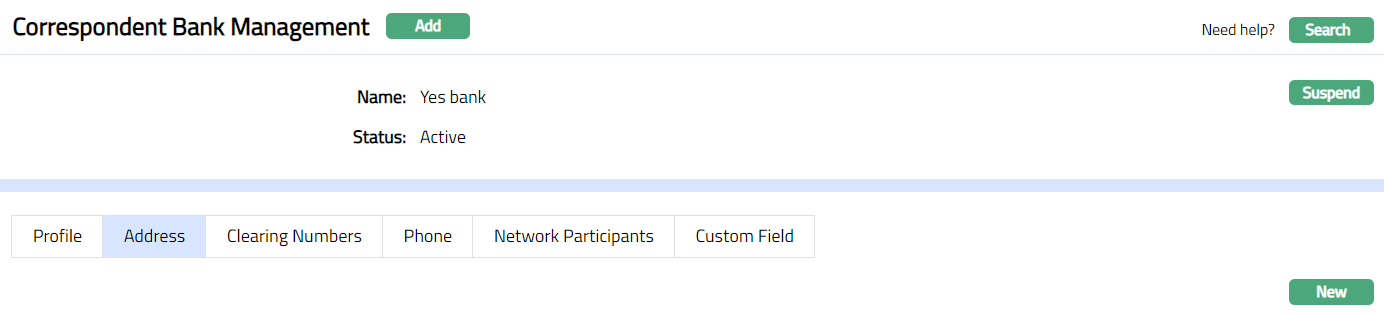
- Click Finish. Correspondent Bank Management page appears displaying the details of the financial institution / intermediary that you added under the Profile tab. Account Status is Active.
Functions: Add, Search, Suspend
Delete: You can delete a Correspondent Bank Management record by clicking on Delete button. Aura will ask for confirmation, on approving which the selected record will be deleted.
Suspend: You can suspend the Correspondent Bank Management by clicking on Suspend button. When you click on Suspend button, Aura will ask for confirmation. On confirmation, Aura will suspend the Correspondent Bank Management and Activate button will appear in place of the Suspend button.
Activate: If you want to activate a suspended Correspondent Bank Management then click on Activate button. Aura will ask for confirmation. On confirmation Aura will activate the Correspondent Bank Management and Suspend button will appear in place of Activate button.
Profile
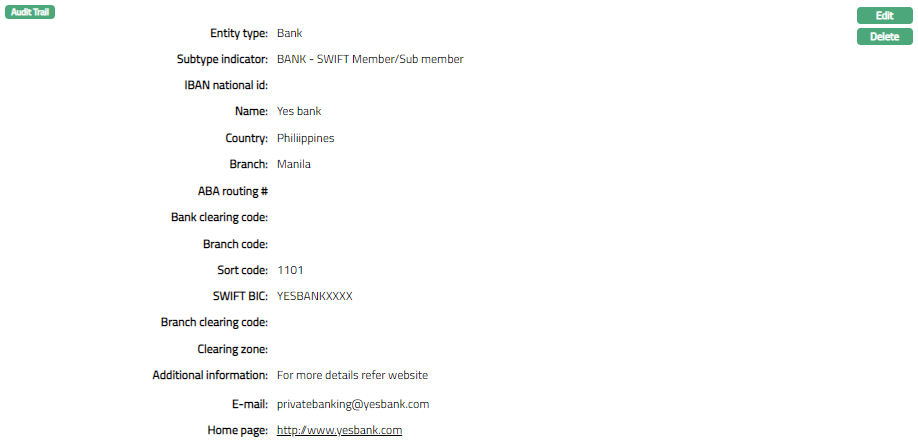
Profile tab, which is the default screen in the Correspondent Bank Management screen, shows the basic details of the financial institution / intermediary. For details refer to New Correspondent Bank Management- General (1/2).
To view/edit settlement Directory
- Access Correspondent Bank Management page and click Profile tab. The details are defaulted from New Correspondent Bank Management- General (1/2) screen.
- Click Edit. Edit Correspondent Bank Management page appears.
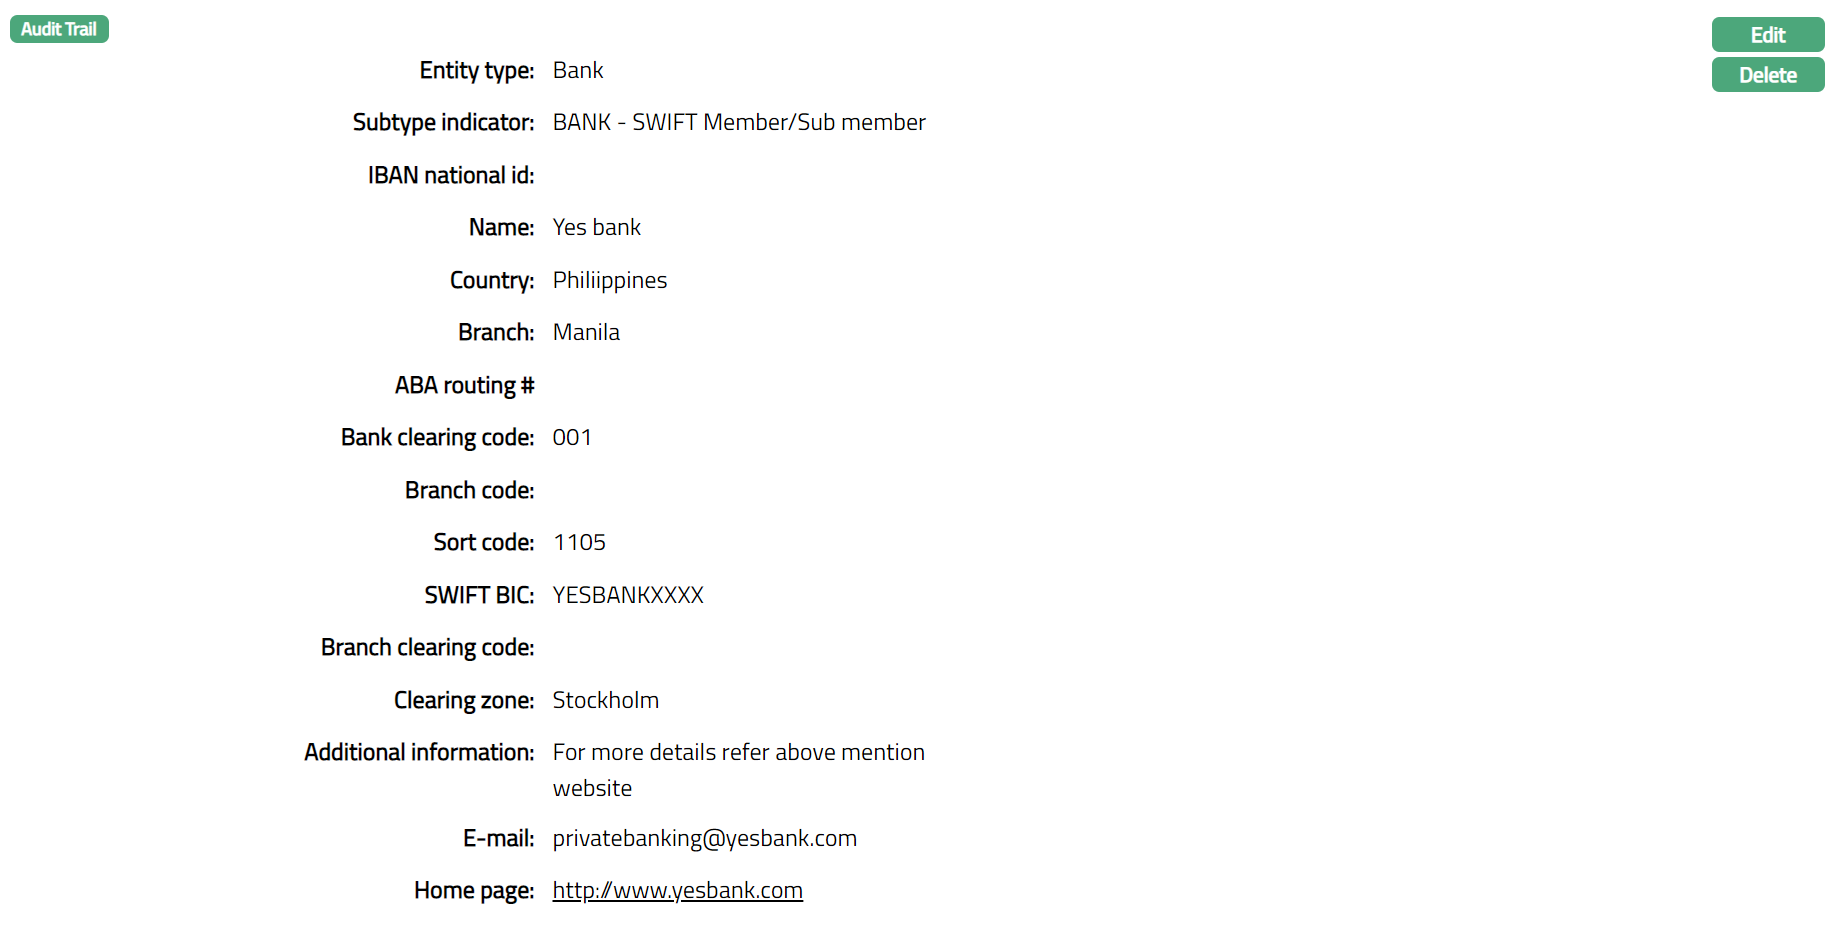
- Click Save. Correspondent Bank Management page appears with the edited details.
Functions: Edit, Delete
Address
Address tab allows you maintain the address details of the financial institution / intermediary.
To add New Address
- Access Correspondent Bank Management page and click Address tab.
- Click New. New Address page appears.
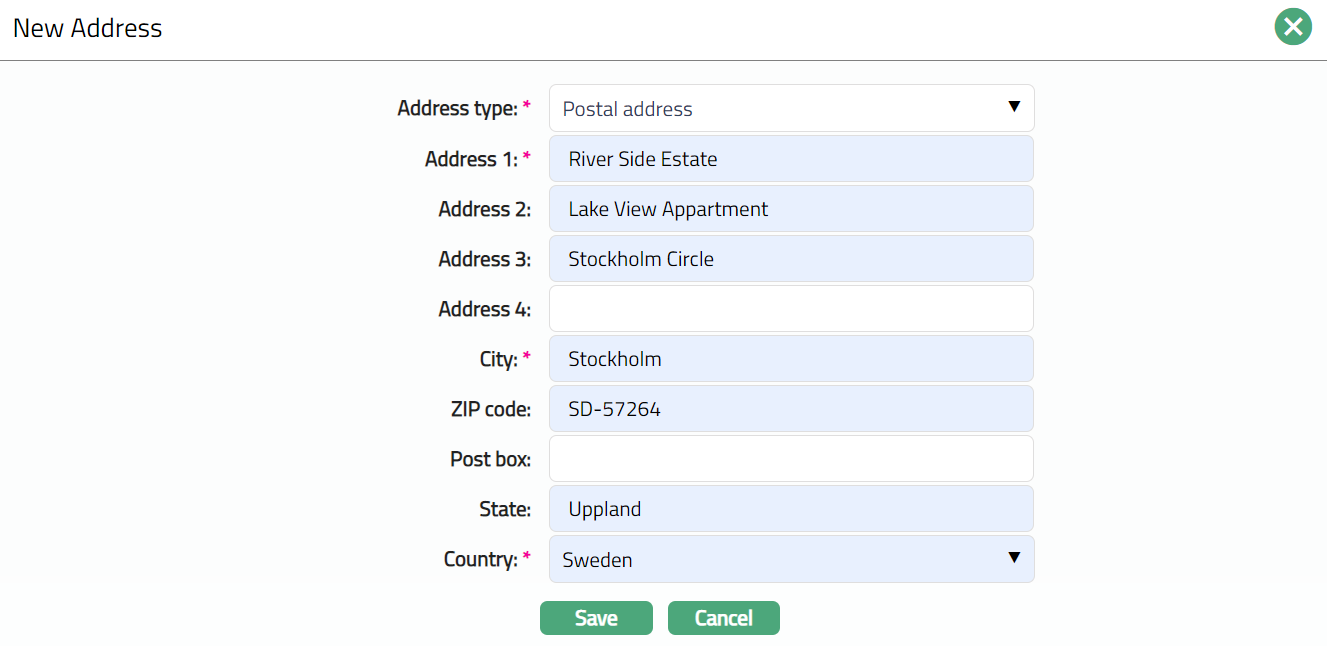
Select Address type from the drop-down list of address types maintained under Admin > System codes > Address details > Address types.
Enter Address 1 details.
Enter Address 2 details.
Enter Address 3 details.
Enter Address 4 details.
Enter City or the town of the financial institution / intermediary.
Enter Zip code or postal code of the financial institution / intermediary.
Enter Post box of the financial institution / intermediary.
Enter State of the financial institution / intermediary.
Select Country from the drop-down list of countries maintained under Admin > System codes > Generic definitions > Countries.
Click Save. Address page appears with the added details.
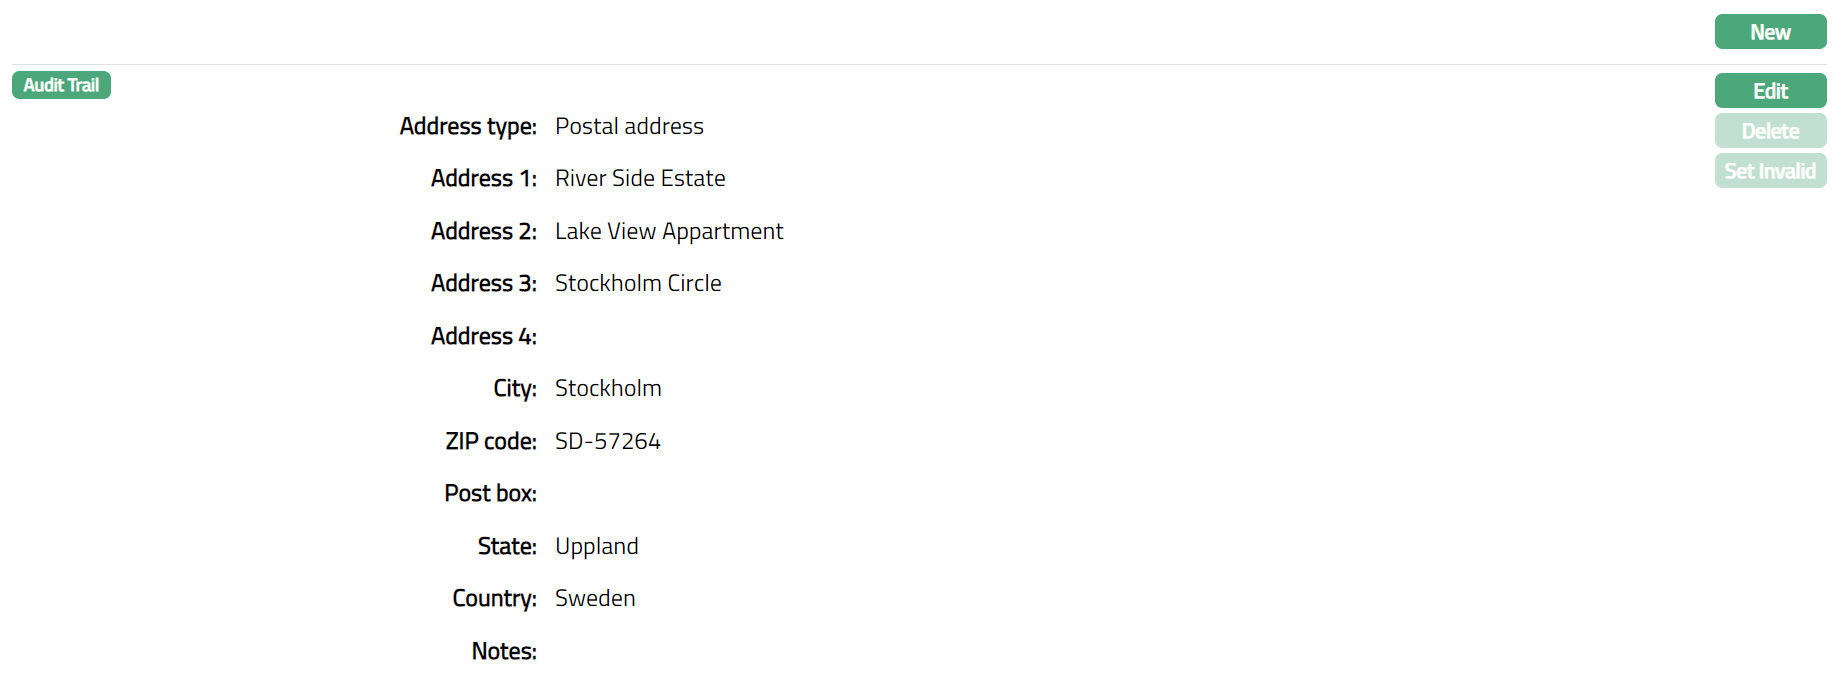
Functions: New, Edit, Delete, Set Invalid, Set Valid
Note: Once saved, there will be an additional field -- Notes, in which you can add any additional information that you wish, regarding the Address record (using Edit function).
Delete: You can delete an Address detail by clicking on Delete button. Aura will ask for confirmation, on approving which the selected Address details will be deleted.
Set Default: When you create multiple Address records, you can set one of them as the default Address using the Set Default function. When there is only one Address, the same is taken as the default Address.
Set Invalid: You can set an Address as invalid by a click on Set Invalid. This means that the particular Address record is no more valid for the financial institution / Intermediary. Aura will ask for confirmation. On confirmation, the Address is made invalid and Set Valid button appear in place of Set Invalid button.
Set Valid: If you want to set an invalid Address to valid, then click on Set valid button. Aura will ask for confirmation. On confirmation, the Aura will set the Address as Valid and Set Invalid button appear in place of Set valid button.
To edit Address
- Click Edit. Edit Address page appears.
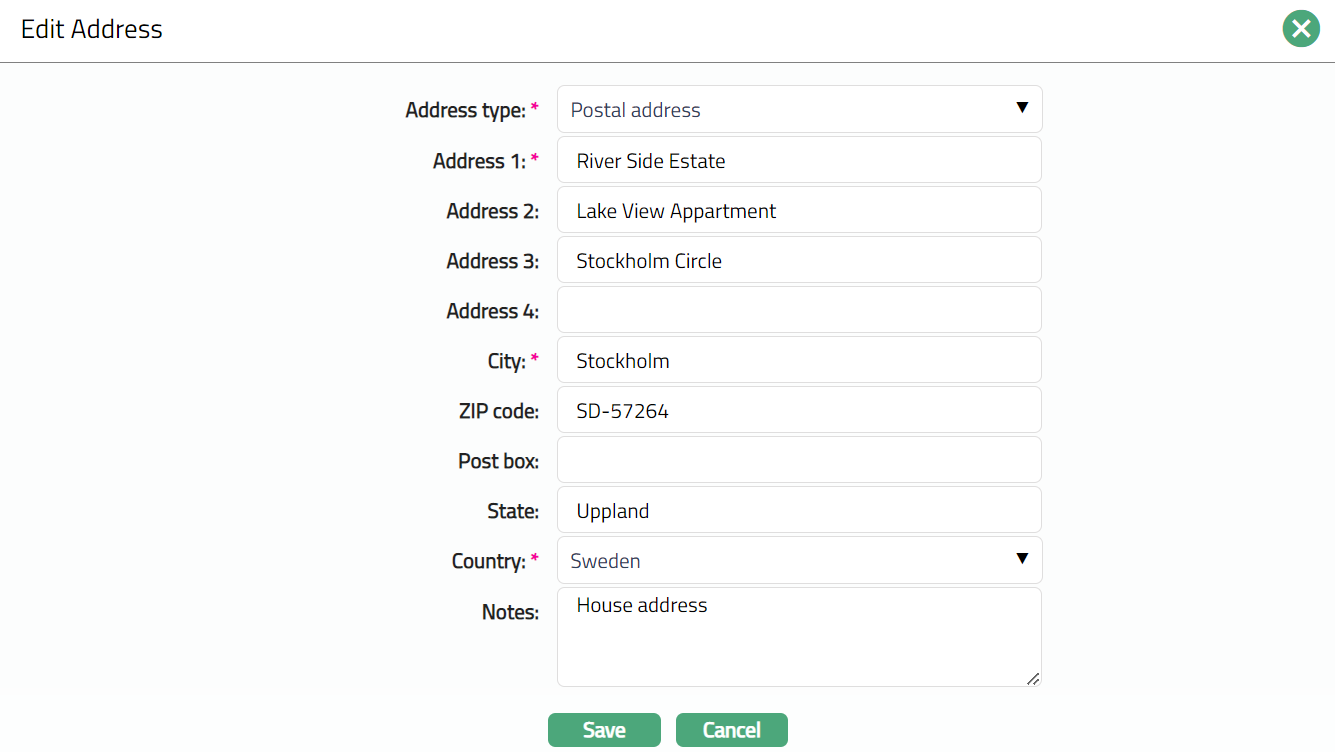
Note: All fields are editable.
- Click Save. Address page appears with the edited details.
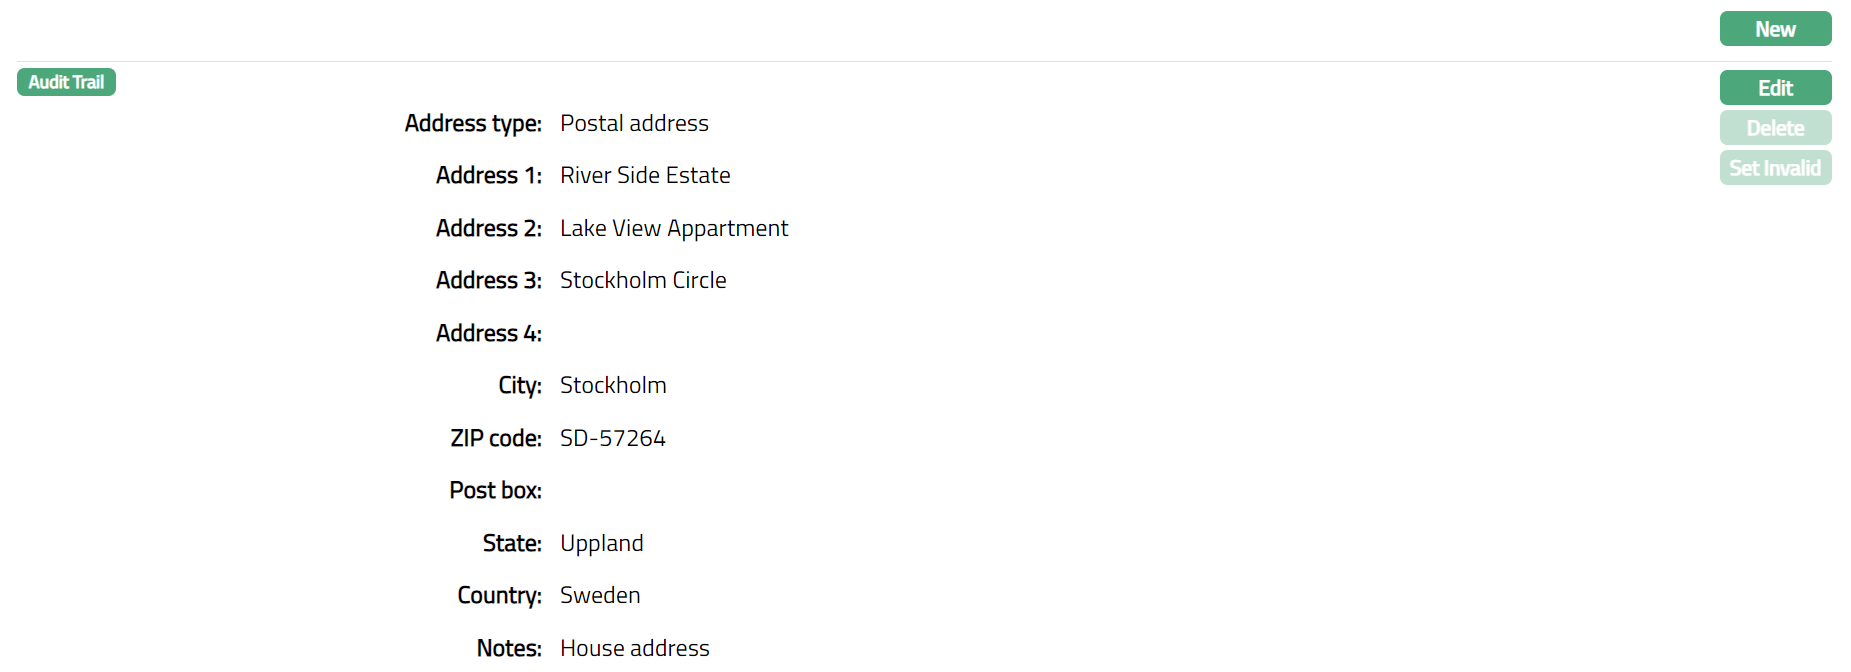
Functions: New, Edit, Delete, Set Invalid.
Clearing Numbers
Clearing Numbers tab allows you to maintain the clearing numbers of the financial institution / intermediary, which are used as part of the inter-bank clearance process.
When banks exchange cheques and electronic money transfers between them through a Clearing House (a central organization body set up by the banks within a country), each participating of the financial institution / intermediary is assigned Clearing Numbers by which they are identified.
To add Clearing Number
- Access Correspondent Bank Management page and click Clearing Numbers tab.
- Click New. New Clearing Number page appears.

Enter From # value of the Clearing Number.
Enter To # of the Clearing Number.
Click Save. Clearing Numbers page appears with the added details.

Functions: New, Edit, Delete
Delete: You can delete a Clearing Number details by clicking on Delete button. Aura will ask for confirmation, on approving which the selected Clearing Number details will be deleted.
To edit clearing numbers
Access Correspondent Bank Management page and click Clearing Number tab.
Click Edit. Edit Clearing Number page appears.

Note: All fields are editable.
- Click Save. Clearing Numbers page appears with the edited details.

Functions: New, Edit, Delete
Phone
Phone tab allows you to maintain the phone number(s) of the financial institution / intermediary.
To add Phone details
- Access Correspondent Bank Management page and click Phone tab.

- Click New. New Phone page appears.
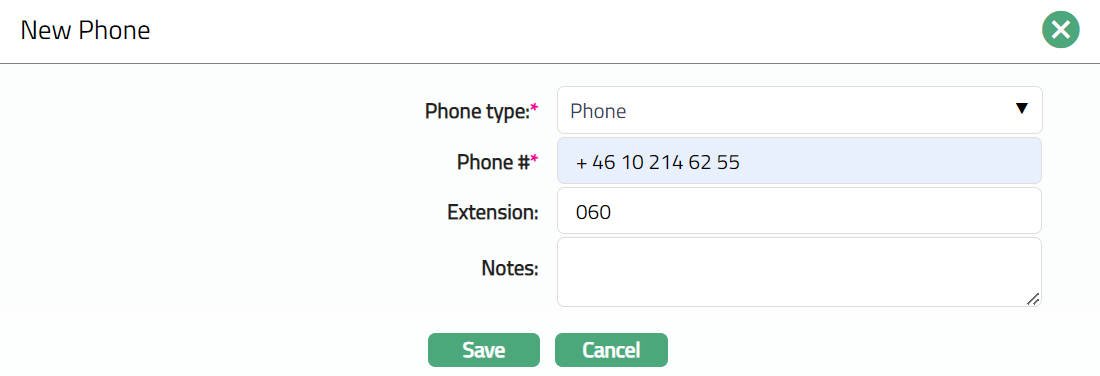
Select Phone type from the drop-down list of options maintained under Admin > System codes > Address details > Phone types.
Enter Phone # i.e., the actual phone number to contact the financial institution / intermediary.
Enter Extension for the Phone #, if applicable.
Enter Notes for the new phone.
Click Save. Phone page appears with the Added details.
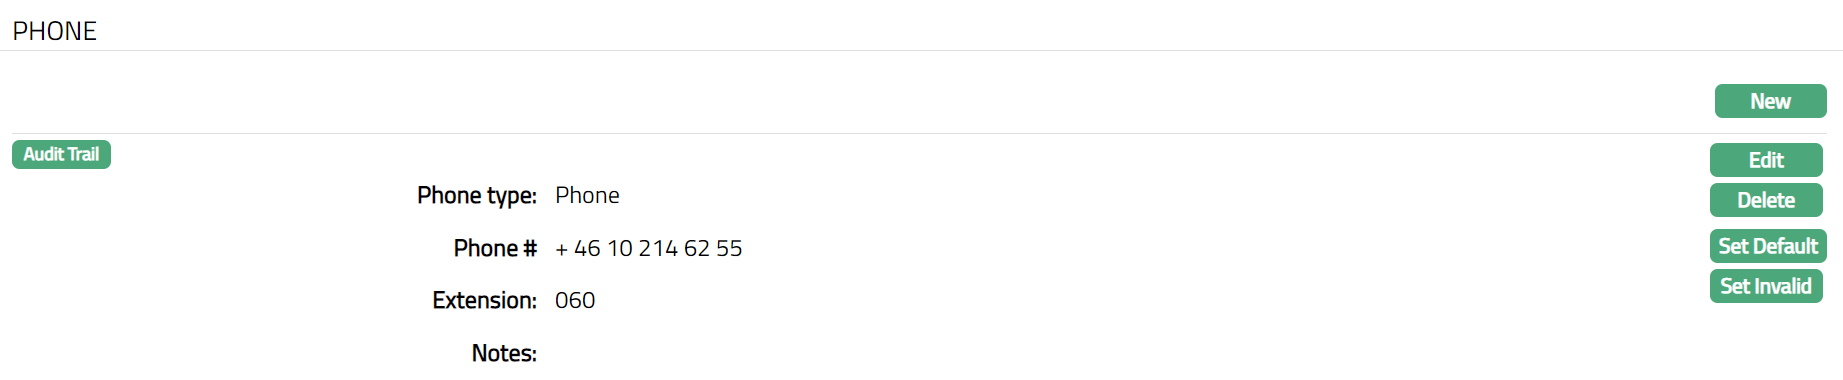
Functions: New, Edit, Delete, Set Default, Set Invalid, Set Valid
Delete: You can delete the Phone details by clicking on Delete button. Aura will ask for confirmation, on approving which the selected Phone details will be deleted.
Set Default: When you create multiple phone records, you can set one of them as the default phone record using the Set Default function. When there is only one phone record, the same is taken as the default phone.
Set Invalid: You can set a phone record as invalid by a click on Set Invalid. This means that the particular phone record is no more valid for the financial institution / Intermediary. Aura will ask for confirmation. On confirmation, the Phone details is made invalid and Set Valid button appear in place of Set Invalid button.
Set Valid: If you want to set an invalid Phone detail to valid, then click on Set valid button. Aura will ask for confirmation. On confirmation, the Aura will set the phone details as Valid and Set Invalid button appear in place of Set valid button.
To edit Phone details
Access Correspondent Bank Management page and click Phone tab.
Click Edit. Edit Phone page appears.
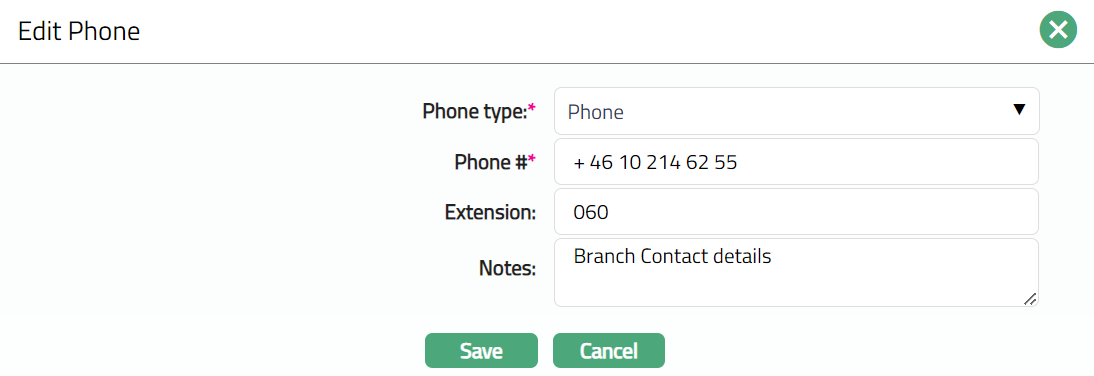
Note: All fields are editable
- Click Save. Phone page appears with edited details.

Functions: New, Edit Delete, Set Default, Set Invalid
Network Participants
This tab will display the details that, maintained bank is Direct or In-direct participant for a network in country.
To Add Network Participants detail
- Access Correspondent Bank Management and click Network Participants tab.

- Click Add, Add Network Participant page appears.

- Select Clearing network from the drop-down list. Based on the Entity country displays the list of clearing networks from the Country-Network-Currency table,
For example, if Entity country = Philippines, then Clearing network will display SWIFT and PCHC.
Select Direct or Indirect radio button for Participant. Note: by default, Direct will be selected
If In-direct is selected by user, then system will display Participate through as an additional field.
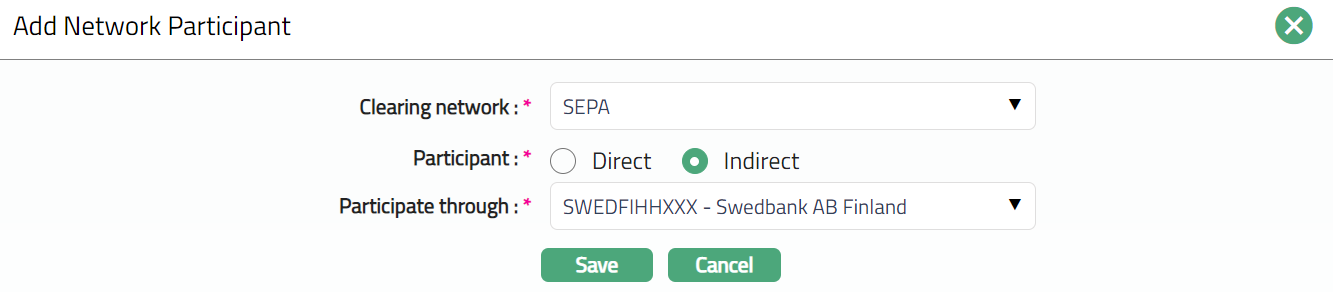
- Select Participate through from the available drop-down list which display values from the Correspondent bank management-maintained list where Participant for the clearing network selected = Direct.
E.g., If country if Philippines then
If Clearing networks = SWIFT or TARGET2 or SEPA, then display SWIFT BIC -- Bank name.
If Clearing networks = NEFT or RTGS or PCHC, then display Bank clearing code -- Bank name

Functions: Add, Edit, Delete
To edit Network Participant
- Click Edit. Edit Network Participant page appears.

Note: Except Clearing network rest fields are editable.
- Click Save. Network Participant page appears with the edited details.

Functions: Add, Edit, Delete
Custom Field
Custom Field tab allows you to edit the custom fields mapped to Correspondent Bank Management module. Depending on the custom fields created and mapped to Correspondent Bank Management module (using System Codes > Custom Fields), the fields will be displayed on this tab.
To access Custom Field
1. Access Correspondent Bank Management page. Click Custom Field tab. Custom Field screen appears.

2. Click Edit. Edit Custom Field page appears.

3. Click Save. Custom Field page appears with the edited details.

Functions; Edit