
Collection Settings
Collection settings menu allow you to maintain the settings for the collection on the basis of which bulk Collection of transactions can be done.
Following are the tabs in a Collection Setting:
Charge - For Collection Type: Prepaid Instrument only.
To add new Collection setting,
1. From Retail menu, click Settings, then Collection settings. Collection Setting Search page appears.

2. Click Add. New Collection Settings → Profile (1/4) page appears.
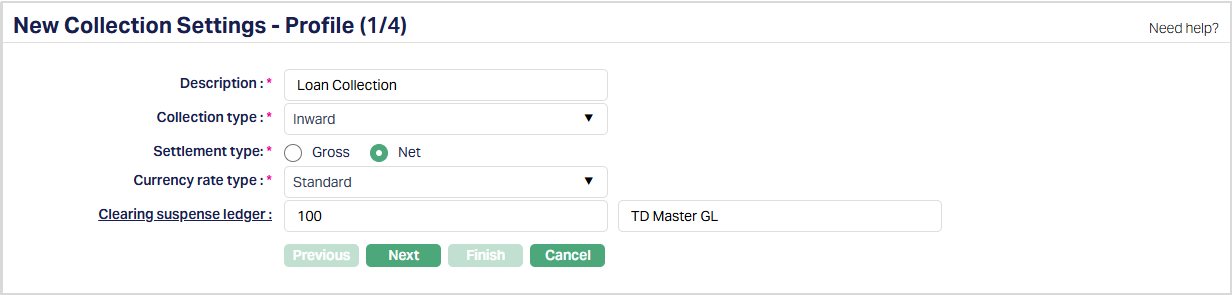
3. Enter Description for the Collection setting.
4. Select Collection type from the dropdown list of pre-defined payment types. The options are:
Inward -- Collections coming in is Inward collection.
Outward -- Collections going out is Outward collection.
Prepaid Instrument -- It is the collection for issuing and handling prepaid instruments.
On-us Deposit -- It is the collection for deposits within the same bank.
If Collection Type is Inward
5. Select Settlement type as Gross or Net. By default, the Settlement type is Net.
6. Select Currency rate type from the dropdown list of Currency rate types maintained under Admin → System codes → Currencies → Currency rate types. Currency rate type is used for calculating the exchange rate.
7. Specify the Clearing suspense ledger. Alternatively, click the Clearing suspense ledger hyperlink to open the General Ledger Account Search screen. All ledgers belonging to Ledger type = Asset or Liability, where Cash account is No and Manual posting is No, are available for selection.
If Collection Type is Outward
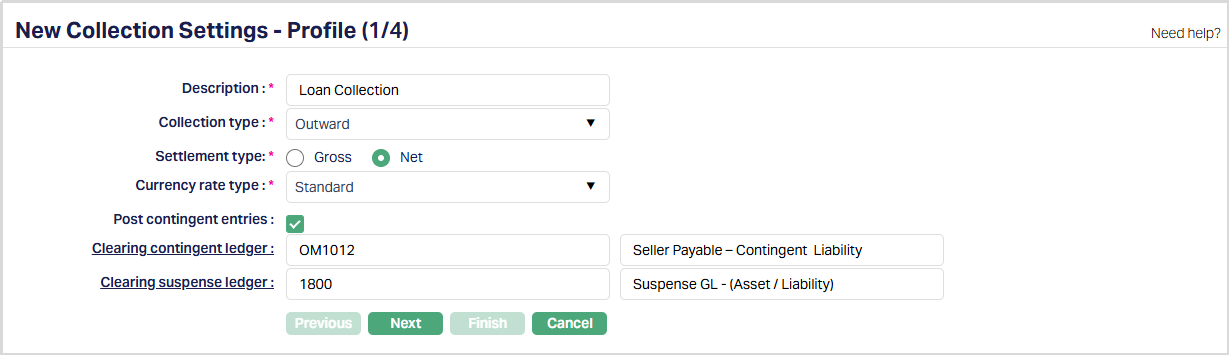
8. Select Settlement type as Gross or Net. By default, the Settlement type is Net.
9. Select Currency rate type from the dropdown list of Currency rate types maintained under Admin → System codes → Currencies → Currency rate types. Currency rate type is used for calculating the exchange rate.
10. Select Post contingent entries to enable contingent postings.
11. Specify the Clearing contingent ledger. This field is enabled only when Post contingent entries is selected.
12. Specify the Clearing suspense ledger. Alternatively, click the Clearing suspense ledger hyperlink to open the General Ledger Account Search screen. All ledgers belonging to Ledger type = Asset or Liability, where Cash account is No and Manual posting is No, are available for selection.
If Collection Type is Prepaid Instrument
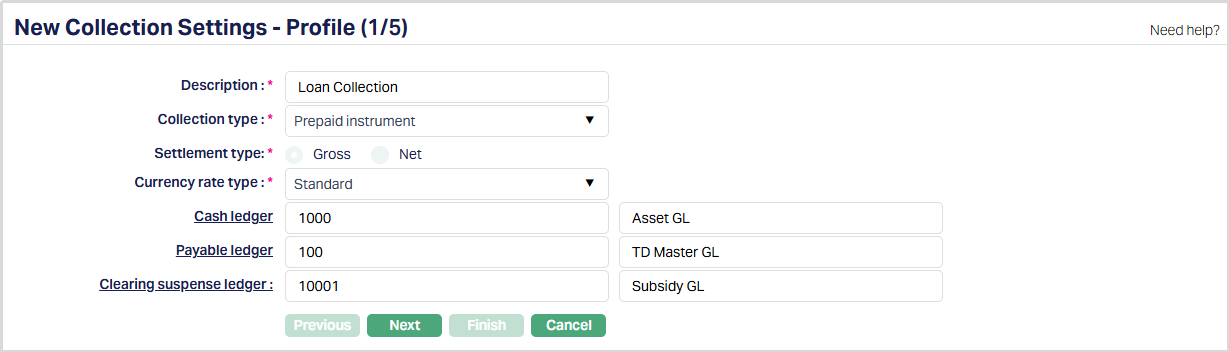
13. Settlement type is defaulted to Gross and cannot be modified.
14. Select Currency rate type from the dropdown list of Currency rate types maintained under Admin → System codes → Currencies → Currency rate types. Currency rate type is used for calculating the exchange rate.
15. Specify the Cash ledger. Alternatively, click the Cash ledger hyperlink to open the General Ledger Account Search screen and select the required ledger. Only ledgers with Ledger type = Liability are available for selection.
16. Specify the Payable ledger. Alternatively, click the Payable ledger hyperlink to open the General Ledger Account Search screen and select the required ledger. Only ledgers with Ledger type = Liability are available for selection.
17. Specify the Clearing suspense ledger. Alternatively, click the Clearing suspense ledger hyperlink to open the General Ledger Account Search screen and select the required ledger. All ledgers belonging to Ledger type = Asset or Liability, where Cash account is No and Manual posting is No, are available for selection.
If Collection Type is On-us Deposit
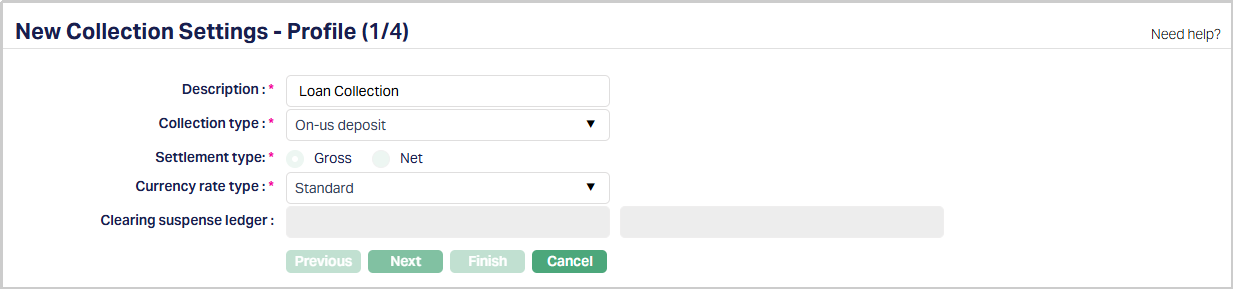
18. Settlement type is defaulted to Gross and cannot be modified.
19. Select Currency rate type from the dropdown list of Currency rate types maintained under Admin → System codes → Currencies → Currency rate types. Currency rate type is used for calculating the exchange rate.
20. Clearing suspense ledger is displayed in a disabled state and cannot be modified.
Field Descriptions:
Settlement type: Settlement type determines how collection transactions are settled. You can select Gross or Net where applicable. For Prepaid instrument and On-us deposit, the Settlement type is automatically set to Gross and cannot be modified.
Currency rate type: Currency rate type is used for calculating the exchange rate. The values displayed are maintained under Admin → System codes → Currencies → Currency rate types.
Cash ledger: Cash ledger specifies the ledger used for processing prepaid instrument cash transactions. This field is available only when Collection type is Prepaid instrument.
Payable ledger: Payable ledger specifies the ledger used for payable entries related to prepaid instruments. This field is available only when Collection type is Prepaid instrument.
Clearing contingent ledger: Clearing contingent ledger is used to record contingent entries during outward collection processing. This field is available only when Post contingent entries is selected.
Clearing suspense ledger: Clearing suspense ledger is used for collection clearance. It is used to temporarily park funds before they are cleared for Outward collections and for moving funds during Inward collections. Alternatively, click the Clearing suspense ledger hyperlink to open the General Ledger Account Search screen. All ledgers belonging to Ledger type = Asset or Liability, where Cash account is No and Manual posting is No, are available for selection
21. Click Next. New Collection Settings → Settings (2/4) page appears.
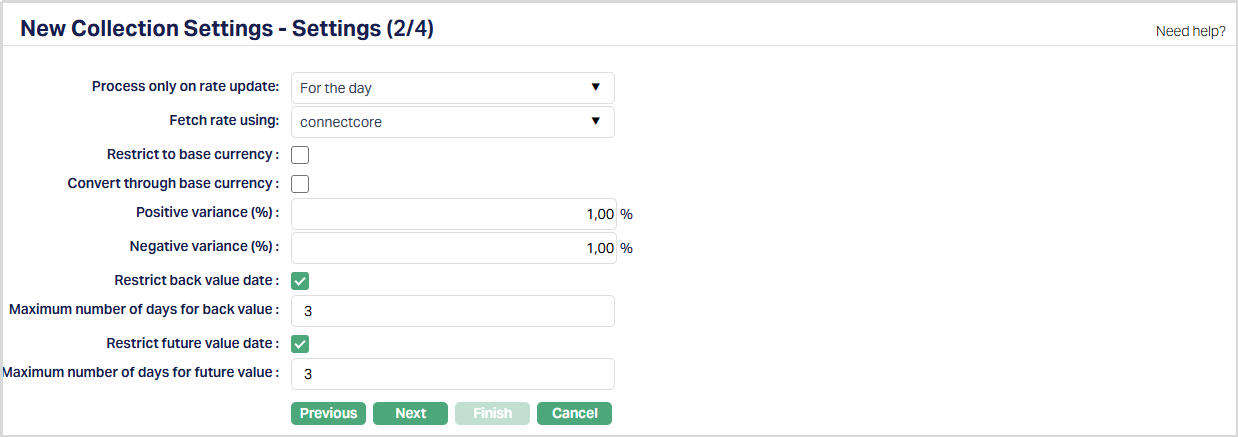
22. Process only on rate update - This field specifies when the exchange rate should be considered during transaction processing. You can leave this field blank to allow transactions to be processed using the latest available approved exchange rate.
- Select For the day to process transactions only after the exchange rate for the day has been updated.
- Select For the transaction to fetch the exchange rate for each transaction individually.
23. Fetch rate using - This field specifies the Interface Definition used to fetch the exchange rate for each transaction. Aura displays all active Interface Definitions. This field becomes mandatory only when For the transaction is selected in the Process only on rate update field.
24. Check Restrict to base currency checkbox to make Aura restrict the transaction to the base currency. If this option is checked, Aura will restrict the transaction only on the base currency. By default, it will be unchecked.
25. Check Convert through base currency checkbox to make Aura convert the transaction through the base currency. If this option is checked, Aura will convert the transaction only through the base currency. By default, it will be unchecked.
26. Enter Positive variance (%) for the Collection setting. Positive variance will be the percentage of variance on the positive side for the rate of Exchange rate.
27. Enter Negative variance (%) for the Collection setting. Negative variance will be the percentage of variance on the negative side for the rate of Exchange rate.
For example:
Suppose, Exchange rate = 9.1
Positive variance % = 5% of 9.1= 0.45 (9.1+0.45= 9.55)
Negative variance % = 5% of 9.1= 0.45 (9.1-0.45= 8.65
28. Check Restrict back value date checkbox to make Aura restrict the back-value date for any transaction to the number of days entered in the Days for back value field. If unchecked, Aura will not display the Days for back value field.
29. Enter Maximum number of days for back value for the Collection setting. This will be the number of days to which Aura will restrict the back value dated transaction.
Note: Aura will allow entering maximum of 3 digits.
30. Check Restrict future value date checkbox to make Aura restrict the future-value date for any transaction to the number of days entered in the Days for future value field. If unchecked, Aura will not display the Days for future value field.
31. Enter Maximum number of days for future value for the Collection setting. This will be the number of days to which Aura will restrict the future value dated transaction.
Note: Aura will allow entering maximum of 3 digits.
32. Enter Maximum retry count to be allowed by Aura to retry a failed transaction. On retry, Aura will follow the normal accounting entry process. Value allowed is from 0 - 9. By default, the field will be blank.
For example:
If Maximum entry count = 0; then Aura will not allow any retry for failed transactions.
If Maximum entry count = 3, then Aura will allow 3 retries for failed transactions
33. Click Next. New Collection Settings → Transaction Code (3/4) page appears.
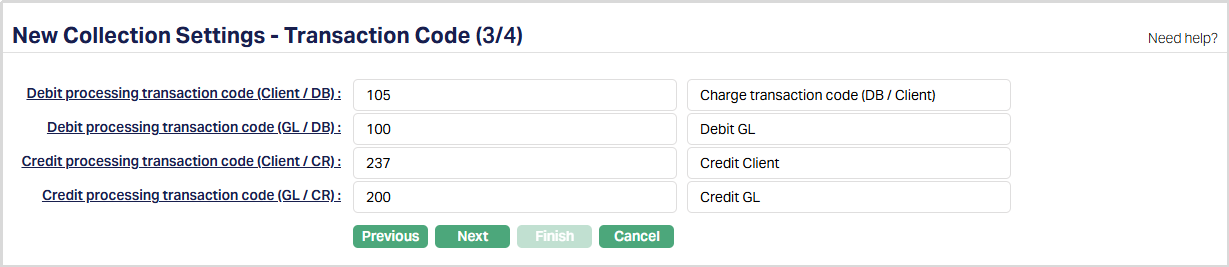
Note: In the table below, you will find the description of the fields, the use and the conditions for each of the GLs / Transaction Codes. You can either directly input the Ledger # / Transaction Code or click on the hyperlink to see the list of GL / Transaction Codes satisfying these conditions and select the required Ledger # / Transaction Code.
| Fields | Used | List of Accounts/Transaction Codes based on |
|---|---|---|
| Debit Processing | For recording all debit processing transactions in Client Account | Transaction type Debit (Client/DB) |
| Debit processing | For recording all debit processing transactions in General Ledger. | Transaction type Debit (GL/DB) |
| System debit | For recording all debit transaction in General Ledger account. | Transaction type Debit (GL/DB) |
| System Credit | For recording all credit transaction in General Ledger account | Transaction type Credit (GL/CR) |
| Credit Processing | For recording all Credit processing transactions in Client Account | Transaction type Credit (Client/CR) |
| Credit processing | For recording all Credit processing transactions in General Ledger. | Transaction type Credit (GL/CR) |
34. Click Next.
- If Collection type is Prepaid instrument, New Collection Settings → Charges (4/5) page appears.
- For all other Collection types, New Collection Settings → Confirmation (4/4) page appears.

35. Select Instrument issuance charge from the dropdown list of Charge Schemes maintained under Admin → Pricing → Charge Scheme. This charge is applied during the issuance of a prepaid instrument.
36. Select Instrument stop payment charge from the dropdown list of Charge Schemes maintained under Admin → Pricing → Charge Scheme. This charge is applied when a stop payment request is placed for a prepaid instrument.
37. Select Documentary stamp tax from the dropdown list of Charge Schemes maintained under Admin → Pricing → Charge Scheme. This charge is applied as the documentary stamp tax for the prepaid instrument, where applicable.
38. Click Next. New Collection Settings → Confirmation (4/4) page appears.
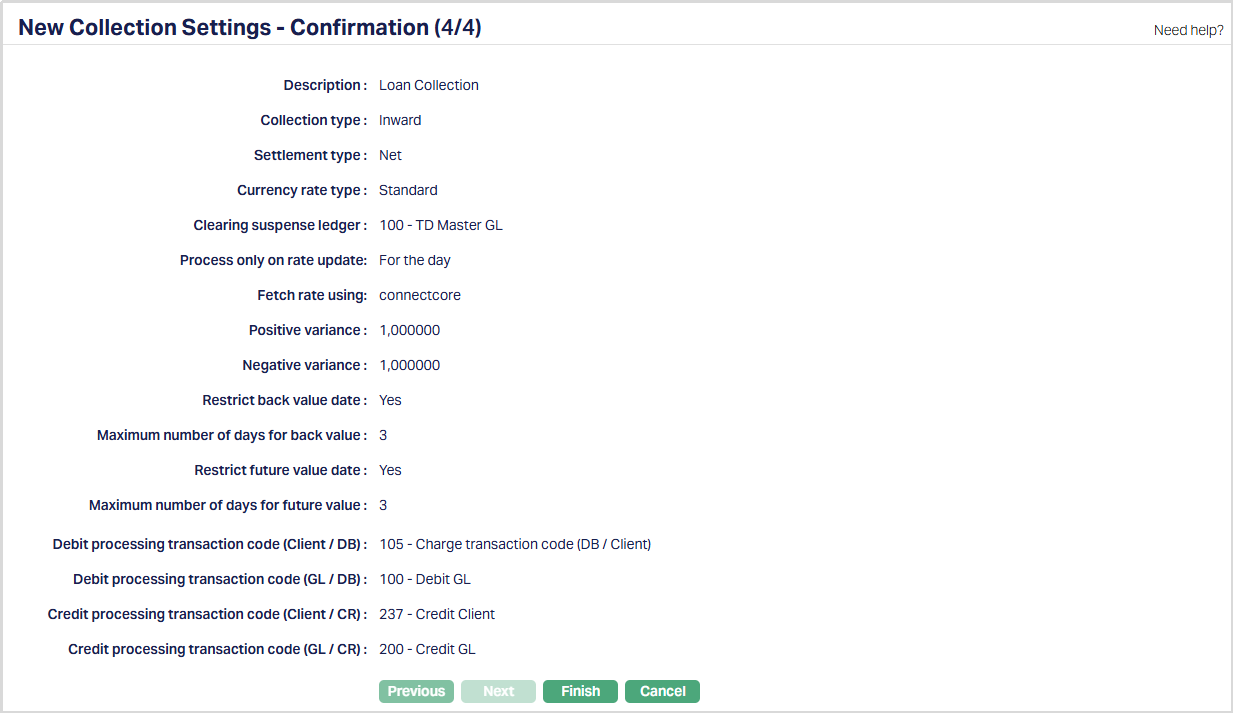
39. Click Finish. Collection Settings page appears with status as Active.
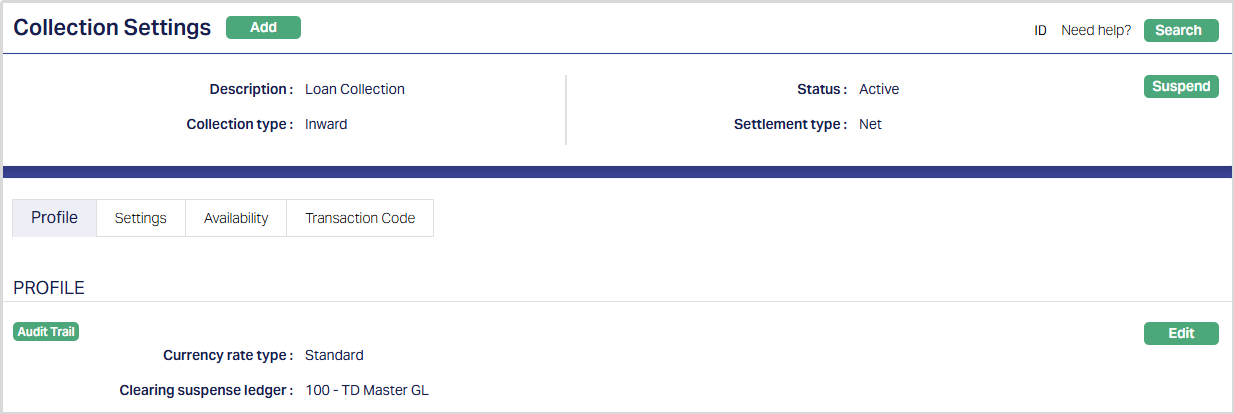
Functions: Add, Suspend, Search, Edit
Note: On creation of new Collection Settings, the Status of the record will show as Active.
Suspend: You can suspend a Collection Setting record by clicking on Suspend button. When you click on Suspend button, Aura will ask for confirmation. On confirmation Aura will suspend the Collection Setting record and Activate button will appear in place of the Suspend button.
Activate: If you want to activate a suspended Collection Setting record then click on Activate button. Aura will ask for confirmation. On confirmation Aura will Activate the Collection Setting record and Suspend button will appear in place of Activate button.
Profile
Profile tab, which is the default tab in the Collection Settings screen, shows the basic details of the Collection Setting.
To view/edit Profile,
1. Access Collection Settings page then click Profile tab to view the details as per sample below. The details are defaulted from the entries that you made during creation of Collection Settings. For details refer to New Collection Settings → Profile (1/4).

2. Click Edit. Edit Profile page appears.
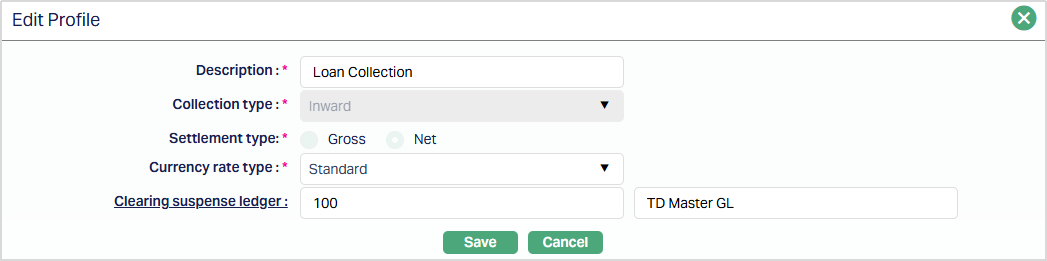
Note: All the fields are editable except the Collection type and Settlement type fields.
3. Click Save. Profile page appears with the edited details.
Functions: Edit
Settings
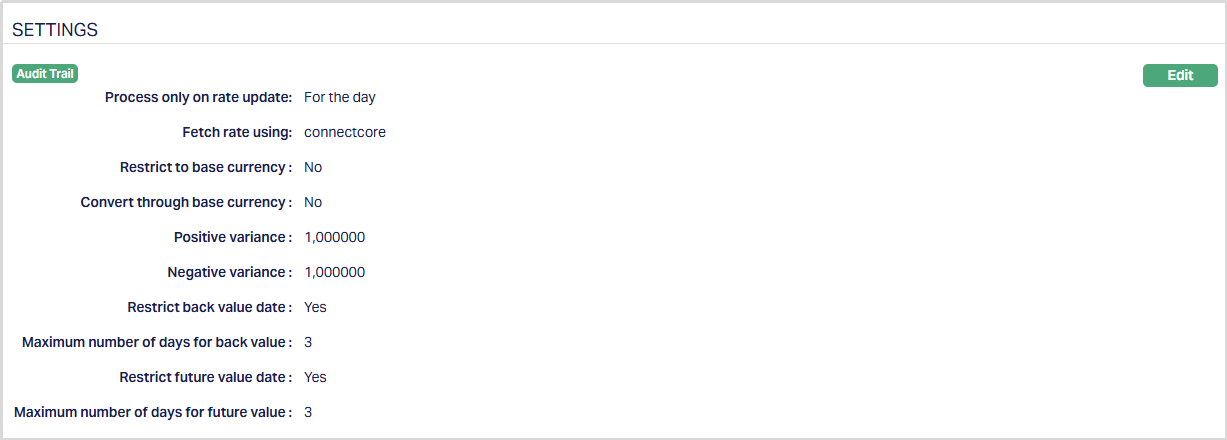
Using this tab, you can view and edit the various Collection settings as selected while creating the Collection setting record.
To view/edit settings,
1. Access Collection Settings page then click Settings tab. The values are defaulted from New Collection Settings → Settings (2/4).
2. Click Edit. Edit Settings page appears.
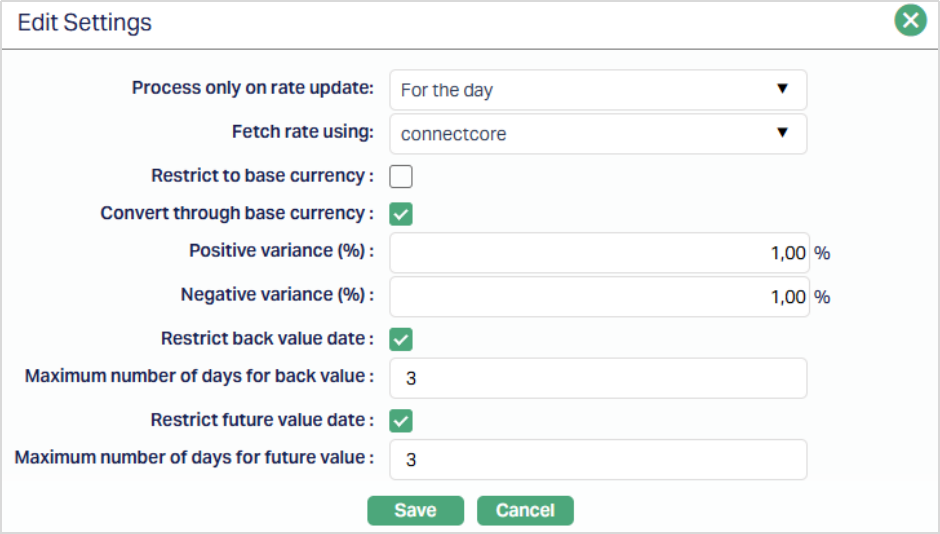
3. Click Save. Settings page appears with the edited details.
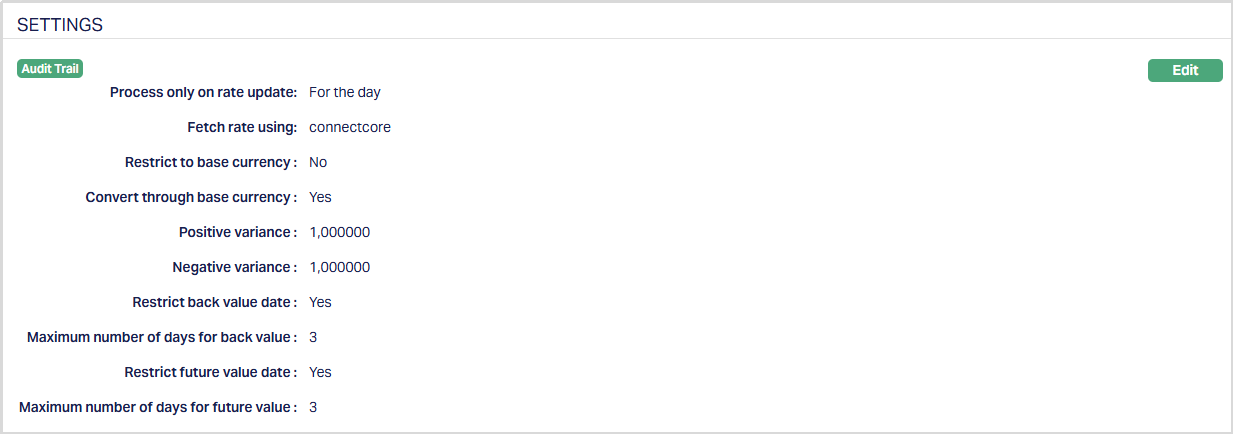
Functions: Edit
Availability
Using this tab, you can allow the Collection Setting to be available for all the Branches or only specific Branch(es).
To select Branch,
1. Access Collection Setting page then click Availability tab, and then click Branch sub tab.
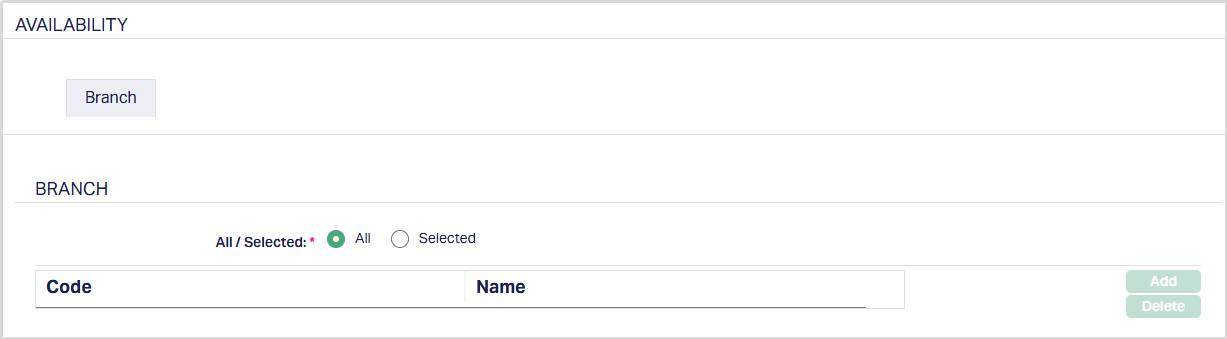
All-radio button is selected by default, so that the collection setting is available for all Branches.
To restrict the branches for which this collection setting is available, click Selected radio button. Add button is now enabled.
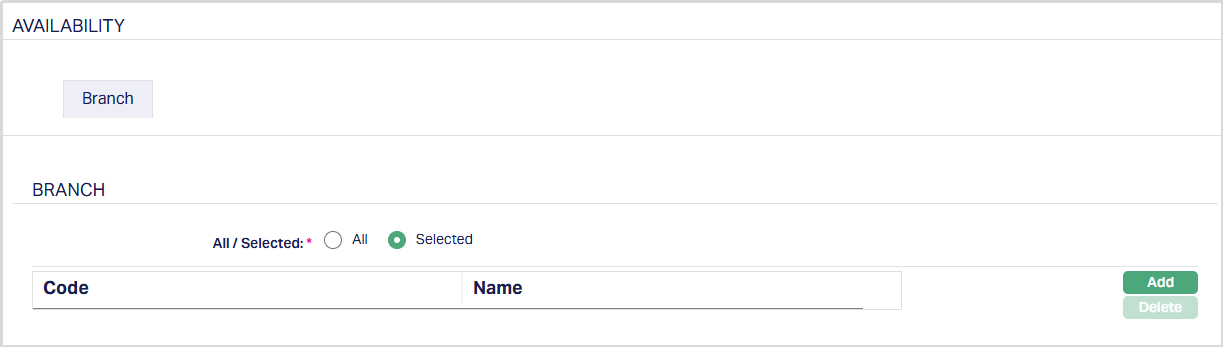
2. Click Add. Add Branch screen appears where you can select the required branch from the drop-down of all active Branches of the Entity.

3. Click Save. Branch sub tab page appears with the added branch details under Availability tab.
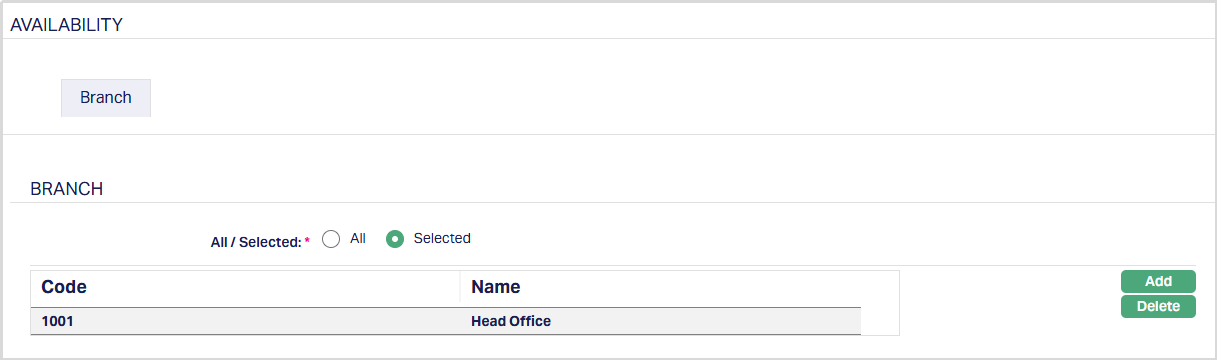
Functions: Add, Delete
Delete: To delete a branch, select the branch and click Delete. You may choose to allow All branches for the product at any time. However, Aura will prompt you to confirm if the selected branches may be deleted. If confirmed, then all the selected branches will be deleted, and the product will be available for ALL Branches.
Transaction code
Transaction code tab allows you to specify the transaction codes that are to be used for the various events while processing a transaction. These transaction codes define what description / narration is used for the account postings / statements.
To view /edit Transaction code,
1. Access Collection Settings page then click Transaction code tab.

2. Click Edit. Edit Transaction code page appears.
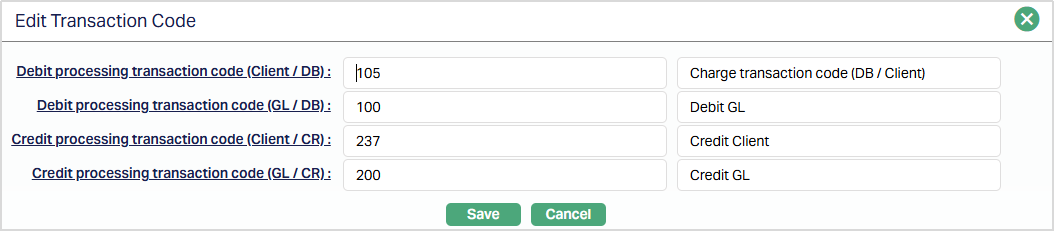
3. Click Save. Transaction Code page appears with the edited details.
Functions: Edit
The events in Collection Status are listed below
| Events | Description | Condition |
|---|---|---|
| COLLBK | Collection Booked | This event occurs when a collection transaction is booked. |
| COLLSC | Collection Sent for Collection | This event occurs when a collection transaction is sent for collection. |
| COLLDP | Collection Debit Processing | This event occurs when an account is debited. |
| COLLCP | Collection Credit Processing | This event occurs when an account is credited. |
| COLLRV | Collection Reversal | This event occurs when a Collection transaction is reversed. |
| COLLCN | Collection Cancelled | This event occurs when a collection transaction is cancelled. |
Charge
The Charge tab is available only for Collection Settings with Collection type set to Prepaid instrument. Using this tab, you can view and edit the charges configured for prepaid instrument processing.
To view/edit Charges,
1. Access the Collection Settings page and click the Charge tab.

2. Click Edit. Edit Charges page appears.
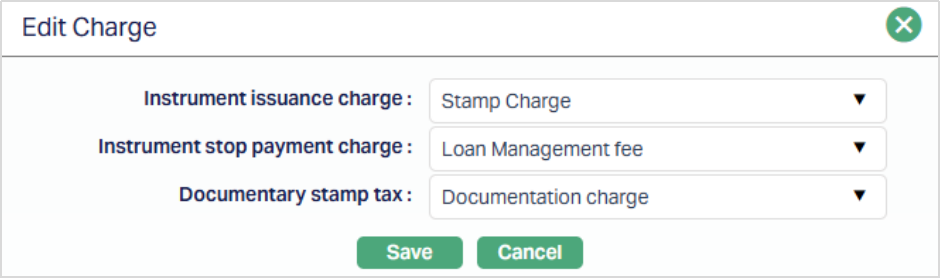
All fields are editable.
3. Click Save. The Charge page appears with the updated details.
Functions: Edit