Terminal
Terminal is a physical device, which acts as a connector, for example POS device. Using this functionality, you can maintain Terminal details and link it to an Agent or Outlet. Using the Agent user id and password, Agent user can access the Terminal device.
Aura displays all the maintained Terminals in green colour, which are in working status (Connected to network) and displays the Status, Location and connection statuses of the Terminal.
You can make the Terminal device available for selected Banks and Card Providers.
The following are the various tabs that appear on the Agent page.
To add New Terminal
- From CRM menu, click Sales and then Terminal. New Terminal -- Profile (1/2) page appears.

Enter Description for the Terminal.
Enter MAC (Media Access Control) address for the Terminal
Enter IP (Internet Protocol) address for the Terminal.
Click Next. New Terminal -- Confirmation (2/2) page appears.

- Click Finish. Terminal page appears displaying Profile tab by default.
Functions: Add, Search, Delete, Suspend, Activate.
Delete: You can delete Terminal record saved in Aura by a click on Delete button. Aura will ask for confirmation, on approving, the selected record will be deleted.
Suspend: You can suspend Terminal record by clicking on Suspend button. When you click on Suspend button, Aura displays an alert message. On confirmation Aura will suspend the Terminal and Activate button will appear in place of the Suspend button.
On suspension of a Terminal, Aura will not allow any transaction to pass from that Terminal device. Mapping of that particular Terminal with any Agent or Outlet will also be removed.
Only on activation, the particular Terminal is made available for new mapping.
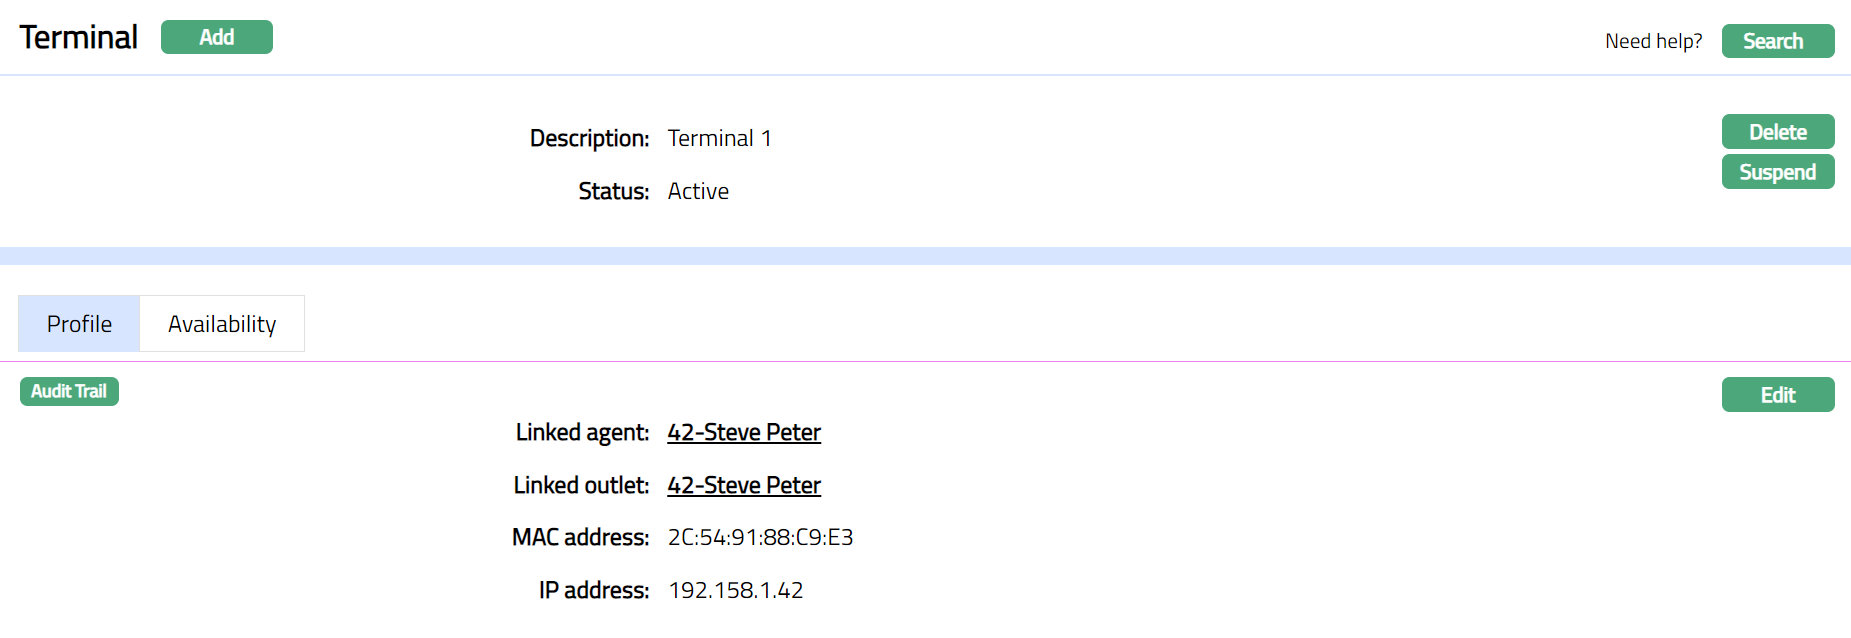
Profile
Profile tab, which is the default tab in Terminal screen, shows the basic details of the Terminal which were added in New Terminal -- Profile (1/2).
To Edit Profile
- Access Terminal page and click Profile tab.

The additional fields that you can view in the Profile tab are explained below:
Linked Agent: The field displays the Agent linked to Terminal by default. The mapped Agent will be displayed as hyperlink. On click of the hyperlink, Agent page appears.
Linked Outlet: The field displays the outlet linked to Terminal by default. The mapped Outlet will be displayed as hyperlink. On click of the hyperlink, Outlet Maintenance page appears.
Location: This field displays the location of the Terminal. Aura will update the location online based on terminal Geolocation.
- Click Edit. Edit Terminal Page appears.
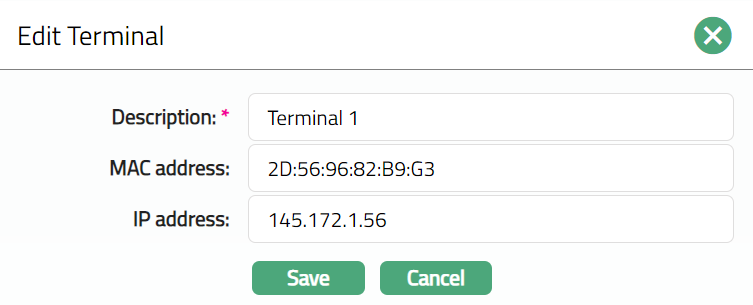
Note: All fields are editable.
- Make the required changes and click Save. Profile page appears with the edited details.

Function: Edit
Availability
This tab can be used to control the availability of the Terminal of specific Banks and Card Provider. It has two Sub-tabs, one for each of these.
Availability - Banks
Using this tab, you can allow the terminal to be available for all Banks or only specific Banks.
To select Bank
- Go to Terminal page, click Availability tab, then click Banks tab.
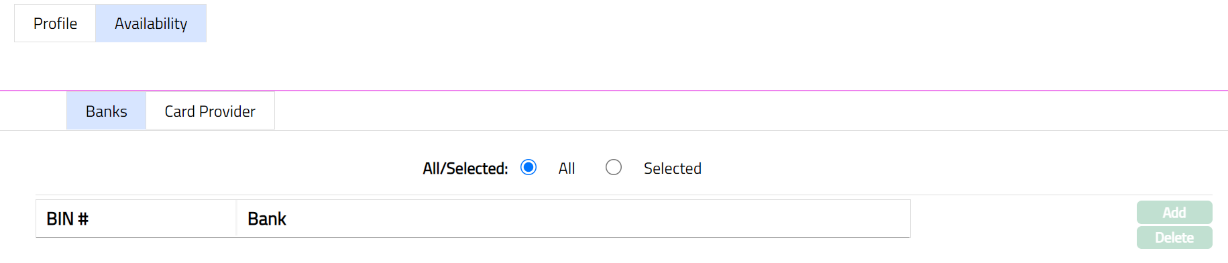
By default, All radio button is selected so that this Terminal is available for all Banks.
To restrict the Banks for which this Terminal is available, click Selected radio button. Add button is now enabled.
Click Add. Add Bank screen appears.

Enter BIN# for the bank.
Click Bank hyperlink to select the bank. Bank page appears with the list of banks maintained under Admin > Correspondent Bank Management > Maintain.
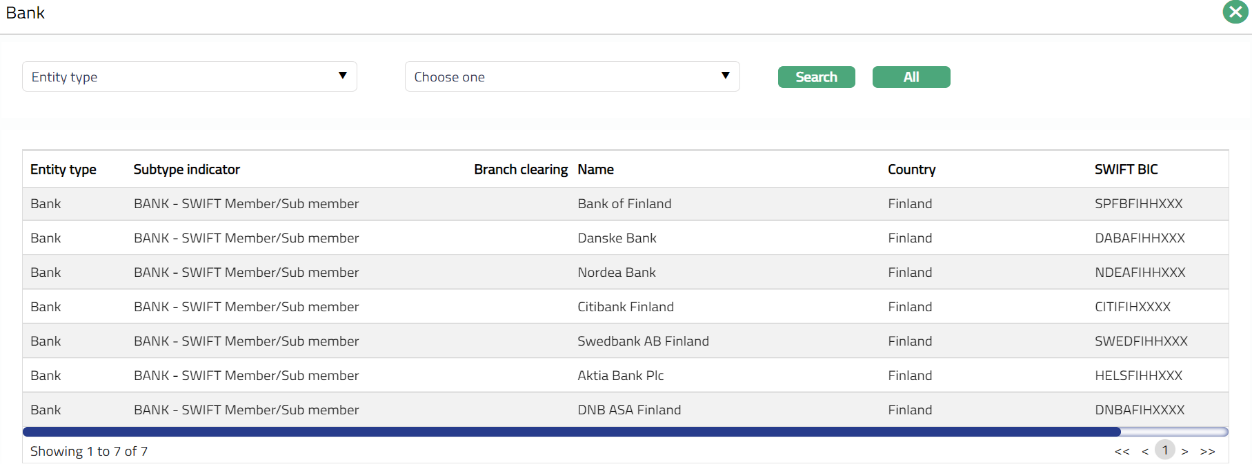
- Click Save. Terminal page appears.

Functions: Add, Delete
Delete: You can delete Bank record saved in Aura by a click on Delete button. Aura will ask for confirmation, on approving which the selected record will be deleted
Availability -- Card Provider
Using this tab, you can allow the Terminal to be available for all the Card Provider or only specific Card Provider.
To select Card Provider
- Go to Terminal page, click Availability tab, then click Card Provider tab.
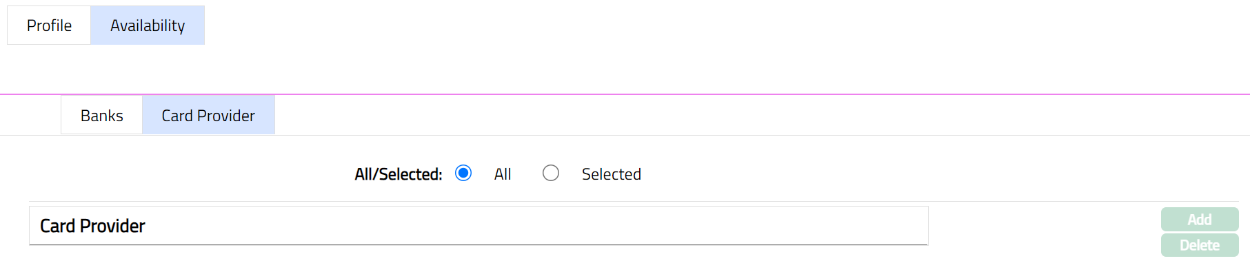
By default, All radio button is selected so that this Terminal is available for all Card Provider.
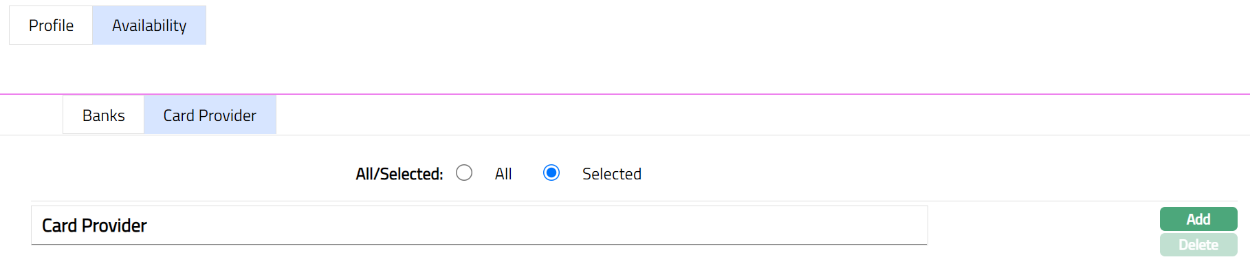
To restrict the Card Provider for which this Terminal is available, click Selected radio button. Add button is now enabled.
- Click Add. Add Card Provider screen appears.
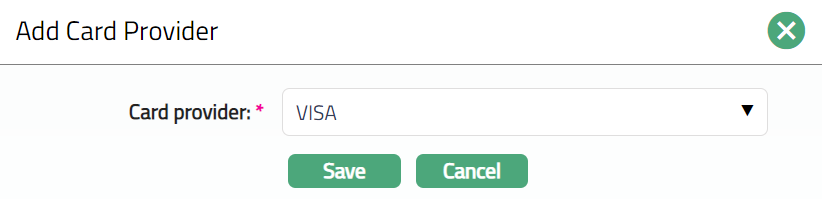
Select Card provider from the drop-down list maintained under Card > Settings > Card provider.
Click Save. Terminal page appears.
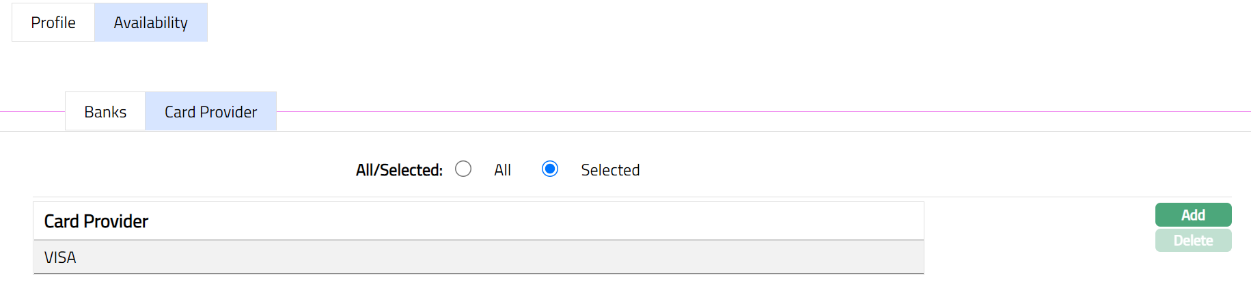
Functions: Add, Delete