Loan Request
Creation of Loan Request is the first step in the process of creating a Marketplace Loan. The borrower who wishes to borrow money through the Portal (Marketplace) applies for the loan and submits the required details and documentation. The Portal has its own loan approval process which may include credit evaluation of the borrower, project appraisal either through its internal processes or through an external agency. Once the Portal approves the loan application, the same is placed on the Marketplace as a Loan Request. Bids can then be placed into the Loan Request and once accepted, loan can be created.
The following are the tabs in Placement Setting:
To create new Loan Request
1. From Retail menu, click Peer to Peer, Loan Request, and then Maintain. Loan Request search page appears. All Loan request available in Aura appear on the page.

2. Click Add. New Loan Request → Profile (1/7) page appears.

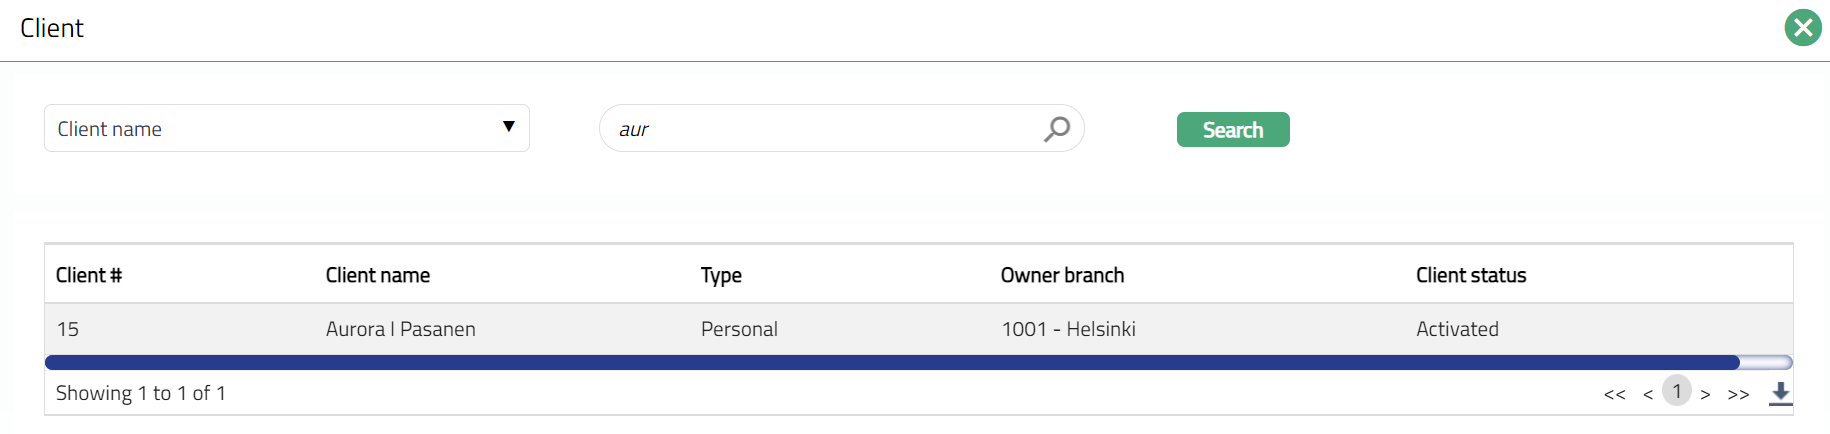
3. Click Member hyperlink. The Client Search page appears where you can search for a client with relevant criteria and select the required client. Alternatively, you can type in the name of the client or client number and choose the relevant client from the list suggested by Aura. Please refer to the Sample Screen shot shown above.
4. The Origin Branch will be automatically populated as the branch into which you have logged in and it cannot be edited. This indicates the branch in which the loan account record is being created.
5. Select Owner branch from the drop-down list of all the branches which are allowed for the product. By default, the user's logged in branch is selected. You can change as required. This is the branch in which the account is maintained.
Select Service delivery channel from the drop-down list of Service Delivery Channels that are maintained under Admin > System codes > Categories > Service delivery channel.
6. Select the Currency from the drop-down list maintained under Admin → System codes → Currency → Currency. The drop-down list displays all the currencies maintained for the selected product.
7. Enter Amount for the account.
8. Select Tenor or Maturity date radio button to Choose loan term by. If you want to indicate the loan's term by way of a specific duration / period, choose Tenor. If you want to indicate the loan's term by way of a specific maturity date, choose Maturity date.
9. The Days / Months / Years depends on what was selected for Choose Loan Term By.
If you had selected Tenor, this field will be enabled, and you can select the appropriate radio button to specify the loan term in Days / Months / Years
If you had selected Maturity date, this field is disabled and is automatically defaulted to Days.
10. Select the Tenor in Days / Months / Years. Note: If you had selected Tenor, this field will be enabled, and you can select the appropriate radio button to specify the loan term in Days / Months / Years
11. Maturity date denotes the date when the loan account will mature and depends on what was selected for Choose Loan Term By.
If you had selected Tenor, this field is not editable. Aura automatically calculates it as Tenor plus Value Date.
If you had selected Maturity date, this field is enabled and is mandatory. You need to input a date greater than the Value Date.
Note: If the Maturity date is a holiday and repayment option is Auto, the maturity happens on the same date. If the Repayment option is Manual, the maturity has to be initiated by the user on the next working day.
12. Select Bid opening date for both Private and Public: Date from which Bids can be input for an Activated Loan Request. This is defaulted to current booking date, but user can change the date to a future date by using the calendar.
13. Select Bid closing date: Date up to which Bids can be input for an Activated Loan Request. This is also defaulted to current booking date but again, user can change the date to any other date equal to or greater than bid opening date
14. Select Bid acceptance date: Date up to which Active Bids can be Accepted. This is defaulted to Bid Closing Date, but user can change to any date equal to or greater than Bid Closing Date. If bids are accepted, Loans can be created online by user clicking on Create Loan Button; if the user does not create online, Loans will be created at the EOD for all such accepted bids; and the Loan Request Status is updated to Committed. Once Loans are created (either online by the user or through EOD batch), no further bids can be input.
15. Select Bid commitment date: Date by which Funds have to be received, so that Loan Accounts can be created for accepted bids. It is defaulted to Bid Opening Date, but you can change. It should be equal to or greater than Bid Opening Date
16. Choose an Asset Type -- Available Asset Types are Unsecured Loans, Secured Loans, Subordinate and High-Risk Loans. Based on the Asset Type selected here, during Loan Request creation, only such Loan Request Setting where the Asset Type matches will be available for the user to choose. This will also be used during auto-creation of bids.
17. Loan Request Setting: Options will be displayed based on the inputs provided above. Based on the Loan Request Setting chosen here, charges and other parameters will be populated at the Loan Request.
18. Interest calculation method is defaulted from the product that you chose above. However, you can change the same from the dropdown list. The options available are Annuity and Amortized. Please refer to the sample screenshots as shown above.
19. Interest Rate: This is the rate that the borrower is willing to pay. Lenders may or may not choose to invest / bid at this rate. Where allowed, bids can be at interest rates different from the one provided here
20. Select the Purpose of Loan from the available drop-down list.
21. Allow multiple loan accounts: Where there is a need for multiple drawdowns for a loan request, this flag has to be set to Yes. Based on the percentage input in the Threshold For Loan Account (next field), users will be able to create a loan account as soon as the threshold is breached. Example: Threshold = 40%; Loan Request Amount = 100,000; When the accepted bids cross 40,000, users can initiate Loan creation. Note: If you select Yes radio button the Threshold for Loan Account Will get enabled, else it will be disabled.
22. Click Next. New Loan Request → Settings (2/7) page appears.
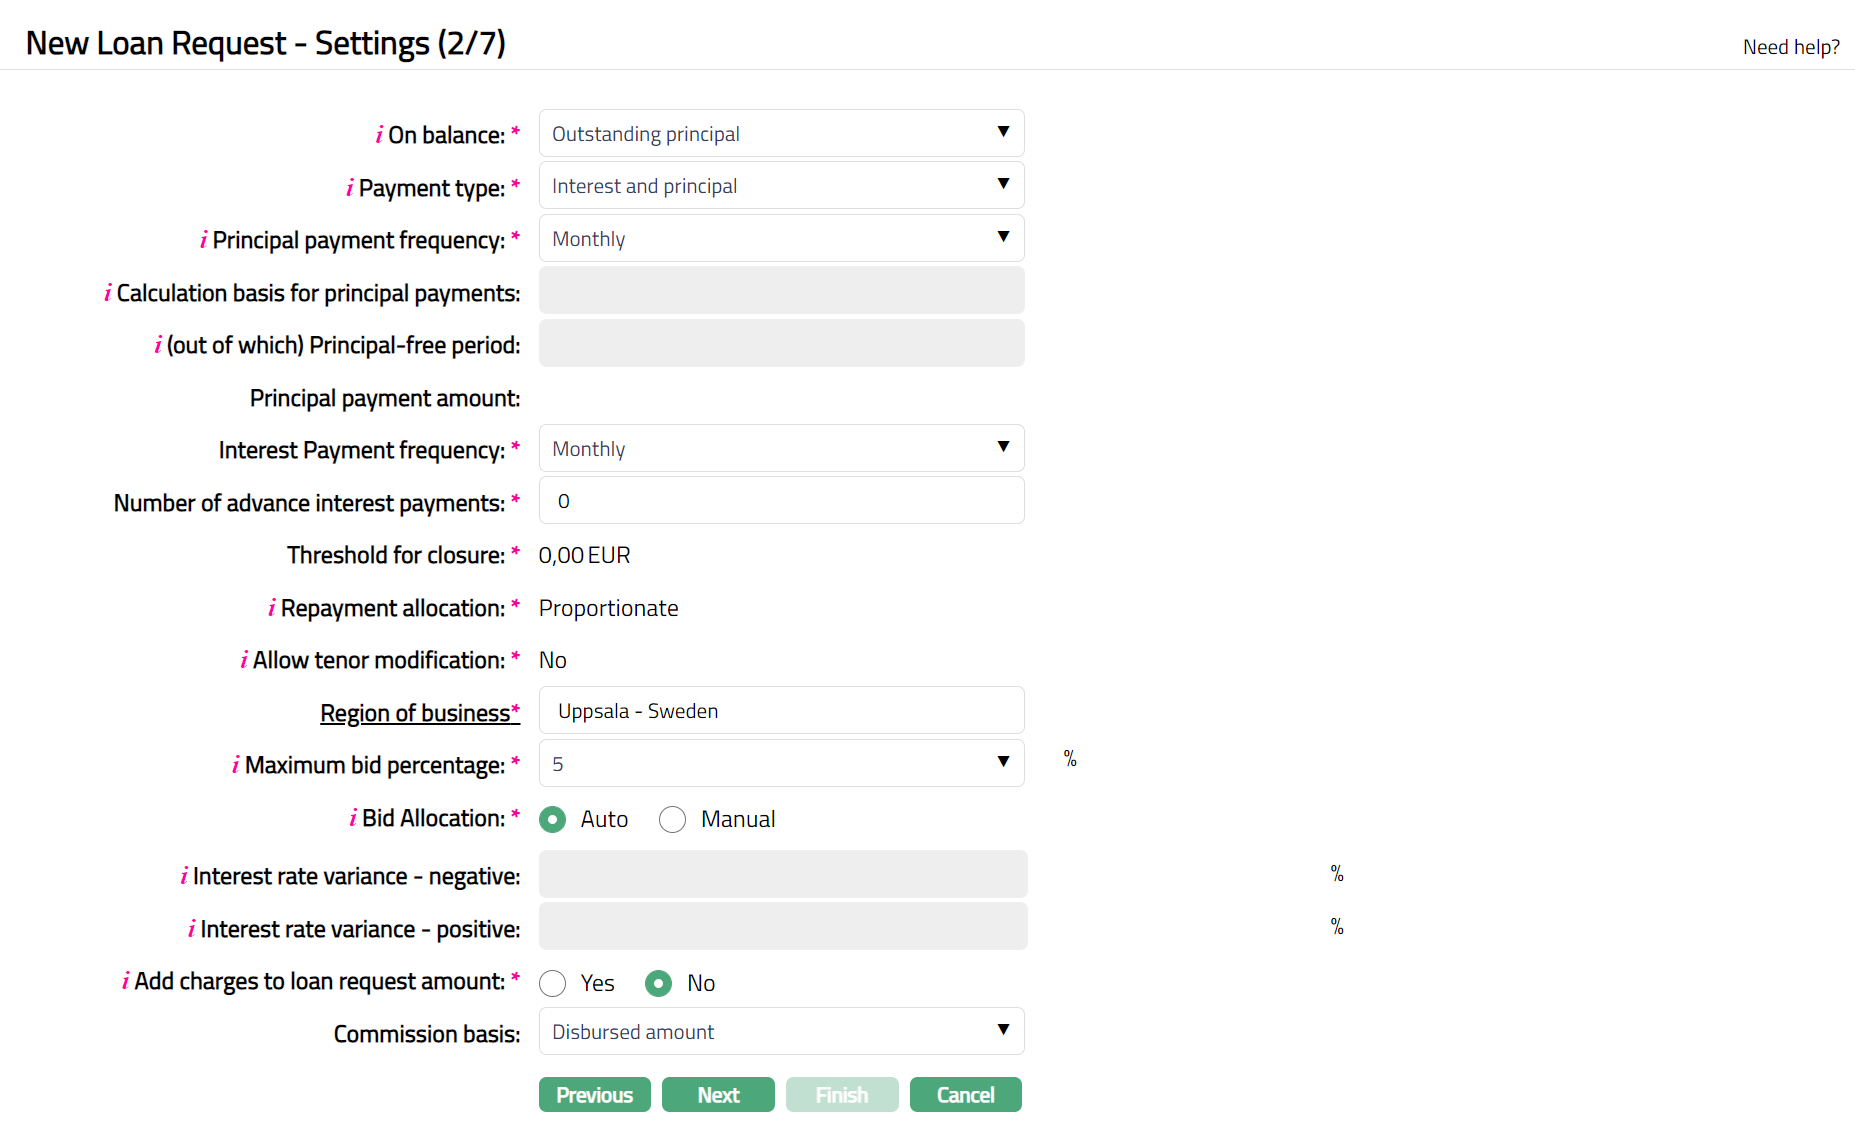
23. On balance can be used to input whether interest has to be calculated on the disbursed amount or on outstanding principal amount. Select the On balance the drop-down list. Available list are disbursed amount and Outstanding principal.
24. Payment type: Can be only Interest, Principal and Interest or Balloon. In case of the former, Principal amount will be payable only on maturity; while in case of the latter, Principal and Interest will be payable as per frequency defined
25. Principal Payment Frequency and Interest Payment Frequency can be used to input how Principal and Interest amounts are to be paid by the borrower. Flexible payment frequency is available only for Principal during creation of the Loan; if Interest payment has to be flexible, it will have to be done using the Change of Terms option. The available options are: Weekly, Semi Monthly, Monthly, Quarterly, Semi Annual, Annual and on Maturity.
26.Enter Calculation basis for principal payments and (out of which) Principal-free period. Note: these fields will be enabled only when you select Balloon.
27. Enter Number of advance interest payments.
28. Enter the threshold amount for closure of a loan account in Threshold for closure field. On partial pre-payment for loan account if remaining outstanding amount is less than threshold amount for closure, then Aura will pass threshold entries for the account and will close loan account.
29. Repayment allocation: If this is Proportionate, any payments received from the borrower will be proportionately distributed among the lenders; and if this is Priority, you will have to define the order of priority of the lenders for distributing payments received.
30. Repayment Allocation and Allow tenor modification are defaulted from the member you have selected.
31. Select Region of Business by clicking on the hyperlink. The Region of Business can be used to input the region where the project / borrower is / loan funds will be used. Lenders use this information to decide if they would like to invest into this loan request. Note: Region of Business is defaulted for the member which is selected for the account. This is the Business region in which the account is maintained.
32. Maximum Bid Percentage indicates the maximum amount that a single auto-created bid for this Loan Request Setting can be. Thus, it allows you to control the number of bids that will be required into a single Loan Request.100% enables the Loan Request to be fulfilled by a single bid. Thus, lesser this percentage more will be the number of bids required to fulfil a Loan Request. Options: 5, 10, 25, 50, 100
33. After bids have been received for a Loan Request, how you would like to have the bids accepted is decided by Bid Allocation. If Allow Tenor Modification is No, Bid Allocation is defaulted to Auto, but you can change to Manual. If Allow Tenor Modification is Yes, then, this is defaulted to Manual and disabled. If this flag is set to Manual, after bids have been received for a Loan Request, Bid Acceptance has to be done manually for each bid. If this flag is set to Auto, Aura will automatically accept the Bids based on the click of a single button -- Accept Bids -- in the header pane.
34. Interest Rate Variance -- Positive and Interest Rate Variance -- Negative can be used to control how much the interest rate quoted by the lender can vary with reference to the rate indicated by the borrower. If this is not filled, then, there will not be any check on the interest rate entered by the lender.
35. When you want to allow the borrower to add the charges on a Loan Request to the requested Loan Amount, you can choose Yes for Add charges to Loan Request Amount. The Total Loan Request Amount that will then have to be fulfilled by bids will be inclusive of the Charge Amounts on the Loan Request.
36. Commission Basis is to indicate whether the Commission on the Loan Request will be based on the Disbursed Amount for the Loan Request or the Income Earned on the Loan Request.
37. Click Next. New Loan Request → Payment Details (3/7) page appears.
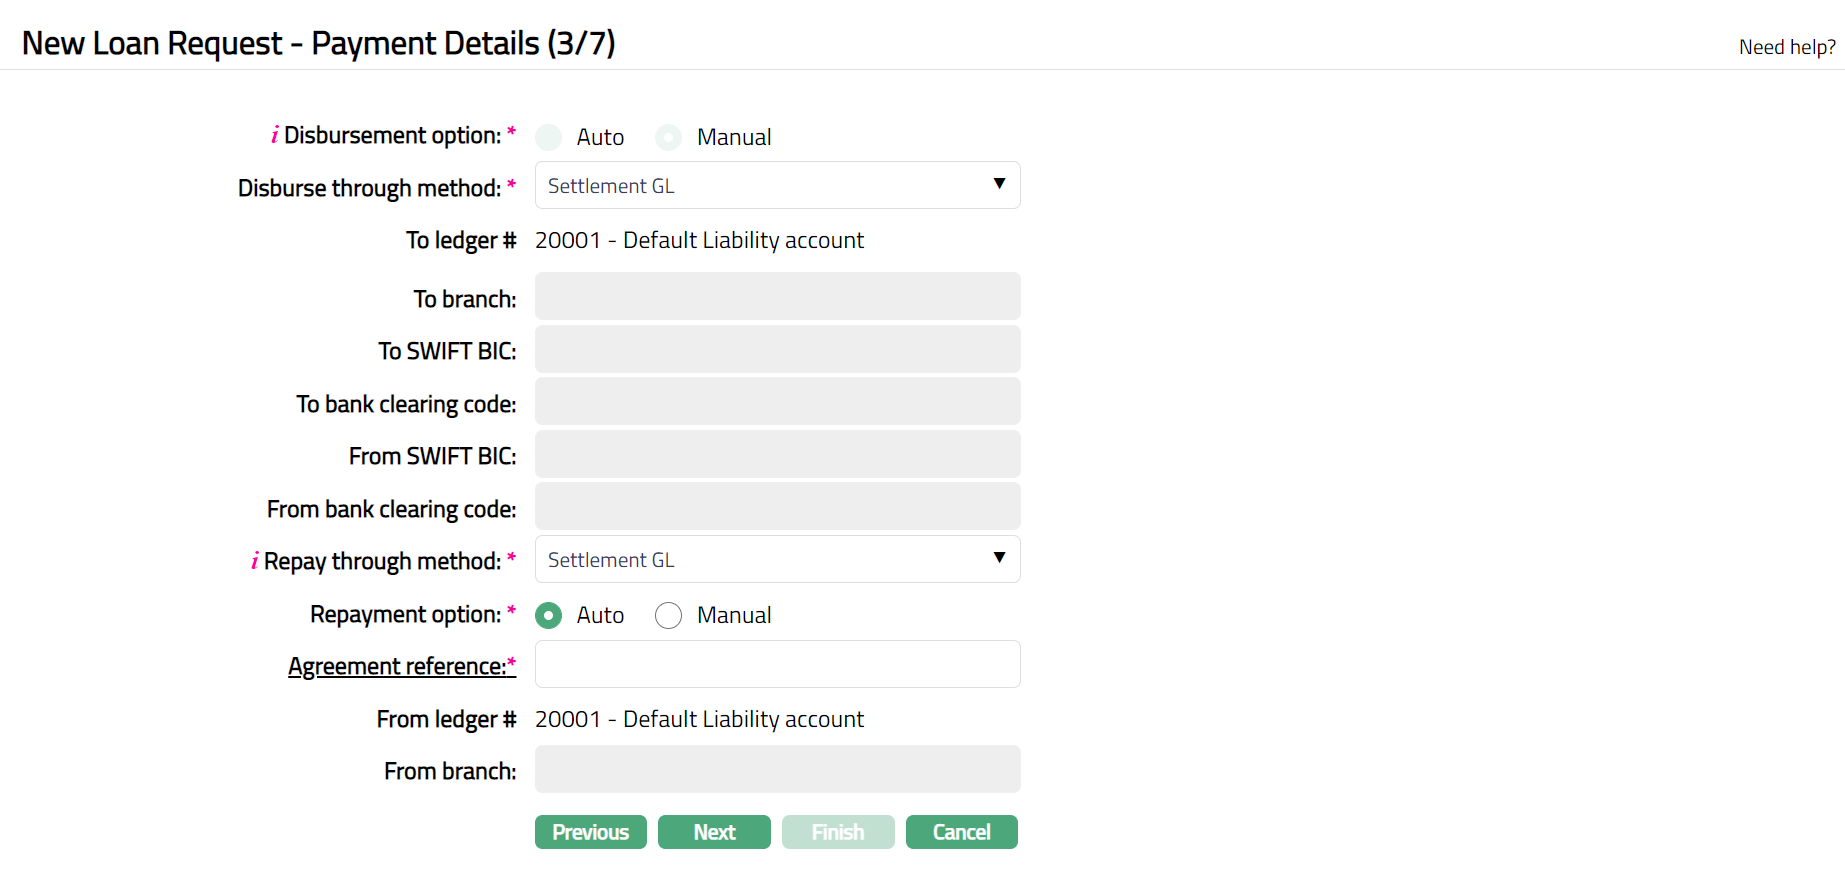
38. Select Disbursement Option by selecting the required radio button Auto or Manual.
39. Disbursement method can be either Automatic or Manual. Generally, the disbursement option should be Manual to ensure that the borrower completes all the documentation and other formalities before the money is actually disbursed. In case of Manual disbursement, you can disburse to the Borrower's account maintained with another Bank (External Account), or with your Bank (Own Account) or through the Settlement GL. Depending on the Disbursement Method chosen, input the associated other relevant details.
Note: Payment message initiation to the bank in case of External Account should be customized during implementation
40. To branch, to SWIFT BIC, To bank clearing code, From SWIFT BIC and From bank clearing code are defaulted for the account selected. Note: Aura will automatically display the SWIFT BIC code of the above bank from Admin → Management → Settlement directory if maintained.
41. Select Repay through Method from the drop-down list. The available options are: Direct Debit, Own Account, Payment by Invoice, Settlement GL and Post-dated Cheques.
42. Select Repayment Option by selecting the required radio button Auto or Manual.
43. Enter Agreement number for the account by clicking on the hyperlink.
44. From branch is enabled only if the funding method is Transfer from other bank. Enter the branch of the Bank from where the funds are to be received. This field can not be edited once it is created.
45. Click Next. New Loan Request → Charge (4/7) page appears.

46. Enter Lender fee and Broker fee if maintained for the account.
47. Total charge amount will be defaulted for the fees you have selected.
48. Click Next. New Loan Request → secured By (5/7) page appears.
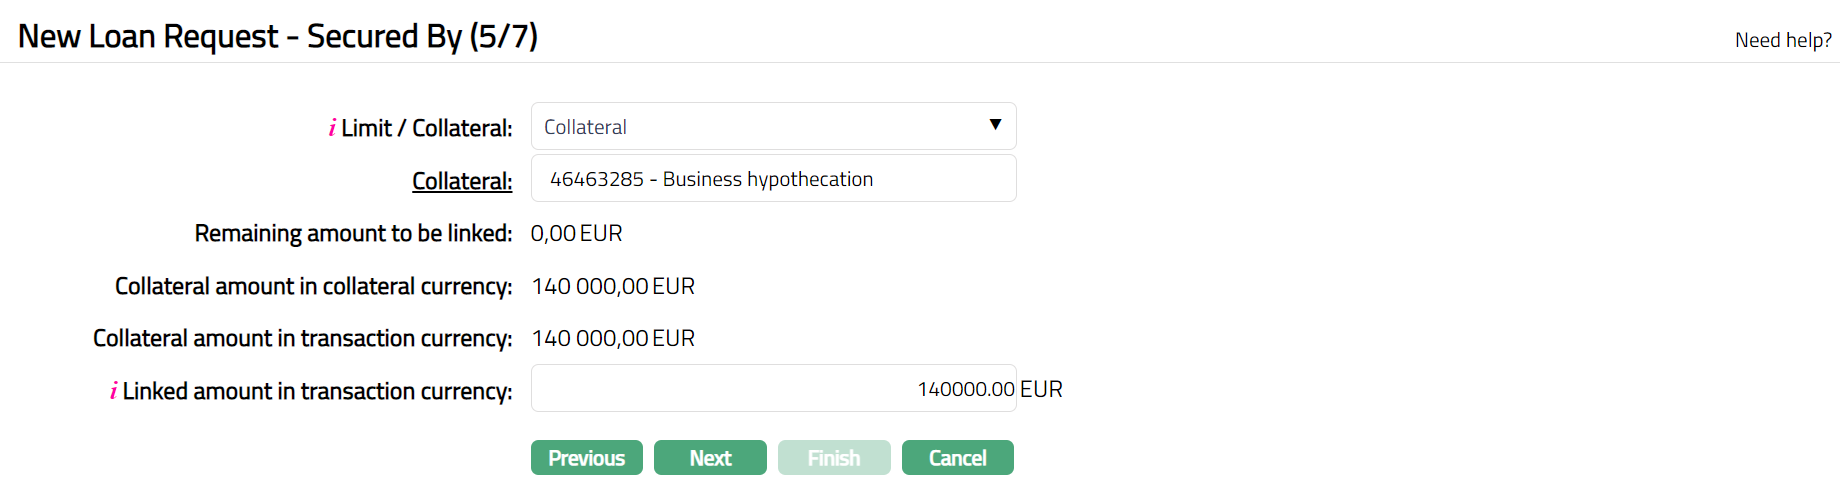
49. Specify whether the loan account is to be secured by a Limit or Collateral using the Limit / Collateral drop-down. It is mandatory only if secured by is Yes at the product level. Please refer the sample screen shots related to both Collateral and Limit.
50. Based on the selection above, enter the details of the specific Limit or Collateral as described below:
If you select Limit, Limit hyperlink will be displayed. On click of the hyperlink, Aura displays the Limit Search screen and the list of limits (status as Active) maintained under CRM → Collaterals & Limits > Limits having Available Limit Amount > 0.
If you select Collateral, Collateral hyperlink will be displayed. On click of the hyperlink, Aura displays the Collateral Search screen and the list of collaterals (status as Active) maintained under CRM → Collaterals & Limits → Collaterals, having Available Collateral Amount > 0.
51. Remaining amount to be linked denotes the pending amount to be linked to the loan account when the limit amount is less than the amount calculated based on Minimum secured percentage and loan amount sanctioned. If the Secured by flag is marked as No and still a limit or Collateral is attached, then Remaining Amount To Be linked is Calculated as 0.
52. Based on the selection of Limit/Collateral, Limit amount in limit currency field or Collateral amount in collateral currency field is displayed. The value for the displayed fields is derived from the limit id or collateral id maintained under CRM → Collaterals & Limits.
53. Based on the selection of Limit/Collateral, Limit Amount in Transaction Currency or Collateral Amount in Transaction Currency is displayed.
For Limit amount in transaction currency, the value is derived from selected limit id. If the limit currency is different from the transaction (account) currency, then Aura will apply the mid-rate for these two currencies from the default rate type maintained in the entity level and display the values after respective conversion. If the same currency is involved for the contract and limit, then system will display the same amount as in Limit Amount In Limit Currency.
For Collateral amount in transaction currency, the value is derived from selected Collateral ID. If the collateral currency is different from the transaction (account) currency, then Aura will apply the mid-rate for these two currencies from the default rate type maintained in the entity level and display the values after respective conversion. If the same currency is involved for the contract and collateral, then system will display the same amount as in Collateral Amount In Limit Currency.
54. Based on the selection of Limit/Collateral, Linked amount in transaction currency is defaulted from Limit (or Collateral) Amount In Transaction Currency. You can modify this, but this amount cannot be greater than Limit (Collateral) Amount In Transaction Currency.
55. Click Next. New Loan Request → Confirmation (6/7) page appears.

56. Click Finish. Loan Request is created with a unique Loan Request ID and the Loan Request page appears displaying the Profile tab of the account that you added.
Functions: Add, Search
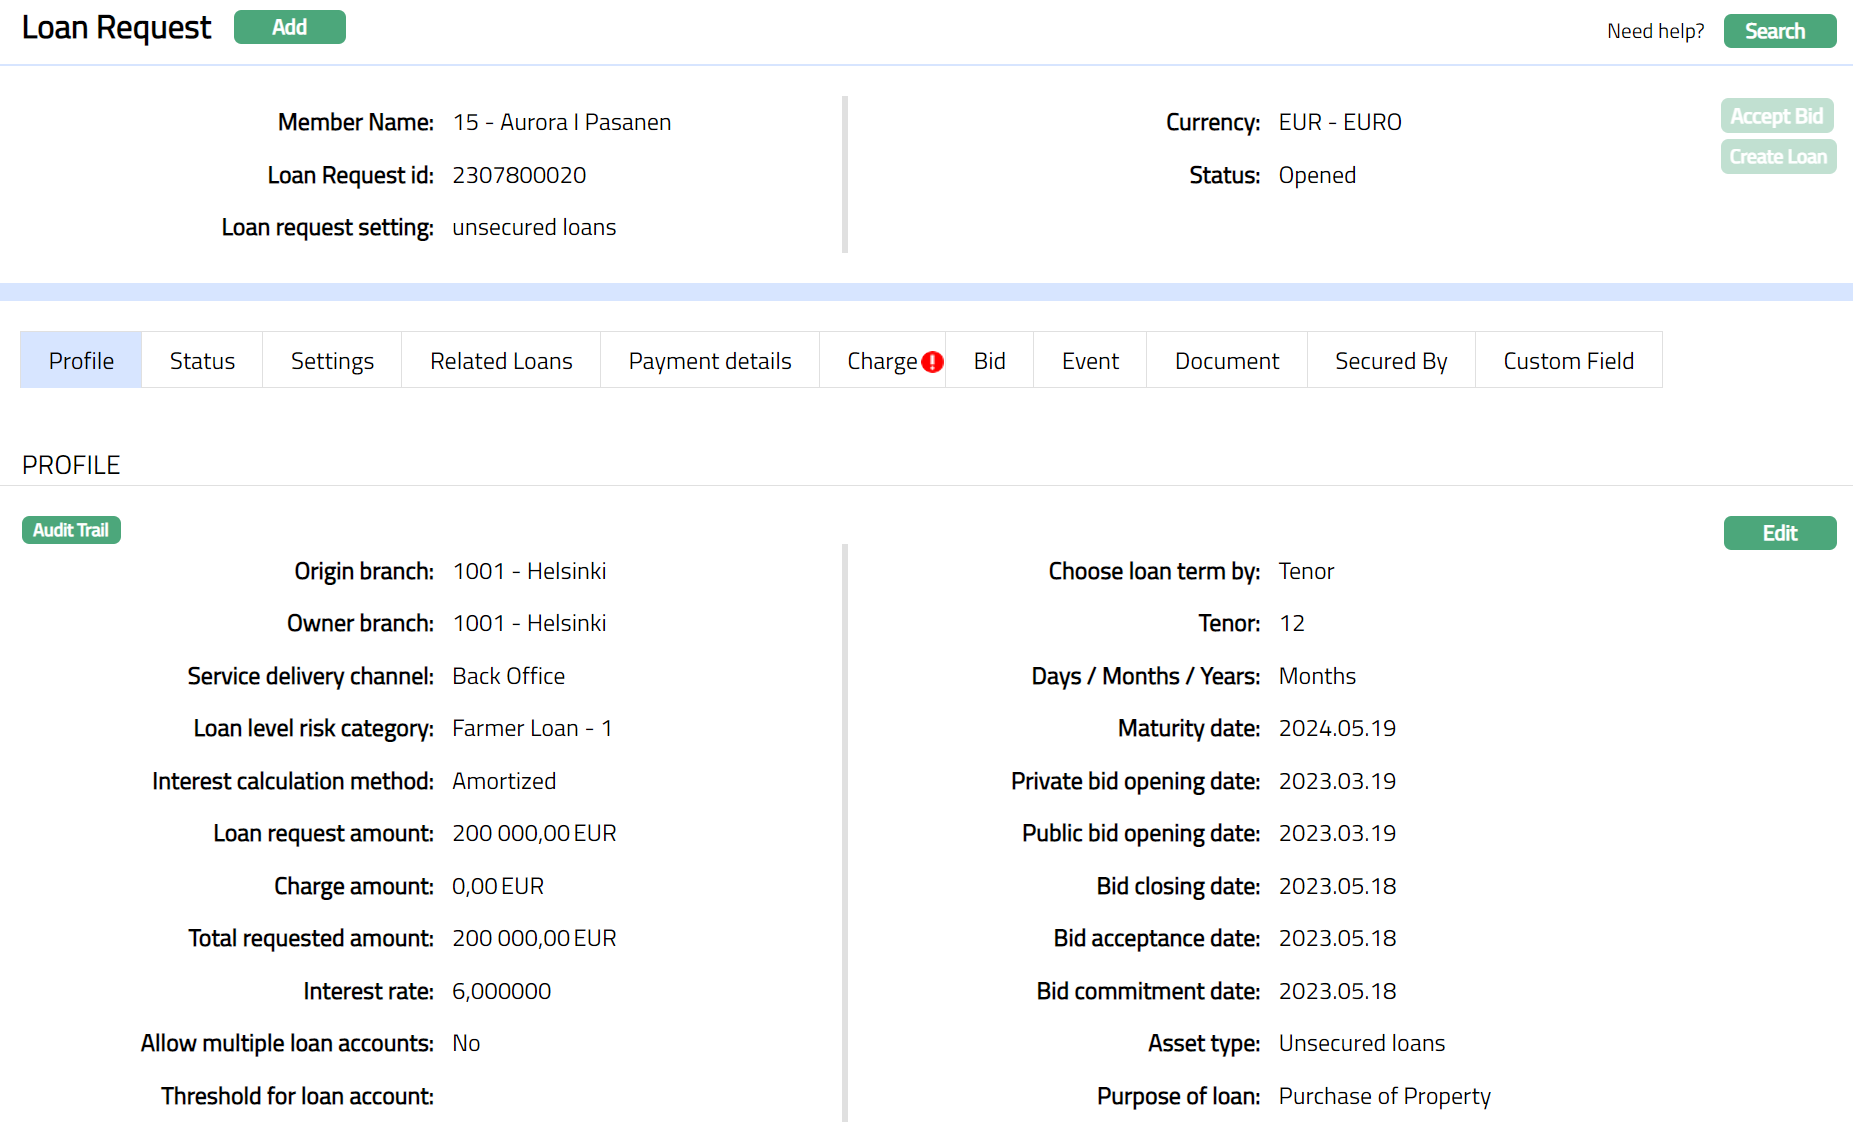
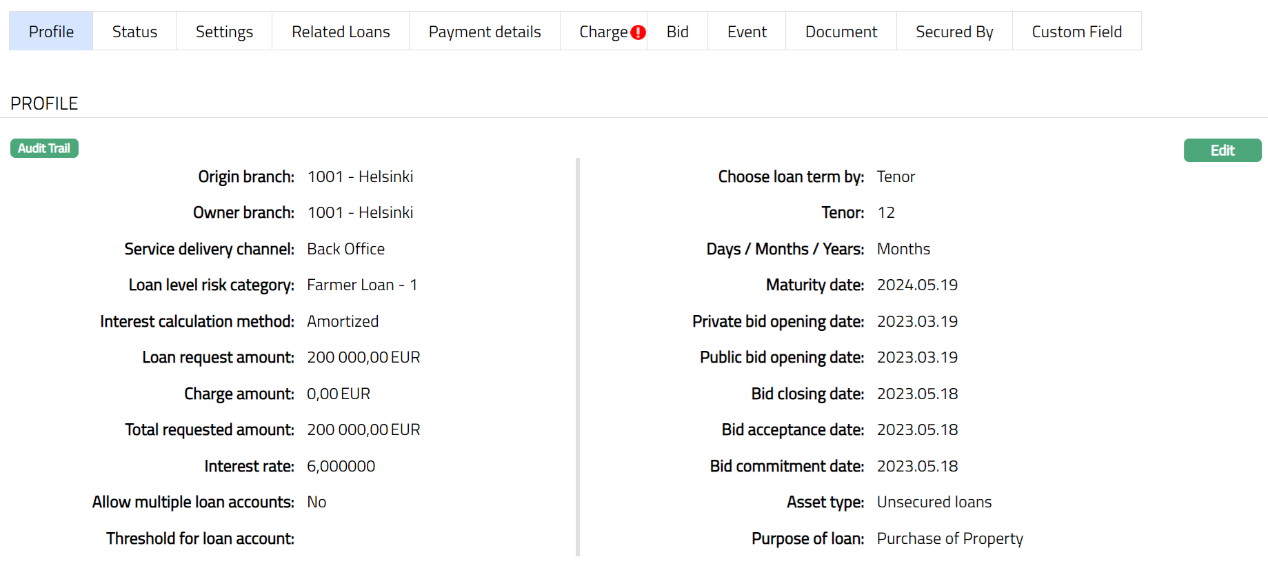
Profile
Profile tab, which is the default tab in the Loan Request screen, shows the basic details of the Loan Request.
To view / edit the Profile
1. Access Loan Request then click Maintain. Click Profile tab to view the details as per sample below. The details are defaulted from the entries that you made during Placement Instruction creation. For details refer to New Loan Request → Profile (1/7)
2. Click Edit. Edit Loan Request Profile page appears.
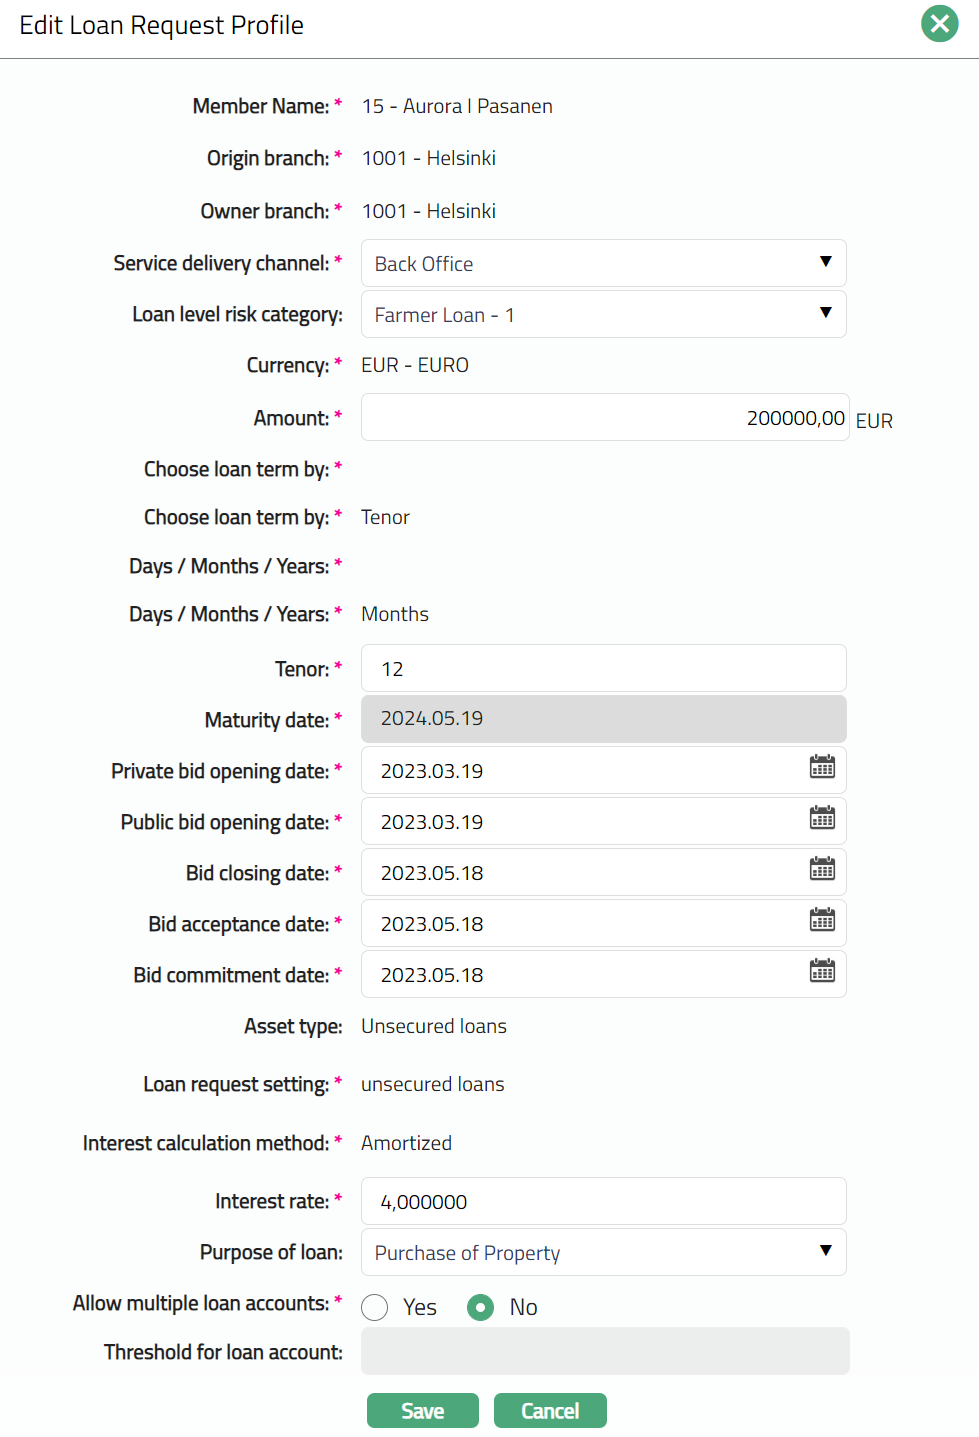
Note: Except the following fields rest all other fields are editable:
Member Name
Origin Branch
Owner Branch
Currency
Choose loan term by
Choose loan term by
Days / Months / Years
Asset type
Loan request setting
Interest calculation method
Interest rate
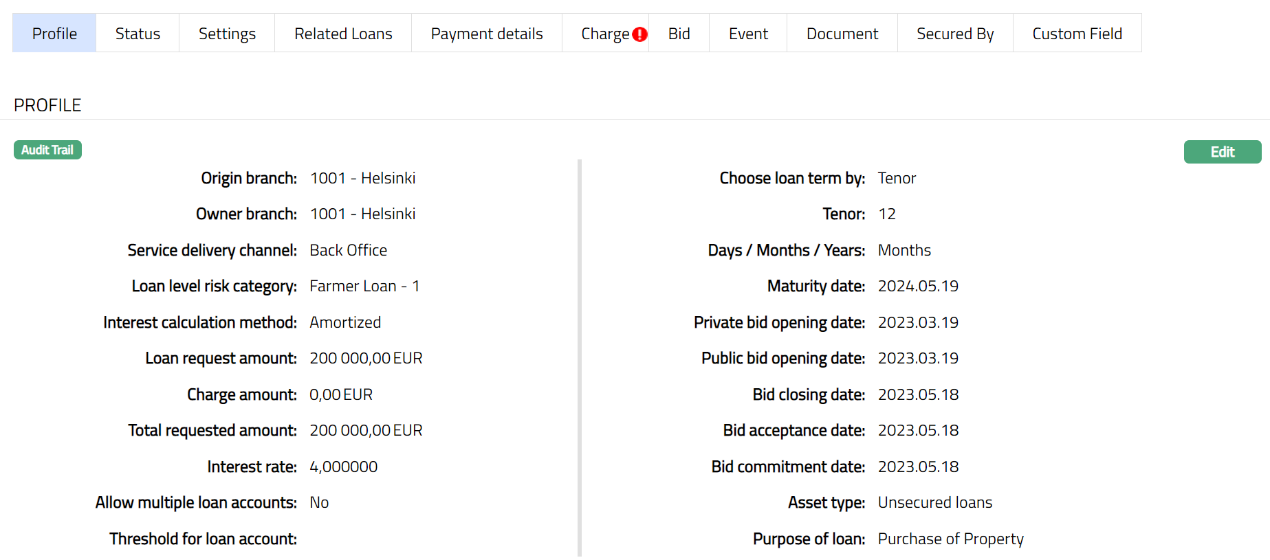
3. Click Save. Profile page appears with the edited details.
Functions: Edit
Overview
The Overview tab provides a summarized view of the bid activity and funding status for the selected loan request. This section helps you quickly assess how much of the requested loan amount has been bid, accepted, or committed, and whether any bids are automatically acceptable.
To view the Loan request details,
1. Access Loan Request then click the Overview tab. This tab serves as a quick reference to monitor investor participation and the overall funding progress of the loan request. You can use this view to see which portions of the loan are still open for bidding and which have already been accepted or committed.
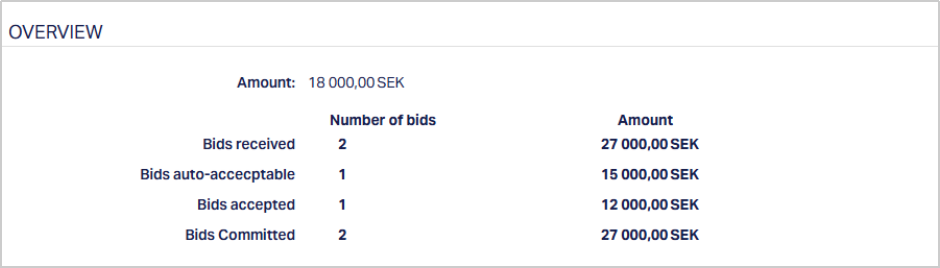
2. Amount displays the total loan amount requested by the borrower.
3. Number of Bids / Amount Bids Received shows the total number of bids submitted by investors and the cumulative bid amount.
4. Bids Auto-Acceptable displays the number and value of bids that meet predefined acceptance criteria and can be automatically approved.
5. Bids Accepted represents the number and total amount of bids that the borrower has accepted.
6. Bids Committed displays the number and value of bids that have been committed for disbursement.
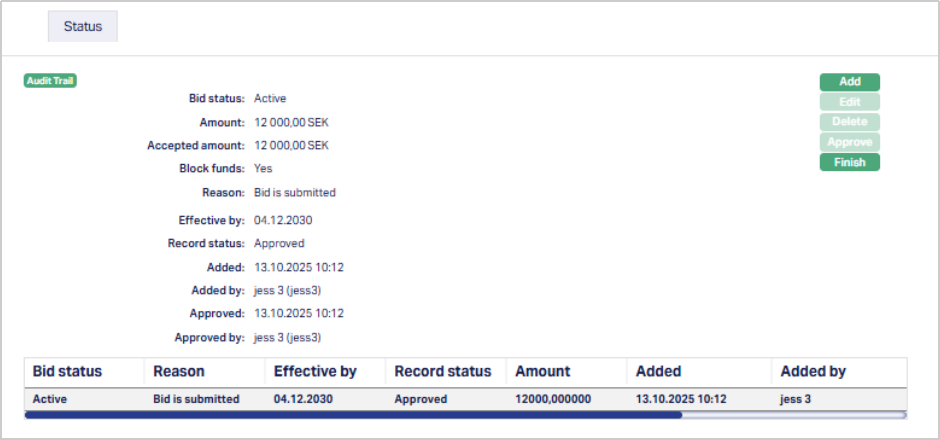
Status
Using this tab, you can view the history of the account status. You can also approve the Status record created by another user.
To View Status tab,
1. Access Loan Request page, then click Status tab.
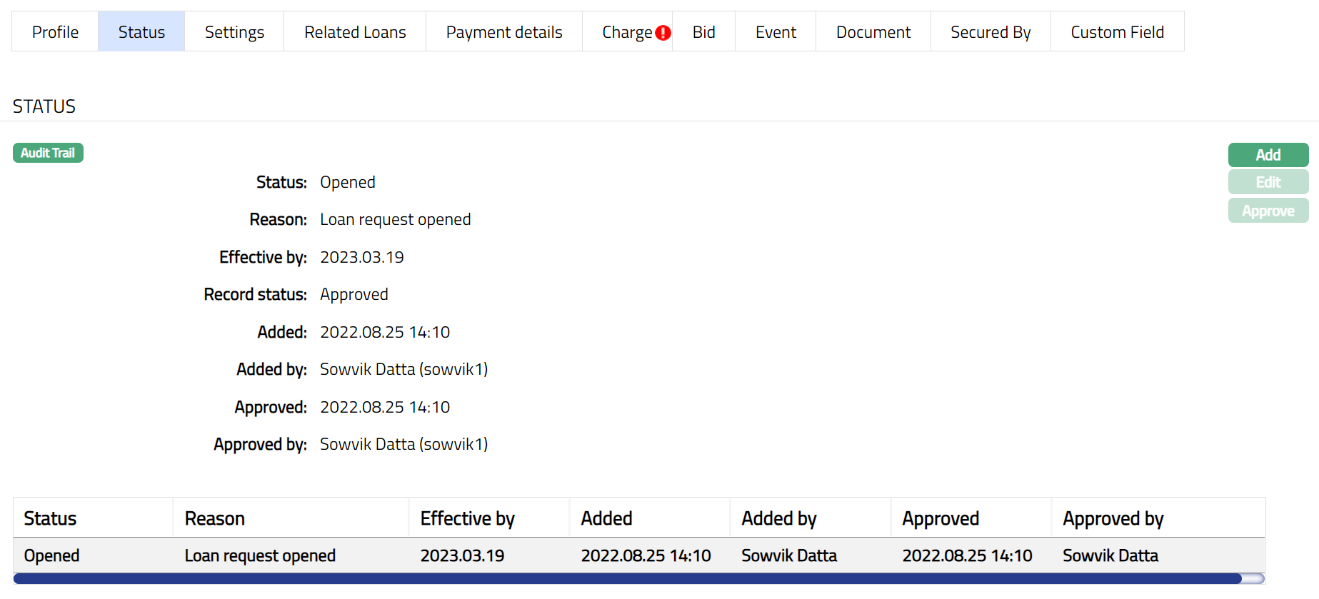
Note: Status will reflect as Opened and the Record Status will reflect as Approved. Note: Once approved by another user apart from the user who created the Account, you cannot Edit or Approve further.
The additional fields under Status tab are explained below.
2. Status denotes the current status of the account.
3. Reason displays the reason for the status selected for the account. In case of automatic status movement, the reason is predefined; while in case of manual status updates, this will display the reason input during the manual status change.
4. Effective by displays the effective date when the account.
5. Record Status displays the status of the account.
To Add Status,
1. Click Add. The Add Status page appears.
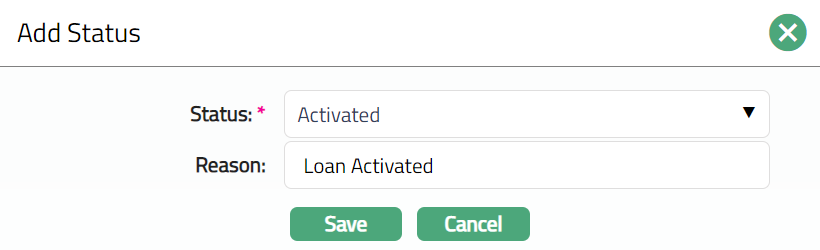
2. Depending on the current status of the loan request, Status could be.
Opened: This is the initial status of the account as soon as it is created.
Activated: This status is automatically set when the value date is equal to current date and the funds for opening have been credited to the term deposit account. The record status should be approved by another user to make it effective.
Await roll over: On maturity, if there is a roll over option chosen for this account, the status of the account is automatically updated to Await roll over.
Matured: On maturity, if there is no roll over option, or, in case of roll over if the grace days have expired, the status of the account is automatically updated to Matured. Once the status of the term deposit account is Matured, it will be available only in view mode and no further actions like edit or delete would be possible.
3. Mention Reason for the Status.
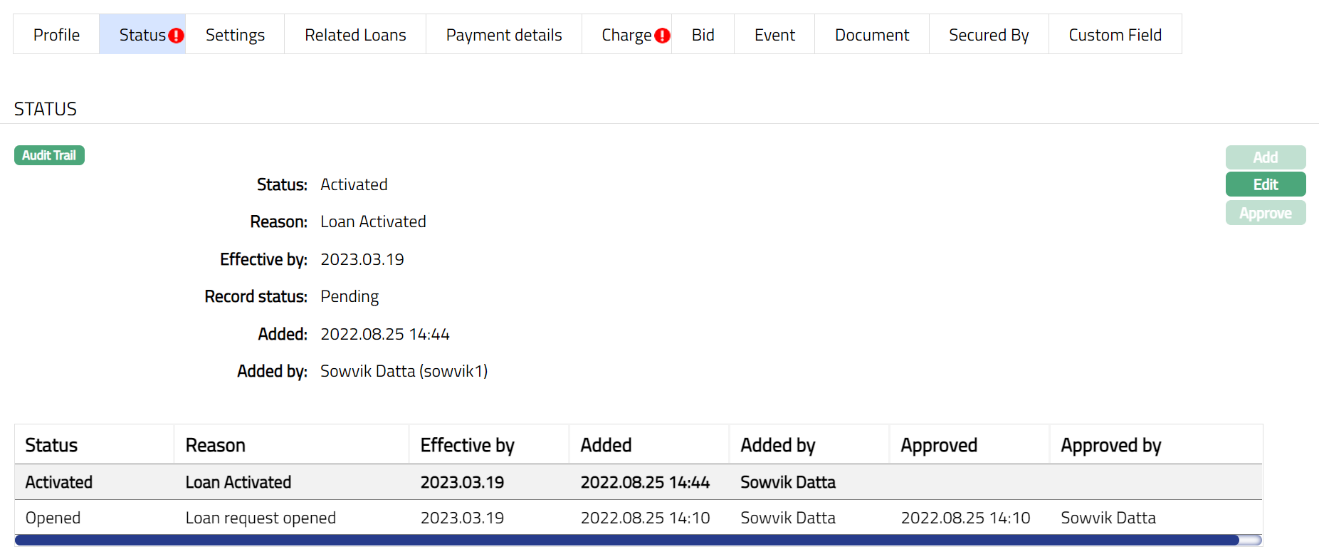
4. Click Save. Status tab appears with the Added details.
To Edit status,
1. Click Edit. Edit Status page appears.

Note: Only Reason field is editable.
2. Click Save. Status page appears with the edited details.
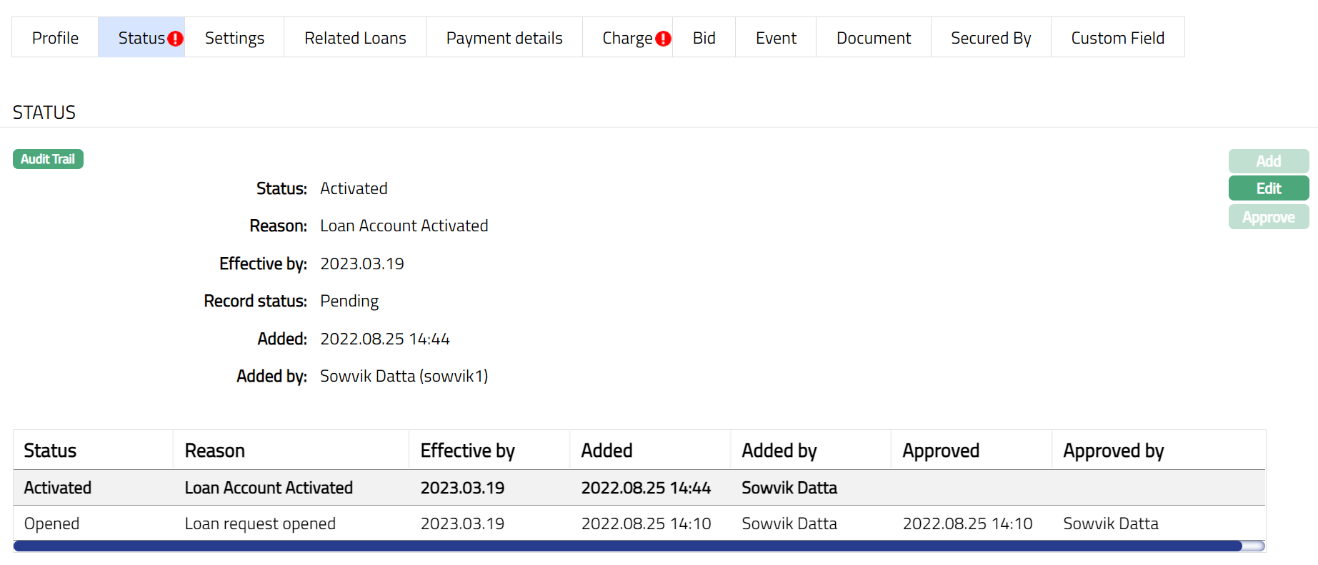
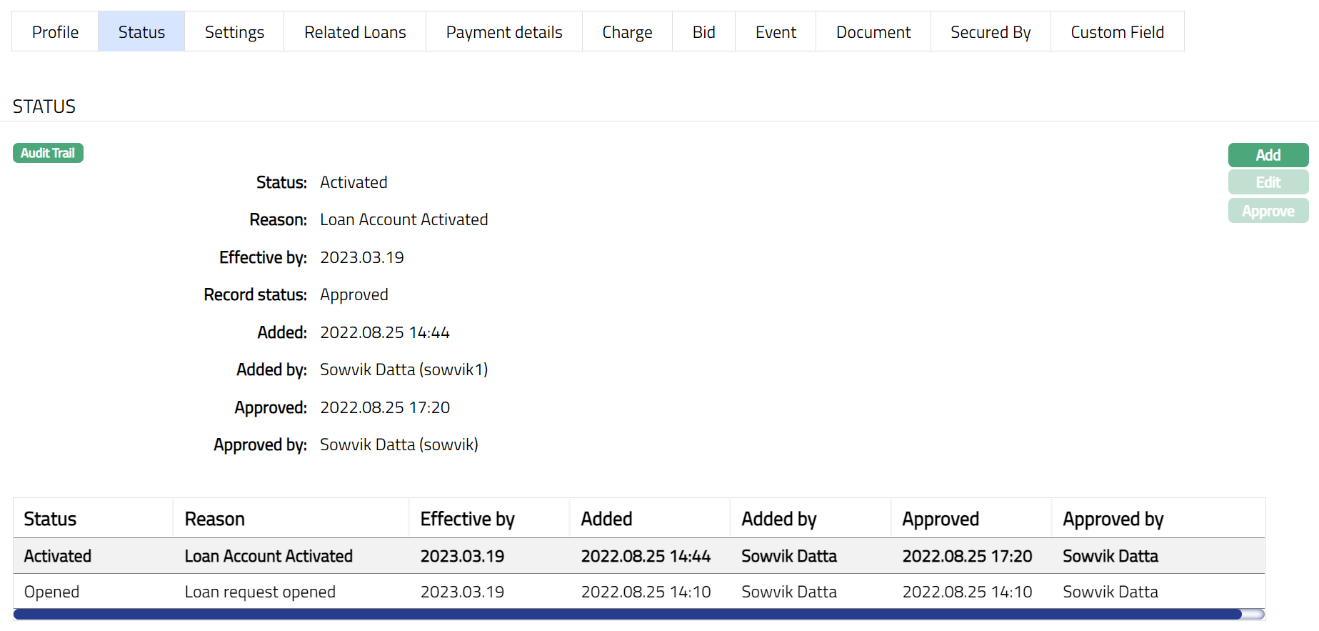
Note: Approval can only be done by a user different from the one who created the record. Once approve the red bubble disappears.
Functions: Add, Edit, Approve
The additional fields available in view are:
Status denotes status of the record.
Added denotes the date and time on which the status record has been added.
Added by denotes the name of the user who has added the status record.
Approved denotes the date and time on which record is approved. This field is displayed for the approved record.
Approved by denotes the name of the user who has approved the record. This field is displayed for the approved record.
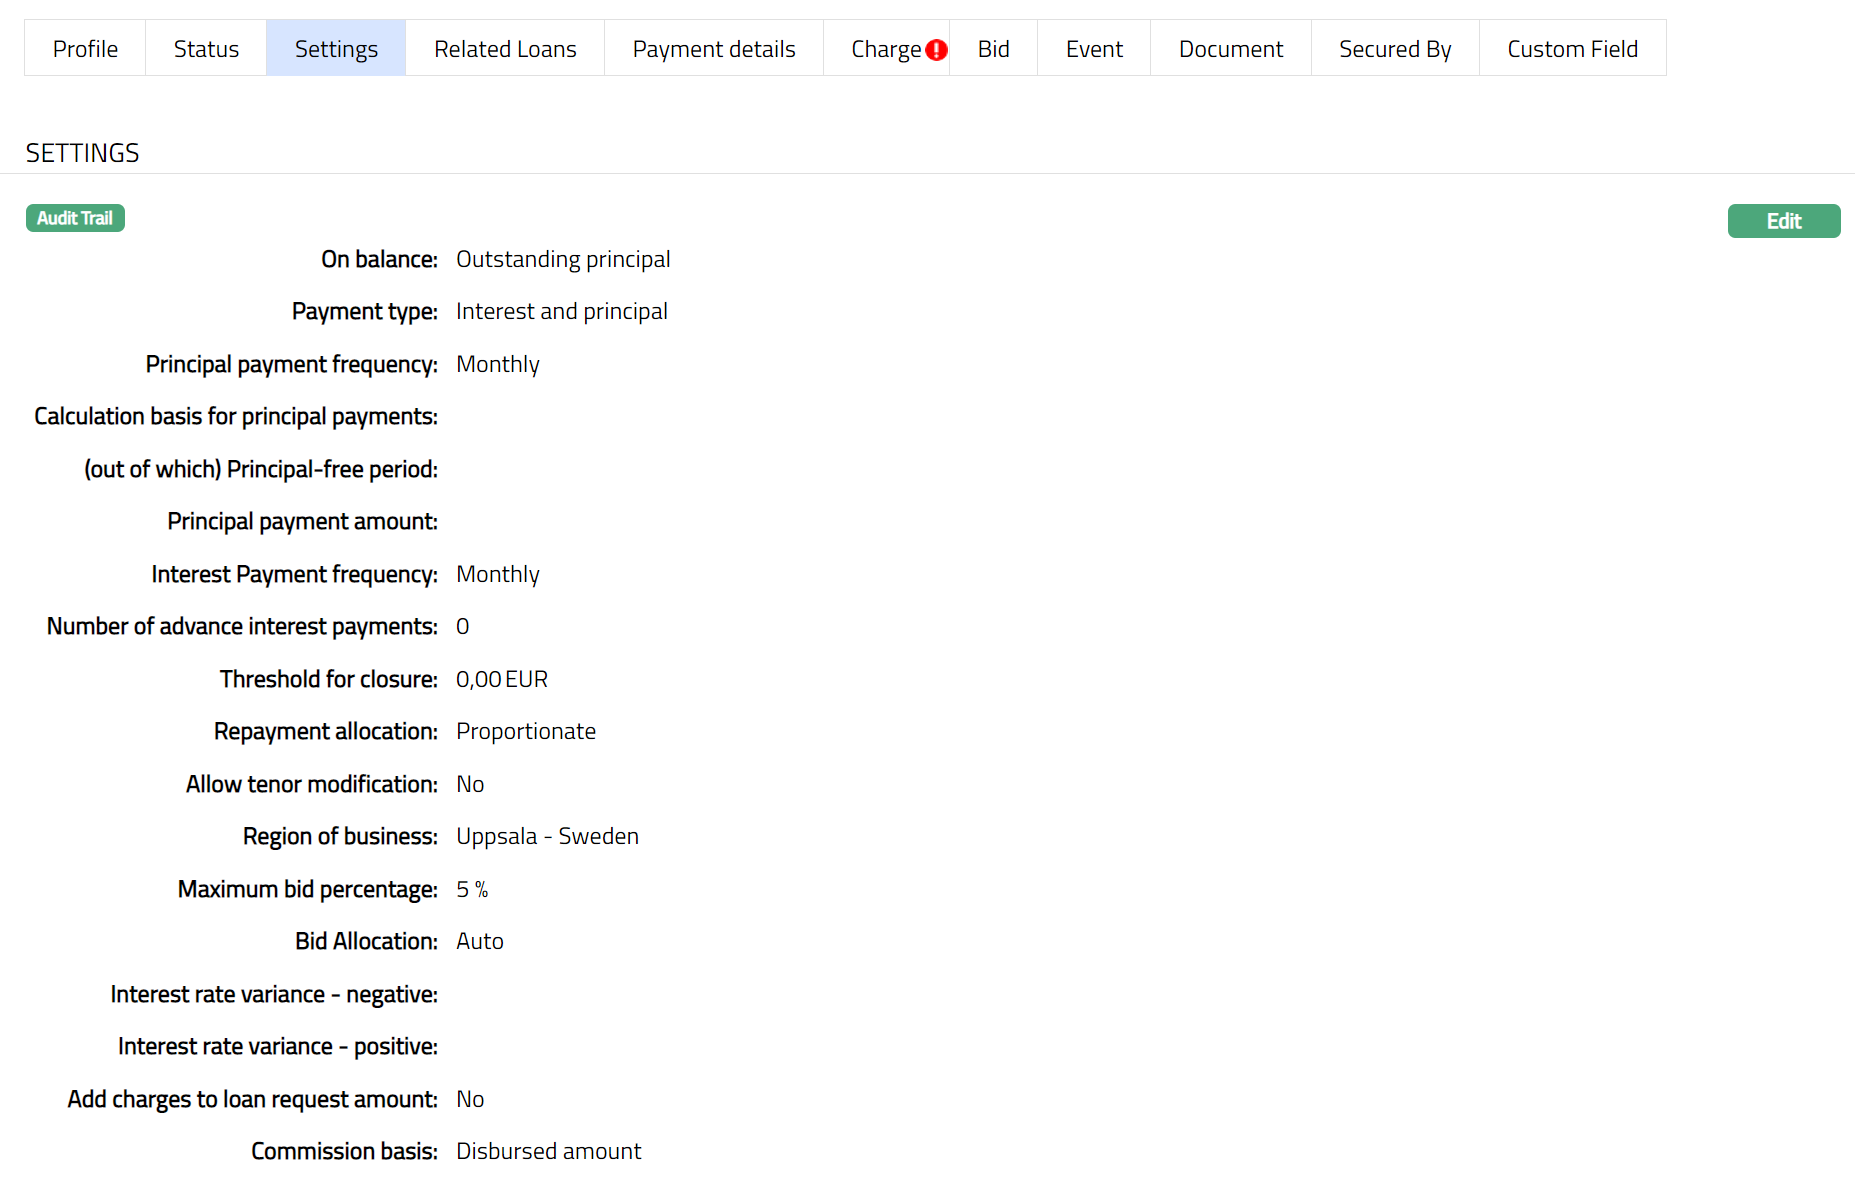
Settings
This Tab allows you to view and maintain certain product settings like IBAN generation required, Minimum and maximum term days, Rate types for currency conversions, holiday preferences, payment free months etc.
To edit settings,
1. Access Loan Request page. Click Settings tab to view the details as per sample below. The details are defaulted from the entries that you made during Account creation. For details refer to New Loan Request → Settings (2/7).
2. Click Edit. Edit Loan Request Settings page appears.
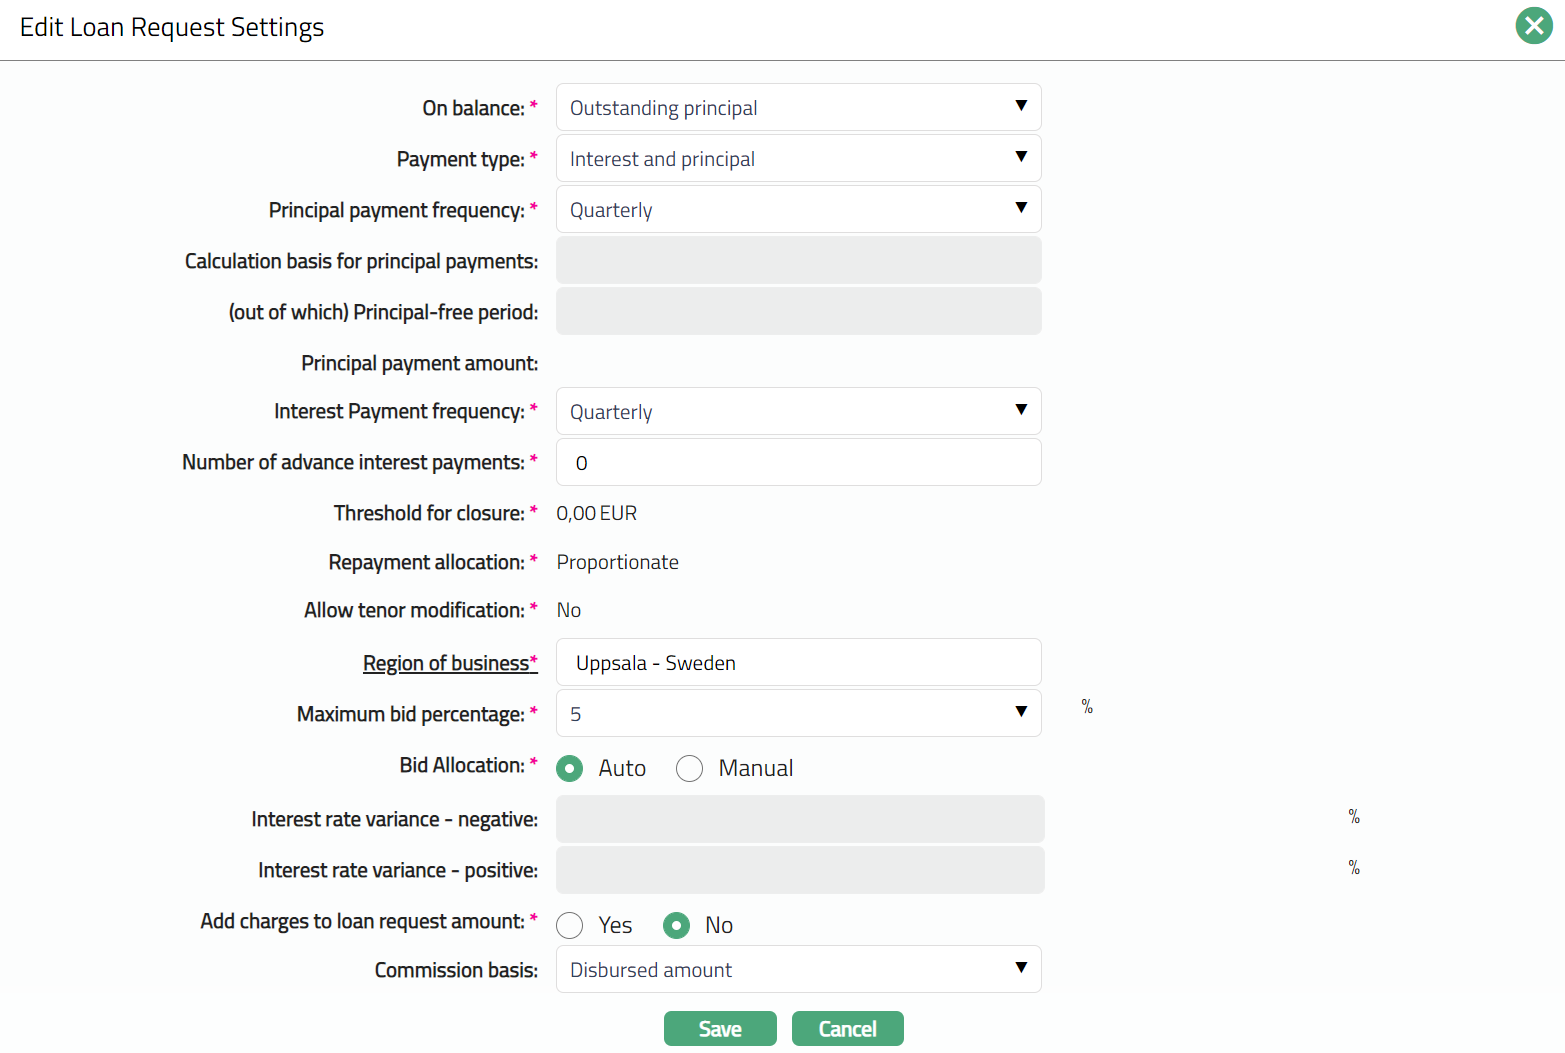
Note: The following fields are not editable in Edit Loan Request Settings page.
Calculation basis for principal payments
(out of which) Principal-free period
Principal payment amount
Threshold for closure
Repayment allocation
Allow tenor modification
Interest rate variance -- negative
Interest rate variance - positive
3. Click Save. Settings page appears with the edited details.

Functions: Edit
Exclude Investors Of
The Exclude Investors Of tab allows you to restrict specific investors or investor groups from participating in the auto-bid process for the selected loan request. This functionality helps ensure that lenders who have previously invested in certain clients’ loans are excluded from automated bidding for those same clients, in line with internal risk or policy requirements.
To add members,
1. Access Loan Request then click Exclude Investors Of tab. By default, this tab appears blank when a new loan request is created, as no investors have been added to the exclusion list yet.

2. Click Add. Add Exclude Investors Of page appears showing all the active investors maintained under CRM → Clients → Maintain. Select the required client(s) from the list.
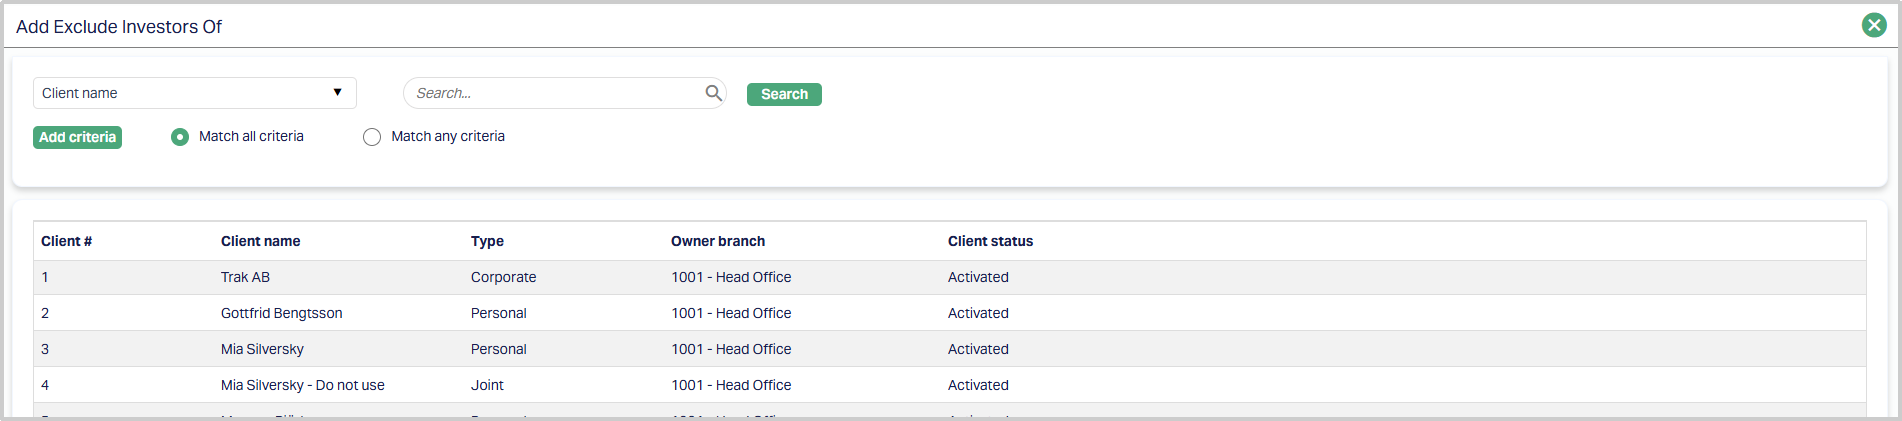
Once added, the tab appears with the added member(s). These investors will not be eligible to participate in the auto-bid process for this loan.

Functions: Add, Delete.
Add: You can add more members by clicking the Add button again and selecting the required investors.
Delete: Move between the various records and ensure that the Member you want to Delete is highlighted with Bold Font. Then click on Delete. Aura will ask for confirmation, on confirmation Aura will delete the member.
During Loan Request maintenance, you can specify certain clients whose associated lenders should be excluded from participating in auto-bidding for this loan request. However, this exclusion only applies to automated bid generation. It does not restrict users from manually creating bids on the Loan Request → Maintain → Bids tab.
You can continue to record manual bids even for lenders associated with excluded clients.
Related Loans
The Related Loans tab displays all the loans that are linked to the selected loan request. These related loans are fetched automatically by Aura based on predefined linkage logic such as borrower relationship, product lineage, or cross-reference from novation, refinancing, or restructuring transactions.
When you create a new loan request, this tab is blank by default since no related loans exist yet. Once the loan request is saved and Aura identifies any existing loans that share a valid relationship with the borrower or loan parameters, the related loans are displayed in this tab.

Behaviour -
- You cannot manually add, modify or delete records in this tab.
- The tab is system-driven and serves as a reference view of all active or historical loans associated with the borrower or entity linked to the current loan request.
- If the borrower has multiple ongoing and previously settled loans, Aura automatically lists them here for reference.
- Any updates to the borrower’s linked loans are automatically reflected in this tab during loan request retrieval or refresh.
Business Context -
This feature supports scenarios where a borrower requests a loan amount that may be disbursed in multiple parts. For example, if a borrower requests a loan of 5,000,000 and bids are received for only 3,000,000, Aura allows creation of a child Loan Request for the accepted amount. The remaining portion of the request remains open for new bids until the total Approved Amount equals the original request amount.
This ensures that the Loan Request-to-Loan Account relationship remains transparent and traceable through the Related Loans tab, where each disbursement or partial funding creates a new child Loan Request and a corresponding Loan Account record.

The grid (shown in the screenshot above) displays the following details for each related loan:
- Loan Request ID - Displays the unique identifier or the related loan request. This field is a hyperlink. You can click the ID to open the corresponding Loan Request in the Maintain screen.
- Loan Account # - Displays the account number of the related loan.This field is also a hyperlink that opens the related Loan Account screen under Retail → Loans → Maintain.
- Amount - Displays the total loan Approved amountfor the respective loan account.
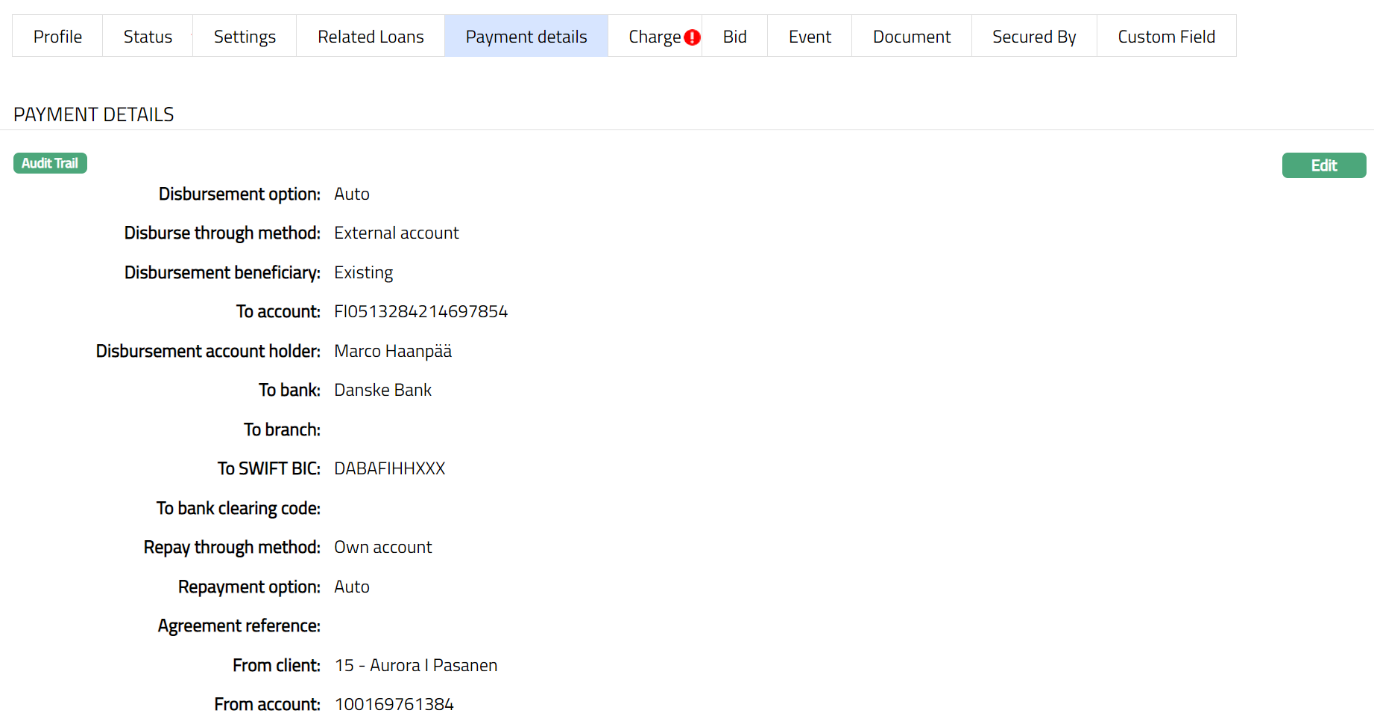
Payment Details
Using this tab, you can view or edit the payment related details of the account.
To edit Payment Details,
1. Access Loan Request page. Click Settings tab to view the details as per sample below. The details are defaulted from the entries that you made during Account creation. For details refer to New Loan Request → Payment Details (3/7).
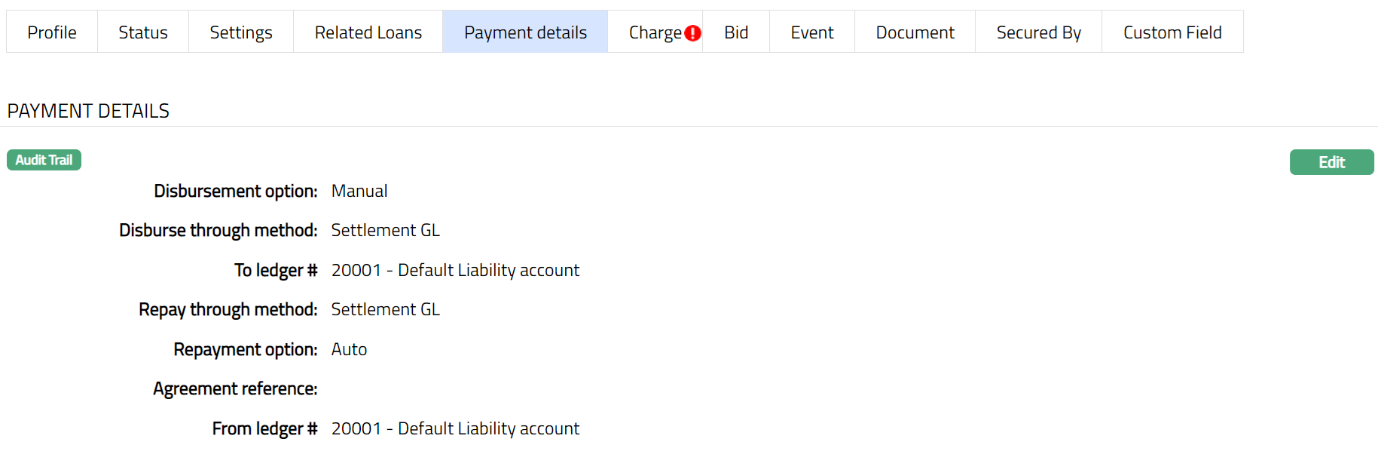
2. Click Edit. Edit Loan Request Payment details page appears.
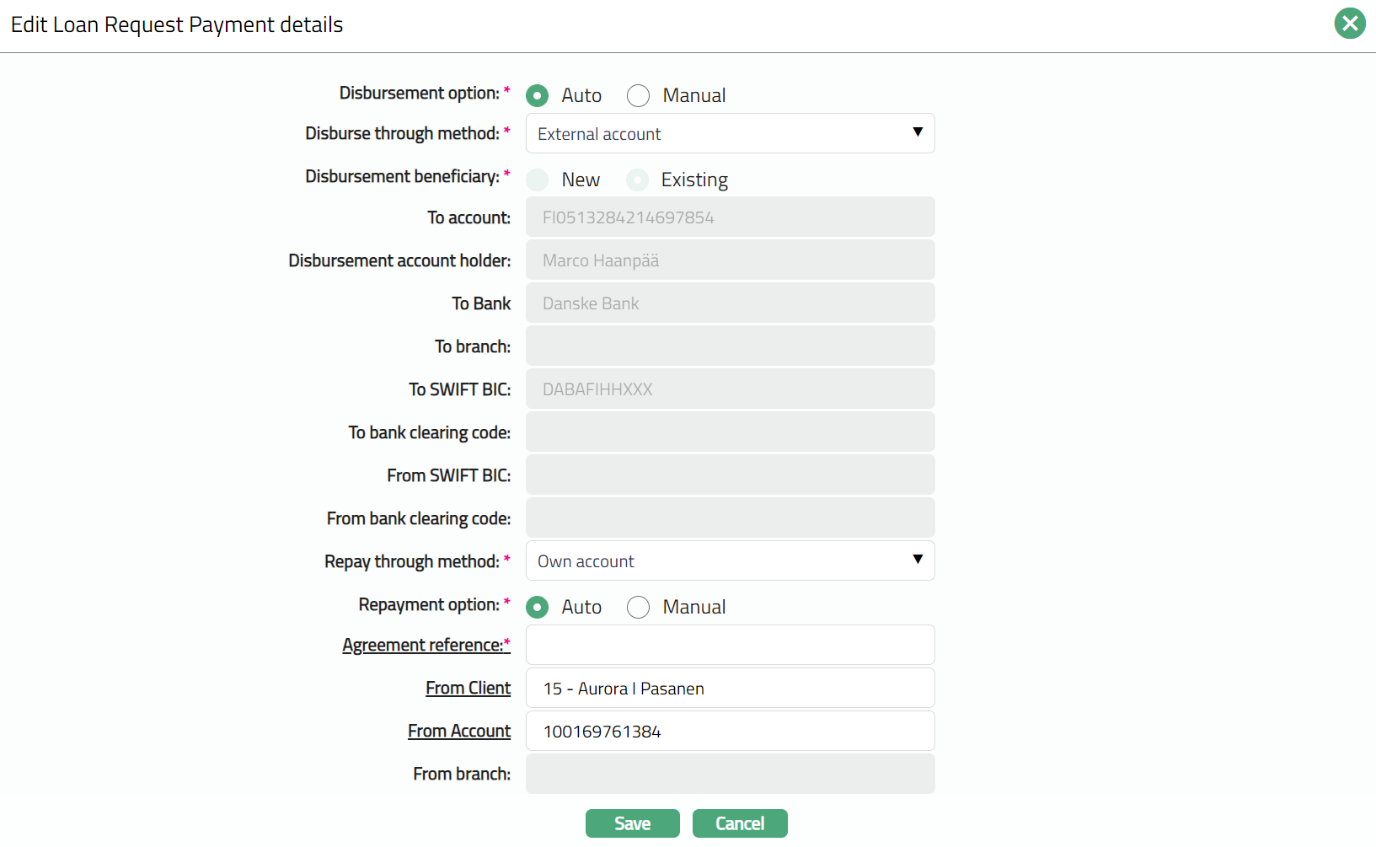
The additional field is:
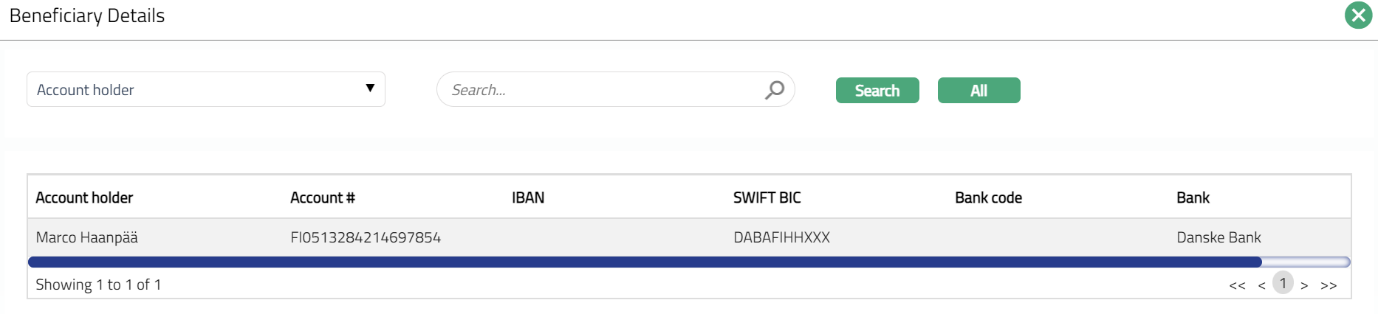
- Disbursement beneficiary: You can select the beneficiary from existing by clicking on New or Existing radio button. Once you click on existing, Beneficiary Details search page appears displaying the beneficiary details which are linked to the account. Select and click the required beneficiary. The details get added to the below fields. Sample screen shot shown above. Note: You can also add new Beneficiary details for the account by clicking on new radio button.
3. Click Save. Payment Details tab appears with the edited details.
Functions: Edit
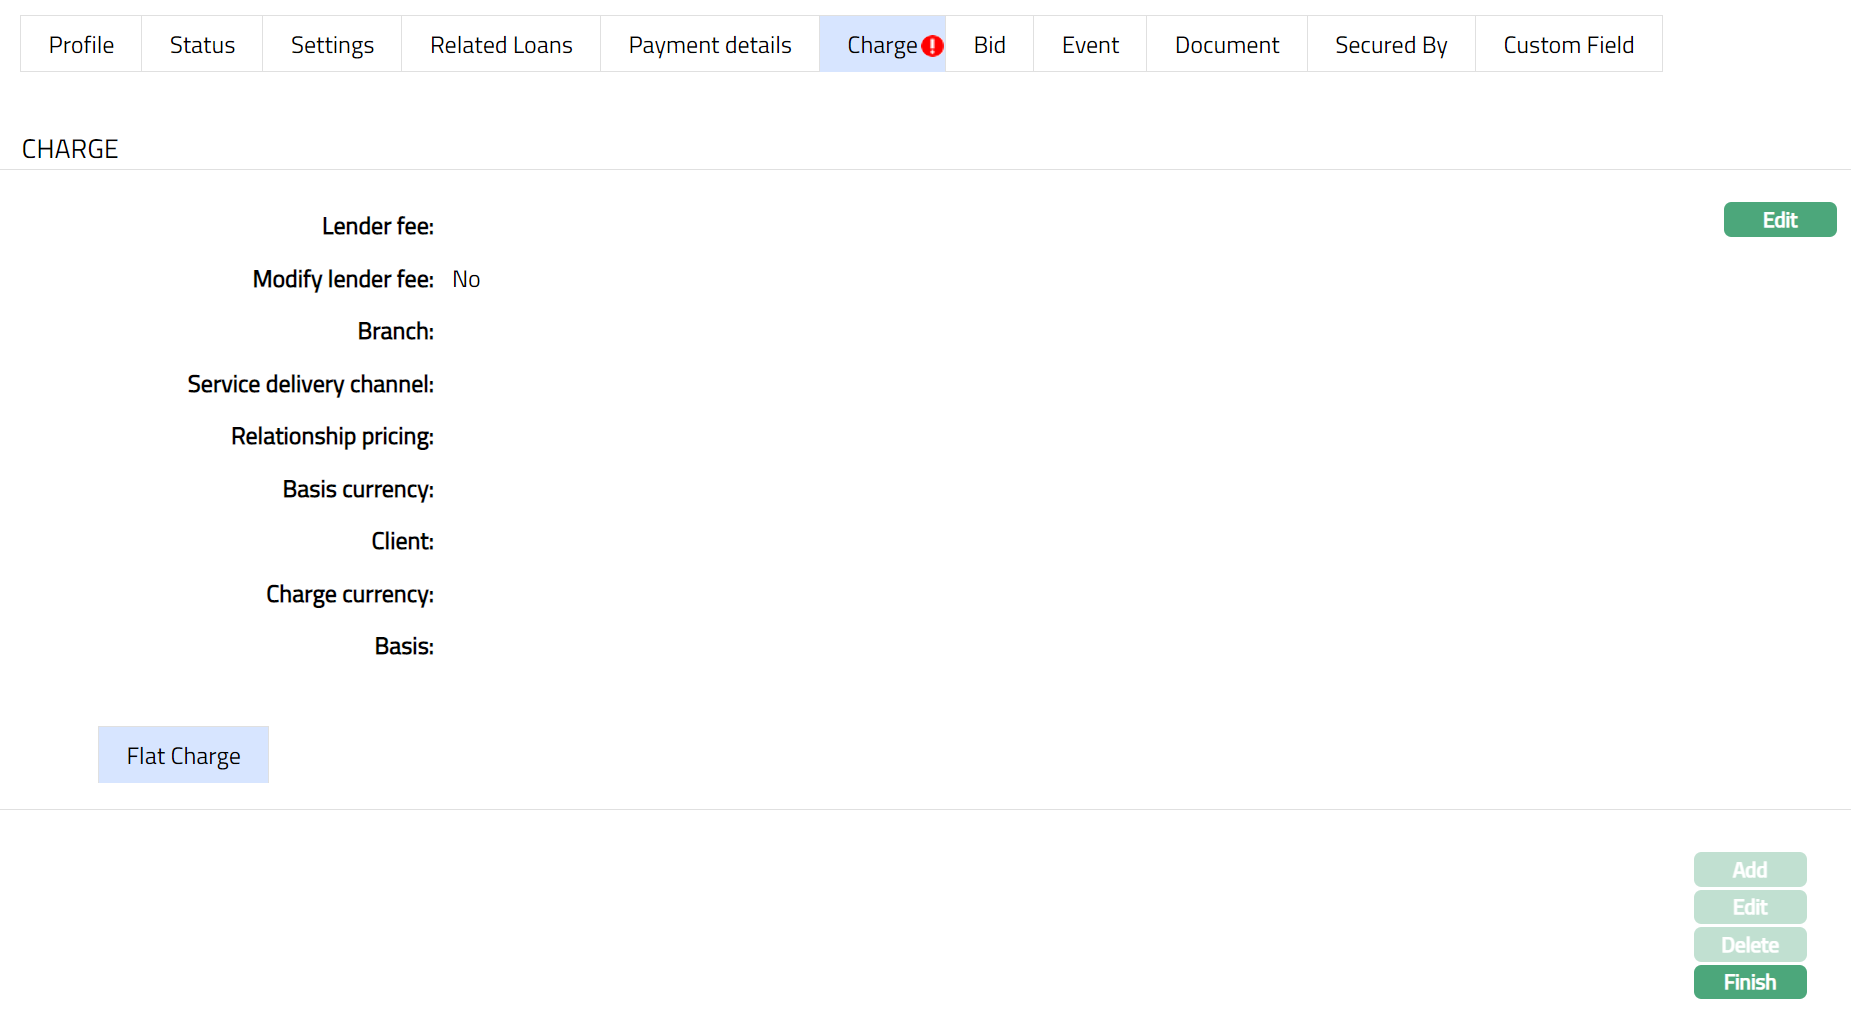
Charge
Charge tab allows you to view and edit the details of different charges for accounts under the Product.
To view/edit Charge
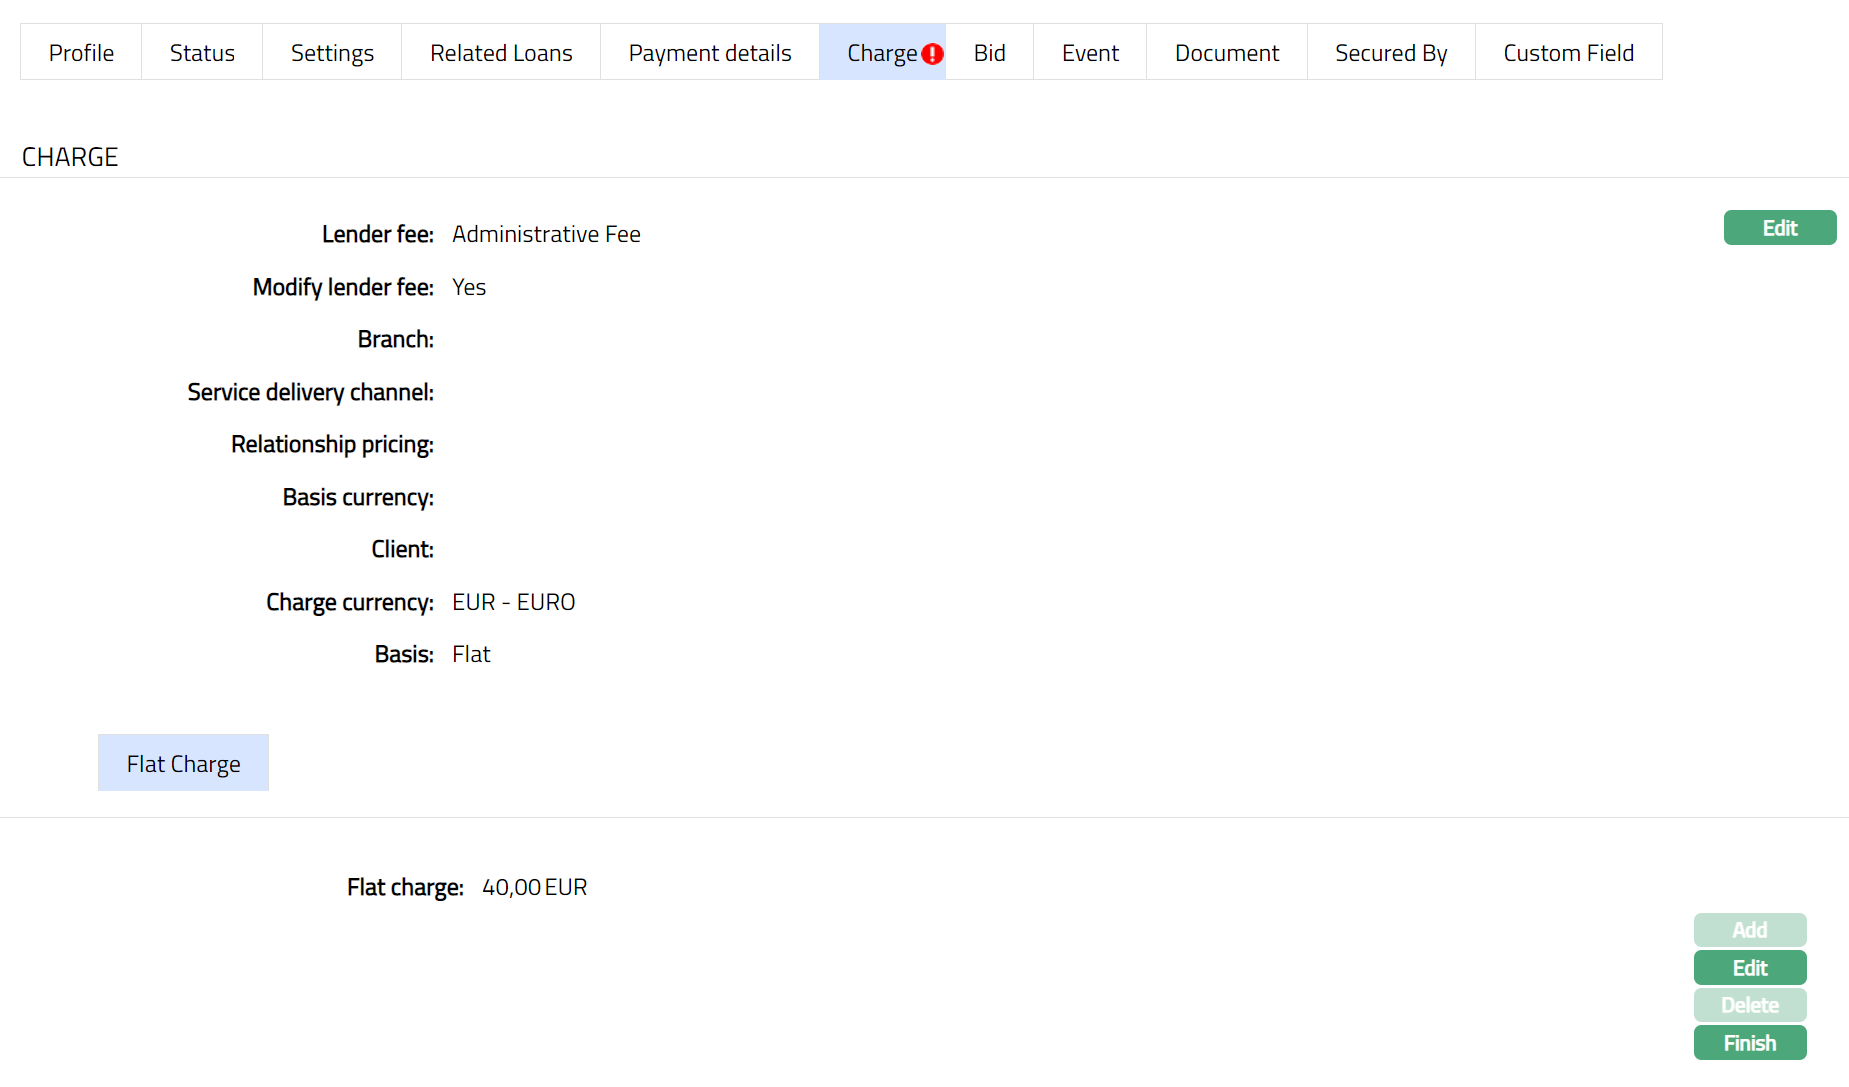
1. Access Loan Request page. Click Charge tab to view the details as per sample below. By default, the Value sub tab will appear displaying the entries that you made during Loan Request creation. For details refer to New Loan Request → Charge (4/7)

The additional fields that you can view in the tab are explained below:
Status field denotes the status of the tab.
Added field denotes the date on which the record was added.
Added by field denotes the name of the user who created the record.
To Edit Lender fee field under Charge tab
2. Click View and then Edit. Edit page appears. Sample screen shots shown below.
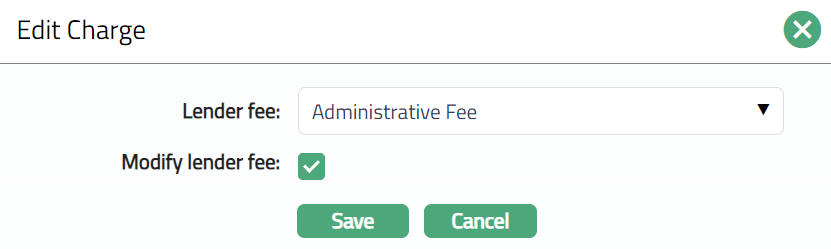
Note: All the fields in Edit Charge page are editable.
3. Click Save. Lender fee page under Charge tab appears with the edited details.
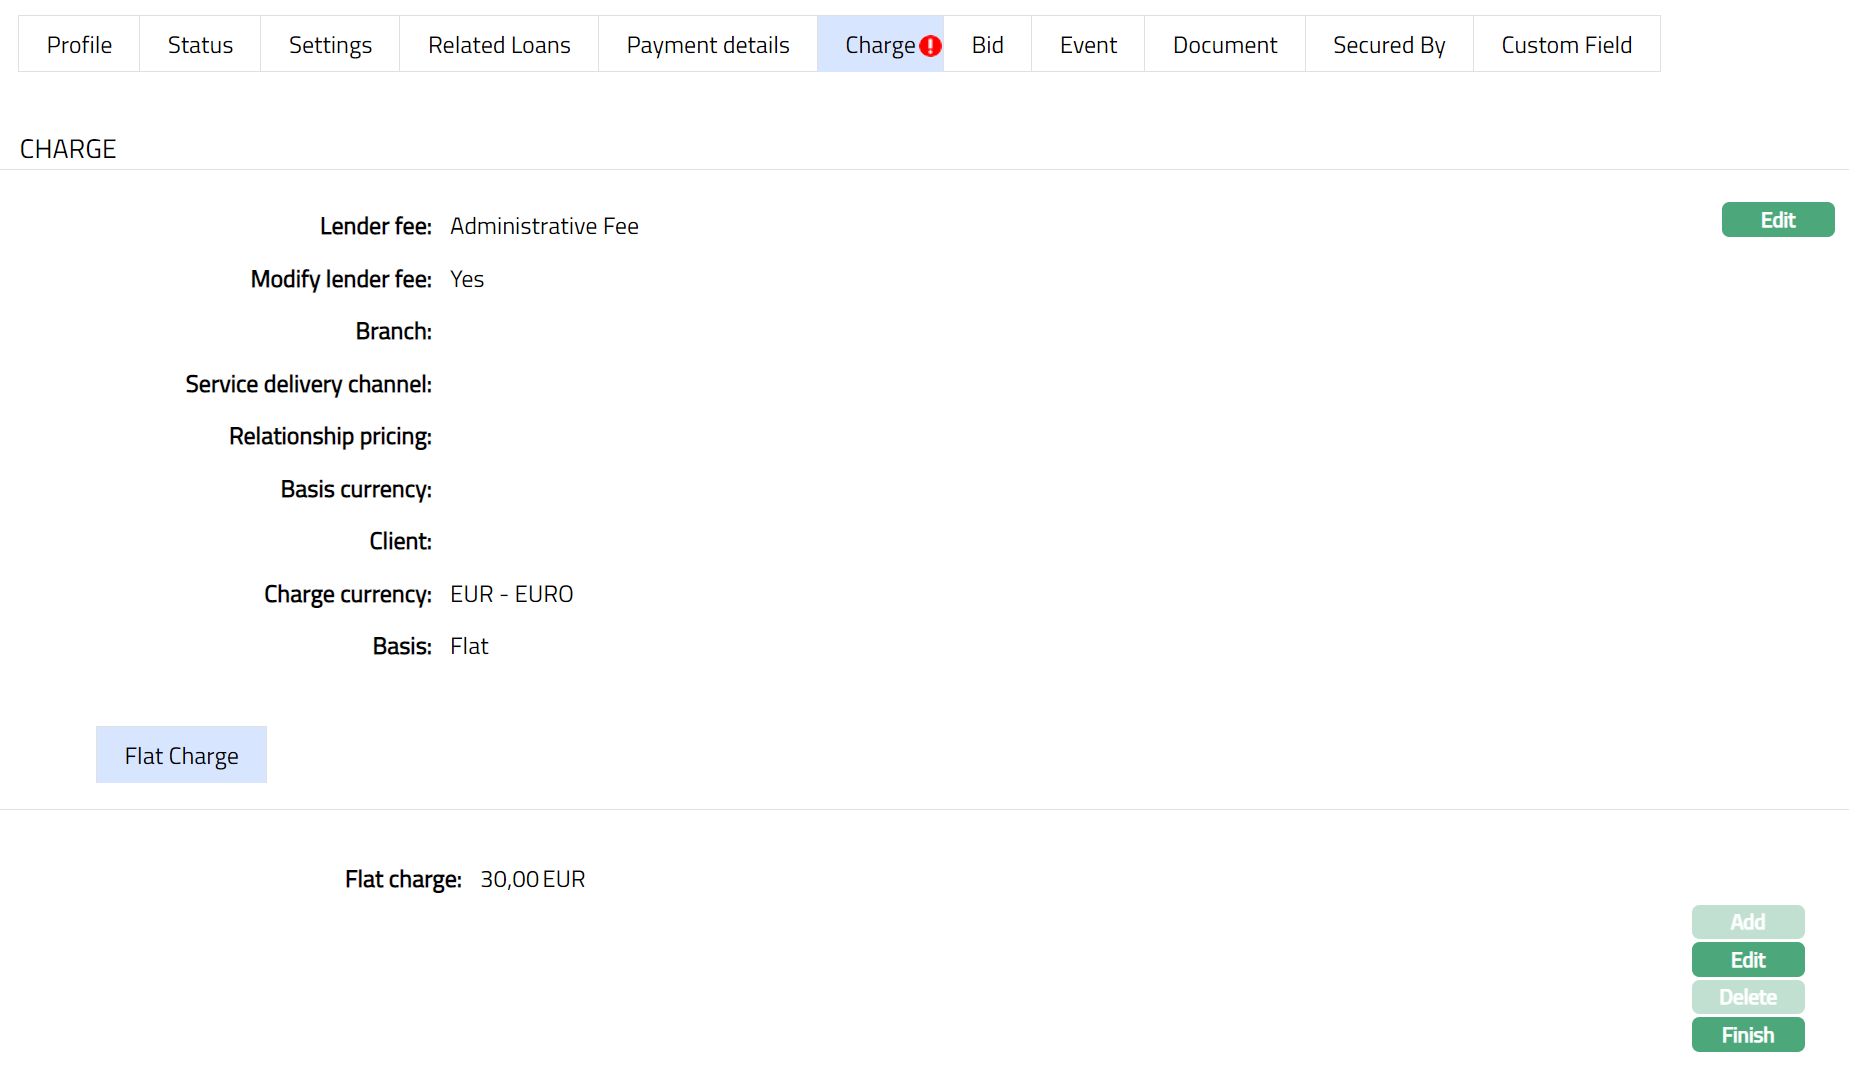
4. Edit Flat Charge If required by clicking Edit button. Edit Flat charge page appears.
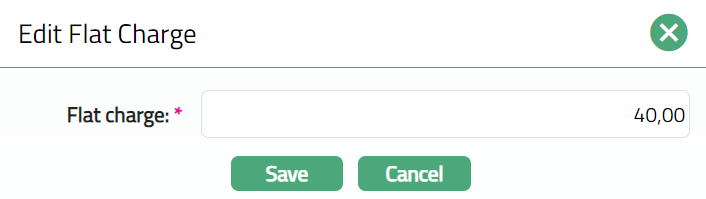
5. Modify the Charge as required and click Save. Flat Charge page appears with the edited details.
Functions: Edit, Finish
- Click Finish. Lender fee field under Charge tab appears with the edited details.
Note: After creation / edit, the status of the charge tab will be Pending till it is approved by another user. On approval, the tab status is set to Approved and the red bubble disappears.
Note: Similarly, You can Edit Broker Fee as required. Sample Screen shot shown below.

Note: After creation / edit, the status of the charge tab will be Pending till it is approved by another user. On approval, the tab status is set to Approved and the red bubble disappears.
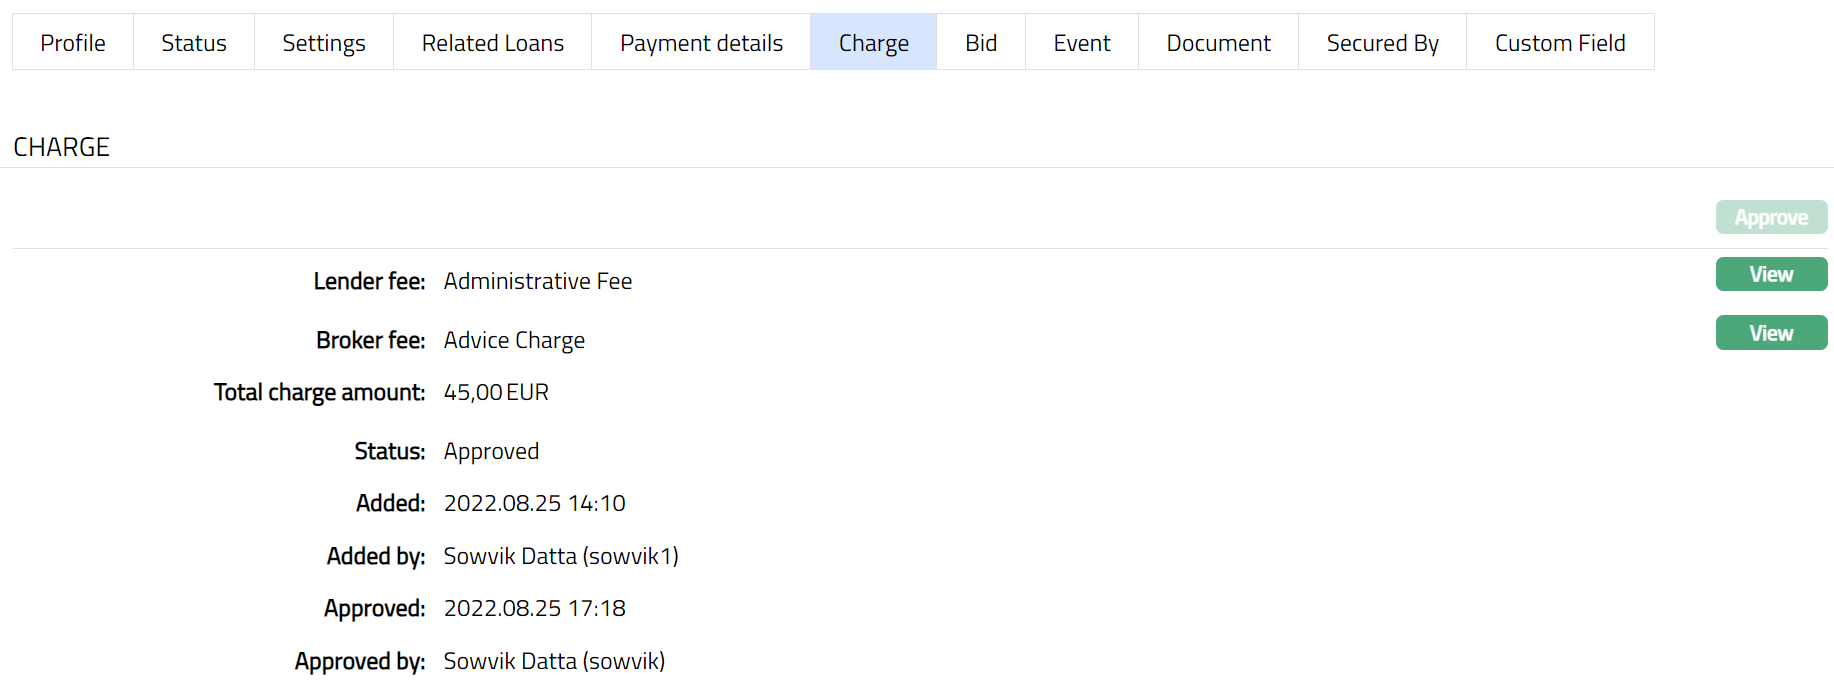
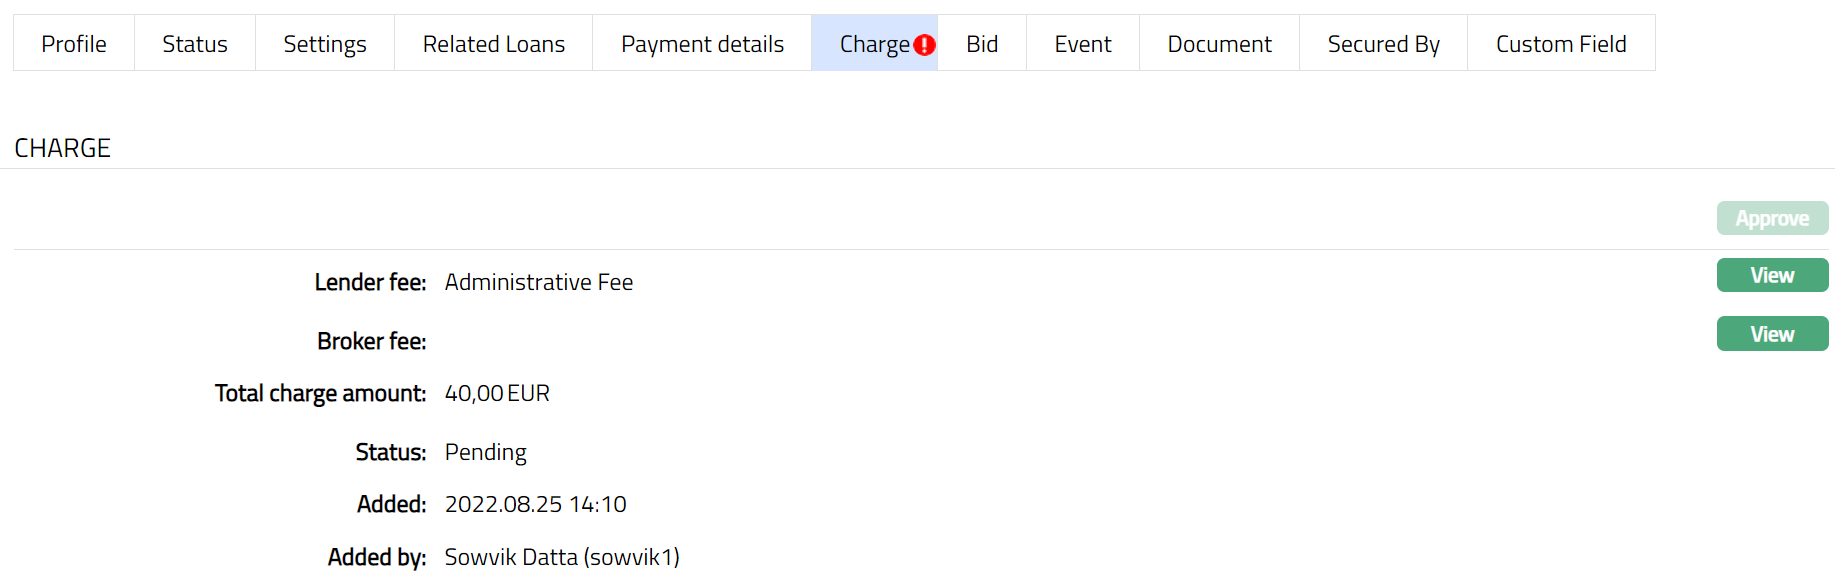
Functions: View, Approve
The following fields are shown only in the View screen and are not editable:
Status field denotes the status of the tab.
Added field denotes the date on which the record was added.
Added by field denotes the name of the user who created the record.
Approved field denotes date on which the record was approved and is displayed only for approved records.
Approved by field denotes name of the user who approved the record and is displayed only for approved records.
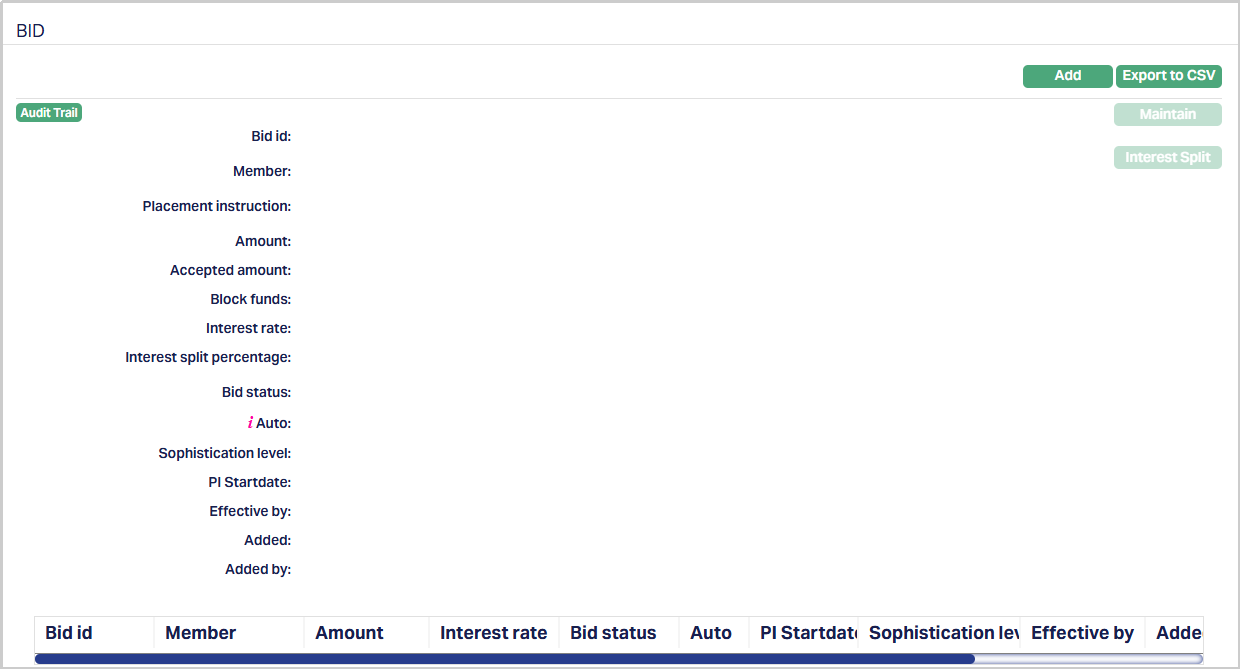
Bid
The Bid tab allows you to manage offers placed by members against a specific loan request. Here, you can view all bids submitted, add new bids and monitor their details. This tab helps you track the interest rates, insurance requirements, and allocation amounts offered by members for the loan request.
To add a new bid for the loan request,
1. Access Loan Request then click the Bid tab. When you first access the Bid tab for a loan request, the grid may appear empty. This occurs because no member has placed a bid against the loan request yet. Once bids are added, the grid displays all bids associated with the load request, along with key details such as member name, bid amount, interest rate, etc.
2. Click Add. The Add Bid page appears.
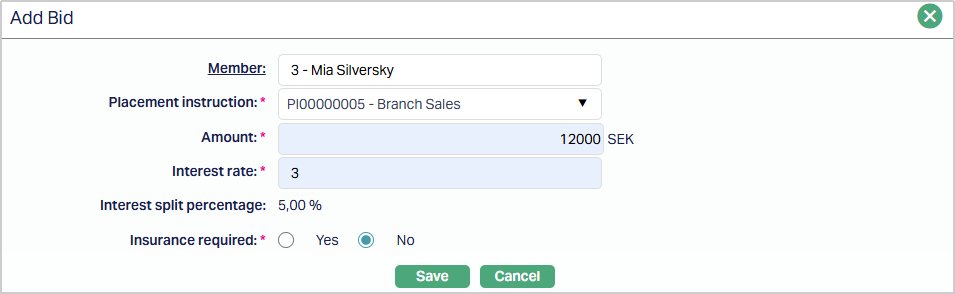
3. Select the member by clicking on the Member hyperlink. This will display a list of all active clients maintained under CRM → Clients → Maintain, from which you can choose the appropriate member to place the bid.
4. Choose the appropriate Placement Instruction from the drop-down list maintained under Retail → Peer to peer → Placement Instruction → Maintain.
5. Enter the bid amount in the currency of the loan request. Aura validates that the amount entered does not exceed the total amount defined in the placement instruction. If the amount entered is more than what is allowed, Aura displays a validation error and prevents saving.
6. Specify the interest rate being offered by the member for this bid. The rate must comply with any limits set at the product or loan request level.
7. Interest Split Percentage - This value is automatically generated by Aura based on the total interest and the configuration in the placement instruction. You cannot manually edit this field. Aura ensures that the calculated percentage is applied correctly across all bids for the loan request.
8. Select Yes or No to indicate whether this bid requires insurance. If Yes is selected, Aura will link the bid to the insurance plan configured for the loan product, and the insurance fees are applied automatically.
9. Click Save. The Bid tab appears with the added details.
Functions: Add, Export to CSV, Maintain, Interest Split.
You can Add multiple bids for a single loan request, provided each bid meets the loan request’s conditions and is placed by an active member.
Export to CSV -
Click to download a CSV file containing all bids of the current loan request. This file includes key details such as Member, Amount, Interest Rate, Interest Split, and insurance Required like the example screenshot shown below.

Exporting to CSV allows you to review or share bid data offline and is helpful for reporting or auditing purposes.
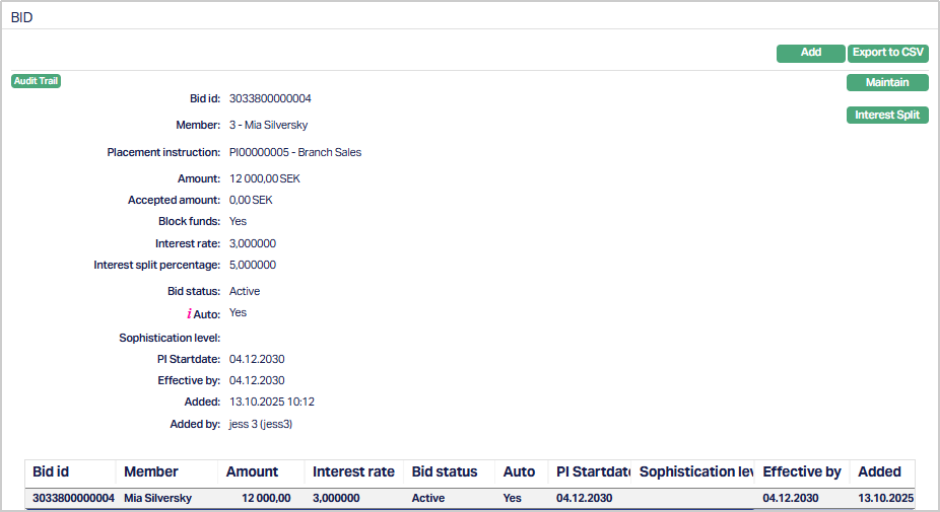
Maintain
Clicking Maintain on a bid opens the bid you have already added. This allows you to view or update the bid details, and also provides access to the Status sub-tab, where you can manage the lifecycle of the bid.
It shows all information entered when the bid was added, such as Member, Placement Instruction, Amount, Interest Rate, Interest Split Percentage, and Insurance Required.
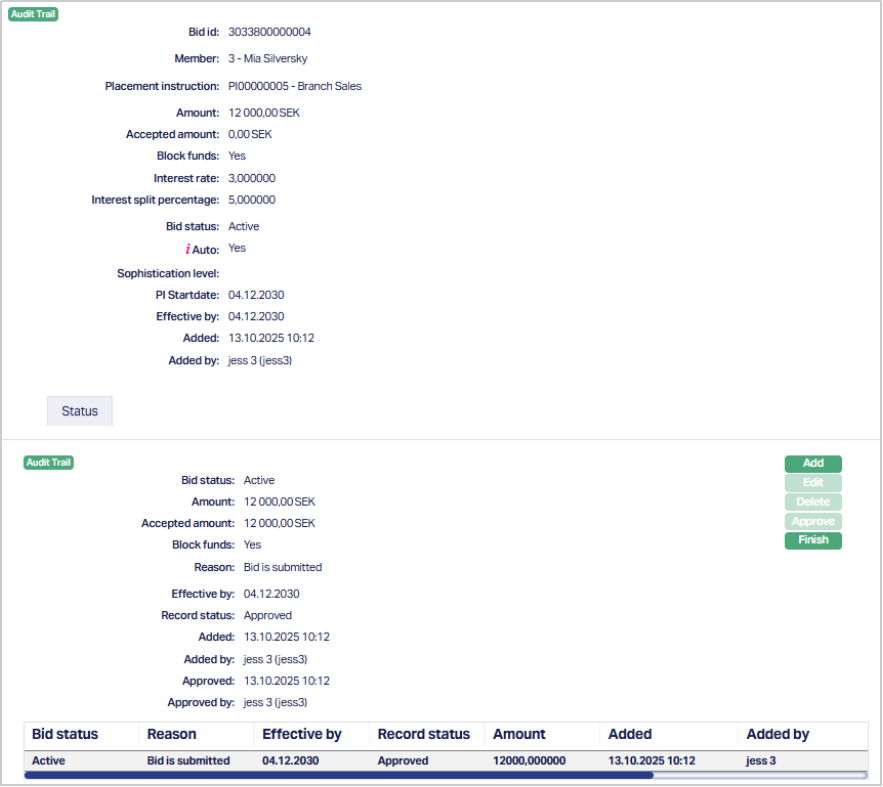
Status sub-tab
The Status tab allows you to view the complete lifecycle of status changes for that bid - including the timestamps, reasons, and approval details.
When a new bid is created, Aura automatically assigns it to the default status Active. This initial entry marks the start of the bid lifecycle and is system-generated.
You can manually change the Bid Status to one of the following depending on the bid’s current state and purpose:
- Accepted - Indicates that the bid has been approved, and the funds associated with the bid are confirmed. When the status is updated to Accepted, the Create Loan button on the Loan Request screen becomes enabled, allowing you to proceed with loan creation based on the accepted bid.
- Withdrawn - Indicates that the bid has been retracted or cancelled by the bidder before acceptance.
- Suspended - Temporarily disables the bid without canceling it, typically used when the bid needs review or correction before further action.
To view/add Status,
1. Access Loan Request then click the Bid tab. Click on the Maintain button which will then display the status sub-tab.
2. Click Add. The Add Status page appears.
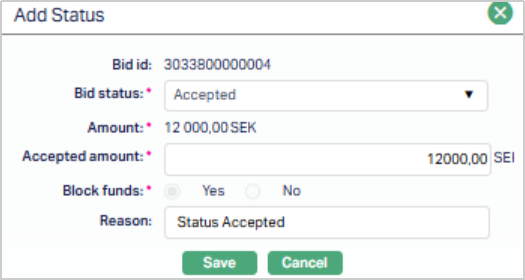
3. Bid ID displays the ID of the Bid you are updating. This is system-generated and cannot be changed.
4. Select the required Status for the Bid from the drop-down list. List includes: Withdrawn, Accepted and Suspended.
5. Amount displays the bid amount in the bid currency. This value is system-generated based on the amount entered at the placement instruction level and cannot be modified.
6. Accepted Amount displays the amount accepted for the bid. This field defaults to the bid amount but can be modified as required before approval.
7. Block Funds indicates whether the funds related to the bid are blocked. This field is disabled and defaults to Yes.
8. Enter any reasons or justification for the status change.
9. Click Save. The Status tab appears with the added and updated details.
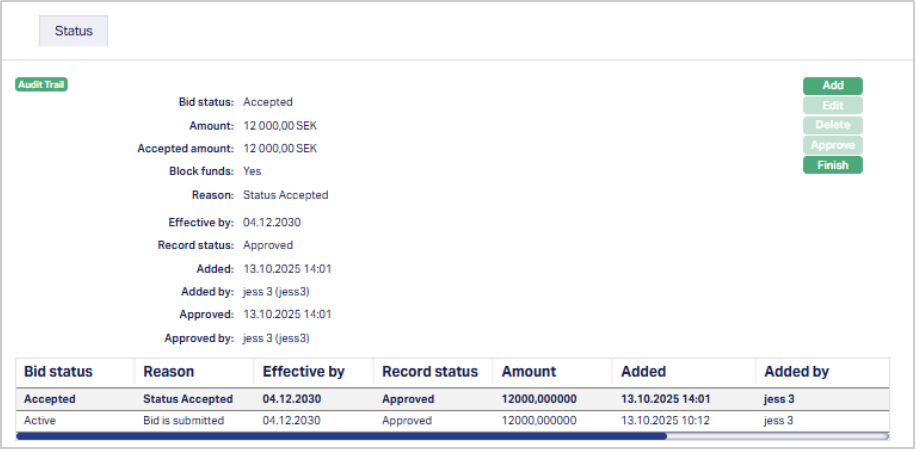
Functions: Add, Edit, Delete, Approve, Finish.
The Edit and Delete buttons are enabled only when the record of the Status is Pending. Status of the record is Pending till it is approved by another user. On approval, the tab status is set to Approved.
Bid Acceptance and Loan Creation
Once a bid is added and saved, it remains in Active status until you take further action. When the bid status is changed to Accepted, additional options become available on the Loan request screen.
Accept Bid: Click Accept Bid to confirm the bid you want to proceed with. Aura updates the bid’s status to Accepted under the Status sub-tab and locks all other bids for the same loan request. Only accepted bids are considered for loan creation.
Create Loan: After a bid is accepted, the Create Loan button becomes active. Click it to generate a loan account under Retail → Loans. Aura automatically carries forward the loan request ID, member details, accepted amount, and interest terms.
Both methods - accepting a bid from the Loan Request page or the Accept Bid drop-down from the status tab have the same result.

Only bids with status Accepted can be used to create a loan. Bids with any other status (such as Withdrawn or Suspended) will not enable the Create Loan option.
Interest Split
Click Interest Split to view the breakdown of the total interest rate between the portal and the lender for the selected bid.
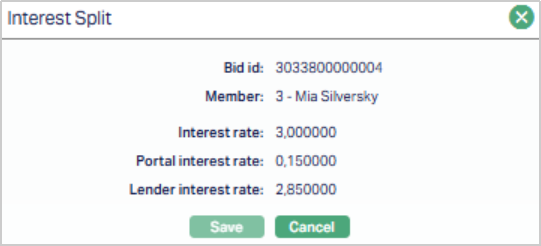
- Bid id is the Unique Identifier of the bid.
- Member displays the member linked to the bid.
- Interest rate displays the total interest rate proposed for the bid.
- Portal Interest rate is the portion of the total interest rate allocated to the portal.
- Lender interest rate is the portion of the total interest rate allocated to the lender.
These fields are read-only and populated automatically based on placement instruction configuration.
Event
Event tab allows you to view the past, current and future events. This tab is non-editable.
To view Events
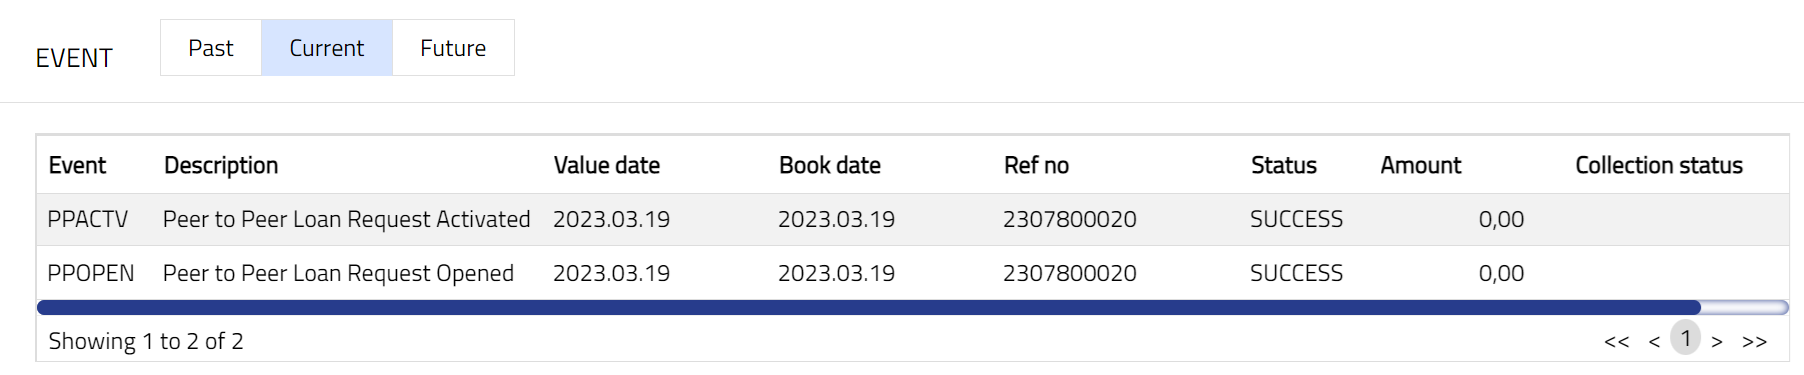
1. Access Loan Request screen then click Event tab. There are three sub-tabs within it -- Past, Current and Future. By default, the Current tab is displayed. It shows the details of the Events that have value date as current business date. The Past tab and Future tab show details of events that have value date earlier than / later than the current business date respectively.
Note: If there are no event then the page will display blank as per the sample screen shot shown below.
Past
A sample of Past tab is shown below:

Current
A sample of Current tab is shown below:
Future
A sample of the Future tab is shown below:
All tabs show the following data:
Event: It displays the code for the event.
Description: It displays the description of the event.
Value Date: It indicates the date on which any event pertaining to the account gets applied. It can be back date, future date or current date.
Book Date: The date of entry / input of the event.
Ref No: The transaction reference number under which the event is processed.
Status: It displays the status of the event. It status can be of the following types.
Pending: Where the event is not yet processed.
Success: Where the event has been processed successfully.
Failure: Where the event has failed during process.
Retry: Indicates a failed event where the system retries to process the event on subsequent business days.
Amount: It indicates the amount processed by the event. Example: Interest liquidation event will have the amount of interest liquidated.
Collection Status: If the Collection status is Pending, it indicates that the deferred charges has not been collected and if the Collection Status is Success, it indicates that the deferred charges has been collected.
| Sl. no | Event Code | Description | Condition |
|---|---|---|---|
| 1 | PPACTV | Peer to Peer Activation | This event occurs when the account is activated, and it occurs only once, i.e., at the time of account activation. |
| 2 | PPOPEN | Peer to Peer Opening | This event occurs when the account is opened, and it occurs only once, i.e., at the time of account opening. |
| 3 | ADDFEE | Additional Fee | This event occurs when you add any additional charge/fee. |
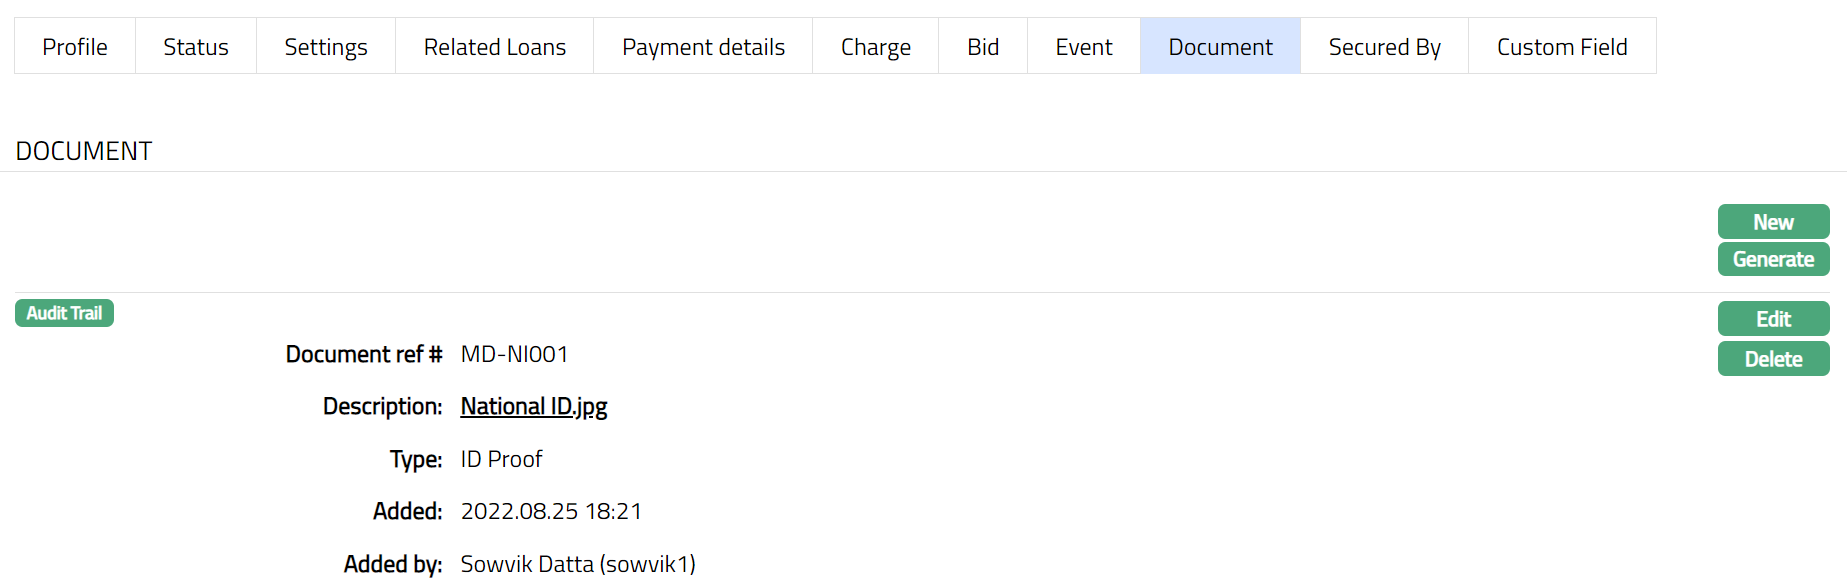
Document
Document tab allows you to upload / generate documents related to the Loan Account. Documents in the form of scanned images or files on your computer can be uploaded. You can categorise the documents as per Document Type and store with a document reference number. You can generate documents related to the Account based on Templates mapped to the product.
To upload document,
1. Access Loan Request page. Click Document tab.

2. Click New. New Document page appears.
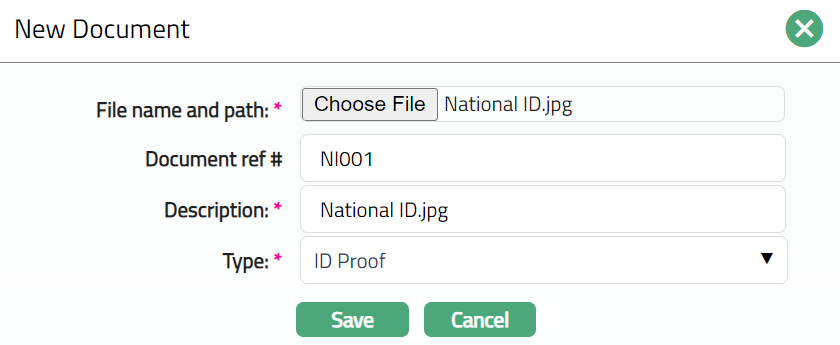
3. Click Choose File button to select the File name and path of the document.
4. Enter Document ref no. for the document. This document reference number is used in Branch view → Documents.
5. Based on the file selected the Description field will be derived. If required, you can change the description.
6. Select Type of the document uploaded. The document types should have been maintained using Admin → System codes → Documents → Document types. Once entered, this cannot be edited.
7. Click Save. Document page appears with the added details.
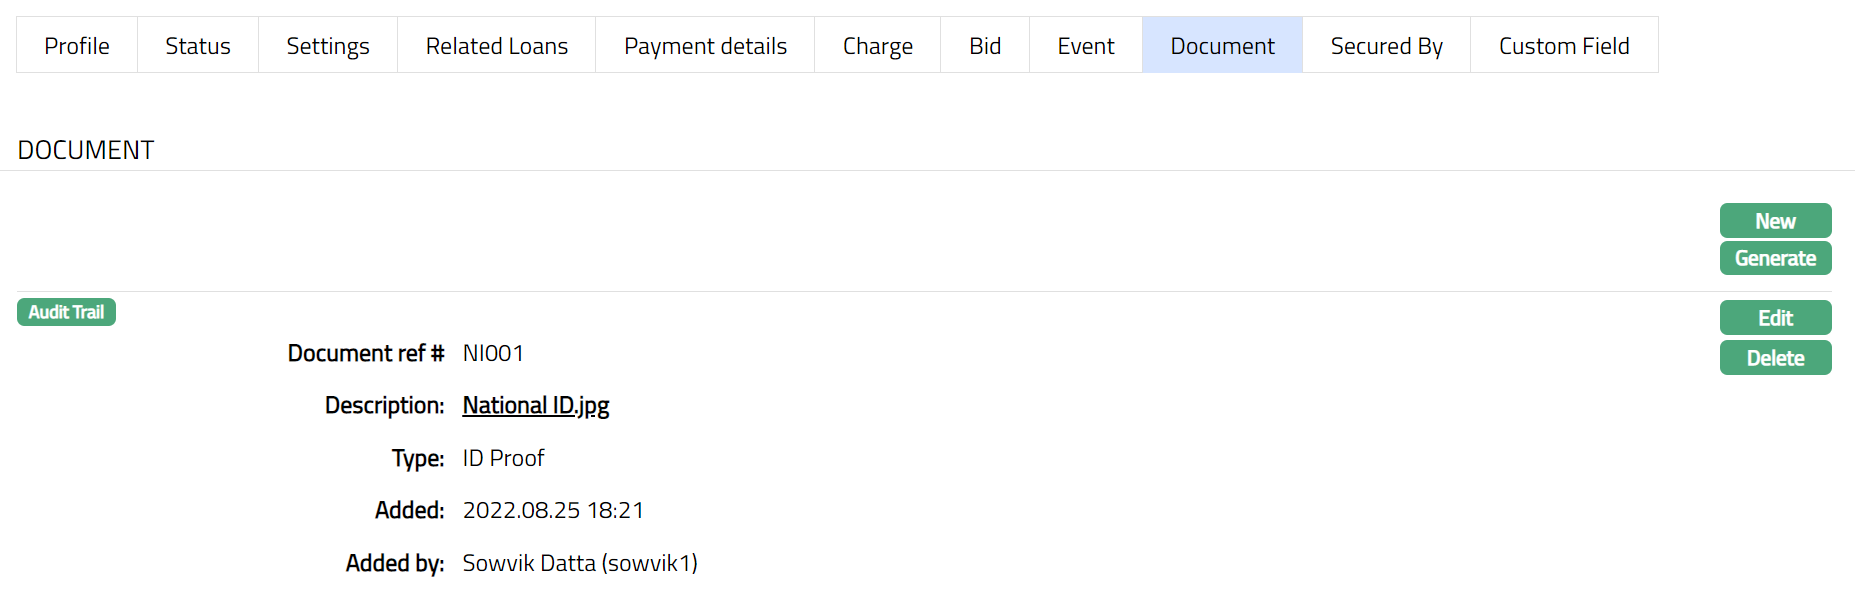
Functions: New, Generate, Edit, Delete.
To generate document,
1. Click Generate to generate the pdf file using the template as maintained under Admin → System codes → Process → Document templates. You have to map the document template for Loan Account using the Document Template Settings tab as maintained under Retail → Settings → Product. Generate Document page will appear where the mapped templates will be displayed.
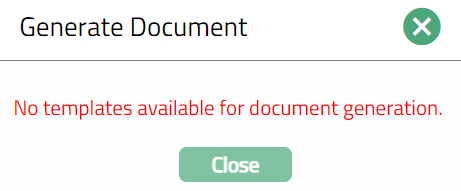
2. Click any template from the list of templates after which the document will be generated based on the selected template as shown below.
To Edit document,
1. Access Loan Request page. Click Document tab.
2. Click Edit. Edit Document page appears.
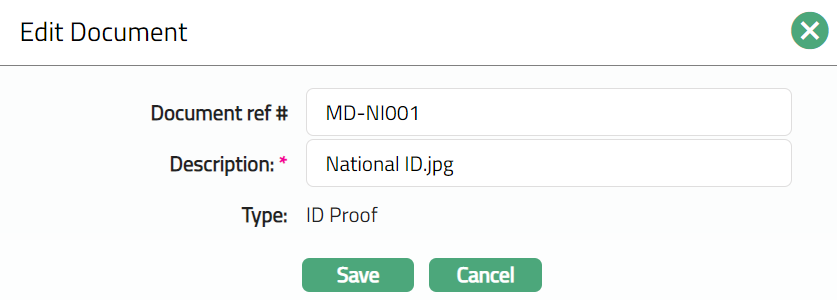
Note: Only Document ref no and Description fields are editable.
3. Click Save. Document page appears with the edited details.
Functions: New, Generate, Edit, Delete
Delete: You can delete a document by a click on Delete button. Aura will ask for confirmation, on approving which the selected document will be deleted.
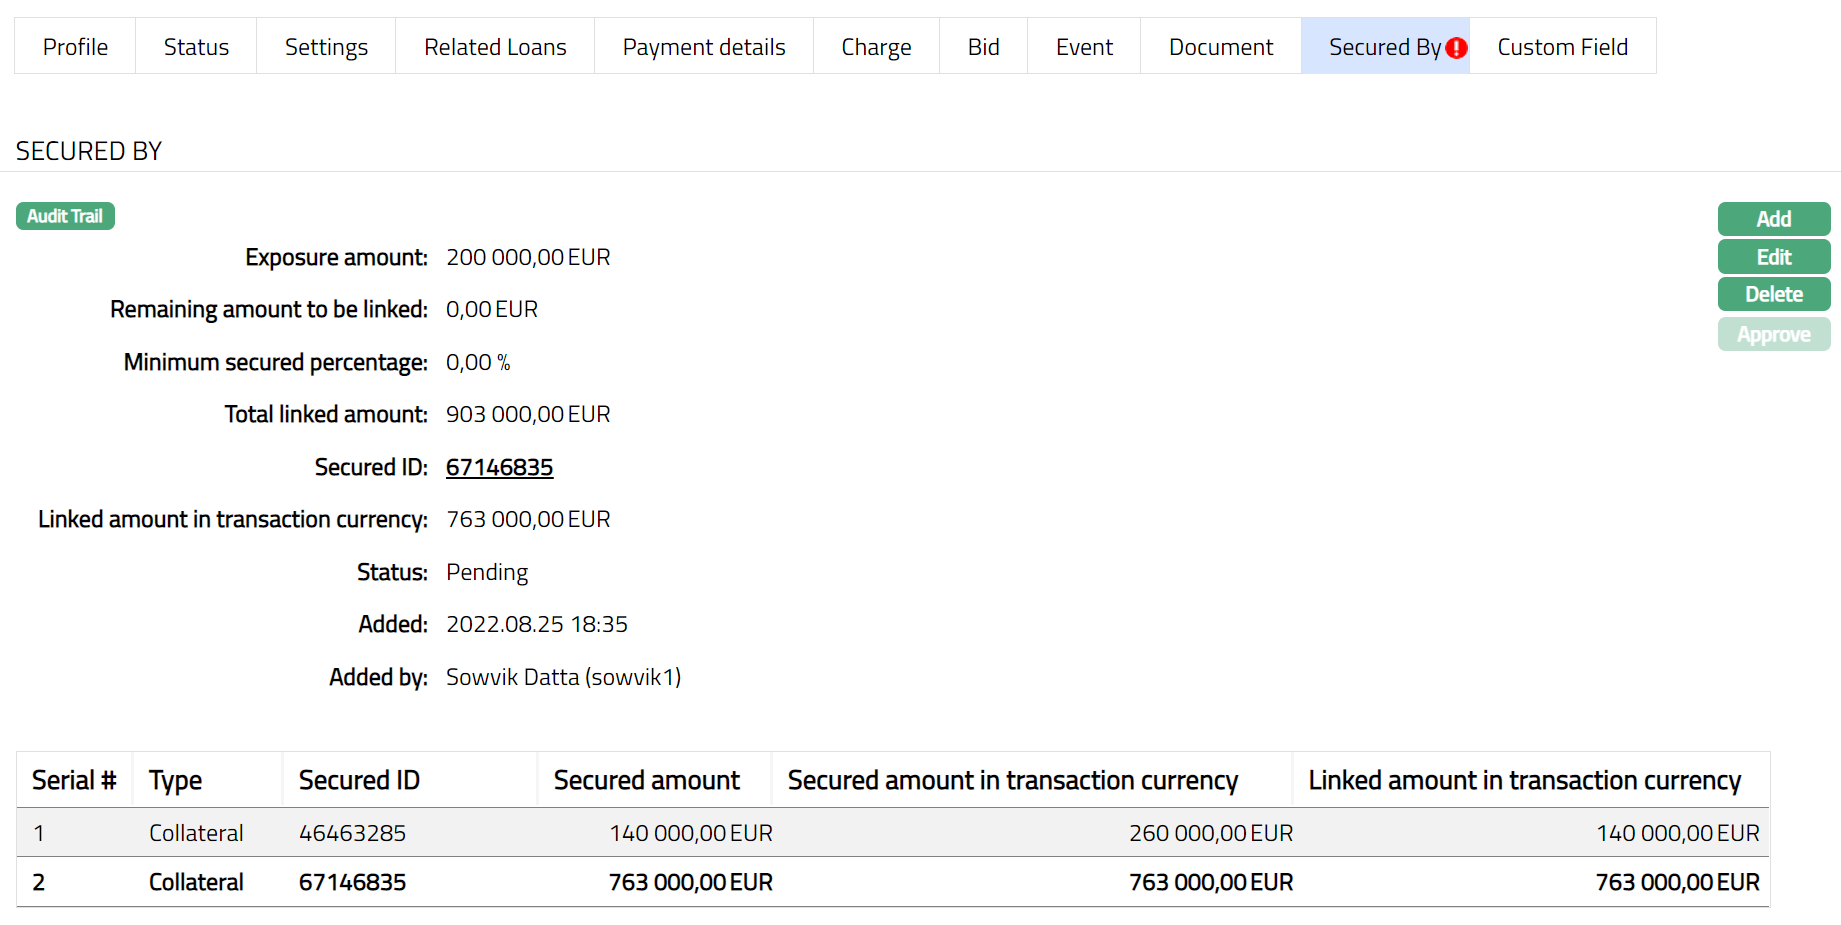
Secured By
During account creation if needed, a limit or collateral is attached to an account, specifying the amount as a security for the loan. You can view and maintain these details using the Secured By tab. You can add multiple limits or collaterals and also change the attached limit / collateral.
To view Collateral/limit attached to the account,
1. Access Loan Request page and click Secured By tab. The details of the Collateral or Limit attached to the account on creation of an account are displayed as shown below.
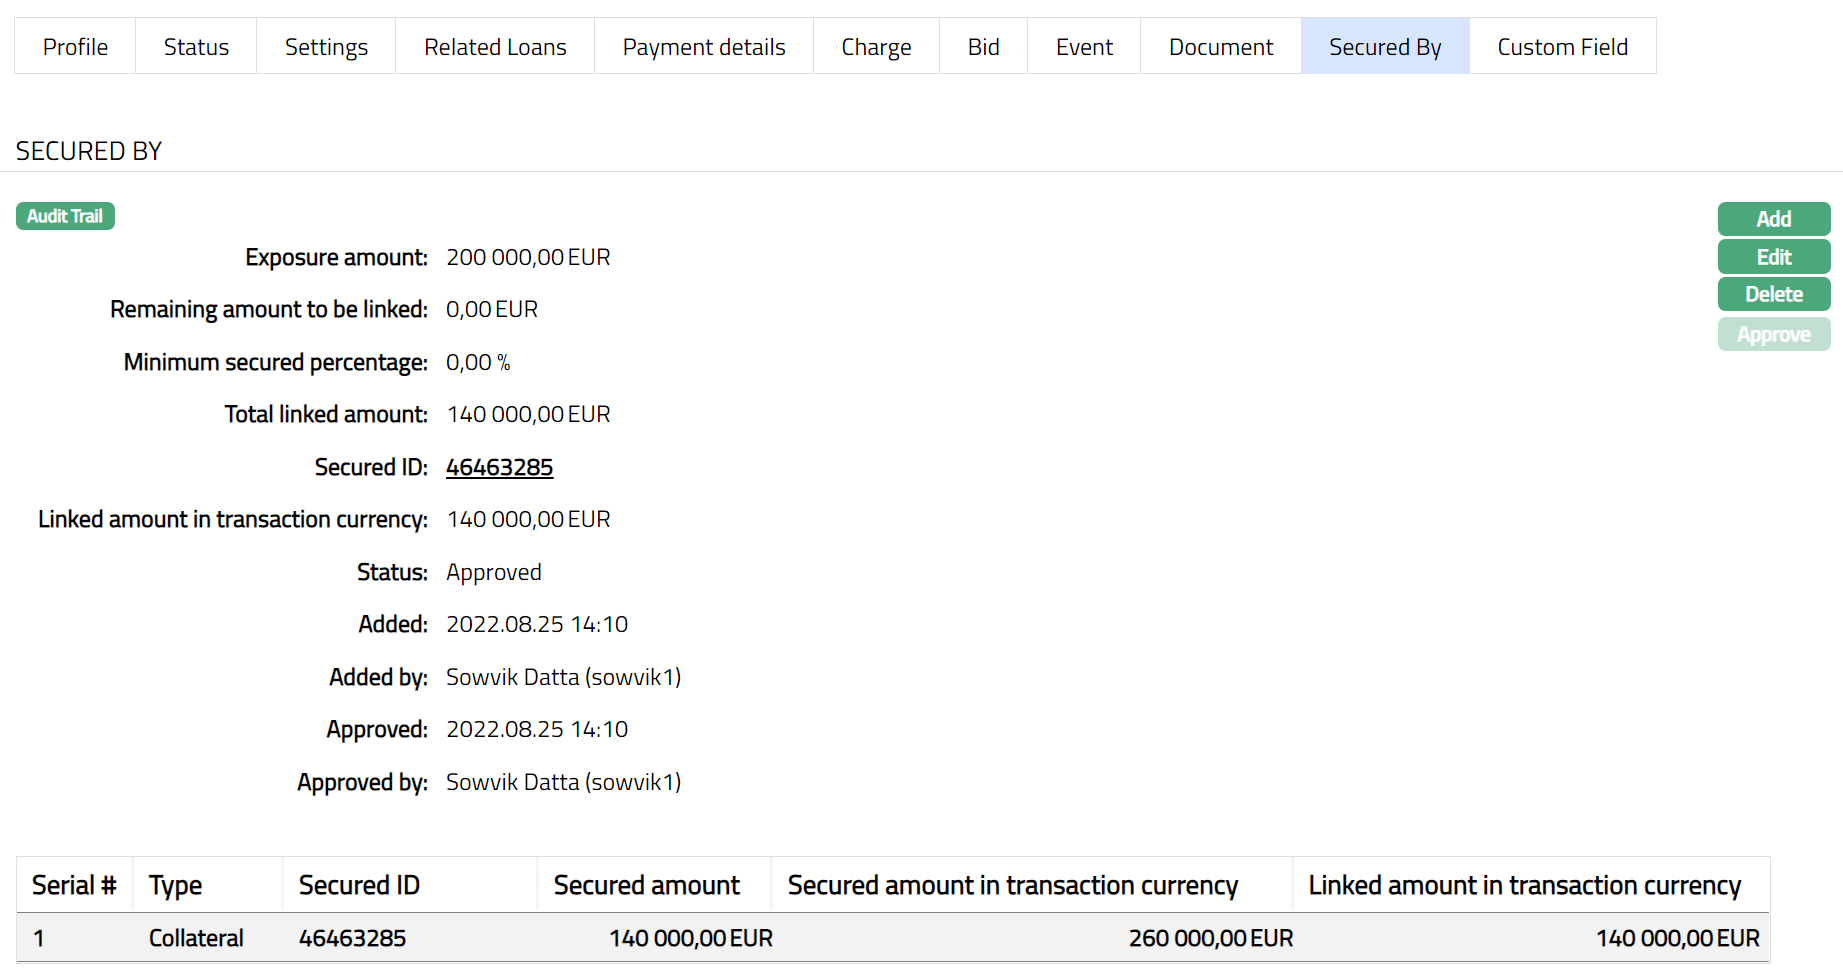
Available fields are:
Type denotes whether the type is collateral or limit.
Secured ID denotes the ID of the security that is attached to the loan account
Secured amount denotes the amount of the loan that are protected by collateral
Secured amount in transaction currency denotes the amount which is protected during the Currency Transaction.
Linked amount in transaction currency is the security amount linked to the Mortgage loan account in account currency
The additional fields that you can view in the tab are explained below:
Exposure amount: In case of the loans the amount disbursed is the exposure amount.
Remaining amount to be linked: The balance amount, i.e. Remaining amount to be linked = (Exposure amount * Minimum secured percentage) -- Total linked amount. The balance might be negative or positive. Both kinds of balances will get displayed.
Minimum Secured Percentage should be maintained while setting up a product and if the Secured By tab is mentioned as "No", then the display value will be 0.
Note: Minimum secured percentage settings will default from product to account and change at product level will always be applicable on new loan accounts.
Total linked amount is the total amount of the security linked to Mortgage loan account in currency of the security attached.
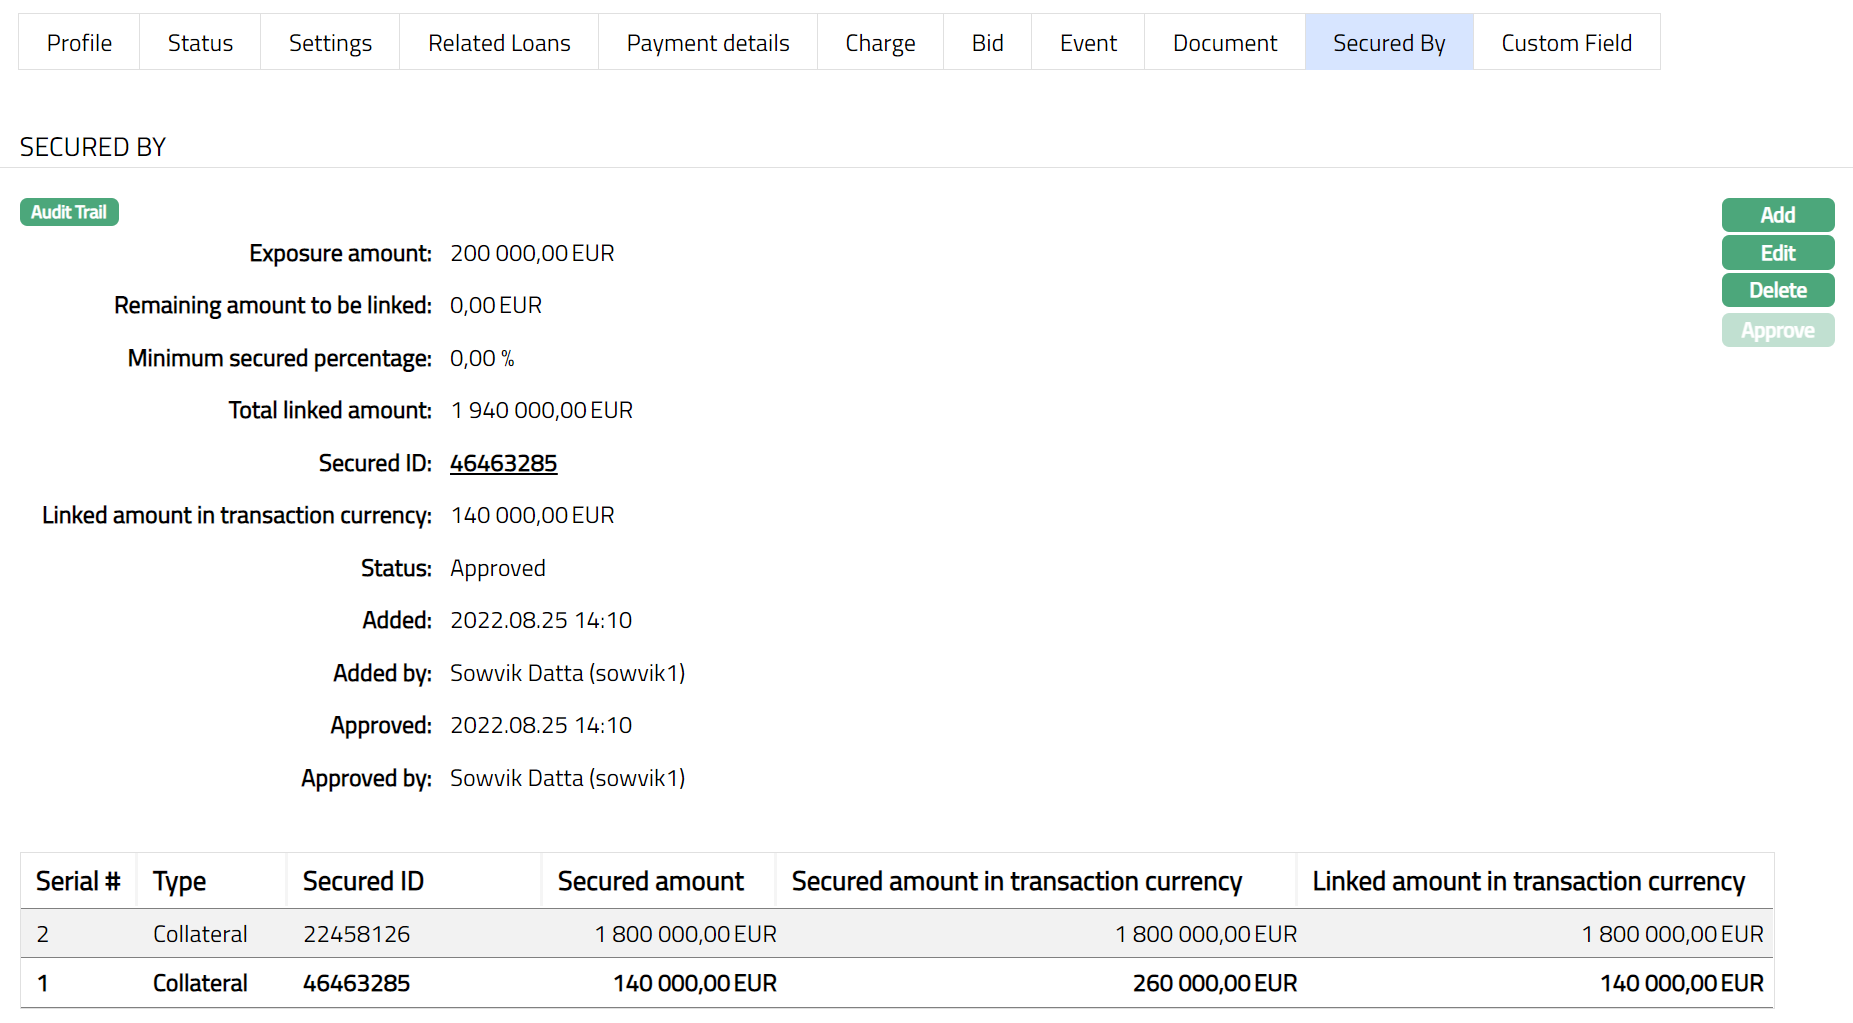
Status denotes the status of the record.
Added field denotes the date on which the record was added.
Added by field denotes the name of the user who created the record.
Approved denotes date on which the record was approved and is displayed only if the record is approved
Approved by denotes name of the user who approved the record and is displayed only if the record is approved.
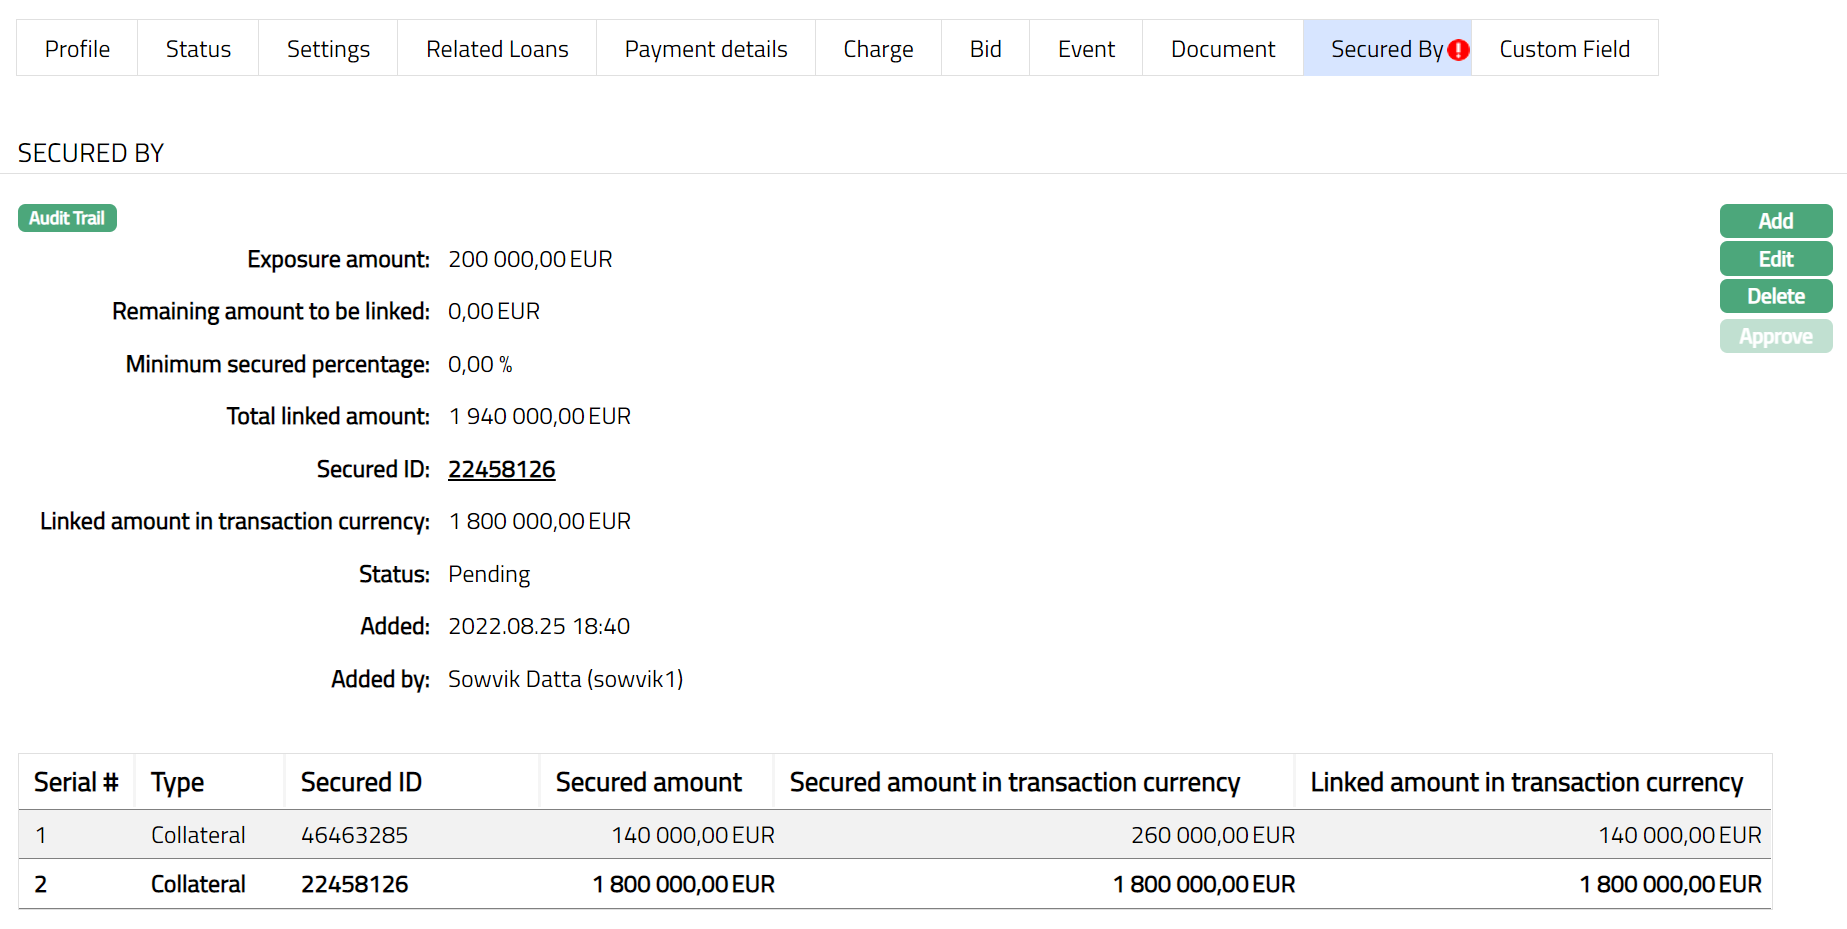
To add Collateral/Limit,
2. Click Add. Add Secured By page appears.
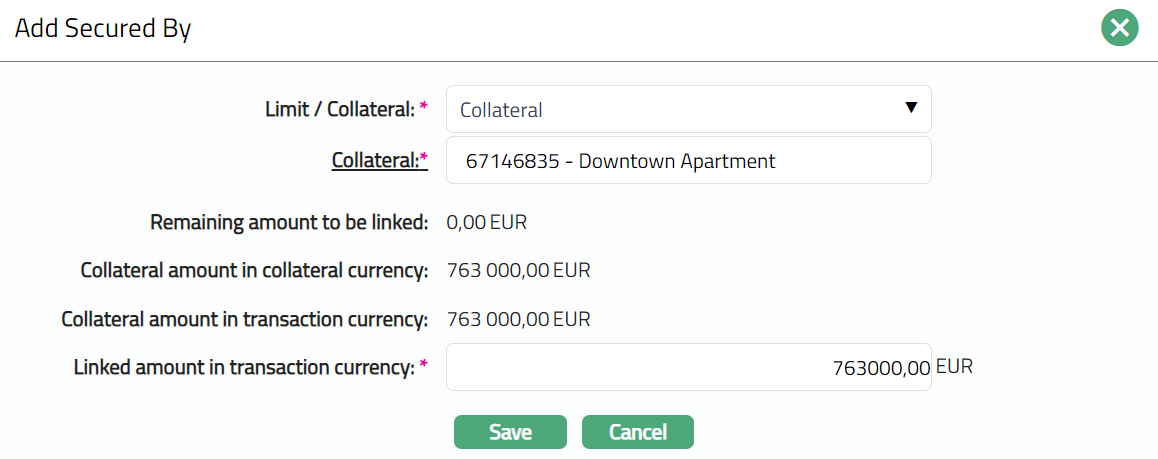
3. Select the security from the drop-down list. It can be Collateral or Limit. In the screen above, Collateral is selected for this account as the security.
4. If you select Collateral, the Collateral hyperlink will get displayed. If you click on the Collateral hyperlink, the collateral search screen appears displaying the list of collaterals with active status maintained under CRM → Collaterals & Limits → Collateral.
Collateral amount in collateral currency will display the unutilized amount of the selected collateral id in collateral currency by default. Aura will calculate the collateral amount as (collateral amount -- Utilized collateral).
Collateral amount in transaction currency is the collateral amount in terms of the account currency. The value will get displayed by default. This value is defaulted to the Linked amount in transaction currency is defaulted from collateral amount in transaction currency. You can modify the value, but the value cannot be greater than collateral amount in transaction currency. Currency code of the transaction currency will be displayed beside the Linked amount in transaction currency.
Linked amount in transaction currency will display the linked amount in account currency. The value is defaulted from Collateral and can be changed while creating an account.
5. Click Save. Secured by page appears with the added details.
Functions: Add, Edit, Delete, Approve
Note: Any change in the tab will set the tab status to Pending till it is approved by another user. On approval, the tab status is set to Approved and the red bubble disappears.
The additional fields that you can view in the tab are explained below:
Status field denotes the status of the tab.
Added field denotes the date on which the record was added.
Added by field denotes the name of the user who created the record.
To Edit Secured by tab,
1. Click Edit. Edit Secured By page appears.
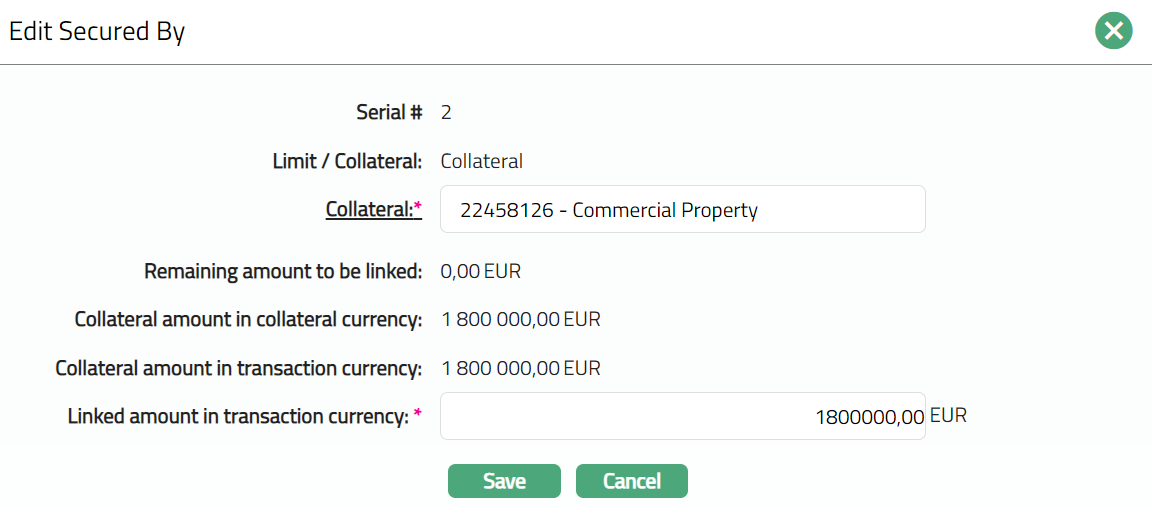
Note: Only the Collateral hyperlink and linked amount in transaction currency fields are editable.
2. Click Save. Secured By page appears with the edited details.
Note: Any change in the tab will set the tab status to Pending till it is approved by another user. On approval, the tab status is set to Approved and the red bubble disappears.
Functions: Add, Edit, Delete, Approve
The following fields are shown only in the View screen and are not editable:
Status field denotes the status of the tab.
Added field denotes the date on which the record was added.
Added by field denotes the name of the user who created the record.
Approved field denotes date on which the record was approved and is displayed only for approved records.
Approved by field denotes name of the user who approved the record and is displayed only for approved records.
Note: Aura allows you to add multiple limit or collateral. The sum of the linked amount in collateral currency of all the collaterals attached has to be greater than or equal to the coverage amount in terms of (Approved Amount * minimum percentage of secured amount defined for an account).
Delete: To delete a limit or collateral, select the limit or collateral record and click Delete. Aura will allow you to delete any collateral only if the linked amount in collateral currency of all the collaterals attached is greater than or equal to the coverage amount in terms of (Approved Amount * minimum percentage of secured amount defined for an account). Aura will ask for confirmation. On confirmation the record will be deleted. If only one collateral is attached, then system will not allow you to delete that collateral.
Credit Evaluation
The Credit Evaluation tab allows you to capture and maintain detailed credit information for a loan request. This tab provides transparency about the borrower’s financial situation, organizational background, and investment risk profile, supporting informed lending decisions. You can access and update these details at any time, even after the loan request has been activated.
The tab consists of five sub-tabs:
Each sub-tab contains fields relevant to different aspects of the credit evaluation process.
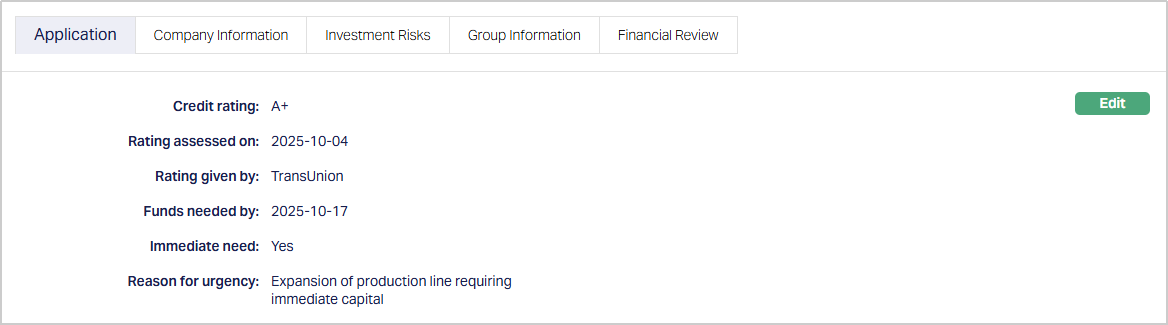
Application
The Application sub-tab is where you record the borrower’s credit rating and urgency details. This sub-tab ensures that critical credit information, including urgency of funding, is captured for each loan request. Immediate needs and credit ratings inform your assessment and prioritization of funding
To add/edit the Application sub-tab,
1. Access Loan Request then click Credit Evaluation tab and select the Application sub-tab. By default, this tab appears blank when a new loan request is created.

2. Click Edit. Edit Application page appears.
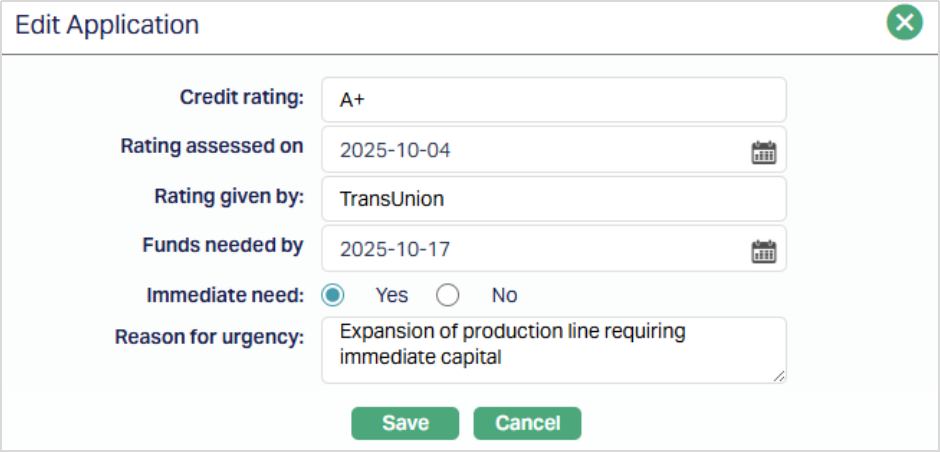
3. Enter the credit rating assigned to the borrower for this specific loan request.
4. Rating assessed on - Select the date on which the rating was performed. This field becomes mandatory if a Credit Rating is provided.
5. Rating given by - Enter the agency or individual who provided the rating. Mandatory if Credit Rating is provided.
6. Funds Needed By - Select the date by which the borrower requires the funds.
7. Immediate Need - Use the radio button to indicate if the borrower needs the funds immediately. Default value is No; change to Yes if applicable.
8. Reason for Urgency - Mandatory only if Immediate Need = Yes. Enter the reason why funds are required immediately.
9. Click Save. The Application sub-tab appears with the added/edited details.
Function: Edit.
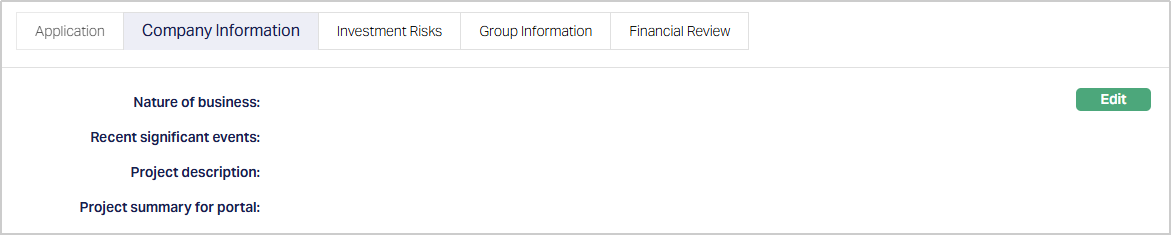
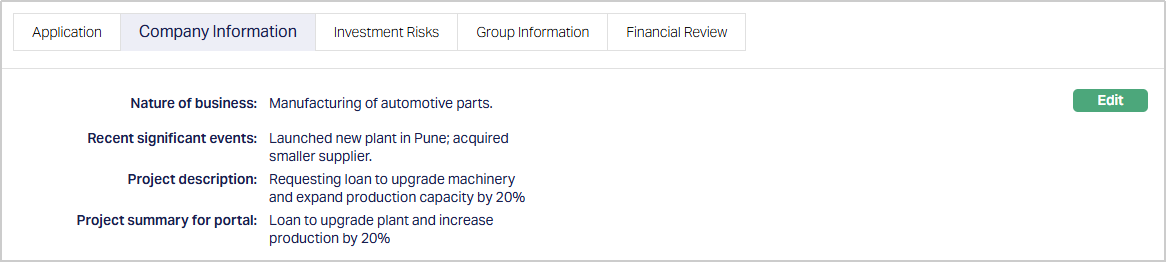
Company information
The Company Information sub-tab captures details about the borrower’s organization and the loan project. Capturing organizational and project details ensures that lenders have a clear understanding of the borrower’s activities and the purpose of the loan, aiding in informed decision-making.
To add/edit the Company information sub-tab,
1. Access Loan Request then click Credit Evaluation tab and select the Company information sub-tab. By default, this tab appears blank when a new loan request is created.
2. Click Edit. Edit Company Information page appears.
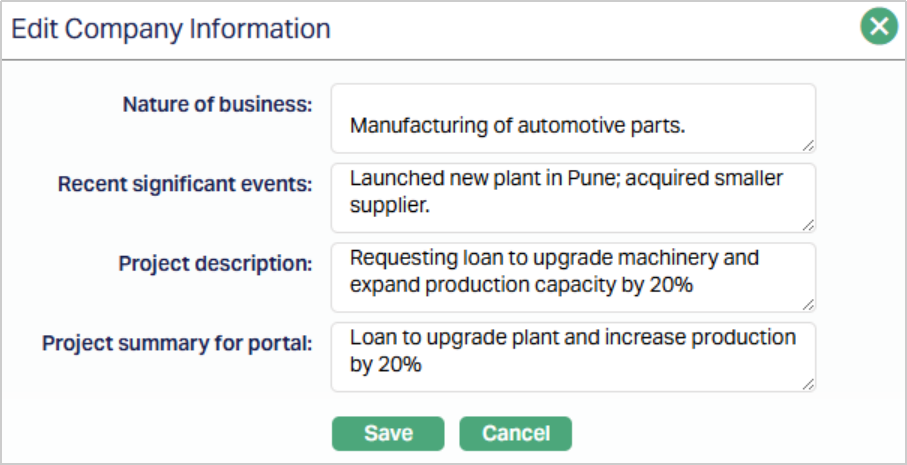
3. Nature of Business - Describe the borrower’s business type.
4. Recent Significant Events - Document any recent events that may impact the borrower’s operations or risk profile.
5. Project Description - Provide a detailed description of the project for which the loan is sought.
6. Project Summary for Portal - Enter a summary of the project information that will be displayed to lenders on the portal.
7. Click Save. The Company Information sub-tab appears with the added/edited details.
Function: Edit.
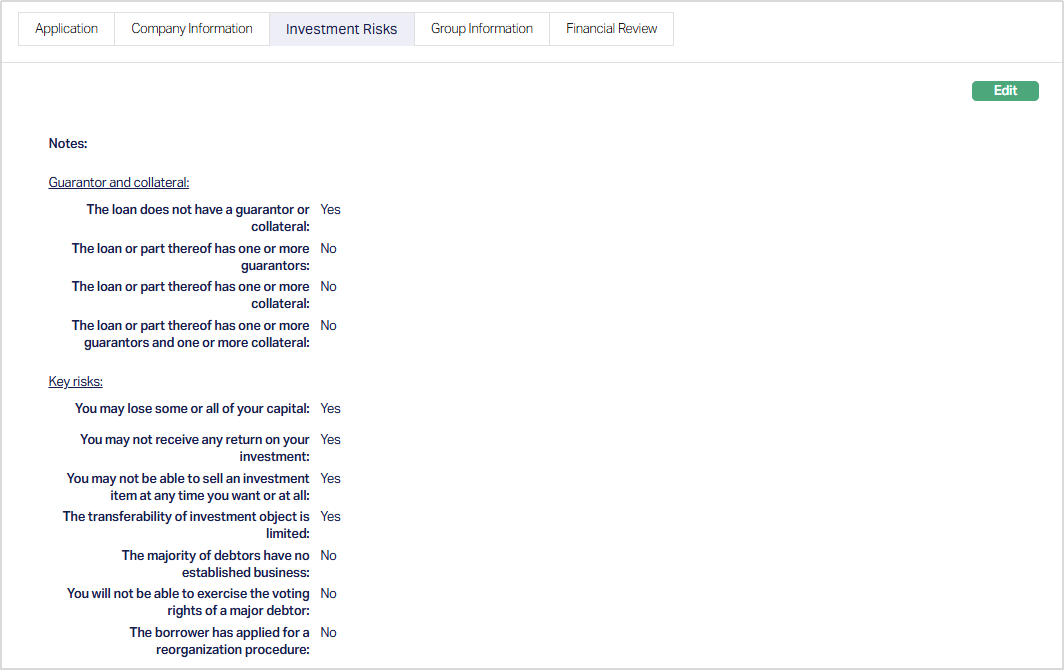
Investment Risks
The Investment Risks sub-tab allows you to record notes, guarantor and collateral information, and key risk indicators associated with the loan. This sub-tab provides a consolidated view of the borrower’s risk profile, helping lenders understand exposure and make informed investment decisions.
To add/edit the Investment Risks sub-tab,
1. Access Loan Request then click Credit Evaluation tab and select the Investment Risks sub-tab.
2. Click Edit. Edit Investment Risks page appears.
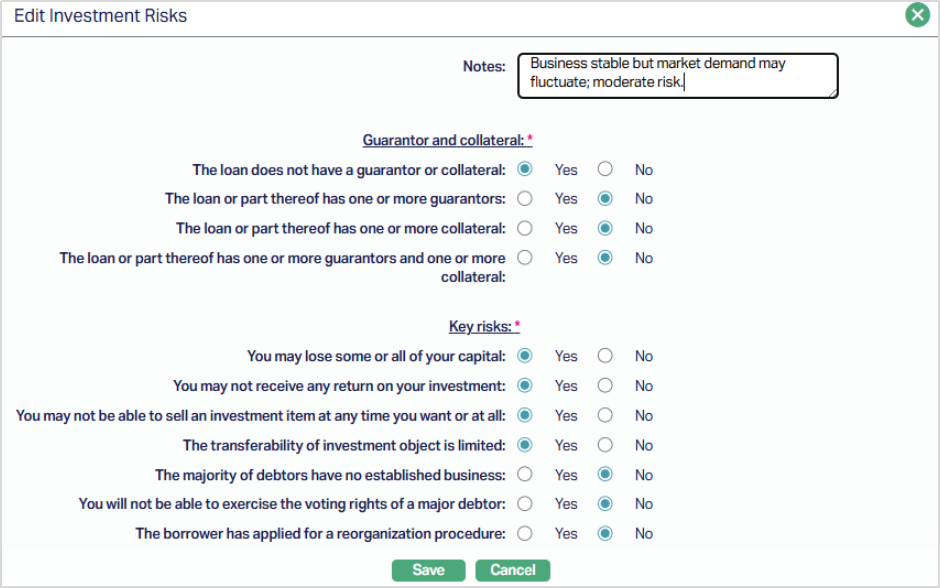
3. Enter credit analyst or loan evaluation team notes.
4. Guarantor and Collateral - Select applicable options using radio buttons to indicate the presence or absence of guarantors or collateral.
5. Key Risks - Radio button options capture potential risks to the lender, including risk of capital loss, limited transferability, or borrower reorganization status.
6. Click Save. The Investment Risks sub-tab appears with the added/edited details.
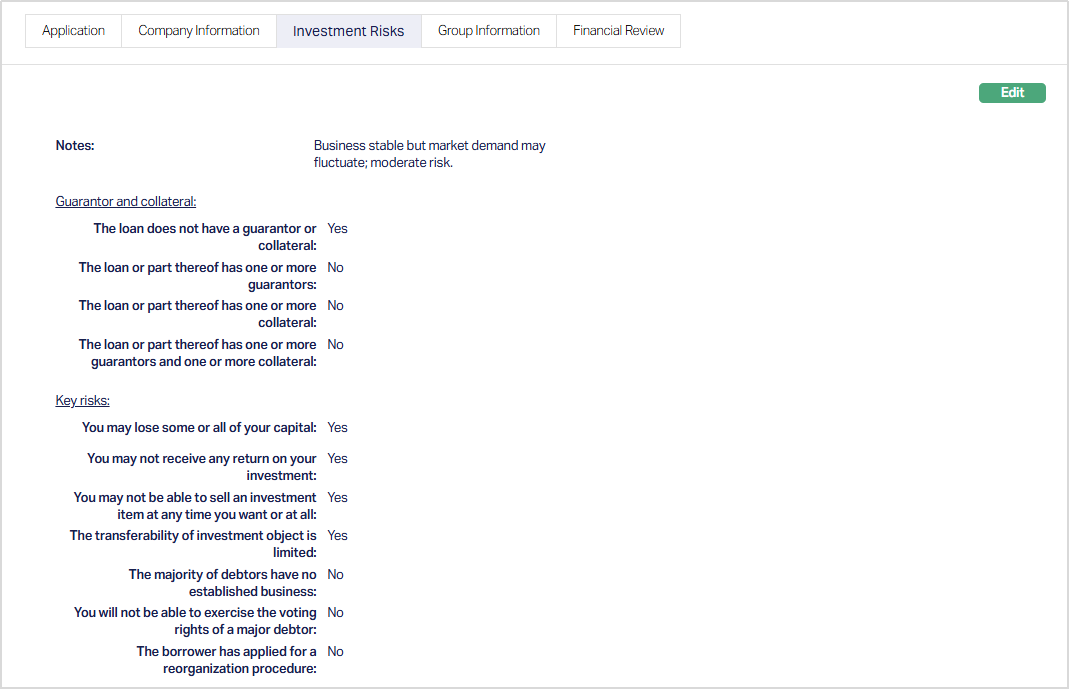
Function: Edit.
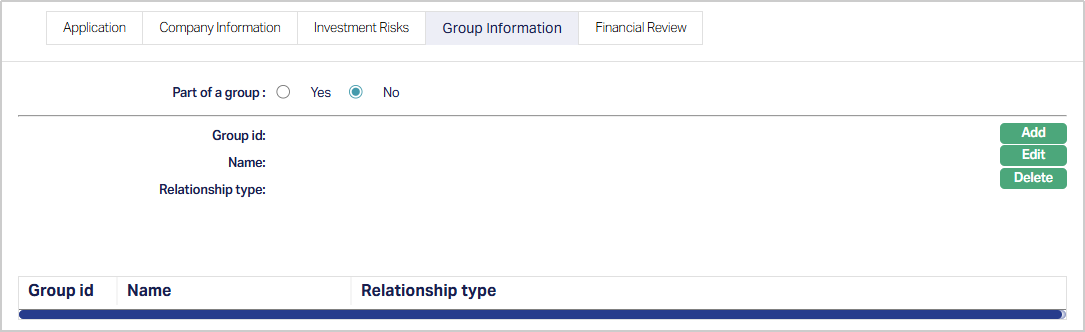
Group Information
The Group Information sub-tab manages the borrower’s relationships with other organizations or groups. You can add, edit, or delete group associations. Maintaining borrower group information ensures visibility of inter-company relationships, which can impact credit assessment and risk exposure.
To add/edit the Group information sub-tab,
1. Access Loan Request then click Credit Evaluation tab and select the Group information sub-tab. By default, this tab appears blank when a new loan request is created.
Part of a group- Yes/No indicator to specify if the borrower is part of a corporate or organizational group.
2. Click Add. Add Group Information page appears.
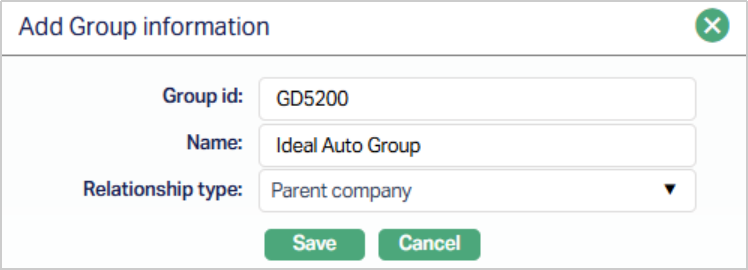
3. Enter the unique identifier Group ID of the group.
4. Enter the name of the group.
5. Select the type of relationship between the borrower and the group from a pre-defined dropdown (e.g., main group, parent company, subsidiary, joint venture).
6. Click Save. The Group Information page appears with the added details.
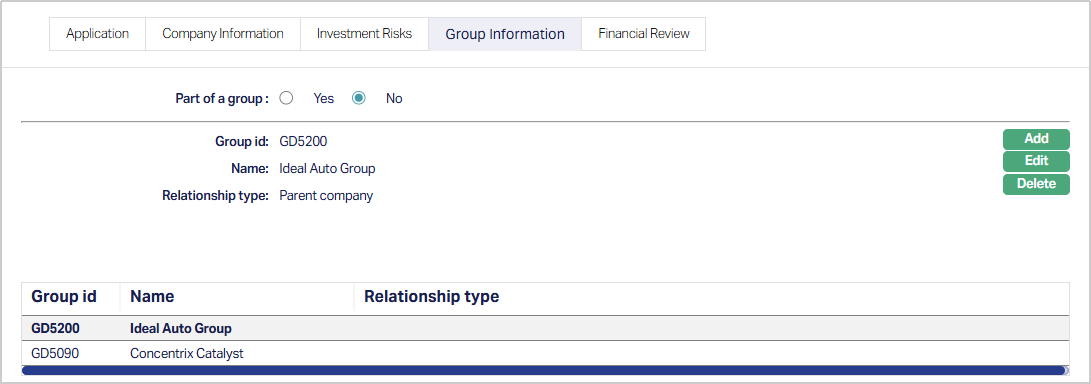
Functions: Add, Edit, Delete.
Add: To add a new group, click the Add button and enter the required details. The new group will be saved once you click Save.
Edit: To modify an existing group, select the group and click the Edit button. All fields become editable. After making the changes, click Save to update the information in Aura.
Delete: To remove a group, select the group you want to delete (it will appear in bold), then click Delete. Aura will prompt you for confirmation. Once confirmed, the group will be permanently removed.
Financial Review
The Financial Review sub-tab is used to record notes about the borrower’s financial situation.
To add/edit the Financial Review sub-tab,
1. Access Loan Request then click Credit Evaluation tab and select the Financial Review sub-tab. By default, this tab appears blank when a new loan request is created. This sub-tab allows the credit team to maintain a high-level assessment of the borrower’s financial position, supporting the overall credit evaluation process.

2. Click Edit. Edit Financial Review appears.
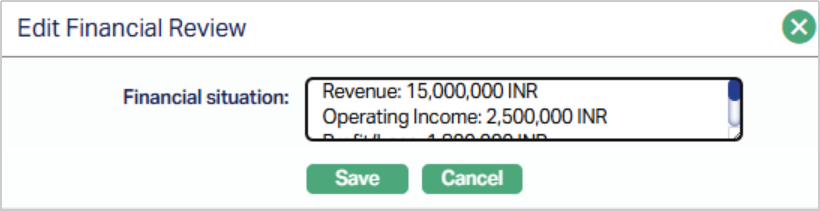
3. Enter text notes about the borrower’s financial health, such as liquidity, solvency, or other relevant financial observations.
4. Click Save. The Financial Review sub-tab appears with the updated/edited details.

Function: Edit.
Note: All changes made in the Credit Evaluation tab are saved directly against the loan request record. You can edit these details any time, even after loan request activation, ensuring that your assessment remains up-to-date.
Custom Field
This menu option allows you to define fields apart from those that are already available in the standard version of Aura. Thus, it enables you to customize additional data storage and use as required to suit your specific business needs.
To maintain Custom Field
1. Access Peer to Peer Loan Request page. Click Custom Field tab.

2. The field appears only when it is created in Admin → System codes → Custom fields → Custom fields and linked to Peer to Peer option in Admin → System codes → Custom fields → Field mappings.
3. Click Edit. Edit Custom Field page appears. In the following illustration, one custom field Loan Category has been mapped to the Product as shown below:

4. Enter Loan Request Details to be associated with the Peer-to-Peer.
5. Click Save. Custom Field tab appears with the editeddetails.

Function: Edit