Loan Application Status
The Loan Application Status screen allows you to define additional statuses that can be used during the processing of a Loan Application.
These statuses are "user-defined" and are used to represent intermediate stages (for example, during credit evaluation or internal processing).
They do not replace or define the core lifecycle of a Loan Application, which is controlled by the system.
How this Configuration is used in Aura:
When you create and maintain Loan Application Status in this screen, its availability depends on its current state:
- If the status is Active, it becomes available for selection in the Status tab of Loan Application under Retail. (Retail → Loans → Loan Application → Status tab)
- If the status is Suspended, it will not be available for use in Retail.
This means that this configuration directly impacts which additional statuses you can use while progressing a Loan Application.
Important Notes on Status Configuration:
When creating a Loan Application Status, you should maintain the Status Name in a standard readable format, using proper casing (for example - Accepted, Under Review, Credit Check)
Avoid maintaining status names in formats such as all uppercase (for example, ACCEPTED), as this may lead to inconsistencies in how the status is displayed or used within Loan Application processing.
Using clear and consistently formatted status names ensures that the statuses appear correctly and are easy to understand during Loan Application processing.
The following are the various tabs that appear on the Loan Application Status page:
To add a new Loan Application Status record,
1. From the Admin menu, click Status and then Loan Application status. The Loan Application Status search page appears.

2. Click Add. The New Loan Application Status → Profile (1/2) page appears.

3. Status Name - This defines the name of the status that will be available during the Loan Application processing.
4. Description - This provides additional context or explanation of the status.
5. Click Next. The New Loan Application Status → Confirmation (2/2) page appears.

6. Click Finish. Loan Application Status page appears displaying the details of the Status you added. The record is set to Active by default.
Functions: Add, Search, Delete, Suspend
Delete: You can delete a Loan Application status by clicking Delete. However, before deletion, Aura checks whether the status is already used in any Loan Application. If the status is in use, Aura will not allow deletion. If the status is not used, the record will be deleted after confirmation.
Suspend: You can suspend the Loan Application Status by a click on the Suspend button. When you click on the Suspend button, Aura will ask for confirmation. On confirmation Aura will suspend the Loan Application Status and Activate button will appear in place of the Suspend button.
Activate: If you want to activate a suspended Loan Application Status record then click on the Activate button. Aura will ask for confirmation. On confirmation Aura will Activate the Loan Application Status and Suspend button will appear in place of the Activate button.
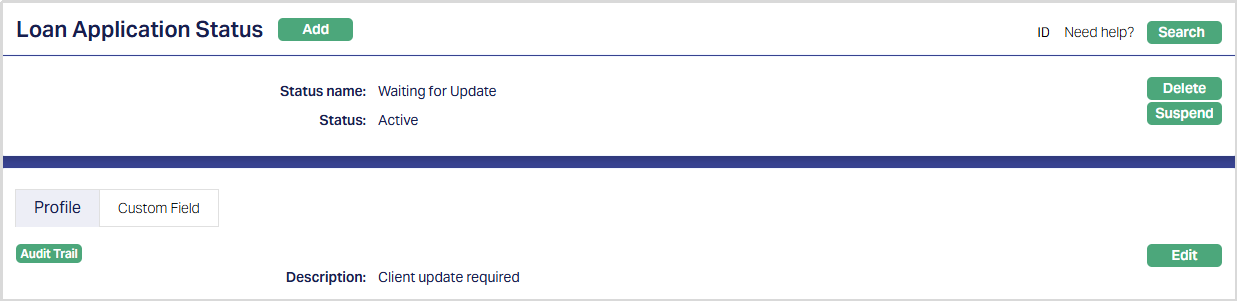
Profile
The Profile tab, which is the default tab in the Loan Application Status screen, shows the basic Status details which were added in New Loan Application Status → Profile (1/2)
To view/edit the Status,
1. Access Loan Application Status page. By default, the Profile tab will be displayed.

2. Click Edit. The Edit Profile page appears.
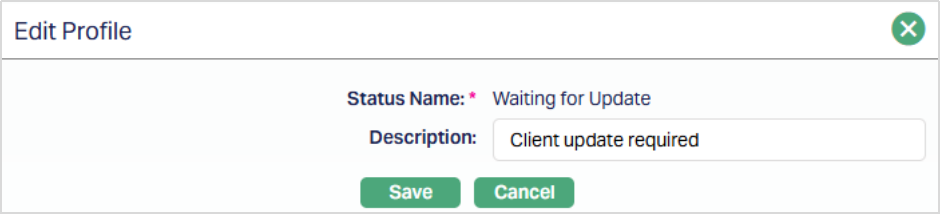
Note: Only the Description field is editable.
3. Click Save. The Profile page appears with the edited details.
Function: Edit
Custom Field
This option provides you the flexibility to define fields apart from those that are already available in the standard version of Aura. Thus, it enables you to customize additional data storage and use as required to suit your specific business needs.
1. Access Loan Repayment page. Click the Custom Field tab.

2. The field appears only when it is created in Admin → System codes → Custom fields → Custom fields and linked to specific Accounts options in Admin → System codes → Custom fields → Field mappings.
3. Click Edit. Edit Custom Field page appears. In the following illustration, a custom field, Last Review Date has been mapped to the Account as shown below.

4. Enter the Last Review Date.
5. Click Save. Custom Field page appears with the edited details.

Function: Edit