Marketplace Loan Placement Settings
A Placement Setting is similar to a Product set up for Accounts. It is a kind of a template that allows you to maintain the details of different kinds of investment products that are offered to investors. Once the Placement Setting is created, the values in these are defaulted to the Placement Instructions that are created under that Setting, with an option to change the details at the Placement Instruction level.
The following are the tabs in a Placement Setting:
Creating a Placement Setting
To create new Placement Setting
From Retail menu, click Peer to Peer, Settings, and then Placement Settings. The Placement Setting Search page appears. All Placement Settings available in Aura appear on the page.

Click Add. New Placement Setting -- Profile (1/5) appears.
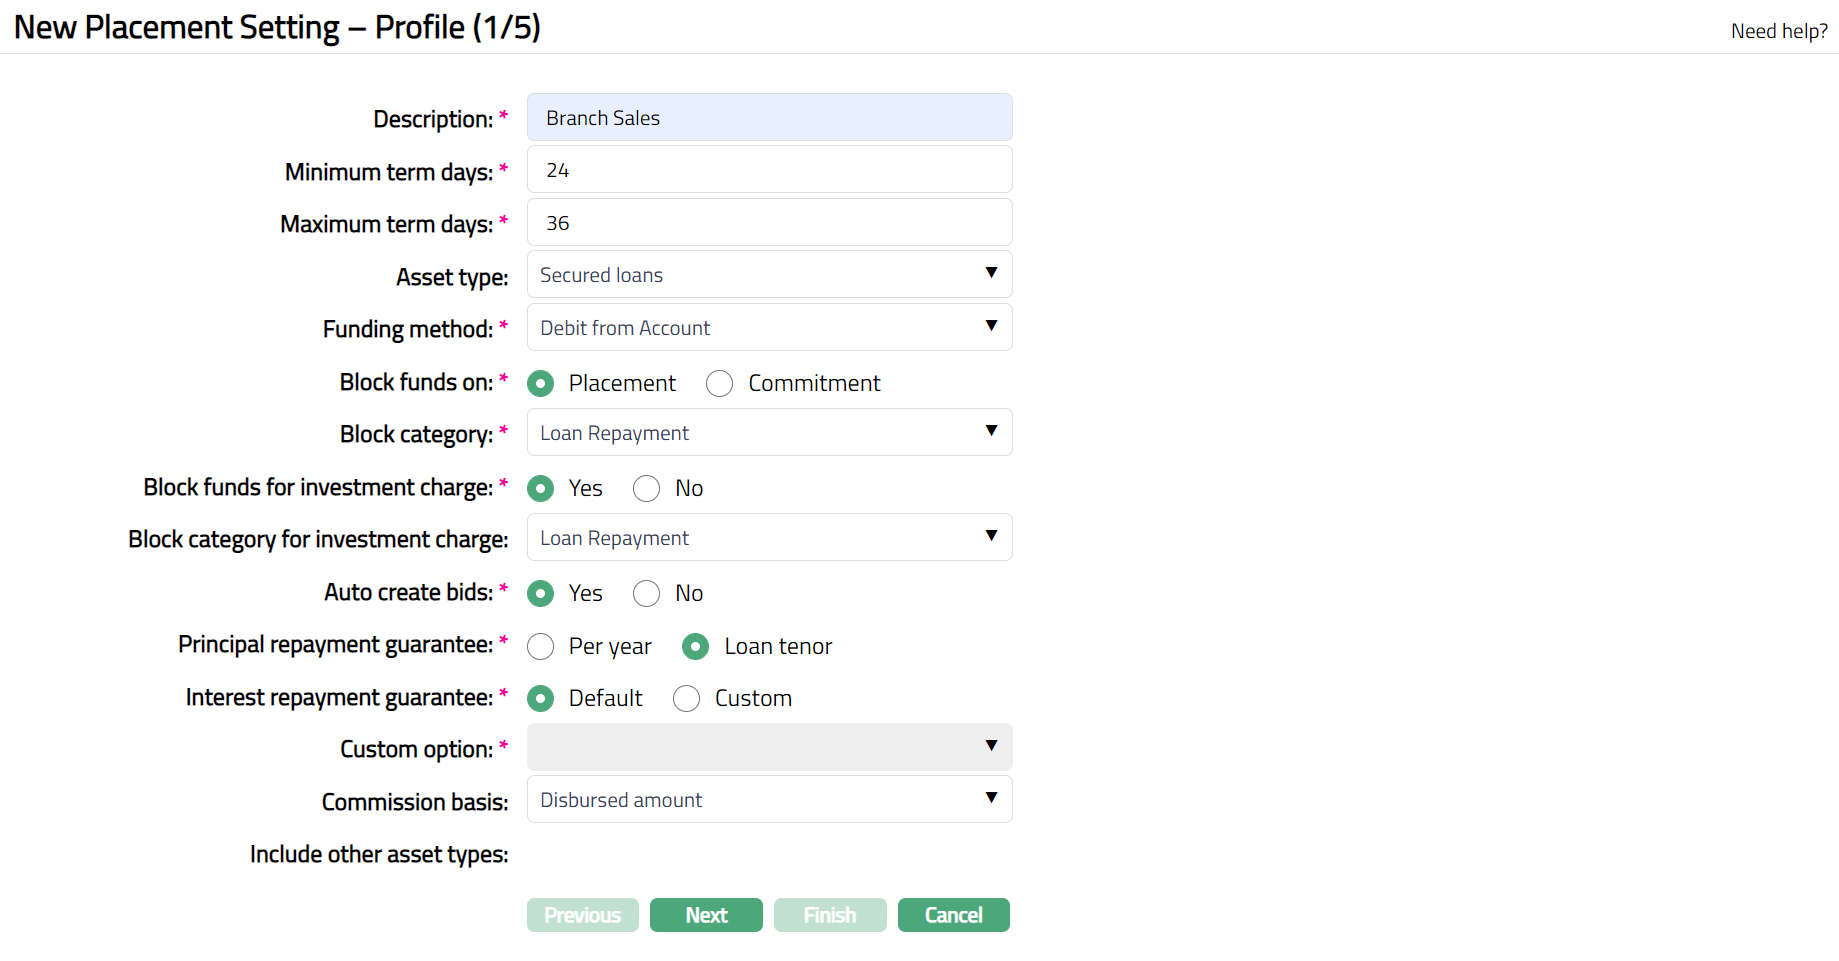
Enter a Description for the Placement Setting.
Specify the Minimum and Maximum term days for the placements to be available on the market.
Choose an Asset Type -- Available Asset Types are Unsecured Loans, Secured Loans, Subordinate and High-Risk Loans. Based on the Asset Type selected here, during Placement Instruction creation, only such Placement Setting where the Asset Type matches will be available for the user to choose. This will also be used during auto-creation of bids.
Select the Funding method for any Placements under this Setting: Option available is Debit from Account
Block Funds On indicates when the funds will be blocked. This is applicable only when funding method is 'Debit from Account'. It ensures that the funds cannot be used by the Lender for any other purposes. Options are:
a. Placement: Funds will be blocked along with Placement -- i.e., when the Lender (Investor) gives an instruction for the Placement
b. Commitment: Funds will be blocked on the Commitment Date as indicated in the Loan Request
Block Category indicates the specific Block Category that has to be used during Amount Block creation based on Block Funds On. Choose from all the Block Categories maintained in Aura under Admin, where Balance Check = Check for available balance
Block Funds for Investment charge indicate if funds have to be blocked also for investment charges when the lender makes a placement by selecting radio button Yes or No as required
Block Category for Investment charge, if you have chosen to block funds for investment charges as well, indicate the specific Block Category that has to be used for the same
Auto create Bids, you can specify that Bids have to be manually placed for certain products using the auto-create bids flag. By default, this is Yes, indicating that Bids will be automatically created by Aura once the lender has given her Placement Instruction.
You can choose to specify if the Principal Repayment Guarantee that is defined as a charge is to be applied based on the entire Loan Tenor or Per Year using the next field
You can choose to specify if the Investment Repayment Guarantee by selecting the radio button Default or Custom. Note: By default, the Default radio button will be selected.
Custom Option field will be activated once you select Custom radio button under Investment Repayment Guarantee.
Commission Basis is to indicate whether the Agent Commission on the Placement Instruction will be based on the Disbursed Amount or the Income Earned.
Note: Commission calculation has to be customized during Implementation
Enter Include other asset types.
Click Next. The New Placement Setting -- Currency (2/5) appears.

Specify the Currency in which this product is available. Choose from the active currencies maintained in Admin
Minimum placement amount indicates the minimum amount that has to be placed for this Placement Setting for this currency
If you (Portal) would like to retain a part of the Interest received under this Placement Setting, specify the same under Interest split percentage. Example: If you input 10% here and the Loan Interest is 12%, your (Portal's) share will be 10% of 12% = 1.2%; and Lender's share will be 10.8%.
Note: If this is left blank, indicates that the Portal will not get any share in the interest; and the Lender will receive all the interest under this Setting
Click Next. The New Placement Setting -- Charges (3/5) appears.
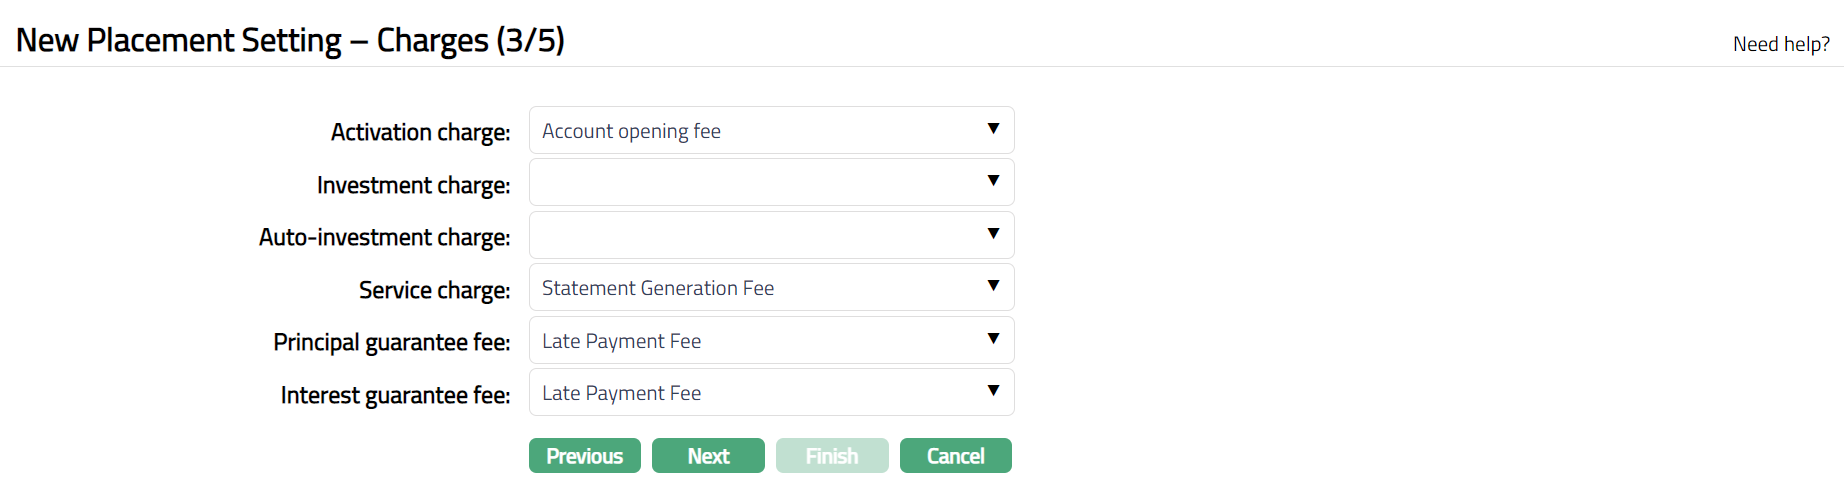
Activation Charge is an optional field to indicate a charge for any Placement Instructions that have been created and activated under this Setting. Thus, this is a one-time charge on approval of Activated Status of the Placement Instruction. The charge will be applied when the Activated Status of any Placement Instruction under this Setting is approved. The charge amount will be debited from the Funding Account. It can be Flat or Banded; if Banded, the Placement Amount will be taken as the Basis for the Charge
Investment Charge is an optional field to indicate a charge for any Placement Instructions where user-created Placement Instructions have been successfully converted to a Loan under this Setting. The charge will be applied when any Bid for a User-created Placement Instruction under this Setting has been accepted and a Loan is activated. The charge amount will be debited from the Funding Account. It can be Flat or Banded; if Banded, the Sub-Loan Amount will be taken as the Basis for the Charge
Auto-Investment Charge is an optional field to indicate a charge for any Placement Instructions where system created Placement Instructions have been successfully converted to a Loan under this Setting. The charge will be applied when any Bid for a system created Placement Instruction under this Setting has been accepted and a Loan is activated. The charge amount will be debited from the Funding Account. It can be Flat or Banded; if Banded, the Sub-Loan Amount will be taken as the Basis for the Charge
Service Charge is an optional field to indicate a periodic charge for servicing the Active Loan Accounts created for any Placement Instructions under this Setting. The charge will be applied at the beginning or end of the period based on the number of loan accounts that are active for any Placement Instruction that has been created under this Setting. For example, if the flat charge is EUR 1 and if the number of loans created from this placement setting that are currently active is 5 then the charge will be EUR 5. The charge amount will be debited from the Funding Account. It can only be a Flat Charge
Principal Guarantee Fee and Interest Guarantee Fee are optional fields to indicate a charge for any Principal or Interest that is repaid by the borrower for any Loans Accounts created for any Placement Instructions under this Setting. The charge will be applied when any repayment of Principal or Interest is received from the Borrower and paid back (redistributed) to the Lender. The charge amount will be debited from the Funding Account. It can be Flat or Banded; if Banded, the Repayment Amount towards Principal or Interest will be taken as the Basis for the Charge
Click Next. The New Placement Setting -- Accounting (4/5) appears
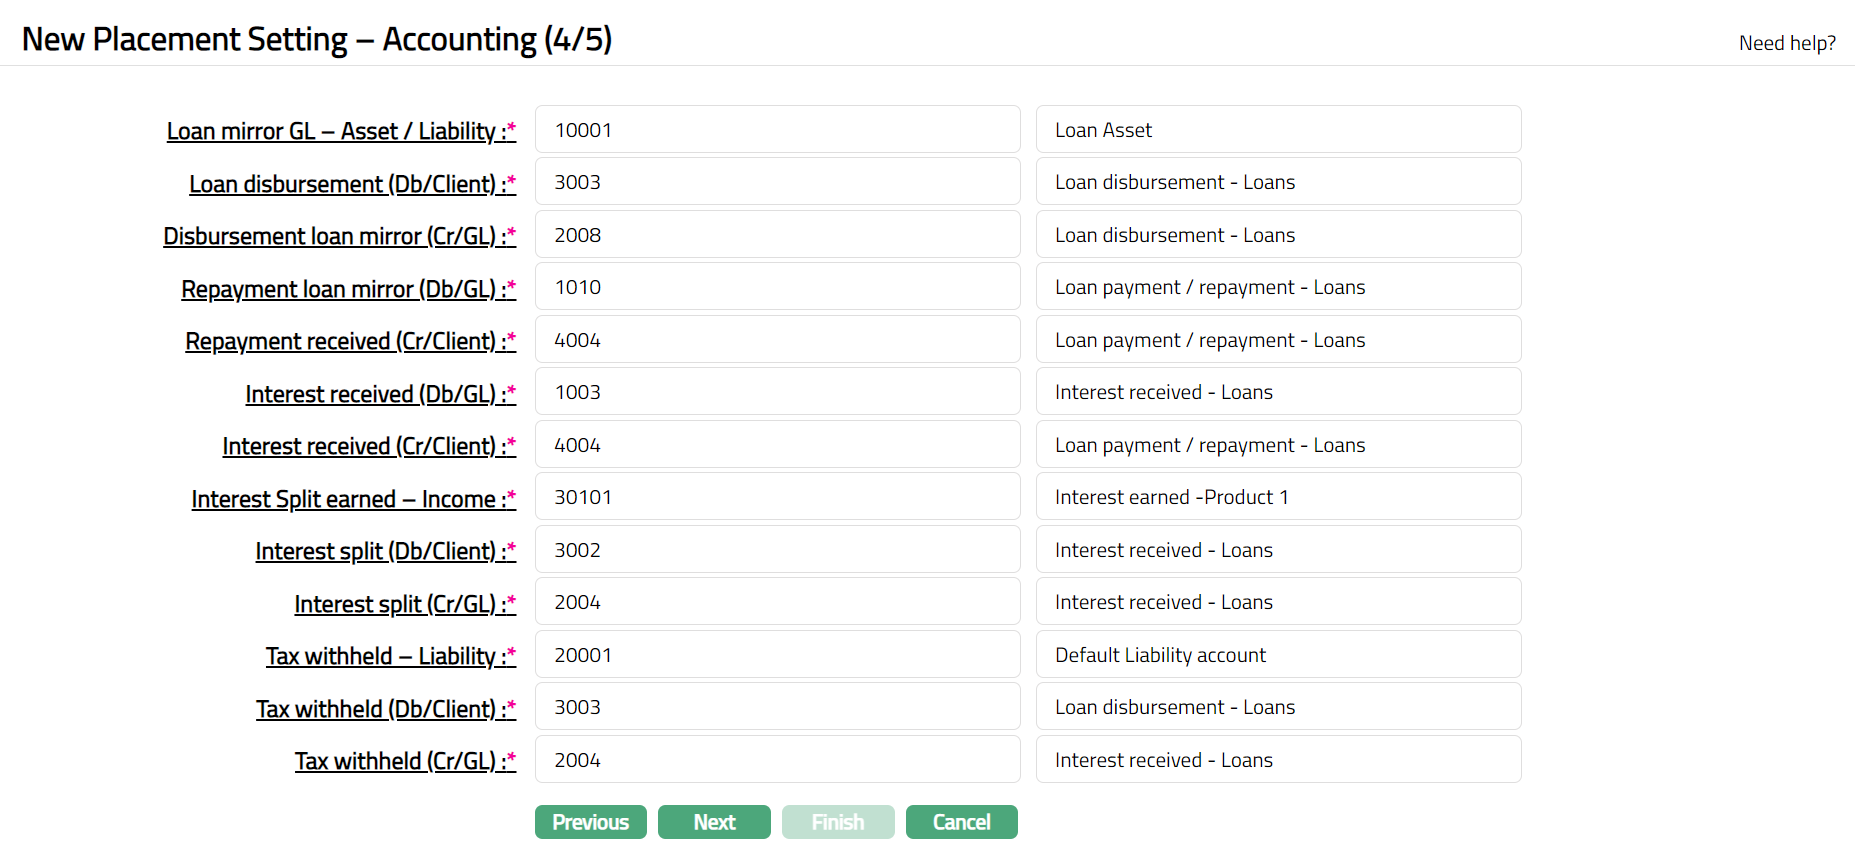
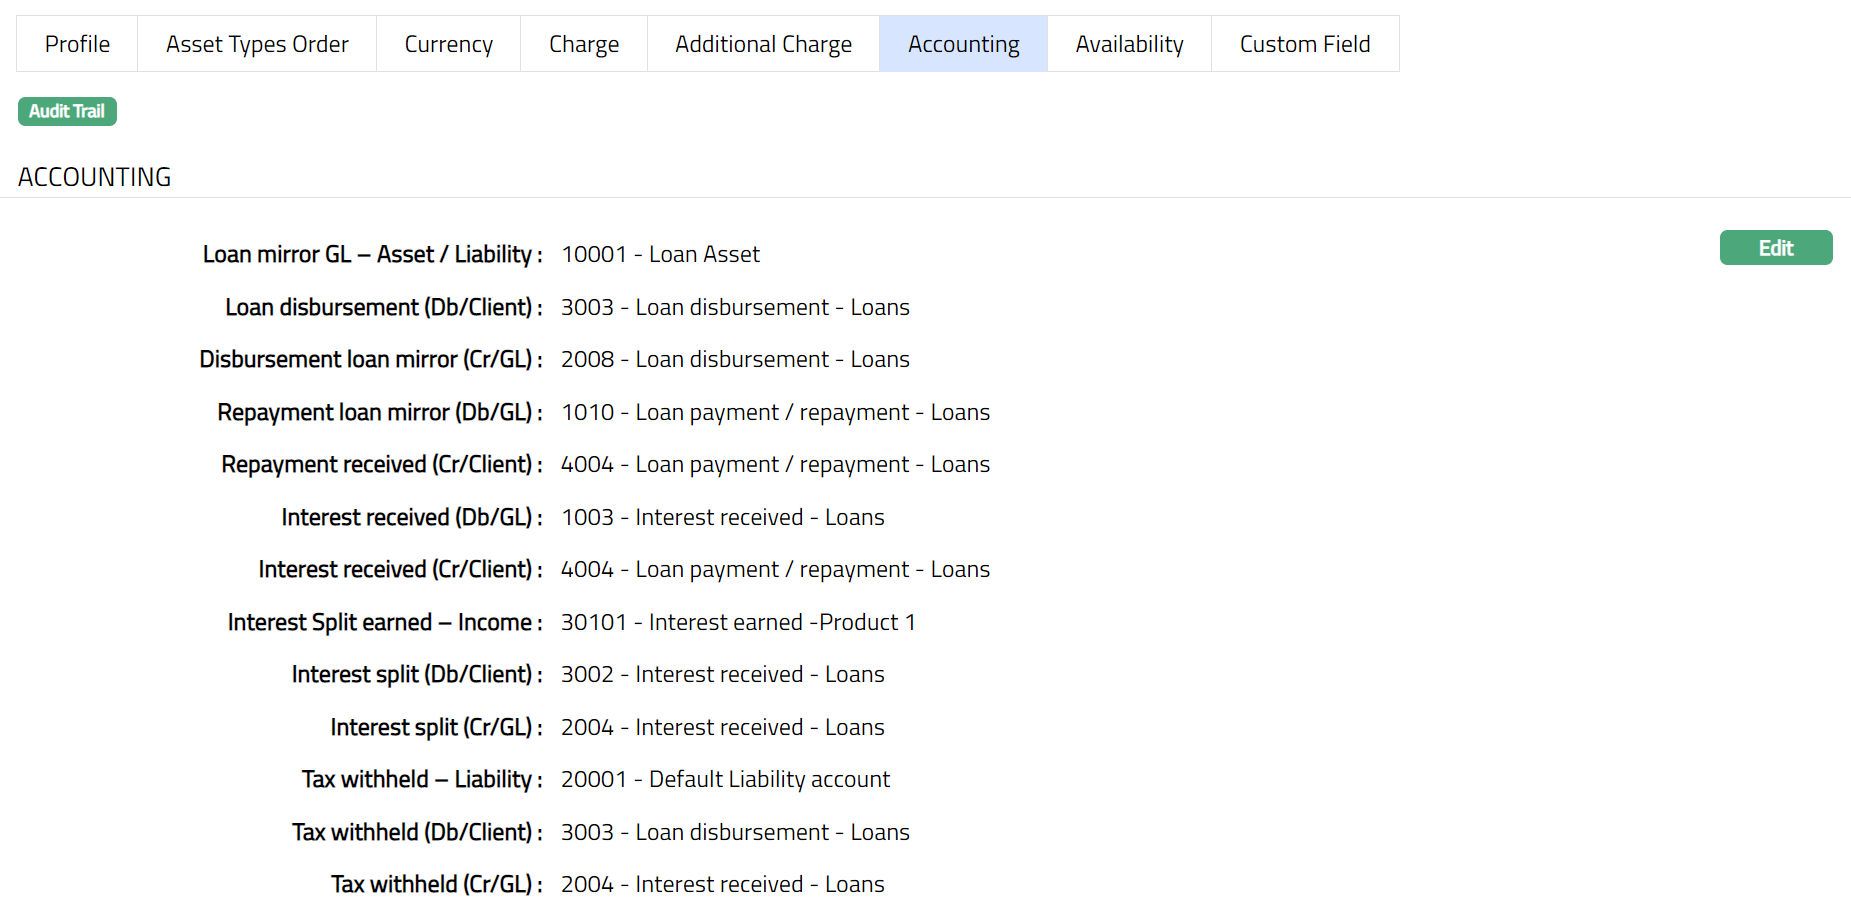
Provide the various General Ledger Accounts and Transaction Codes to facilitate the posting of accounting entries during the life cycle of the Placements. The Accounting entries pertain to Disbursement, Redistribution of Principal and Interest, Interest split (shared with Portal) and Withholding Tax. The Loan Mirror GL on the Lenders' side will be a mirror image of the Loan Account Master GL on the Borrowers' side. Interest split and Withholding tax entries will be posted based on the Interest redistributed to the Lenders.
Click Next. The New Placement Setting -- Confirmation (5/5) page appears showing all the details that you entered above.

- Click Finish. The new Placement Setting record is created and you will see the Profile tab by default.
Functions: Add, Search, Suspend, Activate, Edit, Delete
Note: The status of the Placement Setting is Active as soon as it is created.
Edit: Using Edit, you can update details of the Placement Setting. However, the updated conditions will be applicable only for any Placement Instructions that are created AFTER the changes have been done and will NOT affect the records already created.
Suspend: You can suspend the Placement Setting by a click on Suspend button. When you click on Suspend button, Aura displays an alert message. On confirmation Aura will suspend the Placement Setting. Suspending a Placement Setting only makes it unavailable in future for any new Placement Instruction creation / any other dropdown list. Existing Placement Instructions under the Placement Setting continue without any impact. Suspended records can be activated by using Activate button.
Activate: You can activate a suspended Placement Setting by a click on Activate button. When you click on Activate button, Aura displays an alert message. On confirmation Aura will activate the Placement Setting. Activation of a record only makes it available in future for any new Placement Instructions creation / any other drop-down list.
Delete: To delete the record, click Delete. When you click on Delete button, Aura displays an alert message. On confirmation, Aura will delete the record which you have created.
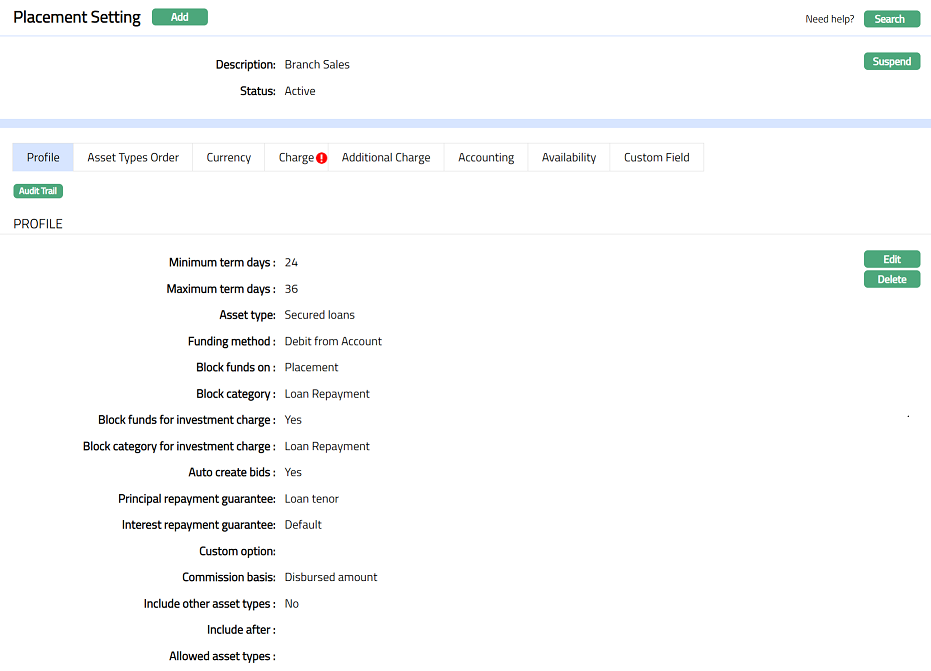
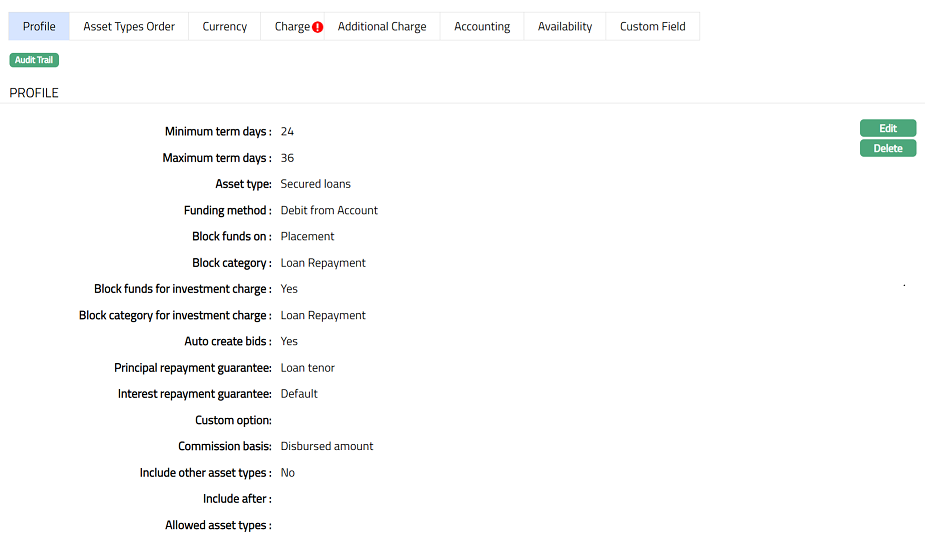
Profile
The Profile tab, which is the default tab in the Placement Setting screen, shows the basic details of the Placement Setting.
To view / edit Profile
- Access Placement Setting page. Click Profile tab to view the details as per sample below. The details are defaulted from the entries that you made during Placement Setting creation. For details refer to New Placement Setting -- Profile (1/5)
- Click Edit. Edit Profile page appears.

The following fields are editable:
Description
Minimum term days
Maximum term days
Asset type
Funding method
Block funds on
Block category
Block funds for investment charge
Block category for investment charge
Auto create bids
Principal repayment guarantee
Interest repayment guarantee
Commission Basis
Include other asset types is to indicate if you want to include any other assets by selecting radio buttons Yes or No if required. Once you select Yes radio button the below screen gets activated where you can select the asset from Available Asset Types and shift to Allowed Asset Types with the help of
 this arrow button.
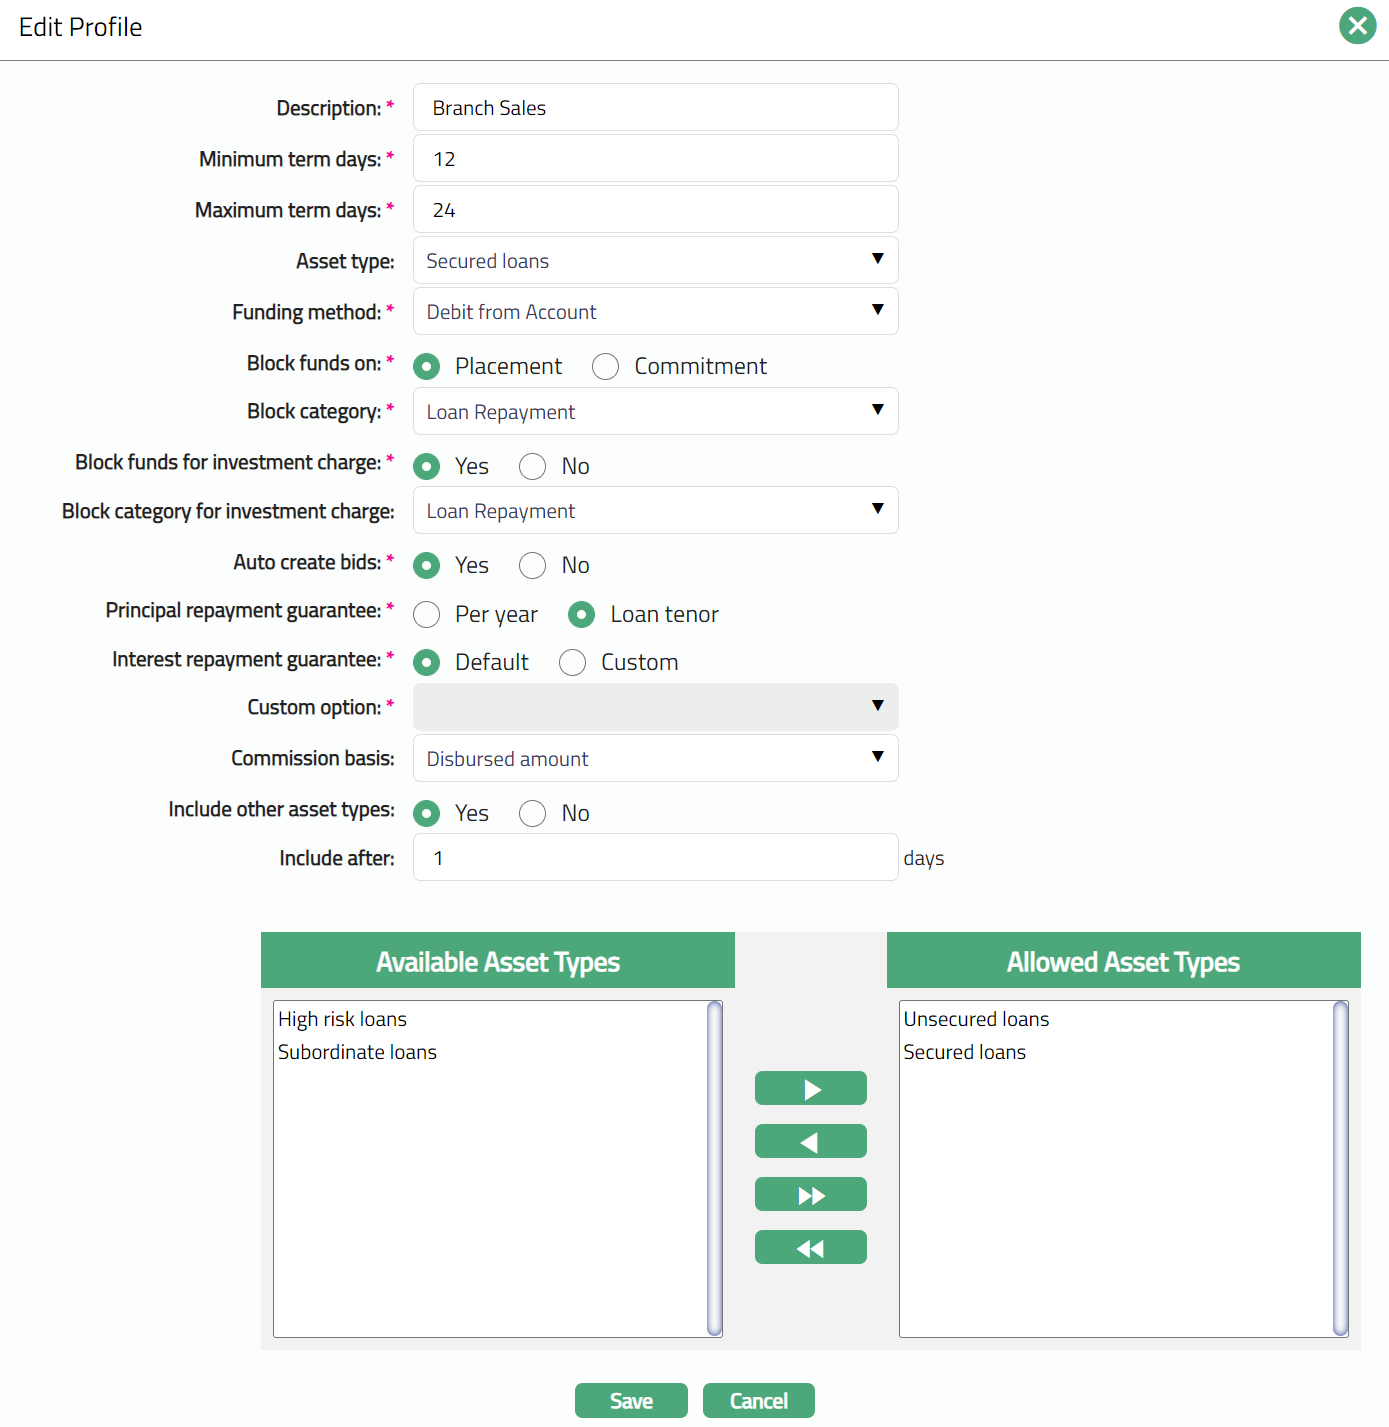
- Include after indicates the number of days after which you want to include the assets as required.
- Click Save. The Profile page appears with the edited details.

Functions: Edit, Delete
Delete: To delete profile, click Delete. When you click on Delete button, Aura displays an alert message. On confirmation, Aura will delete the profile.
Asset Types Order
Asset Types Order tab allows you to define the flexible Asset Types order for accounts based on the product. These asset types order are based on the Loan Account Statuses. You will also be able to choose to use between the standard order or user defined asset types order.
You can change the order between components but will not be allowed to add new components.
- Access Placement Settings page. Click Asset Types order tab to view the details as per sample below.

- Select the required Asset Type and click Up or Down based on the selected Asset Type Component as per the sample screen shot shown below.

- Asset Types Order page displays with the changed Asset Type sequence as per the sample screen shot shown below.

Functions: Up, Down
Asset Types Order
- The standard Asset Type components are displayed in the standard sequence. Select any component and click on Up or Down button, as required.
Up: If you click on up button, then Aura will move the selected Asset Type Component to the next higher order of sequence and interchange the position between the source and destination. For the topmost Asset Type Component, the Up button will be disabled.
Down: If you click on down button, then Aura will move the selected Asset Type Component to the next lower order of sequence and interchange the position between the source and destination. For the bottom most Asset Type Component the Down button will be disabled.
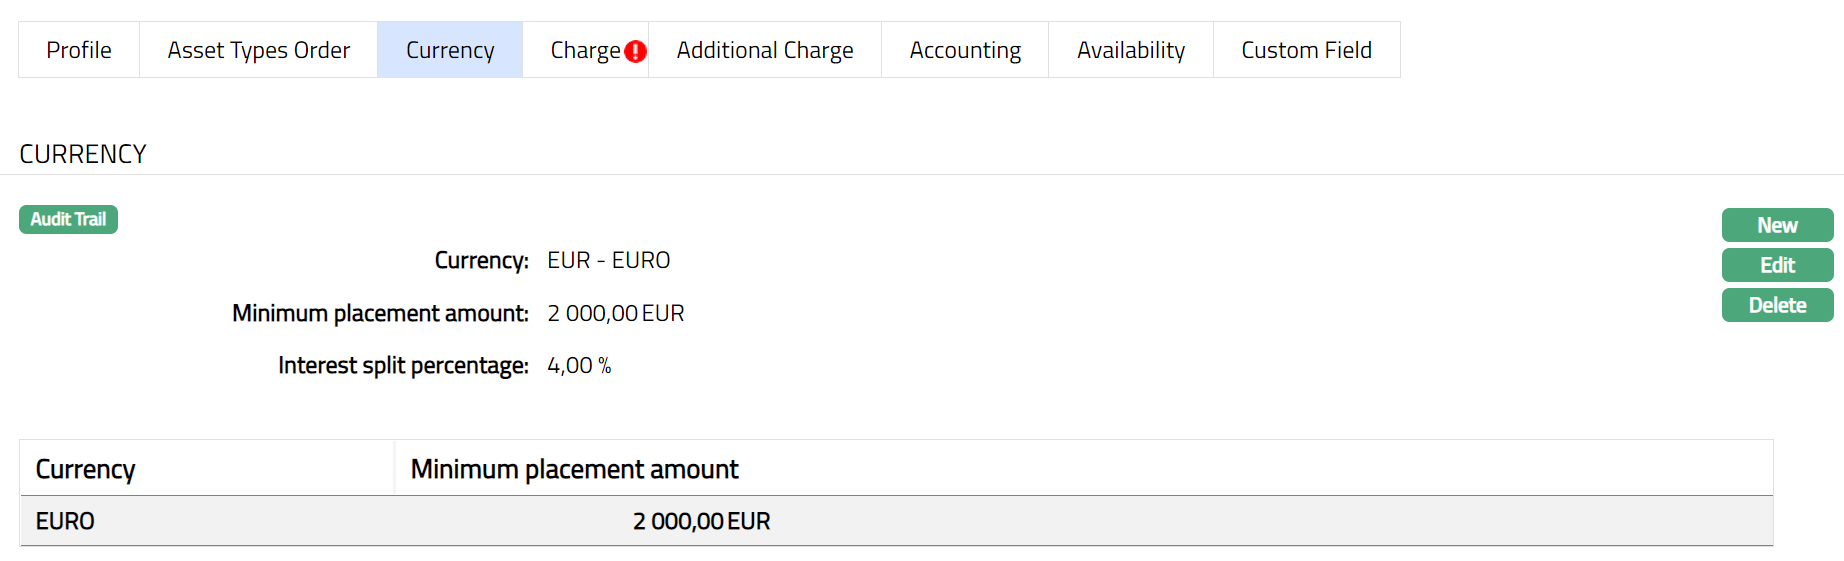
Currency
Currency tab allows you to maintain the currencies for the product. One or more currencies can be added using the Currency tab, once the product record is created. Accounts for the product can be opened only in the selected currencies.
To add the currency
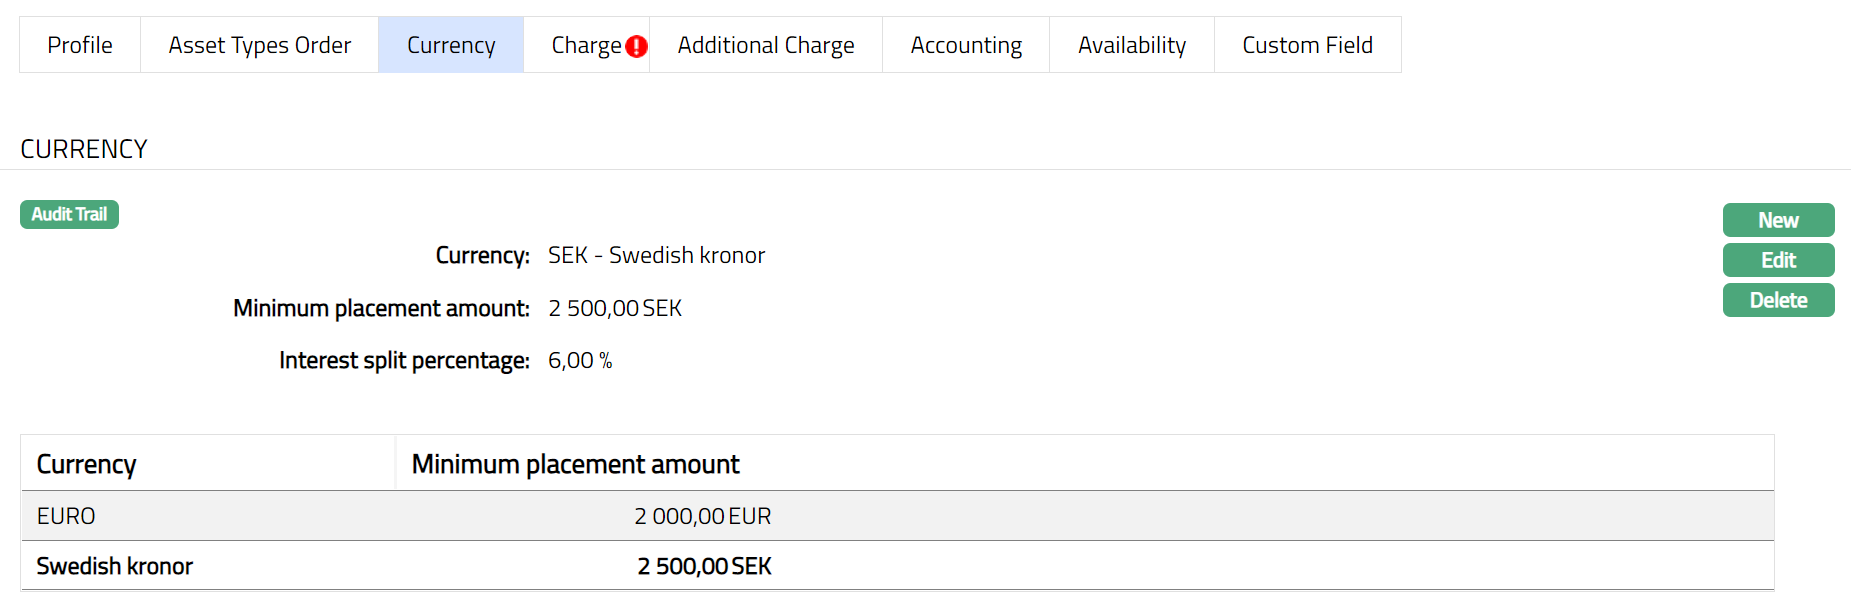
Access the Placement Settings page. Click Currency tab to view the details as per sample shown below under sub tab Settings. The details are defaulted from the entries that you made during product creation. For details refer to **New Placement Setting -- Currency (2/5).
- Click New. New Currency page will appear.
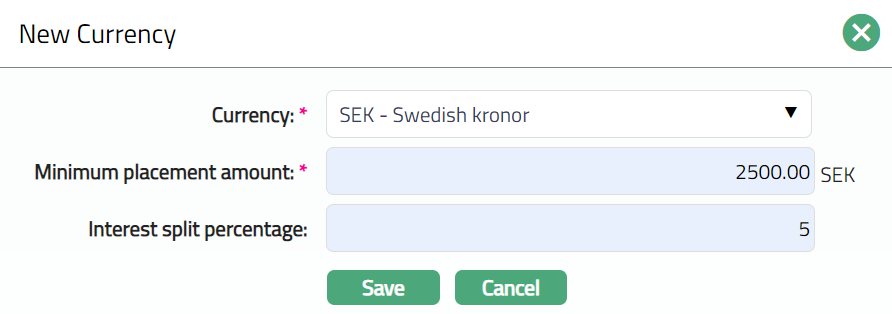
Select the Currency for the product from the drop-down list of GL currencies maintained under General Ledger > Settings > Currency.
Enter the Minimum placement amount for the loan accounts under the currency.
Enter the Interest split percentage for the loan accounts under the currency.
Click Save. The Currency tab appears with the added new currency.

To edit the currency
- Click Edit. Edit Currency page appears.
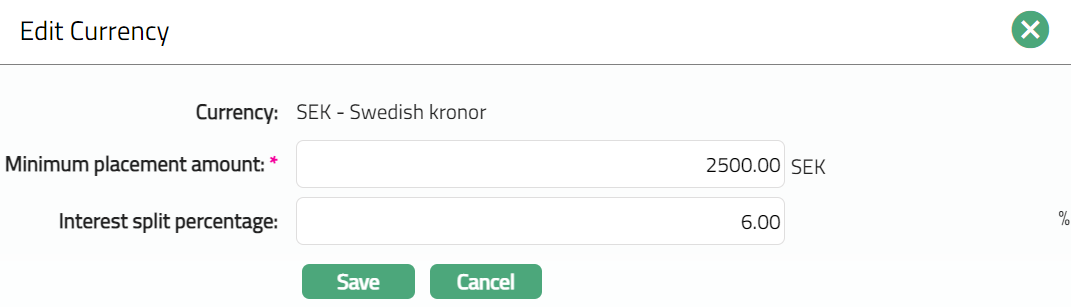
Note: The editable fields are Minimum placement Amount and Interest split percentage fields.
- Click Save. The Currency tab appears with the edited details.
Functions: New, Edit and Delete.
Delete: To delete currency, select the required currency and click Delete. When you click on Delete button, Aura displays an alert message. On confirmation, Aura will delete the currency.
Charge
The Charge tab allows you to view and edit the details of different charges for accounts under the Product.
The following are the Sub tabs under Charge tab:
Value
Tenor
Value
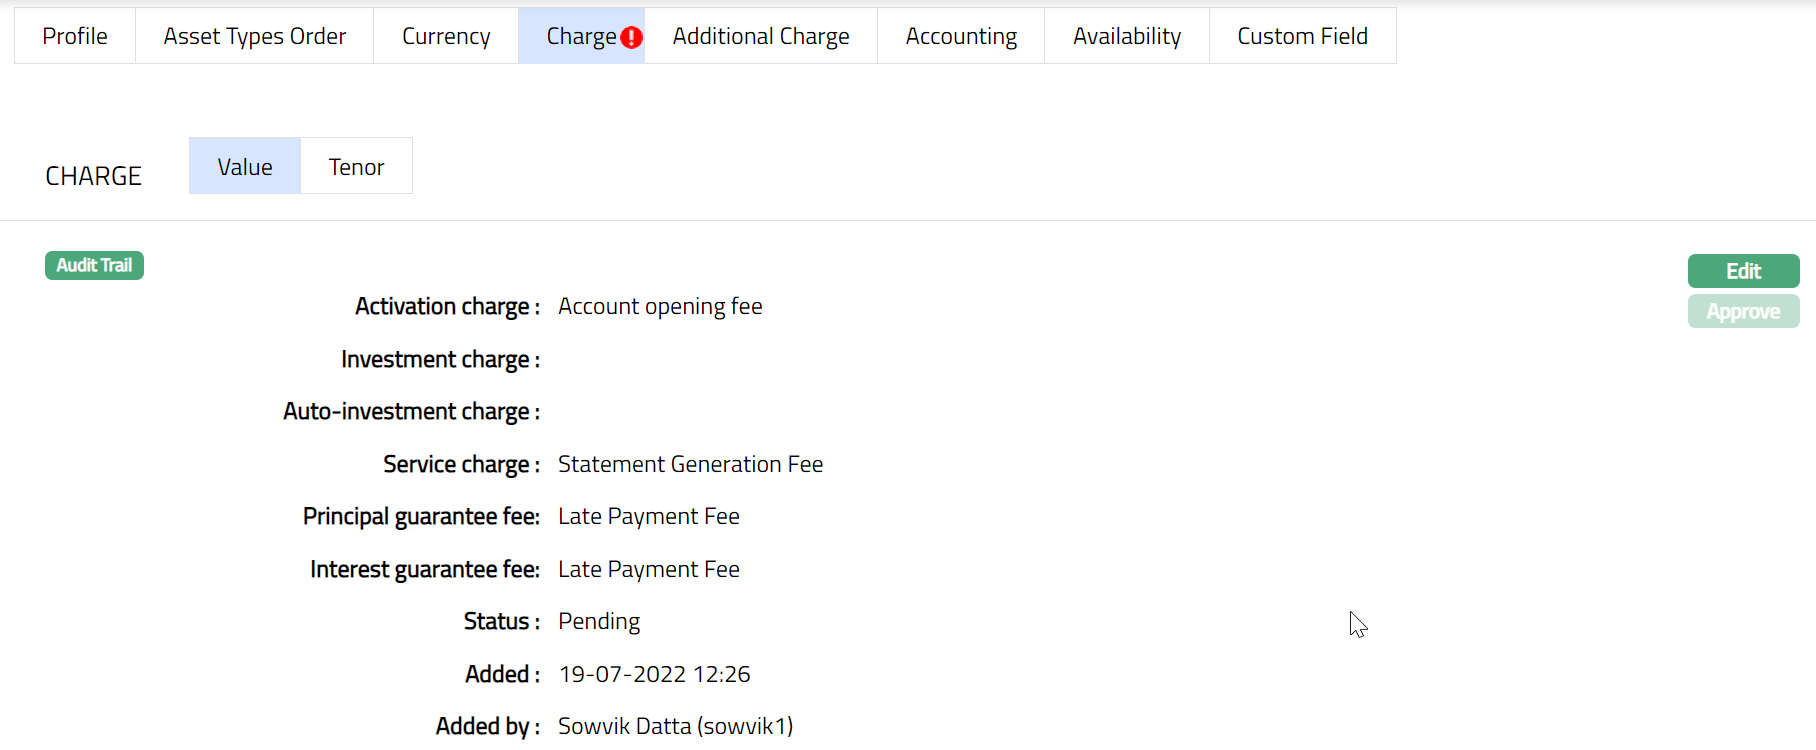
To view/edit the Charge
- Access Placement Settings page. Click Charge tab to view the details as per sample below. By default, the Value sub tab will appear displaying the entries that you made during Placement Instruction creation. For details refer to Retail > Peer to Peer > Settings > Placement Settings -- Charge (3/5).
To Edit Value
- Click Edit. Edit page appears. Sample screen shots shown below.
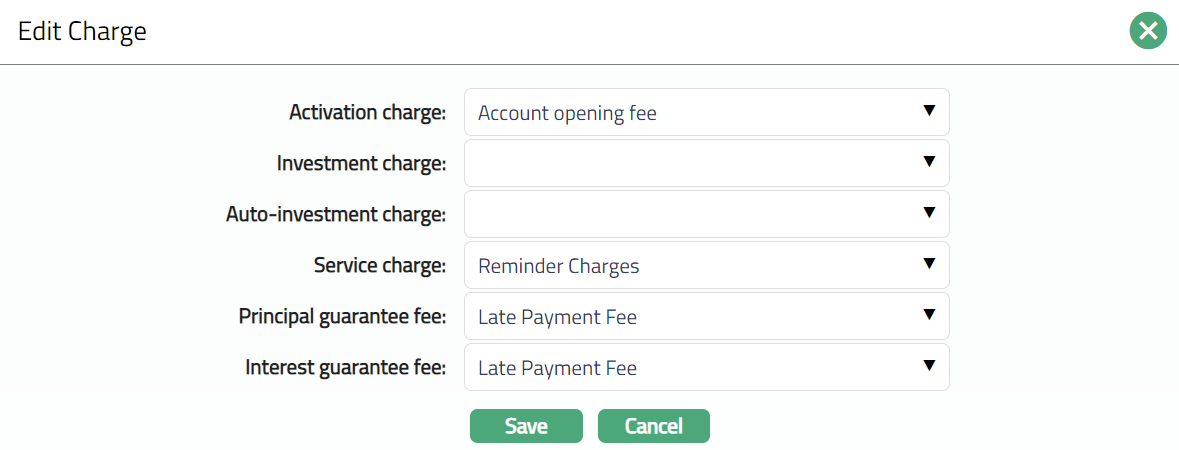
Note: All fields in Edit Charge page are editable.
- Click Save. Value sub tab page under Charge tab appears with the edited details.
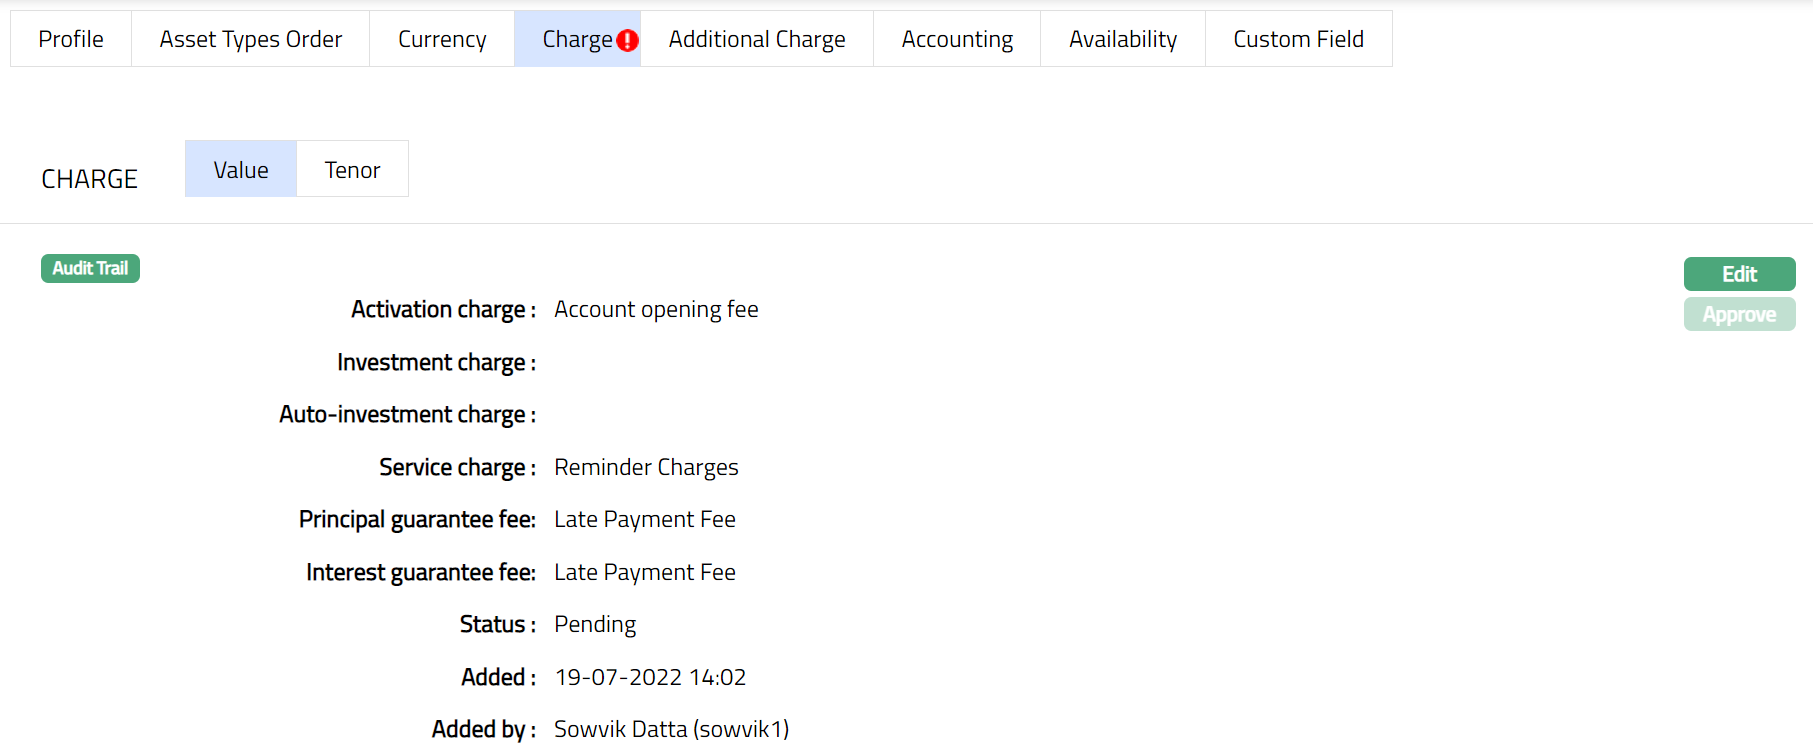
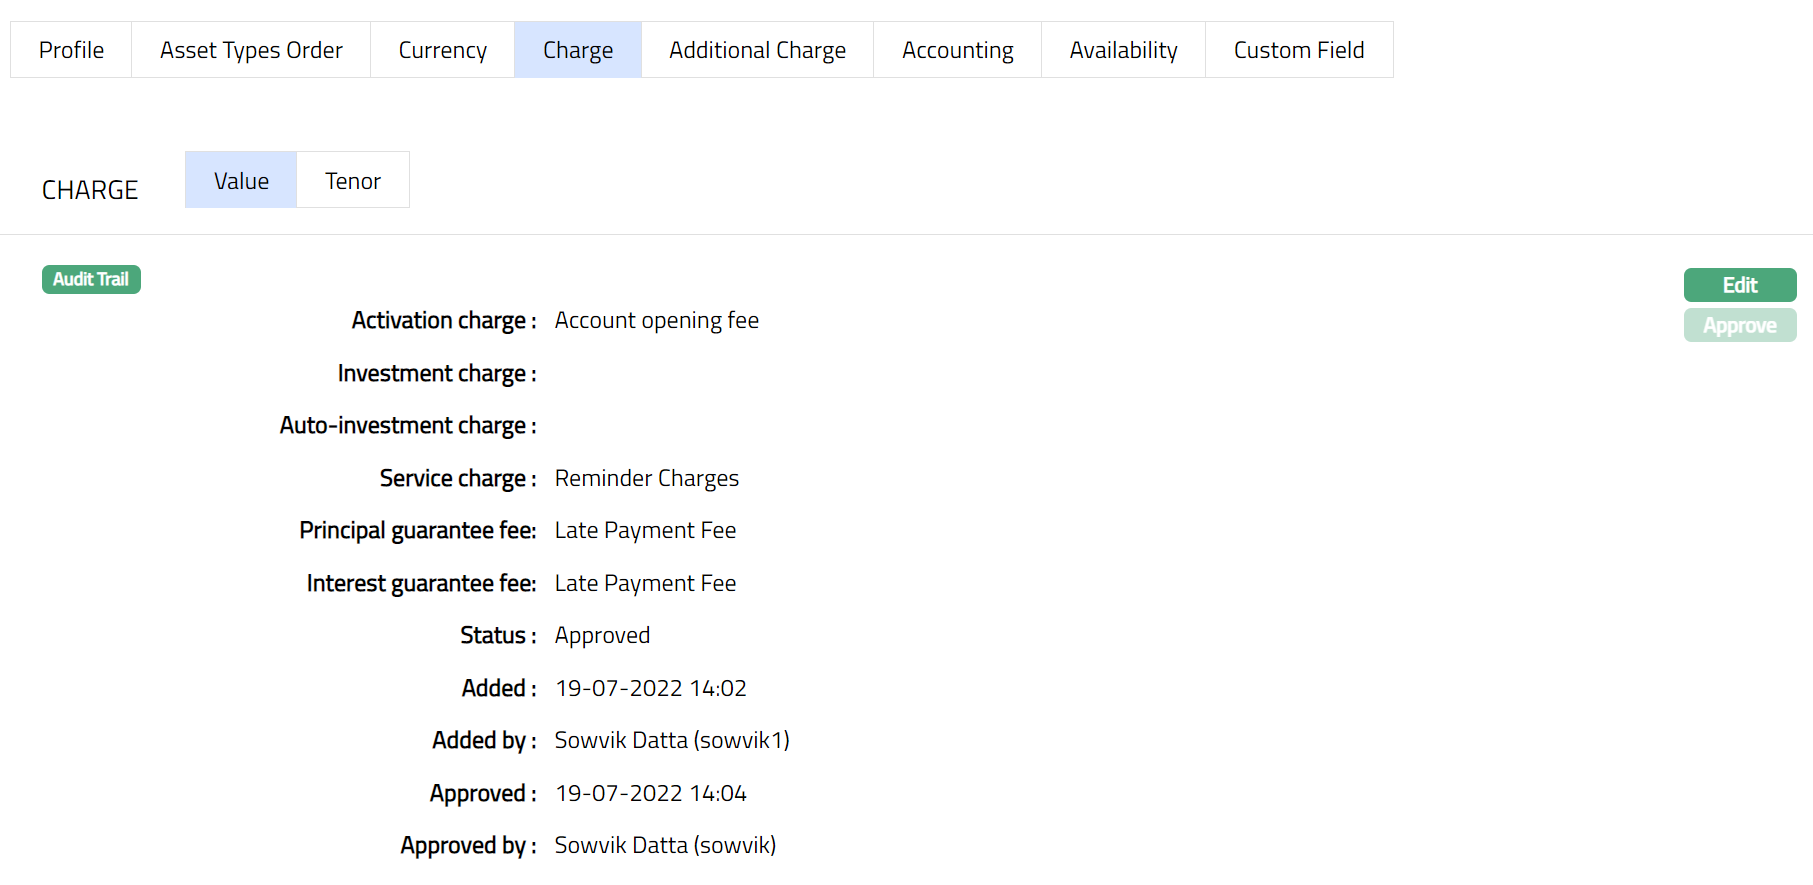
Note: After creation / edit, the status of the Value sub tab under Charge tab will be Pending till it is approved by another user. On approval, the tab status is set to Approved and the red bubble disappears.
Function: Edit, Approve
The following fields are shown only in the View screen and are not editable:
Status field denotes the status of the tab.
Added field denotes the date on which the record was added.
Added by field denotes the name of the user who created the record.
Approved field denotes date on which the record was approved and is displayed only for approved records.
Approved by field denotes name of the user who approved the record and is displayed only for approved records.
Tenor
To view/edit the Charge
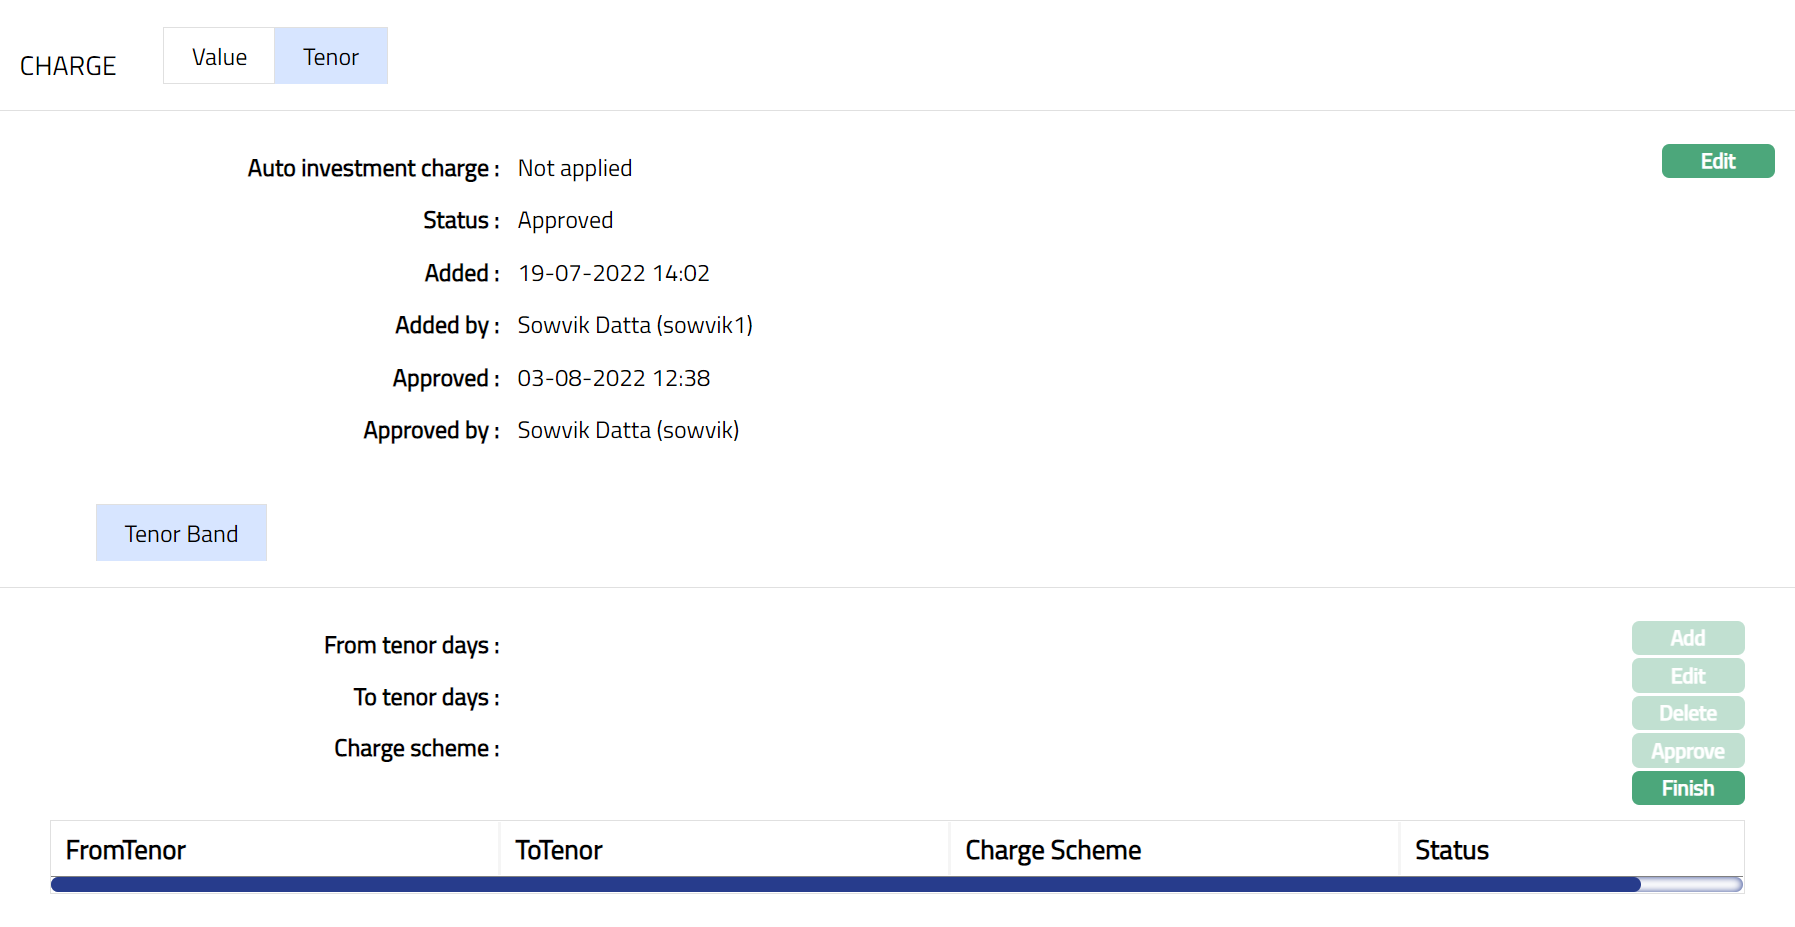
- Access Placement Settings page. Click Charge tab and then Tenor sub tab to view the details as per sample below. The details are defaulted from the creation of Account, if there are any Tenor maintained then the same will reflected.
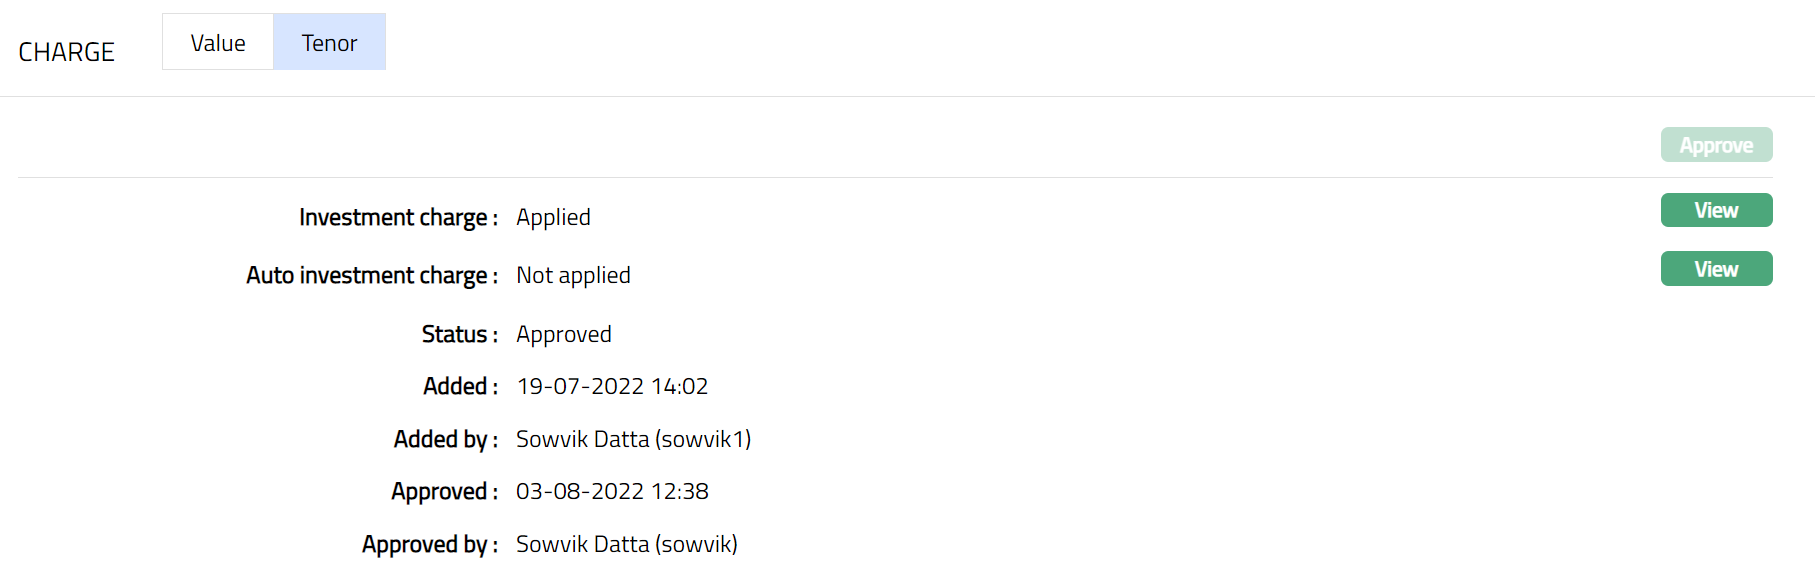
The following fields are shown only in the View screen and are not editable:
Status field denotes the status of the tab.
Added field denotes the date on which the record was added.
Added by field denotes the name of the user who created the record.
Approved field denotes date on which the record was approved and is displayed only for approved records.
Approved by field denotes name of the user who approved the record and is displayed only for approved records.
To View/Add Tenor
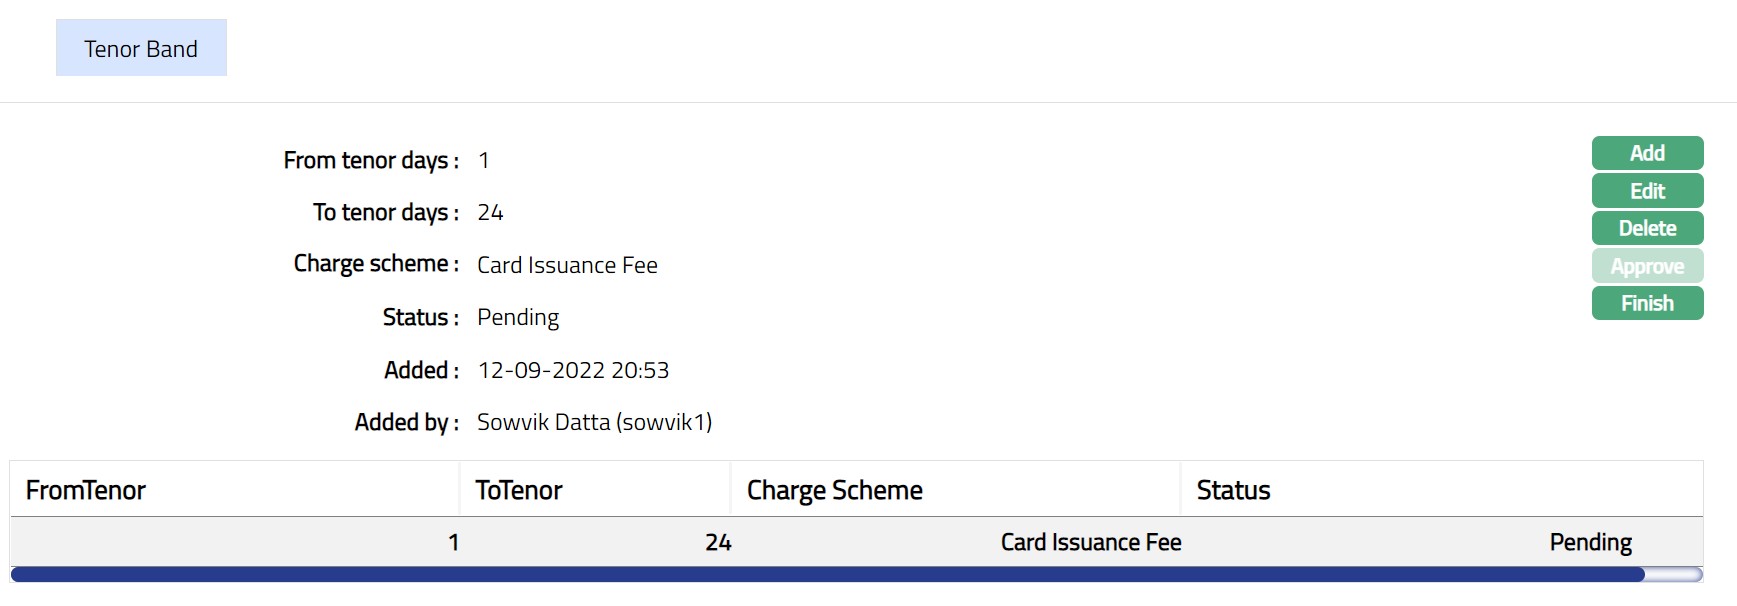
- Click View next to Investment Charge. Tenor Band page appears. Sample screen shots shown below. Sample screen shots as shown below.

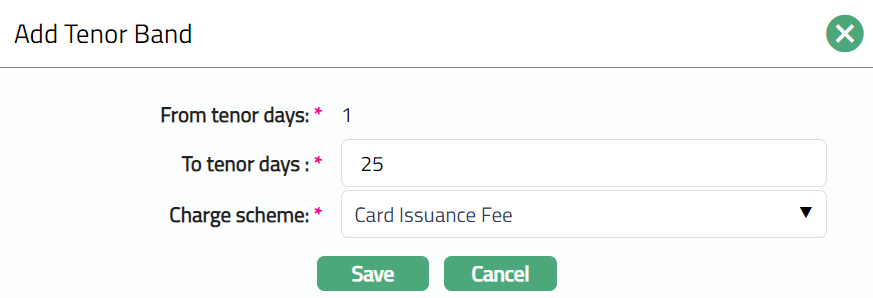
- Click Add. Add Tenor Band page appears.

Note: Except From tenor days, you can add all other fields.
Enter To tenor days as required.
Select the Charge scheme from the available drop-down list.
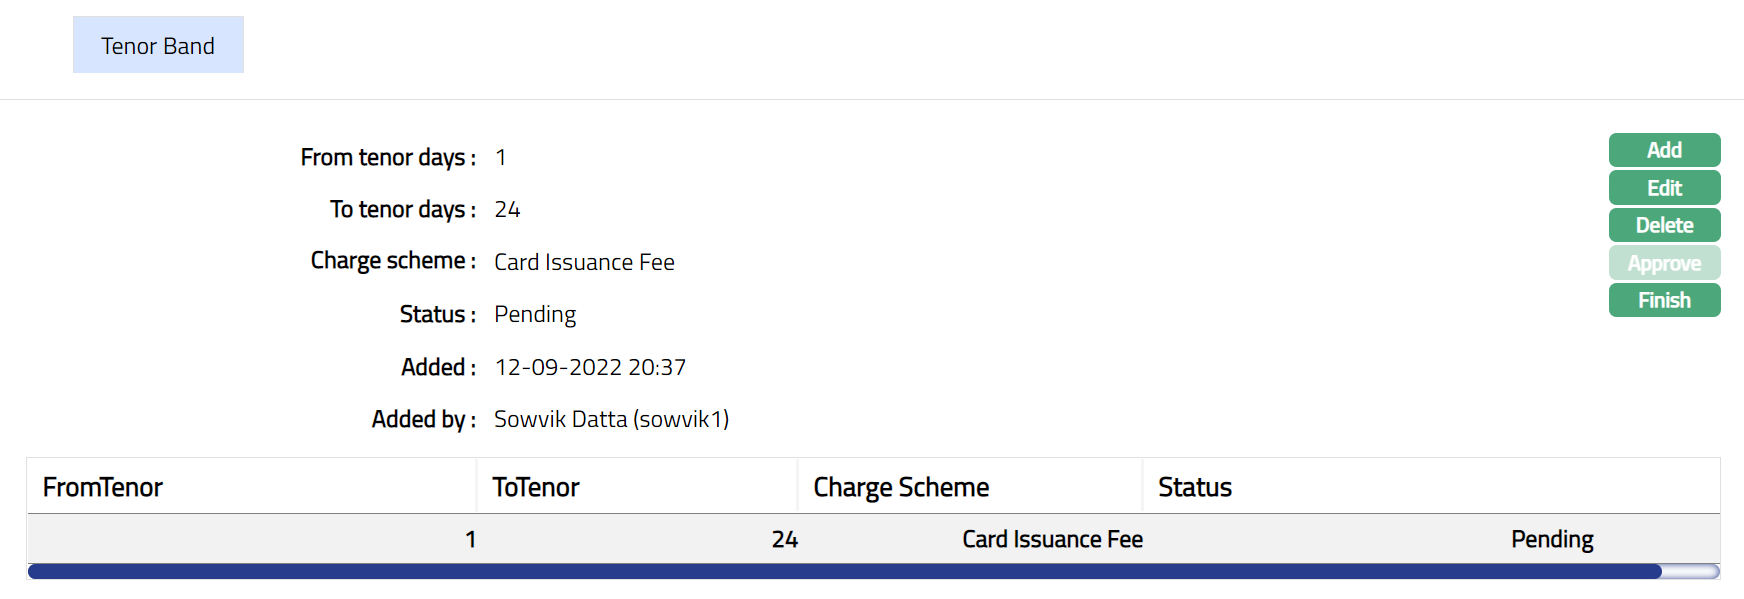
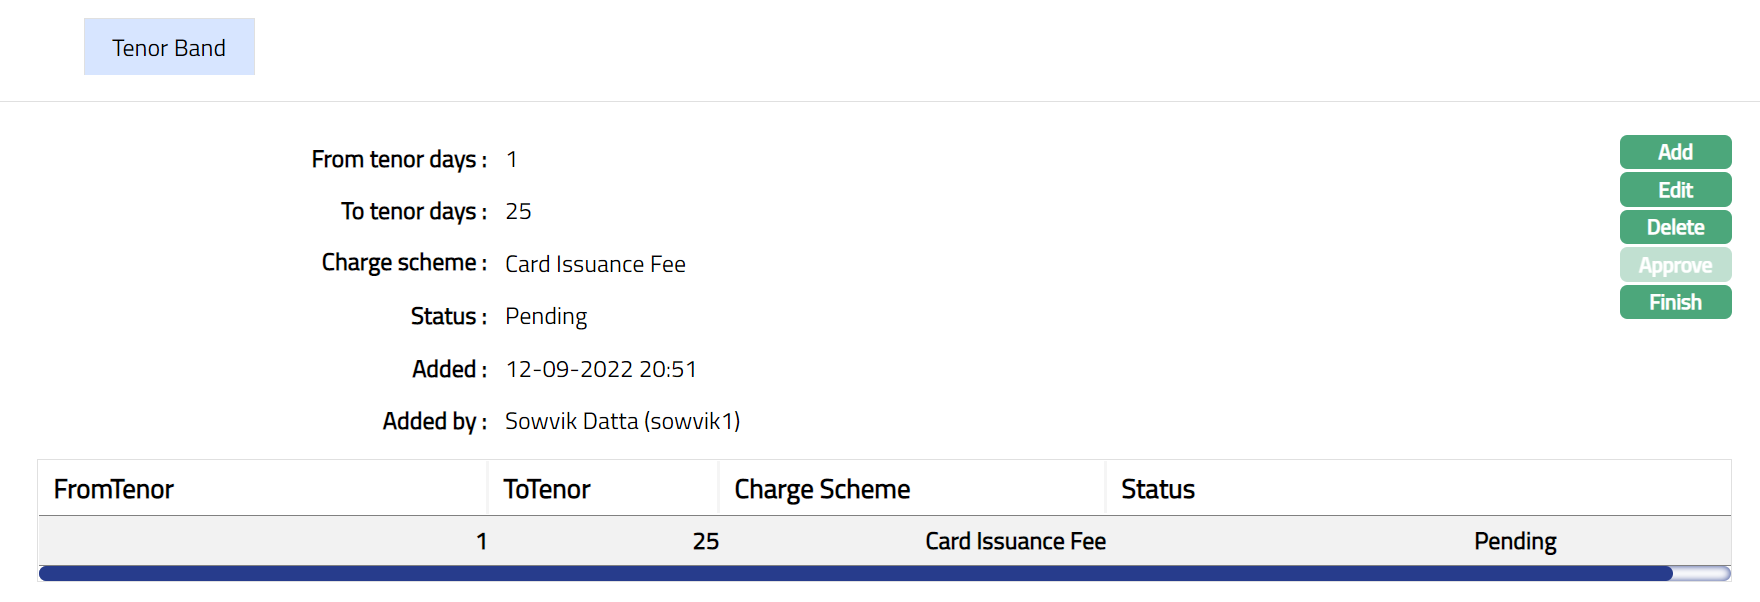
Click Save. Tenor Band page appears with the added details.
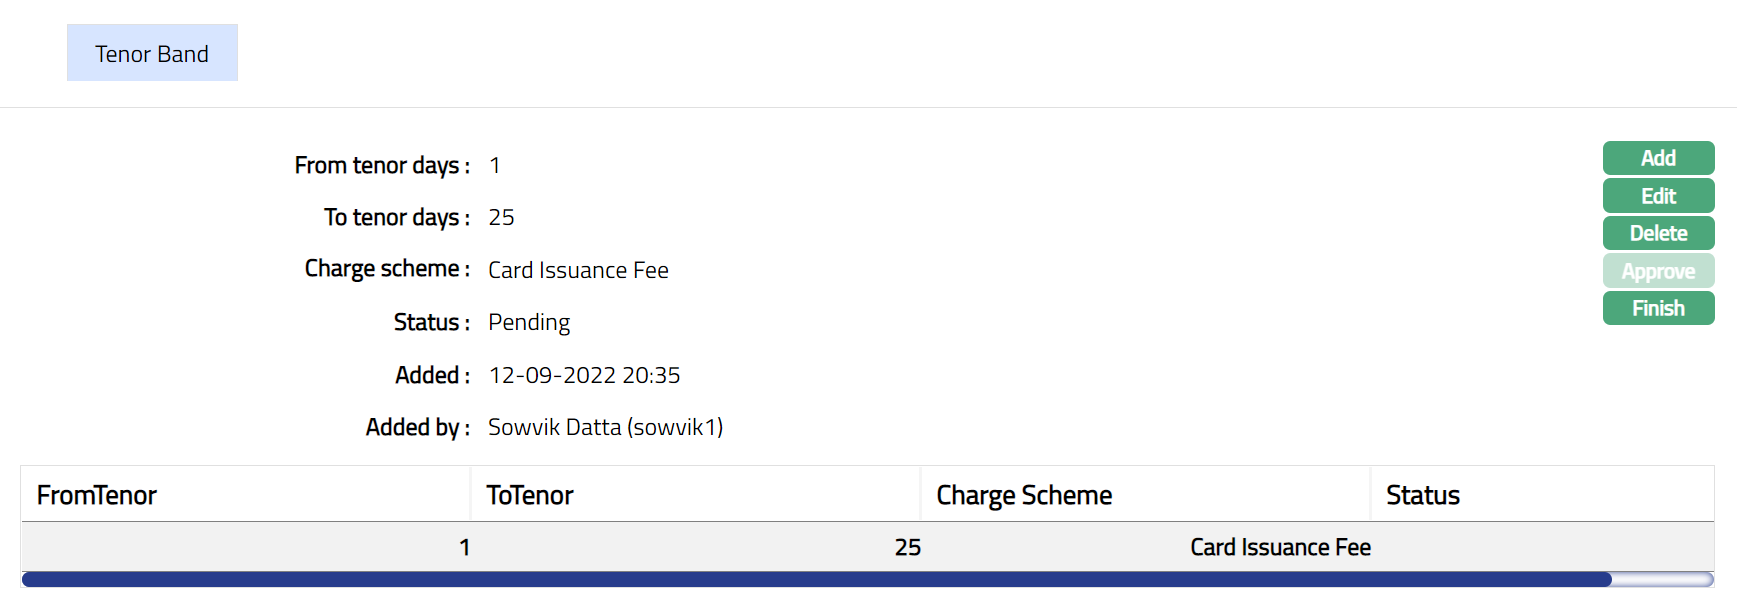
Note: After creation / edit, the status of the Tenor sub tab under Charge tab will be Pending till it is approved by another user. On approval, the tab status is set to Approved.
To Edit Tenor Band
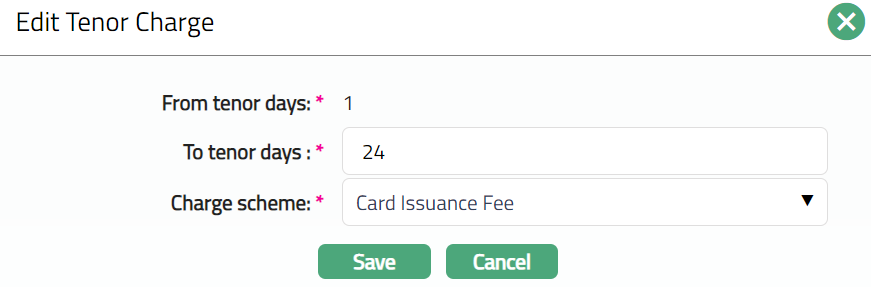
- Click Edit. Edit Tenor Charge page appears.
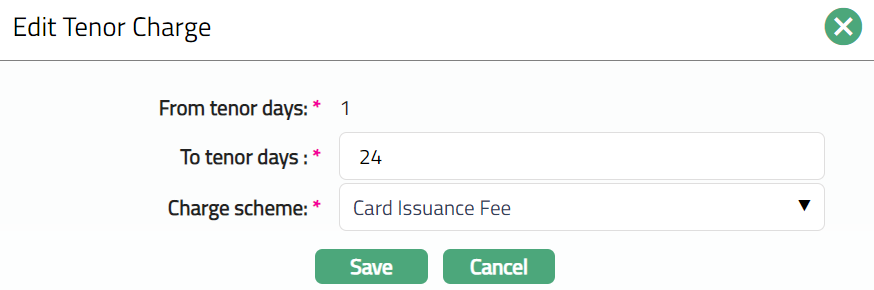
Note: Except From tenor days all other fields are editable.
- Click Save. Tenor Band page appears with the edited details.
Note: After creation / edit, the status of the Tenor sub tab under Charge tab will be Pending till it is approved by another user. On approval, the tab status is set to Approved.
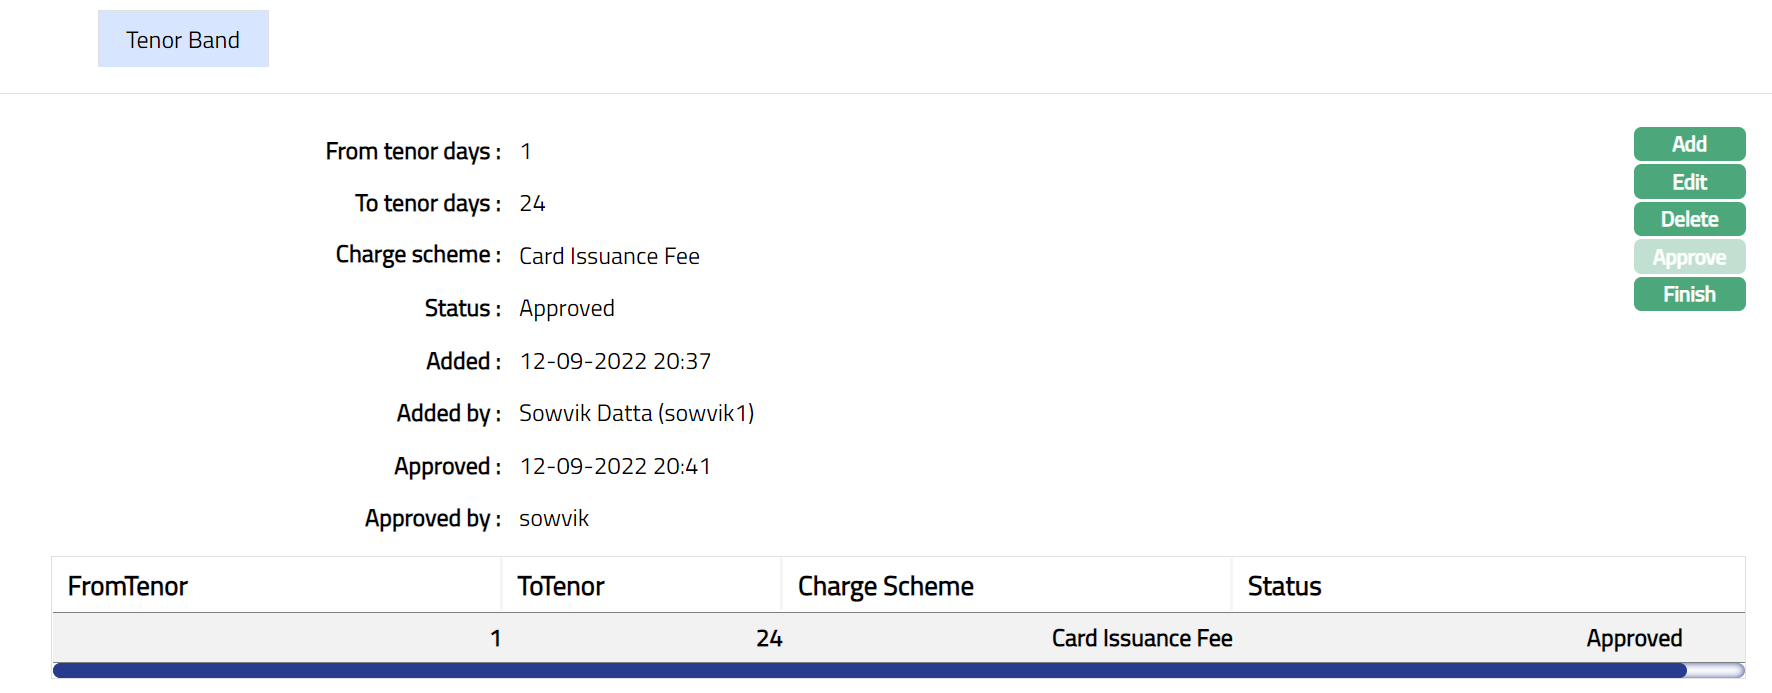
Functions: Add, Edit, Delete, Approve, Finish
The following fields are shown only in the View screen and are not editable:
Status field denotes the status of the tab.
Added field denotes the date on which the record was added.
Added by field denotes the name of the user who created the record.
Approved field denotes date on which the record was approved and is displayed only for approved records.
Approved by field denotes name of the user who approved the record and is displayed only for approved records.
Delete: You can delete Tenor Band saved in Aura by a click on Delete button. Aura will ask for confirmation, on approving the selected record will be deleted.
- Click Finish. Tenor Sub tab page under Charge appears with the added/Edited details.
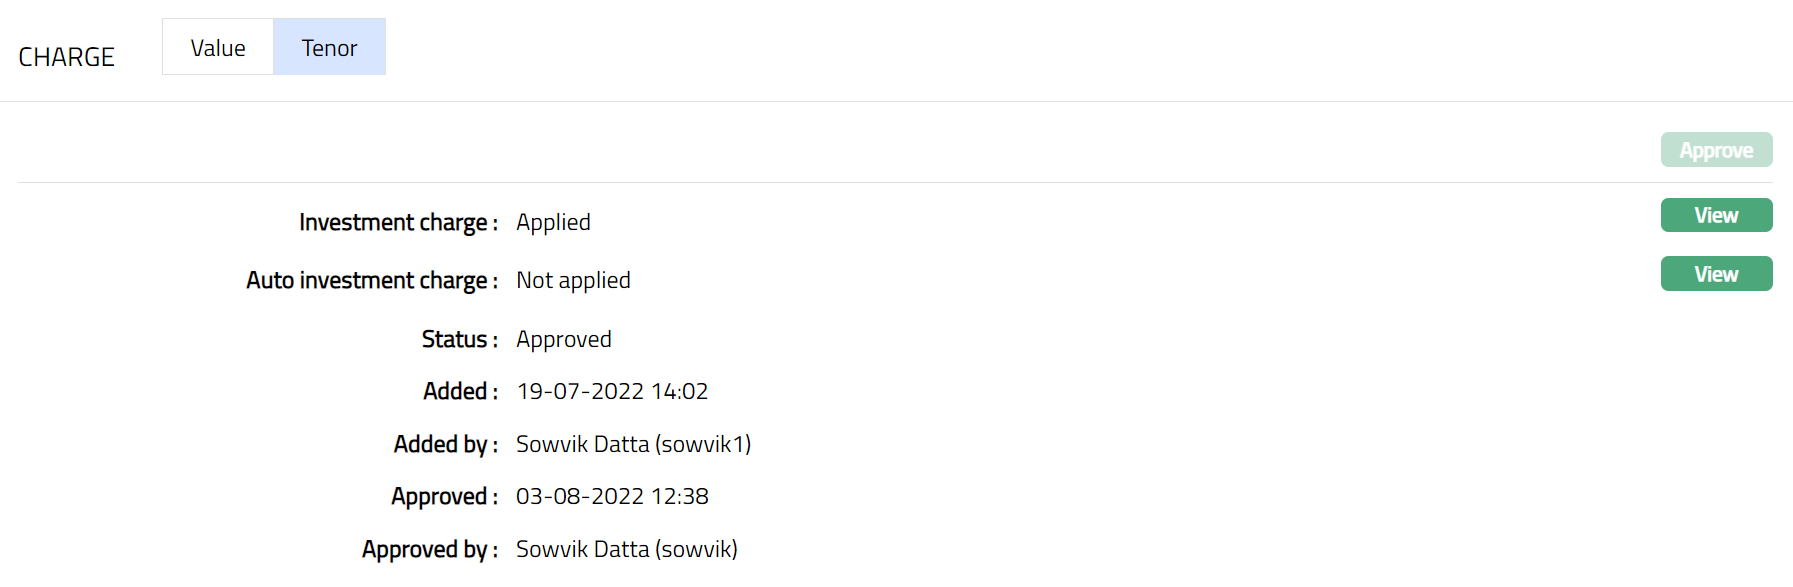
Function: View
To View/Edit Tenor
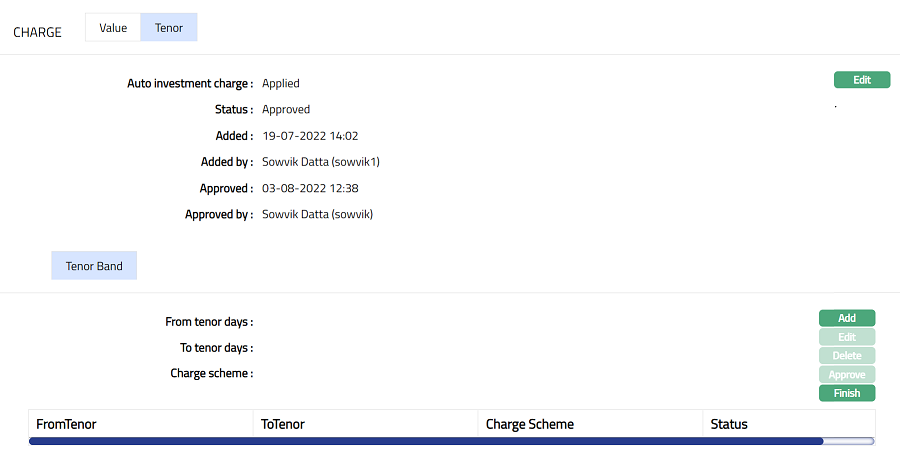
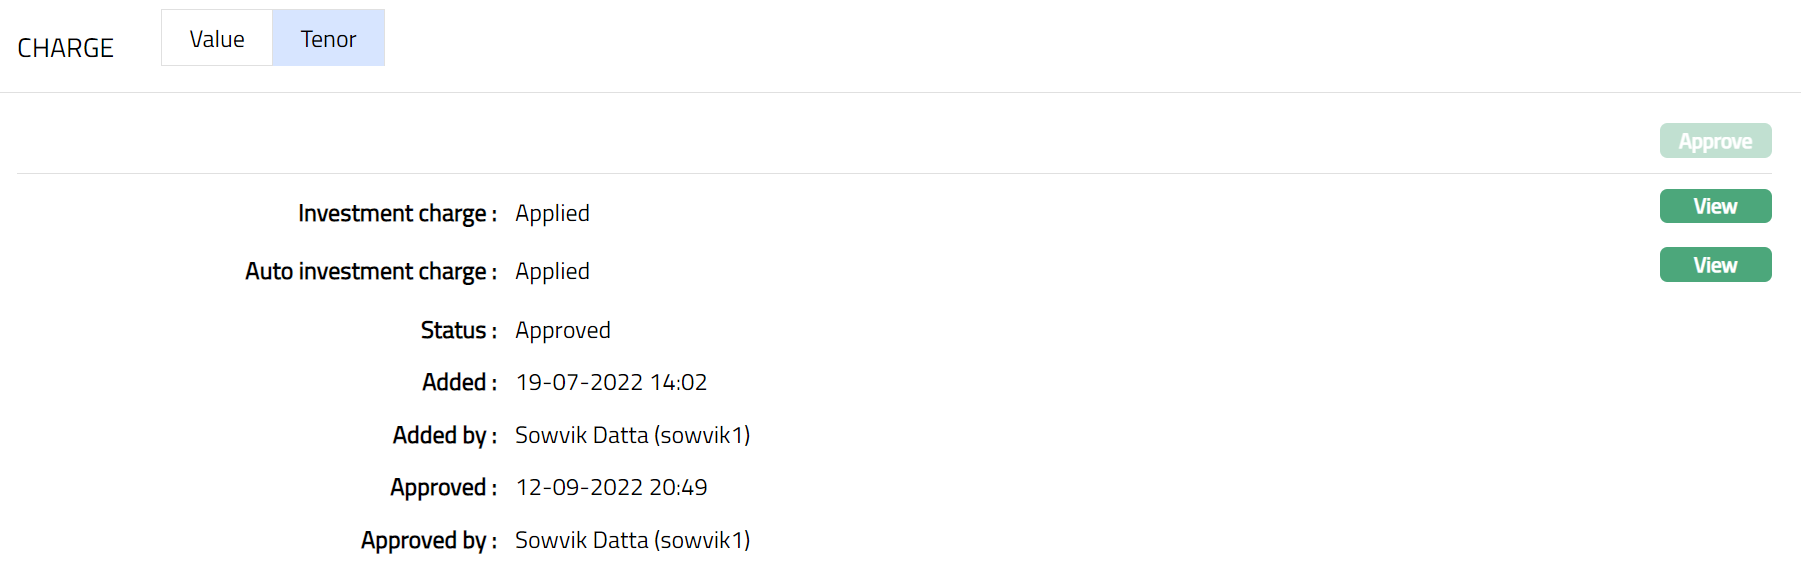
- Click View next to Auto Investment Charge. Tenor Band page appears. Sample screen shots shown below. Sample screen shots as shown below.
- Click Edit. Edit page appears.

Select Applied radio button for Auto Investment Charge.
Click Save. Tenor Band page appears with Auto Investment charge display as Applied.
To Add Tenor Band.
- Click Add. Add Tenor Band page appears.
Note: Except From tenor days, you can add all other fields.
Enter To tenor days as required.
Select the Charge scheme from the available drop-down list.
Click Save. Tenor Band page appears with the added details.
Note: After creation / edit, the status of the Tenor sub tab under Charge tab will be Pending till it is approved by another user. On approval, the tab status is set to Approved.
To Edit Tenor Band
- Click Edit. Edit Tenor Charge page appears.
Note: Except From tenor days all other fields are editable.
- Click Save. Tenor Band page appears with the edited details.
Note: After creation / edit, the status of the Tenor sub tab under Charge tab will be Pending till it is approved by another user. On approval, the tab status is set to Approved.

Functions: Add, Edit, Delete, Approve, Finish
The following fields are shown only in the View screen and are not editable:
Status field denotes the status of the tab.
Added field denotes the date on which the record was added.
Added by field denotes the name of the user who created the record.
Approved field denotes date on which the record was approved and is displayed only for approved records.
Approved by field denotes name of the user who approved the record and is displayed only for approved records.
Delete: You can delete Tenor Band saved in Aura by a click on Delete button. Aura will ask for confirmation, on approving the selected record will be deleted.
- Click Finish. Tenor Sub tab page under Charge appears with the added/Edited details.
Function: View
Additional Charge
Using this tab, you can maintain required Periodic Charges that can be applied on the Placement Instructions created under this Placement Setting. Based on the Frequency of the Charge Scheme mapped here, the lender's Funding Account will be debited for the charge.
To view/Add Additional Charge
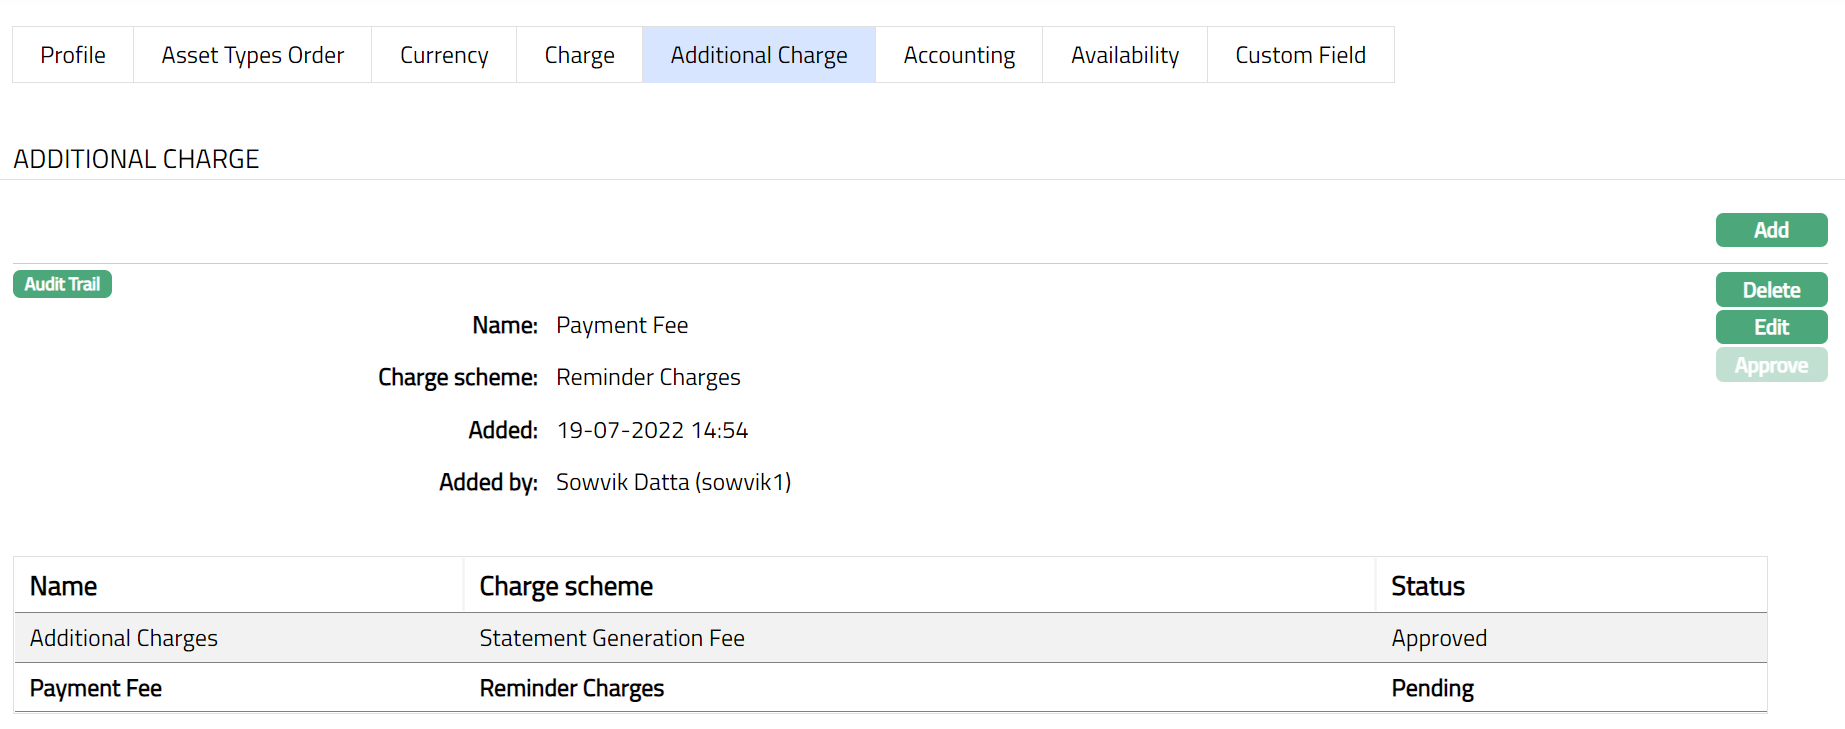
- Access Placement Settings page. Click Additional charge tab, if any additional charges had already been added, these would be displayed; else, it will be blank.
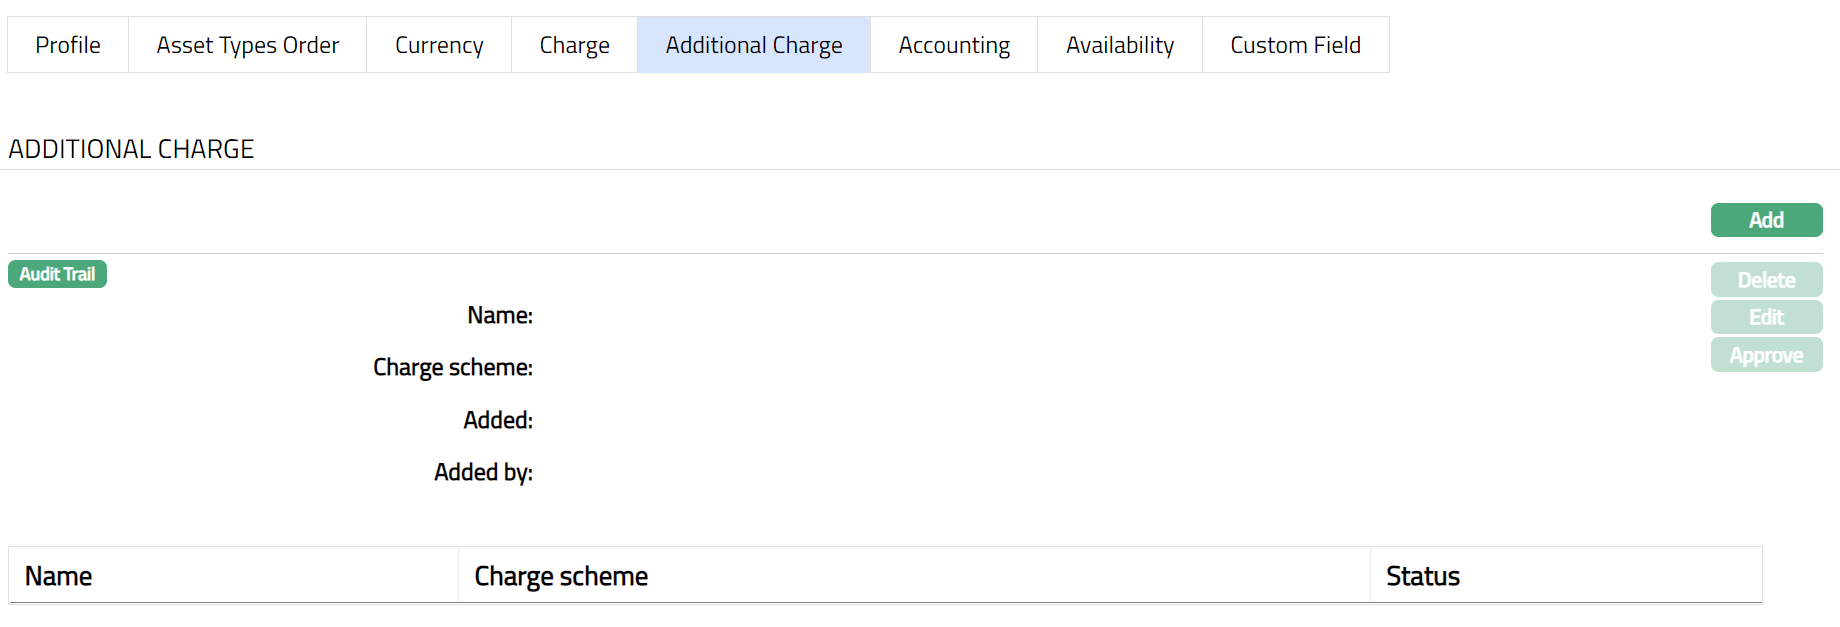
- Click Add. Add Additional Charge page appears.
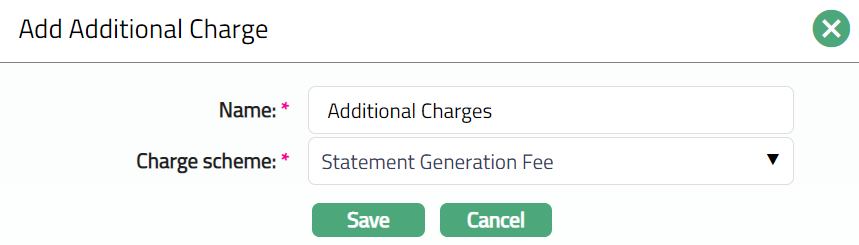
Enter Name of the additional charge to be added.
Select the Charge scheme for the Additional Charge from the drop-down list which must be maintained under Admin > Pricing > Charges > Charges. You can add any Periodic charge -- whether Flat or Banded. If Banded, the Approved amountwill be taken as the basis for the charge.
Click Save. Additional Charge page appears with the added details.
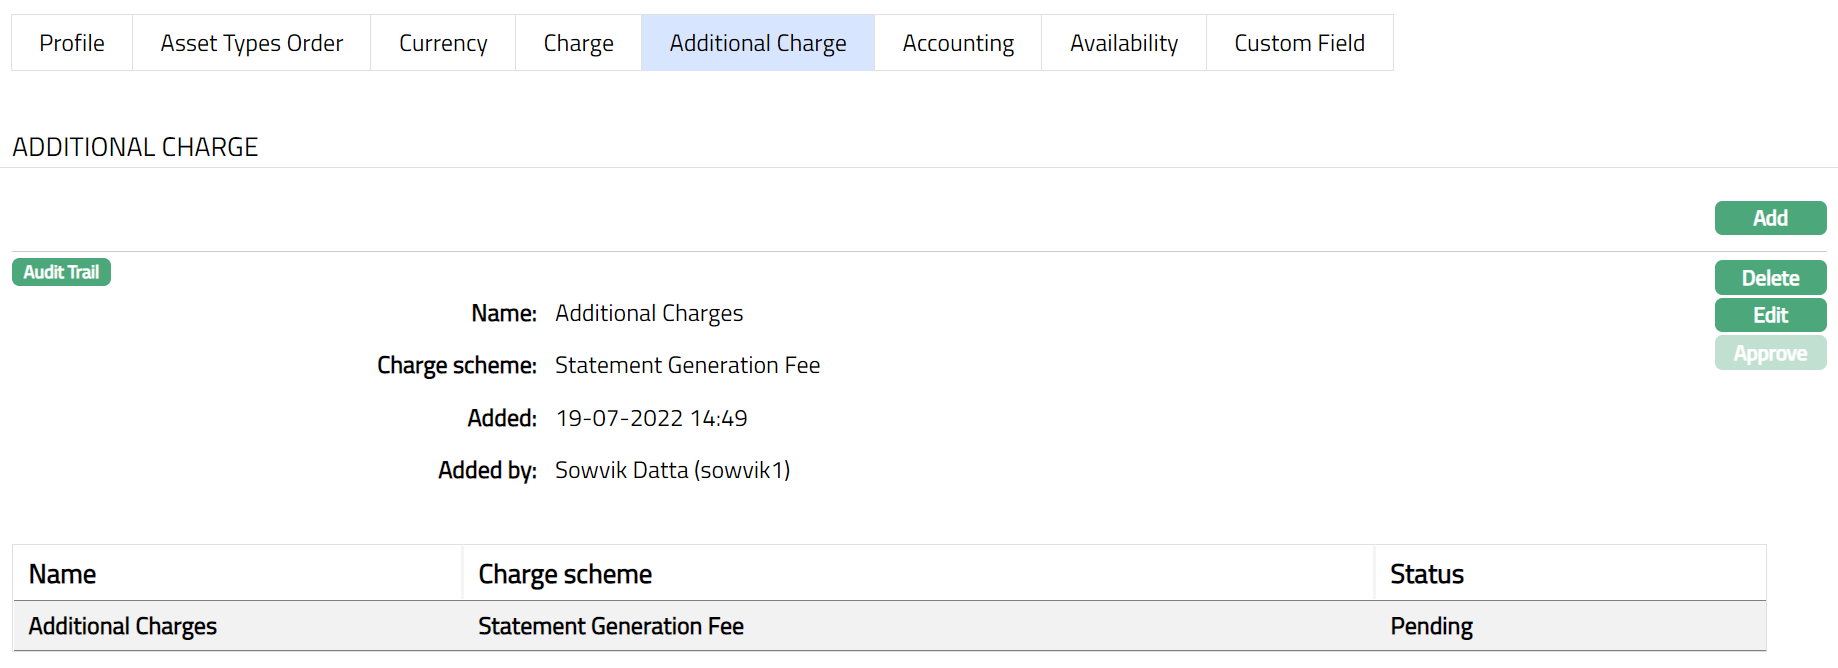
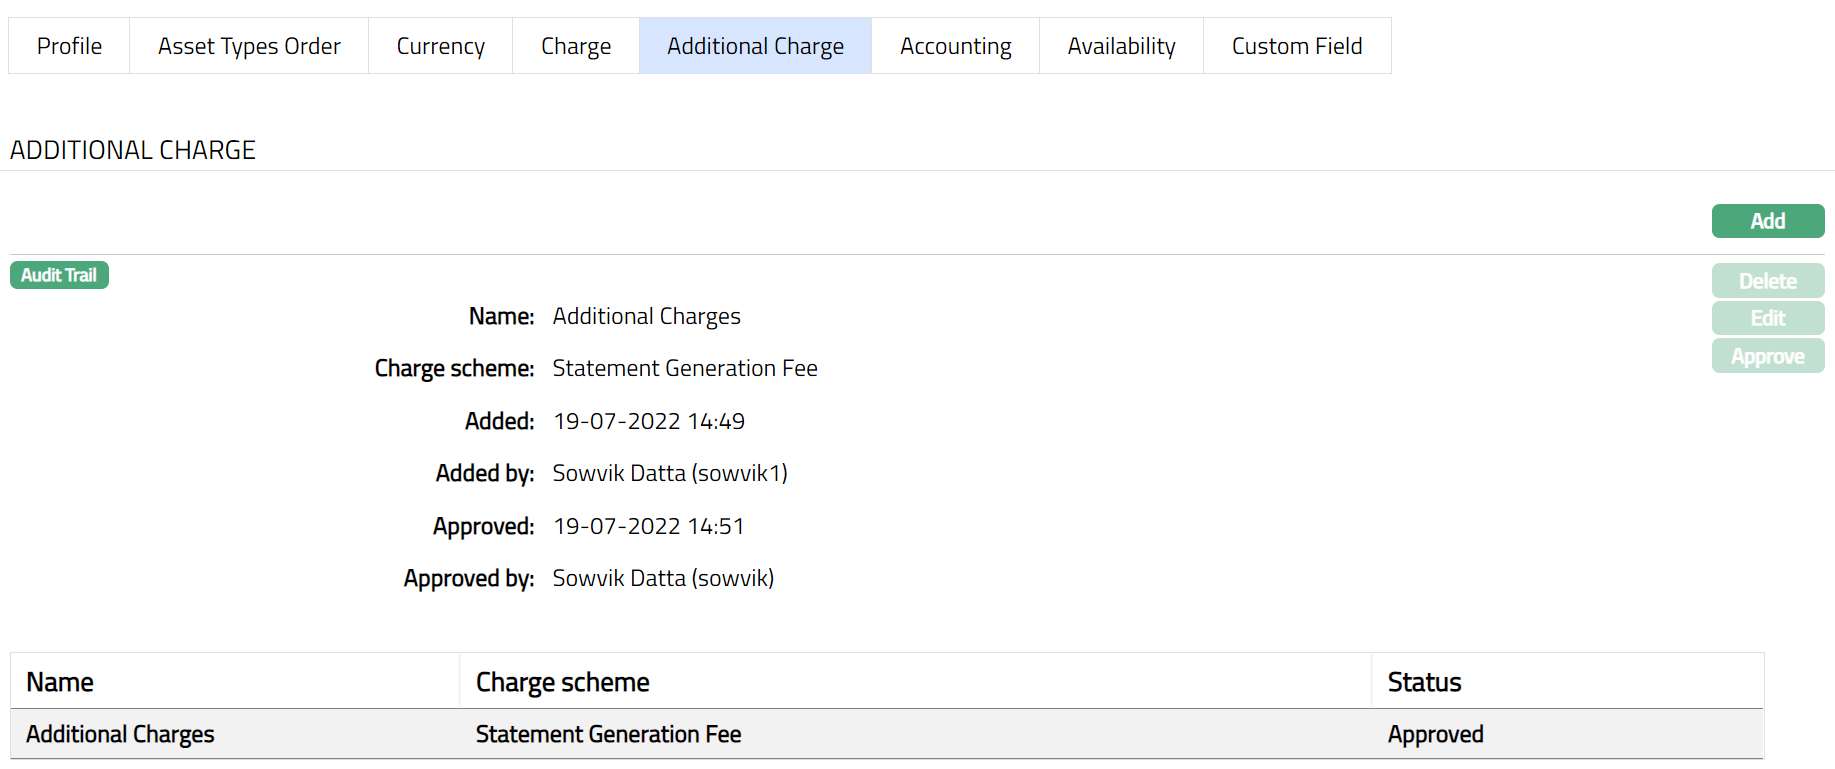
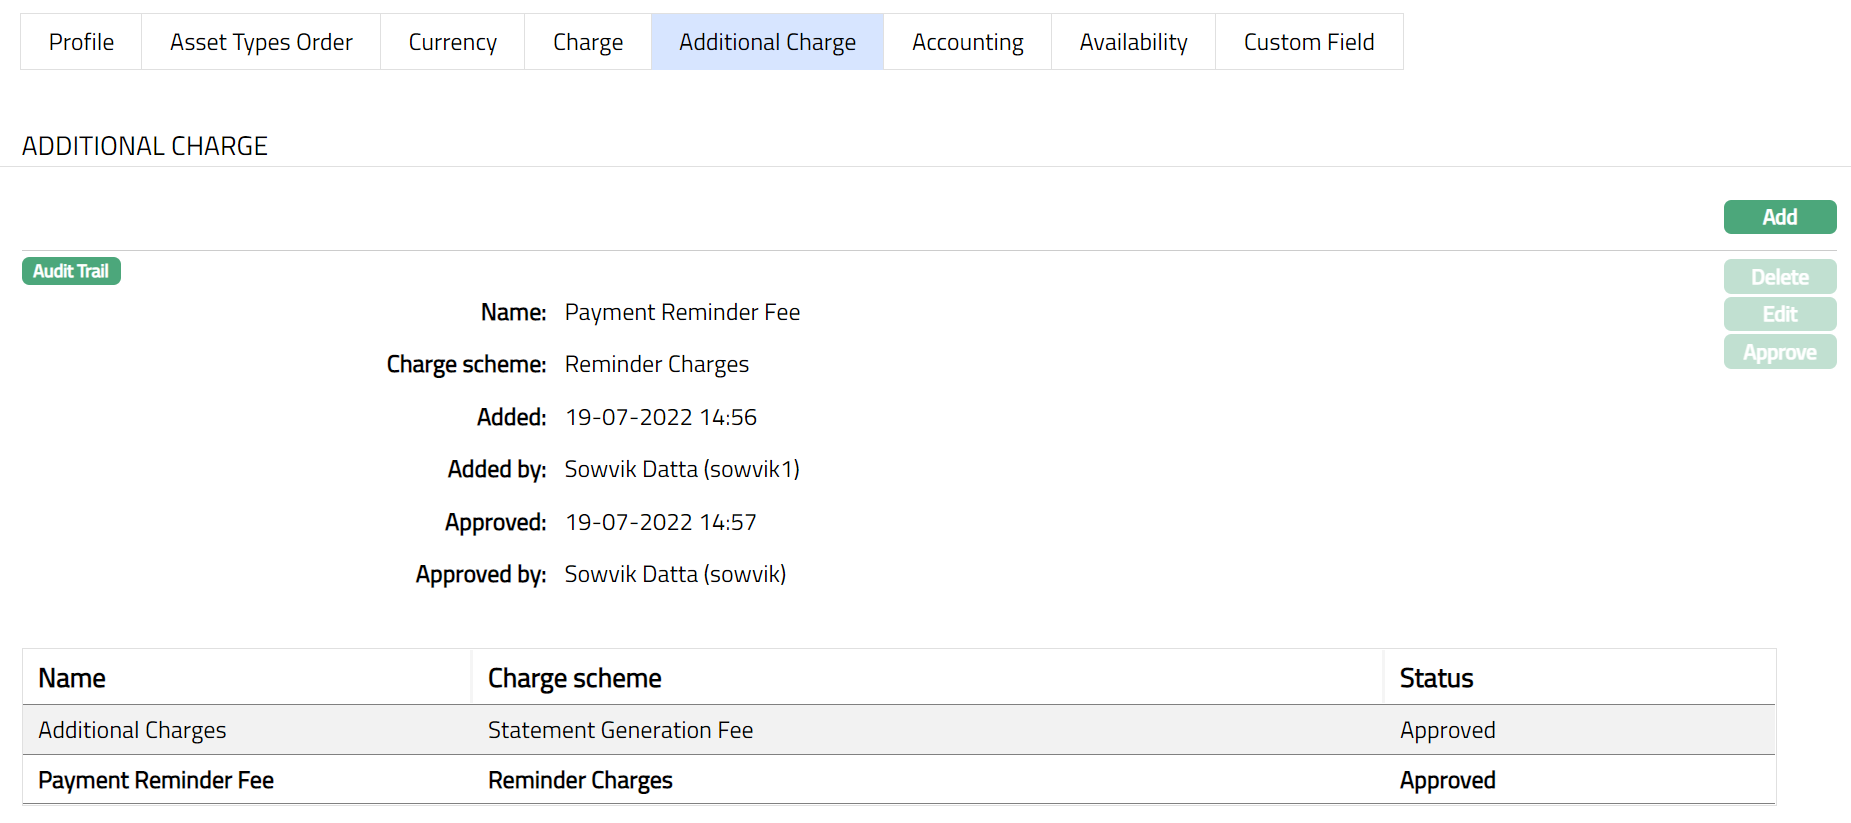
Note: Once the Additional Charge is added or edited, the status of the Additional Charge tab will be Pending till it is approved by another user. On Approval, the charges will be applicable on the new Accounts created based on this product and the Additional Charge tab status is set to Approved. Also, once you approve you cannot edit of make any changes in the tab.
Functions: Add, Edit, Delete, Approve.
The additional fields available are:
Status field denotes the status of the tab.
Added field denotes the date on which the record was added.
Added by field denotes the name of the user who created the record.
Approved field denotes date on which the record was approved and is displayed only for approved records.
Approved by field denotes name of the user who approved the record and is displayed only for approved records.
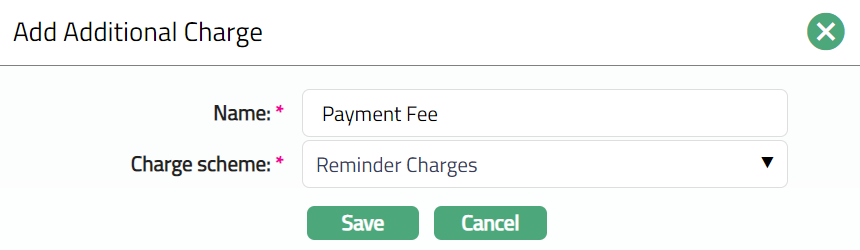
Similarly, if required you can add another Additional Charge based on this product as per sample screen shots shown below.
To Edit Additional Charge
- Click Edit. Edit Additional Charge page appears.
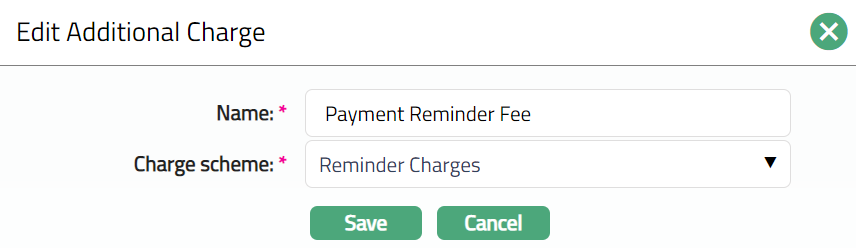
Note: All the fields in Edit Additional Charge are editable.
- Click Save. Additional Charge page appears with the edited details.
Functions: Add, Edit, Delete, Approve.
Accounting
Using this tab, you can maintain the GLs and Transaction codes required for the accounting entries during the life cycle of the Placement Instructions under this Placement Setting.
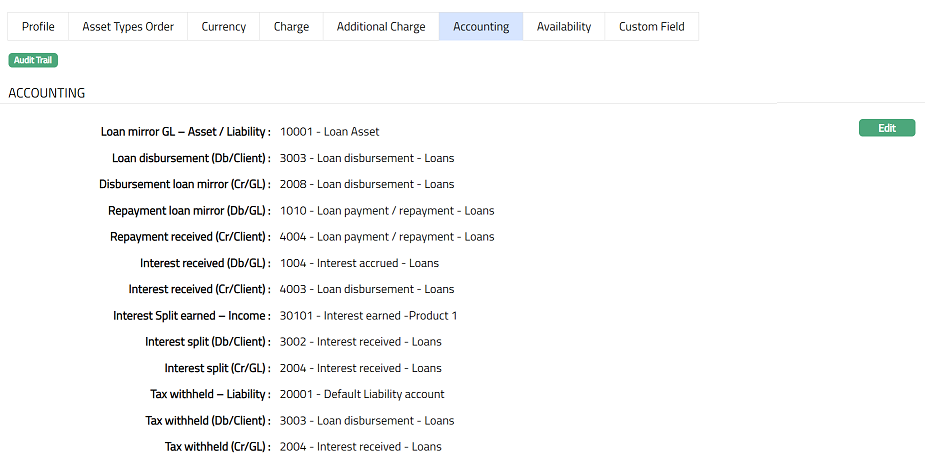
To view/Edit Accounting
- Access Placement Settings page. Click Accounting tab. The details are defaulted from the entries that you made during product creation. For details refer to New Placement Setting -- Accounting (4/5).
To Edit Accounting
- Click Edit. Edit Accounting page appears.
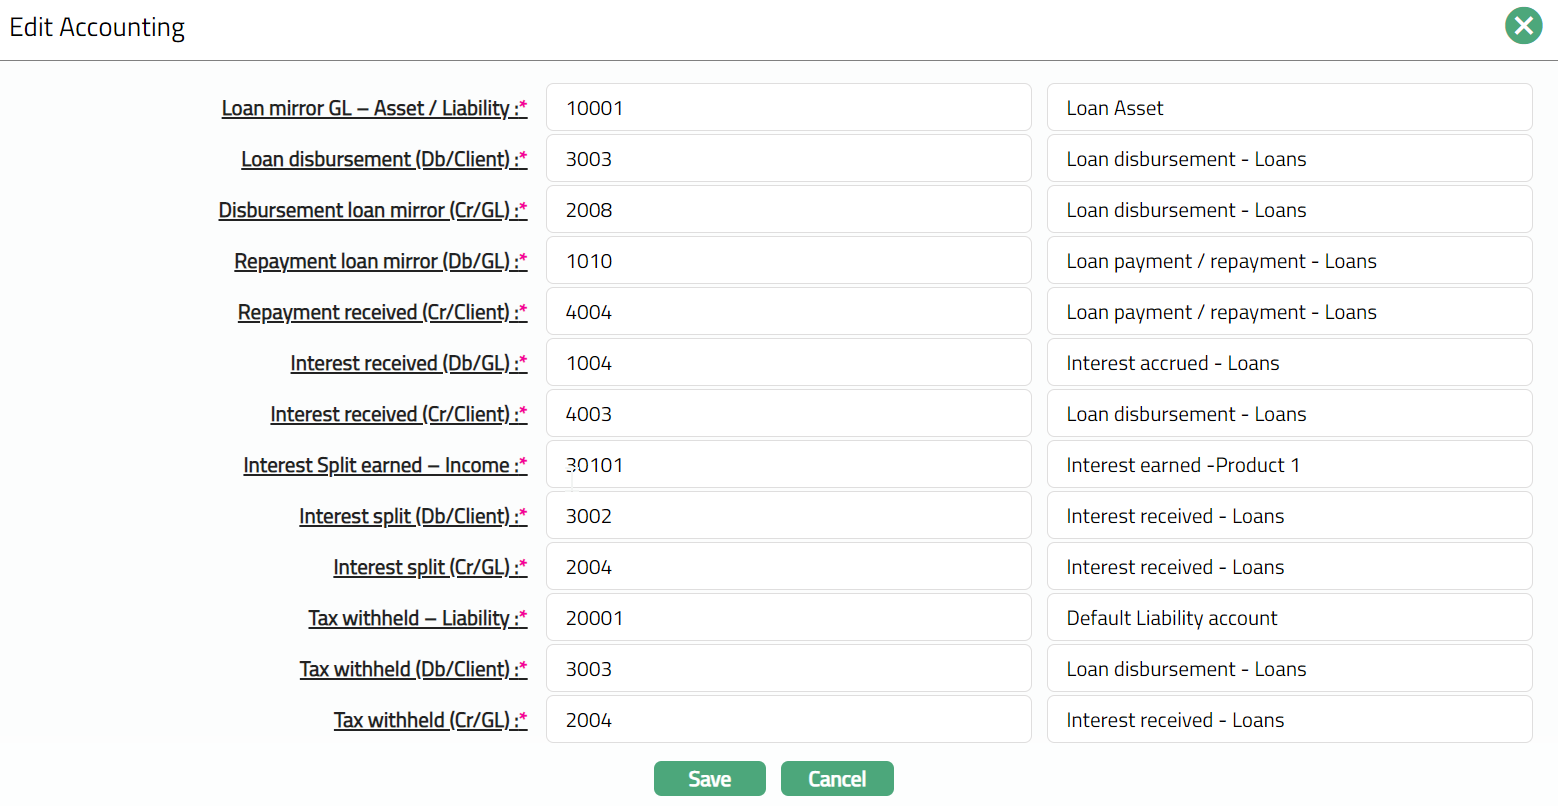
Note: All the fields in Edit Accounting are editable.
- Click Save. Accounting page appears with the edited details.
Functions: Edit
Availability
This tab can be used to control the availability of the Placement Setting to specific Branch, Offering, Client or Loan Request Setting. Each of these can be maintained under the sub-tab. By default, the Placement Setting is available to all. But, if you need to make it available only to specific Branch, Offering, Client or Loan Request Setting, you can do so in these sub-tabs. Once you choose Specific in any of these sub-tabs, you need to add the Specific Branch, Offering, Client or Loan Request Setting. Accordingly, Placement Instructions can be created under this Placement Setting only for those specific records.
For example, you can specify that placements under this Placement Setting can be made only by a certain category of lenders; and / or that they can invest only into specific Loan Request Settings.
Availability-Branch
Using this tab, you can allow the Product to be available for all the branches or only specific branch(es).
To select the branch
- Access Placement Settings page, click Availability tab, then click Branch tab
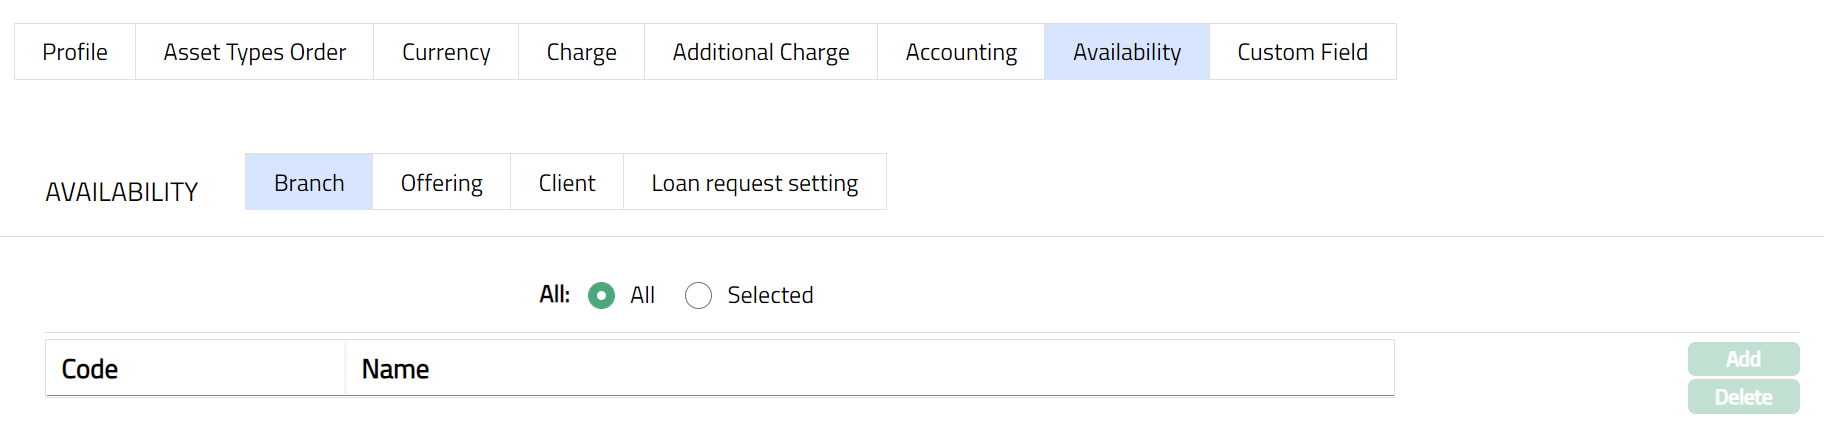
By default, All radio button is selected so that this Product is available for all Branches.
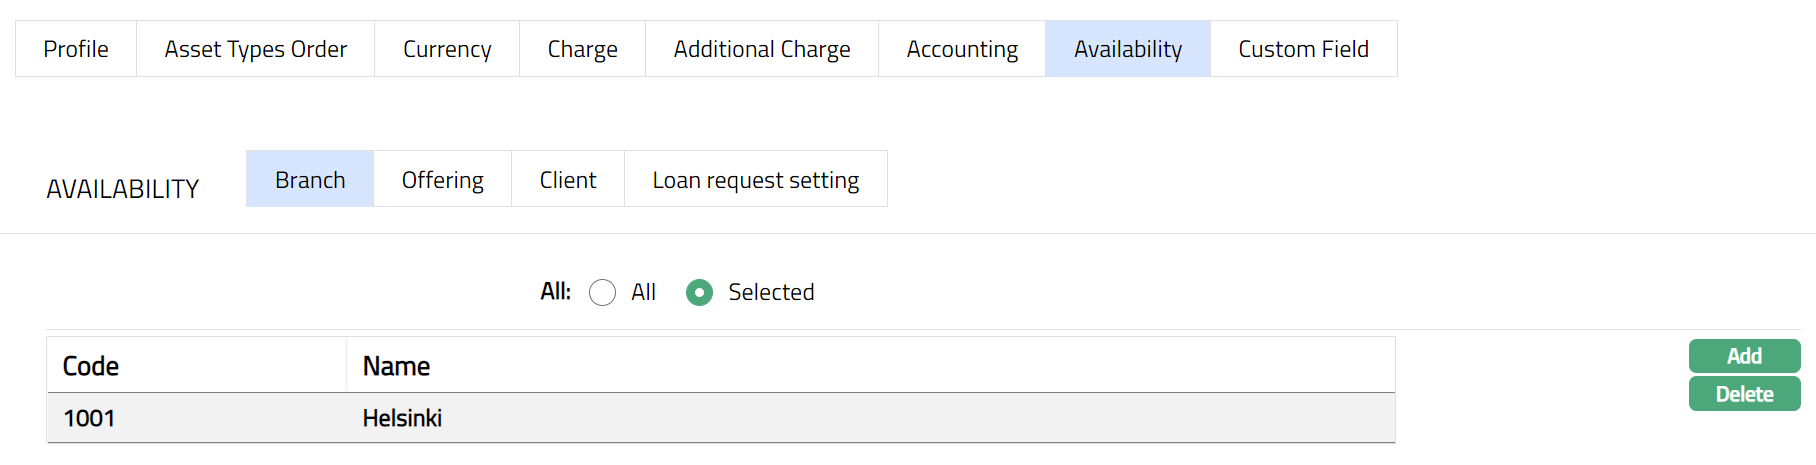
To restrict the branches for which this Product is available, click Selected radio button. Add button is now enabled.
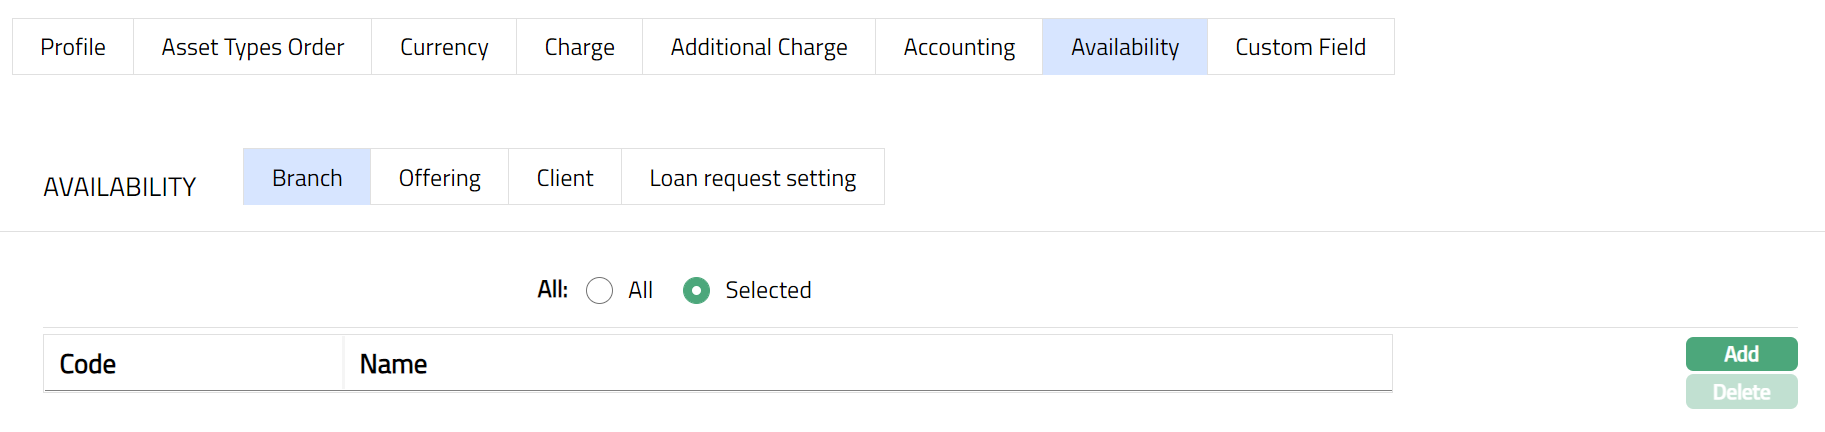
- Click Add. The Add Branch screen appears where you can select the required branch from the drop-down of all active branches of the entity maintained under Admin > Branches > maintain
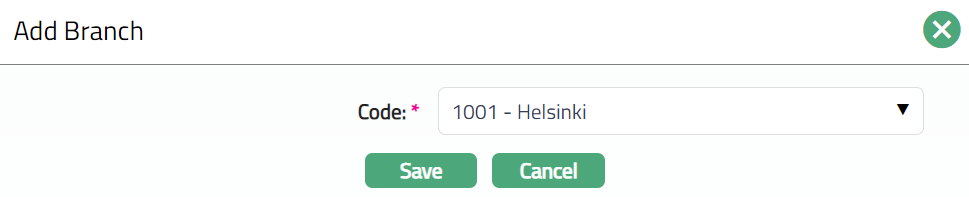
- Click Save. The Availability tab appears with the added branch details under Branch Sub tab.
Function: Add, Delete
Delete: To delete a branch, select the branch and click Delete. When you click on Delete button, Aura displays an alert message. On confirmation, Aura will delete the branch.
Note: You may choose to allow All branches for the product at any time. However, Aura will prompt you to confirm if the selected branches may be deleted. If confirmed, then all the selected branches will be deleted, and the product will be available for ALL branches.
Availability-Offering
Using this tab, you can allow the Product to be available for all the Offerings or only specific Offering(s).
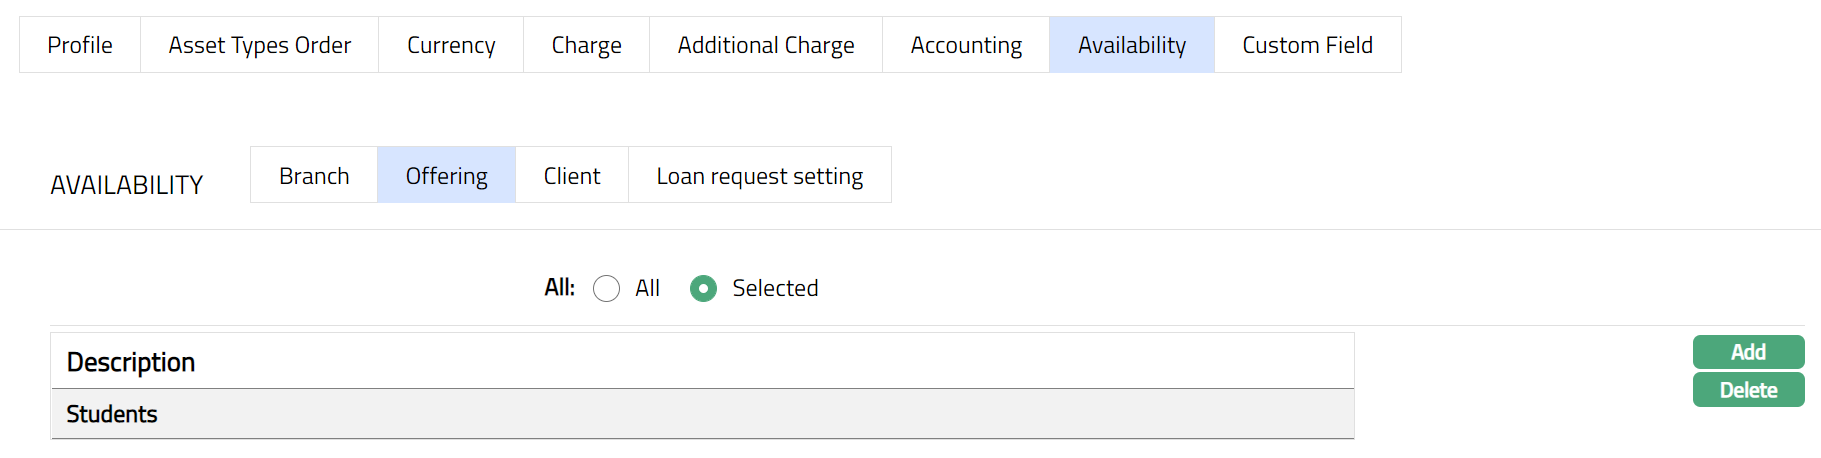
- Access Placement Settings page, click Availability tab, then click Offering tab.
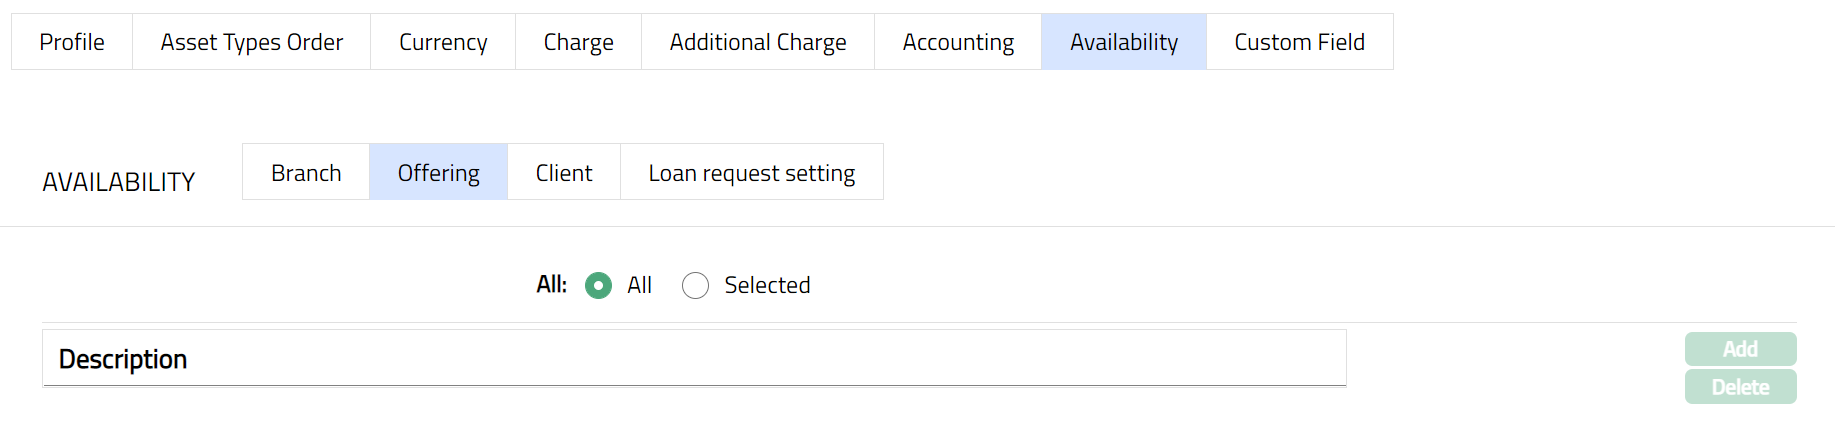
By default, All radio button is selected so that this Product is available for all Offerings.
To restrict the Offerings that are available under this product, click Selected radio button. Add button is now enabled.
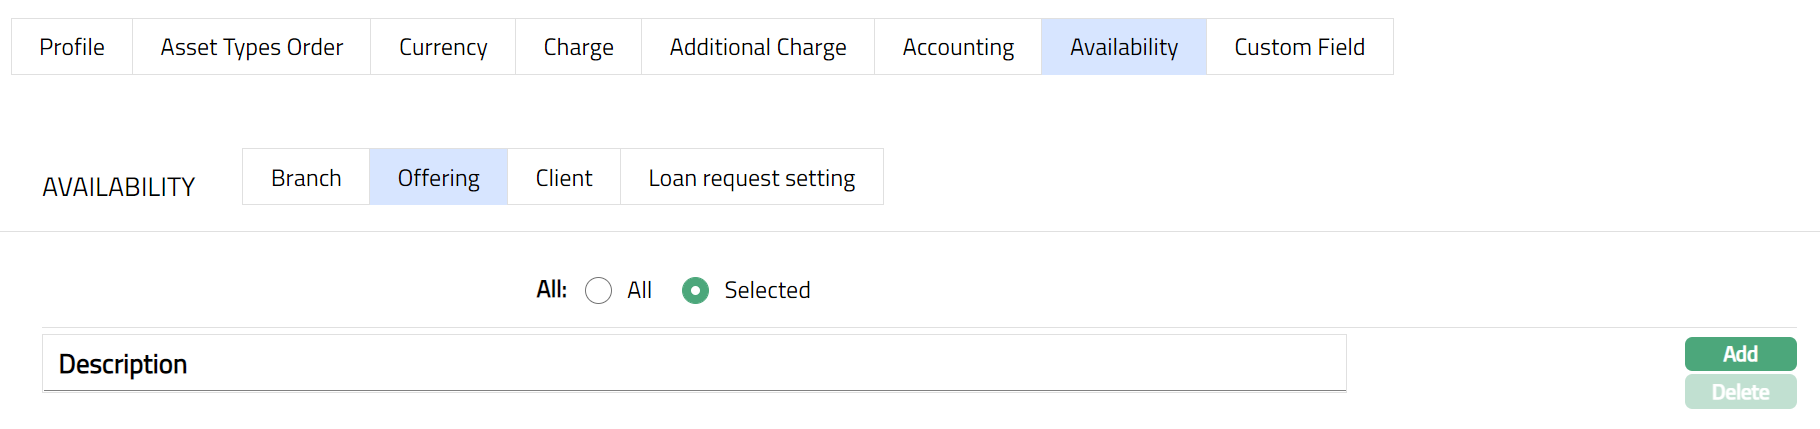
- Click Add. The Add Offering screen appears where you can select the required Offering from the drop-down list of active Offerings maintained under Admin > System Codes > Categories > Offering

- Click Save. The Availability tab appears with the added offering details under Offering Sub tab.
Function: Add, Delete
Delete: To delete a offering, select the offering and click Delete. When you click on Delete button, Aura displays an alert message. On confirmation, Aura will delete the offering.
NOTE: You may choose to allow All Offerings for the product at any time. However, Aura will prompt you to confirm if the selected Offering may be deleted. If confirmed, then all the selected Offering will be deleted, and the product will be available for ALL Offerings.
Availability-Client
Using this tab, you can allow the product to be available for all the Clients or only specific Client(s).
- Access Placement Settings page, click Availability tab, then click Client tab.
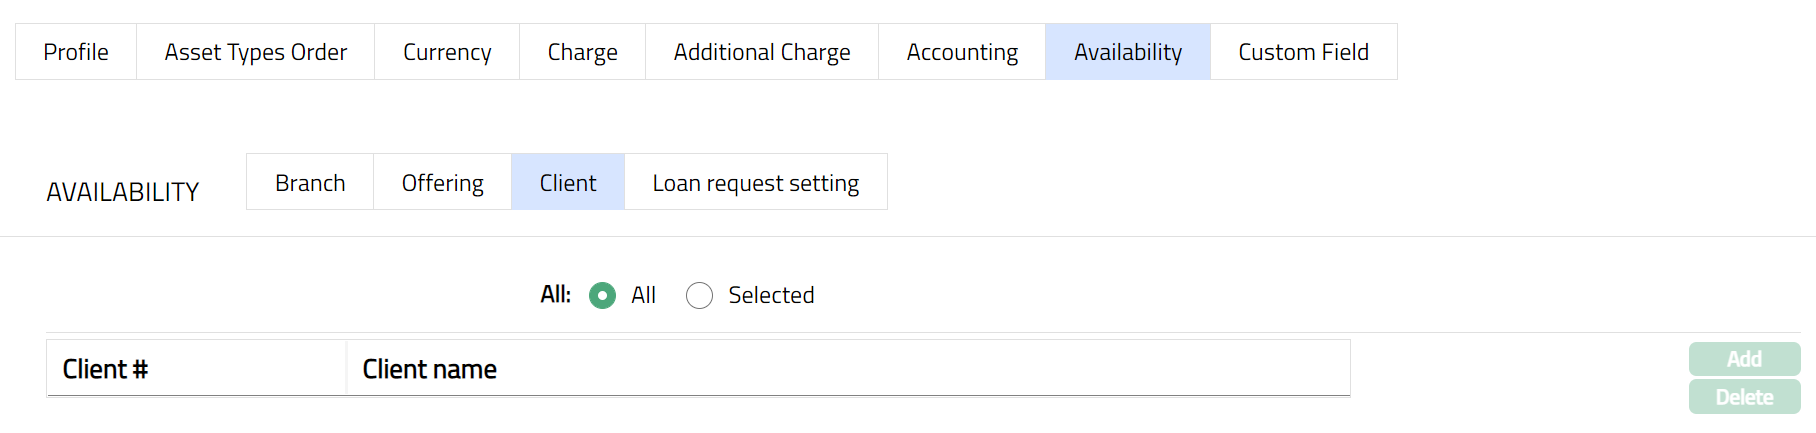
By default, All radio button is selected so that this product is available for all Clients.
To restrict the clients for which this product is available, click Selected radio button. Add button is now enabled.

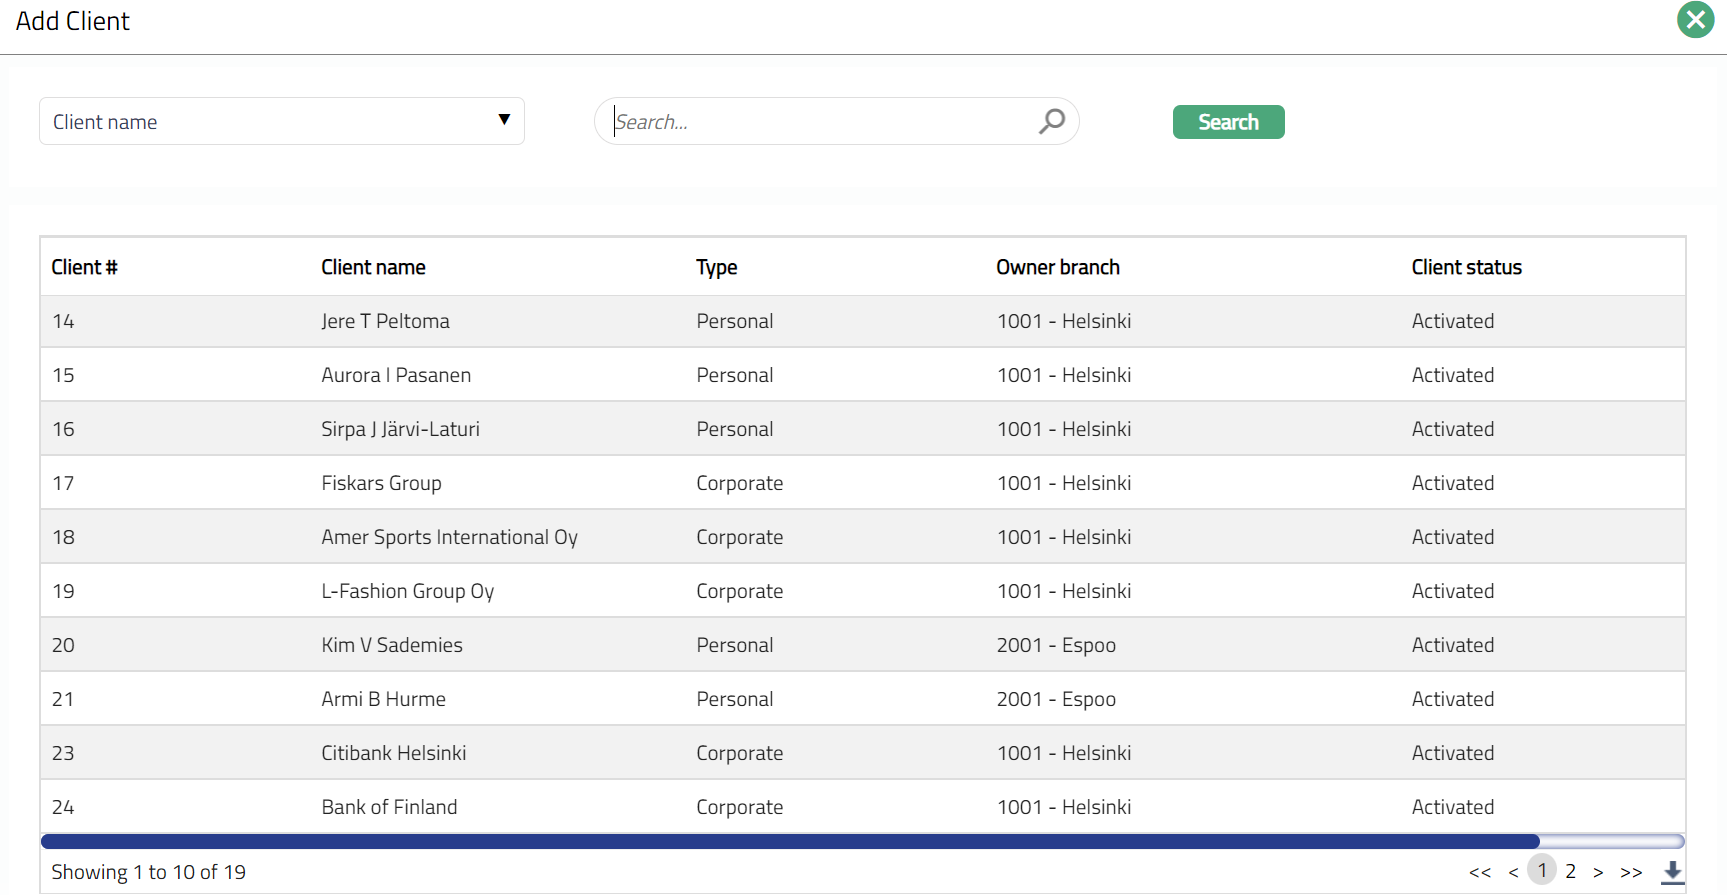
- Click Add. The Add Client page appears, where you can search for the required client with relevant criteria and select the required client
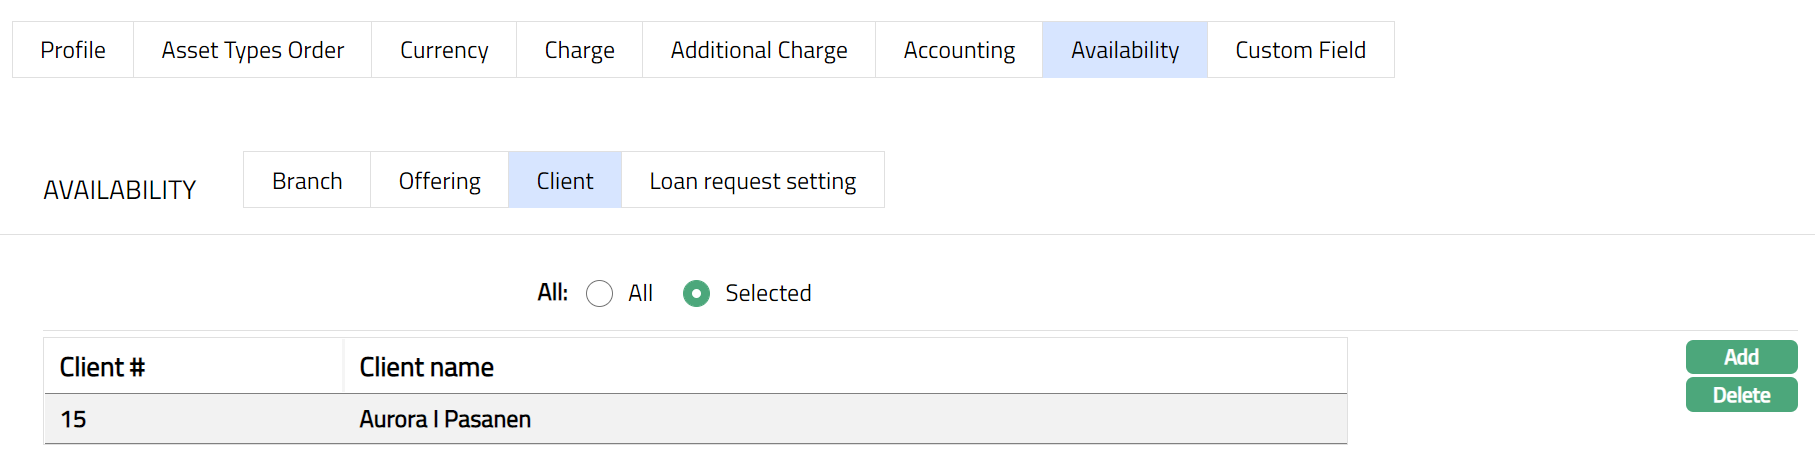
- The selected client(s) will appear under the sub tab Client screen under the main tab Availability as shown below.
Function: Add, Delete
Delete: To delete a client, select the client and click Delete. When you click on Delete button, Aura displays an alert message. On confirmation, Aura will delete the client.
Note: You may choose to allow All clients for the product at any time. However, Aura will prompt you to confirm if the selected clients may be deleted. If confirmed, then all the selected clients will be deleted, and the Product will be available for ALL Clients.
Availability -- Loan request setting
Using this tab, you can allow the product to be available for all the Loan request setting or only specific Loan request setting (s).
- Access Placement Settings page, click Availability tab, then click Loan request setting tab.
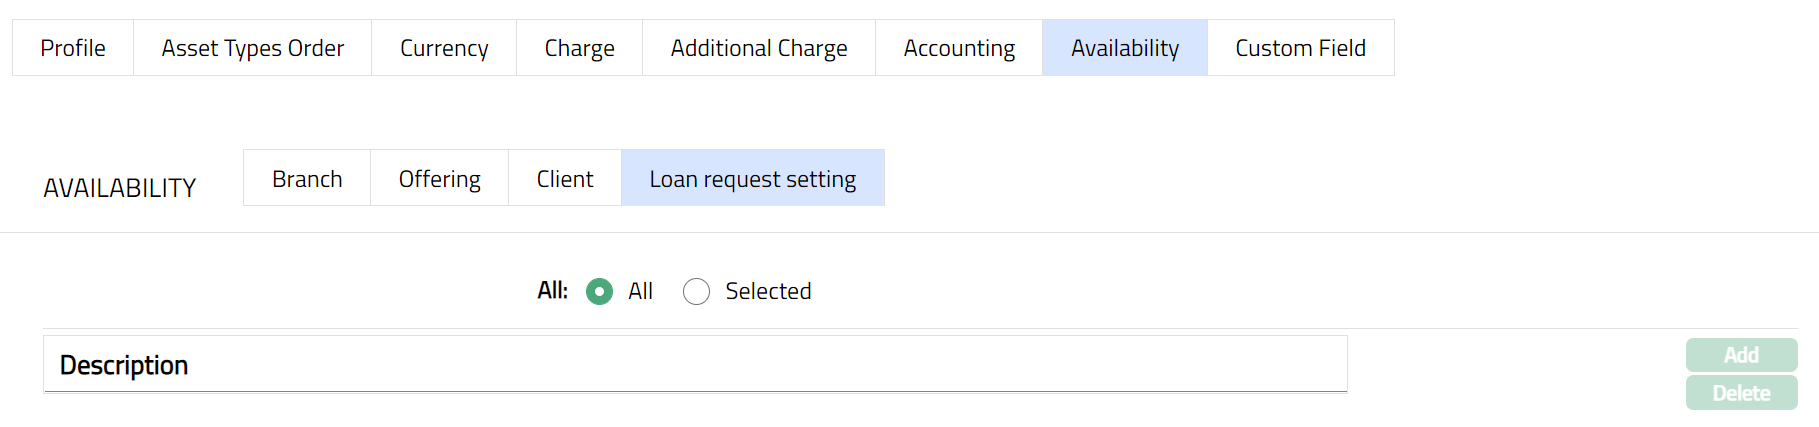
By default, All radio button is selected so that this product is available for all Loan request settings.
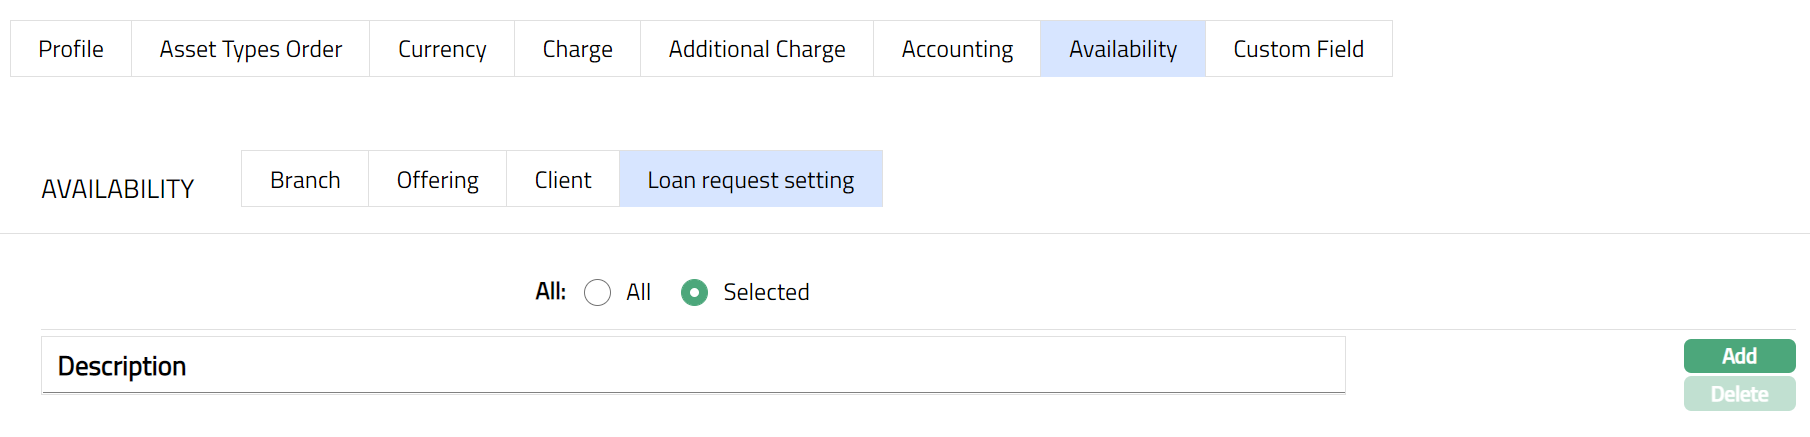
To restrict the Loan request settings for which this product is available, click Selected radio button. Add button is now enabled.
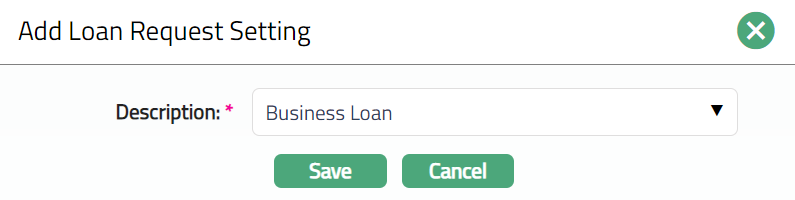
- Click Add. Add Loan Request Setting screen appears where you can select the required Offering from the drop-down list of active Loan request setting maintained under Retail > Peer-to-Peer > Settings > Loan request settings.
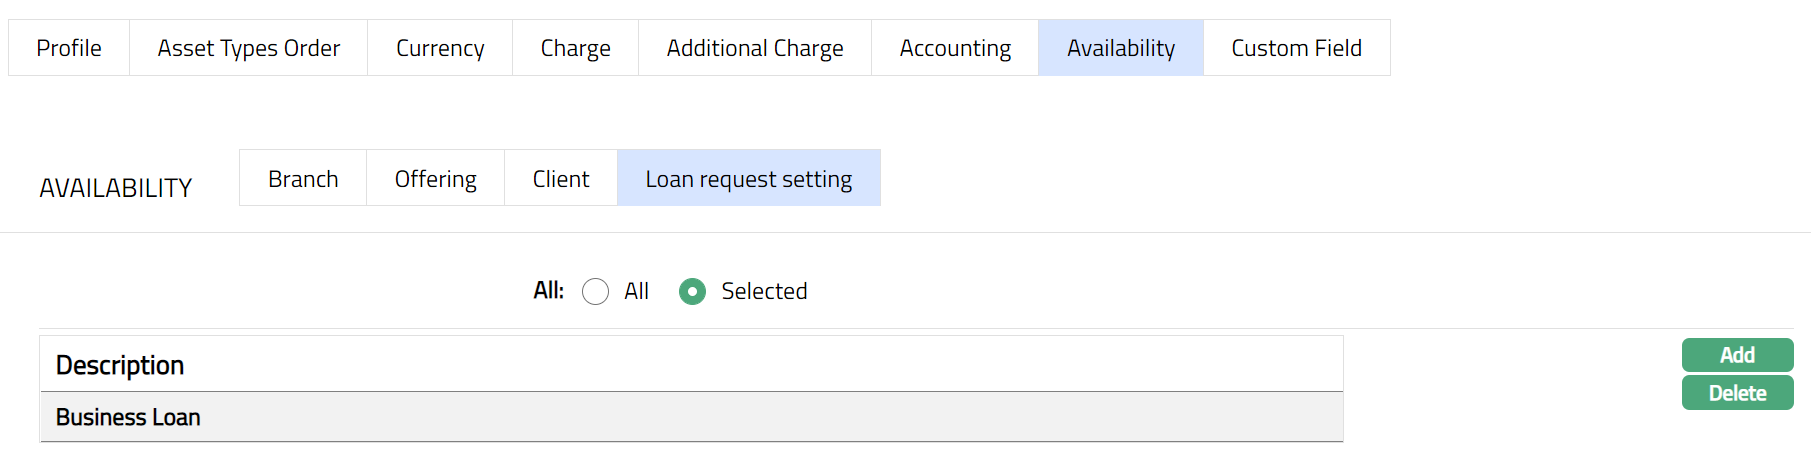
- Click Save. Availability tab appears with the added loan request setting details under Loan request setting Sub tab.
Function: Add, Delete
Delete: To delete a loan request setting, select the loan request setting and click Delete. When you click on Delete button, Aura displays an alert message. On confirmation, Aura will delete the loan request setting.
NOTE: You may choose to allow All loan request setting for the product at any time. However, Aura will prompt you to confirm if the selected loan request setting may be deleted. If confirmed, then all the selected loan request setting will be deleted, and the product will be available for ALL loan request setting.
Custom Field
This menu option allows you to define fields apart from those that are already available in the standard version of Aura. Thus, it enables you to customize additional data storage and use as required to suit your specific business needs.
To maintain the Custom Field
- Access Placement Settings page. Click Custom Field tab.

The field appears only when it is created in Admin > System codes > Custom fields > Custom fields and linked to Peer to Peer product option in Admin > System codes > Custom fields > Field mappings.
Click Edit. Edit Custom Field page appears. In the following illustration, one custom field Loan Category has been mapped to the Product as shown below:

Enter Loan Category to be associated with the Peer-to-Peer. For example: Student Loan, Marketplace lending etc.
Click Save. Custom Field tab appears with the edited details.

Function: Edit