Till / Vault / ATM
Till / Vault / ATM menu allows you to maintain a list of Till / Vault / ATMs for various Branches and define the limits of the cash for various currencies that can be held in the Till / Vault / ATM.
Following are the tabs Under Till / Vault / ATM
To add Till/Vault/ATM
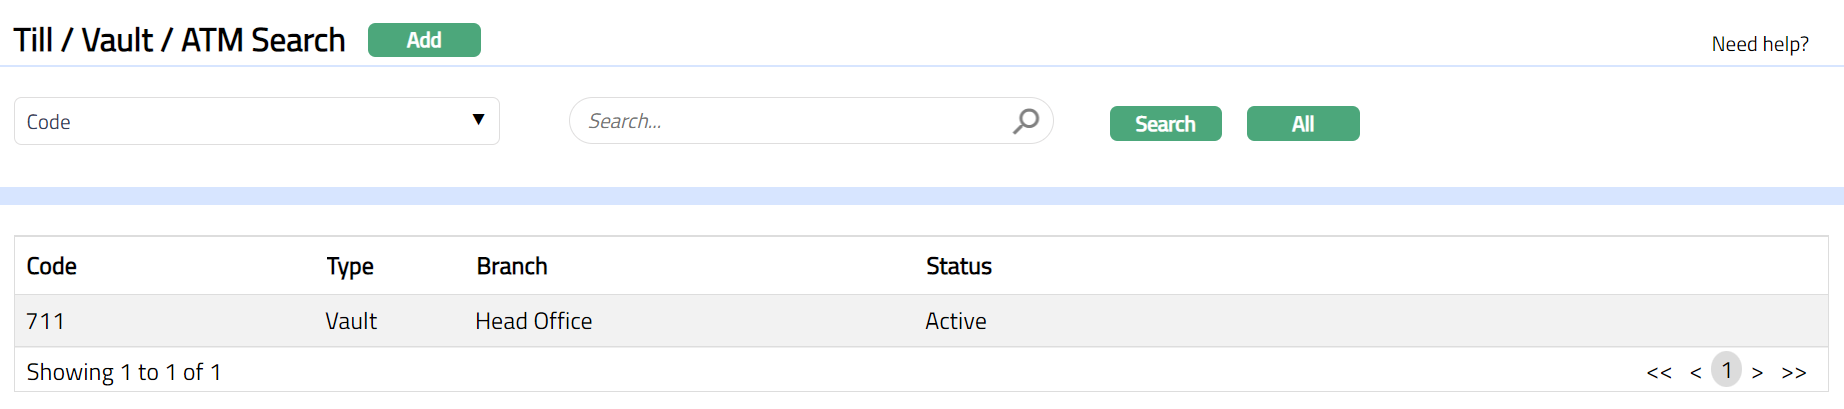
- From Admin menu, click System Codes, Generic Definitions, and then Till / Vault / ATM. The Till / Vault / ATM Search page appears. All Till / Vault / ATMs available in Aura appear on the page.
- Click Add. Till/Vault/ATM-- General (1/2) page appears as shown below.
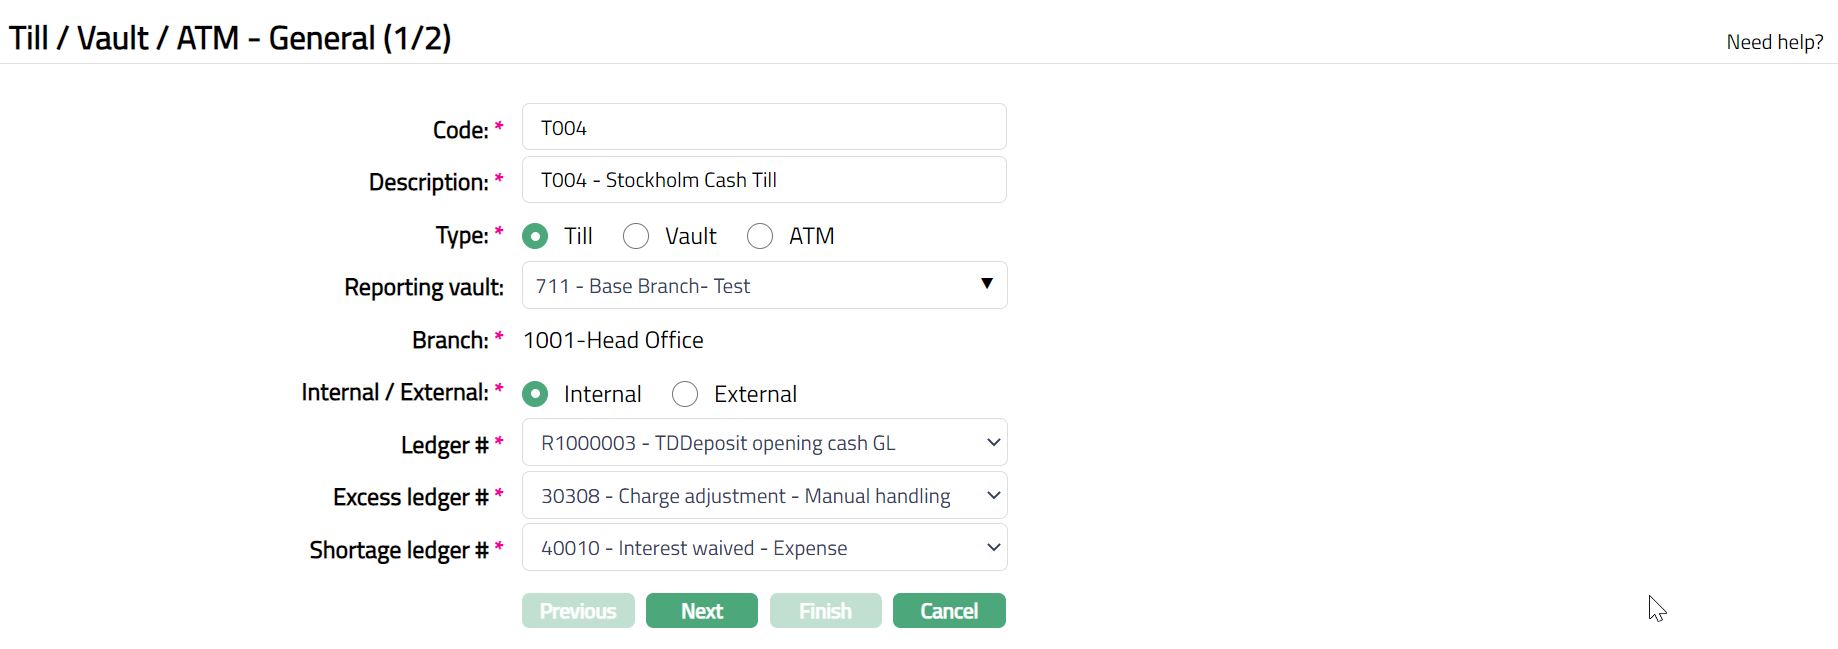
Enter Code.
Enter Description.
Select Type either Till/Vault/ATM by selecting appropriate radio button. If you select Till, then, you also need to specify the corresponding Reporting vault for the Till.
Branch is displayed by default based on the branch into which you have logged in.
Specify if it is an Internal/External Till / Vault / ATM by selecting appropriate radio button.
Specify a Ledger # in which the balance details of the Till /Vault/ATM are maintained. If Internal option is selected, then Ledger # field allows you to select a ledger # of type Asset maintained in Aura under General Ledger > Accounts. If External option is selected, then Ledger # field allows you to enter manually the Ledger # of your choice.
Specify a Ledger # in which the excess balance details of the Till / Vault / ATM is maintained. If internal option is selected, then Excess Ledger # field allows you to select a ledger # of type Liability or Income maintained in Aura under General Ledger > Accounts. If External option is selected, then Excess Ledger # field allows you to enter manually the suitable excess Ledger # of your choice.
Specify a Ledger # in which the shortage in Ledger balance of the Till / Vault / ATM is maintained. If internal option is selected, then Shortage Ledger # field allows you to select a ledger # of type Asset or Expense maintained in Aura under General Ledger > Accounts. If External option is selected, then Shortage Ledger # field allows you to enter manually the suitable Shortage Ledger # of your choice.
Click Next. Till/Vault/ATM -- Confirmation (2/2) page appears.
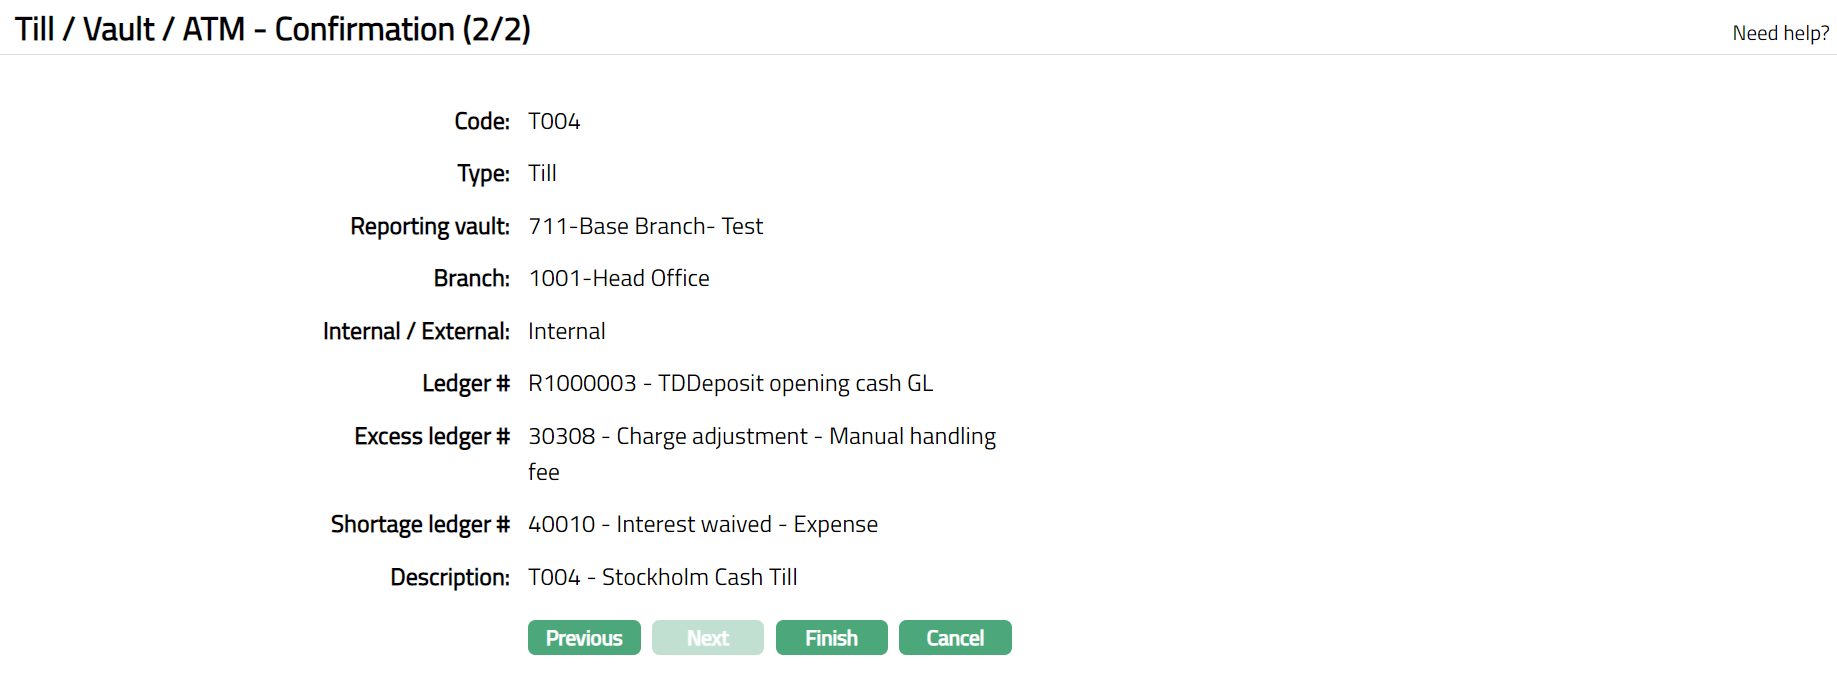
- Click Finish. Till / Vault / ATM page appears displaying Profile tab by default and the Status of the new Till / Vault / ATM record created is Active.

Functions: Add, Edit, Delete, Search, Suspend, Activate
Suspend: You can suspend the Till / Vault / ATM by clicking on Suspend button. When you click on Suspend button, Aura displays an alert message. On confirmation, Aura will suspend the Till / Vault / ATM; and the button will be renamed to Activate. Once the Till / Vault / ATM is suspended, it becomes unavailable in any other drop-down list.
Activate: You can activate a Suspended Till / Vault / ATM by clicking on Activate button. When you click on Activate button, Aura displays an alert message. On confirmation Aura will activate the Till / Vault / ATM; and the button will be renamed to Suspend. Once the Till / Vault / ATM is activated, it becomes available in other drop-down lists.
Delete: You can delete a Till / Vault / ATM by clicking on Delete button. When you click on delete button, Aura displays an alert message. On confirmation Aura will delete the Till / Vault / ATM.
Profile
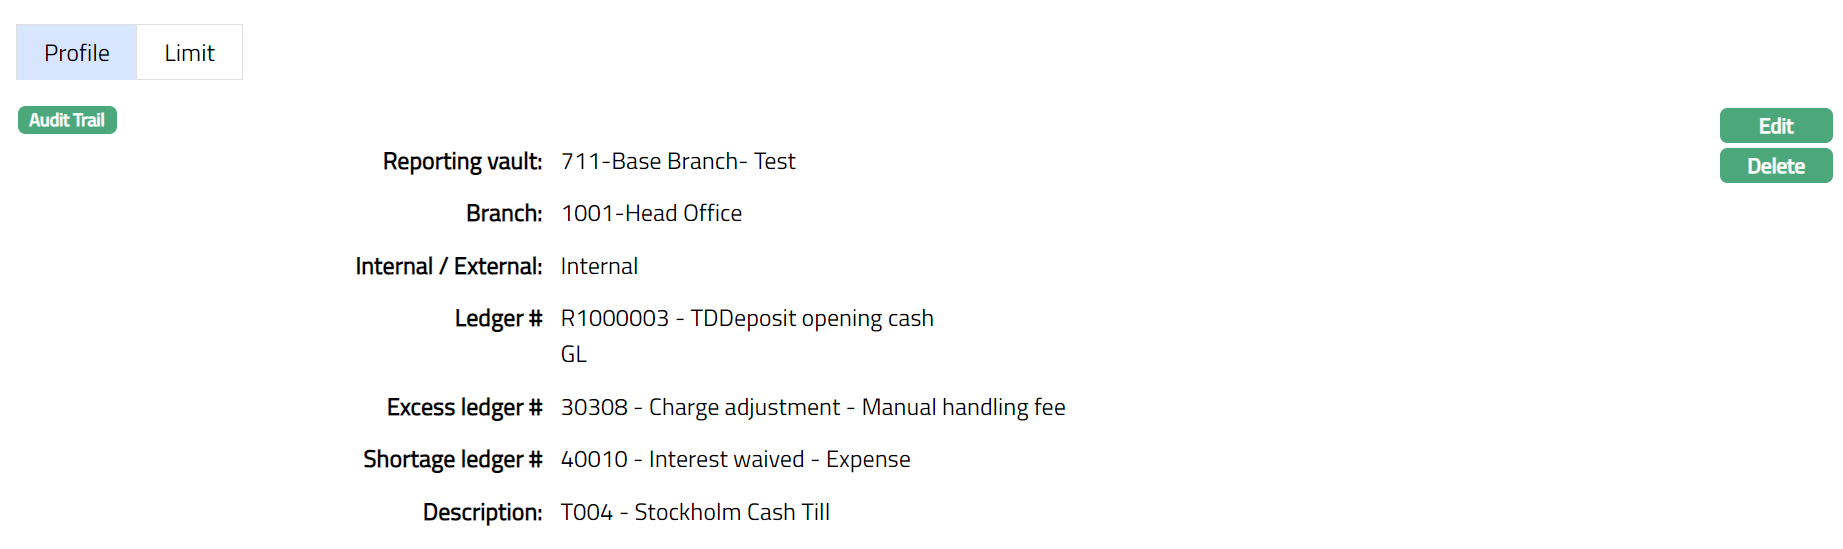
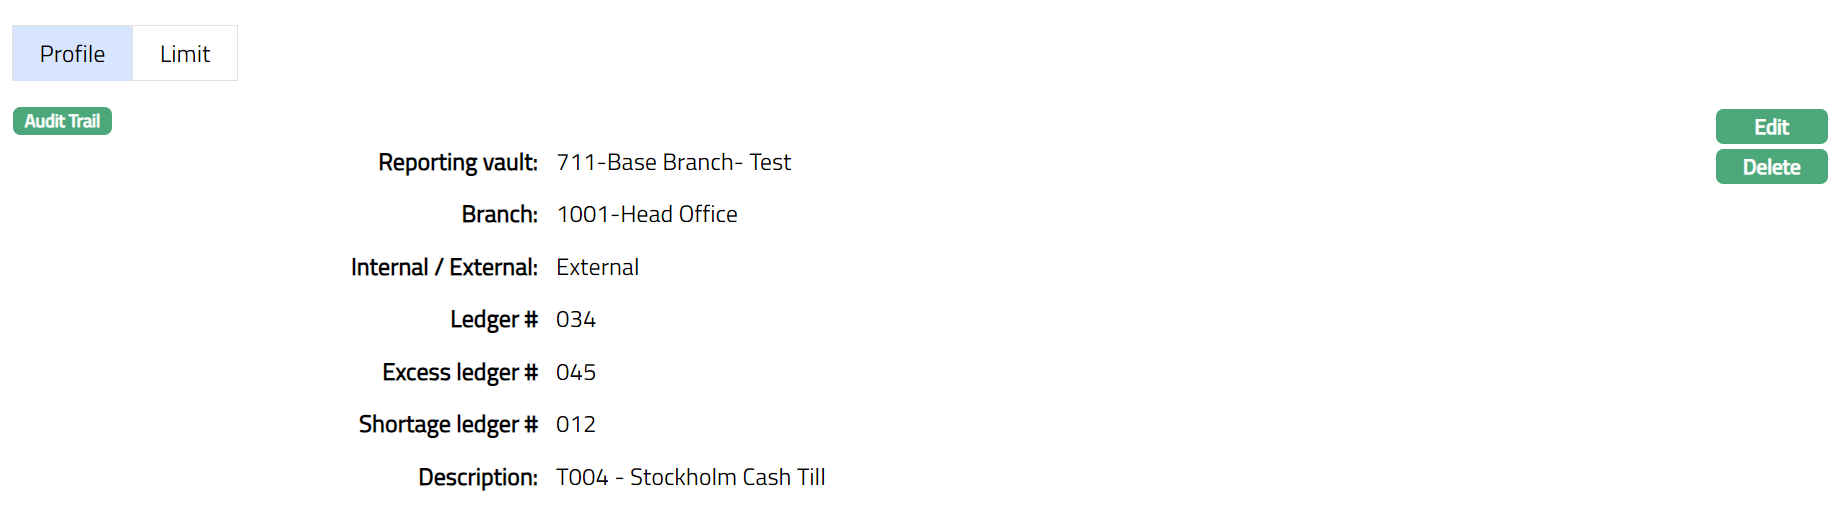
[]The Profile tab, which is the default screen in any Till / Vault / ATM Maintenance screen, shows the basic details of the Till / Vault / ATM.
To view / add / edit Profile tab,
- Access Till / Vault / ATM page. Click Profile tab. The details are defaulted from the entries that you made during Till / Vault / ATM creation. For details refer to Till / Vault / ATM -- General (1/2).
- Click Edit. Edit Till / Vault / ATM screen appears as shown below.
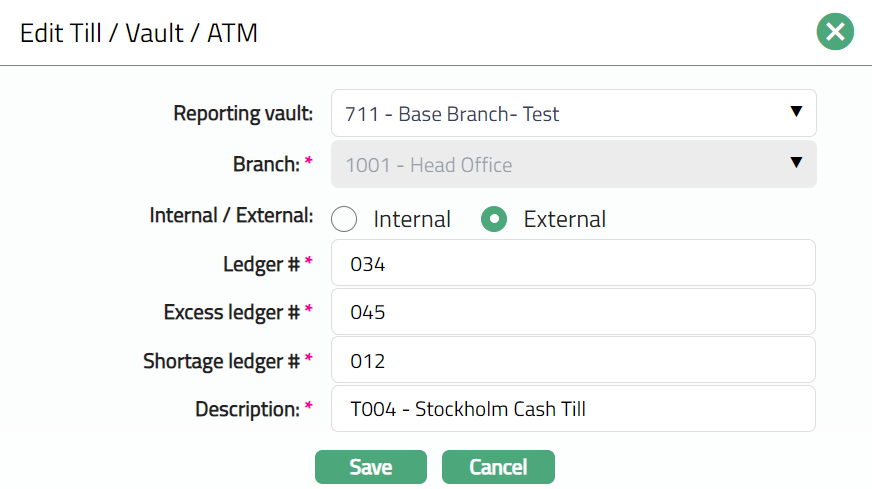
Note: Except Branch field all other fields are editable.
- Click Save. Profile page appears with the edited details.
 Functions: Edit, Delete
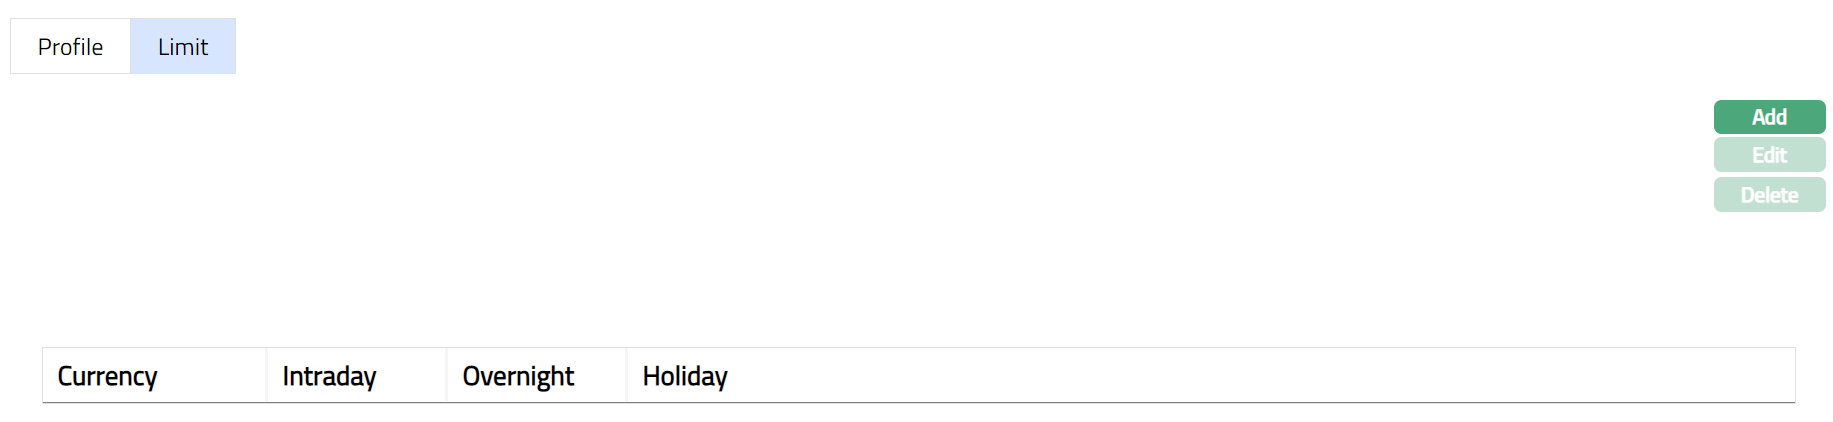
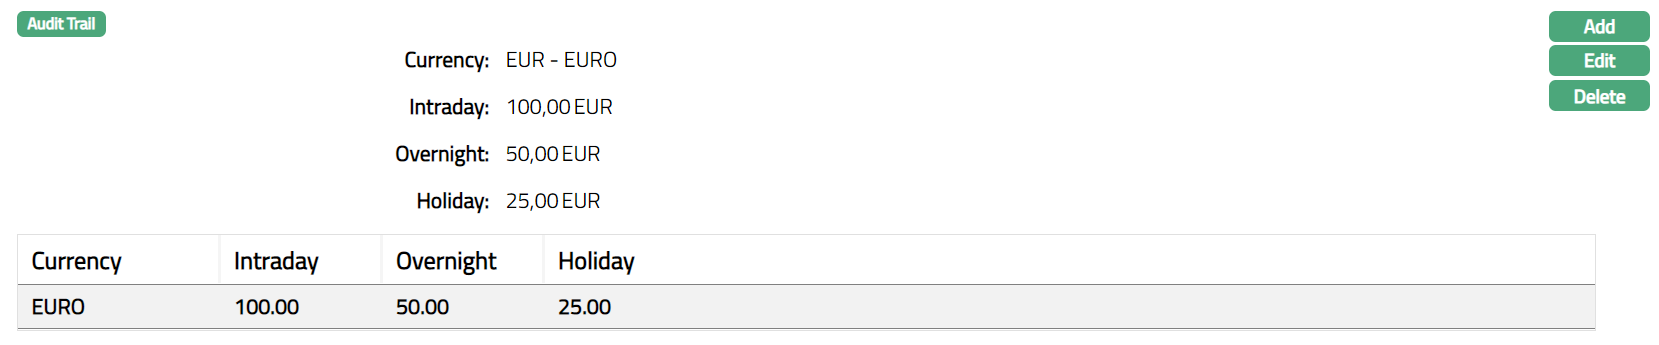
Limit
[]Under this tab, you can specify the maximum amount of cash that can be held in that Till / Vault / ATM in various currencies. When a new Till / Vault / ATM record is created, the fields related to Limit tab are not created. You need to add them by using Add. You can also edit / Delete the Till / Vault / ATM limit.
For adding Limit
- Click any of the existing records to access Till / Vault / ATM page. Then click Limit tab. Initially it will be blank unless it is already added earlier.
- Click Add. Add Till / Vault / ATM Limit page appears.
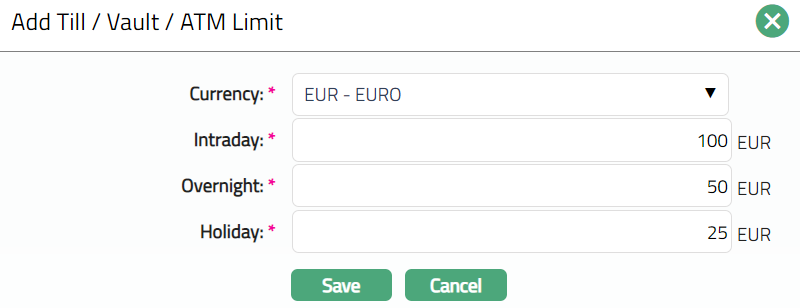
Select Currency from the drop-down list of active GL currencies maintained. The list will show the GL currencies that have not been maintained already for the Till / Vault / ATM.
Enter Intra day limit. This refers to the maximum amount of cash that can be held in that Till / Vault / ATM during the business hours of the day.
Enter Overnight limit. This refers to the maximum amount of cash that can be held in that Till / Vault / ATM overnight.
Enter Holiday limit. This refers to the maximum amount of cash that can be held in that Till / Vault / ATM on a holiday.
Click Save. Till / Vault / ATM page appears displaying the details of the Limit you added.
Functions: Add, Edit, Delete.
To edit Till / Vault / ATM Limit,
Access Till / Vault / ATM page. Click the Limit tab. The details are defaulted from the entries that you made during Till / Vault / ATM Limit creation.
Click Edit. Edit Till / Vault / ATM Limit screen appears as shown below.
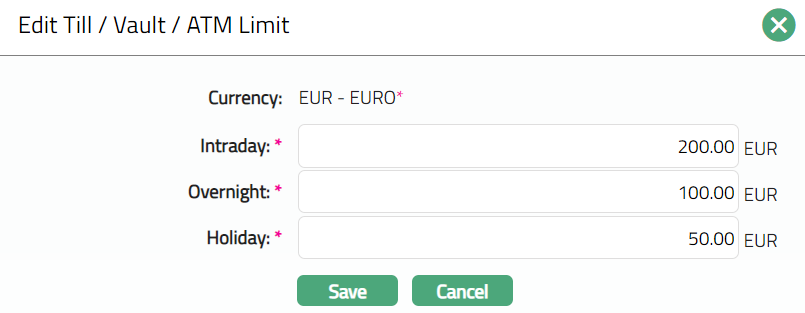
Note: Except Currency field all other fields are editable.
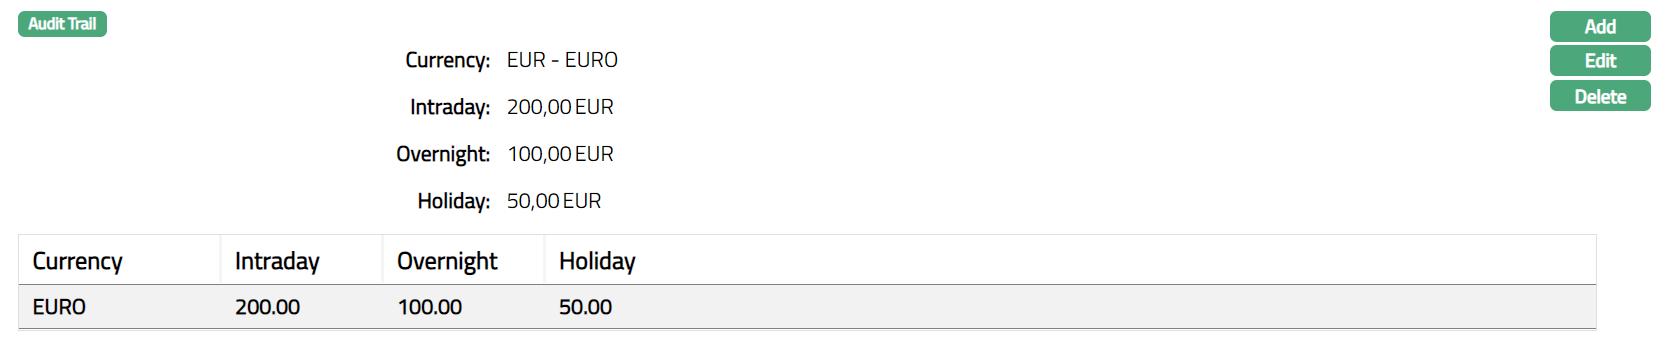
- Click Save. Limit page appears with the edited details.
 Functions: Add, Edit, Delete