Factoring - Change of Terms
The Change of Terms function in Aura allows you to initiate specific updates on an existing factoring contract after it has been created.
This feature does not allow free modification of the contract. Instead, it enables you to initiate predefined actions on the contract based on business conditions.
Using this functionality, you can perform one of the following actions:
Update acknowledgement details
Initiate recourse
Change penalty and charge bearer
The following are the tabs that appear on Factoring - Change of Terms page:
To add Change of Terms,
1. From the Commercial menu, click Factoring, and then click on Change of Terms under Contract. The Factoring Change of Term page appears.

2. Click Add. The New Factoring Change of Terms → Profile (1/2) page appears.
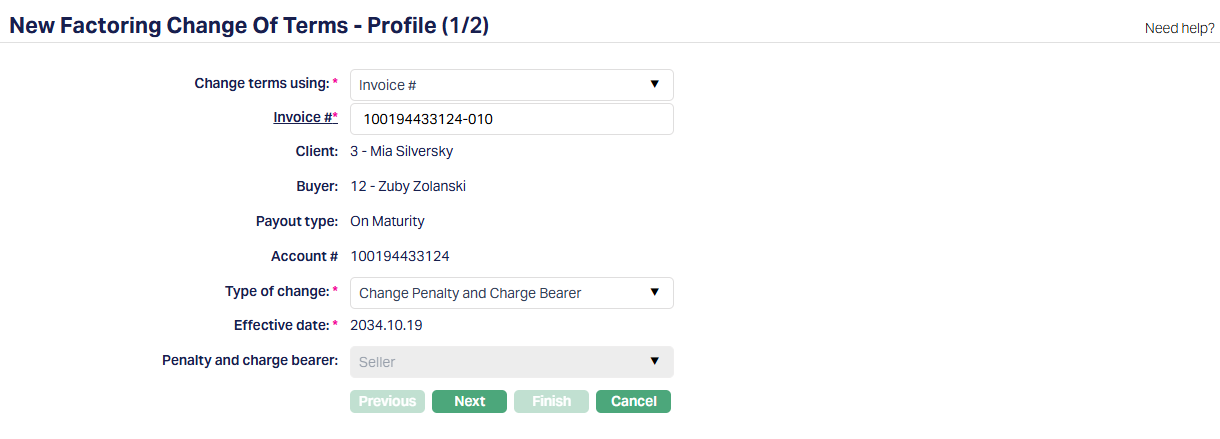
3. Change terms using - This field determines how you want to identify the contract. You can select:
Trade Invoice Number (default)
Invoice Number
Based on the selected option, the next field changes accordingly.
4. Enter or Select the Trade Invoice number / Invoice # by clicking on the hyperlink. The Contract Search page appears where you can search for a client with the relevant criteria and select the required client. (As shown in the screenshot below.)

Alternatively, you can type and choose from the auto-suggested list and select the required record. Once the invoice is selected, Aura automatically retrieves and displays the associated contract details.
5. The Client field is automatically populated based on the selected invoice. This represents the seller associated with the selected factoring contract and cannot be edited.
6. The Buyer field is automatically populated based on the selected invoice. This represents the buyer associated with the selected invoice and cannot be modified.
7. The Payout Type is displayed based on the selected contract. This indicates how the contract is structured (for example - On Maturity) and is shown for reference only.
8. The Account # displays the account number of the factoring contract linked to the selected invoice. This helps you confirm that the Change of Term is being processed against the correct contract.
9. Type of Change - This field specifies the type of change you want to perform on the selected contract. The options available in this field are not always the same. Aura displays each option only when the selected contract satisfies specific conditions.
Available Options and Conditions:
i) Update Acknowledgement - This option is available only when all the following conditions are met:
Acknowledgement Required is set to Yes
Acknowledgement Date is not yet recorded
Notified On date is available
This ensures that the acknowledgement can be updated only for contracts where it is required, has been notified, but has not yet been completed.
ii) Initiate Recourse - This option is available only when all the following conditions are met:
Total Disbursed Amount is greater than 0
Recourse Notification Date is not yet recorded
Unpaid Gross Invoice Amount is greater than 0
This ensures that recourse can be initiated only when funds have already been disbursed, recourse has not yet been triggered, and there is still an outstanding amount on the invoice.
iii) Change Penalty and Charge Bearer - This option is available only when all the following conditions are met:
Recourse Through is set to Invoice
Recourse is not yet activated
This ensures that the penalty and charge bearer configuration can be modified only before recourse processing begins.
Common Conditions - Applicable to All Options
In addition to the above, the following conditions must be satisfied for any type of change to be available:
Contract status must not be Registered or Closed
No other action records (such as Disbursement, Repayment, or another Change of Terms) should exist in Pending status for the same contract.
If any of these conditions are not met, the corresponding option will not be available for selection.
10. The Effective Date is automatically set to the Current Booking Date. This field is displayed for reference and cannot be modified.
11. Penalty and Charge Bearer - This field is displayed only when the selected Type of Change is Change Penalty and Charge Bearer. This field determines who will bear the charges associated with the contract.
The available values are -
Default Behaviour - Charges are applied based on the configuration defined in the Buyer Group.
Seller - All charges are borne by the Seller, irrespective of the Buyer Group configuration.
This field is system-controlled and cannot be edited manually. Aura displays the alternate value based on the current configuration of the contract:
If the current value is Default Behaviour, Aura displays Seller
If the current value is Seller, Aura displays Default Behaviour
This means that the Change of Terms request always represents a switch from the existing configuration to the alternate configuration, rather than allowing a free selection.
12. Click Next. The New Factoring Change of Terms → Confirmation (2/2) page appears showing all the details you have entered in the previous steps.
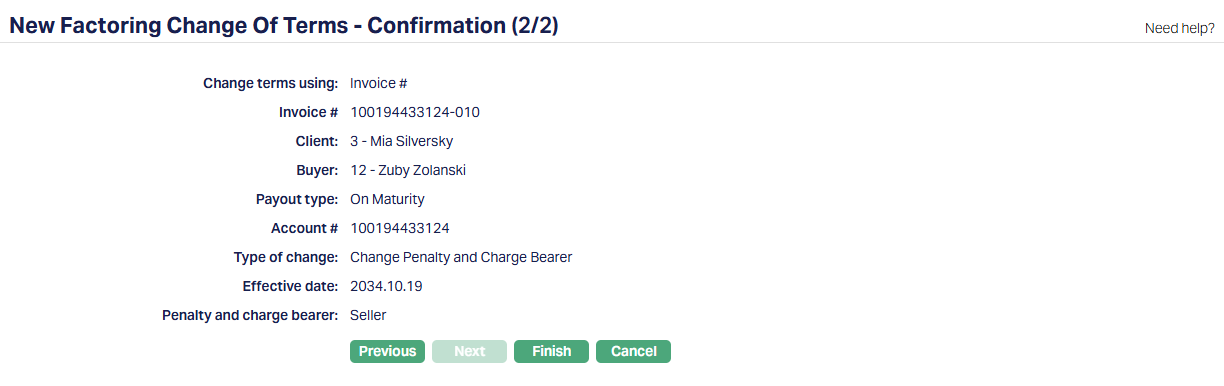
13. Click Finish. The Factoring Change of Terms is created with a unique Change Reference #, and the Change of Terms page appears displaying the Profile tab of the record that you added. The record is created with a Pending status.
No changes are applied to the contract at this stage. The request takes effect only after approval.
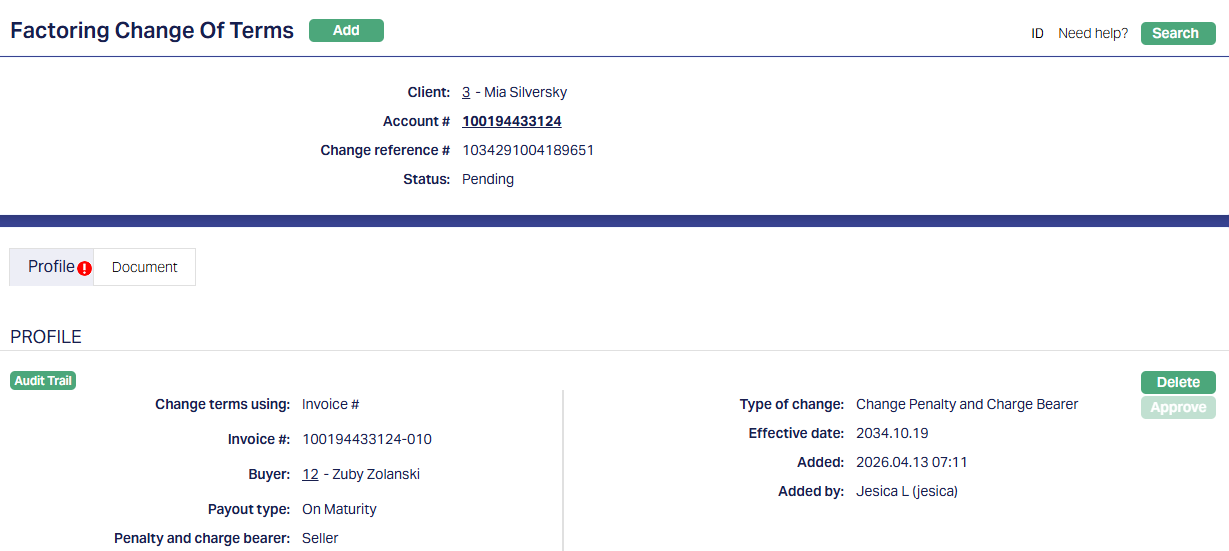
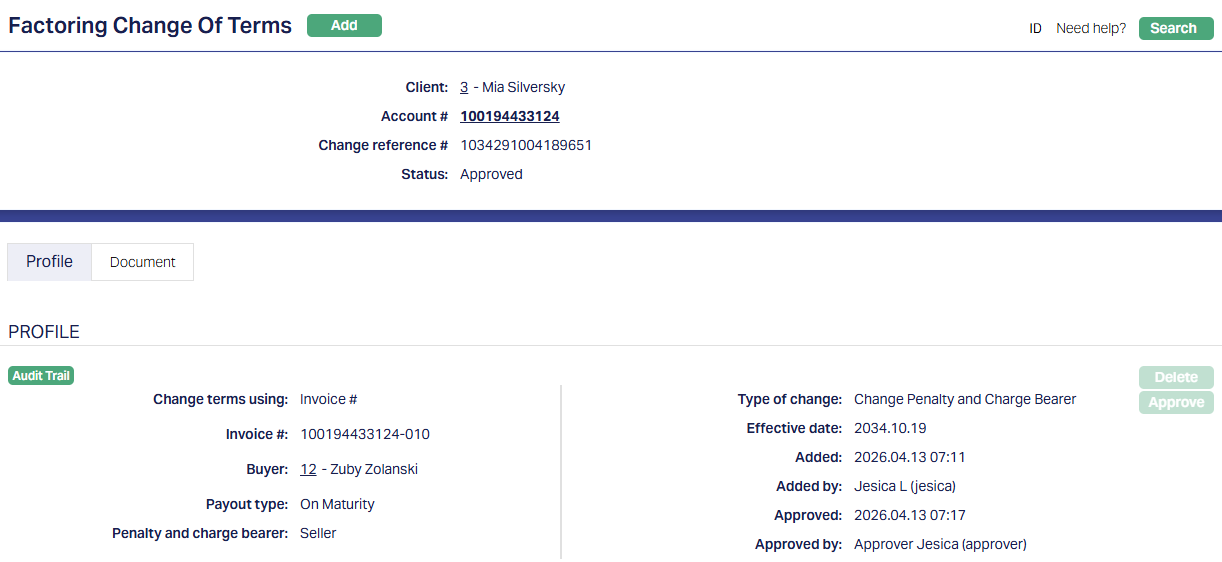
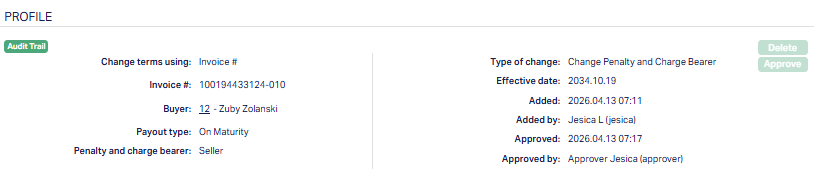
Status of the record is Pending till it is approved by another user. On approval, the tab status is set to Approved and the red bubble disappears.
Profile
The Profile tab, which is also the default tab of the Factoring Change of Terms screen, shows the basic details of the record.
To view Profile,
1. Access Factoring Change of Terms page. Click Profile tab to view the details as per sample below. The details are defaulted from the entries that you made during record creation. For details, refer to New Factoring Change of Terms → Profile (1/2) page.
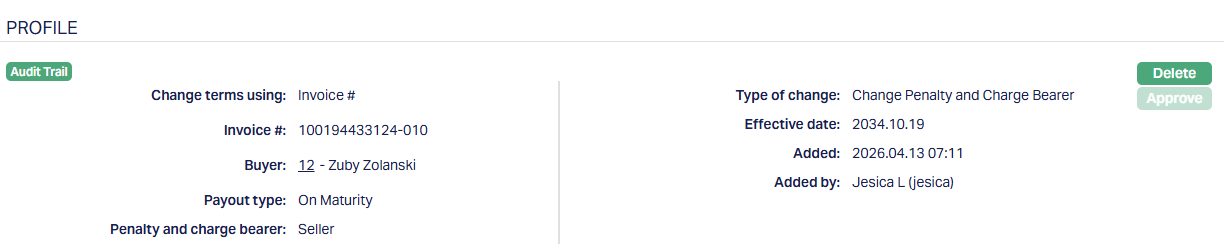
Functions: Delete, Approve.
Delete: You can delete the record only when the status is Pending. On clicking Delete, Aura prompts for confirmation before removing the record.
Approve: You can approve the record only when the status is Pending. On clicking Approve, Aura displays a confirmation message.
Once Approved, Aura performs the following:
1. Revalidation - Aura repeats all validations that were applied during the Add and Finish stages. If any validation fails:
The record is not approved
The status remains Pending
You must make the required changes and retry approval
2. Status Update - If all validations are successful:
The status is updated to Approved
Audit details are recorded
3. Execution Based on Type of Change -
i) Update Acknowledgement - Aura updates the contract by setting:
- Acknowledged On is updated to the Effective Date
ii) Initiate Recourse -
If Recourse Through is Account:
Aura creates an FCRCDA transaction
The transaction is executed immediately
The Seller's Client Account is debited
If Recourse Through is Invoice:
Aura creates an FCRCIN transaction with Pending status
The transaction is picked up during the Invoice Generation batch at End of Day (EOD)
iii) Change Penalty and Charge Bearer - Aura updates:
- Contract → Settings → Penalty and Charge Bearer
If Penalty and Charge Bearer = Seller:
All unpaid charges are marked as payable by the Seller
Future charges applied on the account are also marked as payable by the Seller
These charges are included in the upcoming invoice to the Seller
If Penalty and Charge Bearer = Default Behaviour:
- Aura continues with the standard charge behaviour
The additional fields that are shown are:
Status indicates the current state of the record. It will be either: Pending - If the record is waiting for approval or Approved - If the record has been reviewed and finalized.
Added shows the date and timestamp when the record was created and Added by displays the user ID and full name of the person who created the record.
Approved shows the date and time when the record was approved and Approved by displays the user ID and full name of the person who approved the record.
Document
The Document tab allows you to upload / generate documents related to the Factoring Change of terms record. Documents in the form of scanned images or files on your computer can be uploaded. You can categorise the documents as per Document Type and store them with a document reference number. You can generate documents related to the Account based on Templates mapped to the Product.
To upload a document,
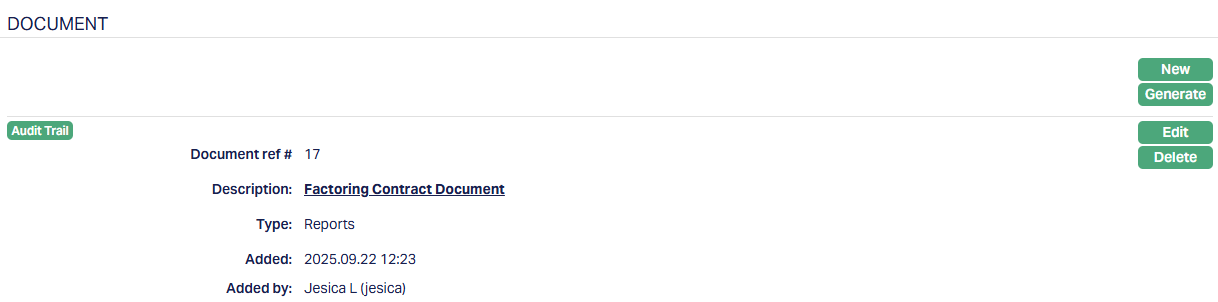
1. Access Factoring Change of Terms page. Click the Document tab to view the details as per sample below.

2. Click New. The New Document page appears.
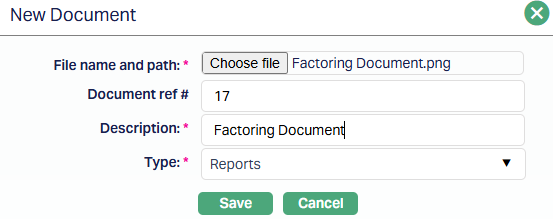
3. Enter Document ref no. for the document. This document reference number is used in Branch view → Documents.
4. Based on the file selected the Description field will be derived. If required, you can change the description.
5. Select Type of the document uploaded. The document types should have been maintained using Admin → System codes → Documents → Document types. Once entered, this cannot be edited.
6. Click Save. Document gets uploaded, and the details are displayed.

Functions: New, Generate, Edit, Delete.
Document Generation
You can generate documents based on the selected Type of Change. Aura maps the document templates as follows:
If Type of Change = Update Acknowledgement: Documents mapped to Change of Terms - Update Acknowledgement are available
If Type of Change = Initiate Recourse: Documents mapped to Change of Terms - Initiate Recourse are available
If Type of Change = Change Penalty and Charge Bearer: Documents mapped to Change of Terms - Change Penalty and Charge Bearer are available
To generate a document,
1. Click Generate to generate the .pdf file using the template as maintained under Admin → System codes → Documents → Document templates. You have to map the document template for Loan Account using the Document Template Settings tab as maintained under Retail → Settings → Product. Generate Document page will appear where the mapped templates will be displayed.
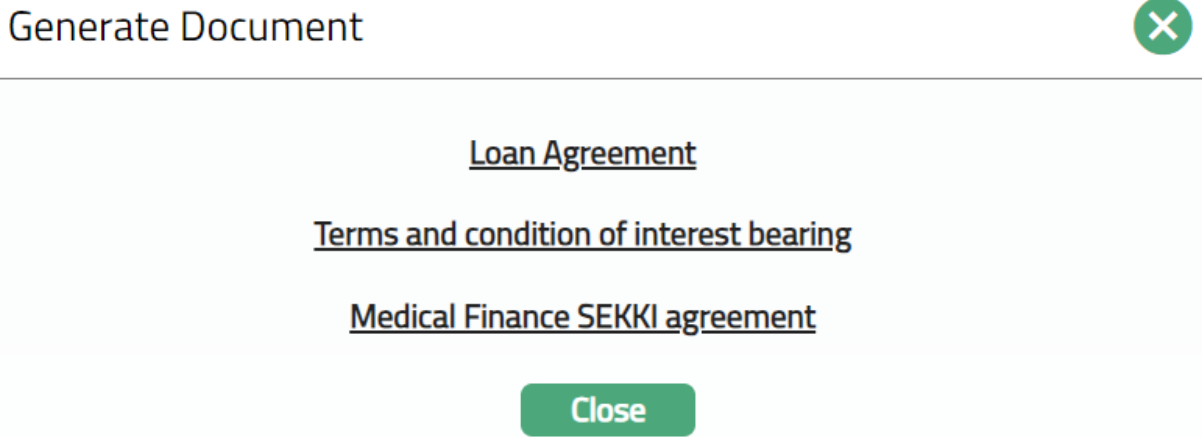
2. Click on any template from the list of templates after which the document will be generated based on the selected template as shown below.
Delete: You can delete a document by a click on the Delete button. Aura will ask for confirmation, on approving which the selected document will be deleted.
To Edit document,
1. Access Contract Maintenance page. Click the Document tab.
2. Click Edit. Edit Document page appears.
Note: Only Document ref no and Description fields are editable.
3. Click Save. The Document page appears with the edited details.
Functions: New, Generate, Edit, Delete.