Nostro Route
Nostro Route option allows you to maintain the specific route details to reach the beneficiary for SWIFT/TARGET2 networks only. If the Bank has a direct relationship with beneficiary Bank, then the Nostro route is mapped. If the Bank does not have a direct relationship with the beneficiary Bank, then the BIC of the intermediate Bank will be the Nostro route BIC. If Nostro route is not maintained, then CC-PG will refer to the settings under Nostro configuration.
There are two sub-tabs under Nostro Route record:
To add new Nostro Route,
1. From PaymentGrid menu, click Settings and then Nostro route. Nostro Route Search page appears.

2. Click Add. New Nostro Route → Profile (1/3) page appears.

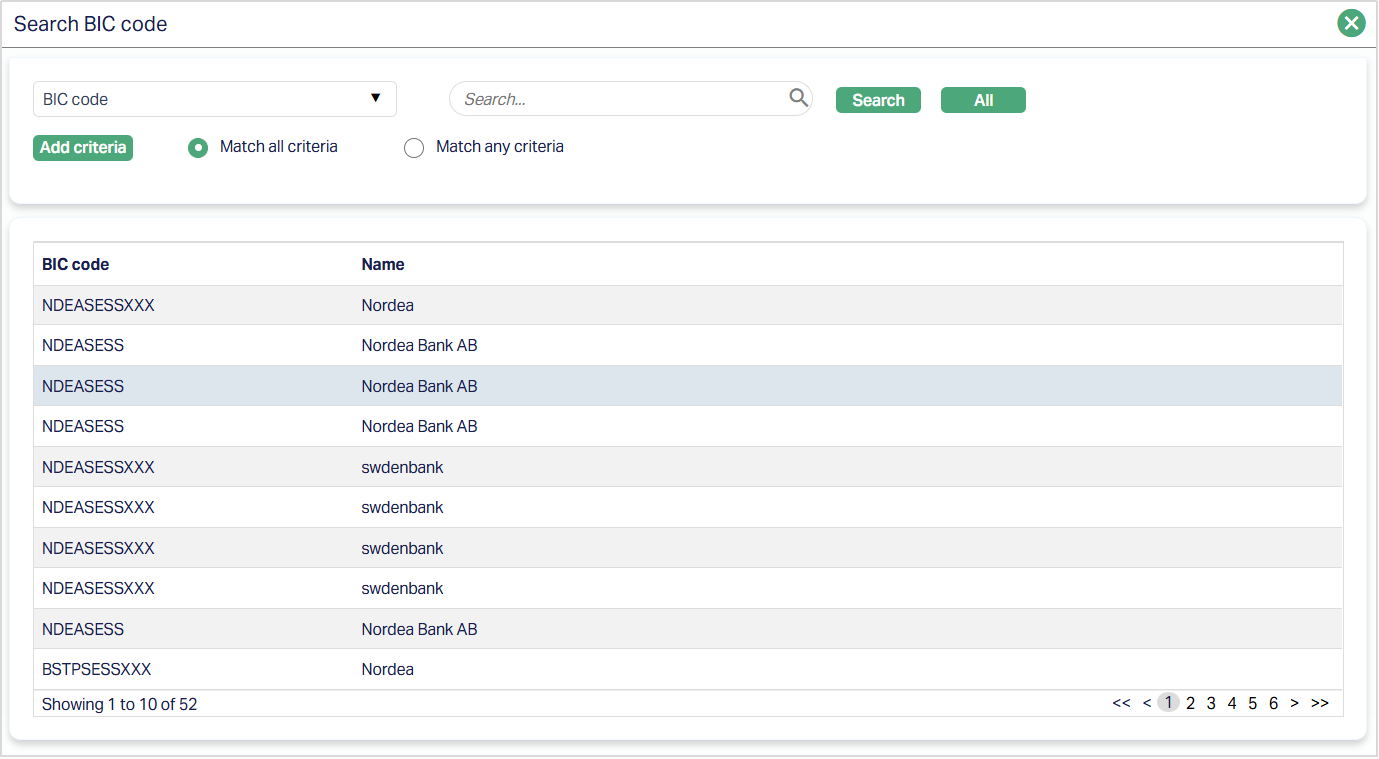
3. Select BIC (Business Identifier Code) for the Nostro Account by clicking on BIC hyperlink. The Search BIC code page appears with the list of active BIC's maintained under Admin → Management → Settlement Directory. You can search for a BIC code with relevant criteria and select the required BIC code. You can also input the name of the bank and select the required BIC code from the list displayed by CC-PG.
4. Enter Nostro Account # maintained in the Core Banking System.
5. Enter External Account # i.e., the account number given by the bank where the above account is maintained.
6. Select Currency of the Nostro account from the drop-down list of active currencies maintained under Admin → System codes → Currencies → Currencies.
7. Select Priority from the drop-down list. The pre-shipped options are System, Normal and Urgent.
If System option is chosen, then SWIFT/TAREGET2 message priority tag in Block 2 will display as S.
If Normal option is chosen, then SWIFT/TAREGET2 message priority tag in Block 2 will display as N.
If Urgent option is chosen, then SWIFT/TAREGET2 message priority tag in Block 2 will display as U.
Based on the selected Priority, the messages will be processed, and the charges will be picked as per the rules configured.
8. Select Yes or No for Confirmation Required. If Yes is chosen, then Nostro Confirmation is required and after confirmation is made the message will be generated. If No is chosen, then Nostro confirmation is not required.
9. Click Next. New Nostro Route → Routing Information (2/3) page appears.
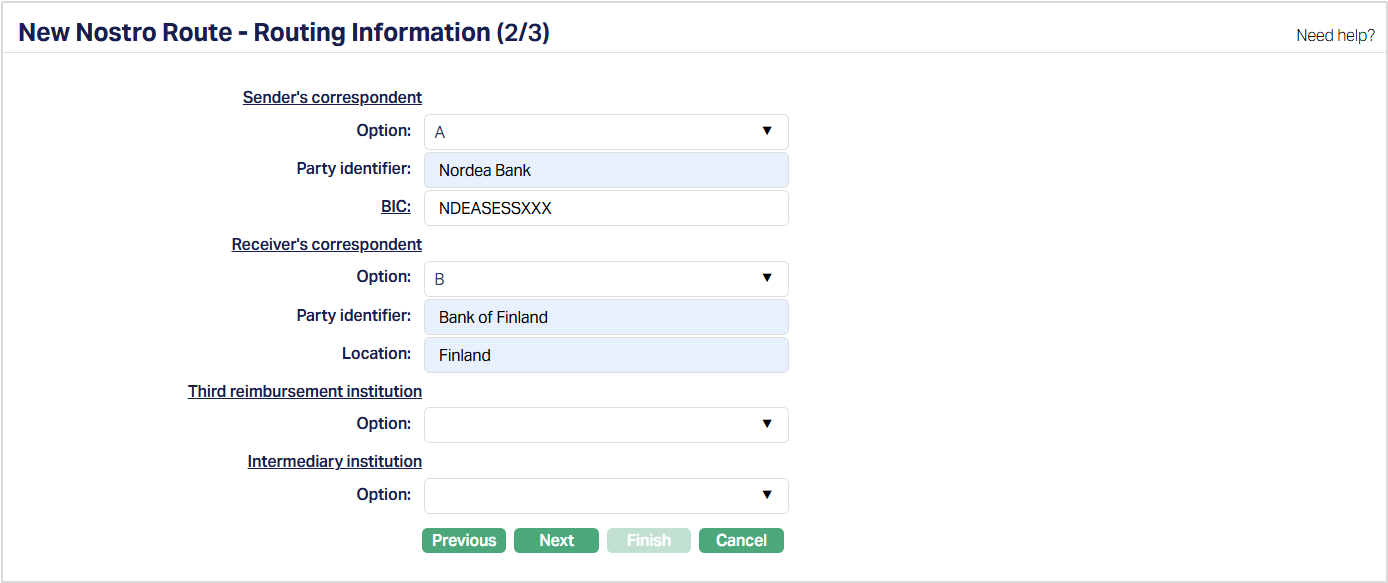
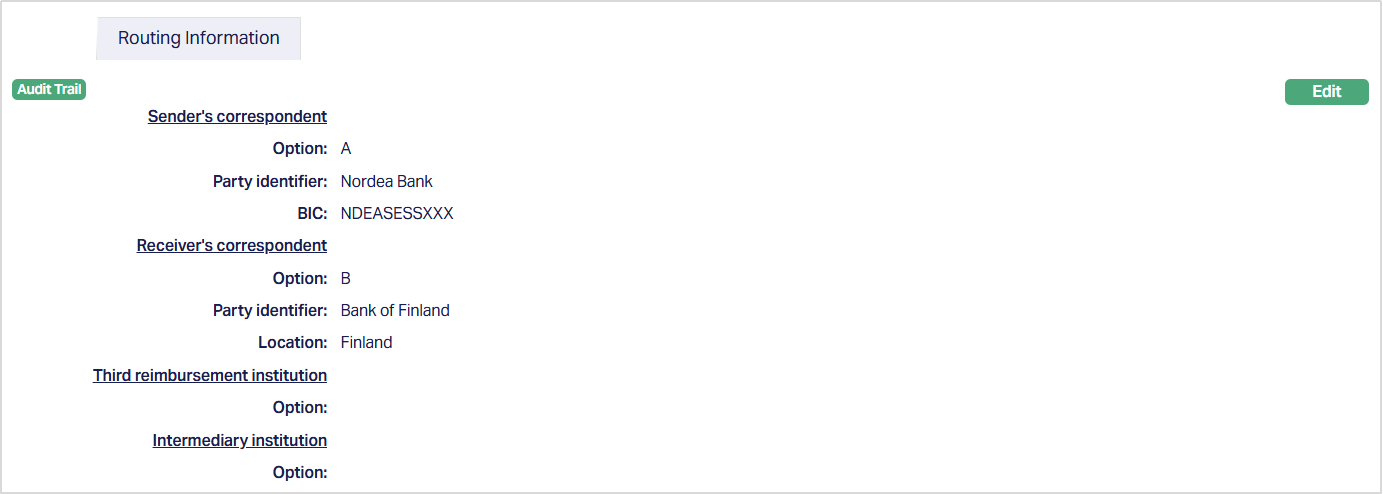
10. Select Option from the drop-down list for the Sender's correspondent. The available options are A, B, D.
If option A is chosen for the Sender's correspondent, then,
Enter Party identifier: this is required to identify the party involved. For example: account number, social security number.
Select BIC (Business Identifier Code) for Nostro Account by clicking on BIC hyperlink. Search BIC code page appears with the list of active BIC's maintained under Admin → Management → Settlement Directory. You can search for a BIC code with relevant criteria and select the required BIC code. You can also input the name of the bank and select the required BIC code from the list displayed by CC-PG.
If option B is chosen for the Sender's correspondent, then,
Enter Party identifier.
Enter Location for the Sender's correspondent.
If option D is chosen for the Sender's correspondent, then,
Enter Party identifier.
Enter Name for the Sender's correspondent.
Enter Address 1 of the Sender's correspondent.
Enter City for the Sender's correspondent.
Enter Country for the Sender's correspondent.
- Select Option from the drop-down list for the Receiver's correspondent. The available options are A, B, D.
If option A is chosen for the Receiver's correspondent, then,
Enter Party identifier. Party identifier is to identify the party involved. For example: account number, social security number
Select BIC (Business Identifier Code) for the Nostro Account by clicking on BIC hyperlink. The Search BIC code page appears with the list of active BIC maintained under Admin → Management → Settlement Directory. You can search for a BIC code with relevant criteria and select the required BIC code. You can also input the name of the bank and select the required BIC code from the list displayed by CC-PG.
If option B is chosen for the Receiver's correspondent, then,
Enter Party identifier.
Enter Location for the Receiver's correspondent.
If option D is chosen for the Receiver's correspondent, then,
Enter Party identifier.
Enter Name for the Receiver's correspondent.
Enter Address 1 for the Receiver's correspondent.
Enter City for the Receiver's correspondent.
Enter Country of the Receiver's correspondent.
- Select Option from the drop-down list for the Third reimbursement institution. The available options are A, B, D.
If option A is chosen for the Third reimbursement institution, then,
Enter Party identifier. Party identifier is to identify the party involved. For example: account number, social security number.
Select BIC (Business Identifier Code) for the Nostro Account by clicking on BIC hyperlink. The Search BIC code page appears with the list of active BIC maintained under Admin → Management → Settlement Directory. You can search for a BIC code with relevant criteria and select the required BIC code. You can also input the name of the bank and select the required BIC code from the list displayed by CC-PG.
If option B is chosen for the Third reimbursement institution, then,
Enter Party identifier.
Enter Location for the Third reimbursement institution.
If option D is chosen for the Third reimbursement institution, then,
Enter Party identifier.
Enter Name for the Third reimbursement institution.
Enter Address 1 for the Third reimbursement institution.
Enter City for the Third reimbursement institution.
Enter Country for the Third reimbursement institution.
Select the Option from the drop-down list for the Intermediary institution. The available options are A, C, D.
If option A is chosen for the Intermediary institution, then,
Enter Party identifier. Party identifier is to identify the party involved. For example: account number, social security number.
Select BIC (Business Identifier Code) for the Nostro Account by clicking on BIC hyperlink. The Search BIC code page appears with the list of active BIC maintained under Admin → Management → Settlement Directory. You can search for a BIC code with relevant criteria and select the required BIC code. You can also input the BIC of the bank and select the required BIC code from the list displayed by CC-PG.
If option C is chosen for the Intermediary institution, then,
- Enter Party identifier.
If option D is chosen for the Intermediary institution, then,
Enter Party identifier.
Enter Name for the Intermediary institution.
Enter Address 1 for the Intermediary institution.
Enter City for the Intermediary institution.
Enter Country for the Intermediary institution.
Click Next. New Nostro Route -- Confirmation (3/3) page appears.
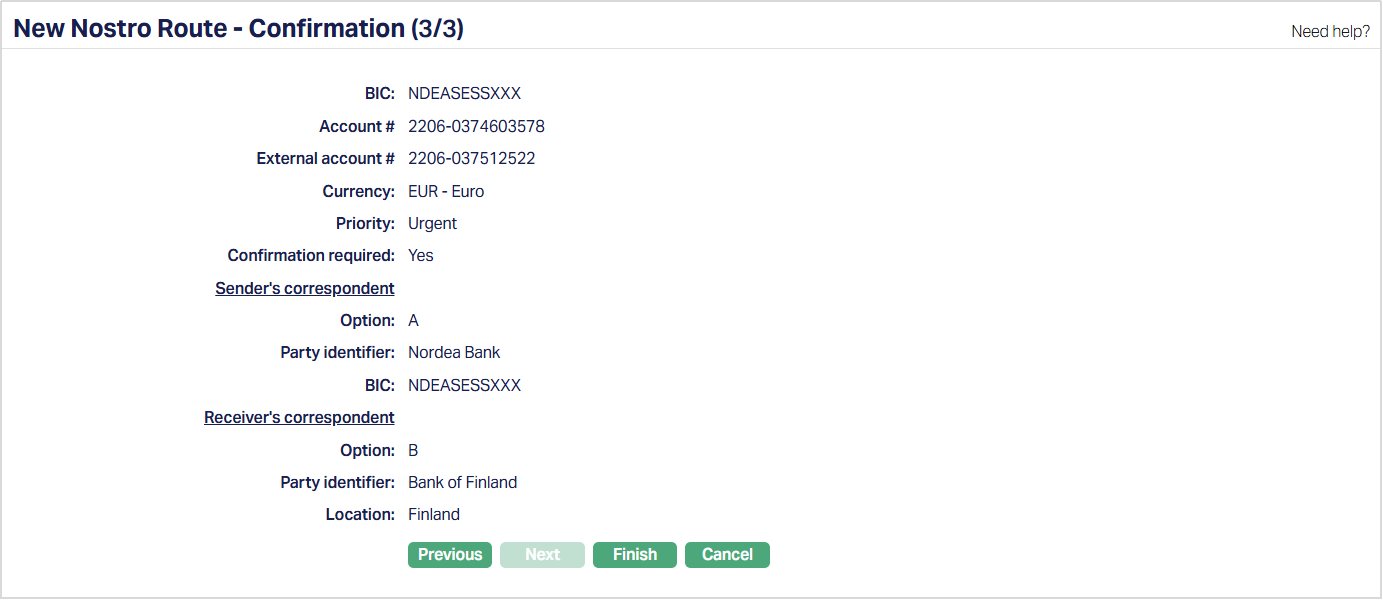
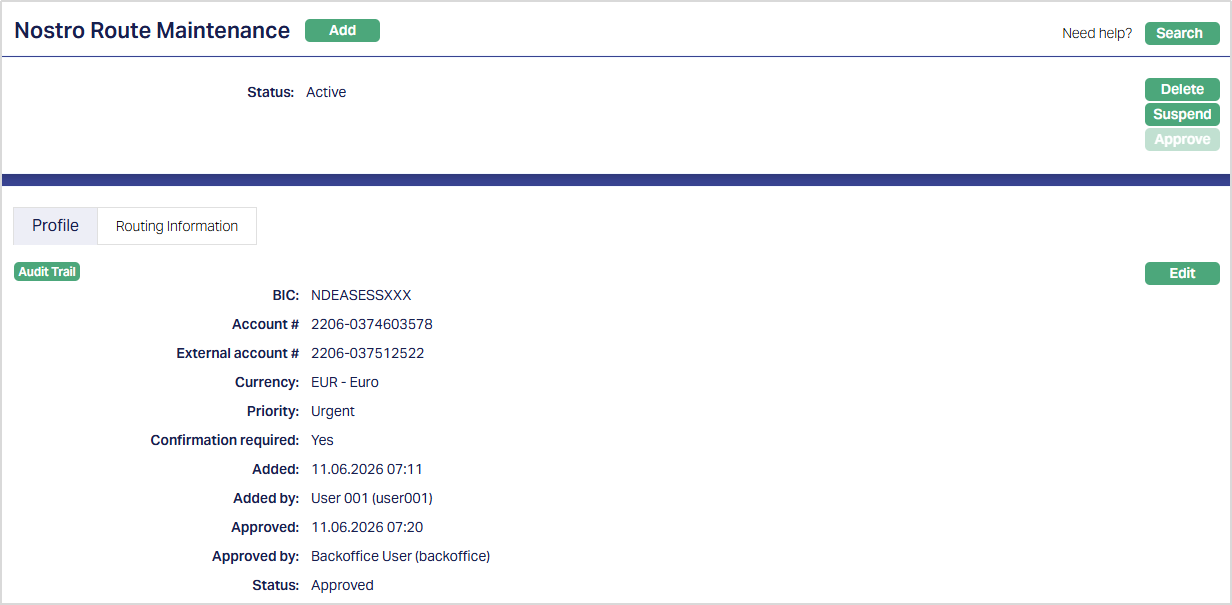
- Click Finish. Nostro Route Maintenance page appears, showing the details of the record that you saved. The status of the record will display as Active.

Functions: Add, Search, Edit, Delete, Approve, Suspend, Activate
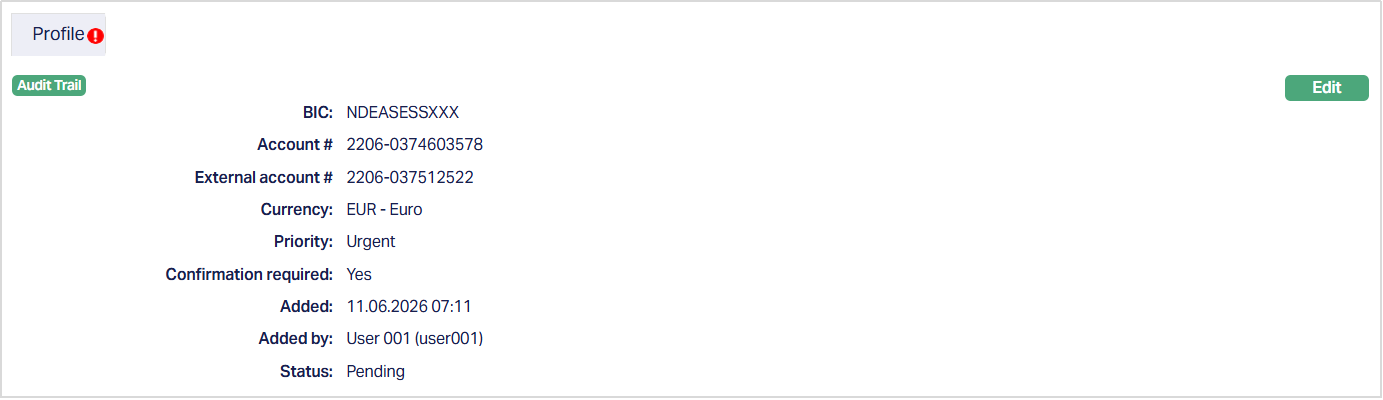
Note: On creation of a new record, Status of the record by default will be Pending and a red bubble will appear on Profile tab. Once the record is Approved, the record Status gets changed to Approved and the red bubble on the tab disappears.
Functions: Add, Search, Edit, Delete, Approve, Suspend, Activate
The additional fields that you can view in the Profile tab are as follows:
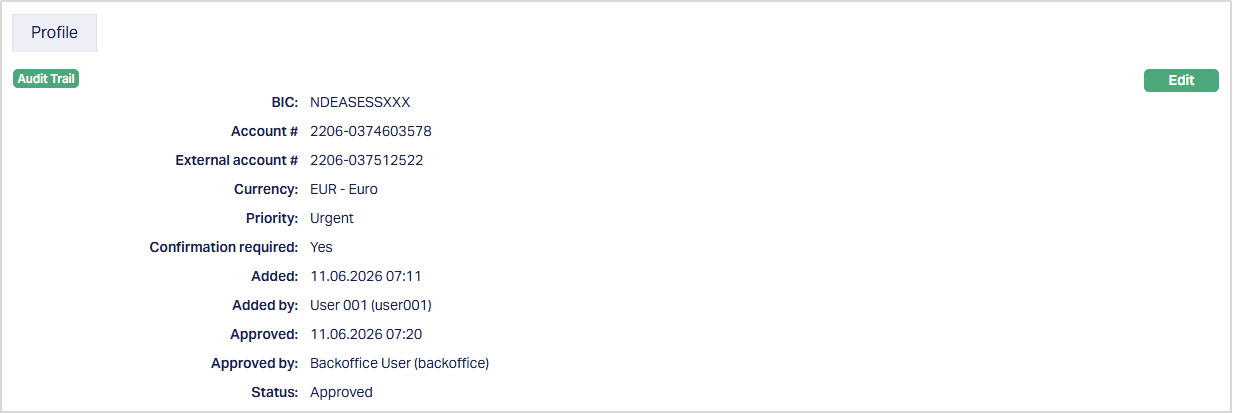
Status field denotes the status of the tab.
Added field denotes the date on which the record was added.
Added by field denotes the name of the user who created the record.
Approved field denotes date on which the record was approved and is displayed only for approved records.
Approved by field denotes name of the user who approved the record and is displayed only for approved records.
Delete: You can delete Nostro Route record saved in CC-PG by a clicking Delete button. CC-PG will ask for confirmation, on approving which the selected record will be deleted.
Approve: If you want to Approve a Nostro Route record, then retrieve the record and Click on Approve. CC-PG will ask for confirmation. Once the tab is approved, record status gets changed from Pending to Approved.
Suspend: You can suspend a Nostro Route by clicking on Suspend button. When you click on Suspend button, CC-PG will ask for confirmation. On confirmation CC-PG will suspend the Nostro Route and Activate button will appear in place of the Suspend button. If Nostro route is suspended, then CC-PG will check for Nostro Configuration. If Nostro route and Nostro Configuration, both is not maintained, then CC-PG will show and error message.
Activate: If you want to activate a suspended Nostro Route then click on Activate button. CC-PG will ask for confirmation. On confirmation CC-PG will Activate the Nostro Route and Suspend button will appear in place of Activate button.
Profile
The Profile tab, which is the default tab in the Nostro Route Maintenance screen, shows the basic details of the Nostro Route created.
To view / edit Profile,
1. Access Nostro Route Maintenance page and click Profile tab to view the details as per sample below. The details are defaulted from the entries that you made during creation of a new Nostro Route. For details refer to New Nostro Route → Profile (1/3) page.
2. Click Edit. Edit Profile page appears.
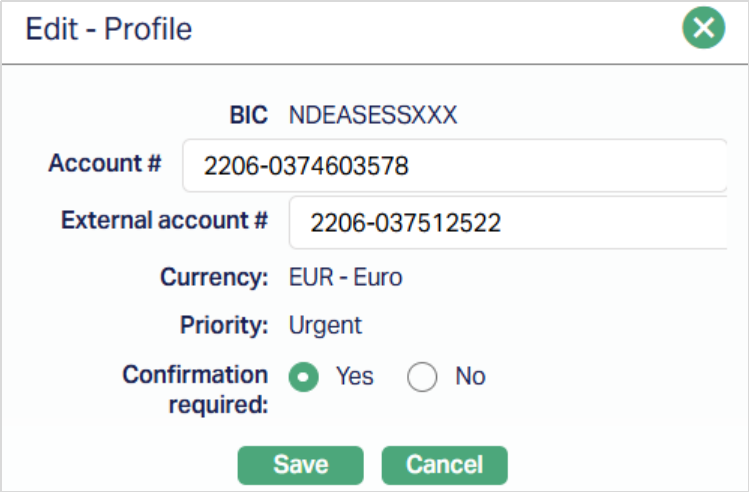
Note: The editable fields are Account #, External account # and Confirmation required.
3. Click Save. Profile tab appears with the edited details. Note: Once edited Status of the tab will be Pending, and a red bubble appears on Profile tab. Only once you Approve Status gets changed to Approved and the red bubble disappears.
Function: Edit.
Routing Information
Routing Information allows you to edit the details of the route in which the payment will go.
To view / edit Routing Information,
1. Access Nostro Route Maintenance page and click Routing Information tab to view the details as per sample below. The details are defaulted from the entries that you made during creation of a new Nostro Route. For details refer to New Nostro Route → Routing Information (2/3).
2. Click Edit. Edit- Routing Information page appears.
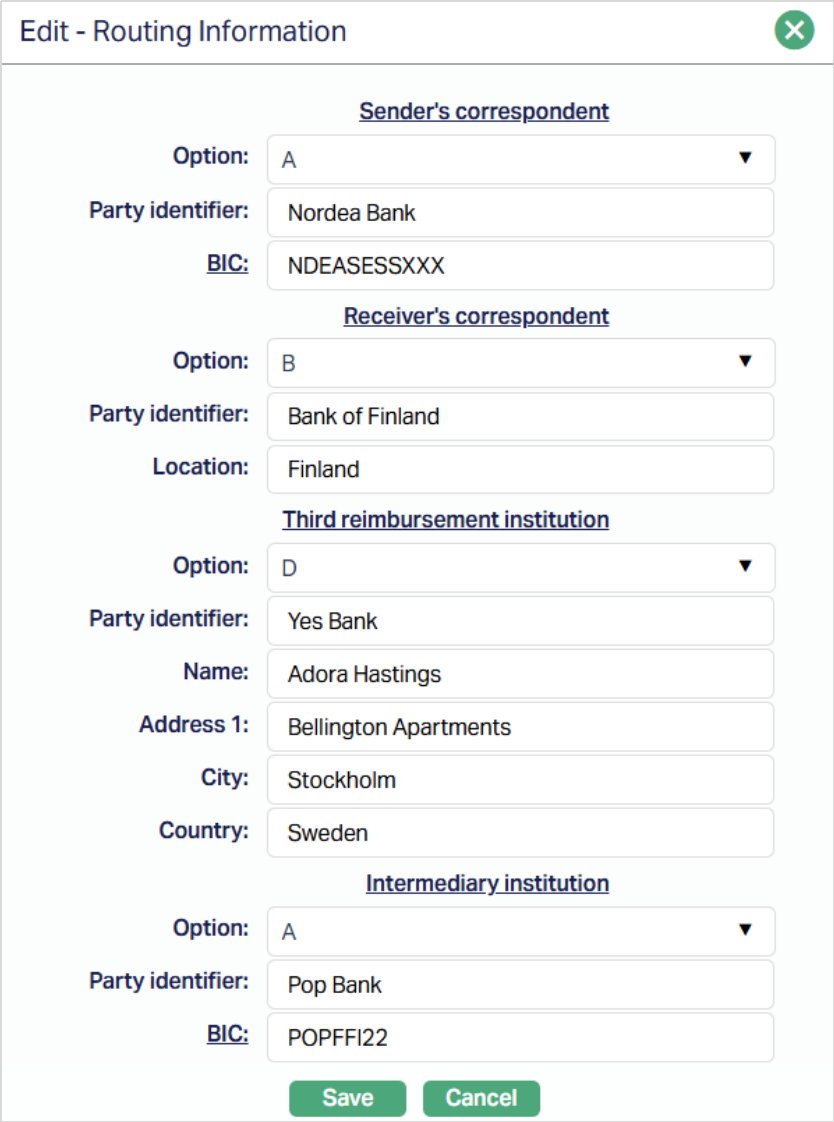
Note: All fields are editable.
3. Click Save. Routing Information tab appears with the edited details.
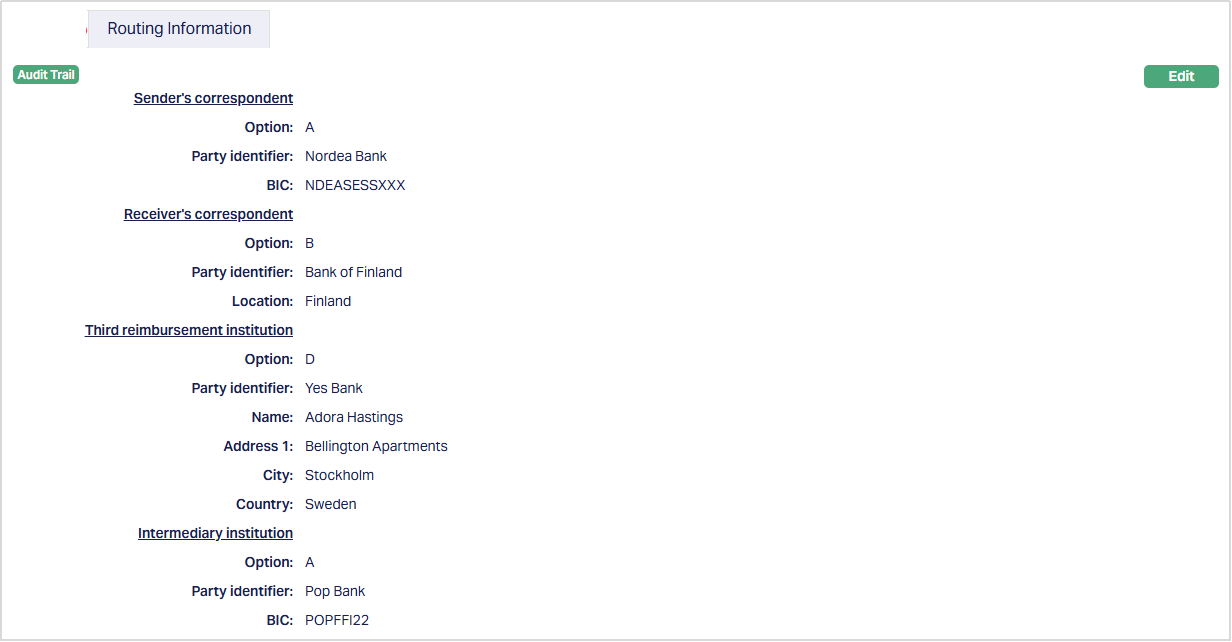
Function: Edit.