Aura-Label
Aura-Label allows you to manage the translations of system labels across various modules within Aura. These labels include names of menu items, fields, and section headers that appear on-screen. You can maintain translations for multiple languages to ensure a localized user experience across different regions.
This screen also supports the translation of tooltips, allowing you to configure help text or hover hints in different languages.
You can maintain two types of translations here:
These translations are grouped by module (e.g., Retail, Treasury, CRM), and each group contains multiple sub-modules with configurable label entries.
To maintain Translation under Aura-Label,
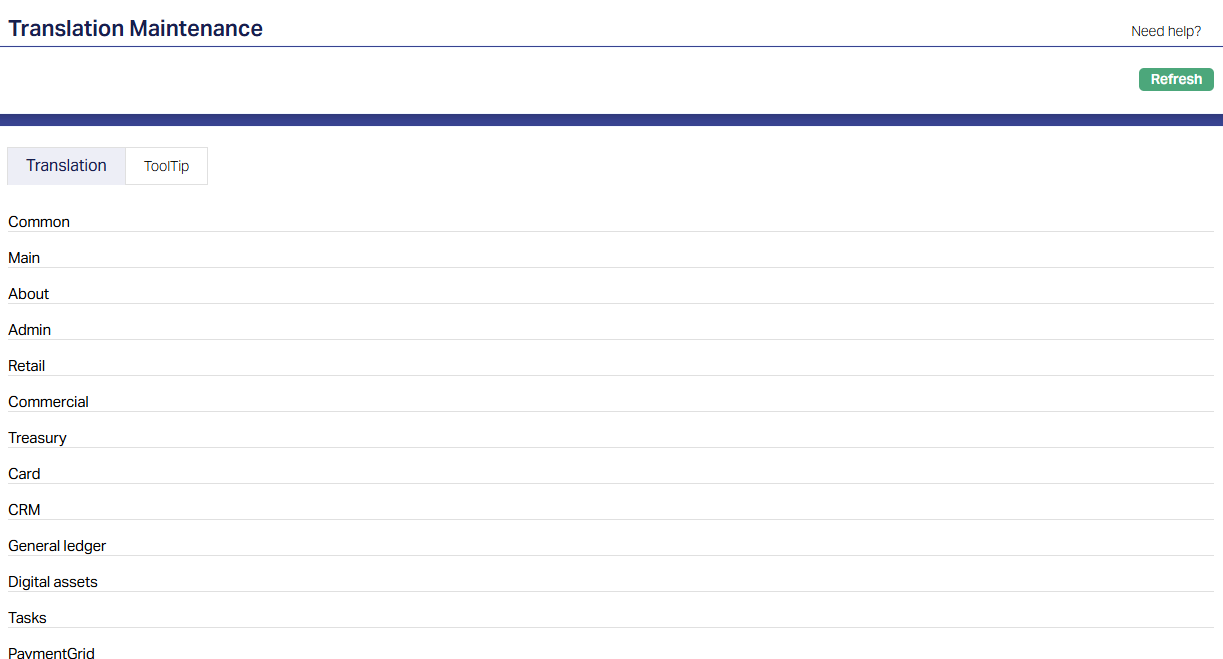
1. From Admin menu, click Translations, and then Aura-Label. Translation Maintenance page appears with the list of modules such as Retail, CRM, Treasury, Card, and others. Make sure the Translation tab is selected.
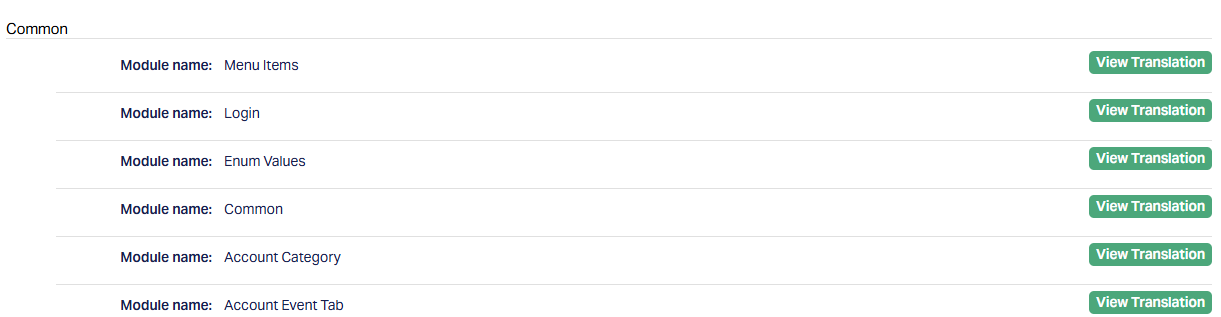
2. Click on any of the available module categories (e.g., Common). You will see a list of sub-modules, each with a View Translation button next to it.
3. Click the View Translation button for the desired sub-module. You will be taken to the translation screen where the labels are listed on the left, and language-specific columns (e.g., English, Finnish, Swedish) appear across the top.
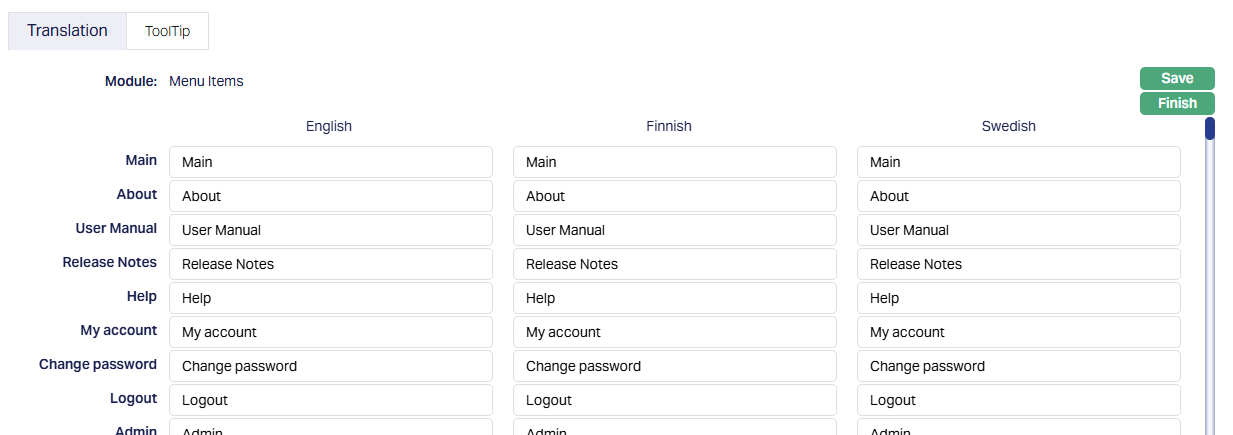
4. Enter or update the translated text for each label in the appropriate language field. For example, to update the Finnish translation for "My account", just type the translated term into the Finnish column beside that row.
5. After updating the translations, click Save and then click Finish. Aura will ask for confirmation before saving. Click Yes and your changes are now applied and will reflect on the user interface across Aura where these labels are used.
Note: Always click Save before clicking Finish. The Finish button does not auto-save changes - it only exits the screen.
To maintain ToolTip Translations,
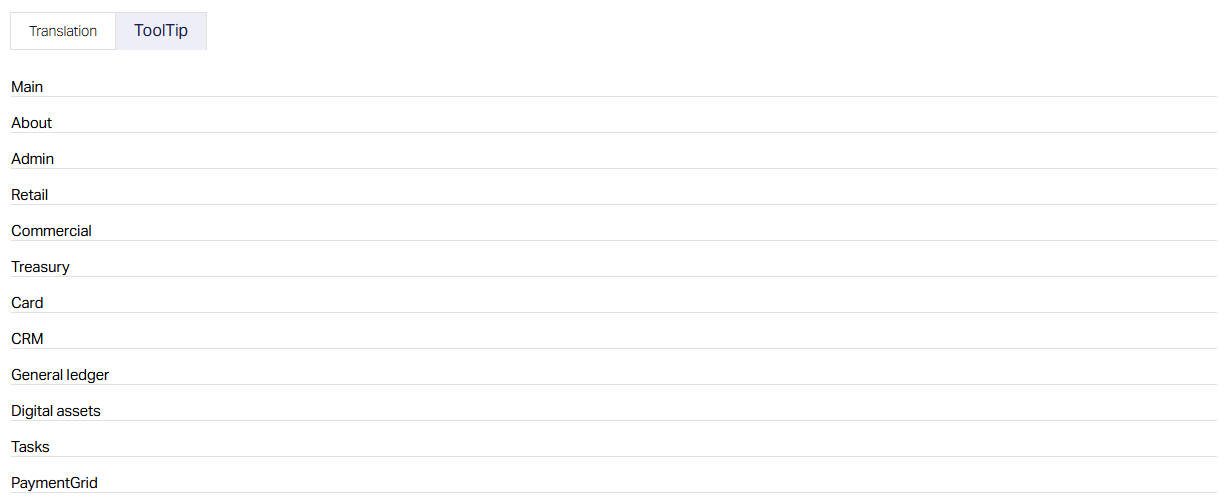
1. From the Translation Maintenance screen, click on the ToolTip tab. The module categories are listed like in the Translation tab.
2. Click on a category (e.g., Admin or Retail). This opens a list of sub-modules, each with a View Tool Tip button.

3. Click the View Tool Tip button for the sub-module you want to access. You will be taken to the translation screen where the labels are listed on the left, and language-specific columns (e.g., English, Finnish, Swedish) appear across the top. However, some modules may not display any fields for editing.

4. ToolTip fields can only be edited for modules that include the information icon (𝑖) next to field labels in Aura screens. This icon indicates that the tooltip is available for translation. If tooltips are configured for the module, the editable fields will be shown in this screen.
5. If fields appear, enter or update the tooltip text in the respective language columns. These texts will appear as hover hints across the Aura interface, offering users brief descriptions or explanations.
6. Once done, click Save, followed by Finish. The updated tooltip content will be saved and reflected on applicable screens.
Note: If the screen appears blank (with no rows shown), it simply means that tooltips have not yet been configured for that module. No action is needed - just click Finish to exit the screen.