Loan Restructuring
Restructuring enables you to completely change the terms of an ongoing loan. During Restructuring, you will be able to change the future cash flow for the loan by taking into consideration all the due amounts till date and adjust to a new cash flow that suits your customer. This can be done without changing the loan account number and hence all attributes of the loan except for future schedules will remain the same. This feature also allows you to bring a loan to “Normal” payment status after adjusting for past receivables.
During Restructuring, you will be able to define the amount to be waived off for various components (except the Principal) that are overdue, revise the maturity date of the loan and define revised payment dates / frequency for Principal & Interest (including Flexible Schedules) as required. On approval of the Restructuring record, the existing unpaid schedules will be deleted; and new schedules will be generated for the amounts to be paid after the restructure. Though it resembles a Change of Terms, the following are the significant differences between a Restructuring and Change of Terms in Aura:
| Change of Terms | Restructuring |
|---|---|
| COT will not impact / change the Past Schedules. It will impact only the future Schedules | All past unpaid schedules will be deleted; and new future schedules will be created; partly paid schedules will be modified to the extent these are unpaid. |
| No way to waive off any amounts | Enables waiver of any of the components (except Principal) |
| Will not have an impact on payment status if there are unpaid past dues. | Will have an impact on payment status as unpaid past dues are carried forward or waived. |
The following are the various tabs that appear on the Loan Restructuring page:
To add Loan Restructuring
- From Retail menu, click Loans, and then Loan Restructuring. Loan Restructuring Search page appears.

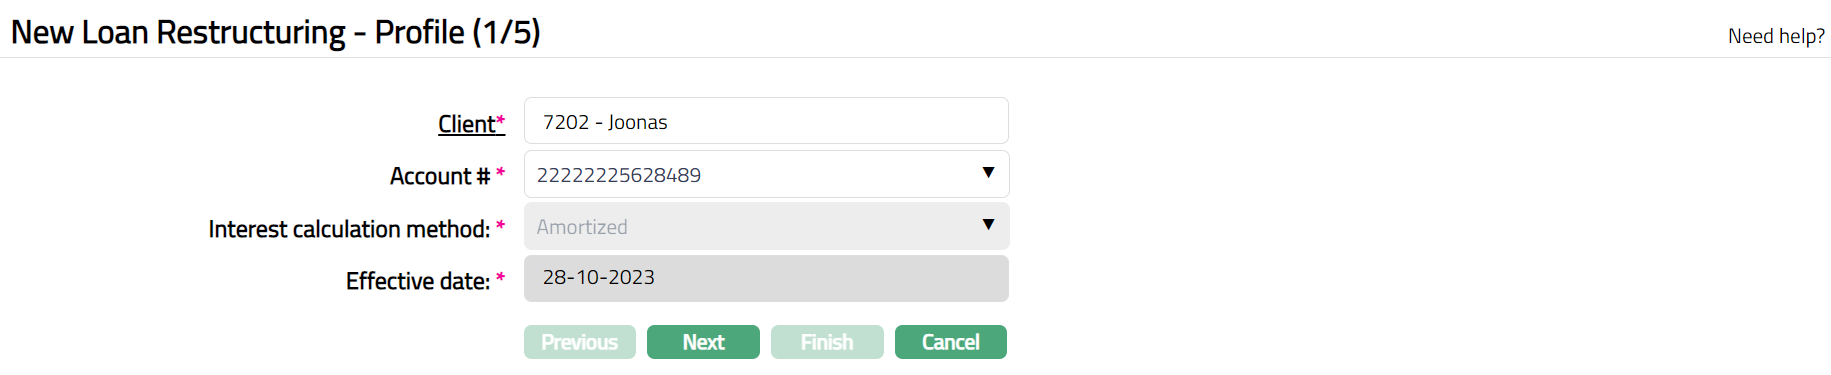
- Click Add. New Loan Restructuring -- Profile (1/5) page appears.
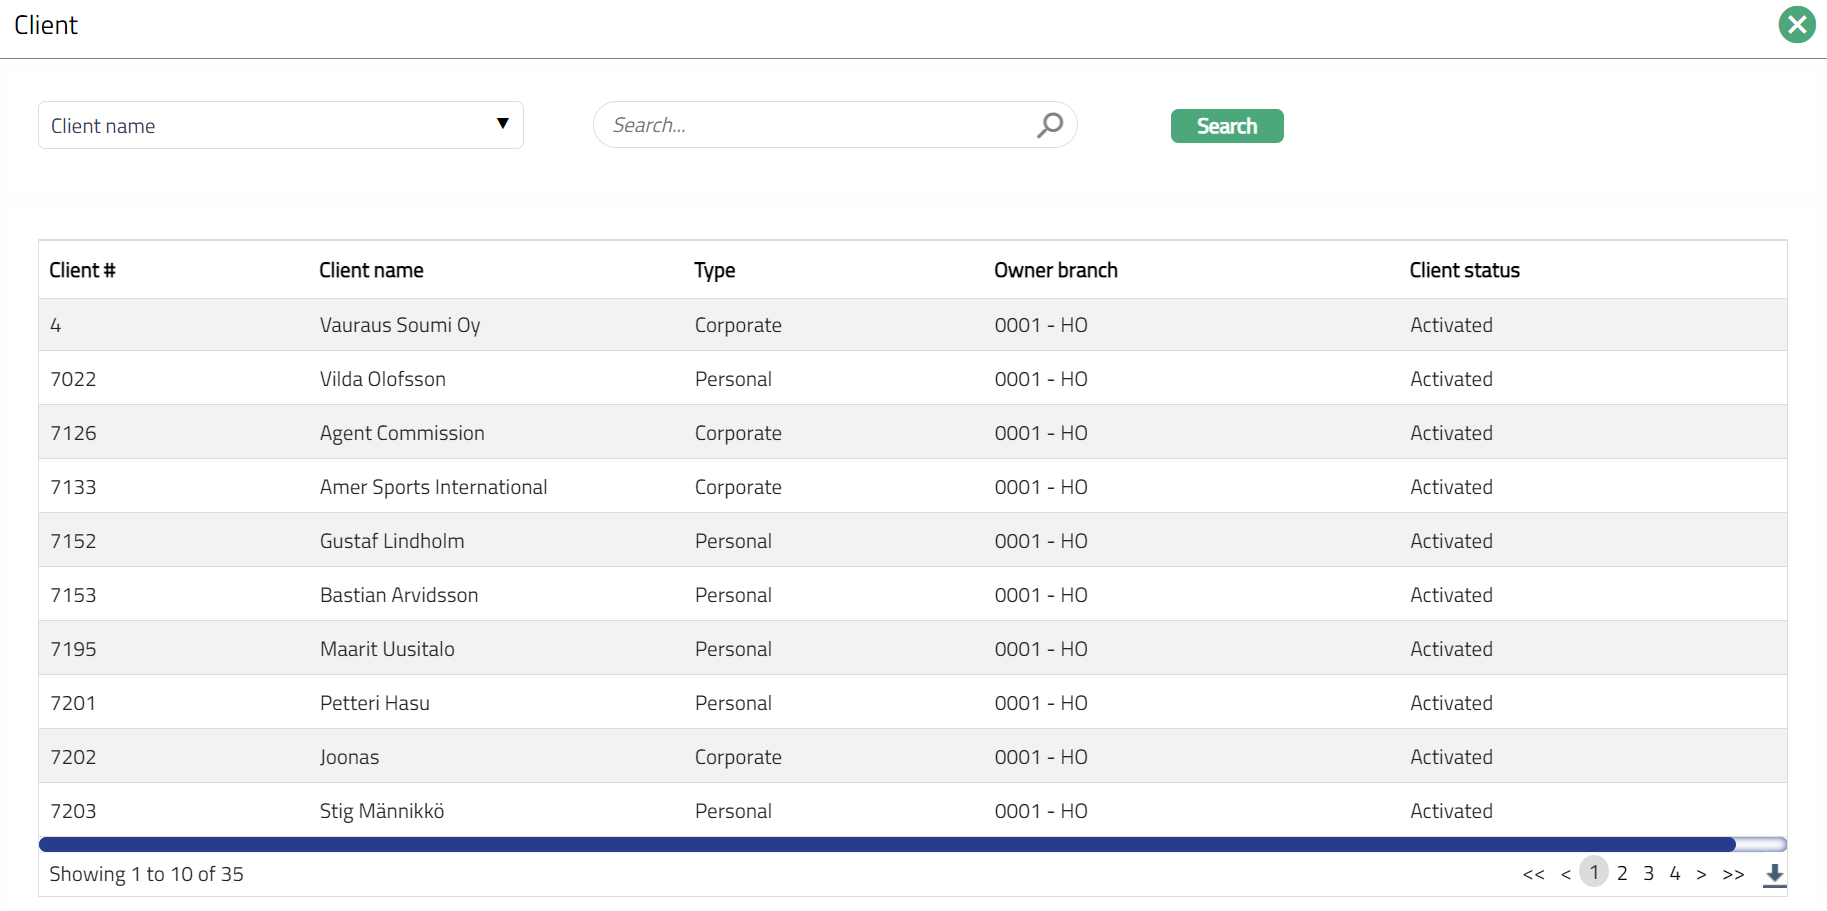
Select Client by clicking on client hyperlink. The Client search page appears where you can search for a client with relevant criteria and select the required client. You can also input the client's name and select the required client from the list displayed by Aura. The Client search page appears with the list of Active Corporate clients maintained at CRM > Clients > Maintain. Please refer to the Sample Screen shot shown above.
Account # will be enabled only on selecting pre-assigned number for Generate account number. Enter the required Account #. Aura will validate the Pre - assigned number against the account number mask maintained at the Entity level and also check if it is unique.
Interest calculation method is defaulted based on the client and account # selected. This cannot be edited.
Effective date is defaulted based on the client and account # selected.
Click Next. New Loan Restructuring -- Schedule Dues (2/5) page appears.
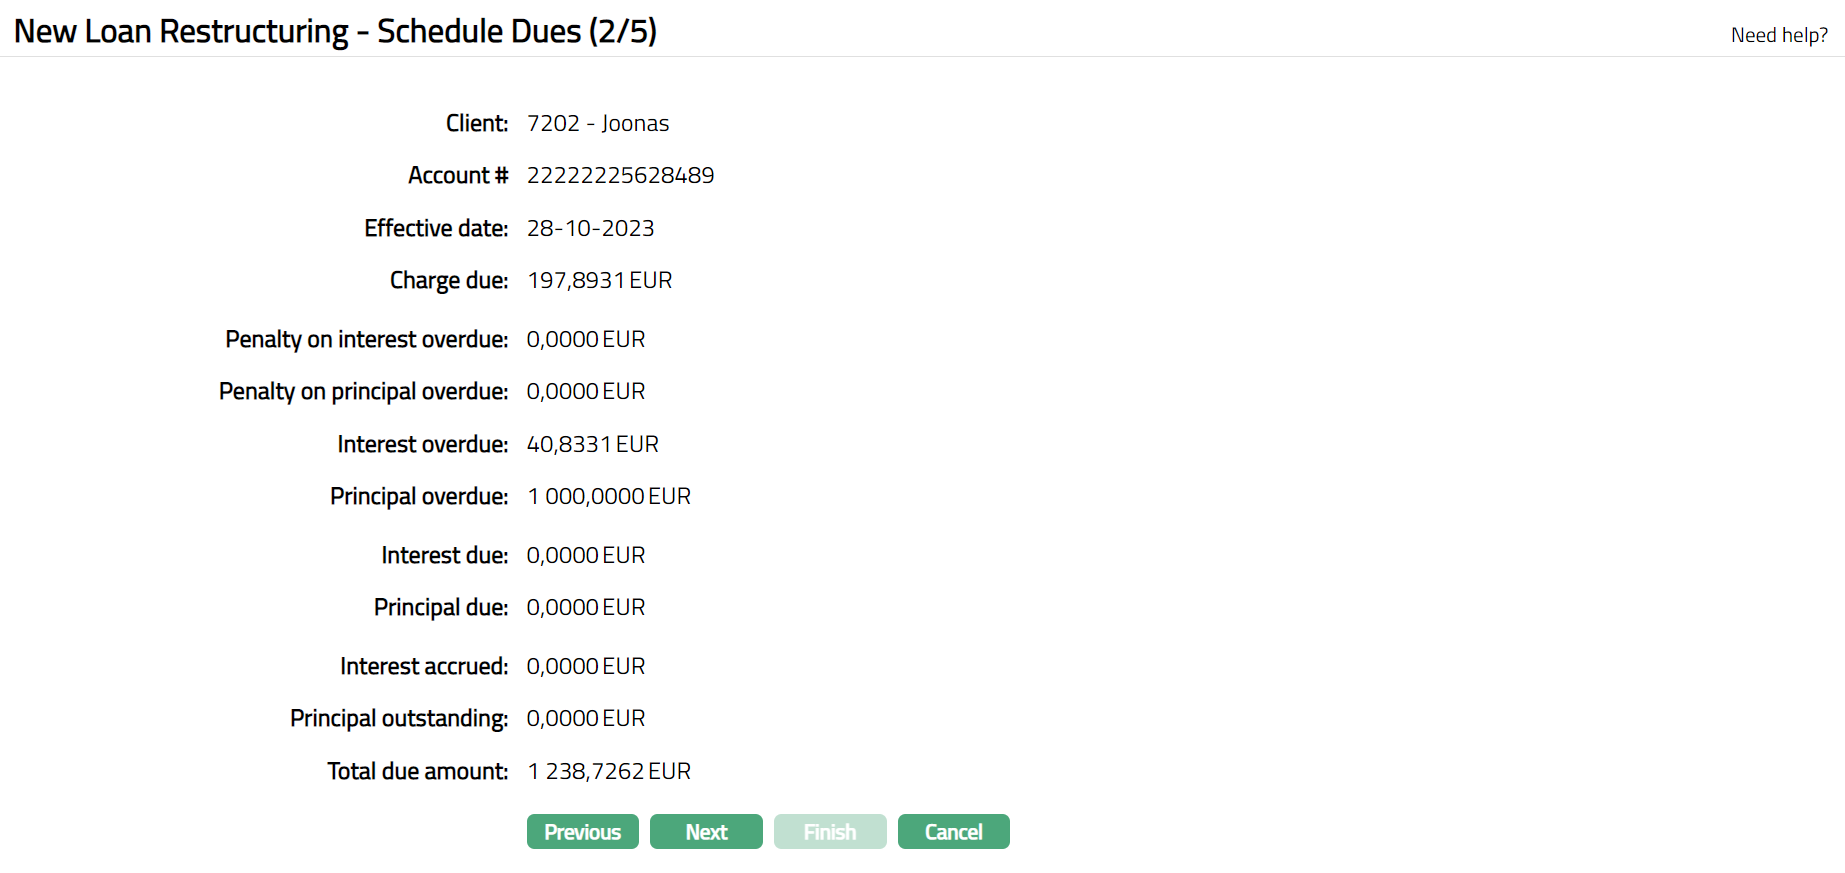
Note: The details are defaulted based on the client and account # selected, and the same cannot be edited.
- Click Next. New Loan Restructuring -- Allocation (3/5) page appears.
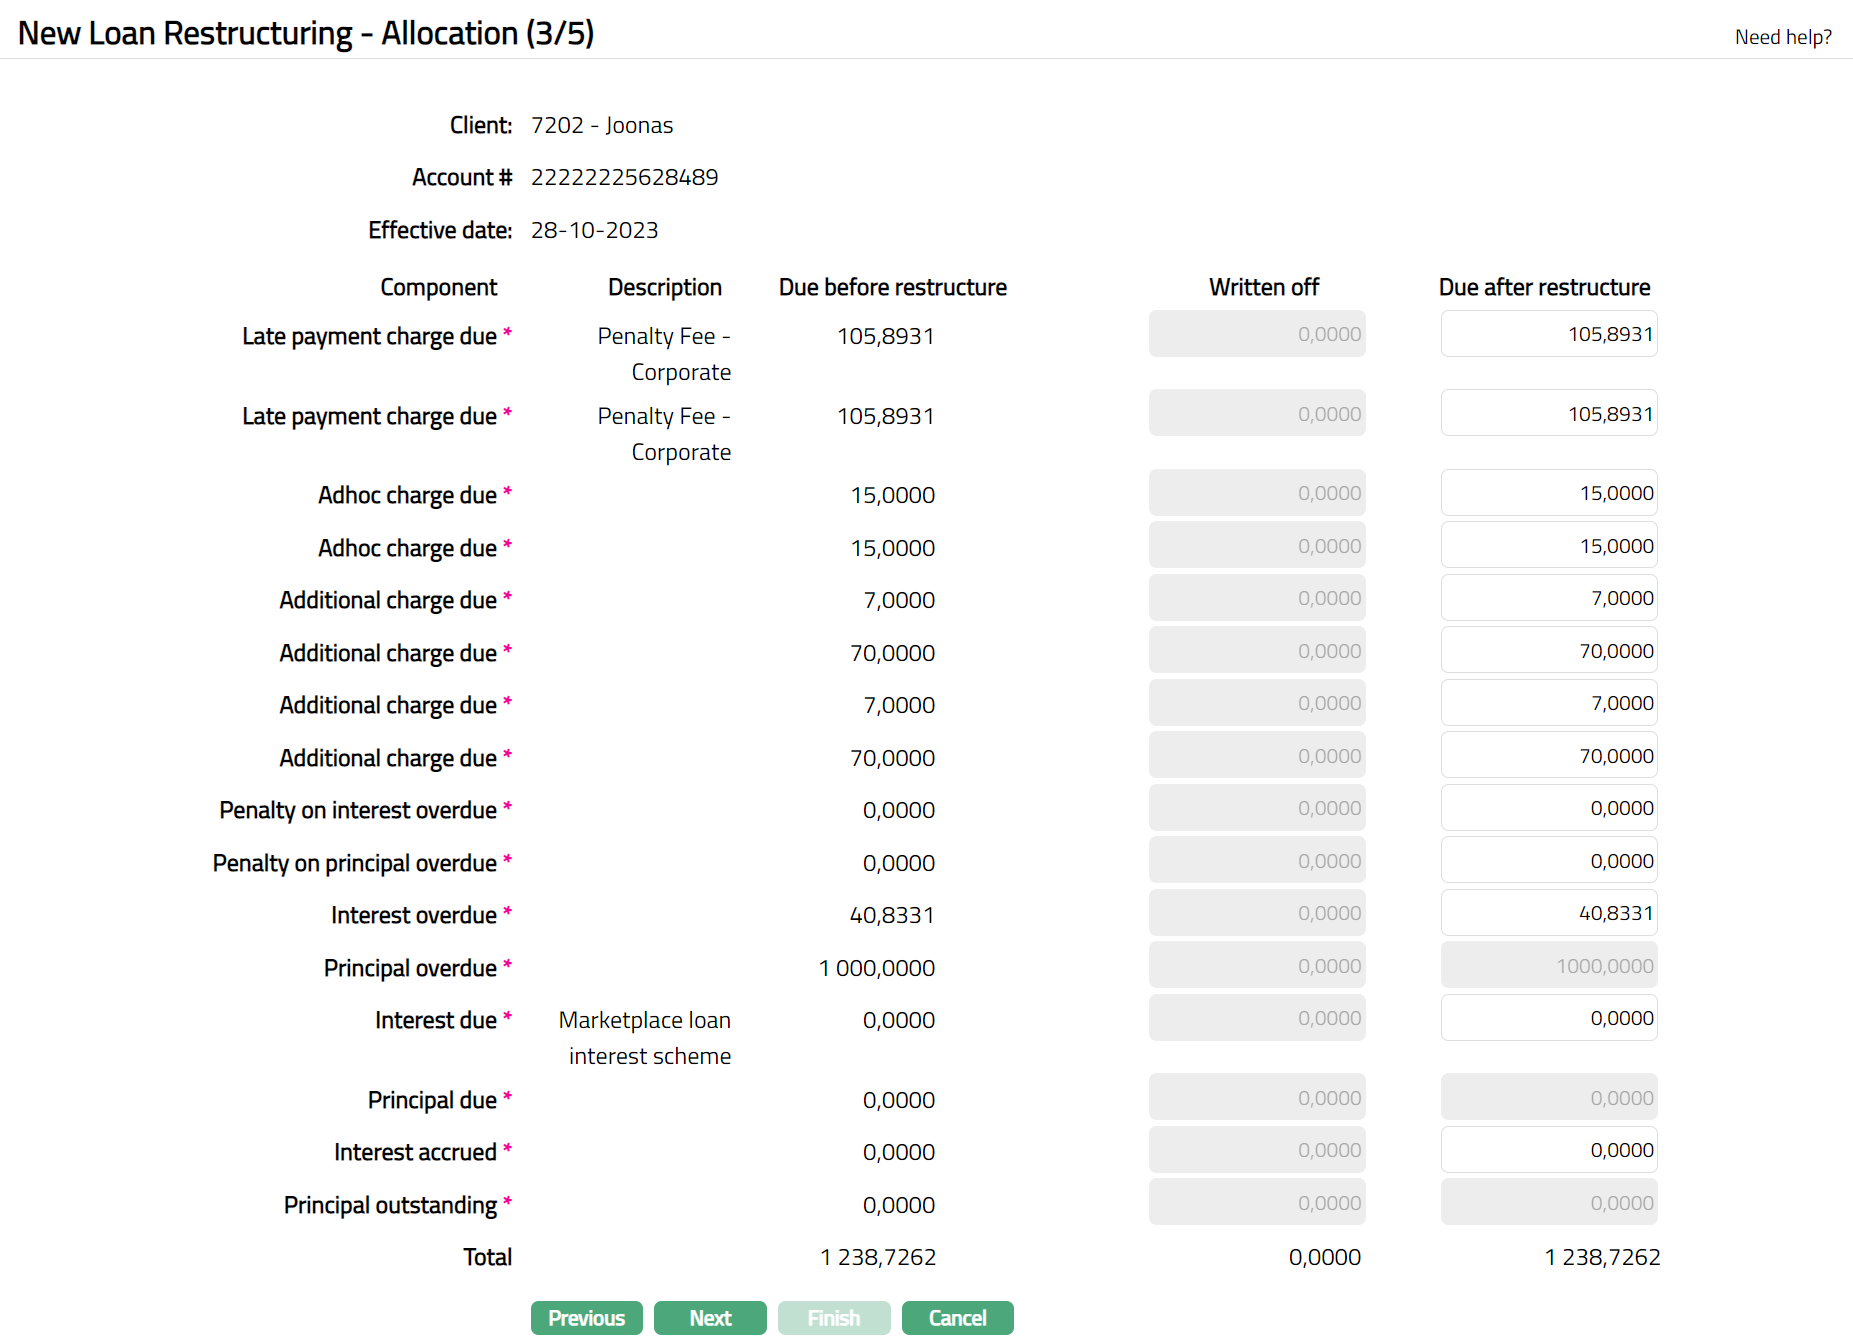
Note: The details are defaulted based on the client and account # selected. You can edit the required details if required under Due after restructuring.
- Click Next. New Loan Restructuring -- Payment Terms (4/5) page appears.
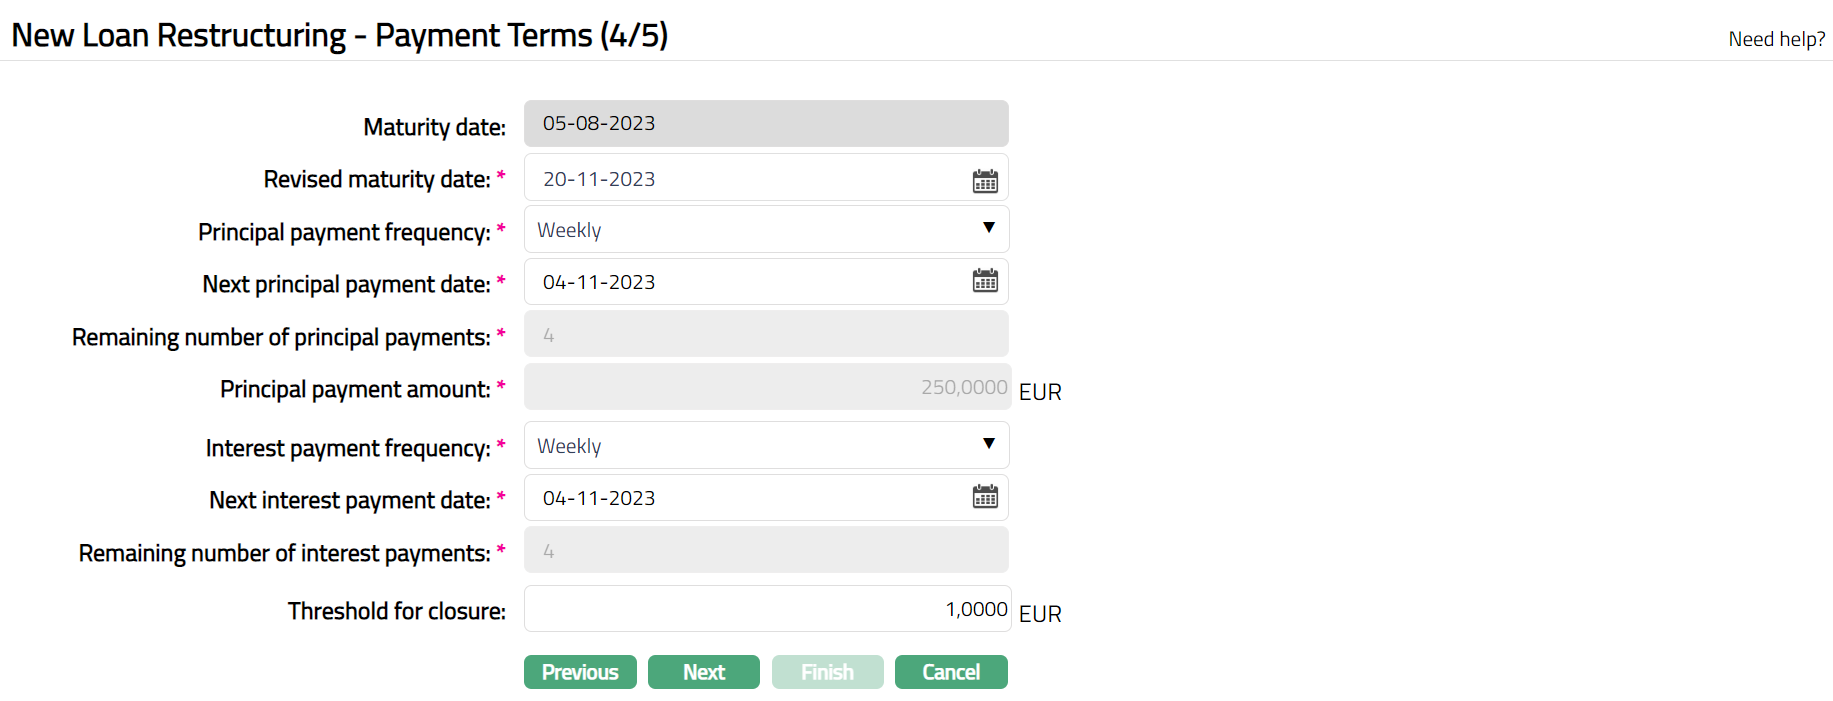
- Maturity date will be defaulted based on the client and account # selected. This denotes the date when the loan account will mature and depends on what was selected for Choose Loan Term By.
If you had selected Tenor, this field is not editable. Aura automatically calculates it as Tenor plus Value Date.
If you had selected Maturity date, this field is enabled and is mandatory. You need to input a date greater than the Value Date.
Note: If the Maturity date is a holiday and repayment option is Auto, the maturity happens on the same date. If the Repayment option is Manual, the maturity has to be initiated by the user on the next working day.
Select Revised maturity date by clicking on the calendar.
Principal payment frequency will be defaulted based on the client and account # selected. However, you can change the same from the drop-down list. The options available are Weekly, Semi Monthly, Monthly, Quarterly, Semi Annual, Annual, On maturity and Flexible.
Next principal payment date denotes the date on which the next payment related to principal to be made. The same is defaulted based on the client and account # selected. However, you can change the same from the available calendar is required. Note: Both the dated under Next principal payment date and Next interest payment date has to be same.
Remaining number of principal payments will be defaulted based on the client and account # selected and the same cannot be edited.
Principal payment amount will be defaulted based on the client and account # selected and the same cannot be edited.
Interest payment frequency will be defaulted based on the client and account # selected. However, you can change the same from the drop-down list. The options available are Weekly, Semi Monthly, Monthly, Quarterly, Semi Annual, Annual, On maturity and Flexible.
Next interest payment date denotes the date on which the next payment related to interest to be made. The same is defaulted based on the client and account # selected. However, you can edit the same by clicking on the calendar if required. Note: Both the dated under Next principal payment date and Next interest payment date has to be same.
Remaining number of interest payments will be defaulted based on the client and account # selected and the same cannot be edited.
Threshold for closure will be defaulted based on the client and account # selected. However, you can edit the same if required.
New Loan Restructuring -- Confirmation (5/5) page appears.
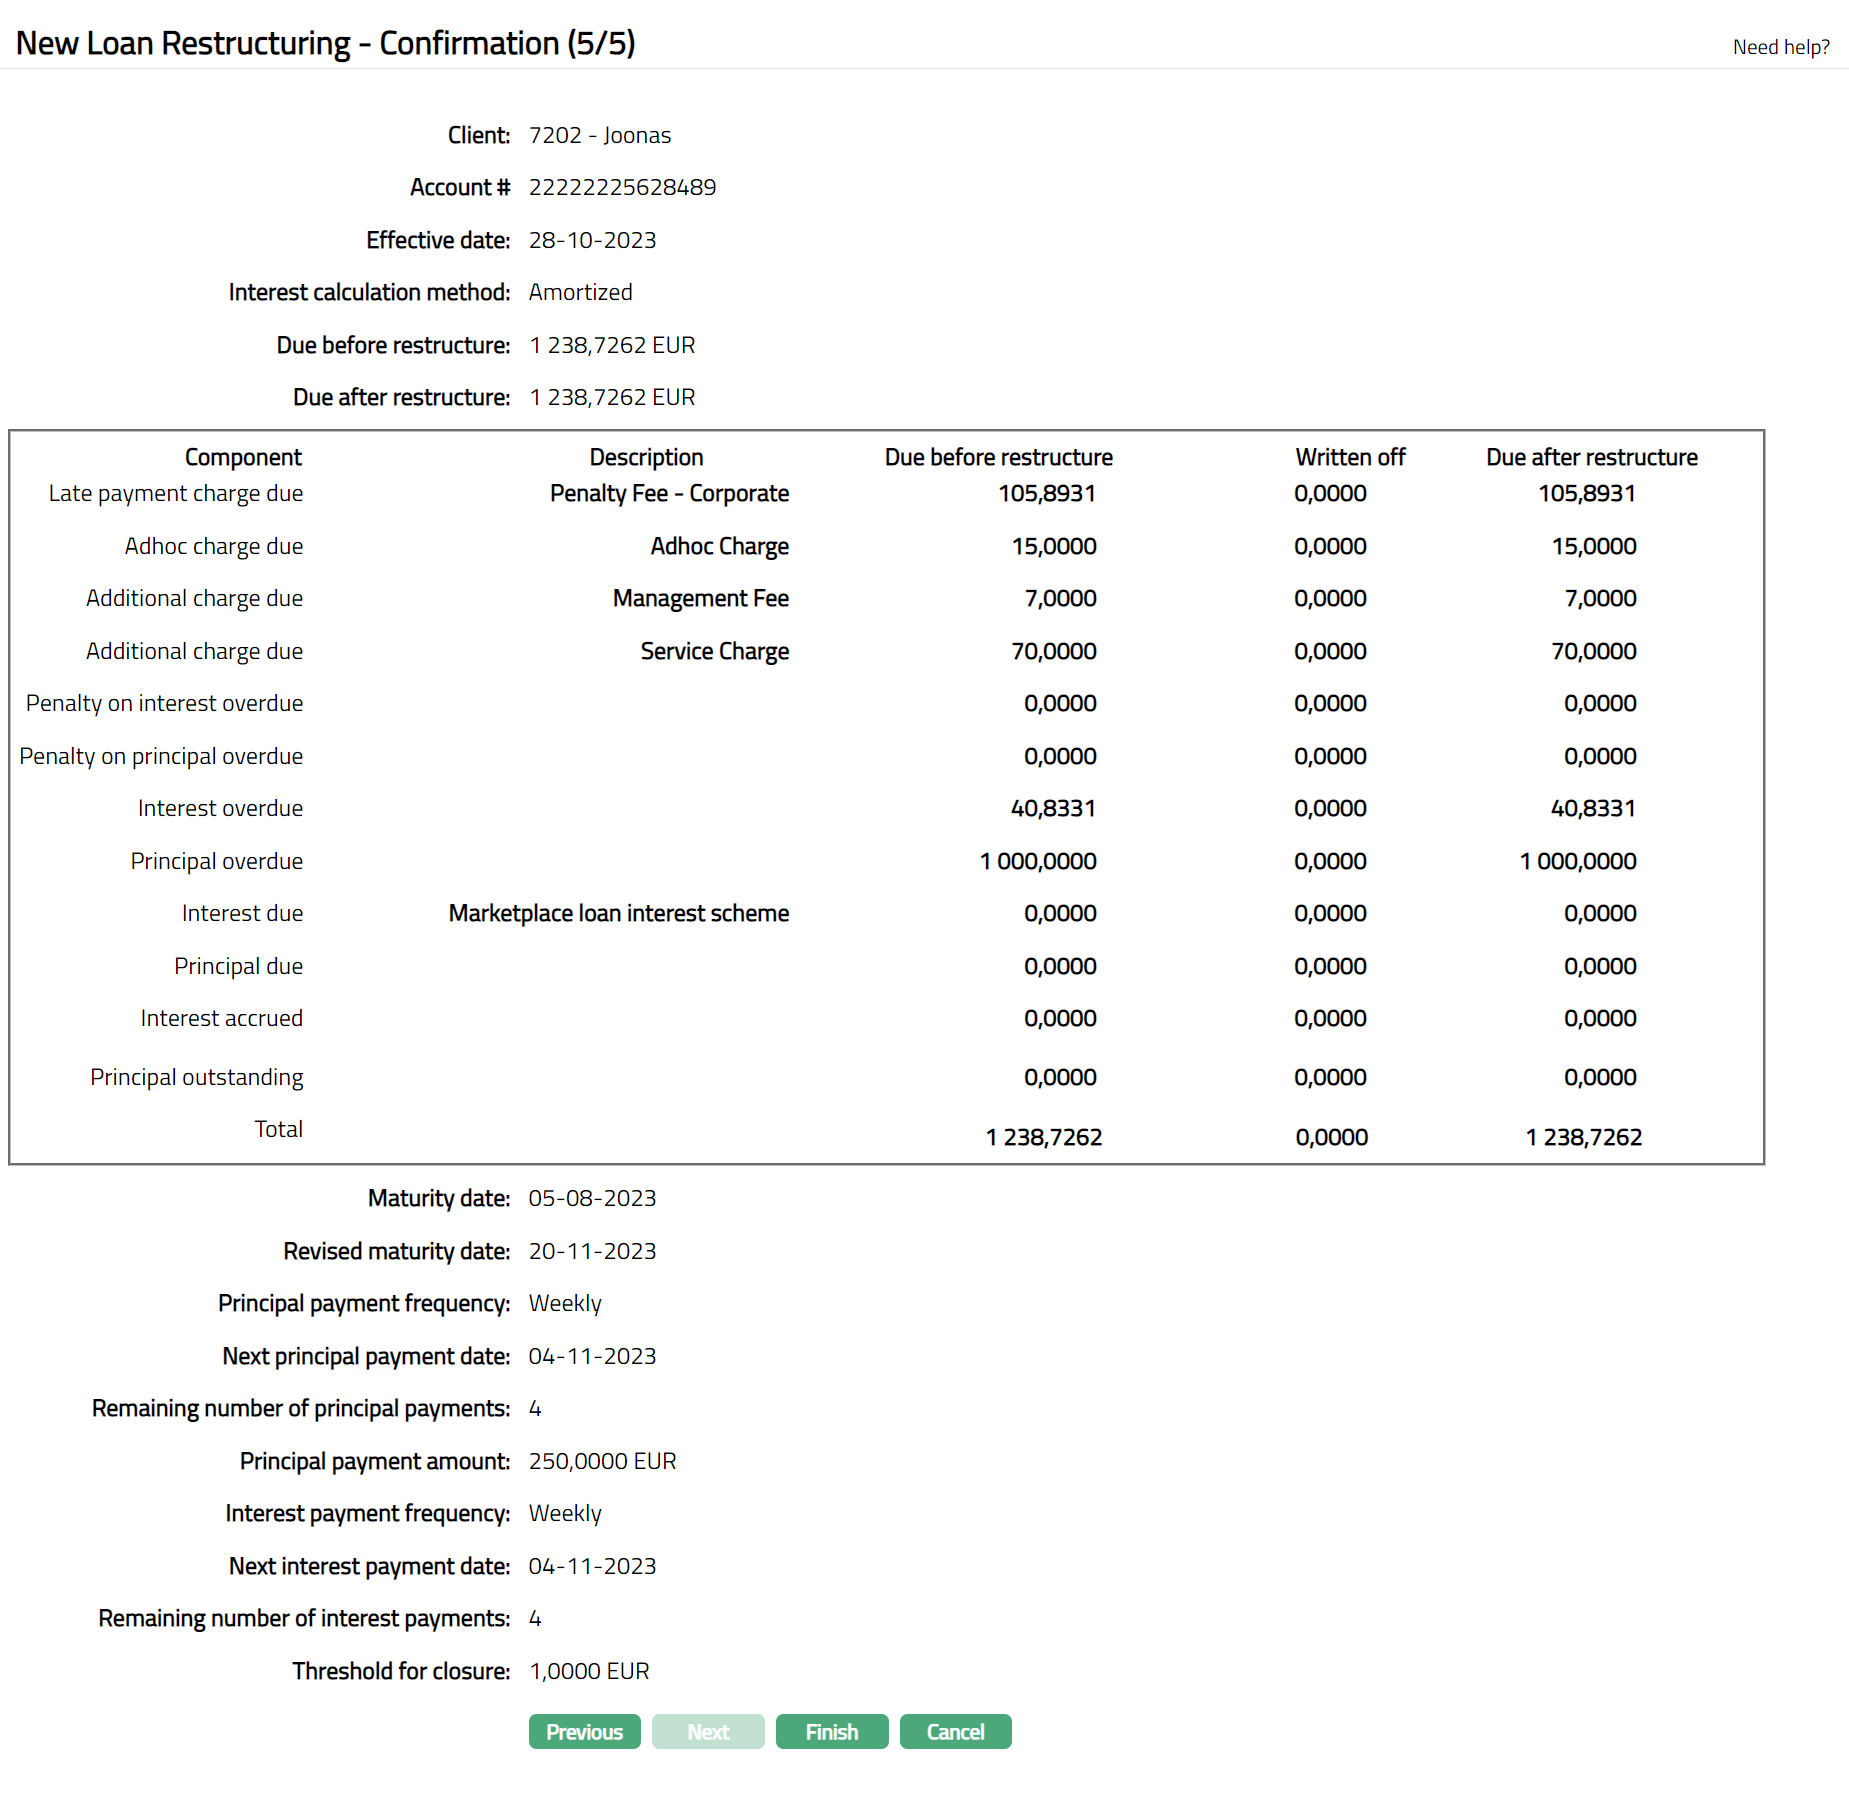
- Click Finish. Loan Restructuring page appears displaying the Profile tab by default.
Functions: Add, Search.
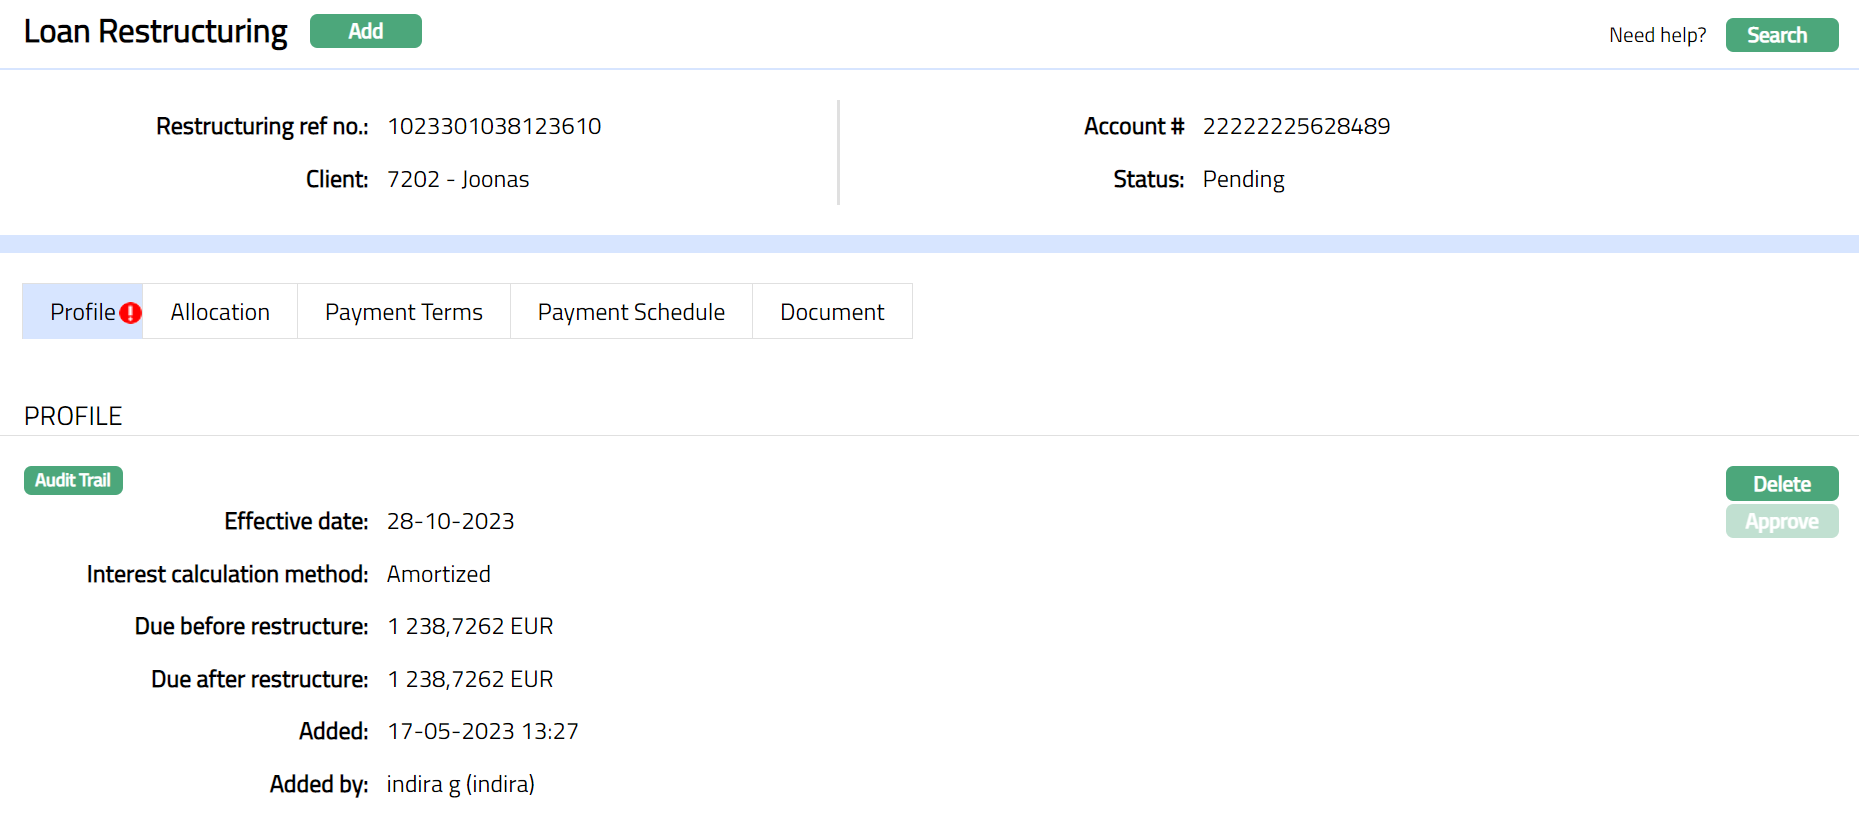
Note: Status of the Loan Restructuring will display as Pending. Once Profile tab is approved by another user who has not created the record, the status will display as Approved, and the red bubble will disappear from Profile tab. Sample screen shown below.
Functions: Add, Search
The additional fields are as follows:
Added field denotes the date on which the record was added.
Added by field denotes the name of the user who created the record.
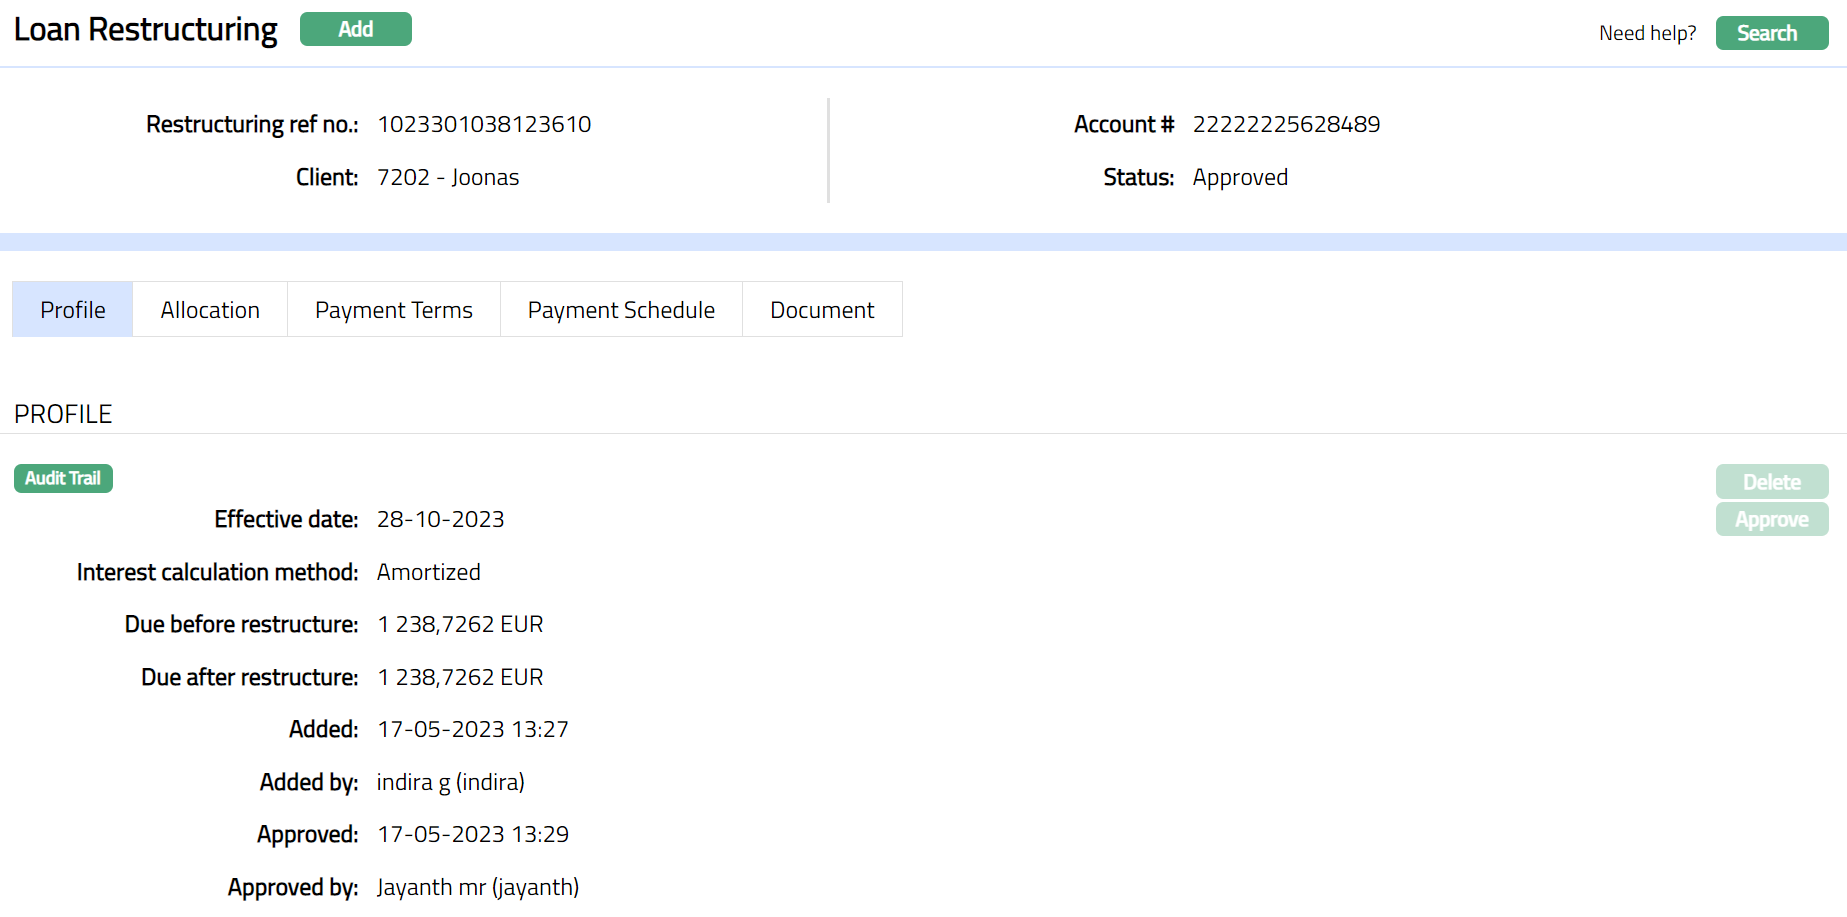
Approved field denotes date on which the record was approved and is displayed only on approval.
Approved by field denotes name of the user who approved the record and is displayed only on approval.
Profile
Profile tab, which is the default tab in the Loan Restructuring screen, shows the basic details of the Loan Restructuring. This tab is non-editable.
To view / Approve Profile
- Access Loans, then click Restructuring. By default, Profile tab appears as per sample below. The details are defaulted from the entries that you made during Restructuring creation. For details refer to New Loan Restructuring -- Profile (1/5)
Note: Status of the Loan Restructuring will display as Pending. Once Profile tab is approved by another user who has not created the record, the status will display as Approved, and the red bubble will disappear from Profile tab. Sample screen shown below.
Functions: Delete, Approve.
The additional fields are as follows:
Added field denotes the date on which the record was added.
Added by field denotes the name of the user who created the record.
Approved field denotes date on which the record was approved and is displayed only on approval.
Approved by field denotes name of the user who approved the record and is displayed only on approval.
Delete: You can delete Loan Restructuring record saved in AURA by a clicking Delete button. AURA will ask for confirmation, on approving which selected record will be deleted.
Allocation
Allocation tab, in the Loan Restructuring screen, shows the complete allocation details of the Loan Restructuring.
To view Allocation
- Access Loans, then click Restructuring and then click Allocation tab. The details are defaulted from the entries that you made during Restructuring creation. For details refer to New Loan Restructuring -- Allocation (3/5)
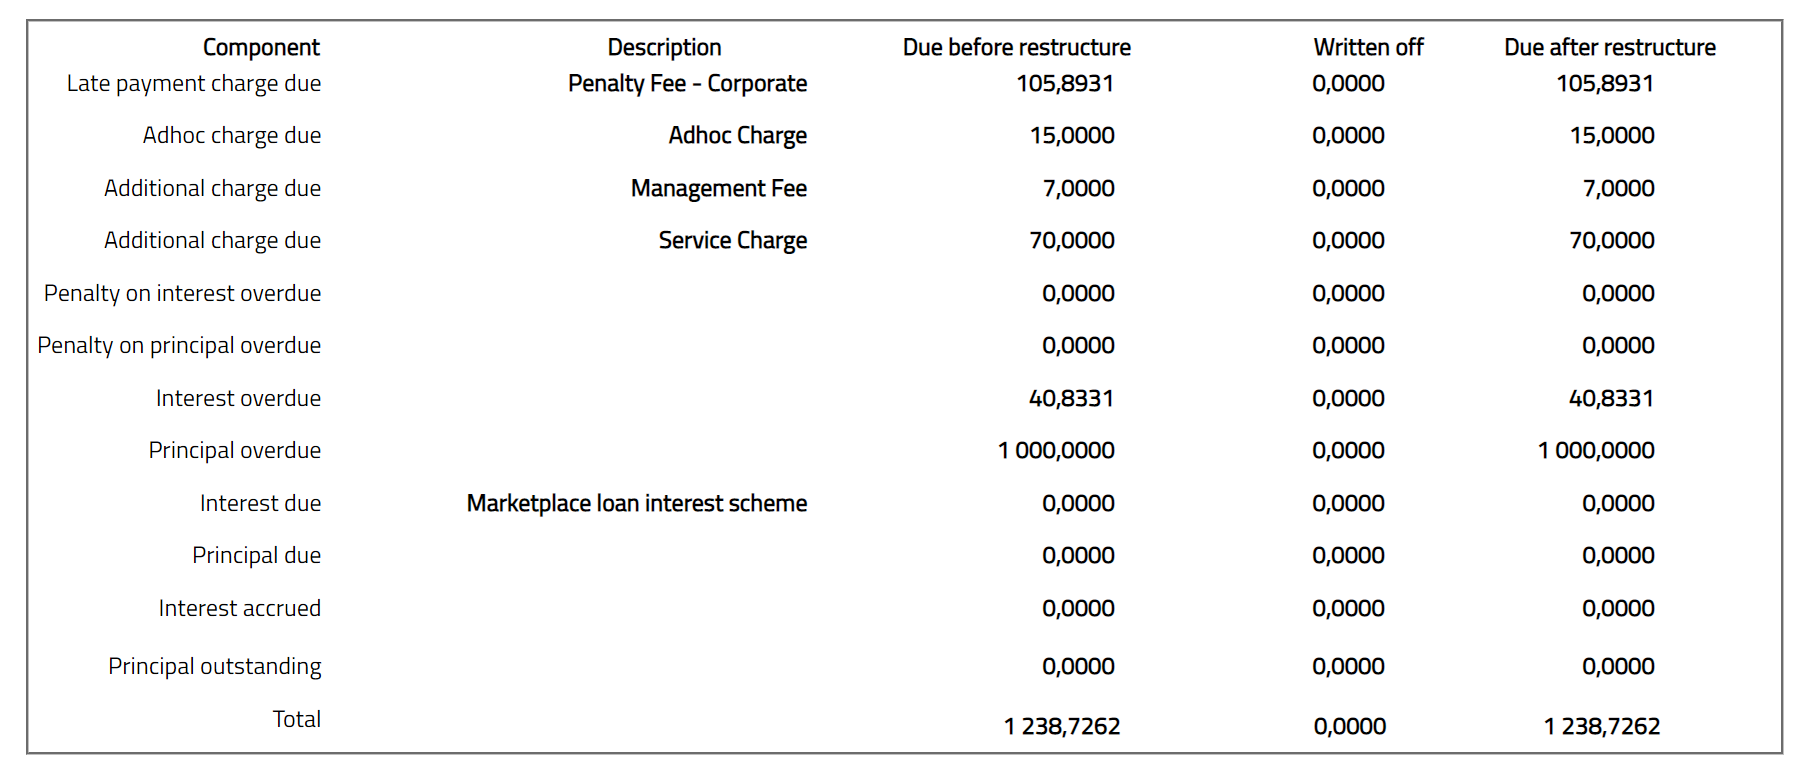
- The available fields in the table are Component, Despription, Due before restructure, Written off and Due after restructure. Note: You cannot add / edit this tab.
Payment Terms
The Payment Terms tab allows you to define how the loan will be repaid after restructuring. It controls how Aura generates the repayment schedules based on the revised terms you configure. The behaviour of this tab depends on the Interest Calculation Method of the loan:
- Amortized
- Annuity
Payment Terms - Amortized
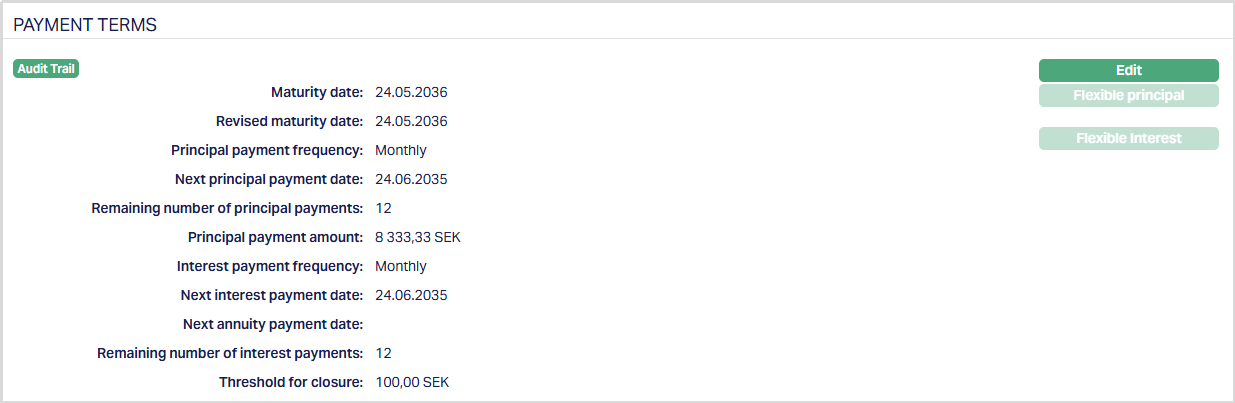
For Amortized Loans, the Payment Terms tab allows you to:
- Revise the maturity of the loan
- Define payment frequency for principal and interest
- Control whether schedules are generated automatically or defined manually
To view/ edit Payment Terms,
1. Access Loans, click Restructuring and then click Payment Terms tab. The details are defaulted from the entries that you made during Restructuring creation. For details, refer to New Loan Restructuring → Payment Terms (4/5)
2. Click Edit. The Edit Payment Terms page appears.
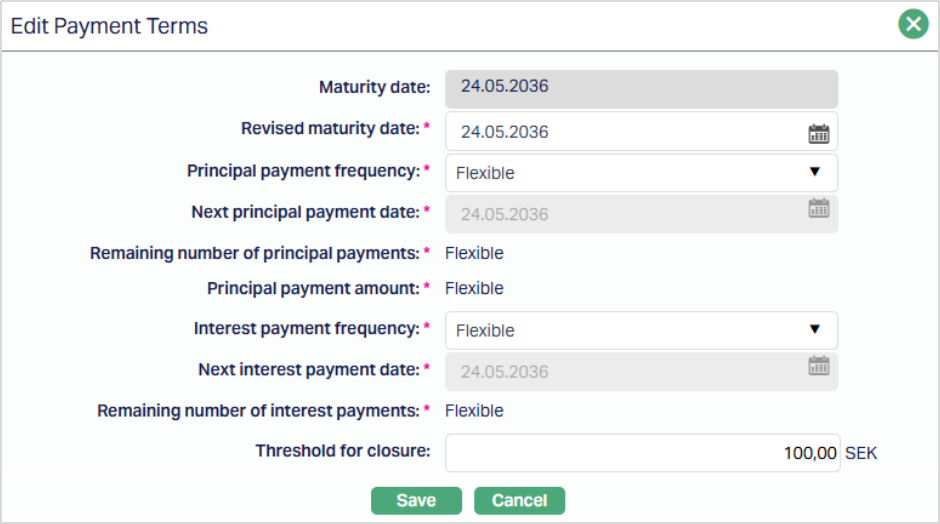
All fields are editable, except the fields that are automatically calculated by Aura.
3. Click Save. The Payment Terms tab appears with the edited details.
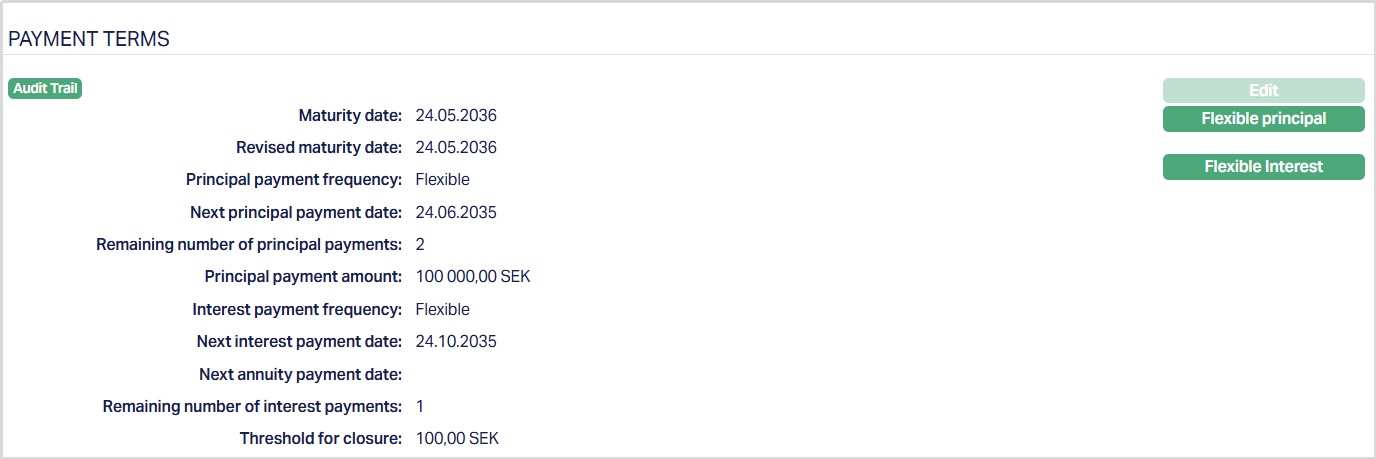
Functions: Edit, Flexible Principal, Flexible Interest
By default, the Flexible Principal and Flexible Interest options are disabled. These options become available only when you set the Principal Payment Frequency and Interest Payment Frequency to Flexible. Once the frequency is set to Flexible and saved, you can use these options to define custom repayment schedules for Principal and Interest.
Flexible Principal
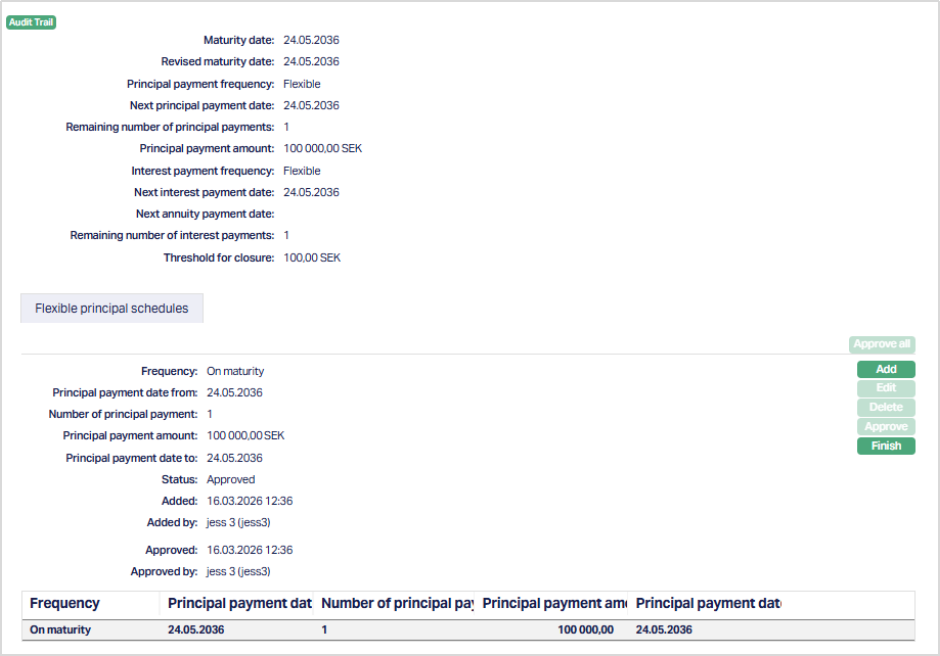
When you click Flexible Principal, Aura opens the Flexible Principal Schedules tab. The tab displays the principal repayment schedules defined for the loan when the payment frequency is set to Flexible. It shows the details of each schedule, including frequency, payment dates, number of payments, payment amount and status.
To view/ add a Flexible Principal Schedule,
1. Access Loans, click Restructuring and then click Payment Terms tab, navigate to the Flexible Principal button.
2. Click Add. The Add flexible principal schedules page appears.
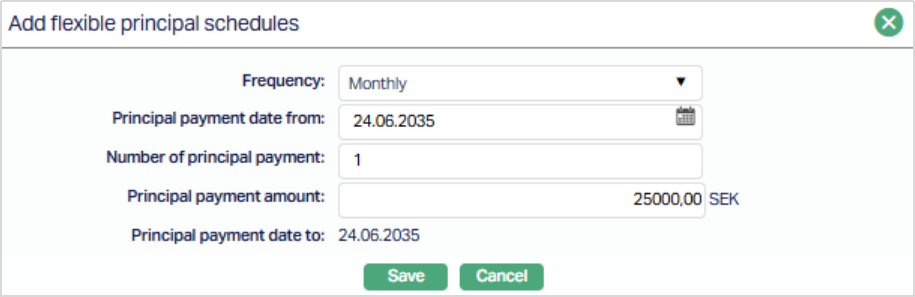
3. Frequency - Select how the principal payments should be scheduled. The available options are - Weekly, Semi monthly, Monthly, Quarterly, Semi annual and Annual.
4. Principal payment date from - Enter the start date for the principal payments.
5. Number of principal payments - Specify how many installments should be created.
6. Principal payment amount - Enter the amount to be paid for each installment.
7. Principal payment date to - This is automatically derived based on the selected frequency, start date and number of payments.
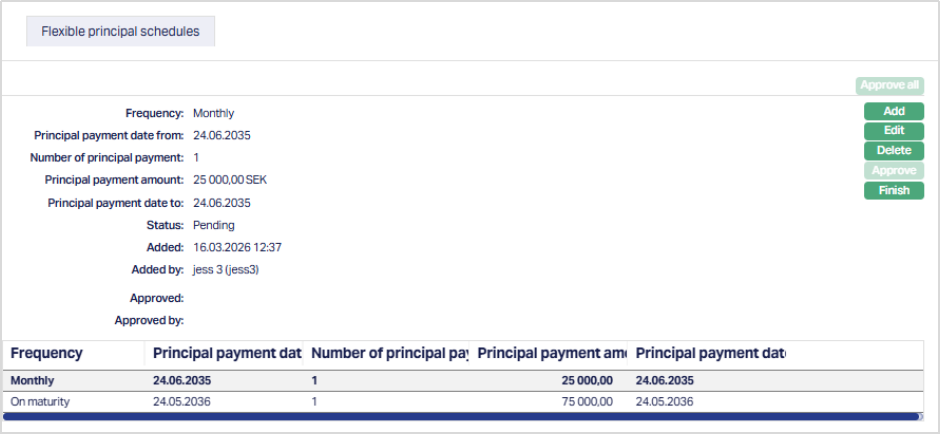
8. Click Save. The newly created schedule is shown with the details you entered. All defined schedules are also displayed in a table at the bottom of the screen, where each row represents a principal payment schedule.
Functions: Add, Edit, Delete, Finish, Approve, Approve all.
Flexible Interest
When you click Flexible Interest, Aura opens the Flexible Schedules section for interest. This tab allows you to define interest repayment schedules when the Interest Payment Frequency is set to Flexible. It displays the details of the defined schedules along with their status and audit information.
To view/ add a Flexible Interest Schedule,
1. Access Loans, click Restructuring and then click Payment Terms tab, navigate to the Flexible Interest button. This tab will show no records, as there are no flexible schedules attached to the account.
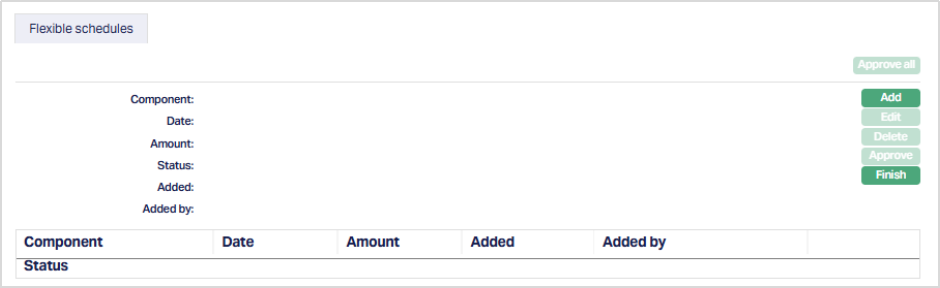
2. Click Add. The Add Flexible Schedules page appears.
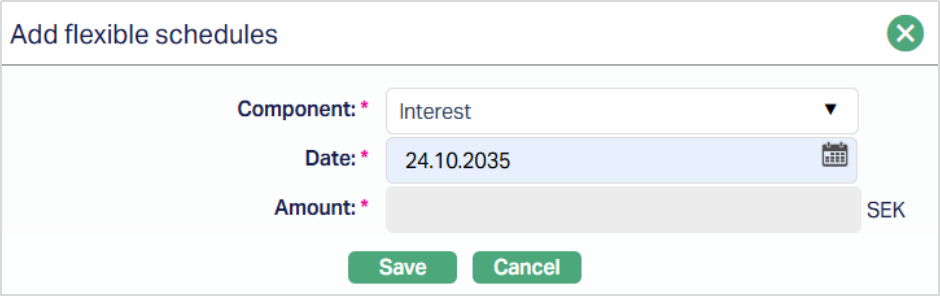
3. Component - This field specifies the type of schedule being defined. For flexible interest schedules, this is set to Interest.
4. Date - Defines the date on which the interest payment is scheduled. You must specify the required date for each interest schedule entry.
5. Amount - This represents the interest amount for the schedule. This field is not editable. The amount is calculated automatically by Aura based on the loan parameters and the selected date.
6. Click Save. The Flexible Schedules page appears with the added details.
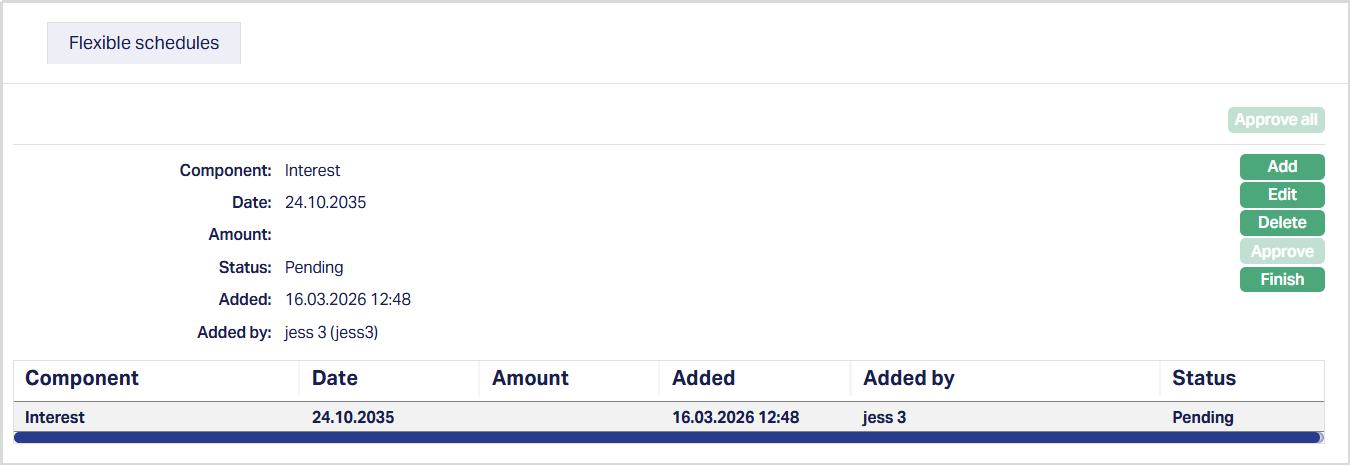
Functions: Add, Edit, Delete, Finish, Approve, Approve all.
Note on Flexible Schedules:
- You can define multiple schedules for the same due date and component.
- For Principal Schedules, you can define both payment dates and amounts based on your requirement.
- For Interest Schedules, the amount is calculated automatically by Aura based on the loan parameters and the selected schedule date.
System Behaviour:
When payment frequency is NOT set to Flexible, Aura generates repayment schedules based on the defined terms.
When Flexible payment frequency is selected, Aura does not generate repayment schedules automatically. Instead, the repayment structure is defined based on the flexible schedules you create for principal and interest. Each schedule is initially saved with a Pending status. You must approve the schedules before completing the restructuring process.
The defined and approved schedules determine:
- The number of payments
- The payment dates
- The repayment amounts
Any changes to the flexible schedules directly impact the repayment structure of the loan after restructuring.
Payment Terms - Annuity
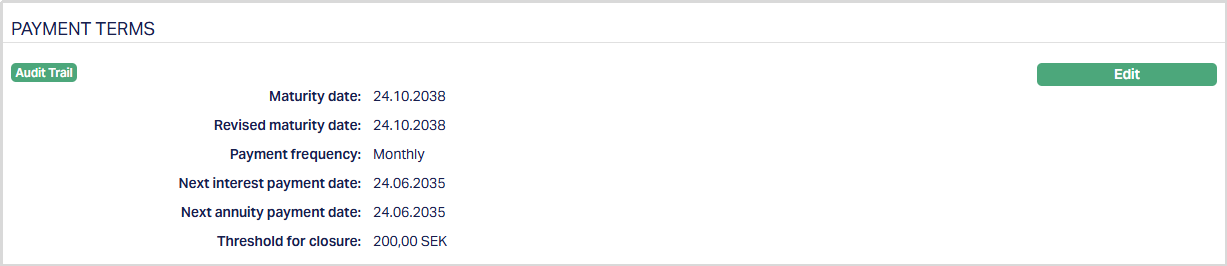
For Annuity Loans, the Payment Terms tab defines the repayment structure as a single periodic payment instead of separate principal and interest components.
The tab displays the values defined during restructuring creation and allows you to modify them before approval using the Edit option.
To view/ edit Payment Terms,
1. Access Loans, click Restructuring and then click Payment Terms tab. The details are defaulted from the entries that you made during Restructuring creation. For details, refer to New Loan Restructuring → Payment Terms (4/5)
2. Click Edit. The Edit Payment Terms page appears.
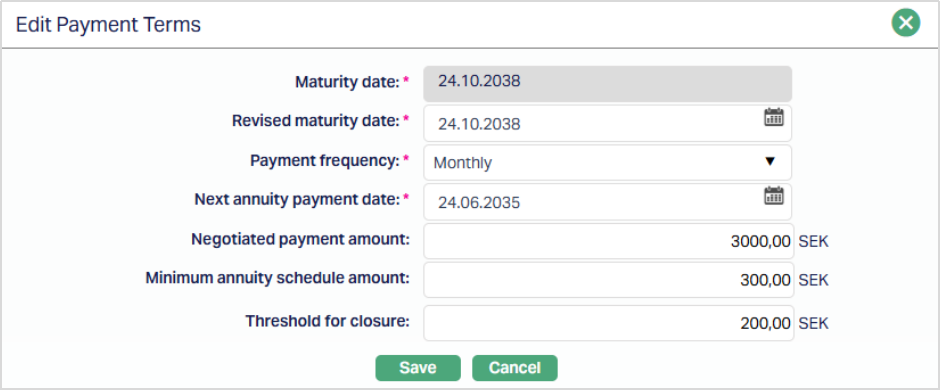
All fields are editable except Maturity date.
3. Click Save. The Payment Terms tab appears with the edited details.
Functions: Edit
System Behaviour:
Aura generates repayment schedules automatically based on the payment frequency, negotiated payment amount, minimum annuity schedule amount, and revised maturity date.
Payment Schedule
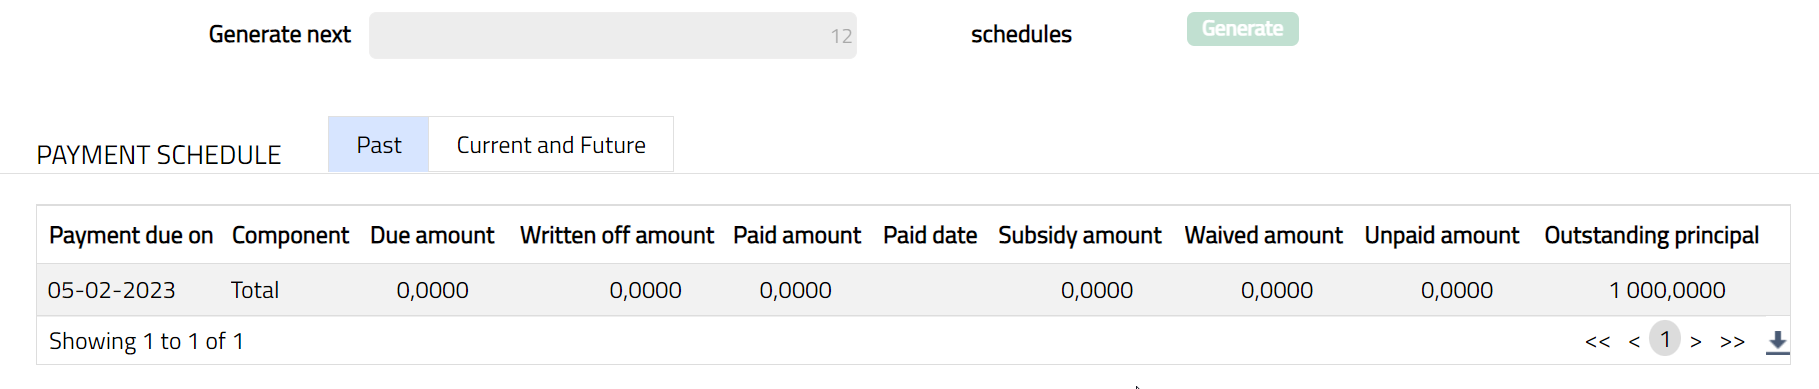
Payment Schedule tab allows you to view the past, current and future payment schedules. This tab is non-editable.
To view Payment Schedule
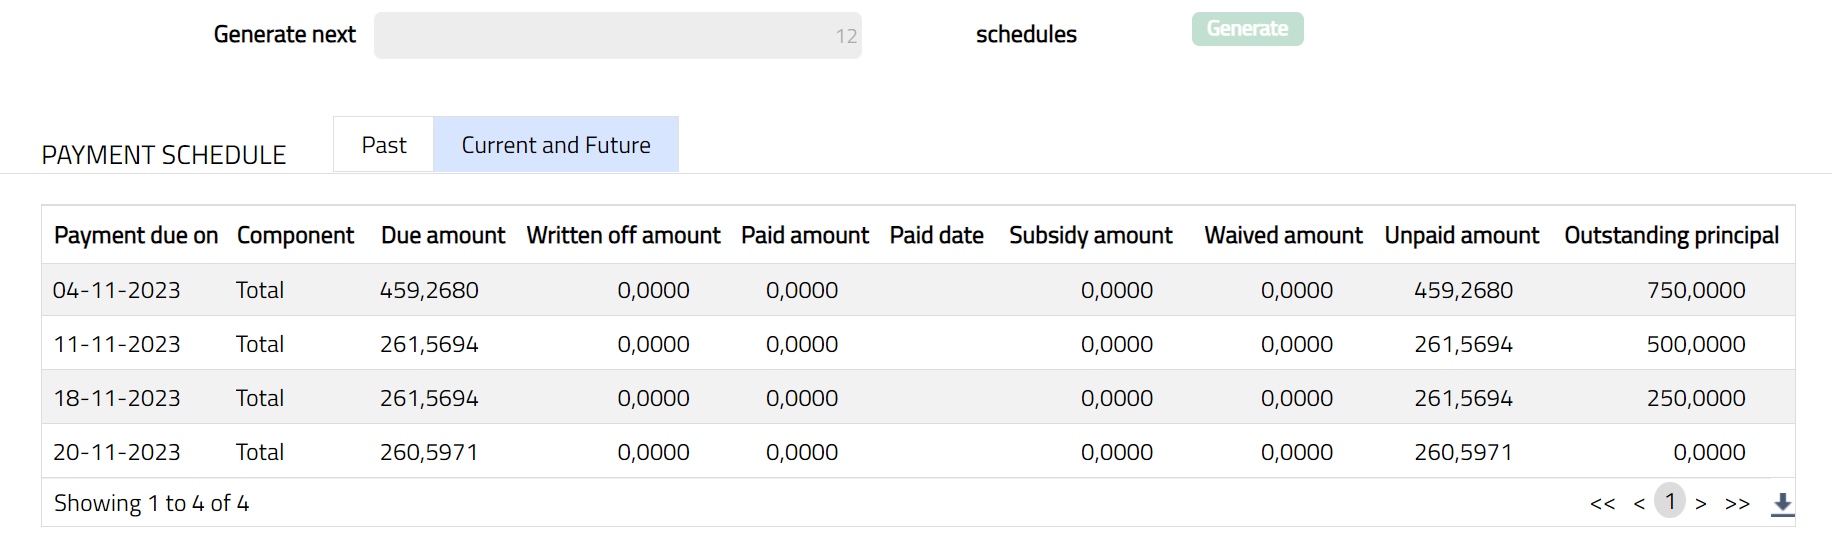
- Click Payment Schedule tab. There are two sub-tabs within it -- Past, Current and Future. By default, the Current and Future tab is displayed. It shows the details of the Payment Schedules that have Payment due on and Paid date.
A sample of Past tab is shown below:
A sample of Current and Future tab is shown below:
All the tabs show the following data:
Payment due on: Date for the payment schedule.
Component: Details of the payment schedule.
Due amount: Amount due for the payment schedule.
Written off amount: Amount which is written off from the book of accounts for the payment schedule.
Paid amount: Amount which is already paid for the payment schedule.
Paid date: Date on which the payment is done for the payment schedule.
Subsidy amount: Indicates the amount which is approved as a part of subsidy.
Waived amount: Amount which is waived of for the payment schedule.
Unpaid amount: This indicated the total amount which is not paid for the payment schedule.
Outstanding principal: Indicates the total outstanding amount for the payment schedule.
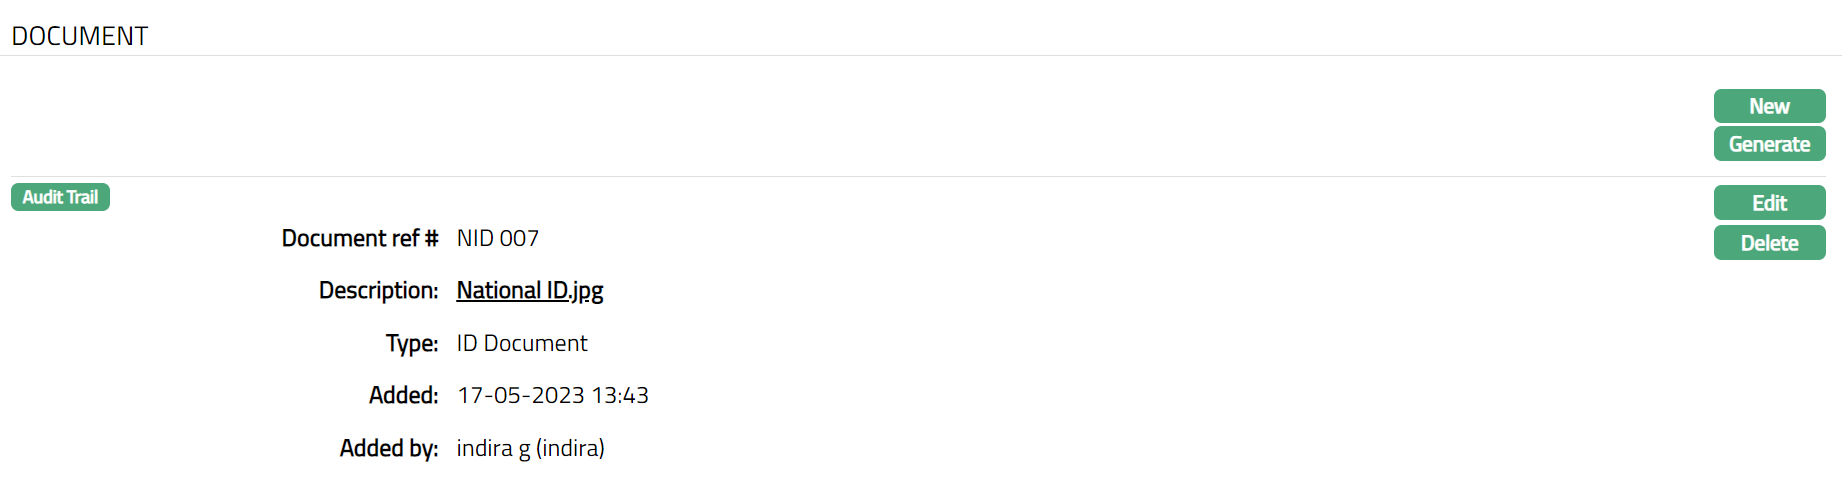
Document
Document tab allows you to upload documents related to loan restructuring. These can be in the form of scanned images or files on your computer. You can categorize the documents as per Document Type and store them with a document reference number.
- Access Restructuring screen. Click Document tab. Document page appears.

- Click New. New Document page appears.
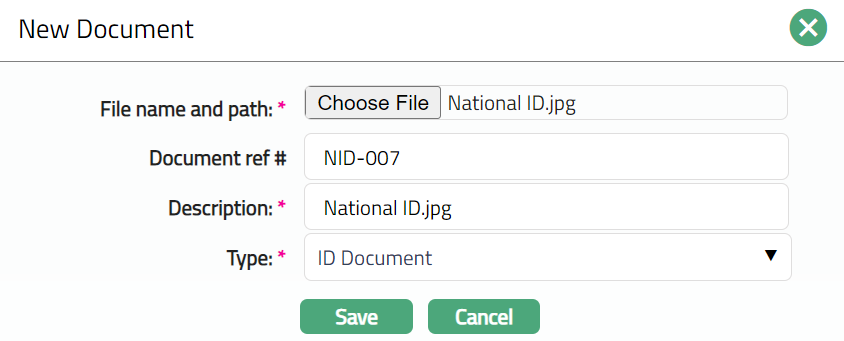
Click Choose File button to select the File name and path of the document.
Enter Document ref # for the document. This document reference number is used in Branch view > Documents.
Based on the file selected, Description field will automatically derive. If required, you can change the description.
Select Type of the Document uploaded. The document types should have been maintained using Admin > System codes > Documents > Document types. Once entered, this cannot be edited.
Click Save. Document tab appears with the added details.

Functions: New, Generate, Edit, Delete
To Edit Document
- Click Edit. Edit Document page appears.
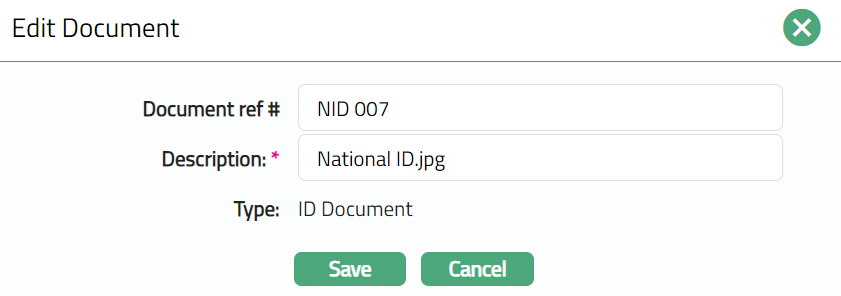
Note: Except Type field, all other fields are editable.
- Click Save. Document page appears with the edited details.
Functions: New, Generate, Edit, Delete
To Generate Document
- Click Generate to generate the pdf file using the template if maintained under Admin > System codes > Process > Document templates. You have to map the document template for Nostro account product under Document template settings as maintained under Retail > Settings > Product. New Document page will appear where the mapped templates will be displayed.
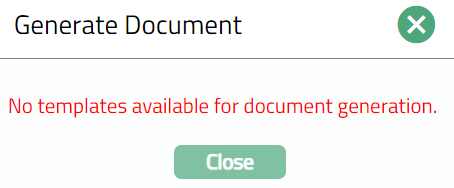
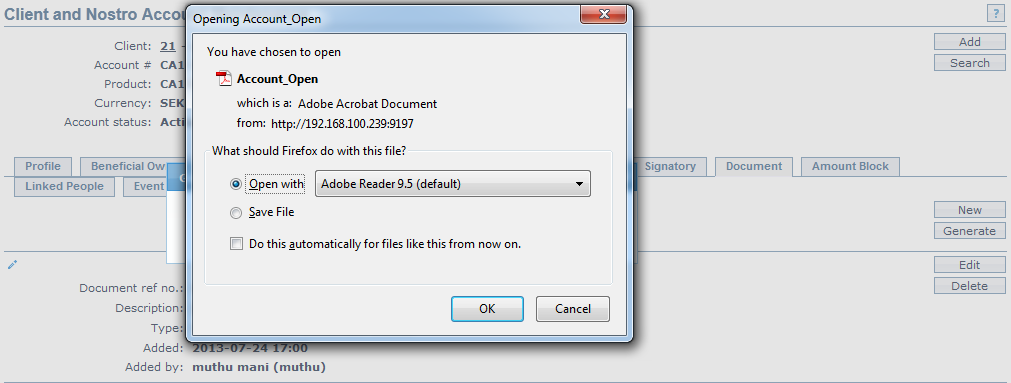
- Click any template from the list of templates after which the document will be generated based on the selected template as shown below.
- Click Delete to delete the document. Aura will ask for confirmation, on approval of which the document will be deleted.