Transaction Code
Transaction codes manage the posting of transactions into the accounts. A transaction code identifies a single debit or credit type transaction which will affect either the general ledger or a customer account. Transaction codes provide significant benefits in automation and error reduction. The code specifies whether a transaction is a debit or credit - there is no need for bank user to specify this when entering a transaction. The code specifies whether it is to be applied to a GL or a client account
The following are the tabs in Transaction code:
Transaction Type -- Client Account
Transaction Type -- General Ledger
Adding new Transaction Code
To add Transaction code,
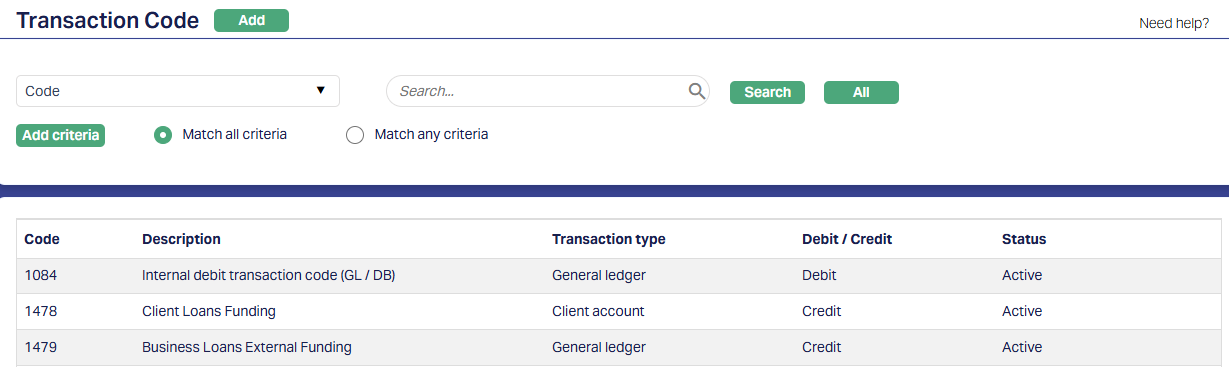
1. Access General Ledger from menu, click Settings and then Transaction code. Transaction Code Search page appears. All Transaction codes available in Aura get displayed.

2. Click Add. New Transaction Code → General (1/2) page will appear.
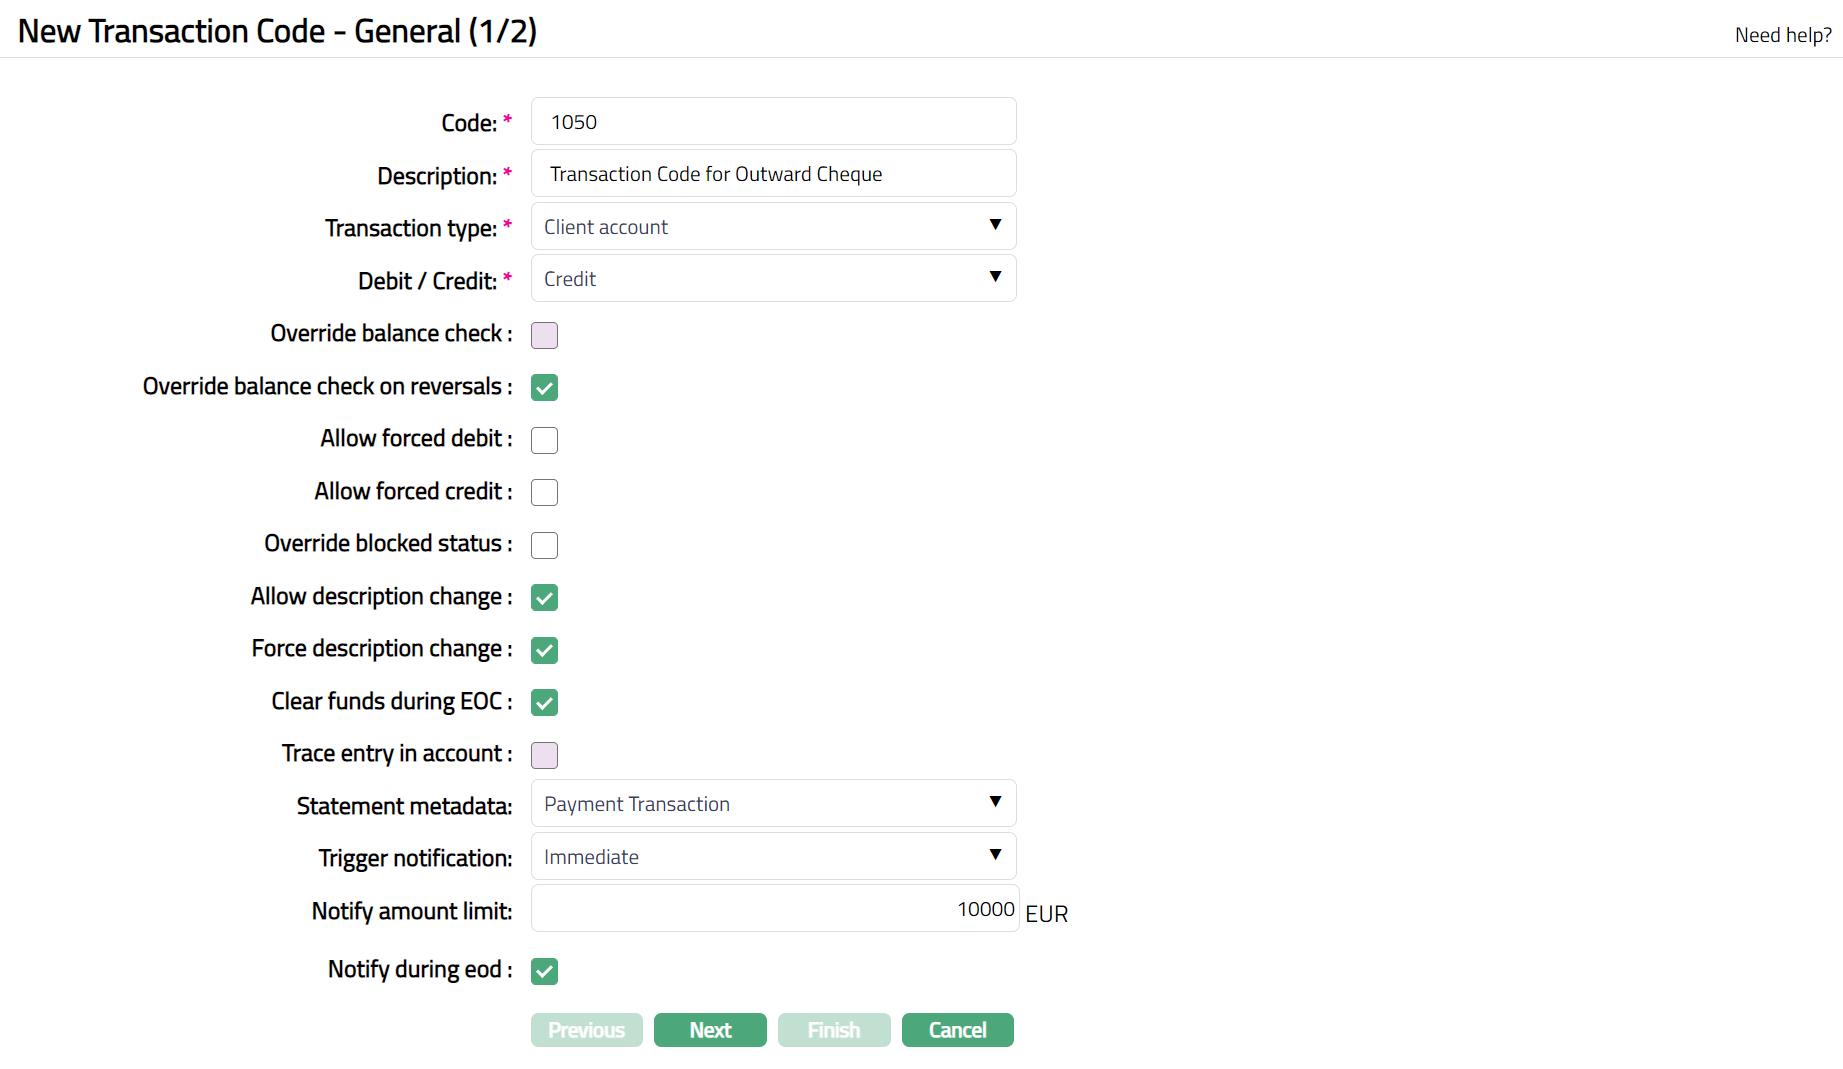
3. Enter Code to be assigned to the new Transaction code. This can be either numerical or alphabetical code and can be up to a maximum of 4.
4. Enter Description for the new Transaction code. This is the default description that will appear when this transaction code is used for any transactions posted to the accounts.
5. If transaction code pertains to a client account, choose Transaction Type as Client account; similarly, if the transaction code pertains to a General ledger, choose General Ledger from the list of available drop-down.
6. Specify whether the transaction code is for a debit or credit type transaction in the Debit / Credit drop-down field.
7. Depending on Transaction type and Debit / Credit field combinations, the checkboxes that follow will be activated. Based on the checkbox selections that you make here; the corresponding details will get validated / updated automatically during transaction postings.
If General Ledger is selected as Transaction Type, the check box against Override balance check, Override balance check on reversals, Allow forced debit, Allow forced credit and Override blocked status are disabled.
If Client Account and Debit are selected, Override balance check checkbox will be enabled. On selecting the checkbox AuraAura will allow you to post the transaction even if client account doesn't have sufficient balance.
If Client Account and Credit are selected, the checkbox against Override balance check on reversals will be automatically selected. This indicates that AuraAura will allow you to post the reversal transaction even if client account doesn't have sufficient balance.
8. If Allow forced debit checkbox is selected, then the debit will be allowed from account even though you have selected Disallow debit at account level.
9. If Allow forced credit checkbox is selected, then the credit will be allowed from account even though you have selected Disallow credit at account level.
10. If Override blocked status checkbox is selected, then both debit and credit will be allowed for an account even though account is in blocked status. This flag will be applicable only to account types which have a "Blocked" status. For example, it will be applicable for a Current account and not relevant for card accounts as there is no blocked status for a Card Account.
11. During journal entry the description from the transaction code will be automatically displayed. If Allow description change checkbox is selected, you can change the description in the journal.
12. If you select the Allow description change then the subsequent checkbox Force description change will get activated as well. If this checkbox is selected, during journal entry, AuraAura will force you to input the description for the transaction.
13. Clear funds during EOC specify whether the funds to be moved from uncleared funds to cleared funds during EOC (End of cycle) batches. If the checkbox is checked, then the funds are moved from uncleared funds to cleared funds during EOC batches. If the checkbox is unchecked, then the funds are not moved from uncleared funds to cleared funds during EOC batches but are triggered separately. This field is enabled and checked only if the Transaction type is Client account and Debit/Credit is Credit.
14. Click Next. New Transaction Code → Confirmation (2/2) will appear.
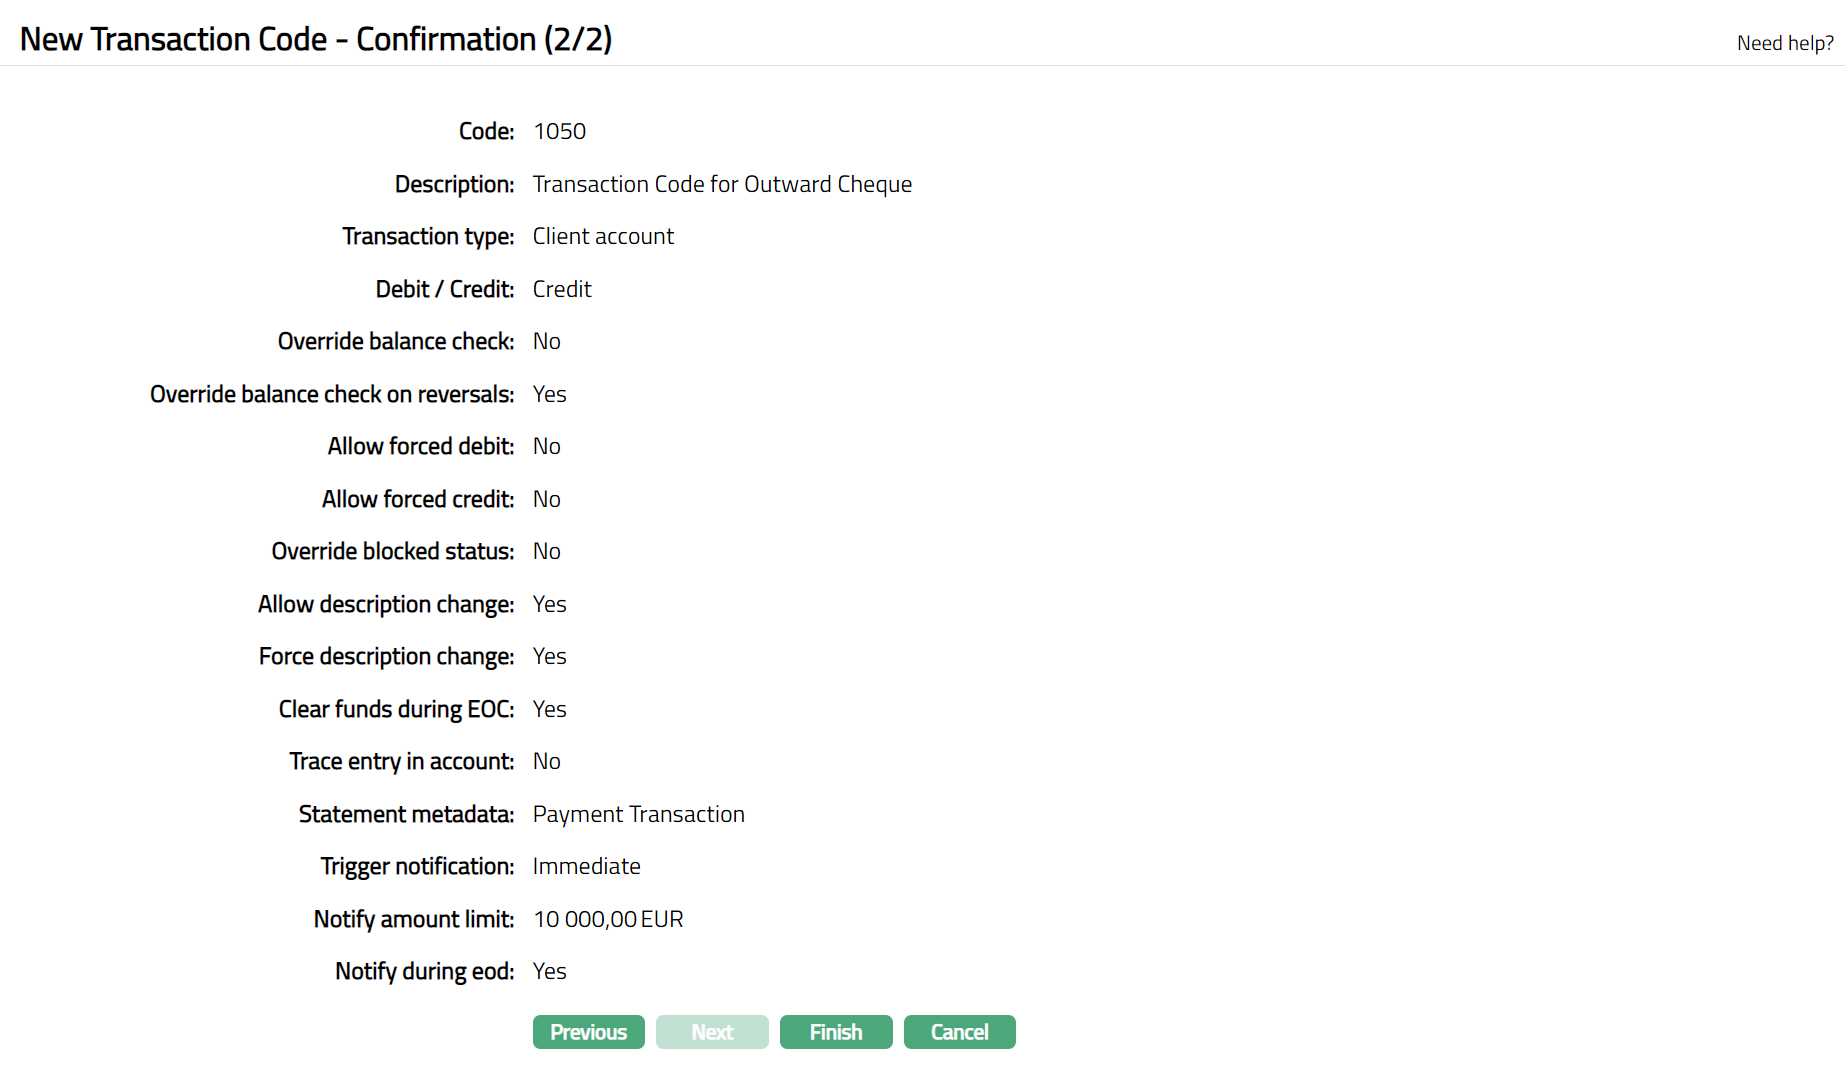
15. Click Finish. Transaction Code page appears displaying the details of the Transaction Code you added.
Transaction Type -- Client Account
Functions: Add, Search, Delete, Suspend, Activate.
Transaction Type -- General Ledger
Functions: Add, Search, Delete, Suspend, Activate.
Delete: You can delete a transaction code by a clicking on Delete button. When you click on Delete button, AuraAura will ask for confirmation on deletion. AuraAura will delete the transaction code. However, you cannot delete a transaction code when any product is using the transaction code and is in active status.
Suspend: If you want to suspend the Transaction Code, click on suspend button. AuraAura will ask for confirmation. On clicking Yes, the status of the Transaction code gets changed to Suspended and the Suspend button gets changed to Activate. The suspended transaction code will not be available in any drop-down list of Transaction codes in any other screen.
A suspended Transaction code can be activated by a click on the Activate button.
The tabs in the Transaction Code page will change according to the Transaction type selection -- as follows:
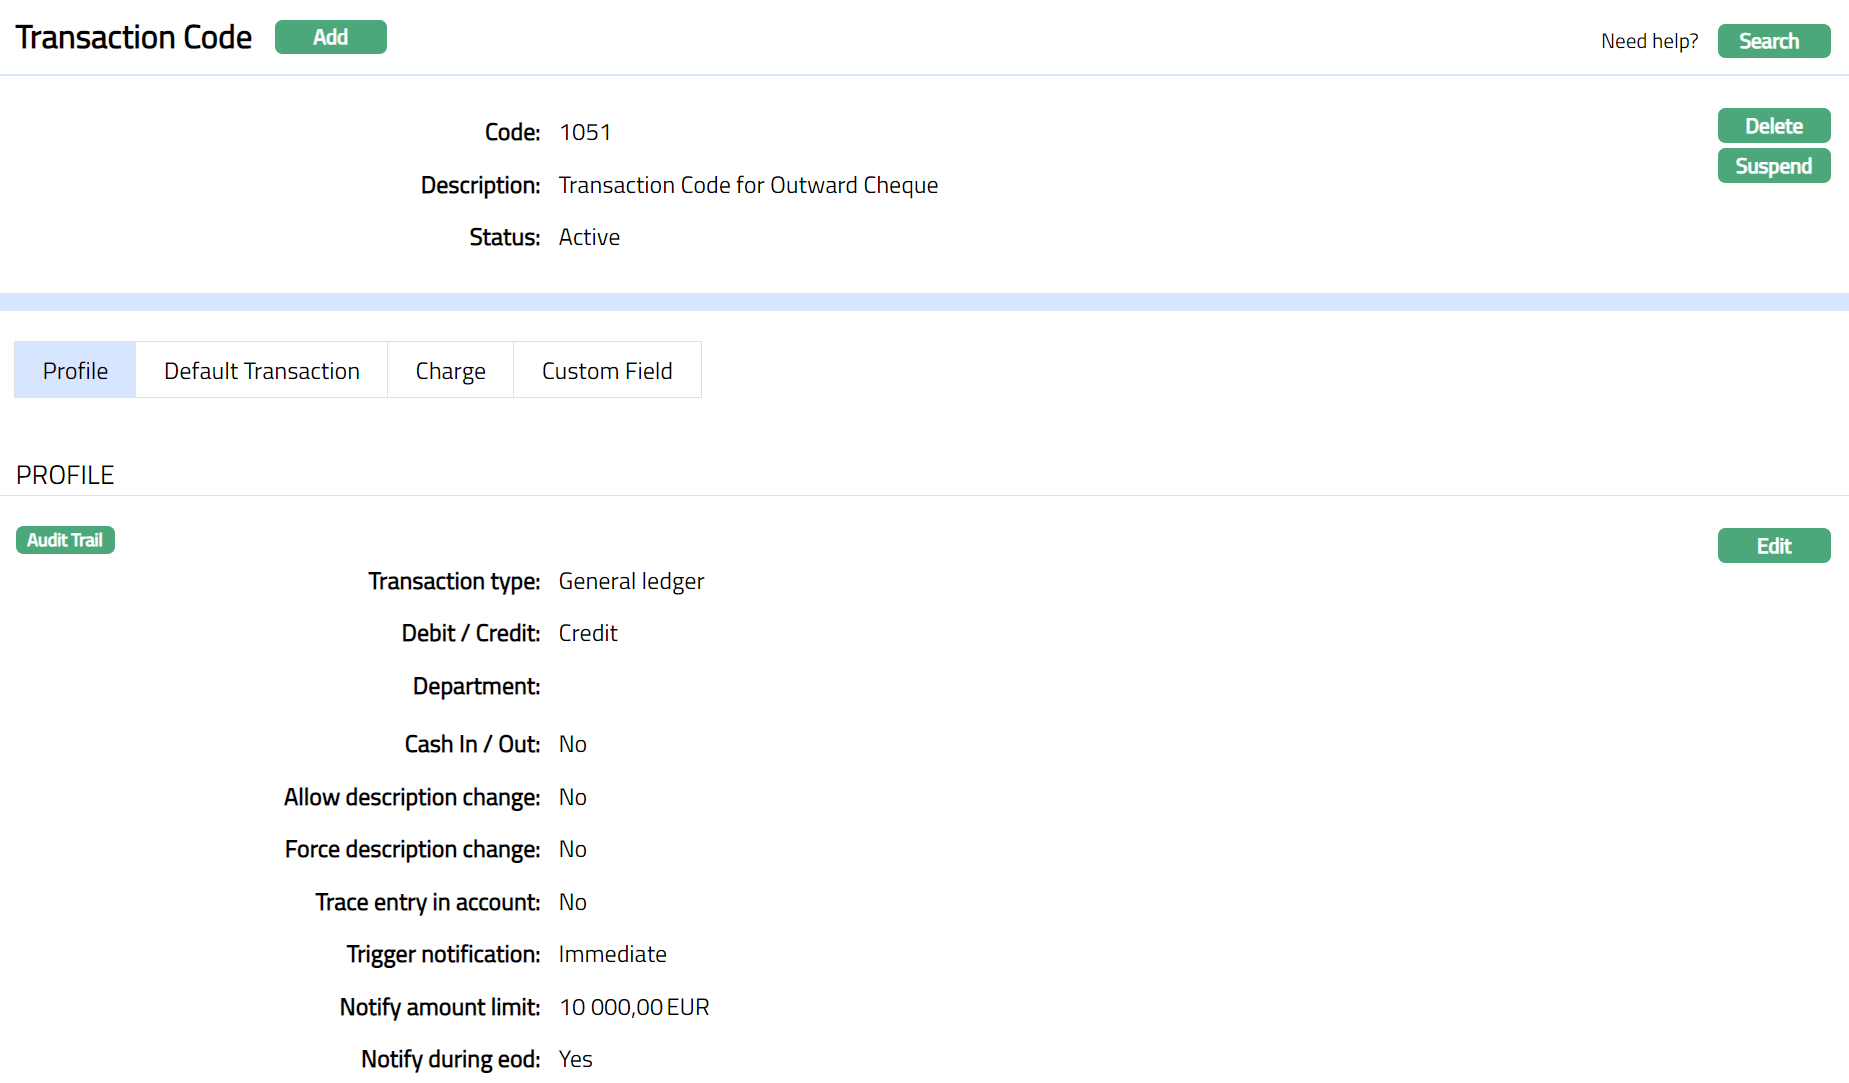
If Transaction type is selected as General ledger, the tabs will be Profile, Default Transaction, Charge and Custom field.
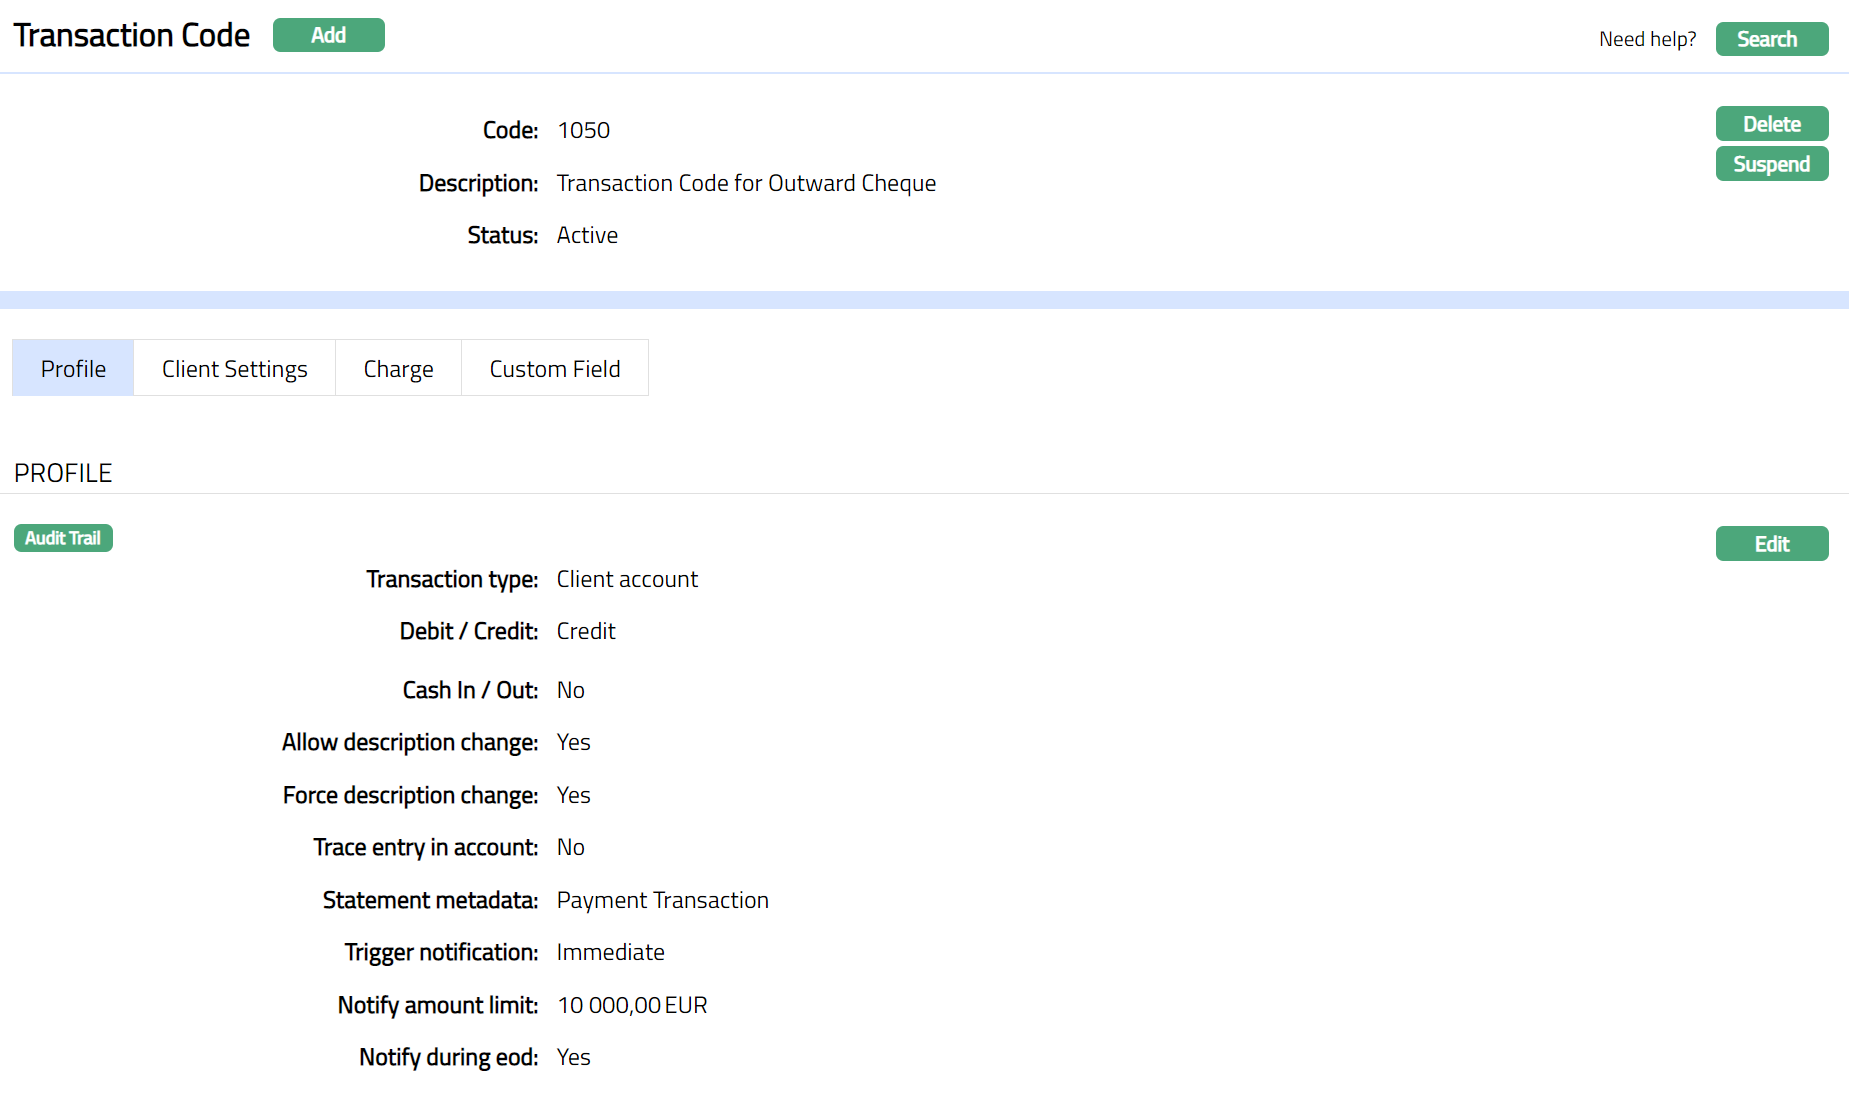
If Transaction type is selected as Client account, the tabs will be Profile, Client Settings, Charge and Custom field.
Note: If the custom field is mapped to Transaction Code under Admin > System Codes > Custom fields > Field mapping, then an additional screen will appear before the confirmation screen. The custom fields will be mandatory or non mandatory based on the rules set at the Field mappings. For more detail on custom field functionality please refer Admin> System codes > Custom fields > Field mappings manual.
Profile
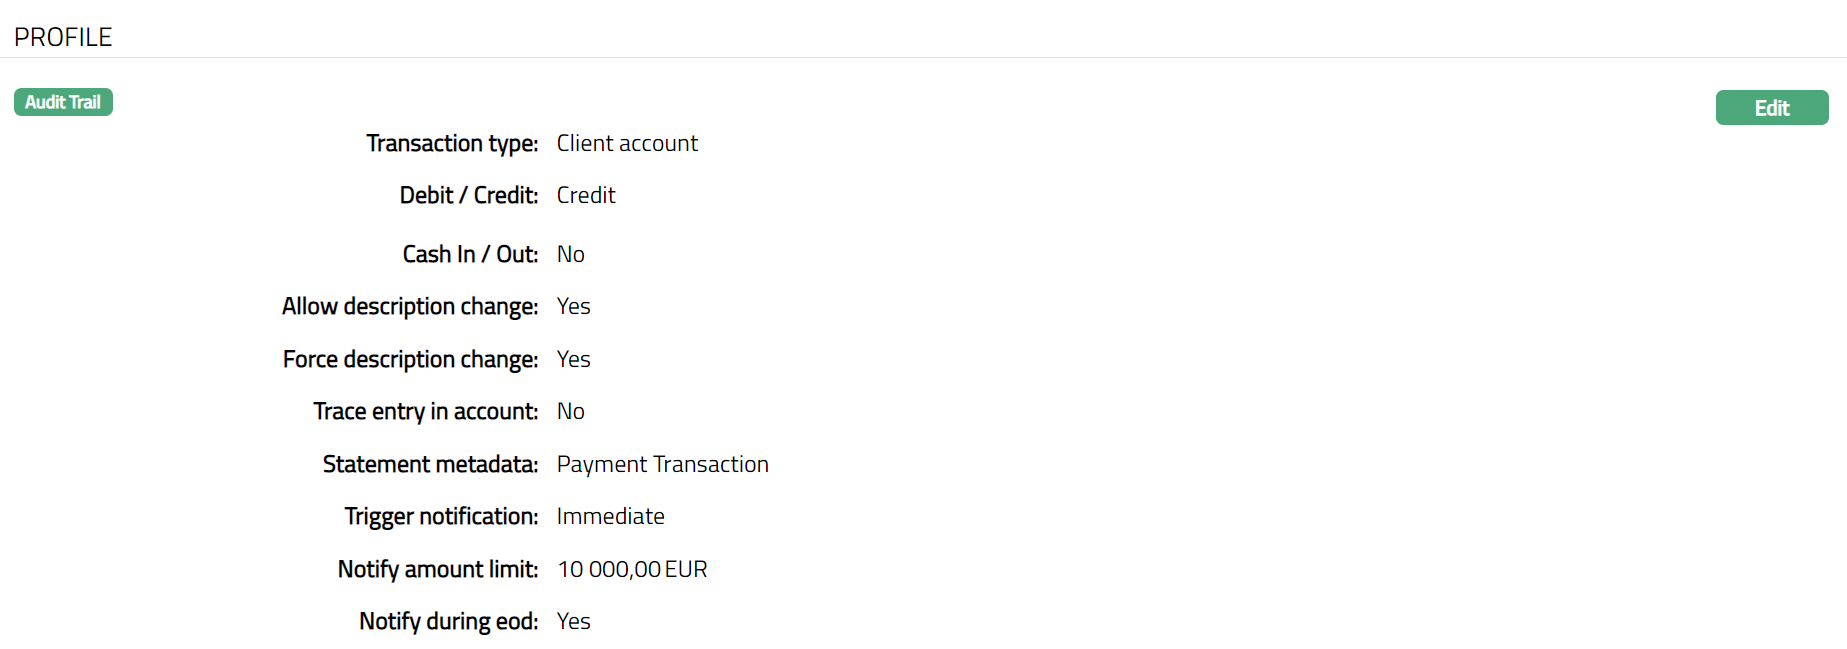
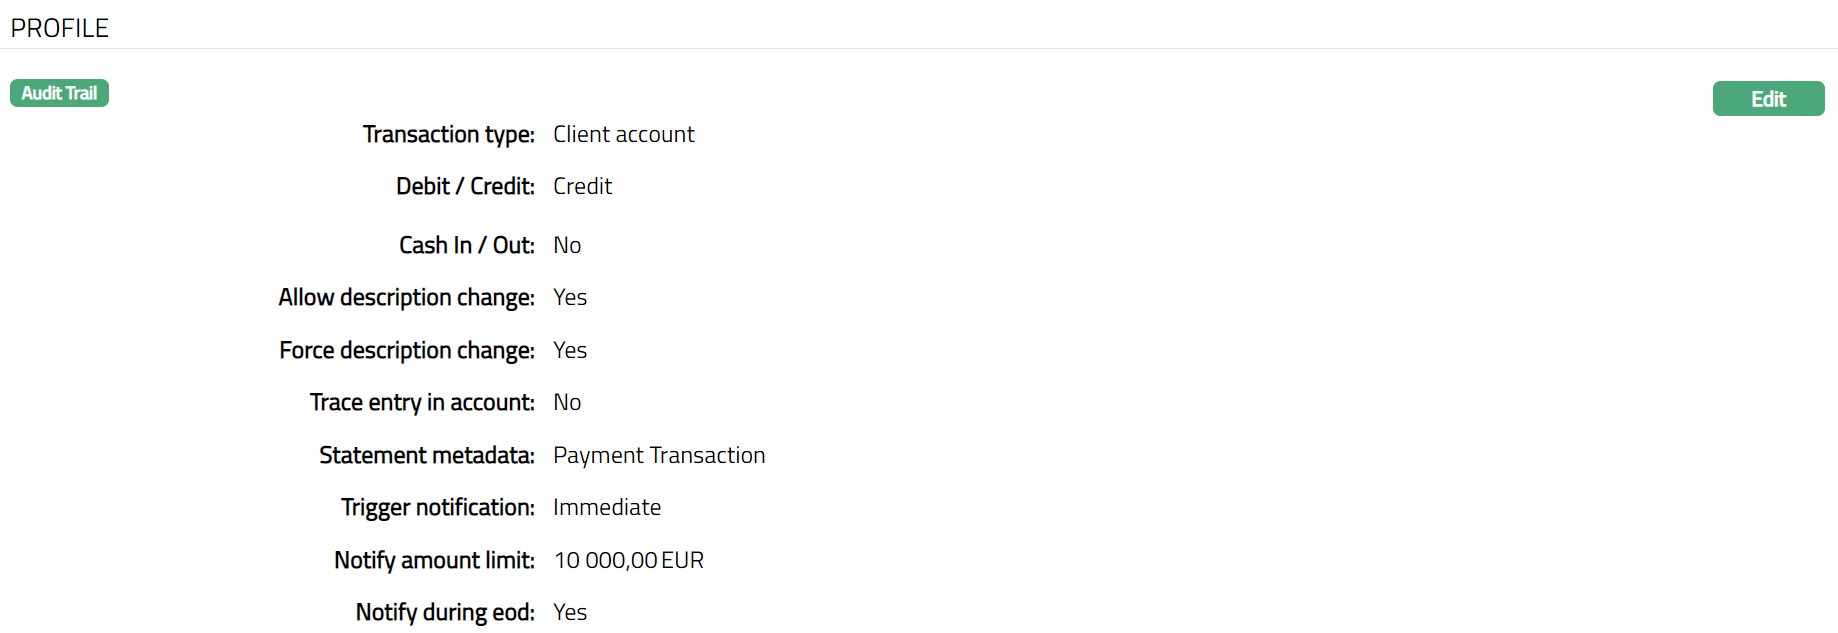
Profile tab shows the basic details of the transaction code.
To view / edit,
1. Access Transaction Code page. Profile tab is displayed by default.
Transaction type -- Client Account
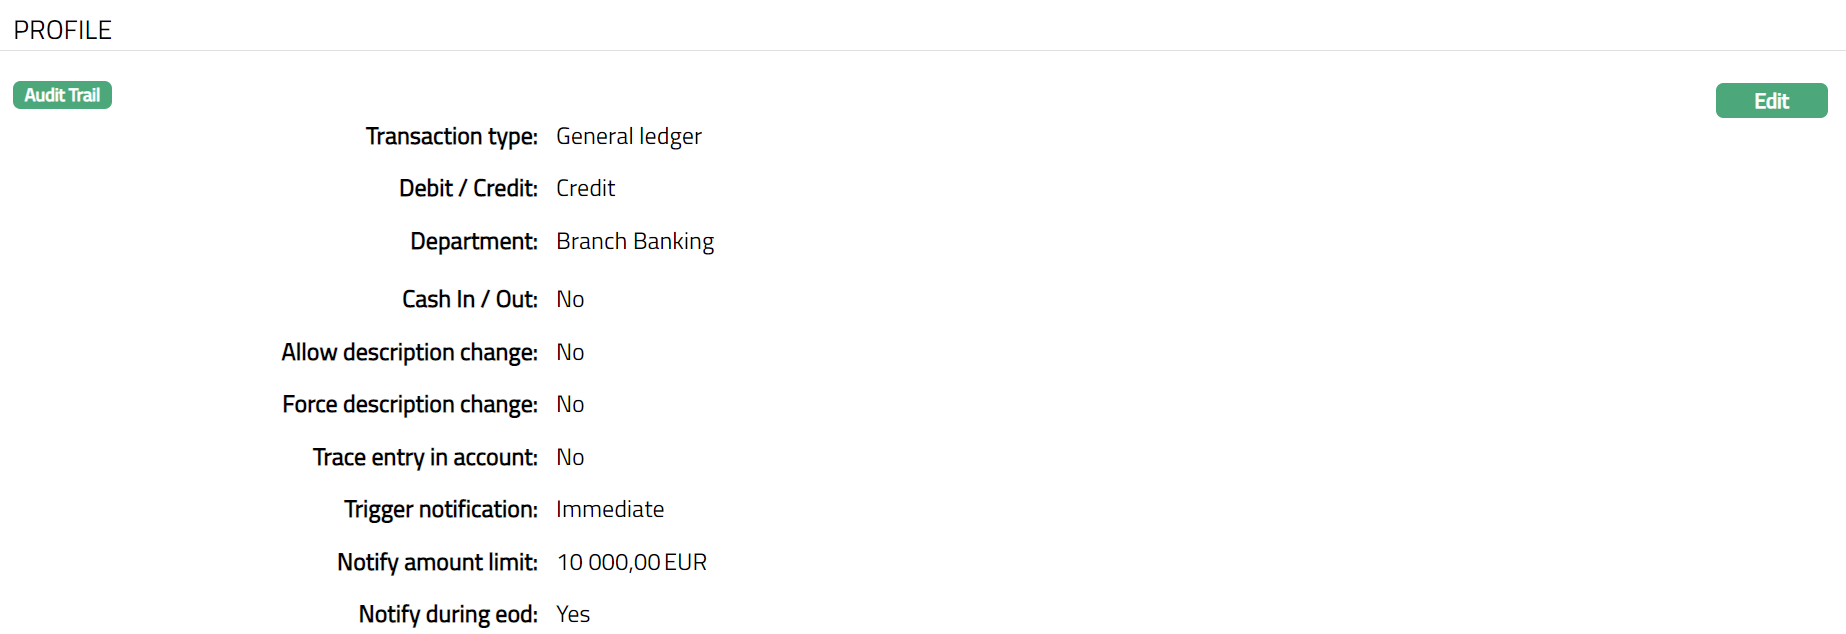
Transaction Type -- General Ledger
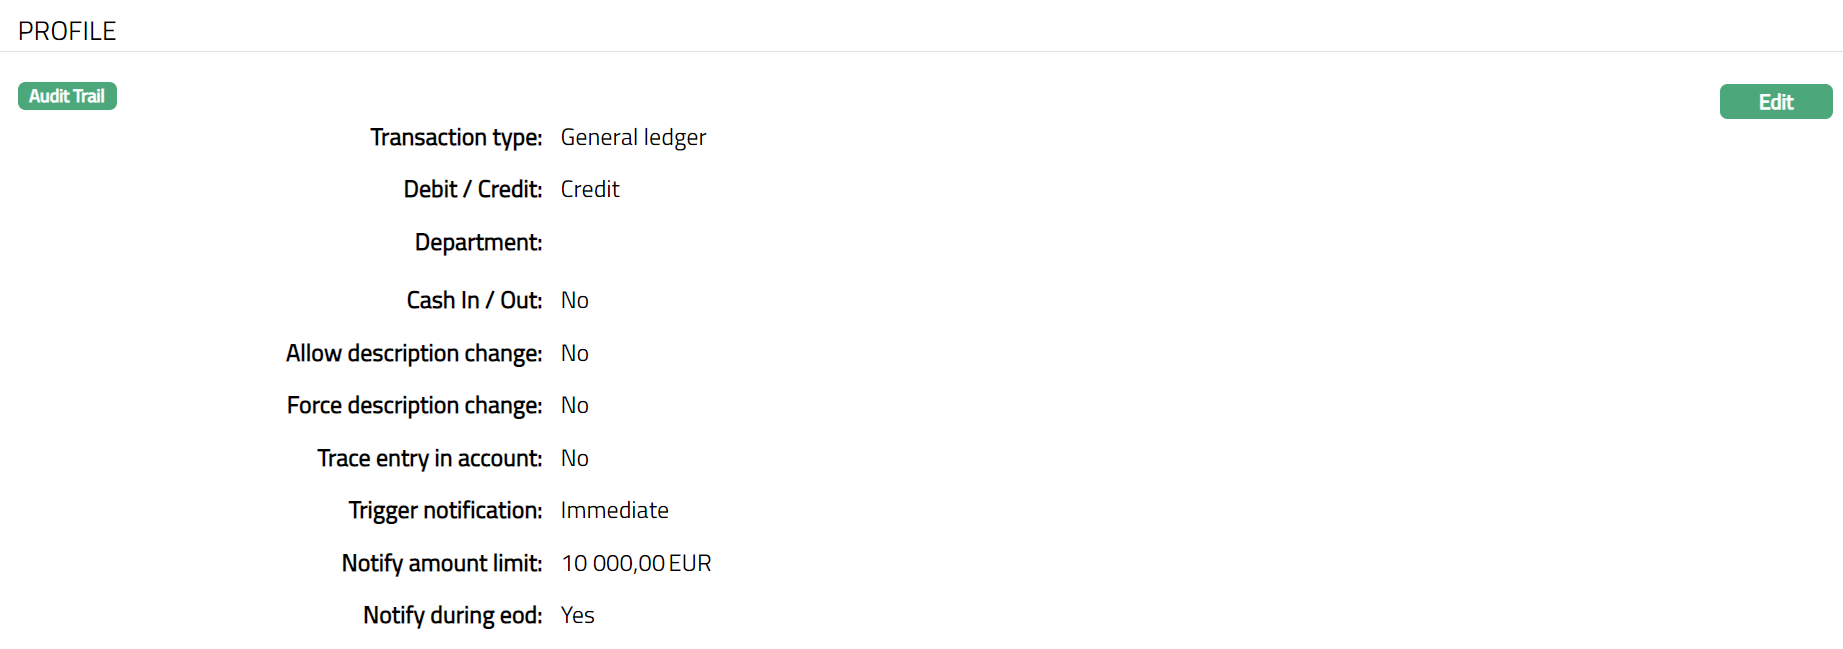
Additional fields that are displayed are as follows:
Department: It denotes the department to which the particular transaction code will be mapped. Initially the field will not display any value; only on using Edit, you can add a department to which the transaction code is mapped.
Cash In / Out: By default, this is set to No. This option describes whether or not the Transaction Code is used for cash deposit and cash withdrawal
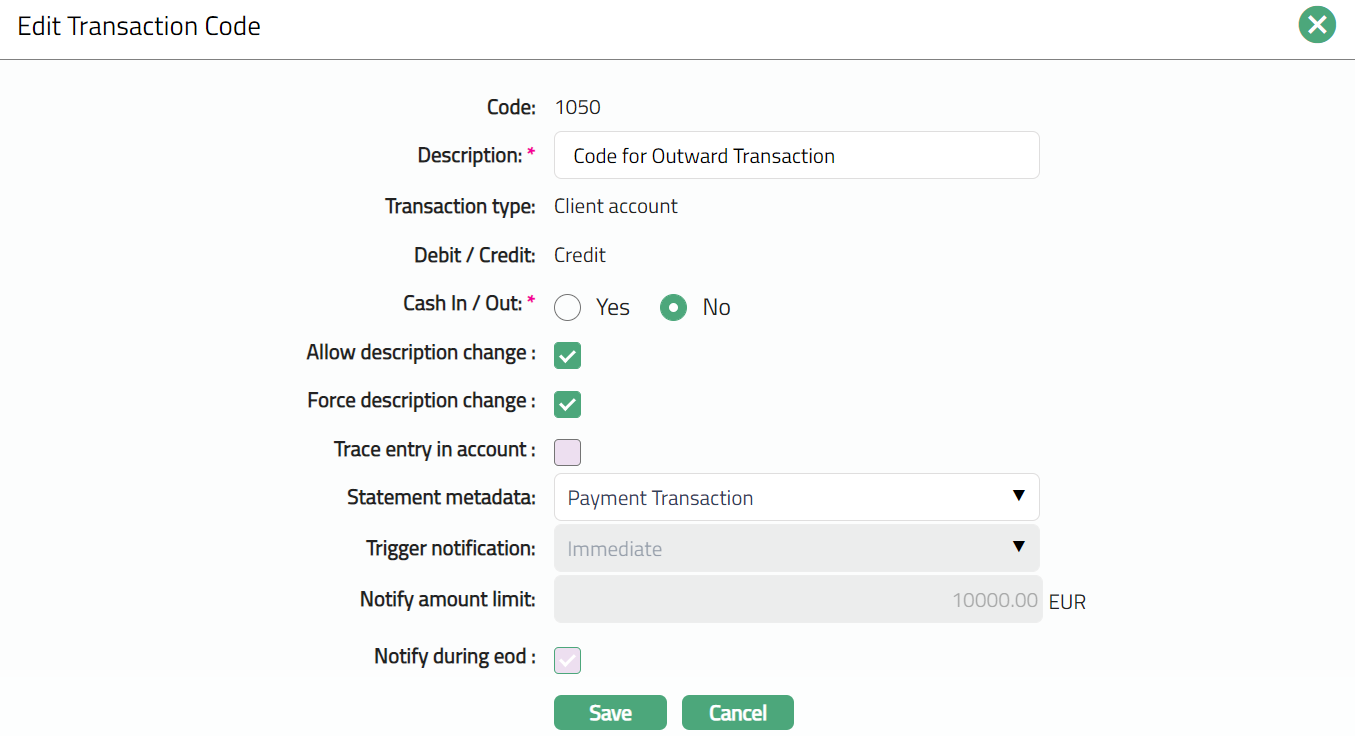
2. Click Edit. Edit Transaction code screen appears showing the details that you input in New Transaction Code → General (1/2).
Transaction type -- Client Account
Transaction type -- General Ledger
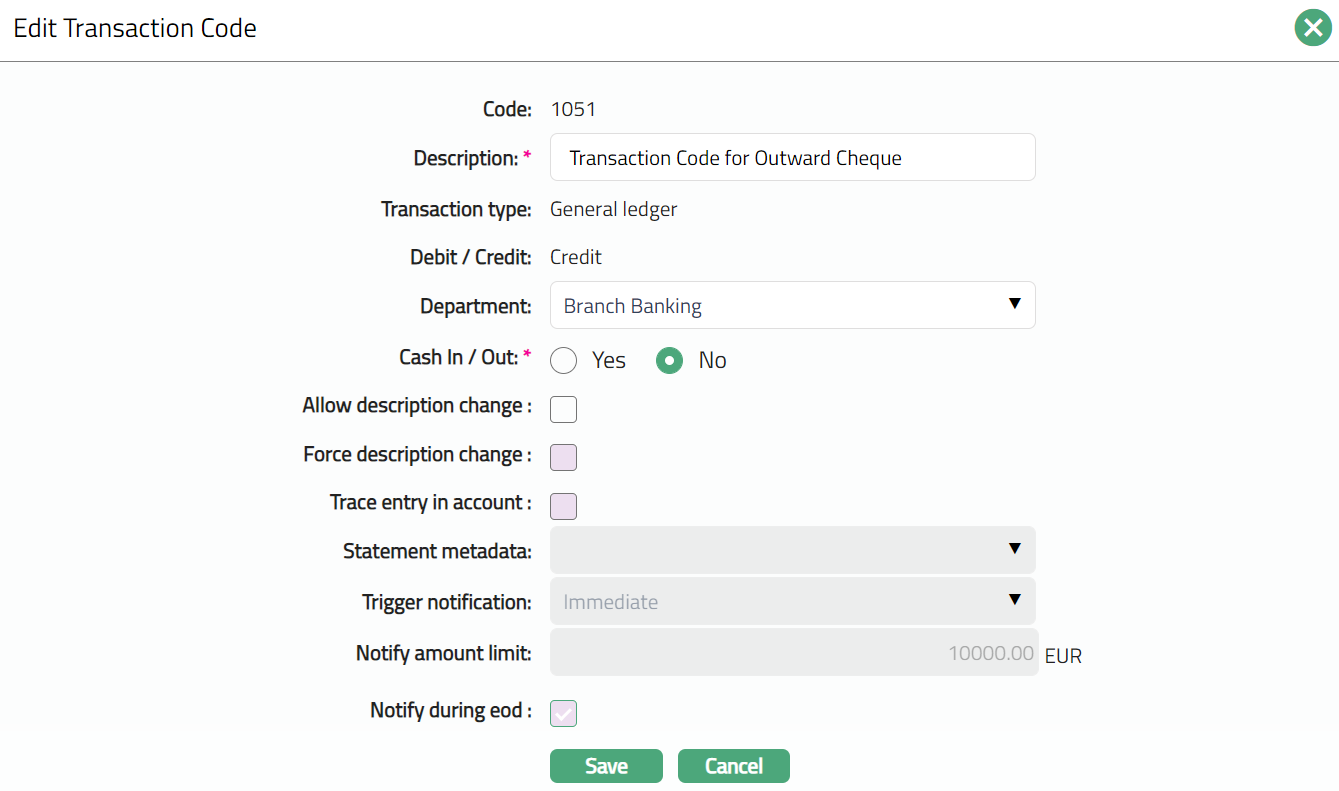
Note: Except Code, Transaction type, Debit/Credit fields, rest all other fields are editable.
3. Select Department to which the transaction code is to be mapped from the drop-down list of options maintained under Admin → Generic definition → Department. This field will appear for only General Ledger (DB/CR) transaction codes.
4. Click Save. Profile page appears with the edited details.
Transaction type - Client Account
 Functions: Edit
Transaction type -- General Ledger
Functions: Edit
Transaction type -- General Ledger
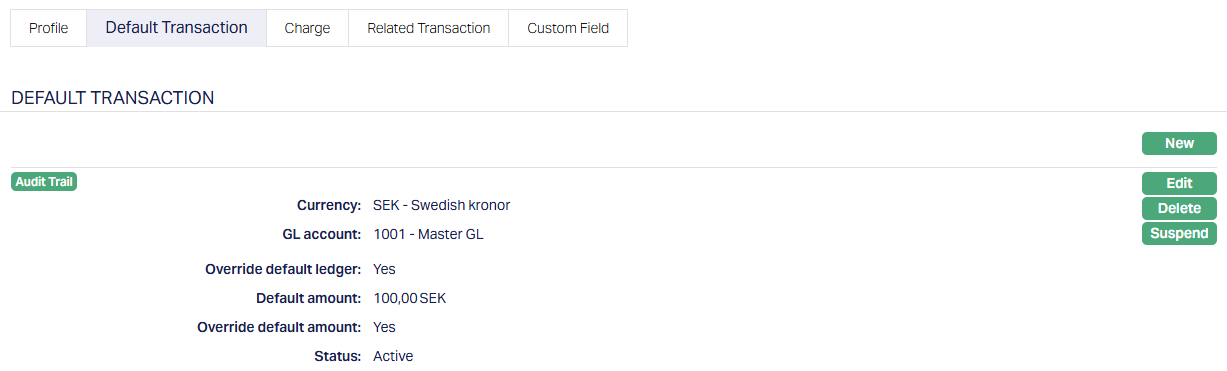
Default Transaction
The Default Transaction tab appears only when the Transaction type is selected as GL account, during creation of a new Transaction Code. It allows you to maintain details of any automatic action that has to be triggered by a GL Transaction code. These settings facilitate journal entries, when the same sets of details are to be entered for specific types of transactions. In such cases, if you enter the specified transaction code, the default transaction details would be automatically picked up by Aura in the journal. Modifications may or may not be allowed depending on what you specify in the settings.
1. Access Transaction Code page of the required GL Transaction code.

2. Click Default Transaction tab and then click New. New Default Transaction page appears.
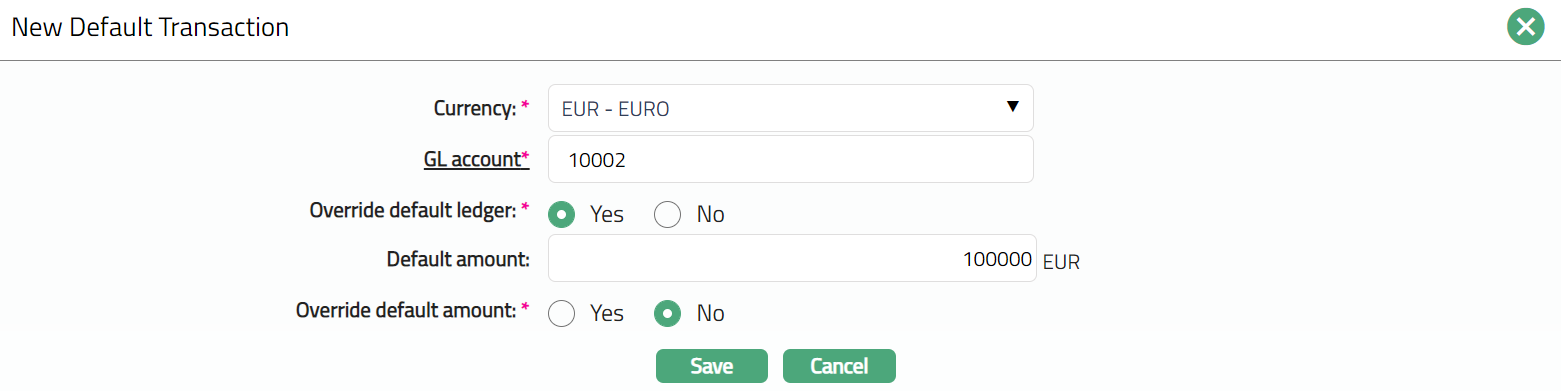
3. Select required Currency to be used for the journal entry when this transaction code is selected. The Currency should have been maintained as a GL Currency.
4. Select required GL account to be used for the journal entry when this transaction code is selected. The GL account should have been created using the GL Account Maintenance option.
5. During journal entry, Aura will automatically display the GL account that you have chosen above. If you choose Yes for Override default ledger, you will be allowed to change the GL Account that is displayed during the journal entry. If you choose No here, Aura will not allow you to change the GL account during the journal entry. By default, Yes is chosen.
6. Enter Default amount to be used for the journal entry when this transaction code is selected.
7. During journal entry, Aura will automatically display the amount that you have chosen above. If you choose Yes for Override default amount, you will be allowed to change the amount that is displayed during the journal entry. If you choose No here, Aura will not allow you to change the amount during the journal entry. By default, Yes is chosen.
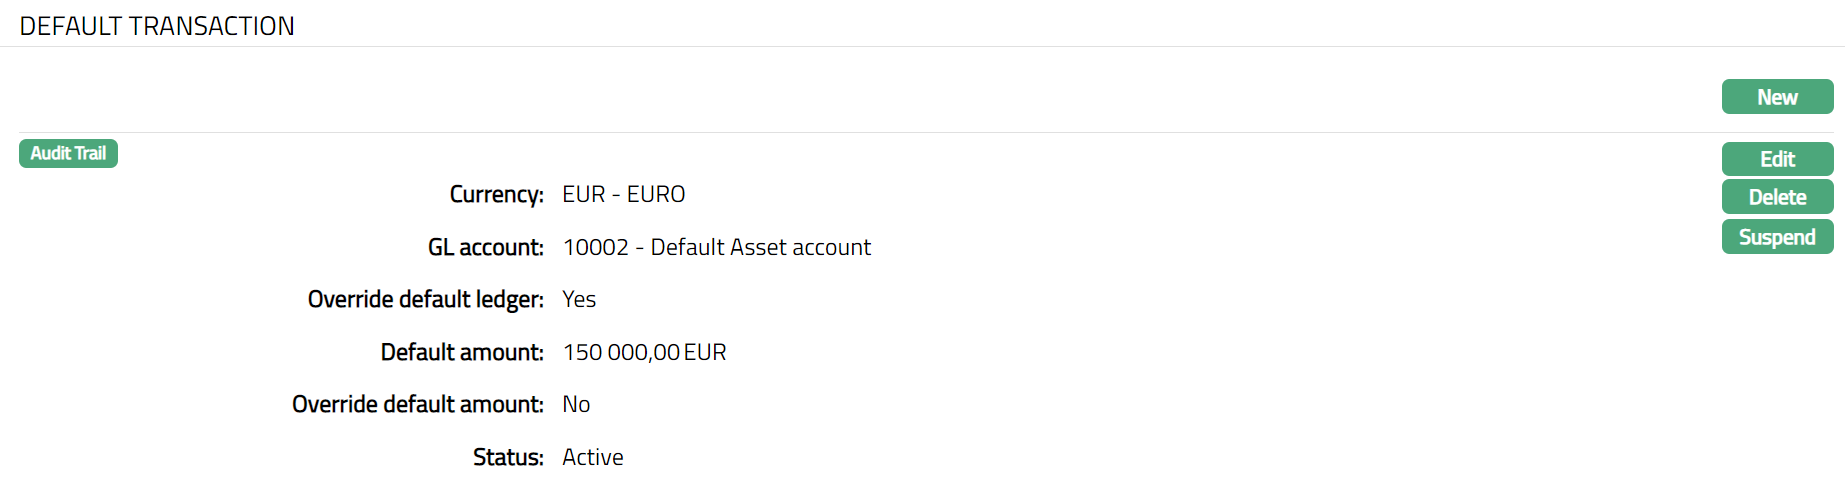
8. Click Save. Default Transaction page appears displaying the added record.
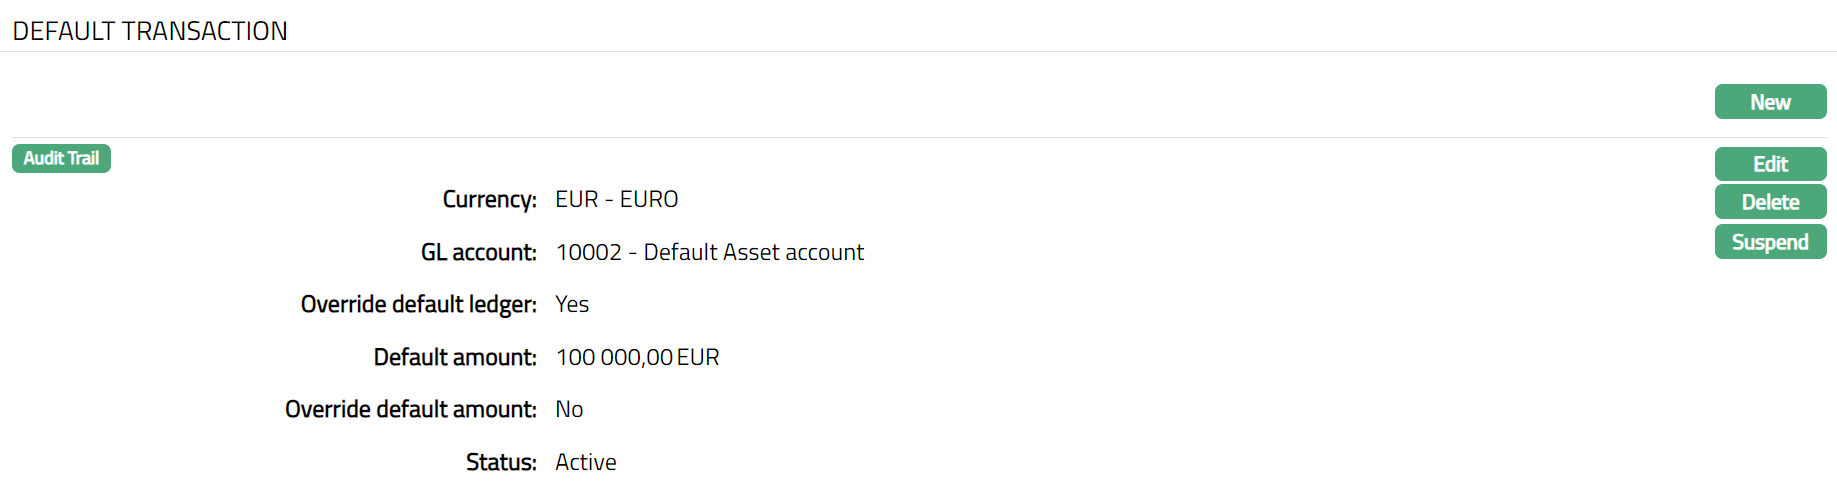
Functions: New, Edit, Delete, Suspend, Activate.
To Edit Default Transaction,
1. Click Edit. Edit Default Transaction page appears.
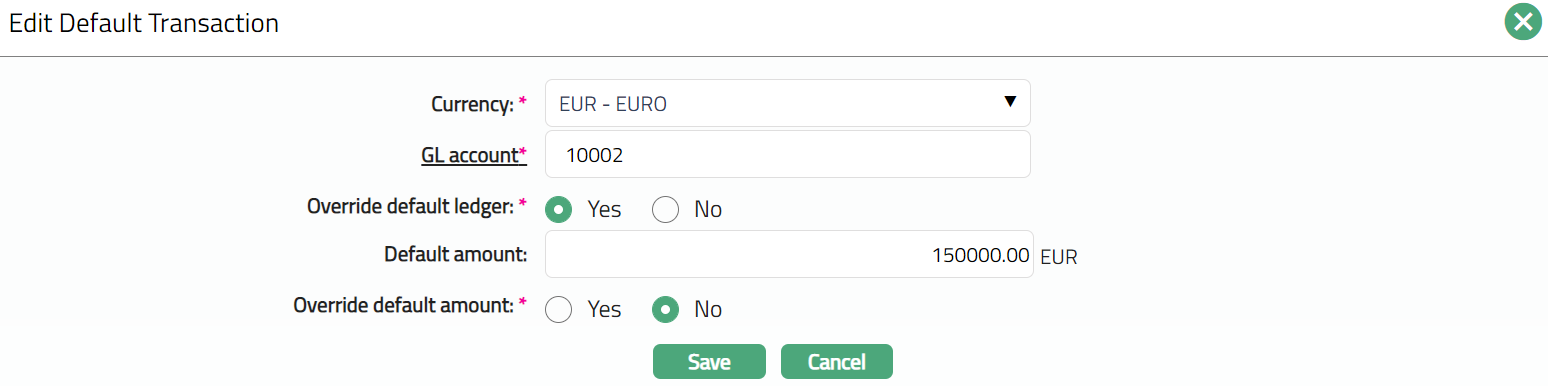
Note: All fields are editable.
2. Click Save. Default Transaction page appears with the edited details.
Functions: New, Edit, Delete, Suspend, Activate.
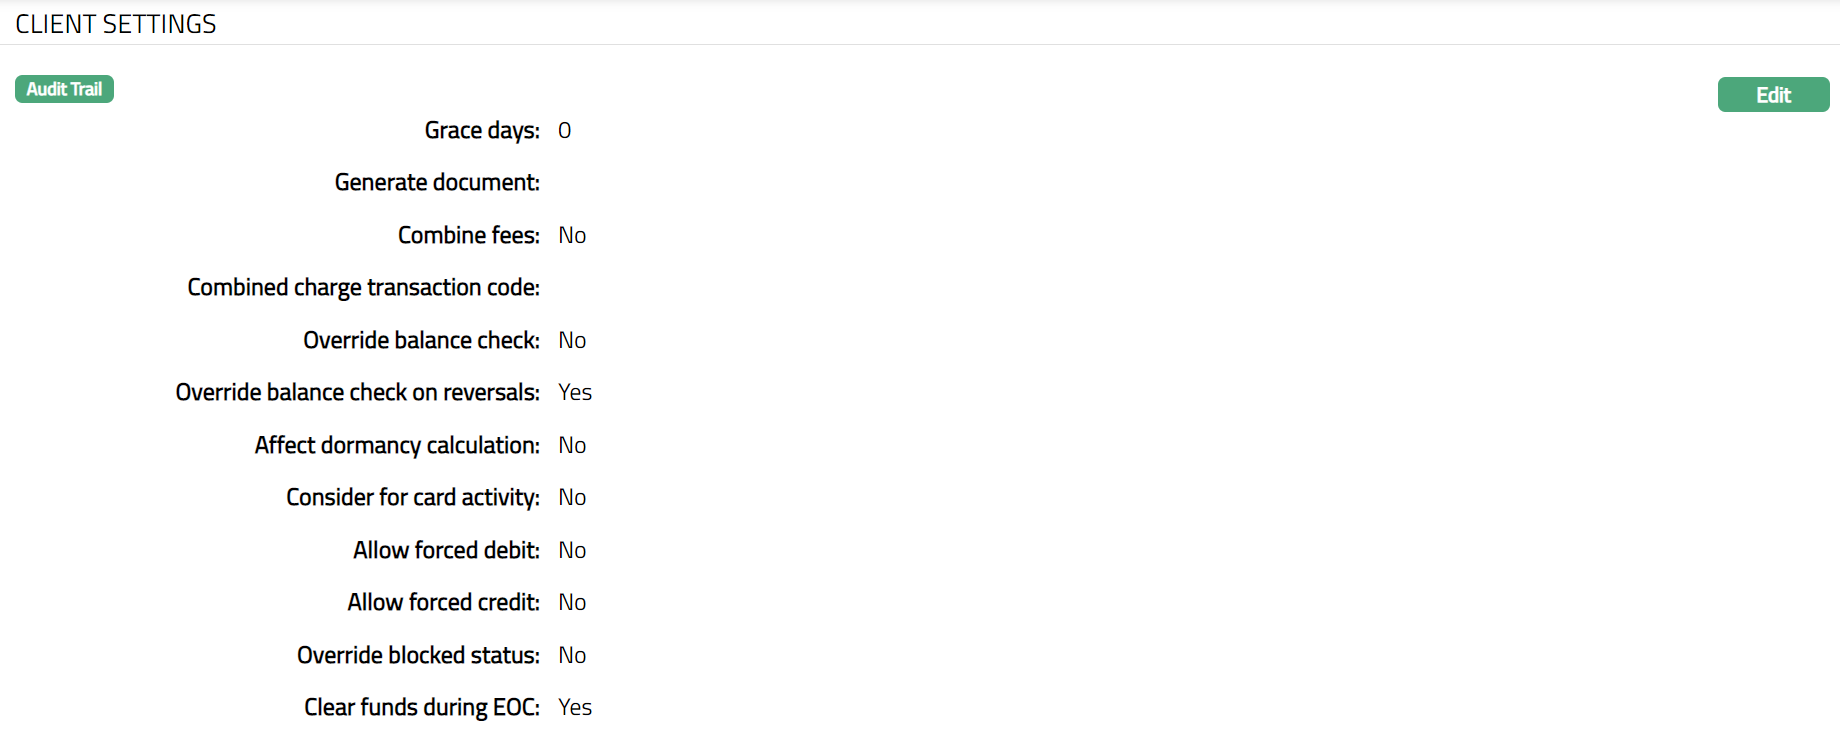
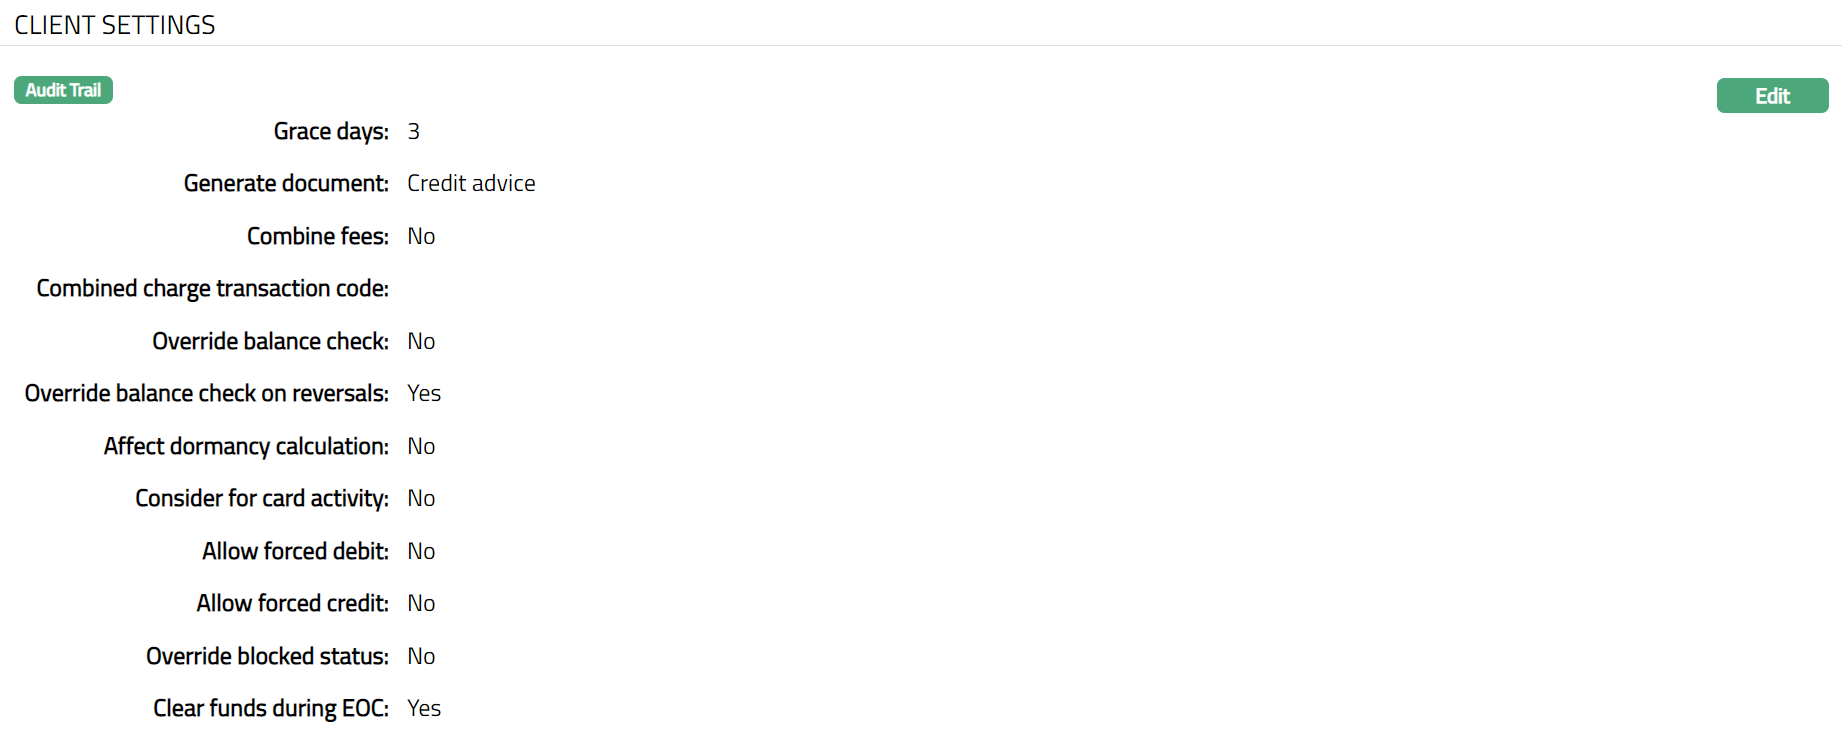
Client settings
The Client settings tab shows the basic details of the transaction code relating to Client Accounts. This tab appears only when the Transaction type is selected as Client account, during creation of a new Transaction Code.
1. Access Transaction Code page. Click Client Settings tab.
2. Click Edit. Edit Client Settings page appears showing the details that you had entered during New Transaction Code → General (1/2). However, you can make the required changes.
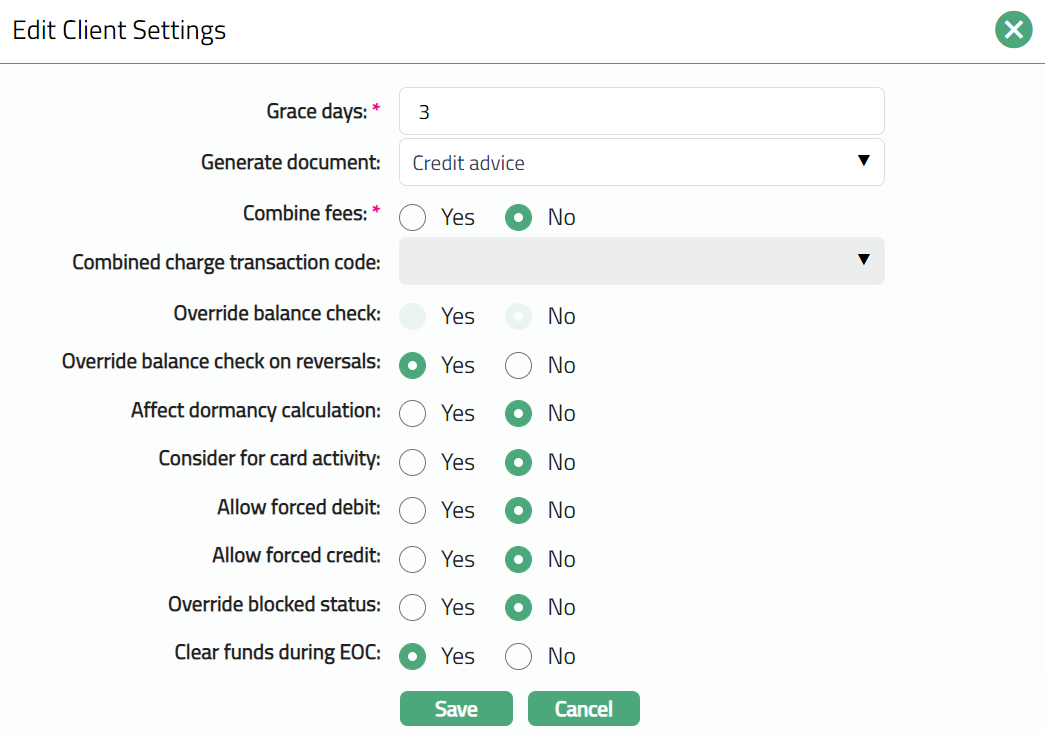
The following additional details can be maintained only during edit:
3. Enter Grace days to indicate the number of days which must elapse before an incoming cheque deposited to client account is assumed cleared.
4. Select appropriate option for Generate documents from the dropdown list. Available options are Debit advice and Credit advice
5. Select appropriate radio button (Yes or No) for Combine Fees. Select Yes if you would like the selected service charges to be combined into a single charge for posting to the client statement. If you do not do so, each charge will be individually posted to the client's account. If you check this box, you must supply the Combined charge transaction code below.
6. Select appropriate option for Combined charge transaction code from the list of available transaction codes. This field gets enabled if a Combine fee has been selected as Yes (above). This refers to the service charges to be combined into a single charge for posting to client account.
7. Select appropriate radio button for Override balance check. Override balance check denotes whether the transaction can be processed by overriding the balance check at the account level -- that is when the client account does not have sufficient balance.
8. Select appropriate radio button for Override balance check on reversals. Override balance check on reversals denotes whether the transaction can be processed by overriding the balance check during reversal -- that is when client account does not have sufficient balance.
9. Select appropriate option for Affect dormancy calculation. If you select Yes, then, use of this transaction code will reset the counter for the dormant number of days for a client account back to zero.
10. Select appropriate option for Consider for card activity. If you select Yes, then, use of this transaction code will indicate that a card activity is posted to the card account
11. Select appropriate option for Allow forced debit. Allow forced debit denotes whether the transaction can be posted to client account even if Disallow debit is set as Yes at the client account. If the option is checked then AuraAura will allow you to debit the client account.
12. Select appropriate option for Allow forced credit. Allow forced credit denotes whether the transaction can be posted to client account even if Disallow credit is set as Yes at the client account. If the option is checked then AuraAura will allow you to credit the client account.
13. Select appropriate option for Override blocked status. Override blocked status denotes whether transaction can be posted to client account even if account status is Blocked under for an Account. If the option is checked then AuraAura will allow you to post the transaction. This flag will be applicable only to account types which have a "Blocked" status. For example, it will be applicable for a Current account. However, it is not relevant for card accounts as there is no blocked status for a Card Account.
14. Select appropriate option for Clear funds during EOC. It specifies whether the funds to be moved from uncleared funds to cleared funds during EOC (End of cycle) batches. If the checkbox is checked, then the funds are moved from uncleared funds to cleared funds during EOC batches. If the checkbox is unchecked, then the funds are not moved from uncleared funds to cleared funds during EOC batches but are triggered separately. This field is enabled and checked only if the Transaction type is Client account and Debit/Credit is Credit
15. Click Save. Transaction Code page appears with the updated details.
Function: Edit
Charge
You can attach a charge to a transaction code such that the charge will be automatically calculated and posted in the same journal / batch whenever the Transaction code is used. For example, if there is a standard fee of SEK 10 for an outgoing wire transfer then the transaction code which is used to debit the client's account for the amount of the outgoing wire transfer can also automatically debit the same account for the transfer fee.
Note: The charges will be debited from the account in which the transaction is posted and hence, transaction codes which are used to debit / credit Loan / Deposit accounts should not have an associated charge.
To add Charge to a Transaction code,
1. Access Transaction Code page. Click Add. Add Charge screen appears.


2. Description drop-down shows the list of charge schemes that are Transaction Charges, which match the Debit / Credit Indicator of the Transaction Code. It also shows all the charge schemes that are created as applicable to Both legs of a transaction. Select the required charge scheme to be attached to the Transaction Code.
3. Click Save. Charge page appears displaying the updated details.
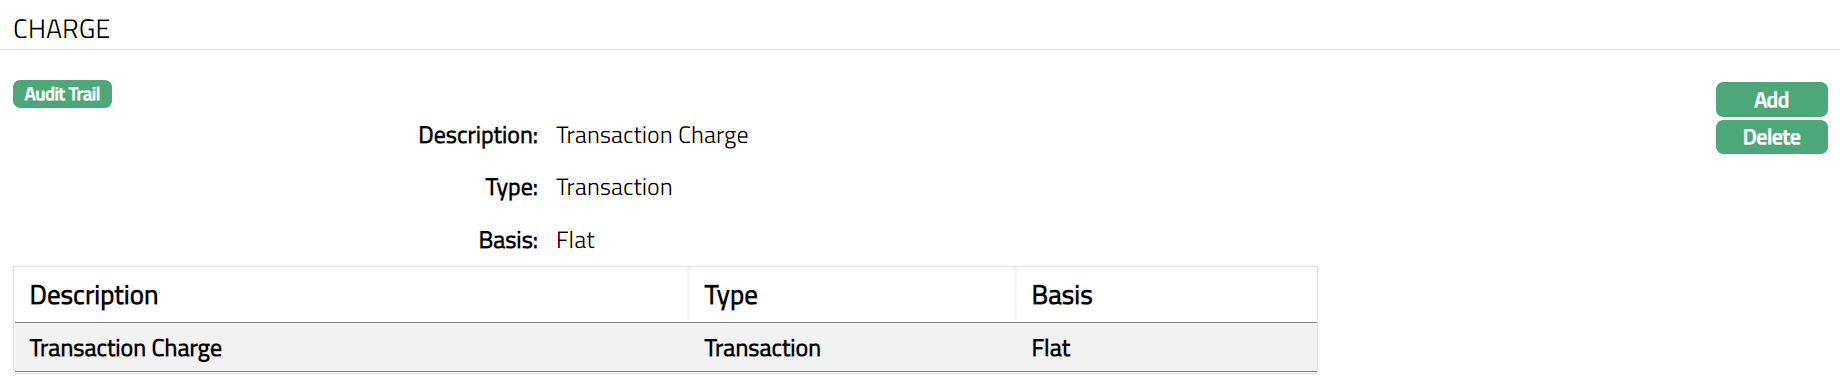
Functions: Add, Delete.
Client Account
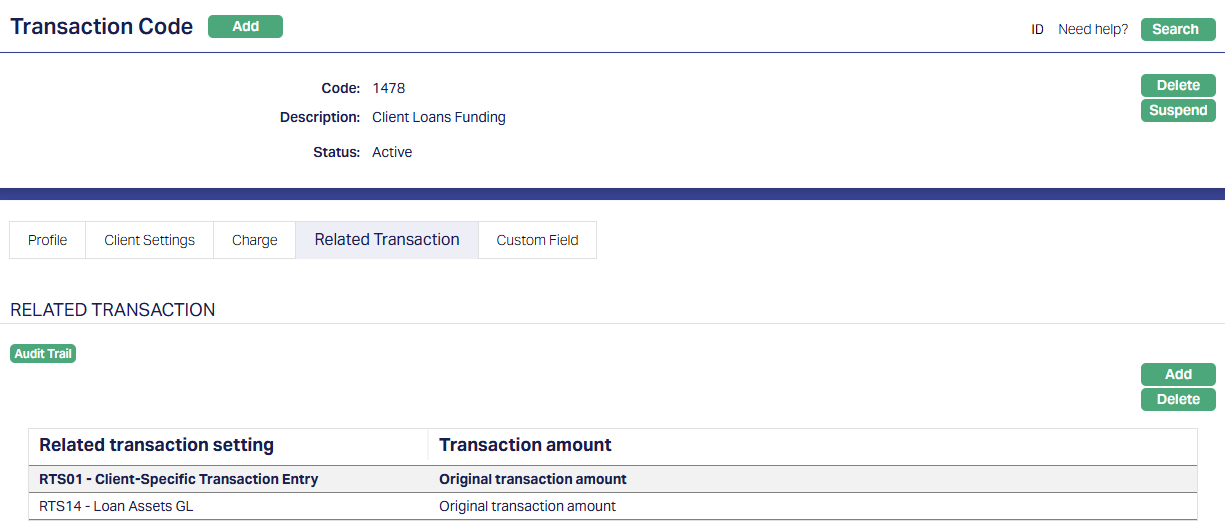
Related Transaction - Client Account
This tab allows you to assign a Related Transaction Setting to the transaction code. Once configured, Aura will automatically trigger and post the related accounting entries based on the selected setting.
To add a Related Transaction,
1. Navigate to the Transaction Code page and click on the Related Transaction tab.
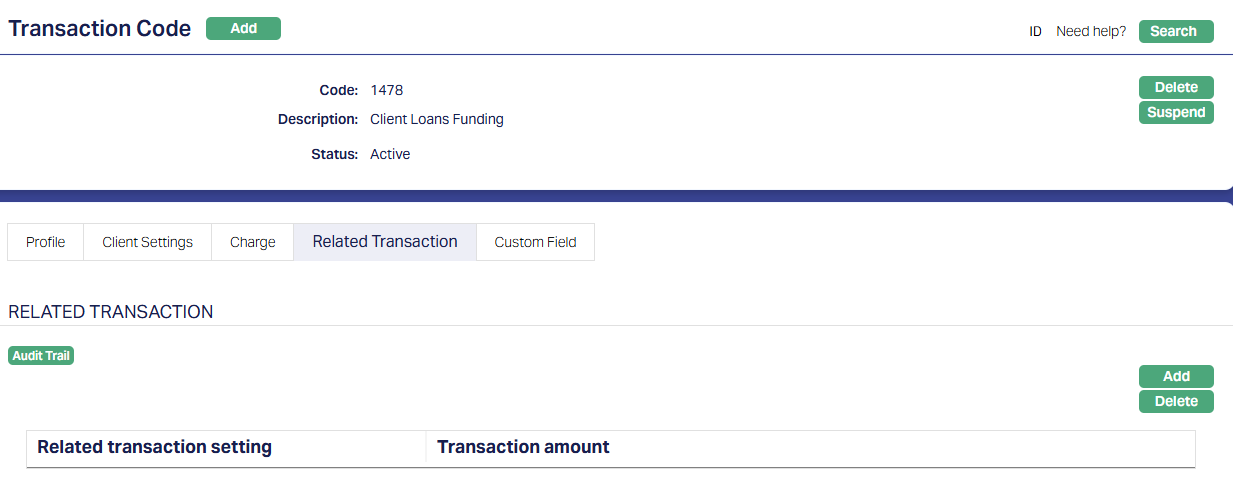
2. Click Add. The Add Related Transaction pop-up will appear.

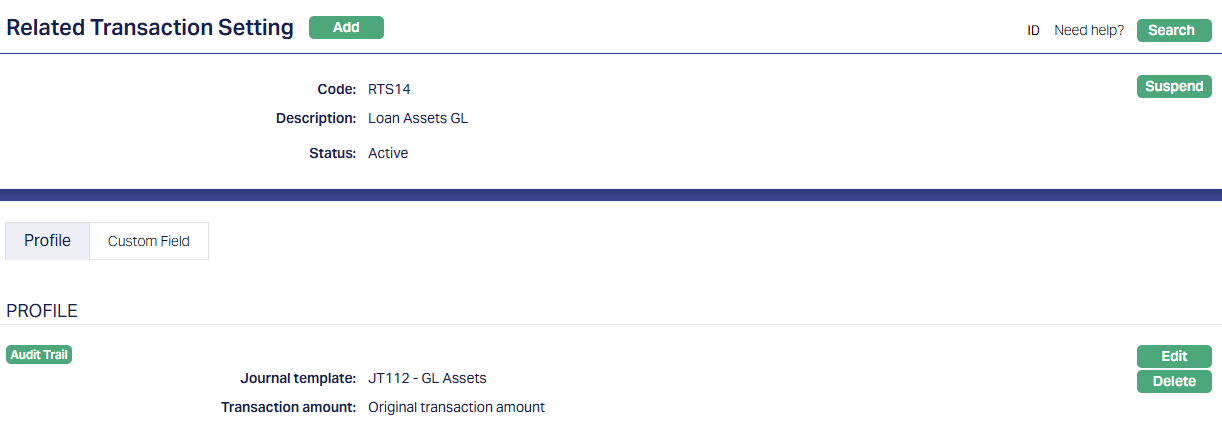
3. From the drop-down list, select the required active Related Transaction Setting maintained under General Ledger → Settings → Related Transaction Setting.

Note: Only active Related Transaction Settings are available for selection.
4. Click on Save. The selected setting, along with the applicable Transaction Amount, will be listed.
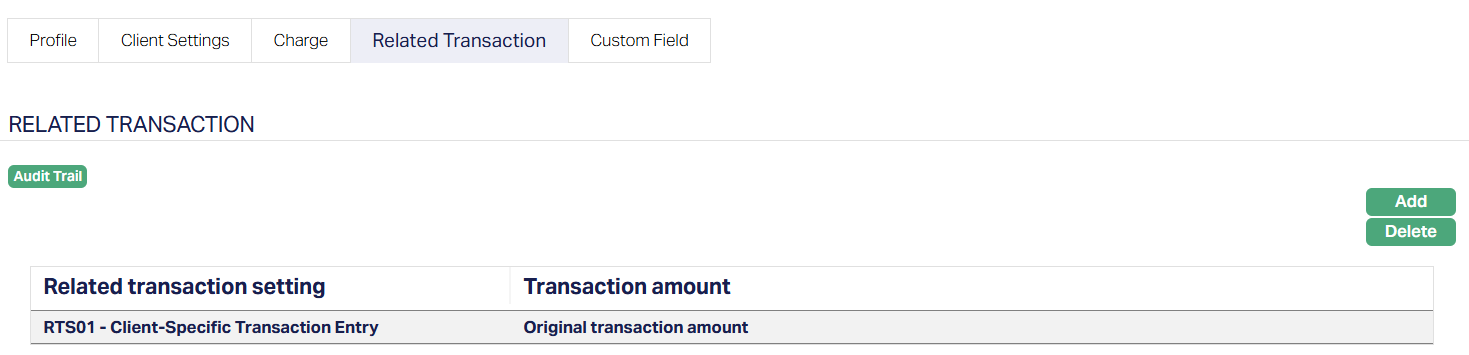 Functions: Add, Delete
You can add Multiple Related Transactions and delete them as required. You can delete a Related Transaction Setting only if it's not currently in use by any transactions. If the setting is already referenced by a transaction, Aura will prohibit its deletion and show a message stating that it cannot be removed.
Once you've linked a Related Transaction Setting to a Transaction Code through the Related Transaction tab, Aura will automatically create additional accounting entries whenever you post a transaction using that code.
Here's how Aura processes those entries:
Accounting Entry
When you post a transaction, Aura checks if the Transaction Code has any Related Transaction Setting mapped. [When multiple settings are available, Aura processes each mapped setting in sequence.]
 Functions: Add, Delete, Suspend.
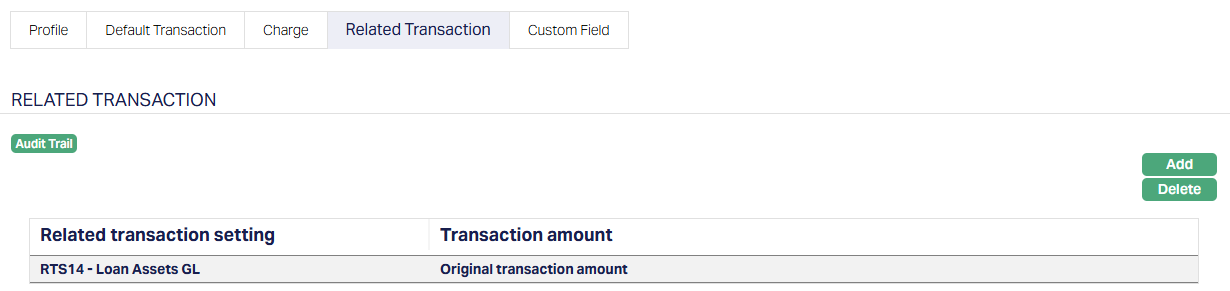
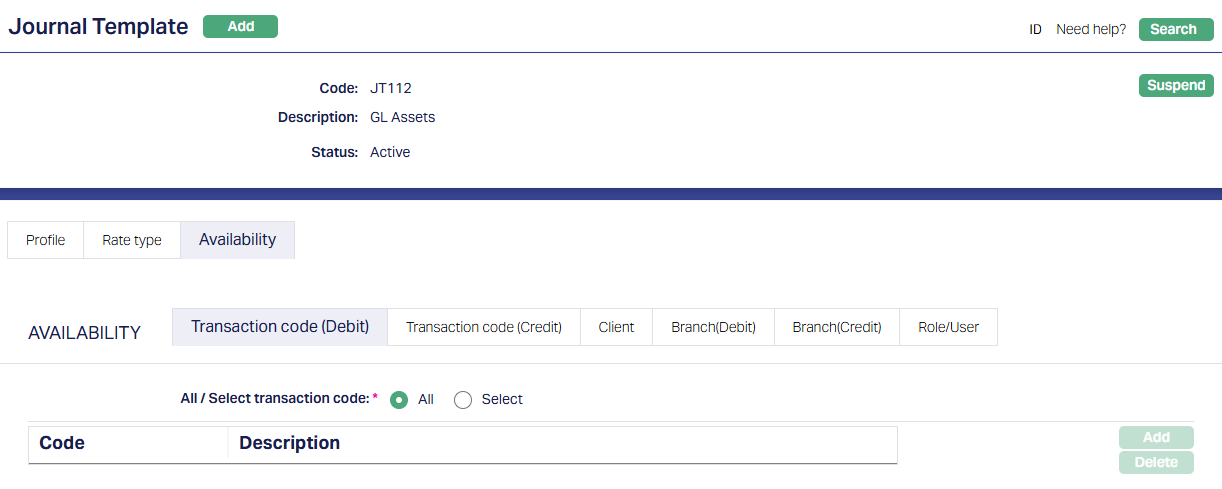
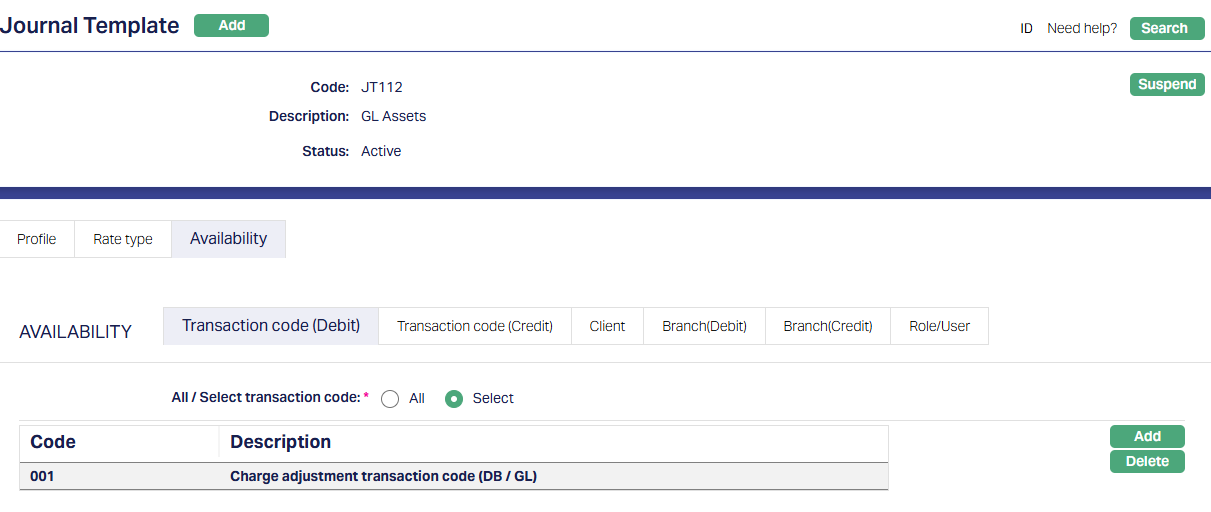
The Transaction Code being configured is shown at the top of the screen. The Related Transaction tab displays all the Related Transaction Settings mapped to this code.
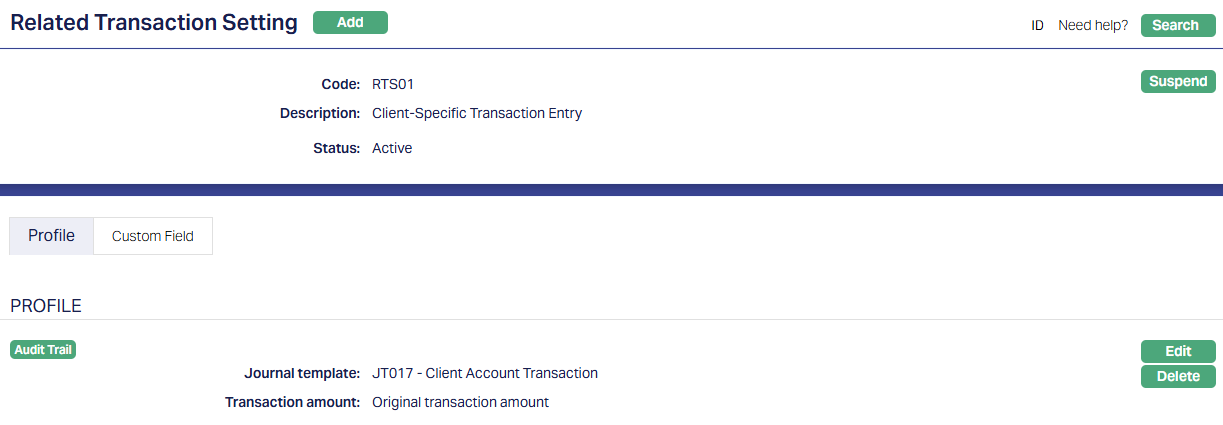
When a transaction is posted using it, Aura checks this tab and processes each setting one by one to post the corresponding related entries (The debit and credit Journal entries on the Journal Template linked through the Related Transaction Setting.)
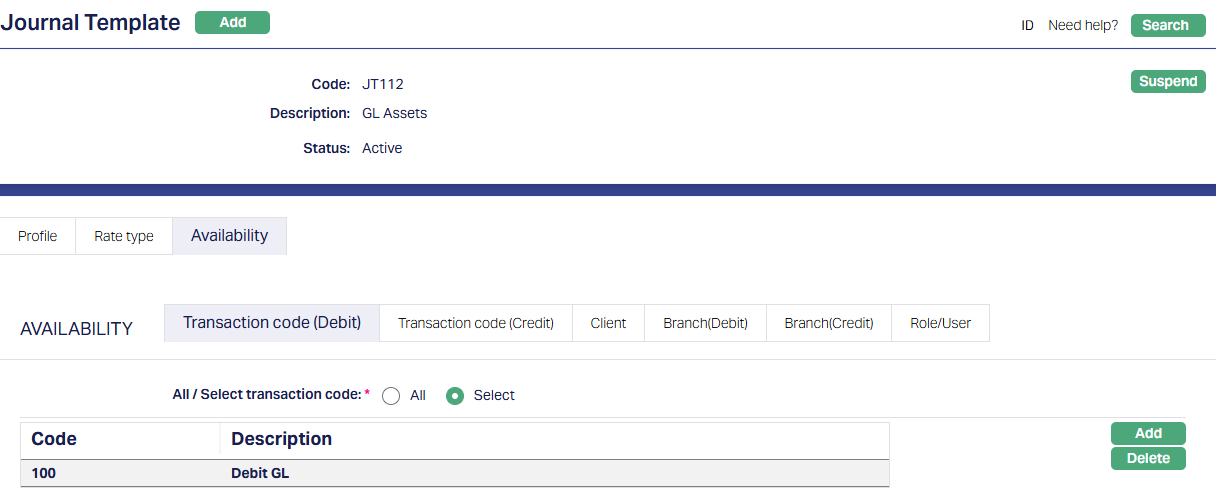
1. Aura validates the Journal Template -
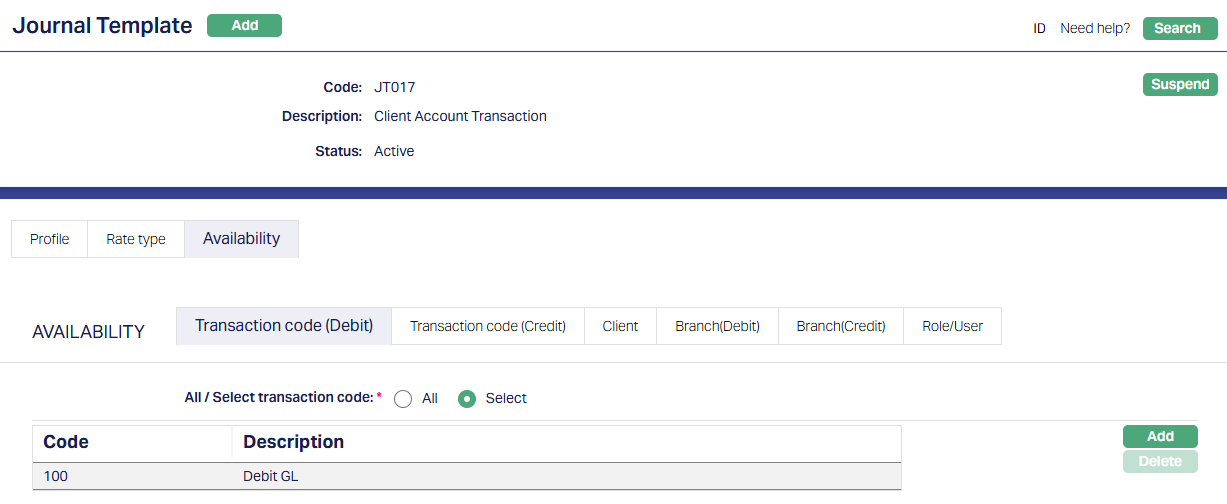
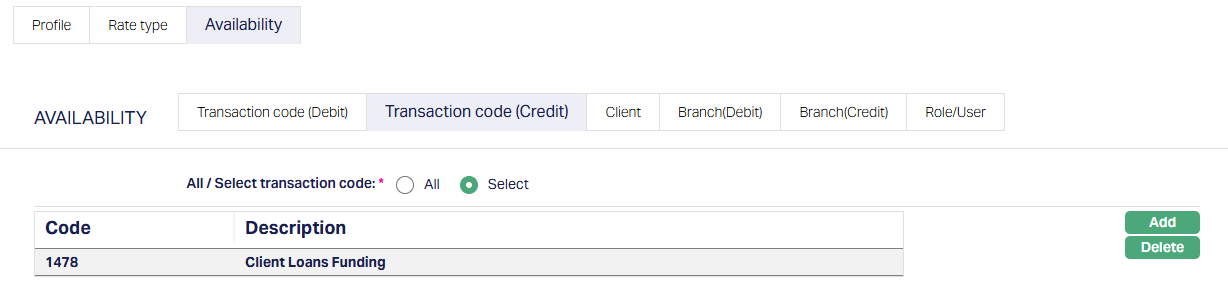
For each mapped setting, Aura refers to the linked Journal Template and makes sure the Journal Template contains exactly one GL Debit and one GL Credit Transaction Code.
If it doesn't, Aura fails the original transaction and shows you an error message.


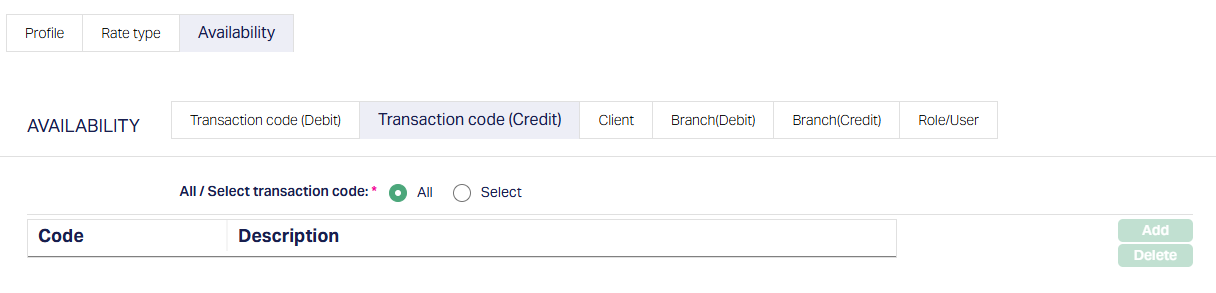
Note: By default, the "All" radio button is selected, displaying all GL accounts mapped to the Transaction Code across all transaction types. If you select the "Select" radio option, you can choose a specific transaction type to view and configure GLs mapped only for that context.
2. Aura posts the related accounting entries -
Once everything is validated, Aura posts the related entries using the Journal Template and the values you've already set. Here's how:
- Amount: Aura picks the amount from the leg of the original transaction where you applied the Related Transaction Setting.
3. Transaction Codes: Aura uses the Debit and Credit Transaction codes you defined in the Journal Template.
4. GL Accounts: Aura pulls the corresponding GLs from the Default Transactions of the Debit and Credit Transaction Codes.
Note: By default, the "All" radio button is selected, displaying all GL accounts mapped to the Transaction Code across all transaction types. If you select the "Select" radio option, you can choose a specific transaction type to view and configure GLs mapped only for that context.
5. Transaction Number: Aura uses the same transaction number as the original transaction. The related entries are grouped separately but still under the same number.

6. Event Code: Aura applies the same Event Code as the original transaction.
7.Other Fields: All other field values in the related entry are exactly the same as those in the original transaction leg.
If any issue occurs while posting the related entry, Aura fails the original transaction and displays the appropriate error message.
General Ledger
Related Transaction - General Ledger
This tab allows you to assign a Related Transaction Setting to the transaction code. Once configured, Aura will automatically trigger and post the related accounting entries based on the selected setting.
To add a Related Transaction,
1. Navigate to the Transaction Code page and click on the Related Transaction tab.

2. Click Add. The Add Related Transaction pop-up will appear.
3. From the down-down list, select the required active Related Transaction Setting available maintained in General Ledger → Settings → Related Transaction Setting.

Note: Only active Related Transaction Settings are available for selection.
4. Click Save. The selected setting, along with the applicable Transaction Amount, will be listed.
Functions: Add, Delete
You can add Multiple Related Transactions and delete them as required. You can delete a Related Transaction Setting only if it's not currently in use by any transactions. If the setting is already referenced by a transaction, Aura will prohibit its deletion and show a message stating that it cannot be removed.
Once you've linked a Related Transaction Setting to a Transaction Code through the Related Transaction tab, Aura will automatically create additional accounting entries whenever you post a transaction using that code.
Here's how Aura processes those entries:
Accounting Entry
When you post a transaction, Aura checks if the Transaction Code has any Related Transaction Setting mapped. [When multiple settings are available, Aura processes each mapped setting in sequence.]
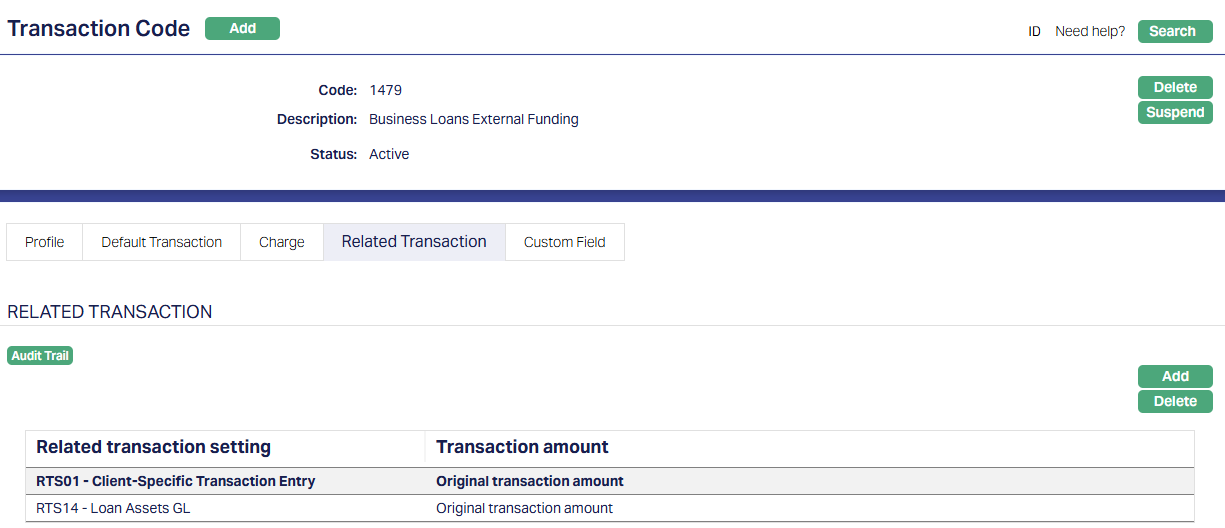
The Transaction Code being configured is shown at the top of the screen. The Related Transaction tab displays all the Related Transaction Settings mapped to this code.
When a transaction is posted using it, Aura checks this tab and processes each setting one by one to post the corresponding related entries (The debit and credit Journal entries on the Journal Template linked through the Related Transaction Setting.)
1. Aura validates the Journal Template -
For each mapped setting, Aura refers to the linked Journal Template and performs the following checks:
- Make sure the Journal Template contains exactly one GL Debit and one GL Credit Transaction Code.
If it doesn't, Aura fails the original transaction and shows you an error message.
- Checks that both the Debit and Credit Transaction Codes have Default Transactions set up.
If either one is missing, Aura fails the transaction and lets you know what's wrong.
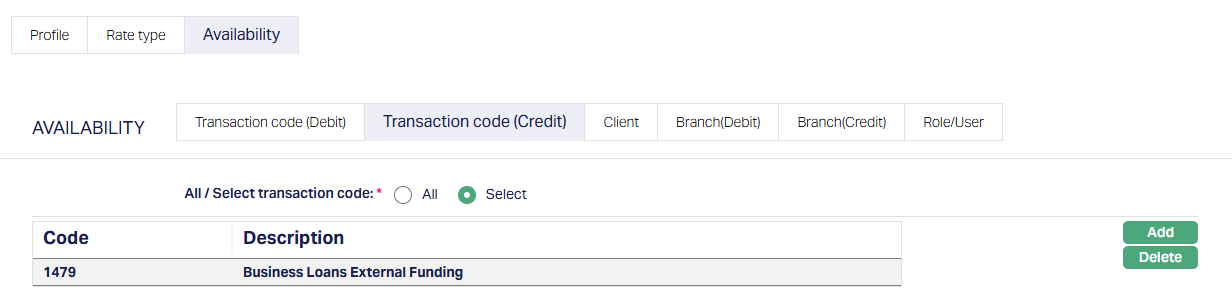
Note: By default, the "All" radio button is selected, displaying all GL accounts mapped to the Transaction Code across all transaction types. If you select the "Select" radio option, you can choose a specific transaction type to view and configure GLs mapped only for that context.
2. Aura posts related accounting entries:
Once everything is validated, Aura posts the related entries using the Journal Template and the values you've already set. Here's how:
- Amount: Aura picks the amount from the leg of the original transaction where you applied the Related Transaction Setting.
Note: Aura ignores the "Override Default Amount" value in the Default Transaction.
3. Transaction Codes: Aura uses the Debit and Credit Transaction codes you defined in the Journal Template.
4. GL Accounts: Aura pulls the corresponding GLs from the Default Transactions of the Debit and Credit Transaction Codes.
Note: By default, the "All" radio button is selected, displaying all GL accounts mapped to the Transaction Code across all transaction types. If you select the "Select" radio option, you can choose a specific transaction type to view and configure GLs mapped only for that context.
5. Transaction Number: Aura uses the same transaction number as the original transaction. The related entries are grouped separately but still under the same number.
6. Event Code: Aura applies the same Event Code as the original transaction.
7.Other Fields: All other field values in the related entry are exactly the same as those in the original transaction leg.
If any issue occurs while posting the related entry, Aura fails the original transaction and displays the appropriate error message.
Custom field
This option provides you the flexibility to define fields apart from those that are already available in the standard version of AuraAura. Thus, it enables you to customize additional data storage and use as required to suit your specific business needs.
Using Custom Field tab, you can maintain the custom fields mapped to the Transaction codes. Depending on the custom fields created and mapped to Transaction codes (using Admin → System Codes → Custom Fields), the fields will be displayed on this tab
To edit Custom field,
1. Access Custom Field page.

2. Click Edit. Edit Custom Field page appears.

3. Click Save. Custom Field page appears with the edited details.
Transaction Type -- Client Account

Functions: Edit
Transaction Type -- General Ledger

Functions: Edit