
Document template
This menu allows you to maintain the details about the Document templates that can be stored in Aura and used during transaction processing / contract life-cycle events. These templates can be mapped in the Document Template Settings tab in various Products for document generation as required.
Adding a Document Template
To add Document Template,
1. From Admin menu, click System Codes, Documents and then Document templates. The Document Template Search page appears. All document templates available in Aura appear on the page.
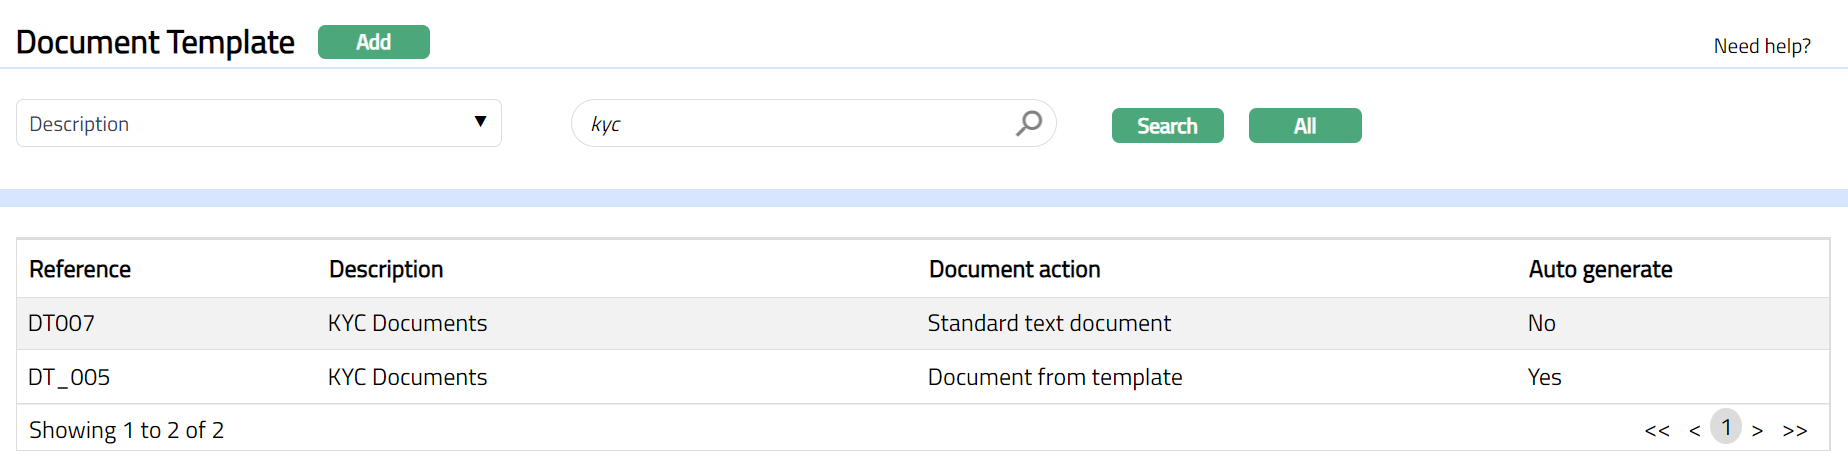
2. Click Add. New Document Template → General (1/2) page appears.
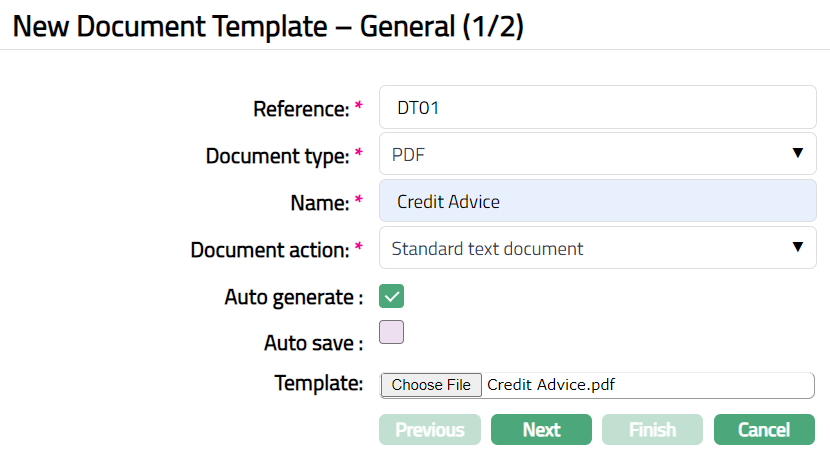
3. Enter unique Reference code for the Document Template. For example -- DT01
4. Select Document type from the list of available drop-down options. For example, PDF. The Document type should have already been created using the Document type Maintenance option.
5. Enter a descriptive Name, which will further identify the template and / or its purpose. For example, Credit advice.
6. Select Document action option from the drop-down -- this is used to indicate the purpose / usage of the Document template. Available options are Standard text document, Document from Template and Checklist. For example, Standard text document.
Standard text document is used for pre-generated documents like standard Terms and Conditions which can be PDF documents. These are not generated from Aura but are shown as they are from the repository. Standard Text Documents can be mapped to loan products through the Document Template Settings sub-tab for automatic document generation and linkage to loan accounts.
Document from template is used to generate a document from a template at runtime.
Checklist is used for a checklist which is configured to a task level for the user / teller to check and mark the list. For example, the teller may need to check if he has taken a printout of the agreement and shown to the customer or signed by the customer.
7. Select Auto generate check box if you wish to allow the Document to be generated automatically by the system during processing. This checkbox is enabled only when Standard text document or Document from template is selected in the Document action.
8. Select Auto Save checkbox if you wish to allow the Document to be saved automatically by the system when the document gets generated. This checkbox is enabled only when Document from template is selected.
9. Click Choose File button to select the path of the Template. This checkbox is enabled only when Standard text document or Document from template is selected in the Document action.
10. Click Next. New Document Template → Confirmation (2/2) page appears.
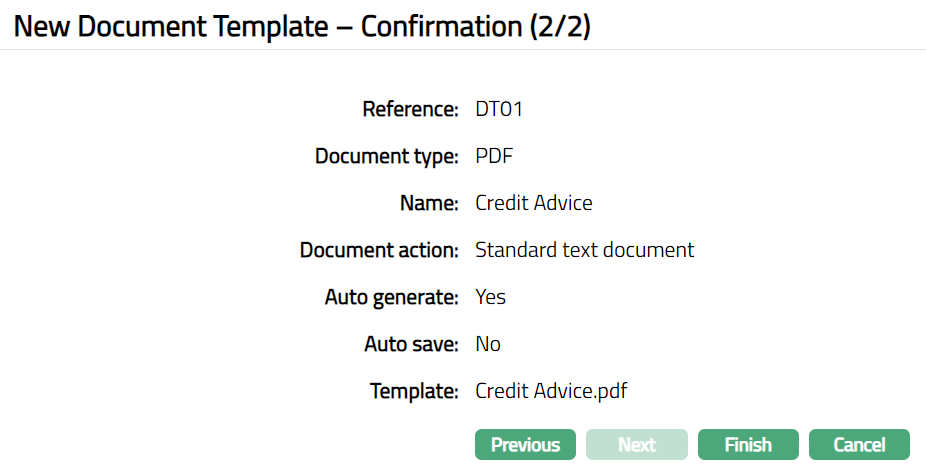
11. Click Finish. Document Template page appears with the added details.

Functions: Add, Edit, Delete, Search
Delete: You can delete a Document Template saved in Aura by a click on Delete button. Aura will ask for confirmation; and on confirming, the selected record will be deleted.
To edit Document Template,
1. Access Document Template page.
2. Click Edit. Edit Document Template page appears.
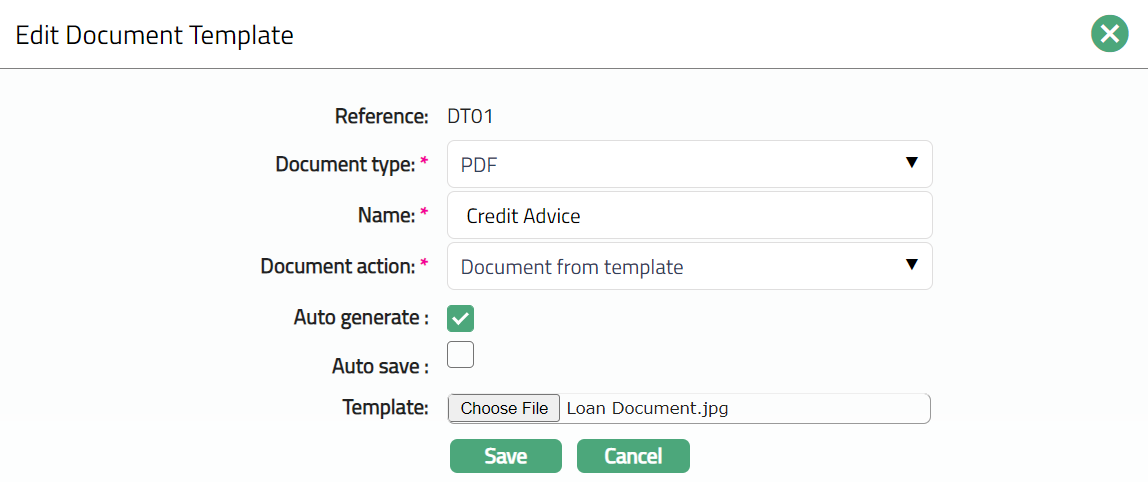
Note: The Reference field cannot be modified after the document template is created. All other fields remain editable.
3. Click Save. Document Template page appears with the edited details.

Functions: Add, Edit, Delete, Search
Custom Field
This option provides you the flexibility to define fields apart from those that are already available in the standard version of Aura. Thus, it enables you to customize additional data storage and use as required to suit your specific business needs.
To Edit Custom Field,
1. Access Factoring Status page. Click Custom Field tab.

2. The field appears only when it is created in Admin → System codes → Custom fields → Custom fields and linked to specific Accounts option in Admin → System codes → Custom fields → Field mappings.
3. Click Edit. Edit Custom Field page appears. In the following illustration, a custom field, Last Review Date has been mapped to the Account as shown below.

4. Enter Last Review Date.
5. Click Save. Custom Field page appears with the edited details.

Functions: Edit