Person Due Diligence
Person due diligence allows you to maintain details of the due diligence exercise carried out for a New / existing Person record.
Following are the various tabs that appear on the Person Due Diligence page. You can use these tabs to maintain the due diligence details of a Person already created or create a new Person and then use these tabs.
To add due diligence details of a new Person
1. From CRM menu, click Due Diligence, and then Person. Person search page appears. All Persons available in Aura appear on the page.

2. Click Add. New Person → General (1/5) appears
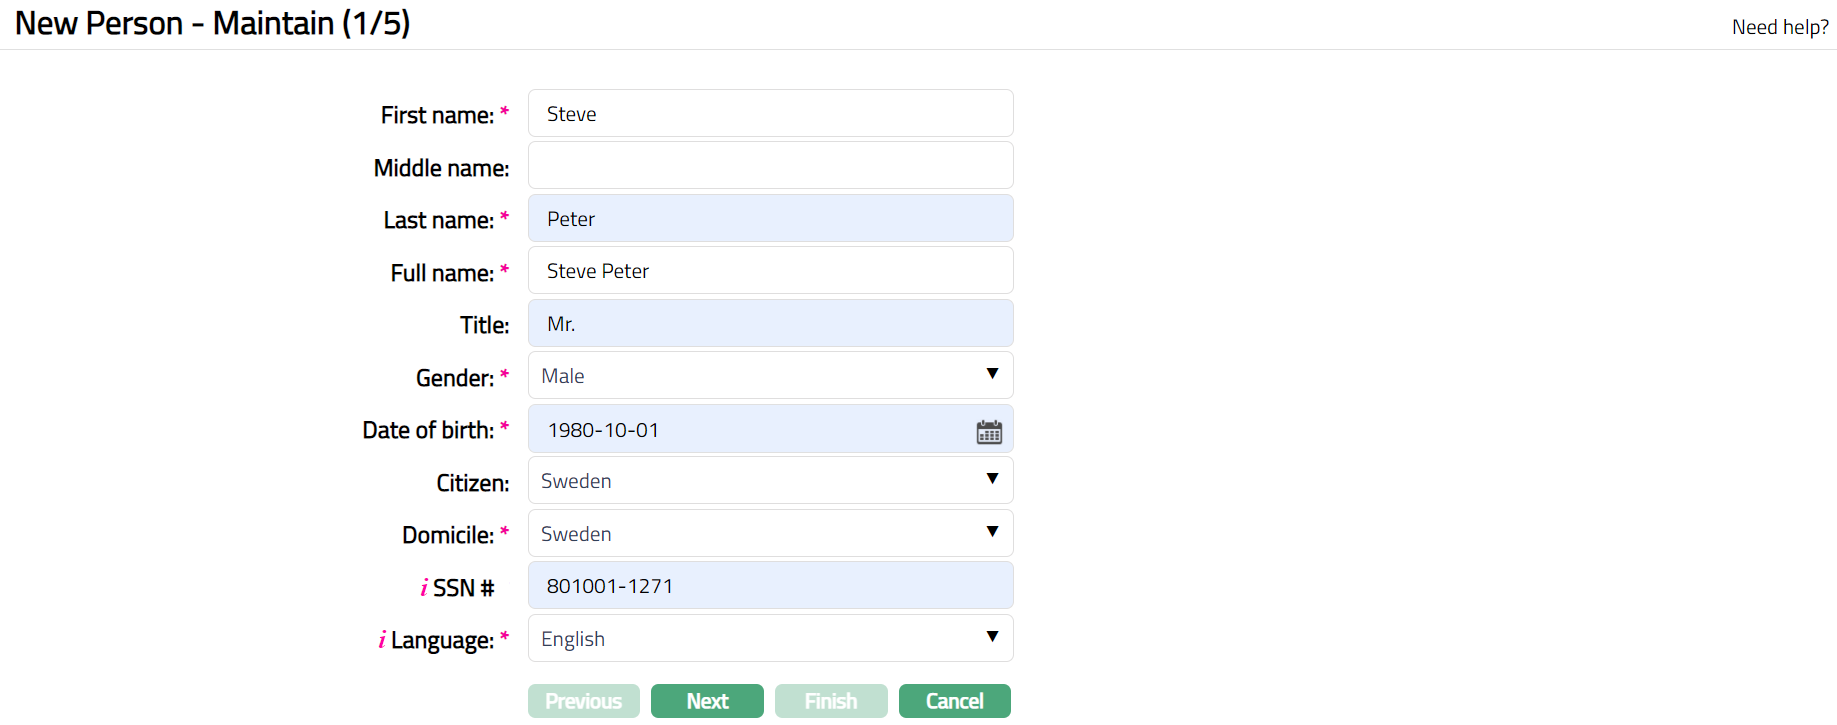
3. Enter First Name of the person.
4. Enter Middle Name of the person if applicable.
5. Enter Last Name of the person.
6. On entering the First Name and Last Name system derives Full Name of the person. You can however edit it as needed.
7. Enter Title of the person that is to be prefixed to the person's First name.
8. Select Gender of the person from the drop-down list. The available options are: Male and Female.
9. Enter Date of birth of the person. You can either enter the date manually or select using the calendar. Aura will validate the date format using the format maintained under Admin → Entity → Maintain → Regional tab → Date format.
10. Select Citizen i.e. country of Citizenship of the Person from the drop-down list of countries maintained under Admin → System Codes → Generic Definitions → Countries.
11. Select Domicile of the person i.e. country of residence from the drop-down list of countries maintained under Admin → System Codes → Generic Definitions → Countries.
12. Enter SSN# if required, as this is a non-mandatory filed. It is the person's Social Security Number i.e. a unique number provided by the person's residence country.
Note: The validation for SSN, if required, may be customized during implementation.
13. Select Language i.e. Language of the person from the drop-down list of Languages maintained under Admin → System codes → Generic definitions → Languages.
14. Click Next. New Person → Address (2/5) page appears.
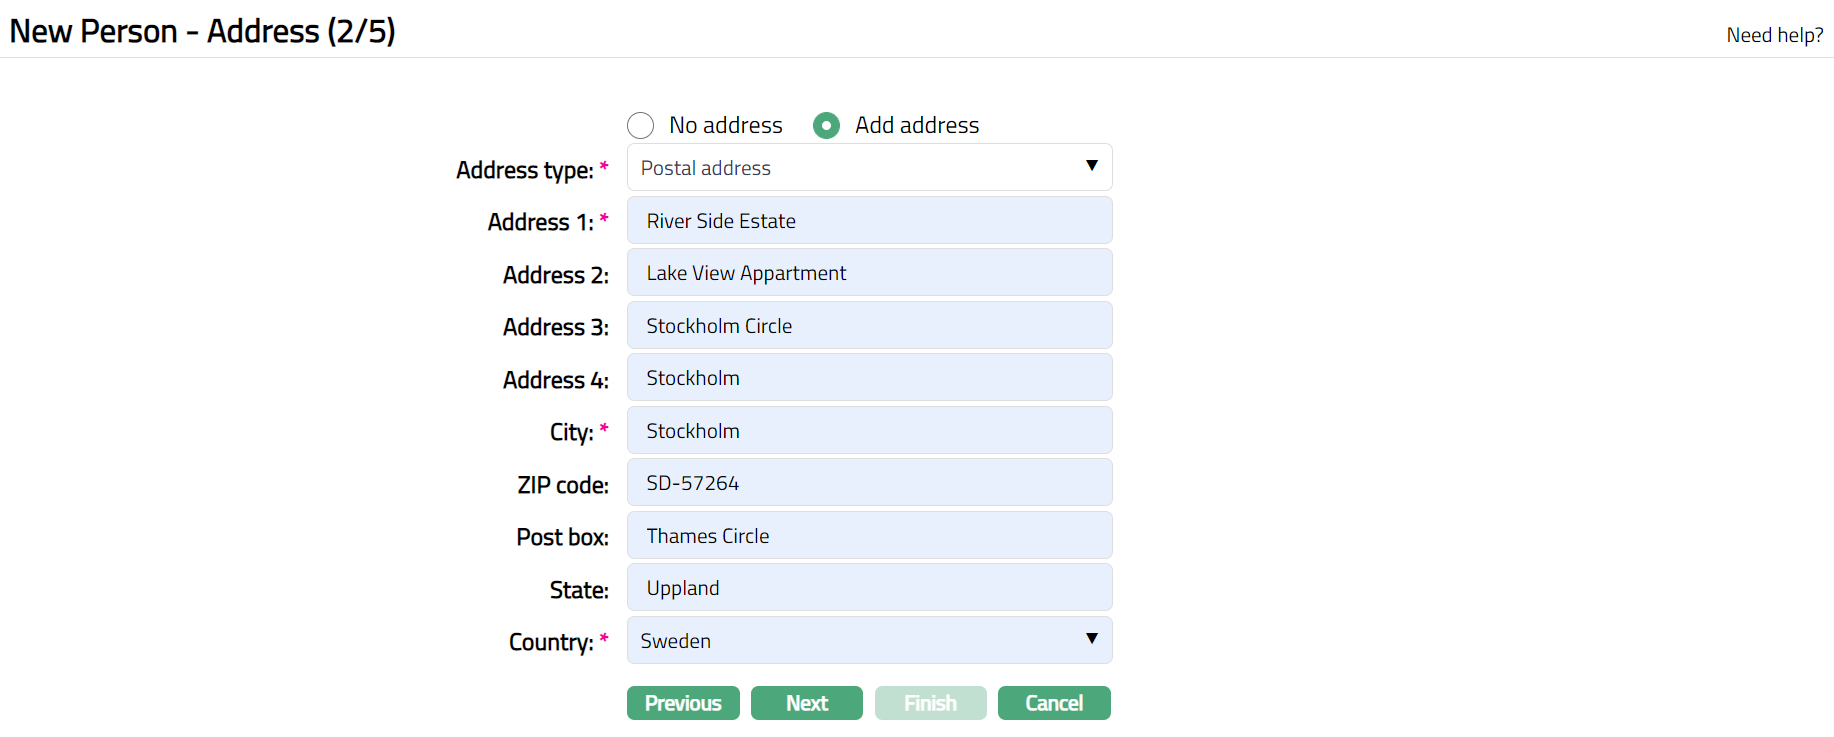
15. By default, No address is selected. If you do not want to record the address of the Person at this stage, then you can select this option.
16. If you want to enter the address, then click Add address and provide the required details.
17. Select Address type from the drop-down list of Address Types maintained under Admin → System Codes → Address details → Address types.
18. Enter Address 1, 2, 3 and 4 of the person.
19. Enter City of the person.
20. Enter ZIP code of the person.
21. Enter Post box of the person.
22. Enter State of the person.
23. Select Country from the drop-down list of countries maintained under Admin → System codes → Generic definitions → Countries.
24. Click Next. New Person → Phone (3/5) page appears.

25. By default, No phone is selected. If you do not want to input the phone details at this stage, then you can select this option.
26. If you want to enter the phone details, then click Add phone and provide the required details.
27. Select Phone type from the drop-down list of Phone Types maintained under Admin → System Codes → Address details → Phone types.
28. Enter Phone # of the person.
29. Enter Extension of the phone of the person.
30. Click Next. New Person → E-mail (4/5) page appears.

31. By default, No E-mail is selected. If you do not want to enter the E-mail details of the person at this stage, then you can select this option.
32. If you want to enter the E-mail, then click Add E-mail and provide the required details.
33. Select E-mail type from the drop-down list of email types maintained under Admin → System Codes → Address details → E-mail types.
34. Enter E-mail address of the person.
35. Click Next. New Person → Confirmation (5/5) page appears.
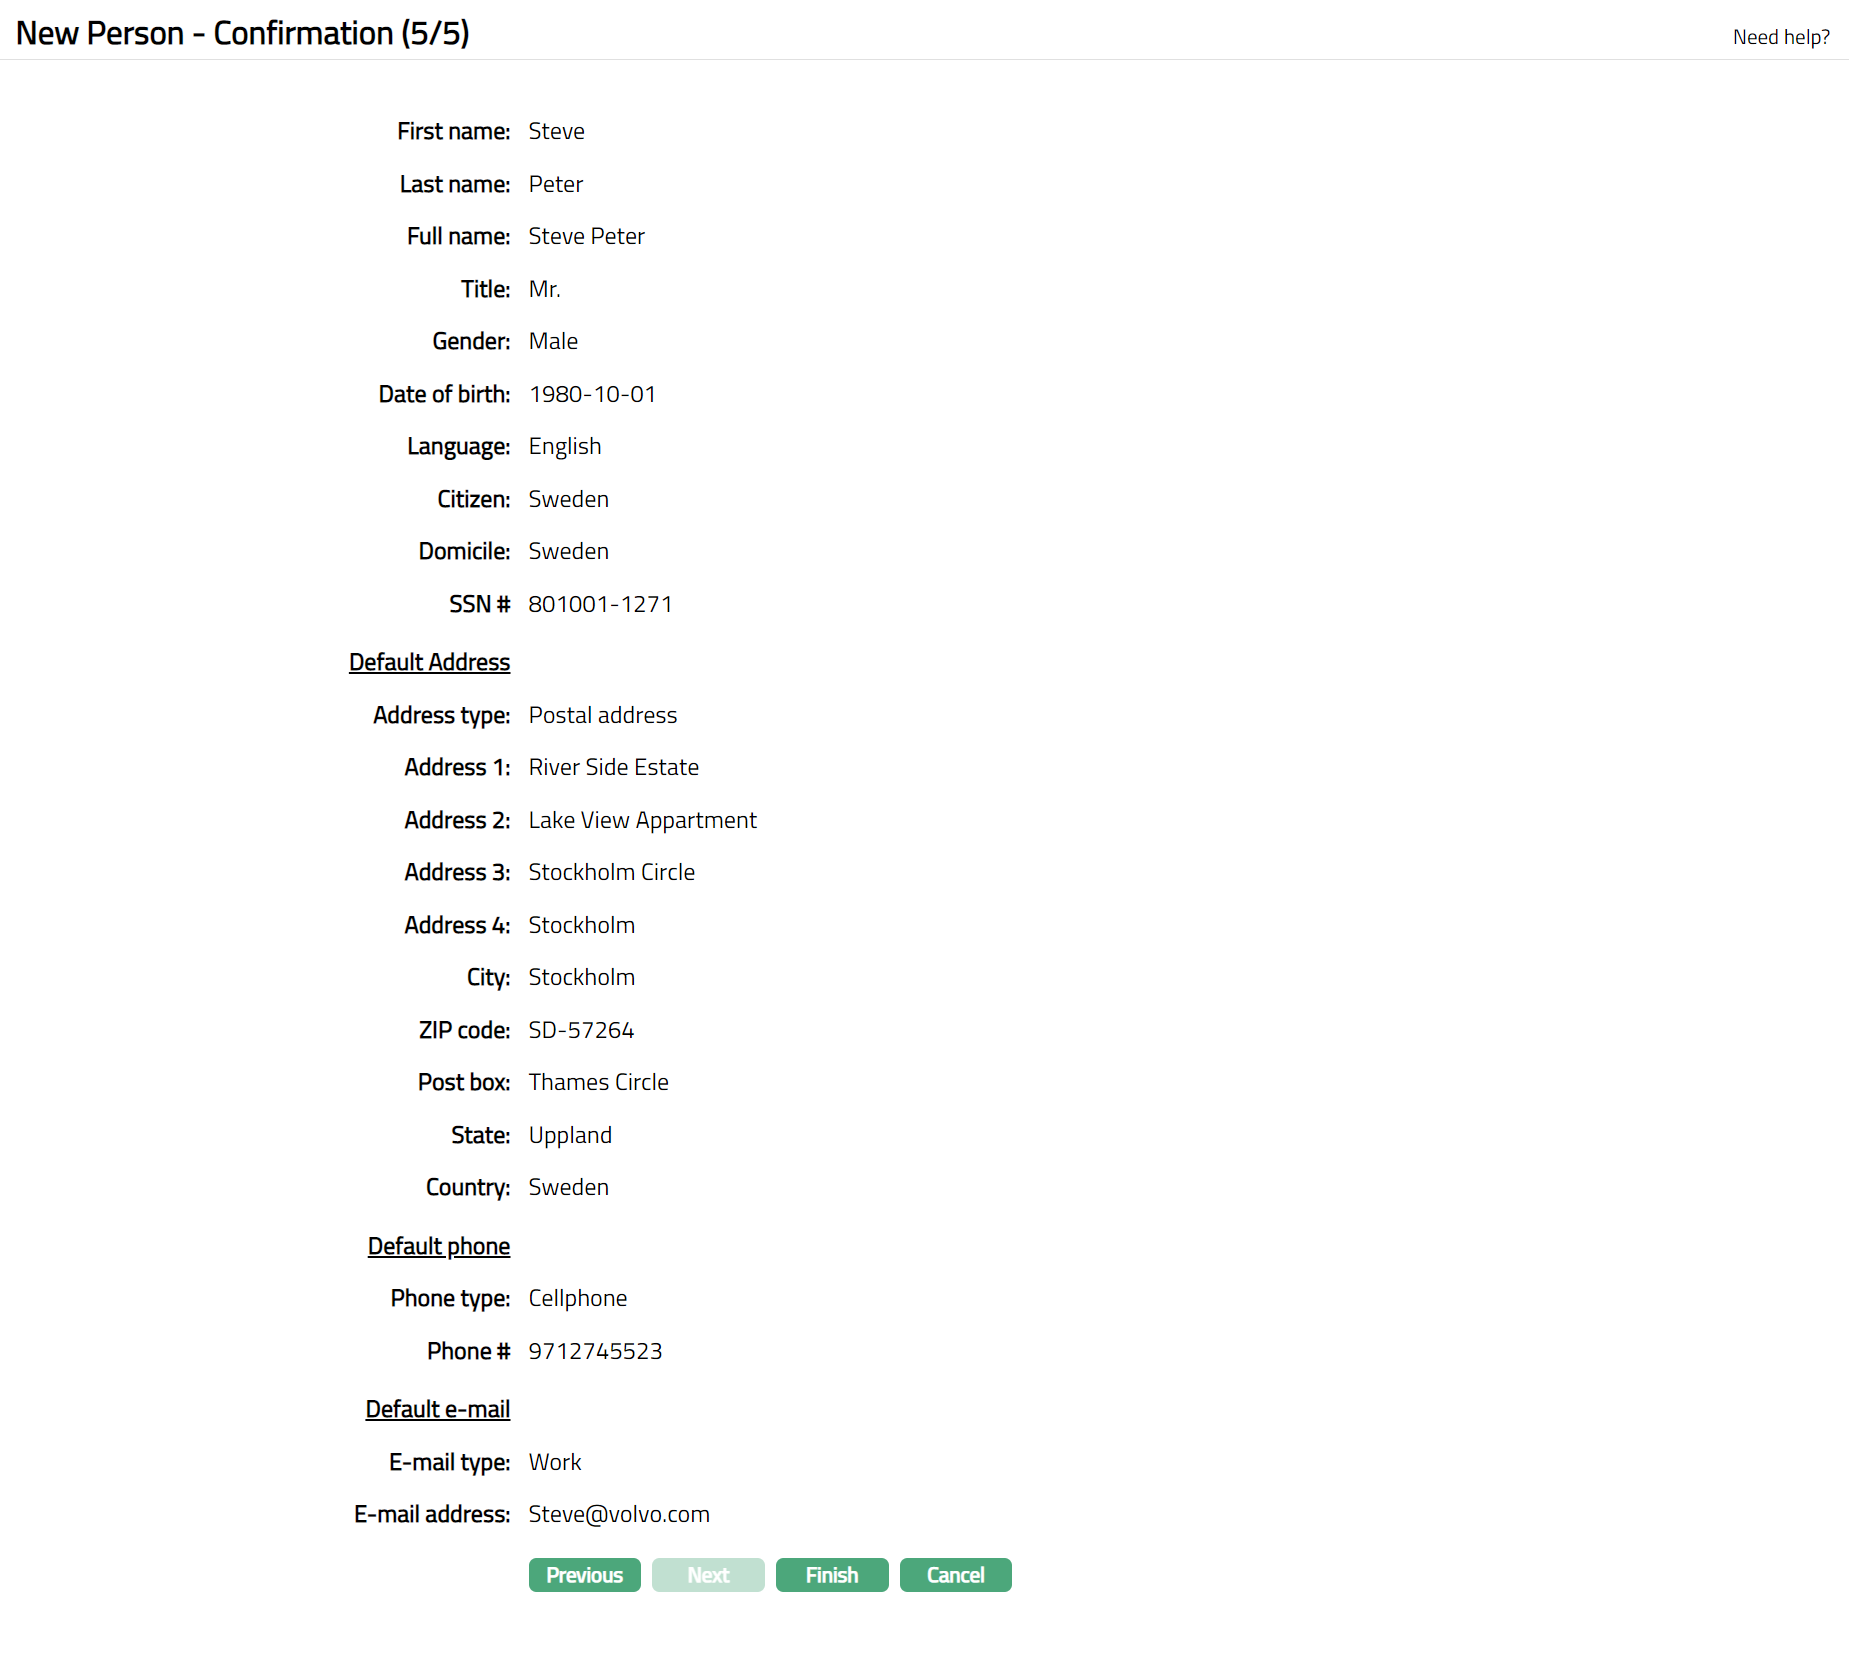
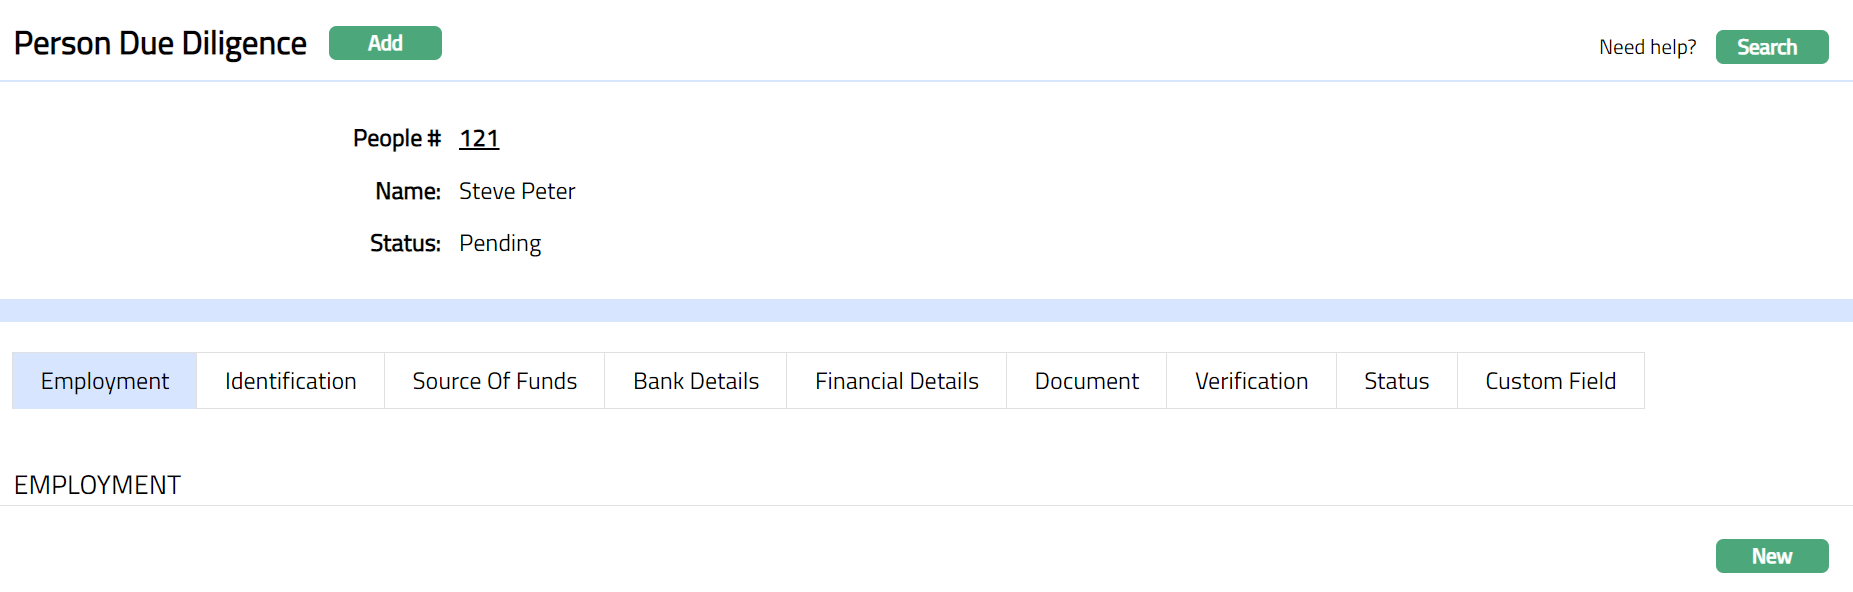
36. Click Finish button to complete the maintenance of new person. The new person details are added with a unique People # and you will see the Person Due Diligence record displaying the Employment tab. Due Diligence Status will show as Pending.
Note: Under Verification tab enter Data Gathered on & Due for Review On dates then click Save. Then under Person Maintain page the status needs to be approved under Status Tab. Once Approved then the Person Due Diligence Status appears as Approved.
Functions: Add, Search
Note: If the custom field is mapped to Person or Person Due Diligence under Admin → System Codes → Custom fields → Field mapping, then additional screen(s) will appear before the confirmation screen. The custom fields will be mandatory or non-mandatory based on the rules set at the Field mappings. For more detail on custom field functionality please refer Admin → System codes → Custom fields → Field mappings manual.
Employment
Employment tab allows you to create and maintain the employment details of the Person.
To add New Employment details,
1. Access Person Due Diligence page and click Employment tab.
2. Click New button. New Employment page appears.
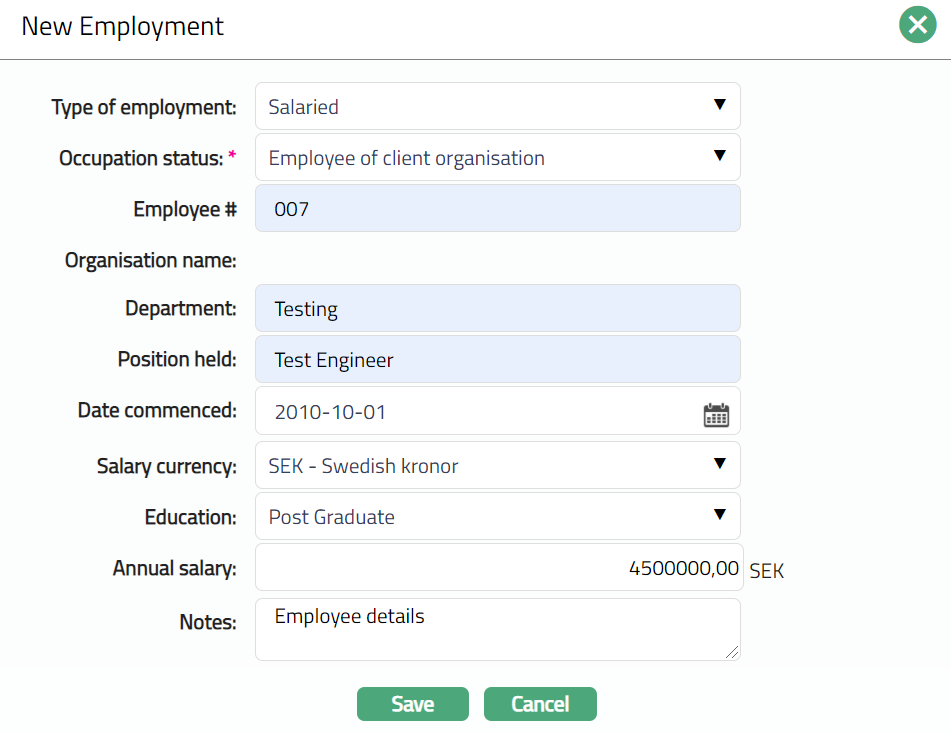
3. Select Employment Type of the person from the drop-down list maintained under Admin → System Codes → Generic definitions → Employment Type.
4. Select Occupation status of the person from the drop-down list.
The available values are:
Employee of bank -- select this when the person is employed in your bank.
Employee of Client organization -- choose this when the person is employed in an organisation that is already the bank's client and hence, the organisation details are already maintained in CRM → Organisation → Maintain.
Employee of other -- choose this when the person is employed in an organisation that is not the bank's client.
Retired
Self employed
Student
Unemployed
- Enter Employee # of the person.
6. Organisation name depends on the Occupation status selected above.
If you had selected Employee of bank, the name of bank (Entity Name from Entity Maintenance) is automatically displayed here, and it is not editable.
If you had selected Employee of Client Organization, the field becomes a hyperlink. On clicking on the hyperlink, Aura will display the organisation search window with the list of organisations maintained in the system. Select the desired organisation.

- If you had selected Employee of other, this field becomes a text box where you can enter the name of the Organisation.
7. Enter Department of the person. It is the department where the employee is working. This will be disabled on selecting the Occupation status as Employee of bank.
8. Enter Position held for the person. It is the designation of the person. This will be disabled on selecting the Occupation status as Employee of bank.
9. Enter date on which the employee joined the organization in Date Commenced. By default, the date will be the current date. You can change it by clicking on the date picker located to the right and choosing another date OR by manually changing the date in the field itself.
10. Select Salary currency of the person from the available drop-down list of currencies maintained under Admin → Currencies → Currency maintenance.
11. Enter Annual Salary of the Person.
12. Select Education of the person from the available drop-down list of education levels maintained under Admin → System codes → Generic Definition → Education
13. Enter Notes for employment.
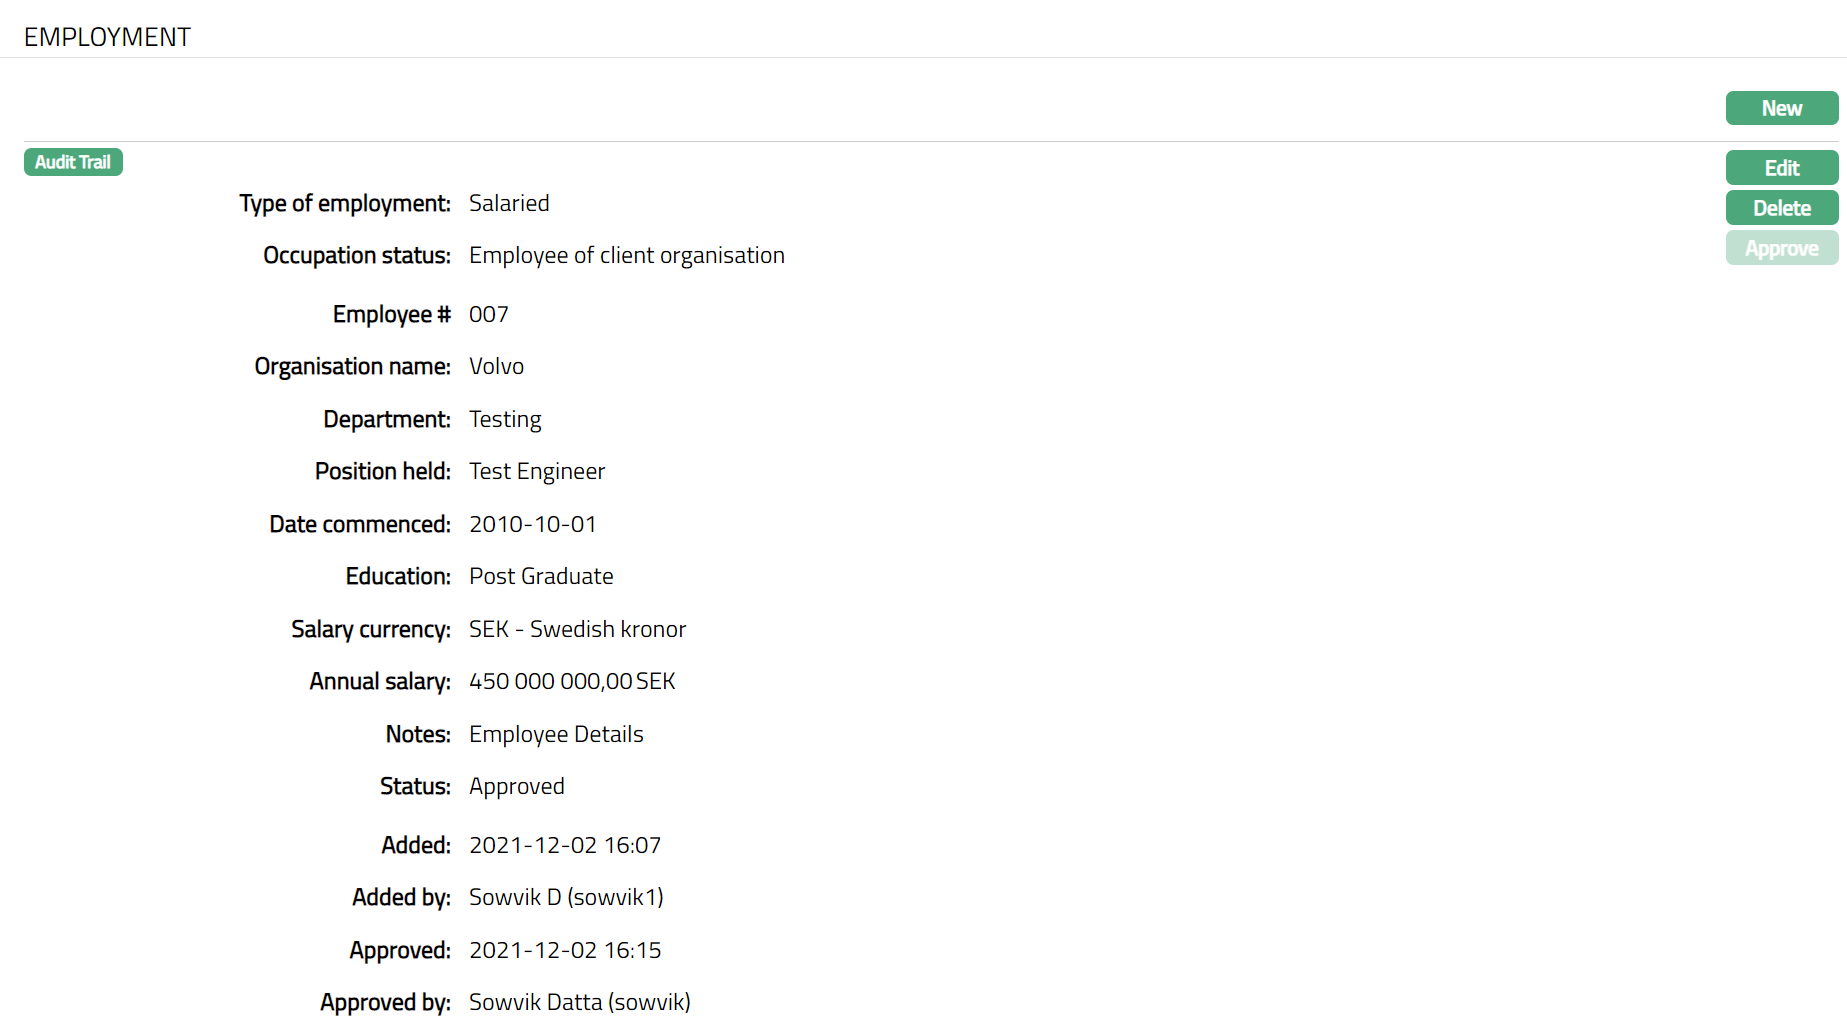
- Click Save. Employment Page appears displaying the added fields.
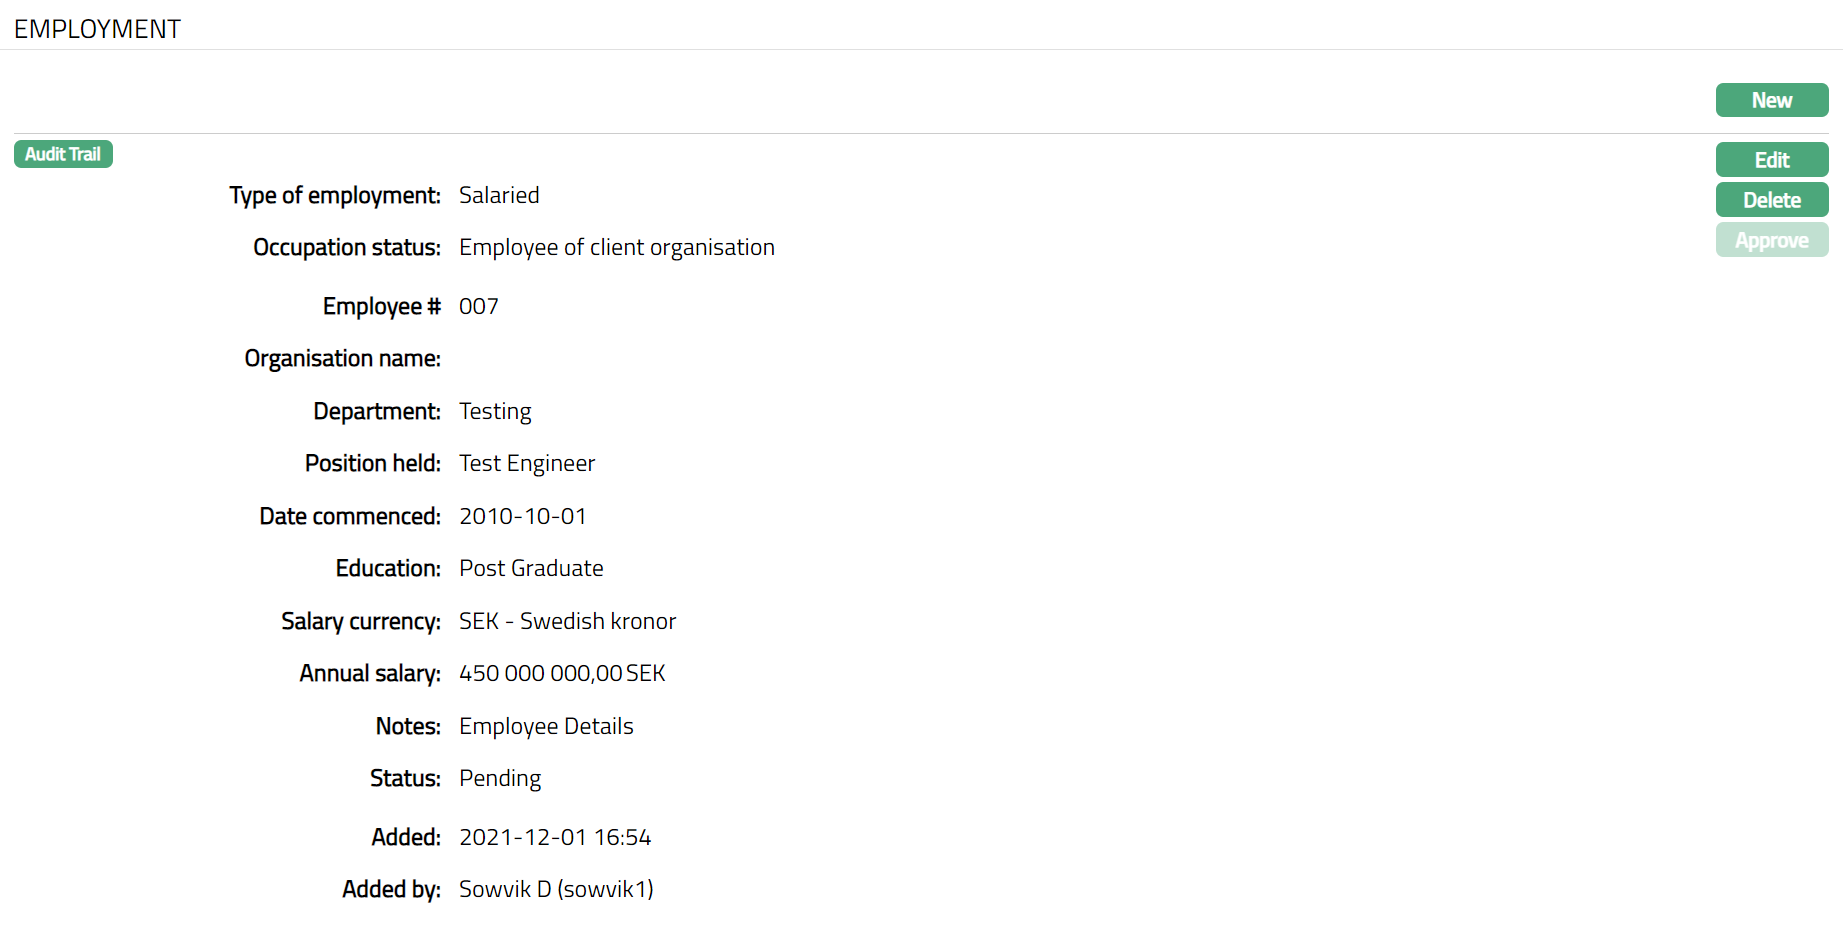
Functions: New, Edit, Delete, Approve
Note: On addition of a new record / edit, the tab Status appears as Pending. Only on Approval by another user, the Status becomes Approved
The additional fields that you can view in the Employment tab are explained below:
Status field denotes the status of the tab
Added field denotes the date on which the record was added.
Added by field denotes the name of the user who created the record.
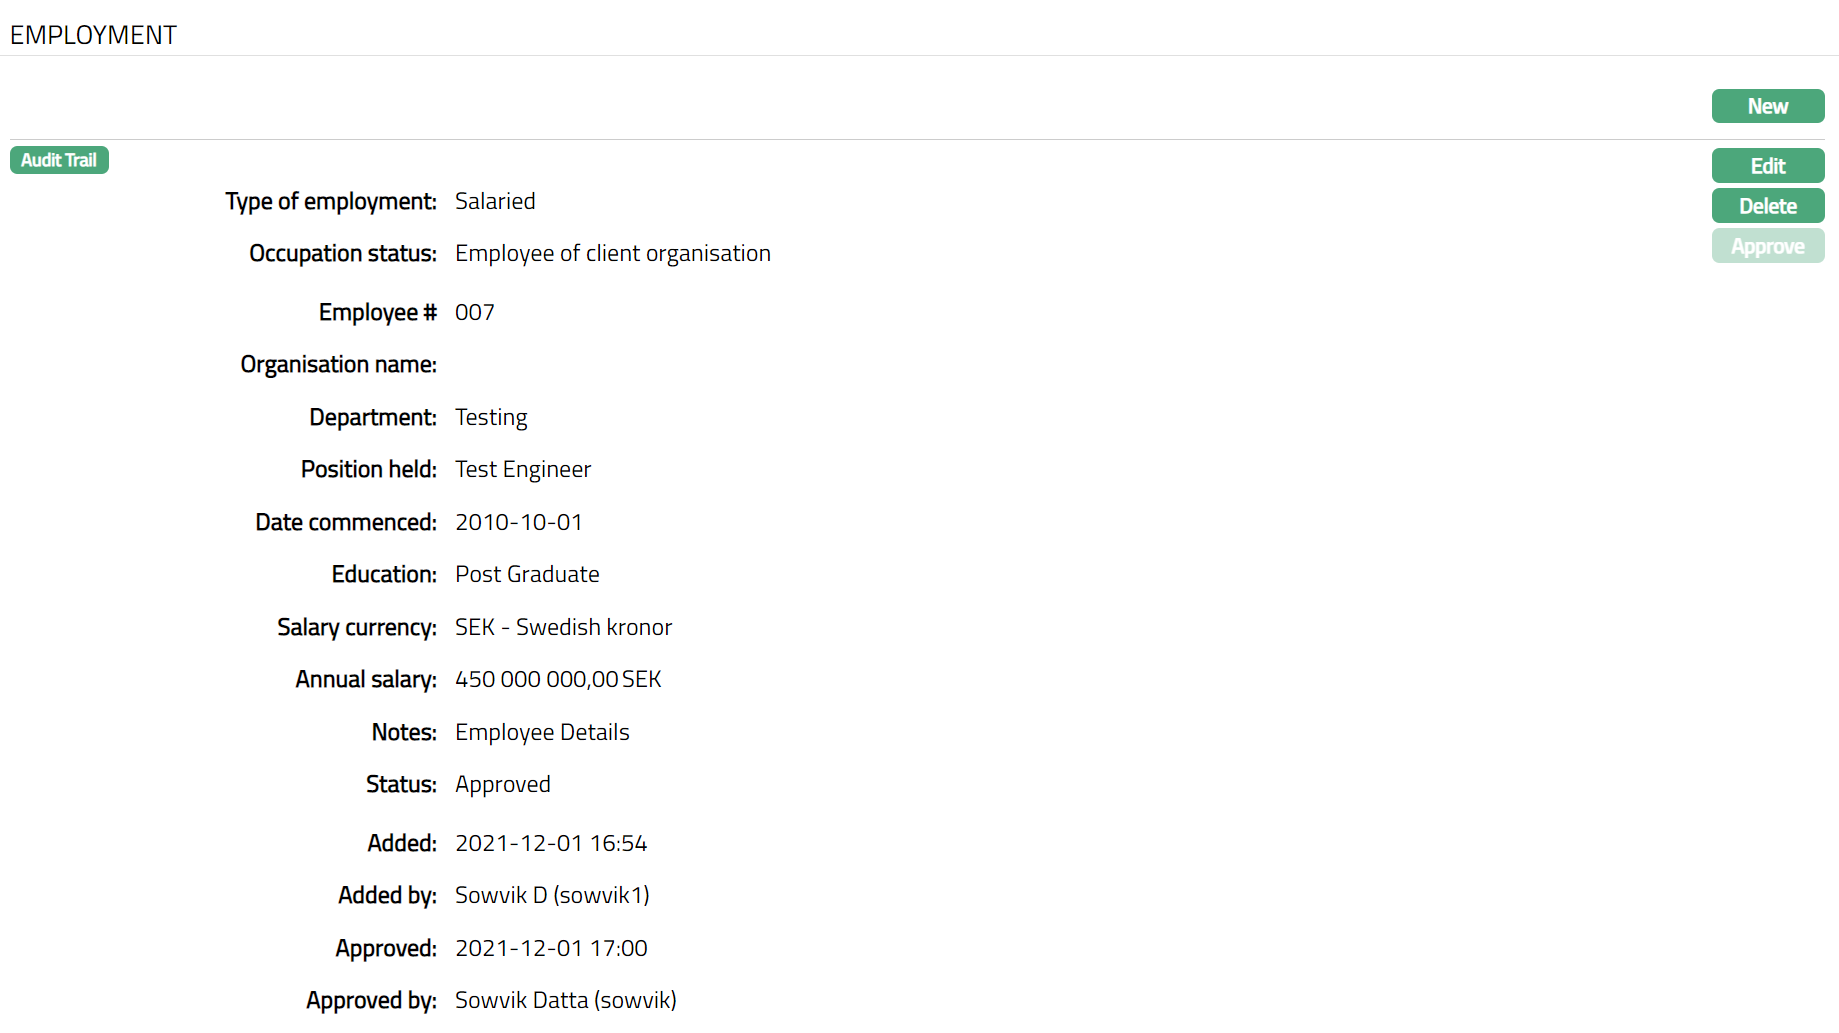
Approved field denotes date on which the record was approved and is displayed only for approved records.
Approved by field denotes name of the authorized person who approved the record and is displayed only for approved records.
To edit Employment record
1. Access Person Due Diligence page and click Employment tab.
2. Click Edit. Edit Employment page appears.
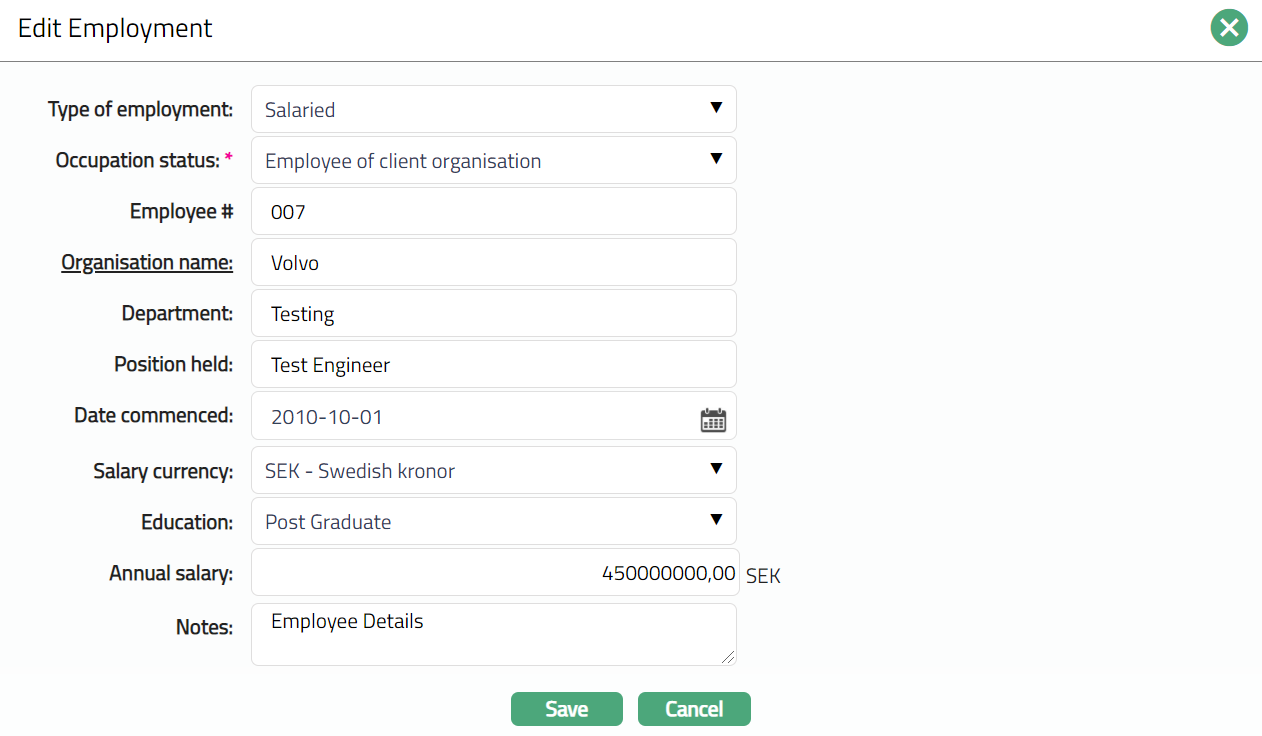
Note: All fields are editable.
3. Make required changes and click Save. Employment tab appears with the edited details.
If you had selected Employee of Client Organization, the field becomes a hyperlink. On clicking on the hyperlink, Aura will display the organisation search window with the list of organisations maintained in the system. Select the desired organisation.

Functions: New, Edit, Delete, Approve
Click Save. Employment Page appears displaying the added fields.
Once you Edit the record, the Employment page appears displaying Status as Pending. Only on Approval by authorized person, the Status becomes Approved
Once approved Status changed to approve
Identification
Identification tab allows you to create and maintain the person's identification details.
To add New Identification,
1. Access Person Due Diligence page and click Identification tab.
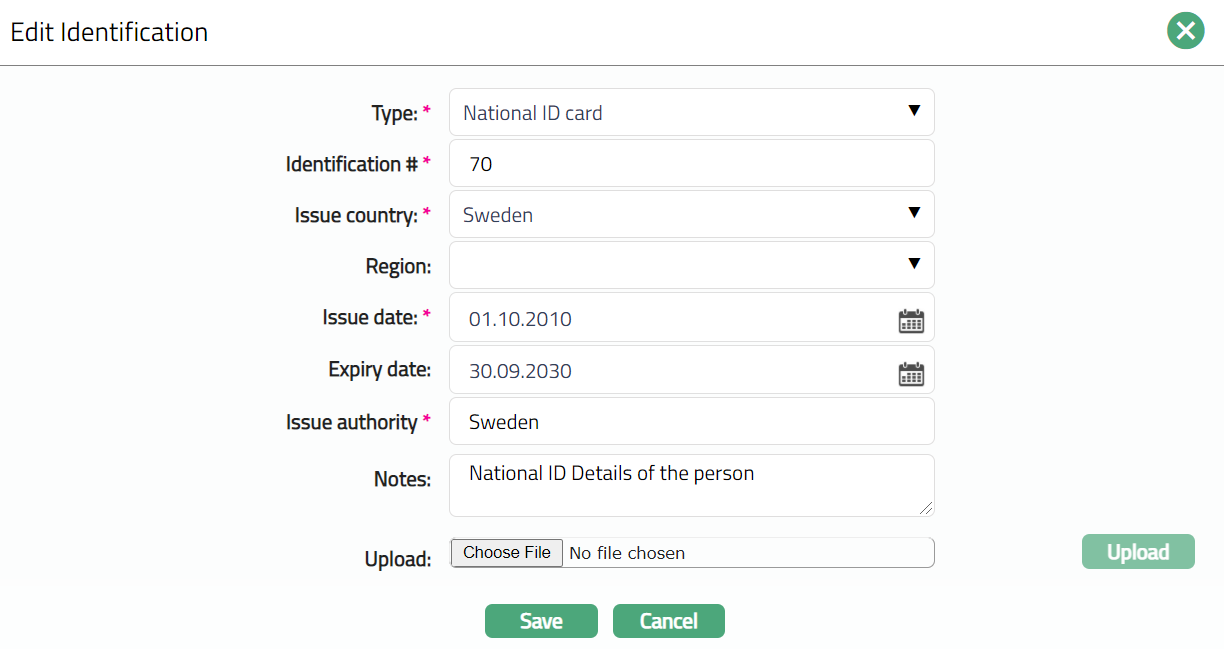
2. Click New button. New Identification page appears.
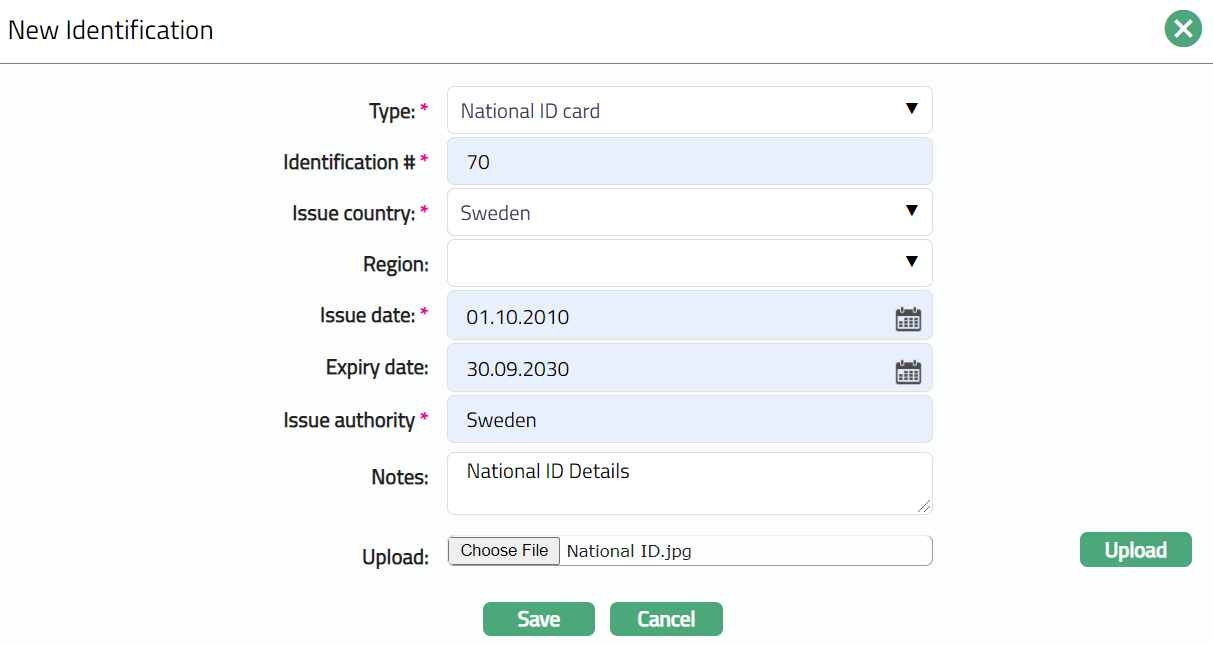
3. Select Type from the drop-down maintained under Admin → System Codes → Generic Definition → Identification Type. It is the identification type provided by the person for performing due diligence. Passport, Driver's licence, Birth certificate, National ID card, Voter card, Utility Bill, Registration Certificate and Others.
4. Enter Identification # on the Identification document.
5. Select Issue country from the drop-down list of countries maintained under Admin → Generic Definition → Countries. It is the country where the person's identification document is issued.
6. Select Region from the drop-down list of Regions maintained for the Issue country.
7. Enter the issue date of the identification document in Issuedate by clicking on the date picker located to the right and choosing a date OR by manually updating the date in the field itself. This cannot be a future date.
8. Enter expiry date of the identification document in Expirydate by clicking on the date picker located to the right and choosing a date OR by manually updating the date in the field itself. This cannot be a past date.
9. Enter Issue Authority. It is the Organization / Office that has issued the Identification document
10. Enter Notes, if any, for the identification document.
11. You can Upload the scanned image of the identification document. Click on the Choose file button to select the file. Then click upload button to upload the document to Aura. Note: While uploading document if you select file other than the Image files (.jpg,.gif,. jepg, .png, .tif, .bmp), system will show an error message as "Invalid file format." Once you click on Save button.
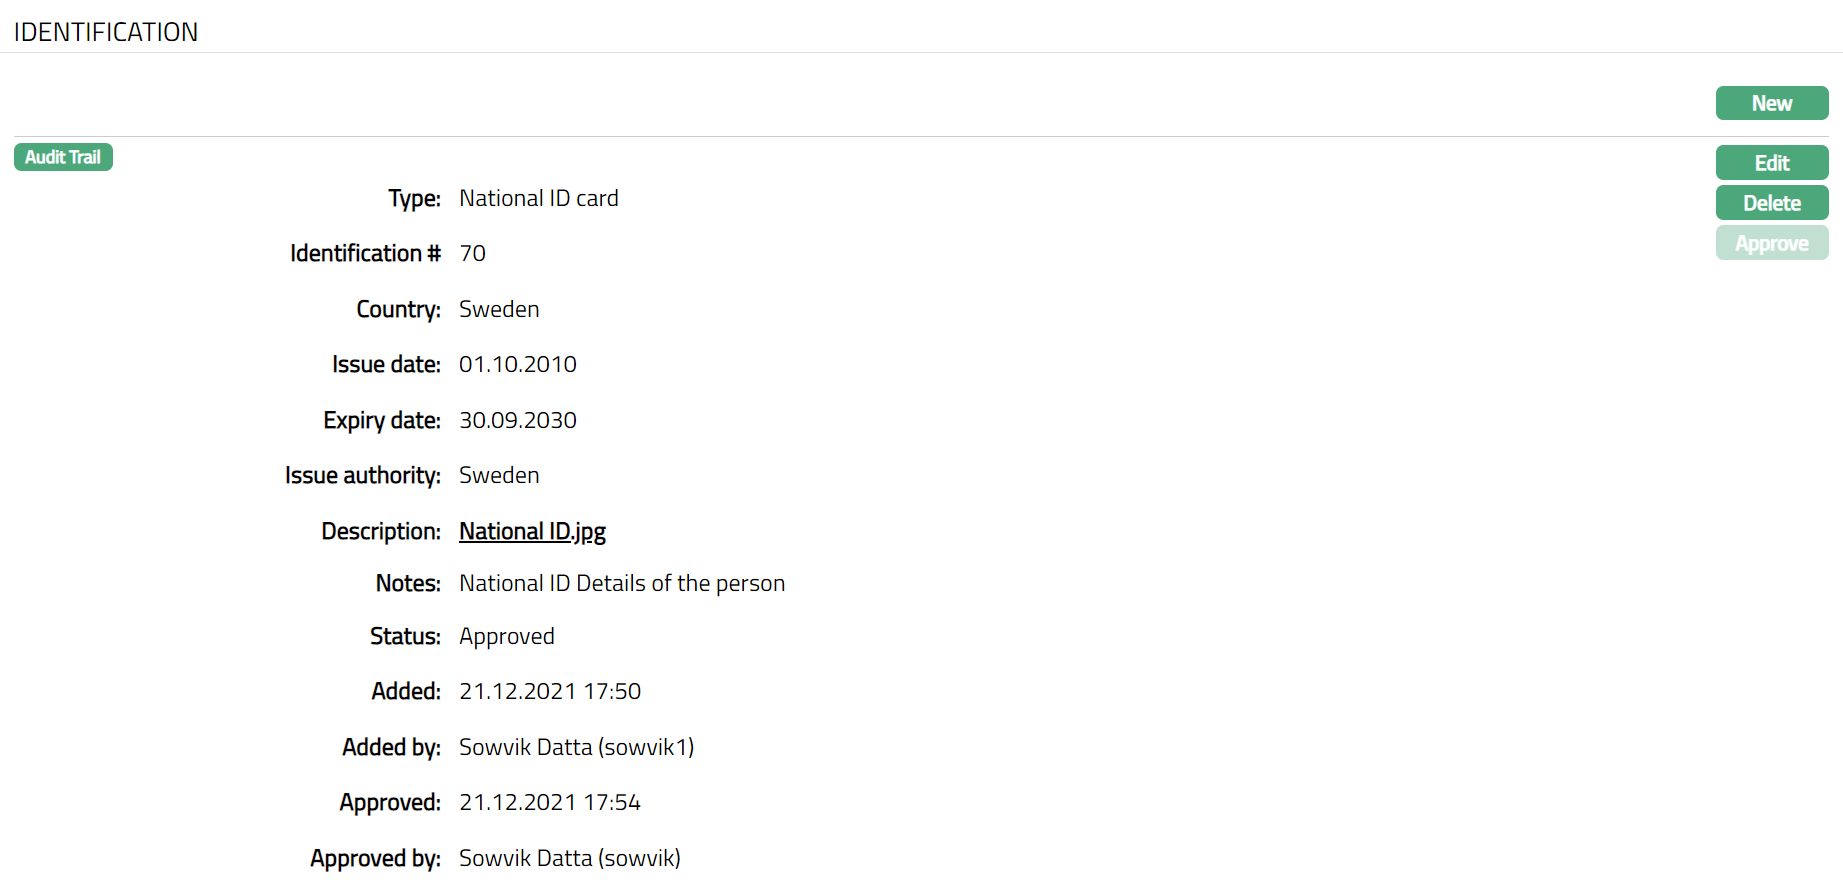
12. Click Save. Identification page will open displaying the added details.
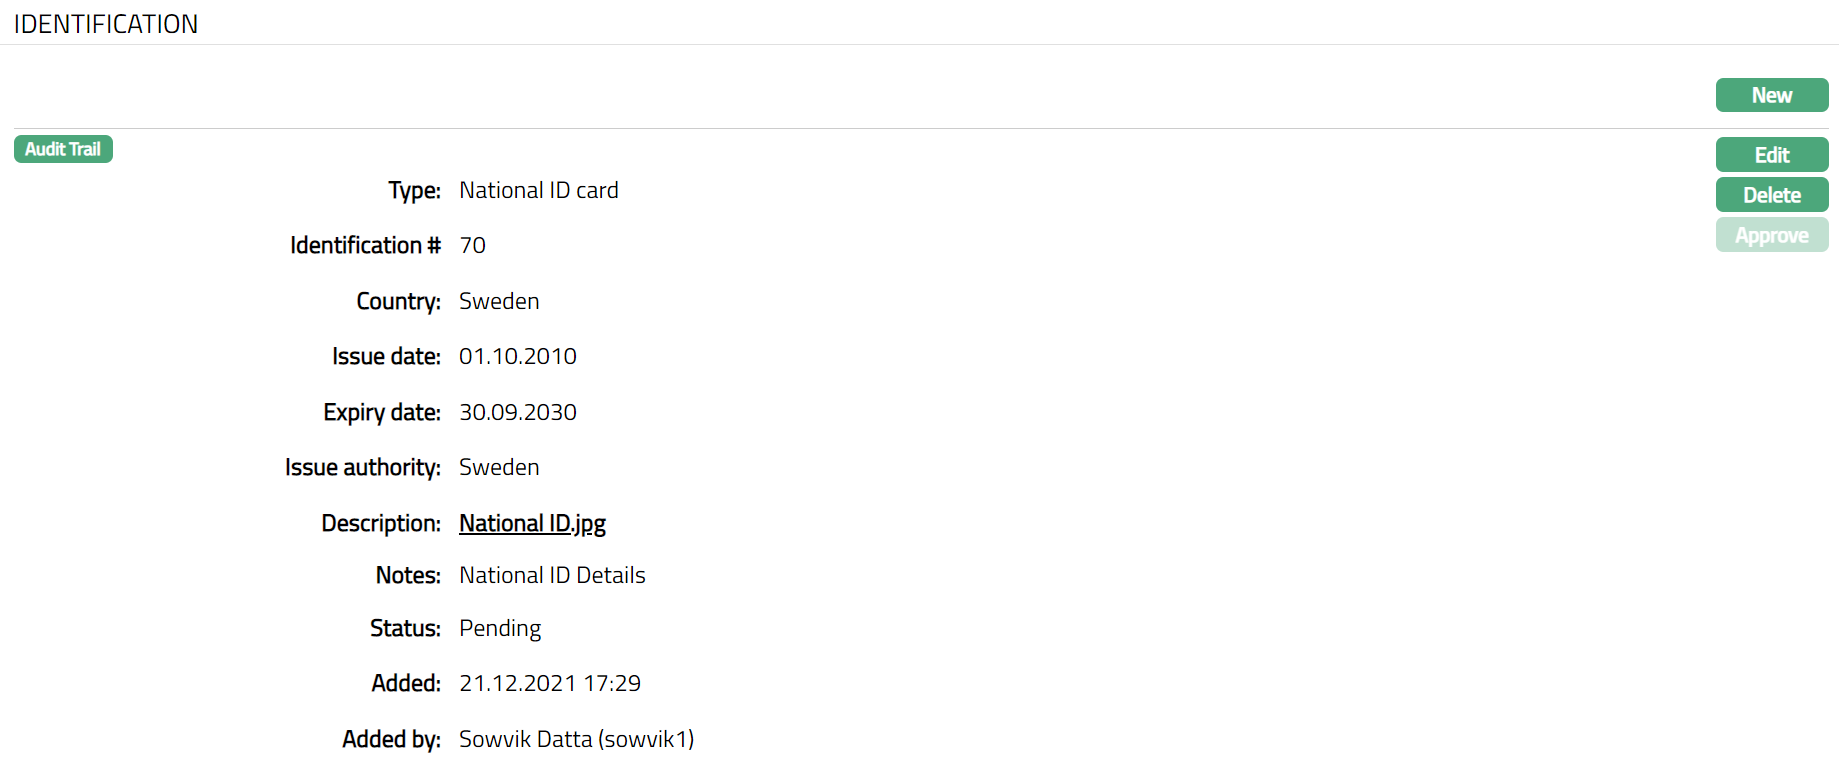
Functions: New, Edit, Delete, Approve
Note: On addition of a new record / edit, the tab Status appears as Pending. Only on Approval by authorized person, the Status becomes Approved
The additional fields that you can view in the Identification screen are explained below:
Description filed denotes the uploaded document with a Hyperlink. To view the document, you need to click on the Hyperlink.
Status field denotes the status of the tab.
Added field denotes the date on which the record was added.
Added by field denotes the name of the user who created the record.
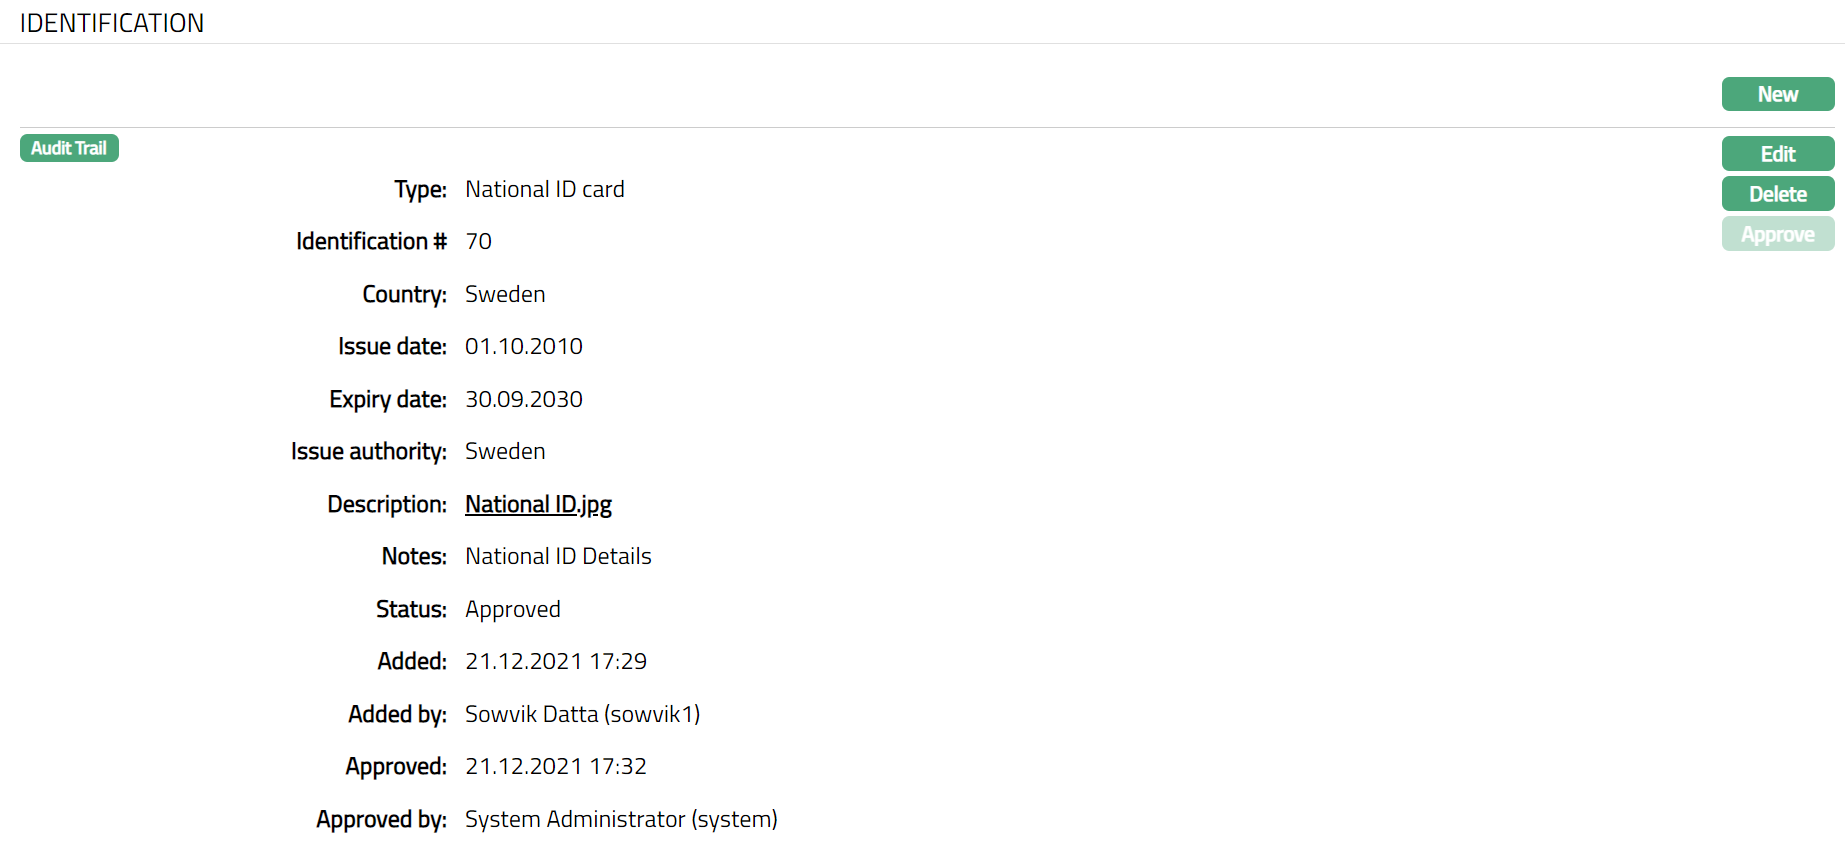
Approved field denotes date on which the record was approved and is displayed only for approved records.
Approved by field denotes name of the person who approved the record and is displayed only for approved record.
Functions: New, Edit, Delete, Approve
Delete: You can delete Identification record saved in Aura by a click on Delete button. Aura will ask for confirmation, on approving which the selected record will be deleted. Once the record is approved, it cannot be deleted.
Approve: If you want to approve an Identification record, then retrieve the record and click on Approve. Aura will ask for confirmation. On confirmation, the tab status changes from Pending to Approved.
To edit Identification record
1. Access Person Due Diligence page and click Identification tab.
2. Click Edit. Edit Identification page appears.
Note: All fields are editable.
3. Make required changes and click Save. Identification tab appears with the edited details.
Functions: New, Edit, Delete, Approve
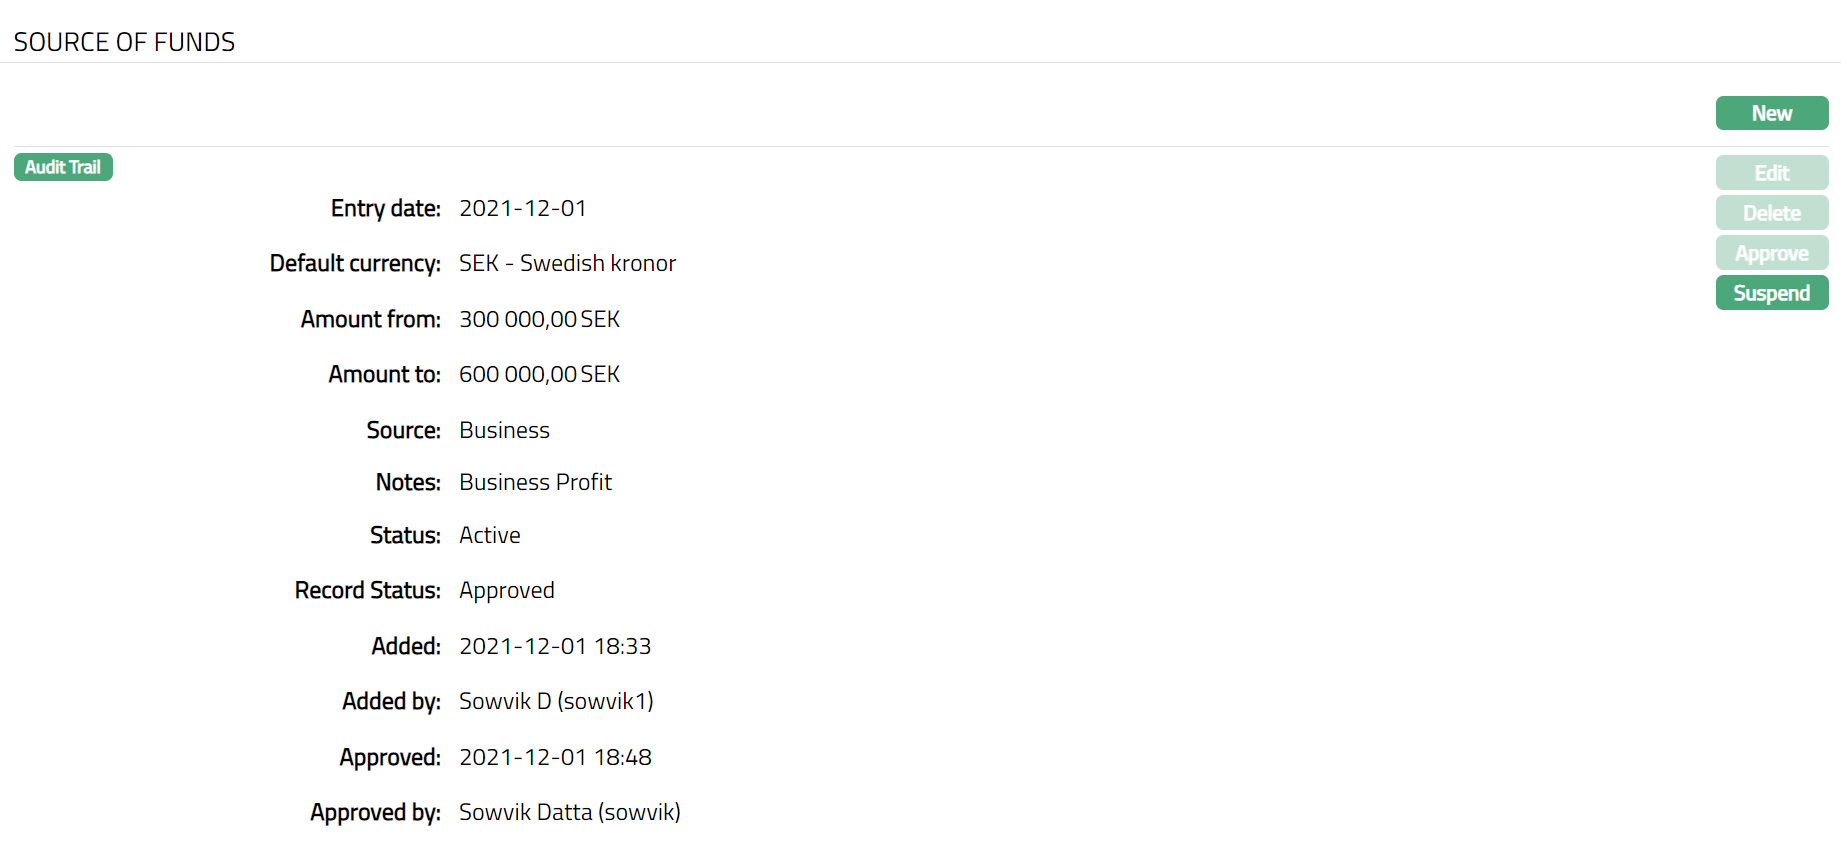
Source of Funds
Source of Funds tab allows you to create and maintain the source of funds details. It refers to where a client got hold of or received the funds being deposited
To add New Source Of Funds
1. Access Person Due Diligence page and click Source of Funds tab.
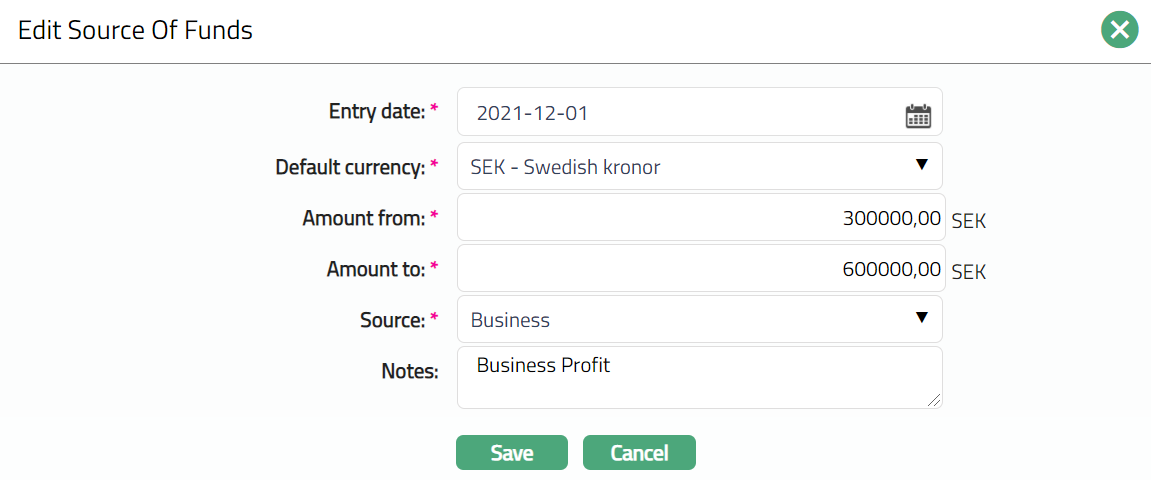
2. Click New button. New Source of Funds page appears.

3. Enter the date of entry for the deposit in Entry date. By default, the date will be the current date. You can change it by clicking on the date picker located to the right and choosing another date OR by manually changing the date in the field itself.
4. Default Currency is the currency in which the amount is deposited. Select the Default currency from the drop-down list of active currencies maintained under Admin → System codes → Currency.
5. Enter the lower limit of the range in Amount from. Aura will allow you to enter any amount greater than zero.
6. Enter the upper limit of the range in Amount to. Aura will allow you to enter any amount greater than or equal to Amount from.
7. Source is the source from which the fund will be deposited. Select the Source from the drop-down list maintained under Admin → System codes → Payments → Source of funds.
8. Enter Notes if any.
9. Click Save. Source of Funds page appears with the added details.
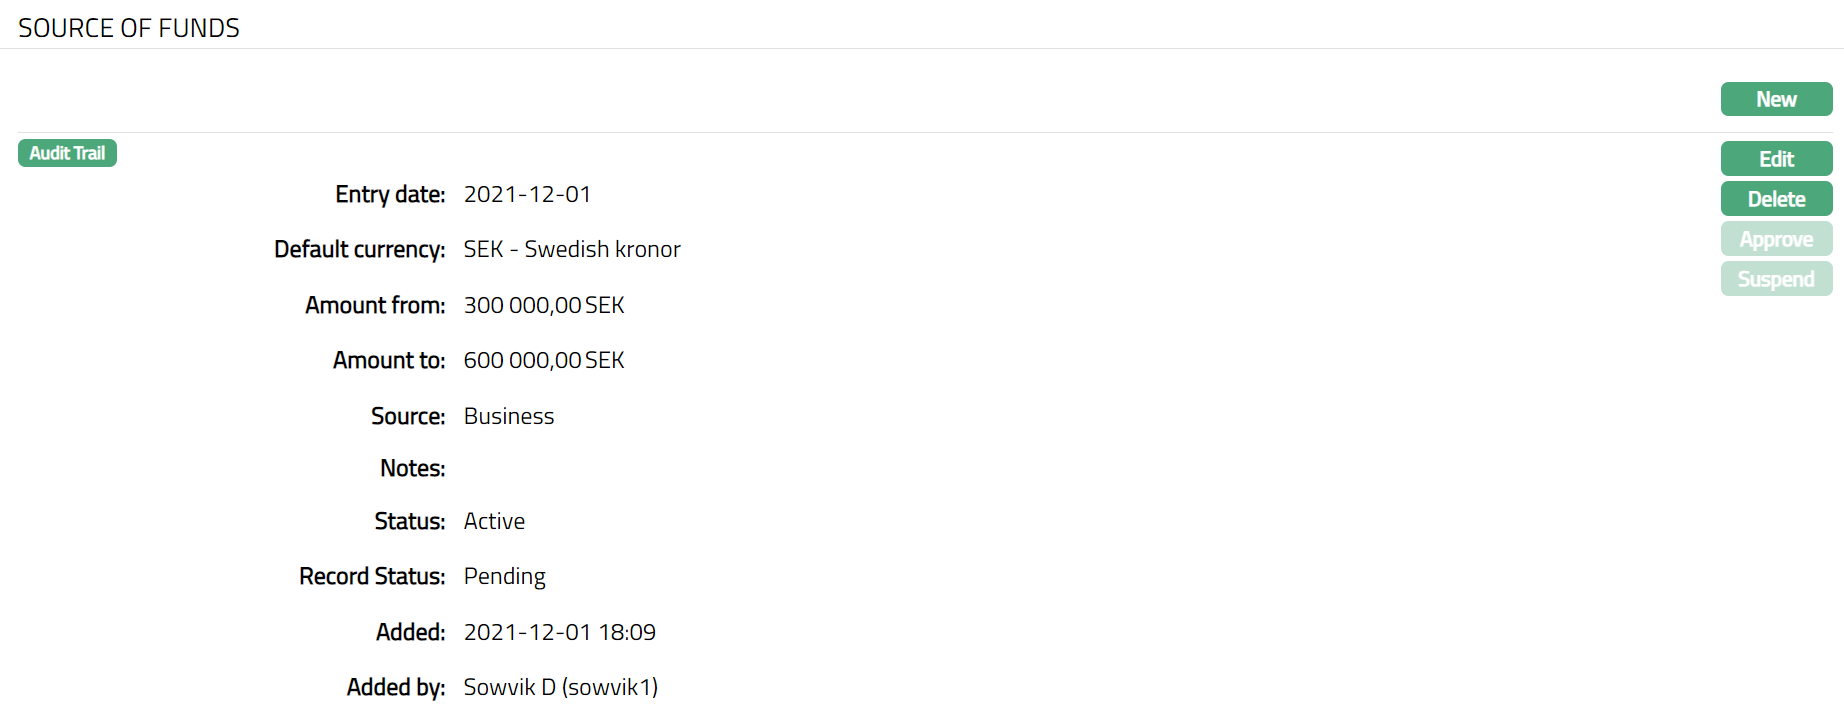
Functions: New, Edit, Delete, Approve, Suspend, Activate
Note: On addition of a new record / edit, the tab Status appears as Pending. Only on Approval by authorized person, the Status becomes Approved
The additional fields that you can view in the Source of Funds screen are explained below:
Status field denotes the status of the record.
Added field denotes the date on which the record was added.
Added by field denotes the name of the user who created the record.
Approved field denotes date on which the record was approved and is displayed only after approval.
Approved by field denotes name of the person who approved the record and is displayed only after approval.
Delete: You can delete Source of Funds record saved in Aura by a click on Delete button. Aura will ask for confirmation, on approving which the selected record will be deleted. Once the record is approved, it cannot be deleted.
Approve: If you want to approve a Source of Funds record, then retrieve the record and click on Approve. Aura will ask for confirmation. Once the tab is approved, status gets changed from Pending to Approved.
Suspend: You can suspend a Source of Funds record by clicking on Suspend button. When you click on Suspend button, Aura will ask for confirmation. On confirmation Aura will suspend the Source of Funds record. Suspended records can be activated by using Activate button.
To edit Source of Funds record,
1. Access Person Due Diligence page and click Source of Funds tab.
2. Click Edit. Edit Source of Funds page appears.
Note: All fields are editable.
3. Make required changes and click Save. Source of Funds page appears with the edited details.
Functions: New, Edit, Delete, Approve, Suspend, Activate
Bank Details
Bank details tab allows you to maintain the bank details of the person.
To add New Bank Details
1. Access Person Due Diligence page and click Bank Details tab.
2. Click Add button. New Bank details page appears.
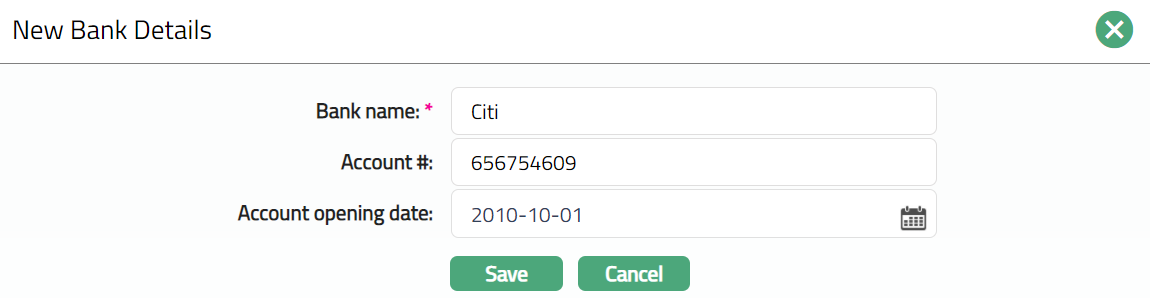
3. Enter Bank name where the person holds the account.
4. Enter Account number of the person in that bank.
5. Enter the date on which the above account was opened in the Account opening date. By default, the date will be the current date. You can change it by clicking on the date picker located to the right and choosing another date OR by manually changing the date in the field itself.
6. Click Save. Bank Details page appears with the added details.

Functions: Add, Edit, Delete
Delete: You can delete Bank Details record saved in Aura by a click on Delete button. Aura will ask for confirmation, on approving which the selected record will be deleted.
To edit the Bank Details record
1. Access Person Due Diligence page and click Bank Details tab.
2. Click Edit. Edit Bank Details page appears.
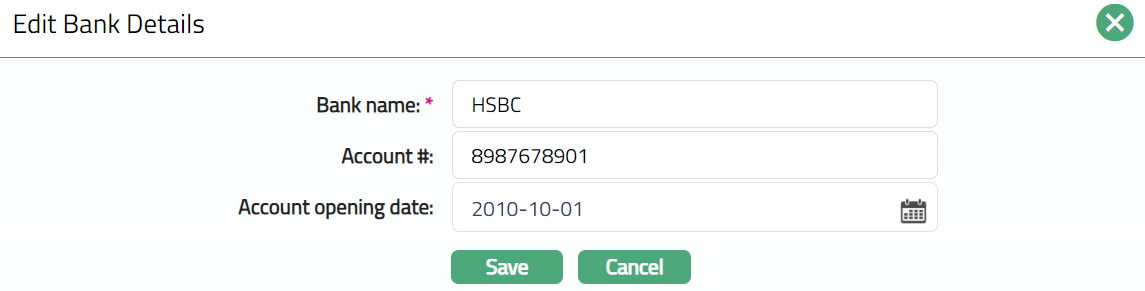
Note: All fields are editable.
3. Make required changes and click Save. Bank Details page appears with the edited details.

Functions: Add, Edit, Delete
Financial Details
Using the Financial Details tab, you can maintain the Financial Details of a Person. The Financial Details are the snapshot of your personal financial position at a specific point of time. It lists the Person's assets (what he/she owns), origin of assets, liabilities (what he/she owes), investments (where he/she invested), regular expenditure, etc.,
To add new Financial Details,
1. Access the Person Due Diligence page and click the Financial Details tab. When a new person record is created, this tab does not display any records by default.

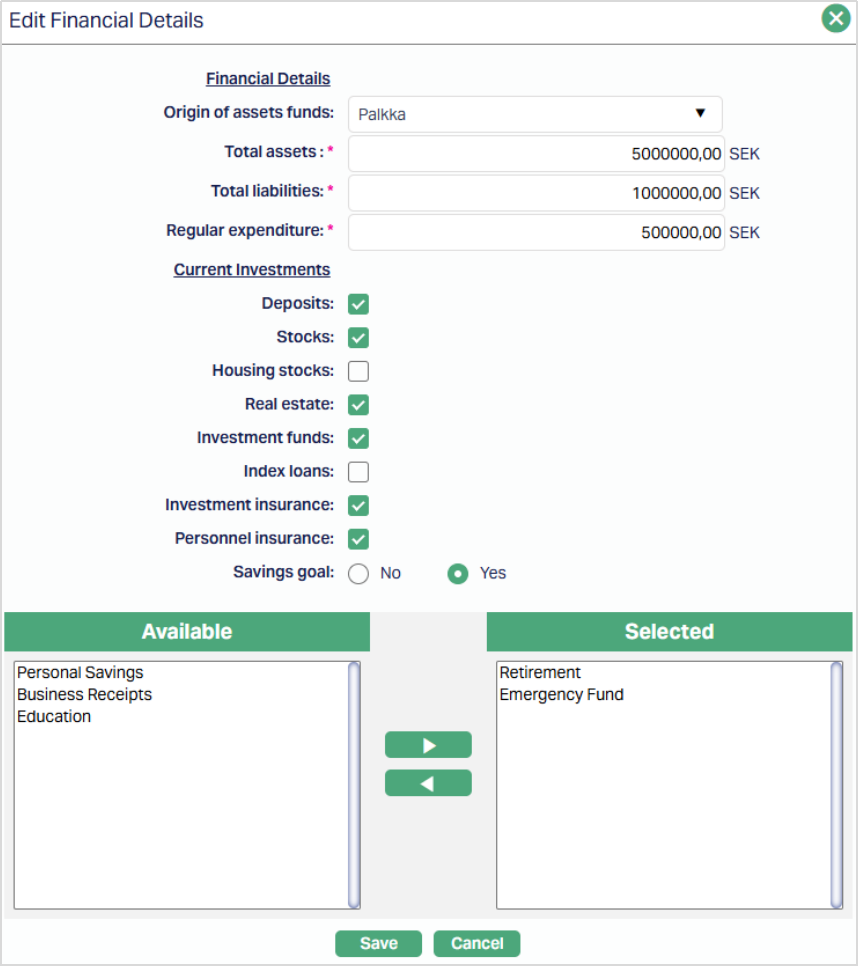
2. Click New. New Financial Details page appears.
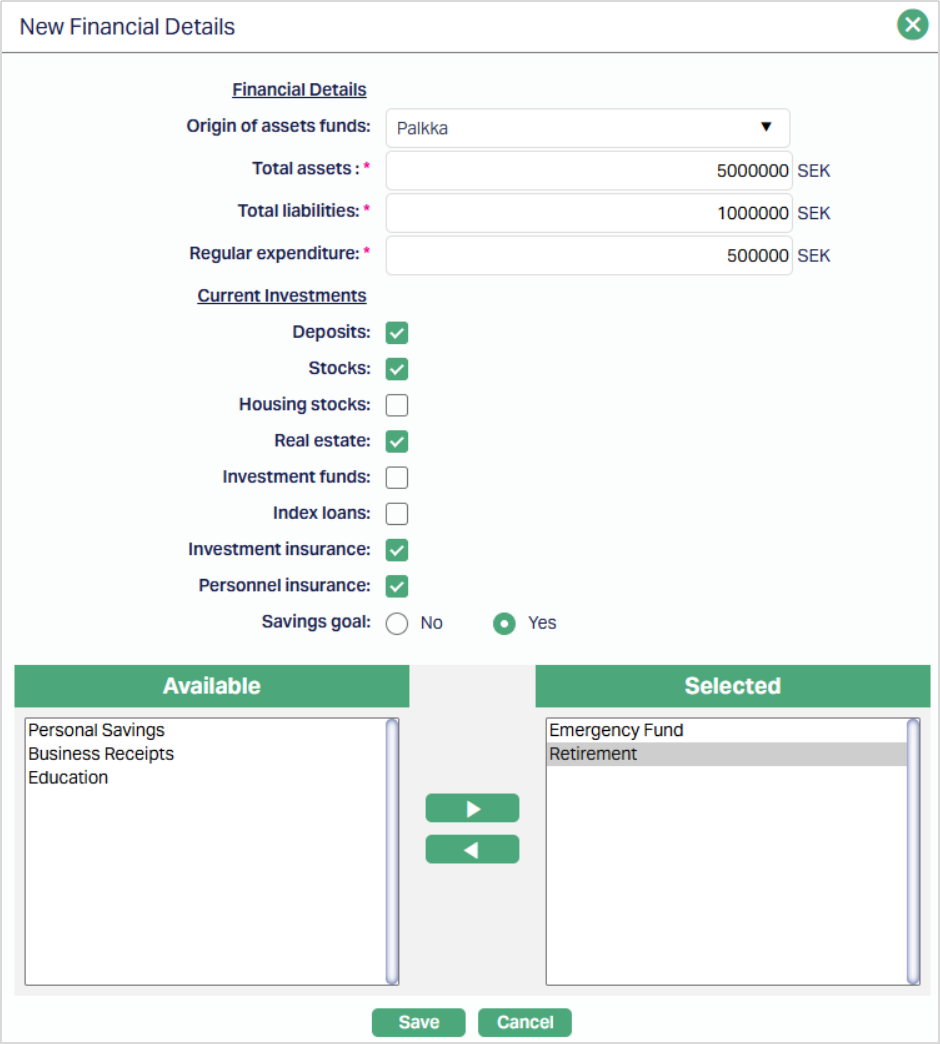
3. Select Origin of Assets Funds from the drop-down list of pre-shipped values.
4. Enter value of Total Assets that the Person owns
5. Enter value of Total Liabilities that the Person owes
6. Enter value of Regular Expenditure
7. Select instruments into which the Person has invested from the mentioned list under Current Investments.
Savings Goal
Savings goal allows you to capture whether the person has specific savings objectives.
8. Select the Savings goal as Yes or No. By default, the value is set to No.
- If you select No - the savings goal values will not be displayed and no further action is required.
- If you select Yes - Aura displays a selection panel to choose the savings goal values. The available values are derived from the list maintained under Admin → System Codes → Generic Definitions → Purpose of Savings.
- Select the required values from the Available list and move them to the Selected list. You can select more than one savings goal as required
The selected savings goals will be stored along with the Financial Details record.
9. Click Save. Financial Details page appears with updated details.
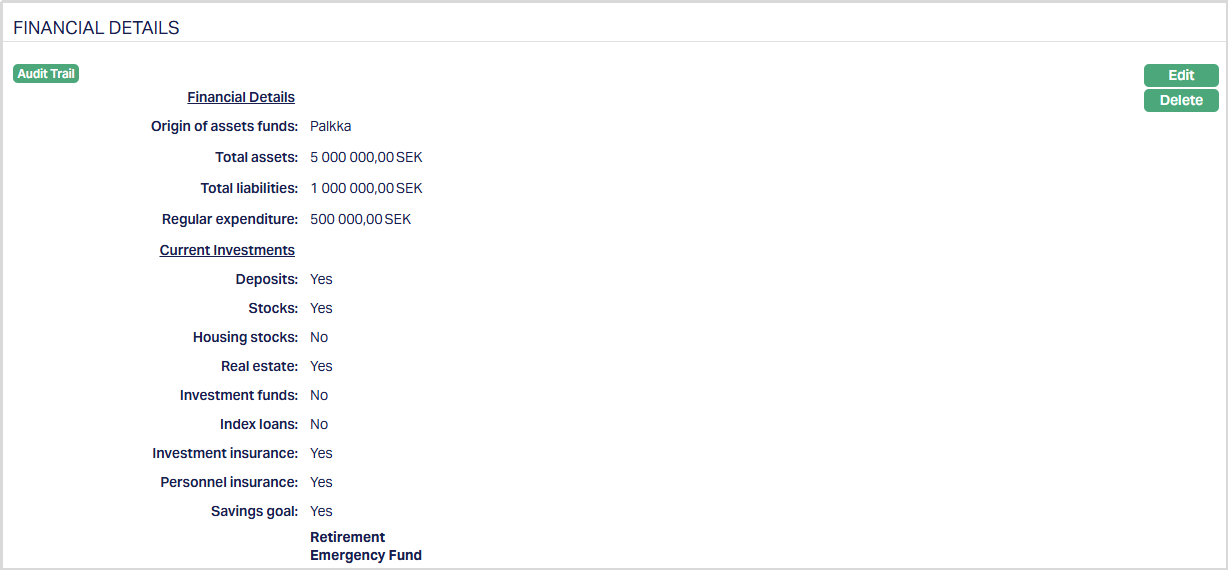
Functions: Edit, Delete
Delete: You can delete the Financial Details record saved in Aura by a click on Delete button. Aura will ask for confirmation, on approving which the selected record will be deleted.
To edit Financial Details record,
1. Access Person Due Diligence page and click Financial Details tab.
2. Click Edit. Edit Financial Details page appears.
Note: All fields are editable.
3. Make required changes and click Save. Financial Details tab appears with the edited details.
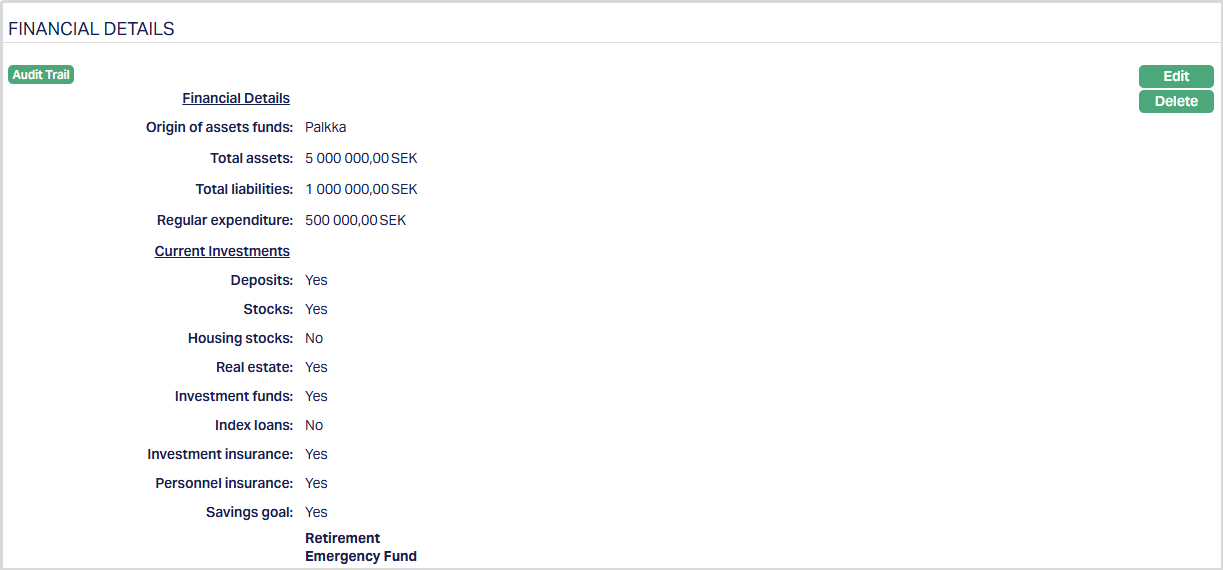
Functions: Edit, Delete
Investment Experience
The Investment Experience tab allows you to capture and evaluate the person’s investment knowledge, experience, and behaviour for Due Diligence and Regulatory classification. This information is used to assess whether the person can be classified as a Sophisticated or Non-Sophisticated investor and to maintain periodic assessment records.
The tab contains two sub-tabs:
- Details
- Assessment
You can use these sub-tabs to record the investment profile of the person and maintain the assessment history.
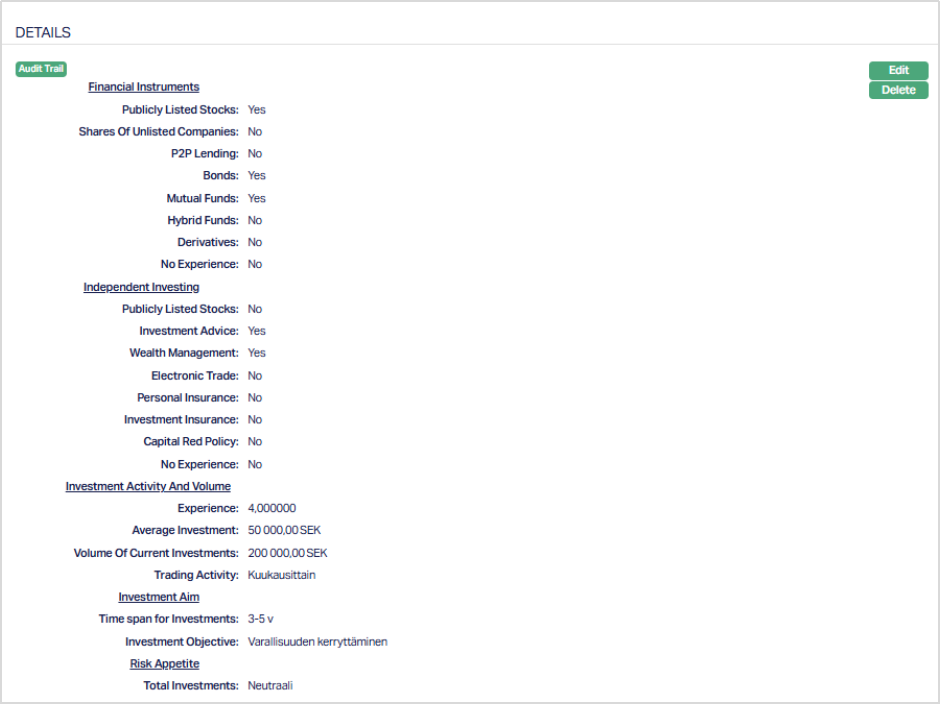
Details
The Details sub-tab allows you to capture the person’s overall investment profile. This includes the types of financial instruments handled, investment behaviour, experience level, and risk appetite. The information maintained here forms the basis for evaluating the person’s investment knowledge and supports the classification recorded in the Assessment sub-tab.
To add Investment Experience details,
1. Access the Person Due Diligence page and click the Investment Experience tab, select the Details sub-tab which is the default tab. When a new person record is created, this tab does not display any records by default.

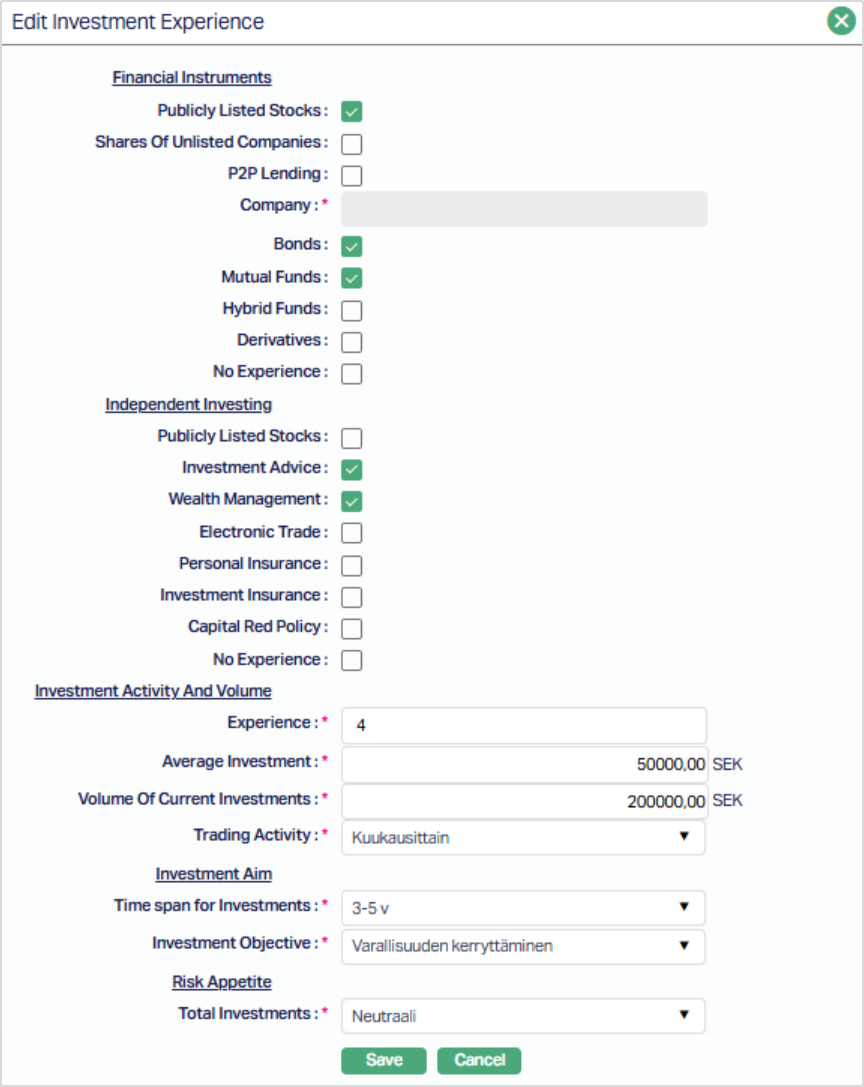
2. Click New. The New Investment Experience page appears.
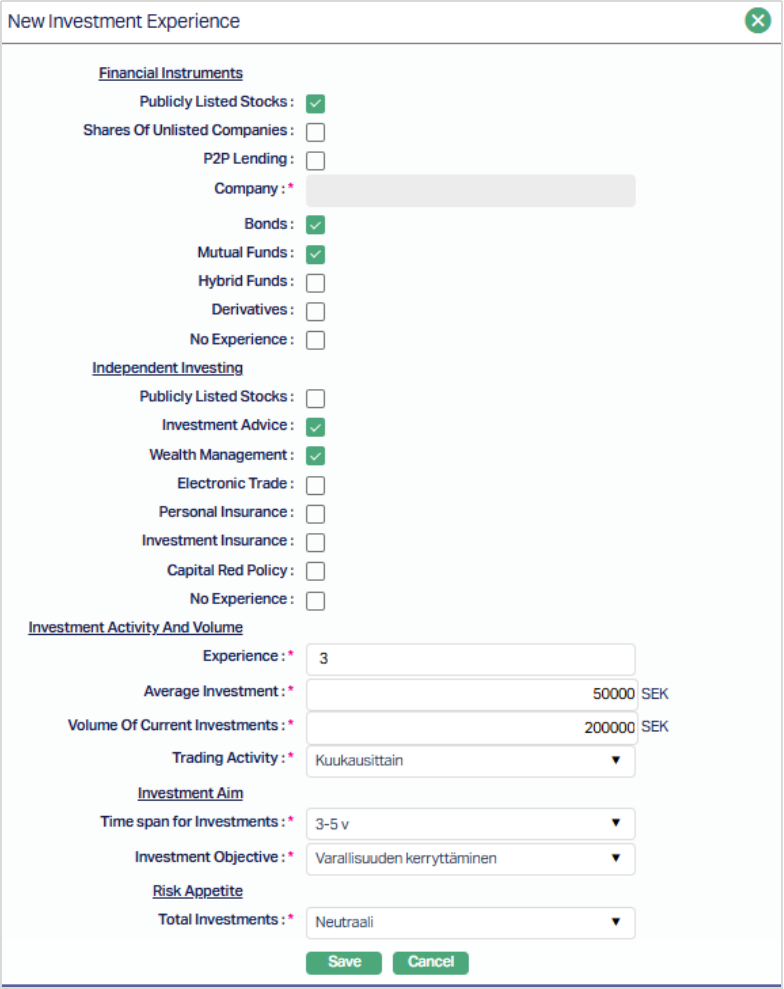
3. Under Financial Instruments - Select the types of instruments in which the person has prior or current investment experience. This provides an indication of the person’s exposure to different investment products.
4. Under Independent Investing - Select the applicable options that describe how the person manages or participates in investment activities, such as whether investments are self-directed or managed through advisory services.
5. Under Investment Activity and Volume, enter the required information:
- Experience - Enter the number of years or duration of the person’s investment experience.
- Average Investment - Enter the typical investment amount made by the person.
- Volume of Current Investments - Enter the approximate total value of current investments held by the person.
- Trading Activity - Select how frequently the person undertakes investment or trading activity.
6. Under Investment aim, enter the required information:
- Time Span for Investments - Select the typical investment horizon followed by the person.
- Investment Objective - Select the primary objective of the person’s investments, such as wealth accumulation or savings.
7. Under Risk Appetite, enter the required information:
- Total Investments - Select the appropriate range representing the person’s overall investment holdings.
All mandatory fields must be completed.
8. Click Save. The Details sub-tab appears with the added details.

Functions: Edit, Delete.
To edit,
1. Click Edit. Edit Investment Experience page appears.
Note: All fields are editable.
2. Make the required changes and click Save. The Details sub-tab appears with the edited details.
Functions: Edit, Delete.
Assessment
The Assessment sub-tab allows you to evaluate the person’s investment knowledge and classify the person as a Sophisticated or Non-Sophisticated investor. This classification is used for regulatory, compliance, and suitability purposes and must be periodically reviewed.
Multiple assessment records can be maintained over time to track changes in the person's investment experience and classification.
To add assessment details,
1. Access the Person Due Diligence page and click the Investment Experience tab and select the Assessment sub-tab. When a new person record is created, this tab does not display any records by default.

2. Click New. The New Assessment page appears.
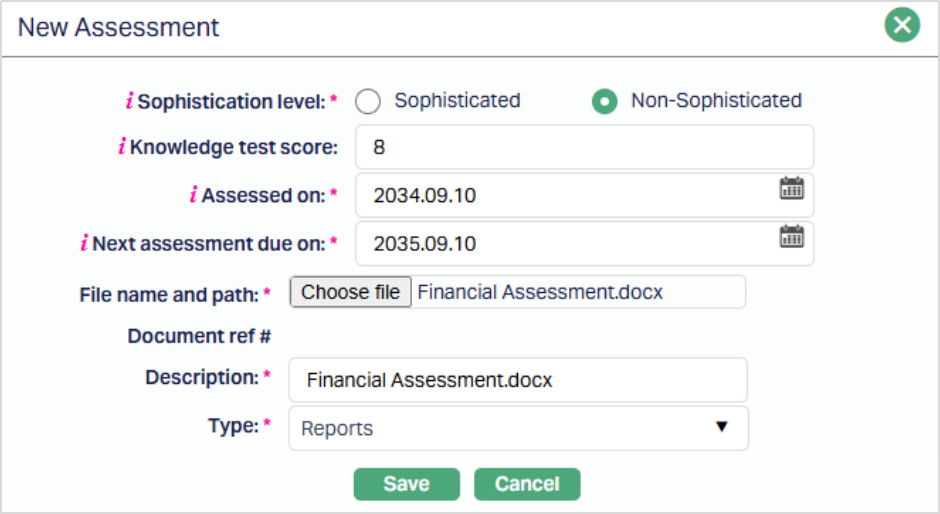
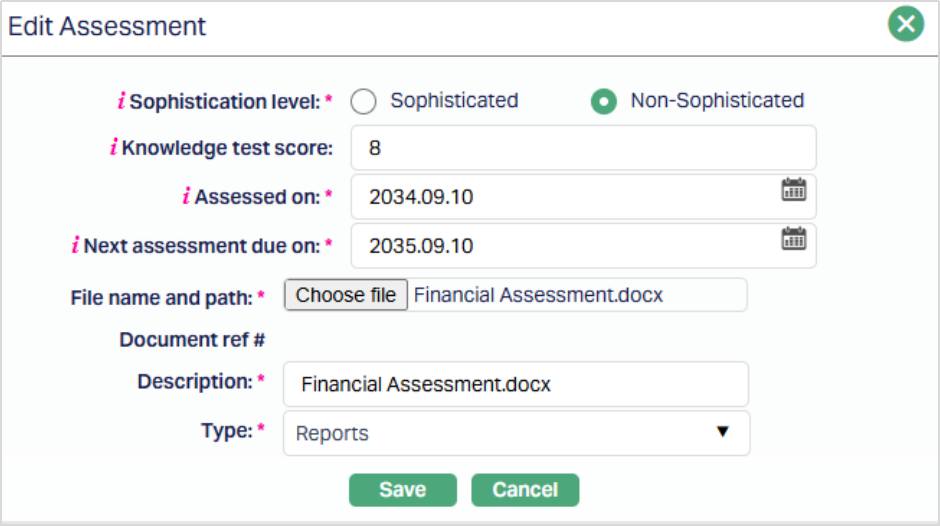
3. Sophistication Level - Select whether the person is classified as:
- Sophisticated
- Non-Sophisticated (Default)
This classification indicates whether the person has sufficient knowledge and experience to evaluate investment risks independently.
4. Knowledge Test Score - Enter the score obtained by the person in any knowledge or suitability test conducted. This field is optional and may be used to support the classification decision.
5. Assessed On - Enter the date on which the investment experience evaluation was performed. By default, the current date is displayed and can be changed to a past date if required.
6. Next assessment due on - Enter the date on which the next evaluation must be carried out. If Sophistication level is selected as:
- Sophisticated - The next assessment due date defaults to two years from the Assessed on date.
- Non-Sophisticated - The next assessment due date may default from the Due for Review On date maintained under the Verification tab. You can modify this date if required.
The next assessment due date must be the same as or later than the Assessed on date.
7. File name and path - You can upload a supporting document related to the assessment, such as evaluation forms or declaration. Description and Document type must be provided.
8. Click Save. The Assessment sub-tab appears with the added details.
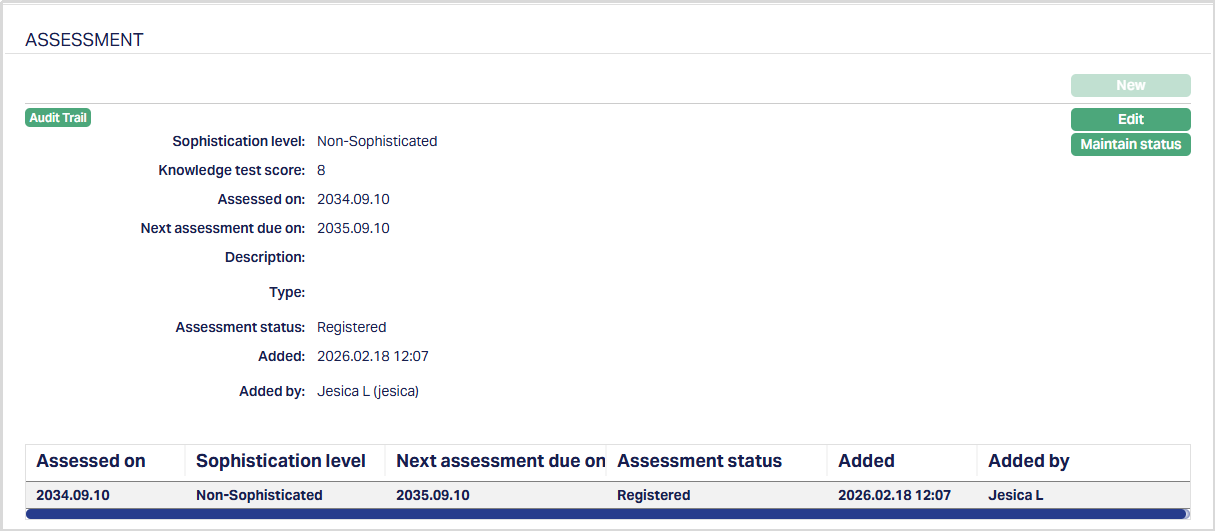
Functions: New, Edit, Maintain Status.
Over time, additional assessment records can be added to maintain the history of classification and reviews.
New: The New button allows you to create a new assessment record for the person. When no assessment record exists, the New button is enabled for all users. After an assessment record is created, the New button will be enabled only when the previous assessment record has been completed with a final status - Accepted or Rejected. This ensures that multiple active assessment records are not maintained simultaneously.
To edit an Assessment,
1. Click Edit. The Edit Assessment page appears.
Note: All fields are available.
2. Make the required changes and click Save. The Assessment sub-tab appears with the edited details.

Functions: New, Edit, Maintain Status.
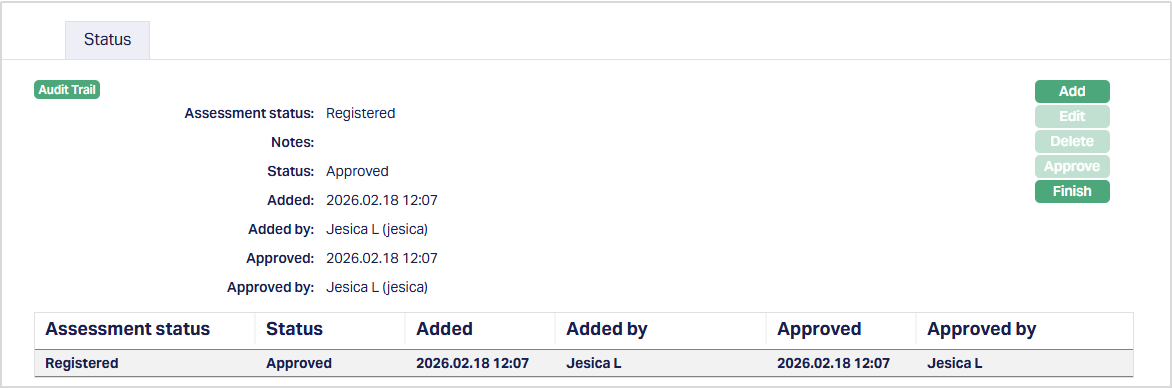
Maintain Assessment Status Aura allows you to record whether the assessment has been accepted or rejected through the status maintenance tab.
To update the assessment status,
1. Access the Assessment sub-tab and select the required record. Click Maintain Status and the Status tab appears.
2. Click Add. The Add Status page appears.
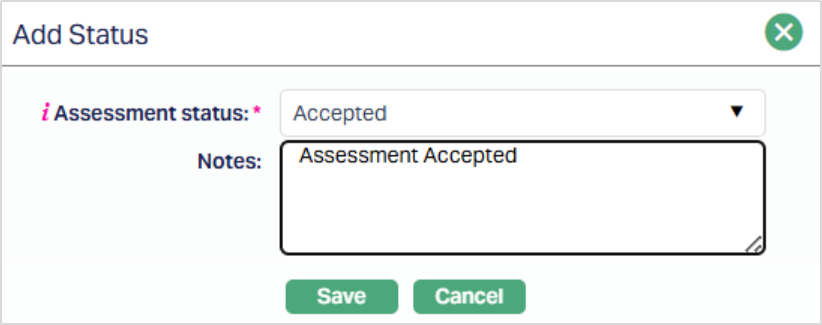
3. Select the Assessment Status from the drop-down. This will either be - Accepted or Rejected.
4. Enter the reason in the Notes field.
5. Click Save. The Status tab appears with the updated status.
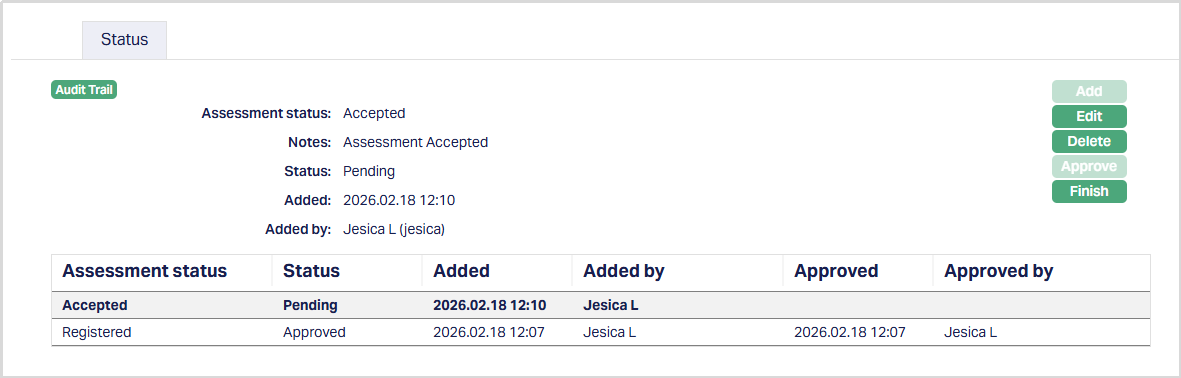
Status of the record is Pending till it is approved by another user. On approval, the tab status is set to Approved and the Assessment status is changed from Registered to Accepted.
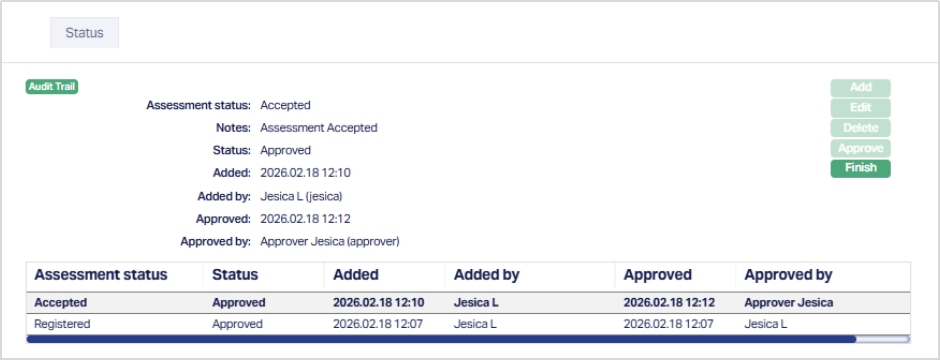
Functions: Add, Edit, Delete, Approve, Finish.
The additional fields that are shown are:
- Status indicates the current state of the record. It will be either: Pending - If the record is waiting for approval or Approved - If the record has been reviewed and finalized.
- Added shows the date and timestamp when the record was created and Added by displays the user ID and full name of the person who created the record.
- Approved shows the date and time when the record was approved and Approved by displays the user ID and full name of the person who approved the record.
Document
The Document tab allows you to upload documents related to the person. These can be in the form of scanned images or files on your computer. You can categorise the documents as per Document Type and store with a document reference number. You can also view the documents that were uploaded using this tab or from Person Maintenance → Documents tab.
To add New Document,
1. Access Person Due Diligence page and click Document tab.
2. Click New button. New Document page appears.
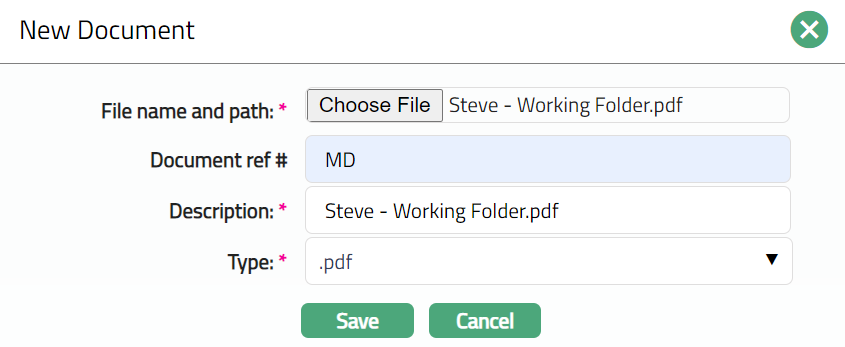
3. Click Choose File button to select File name and path of the document.
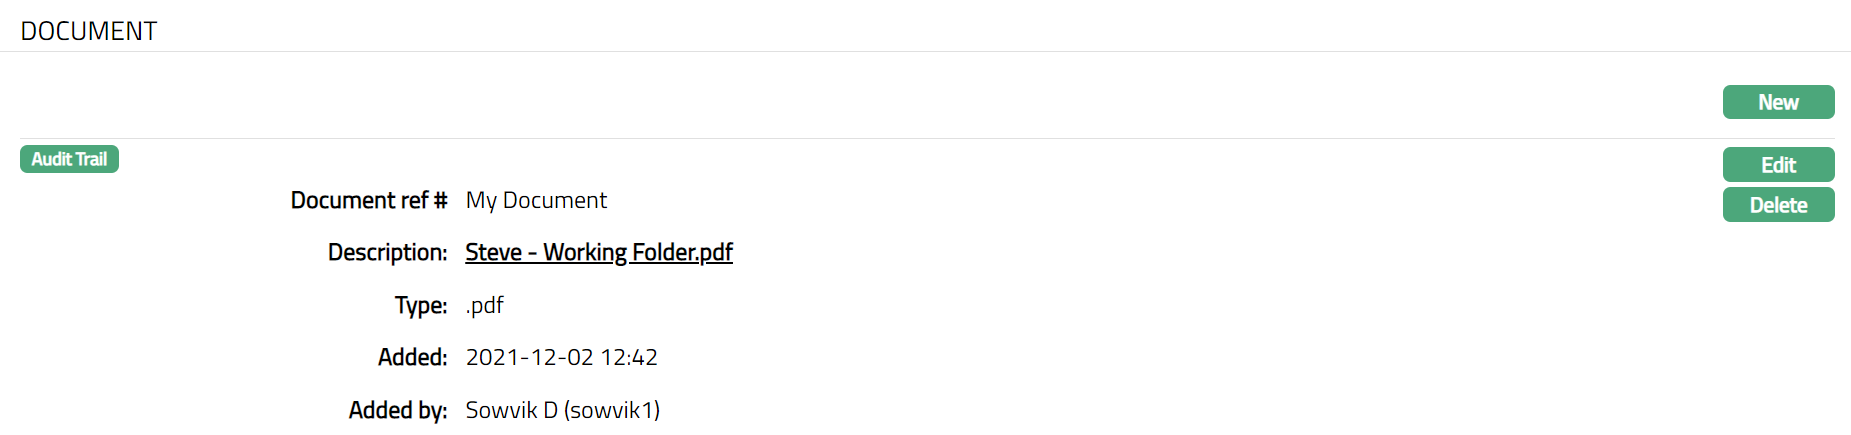
4. Enter Document ref # for the document.
5. Description field denotes the uploaded document with a Hyperlink. To view the document, you need to click on the Hyperlink.
6. Select Type of the Document uploaded from the list of Document types maintained under Admin → Documents → Document type. Once entered, this cannot be edited.
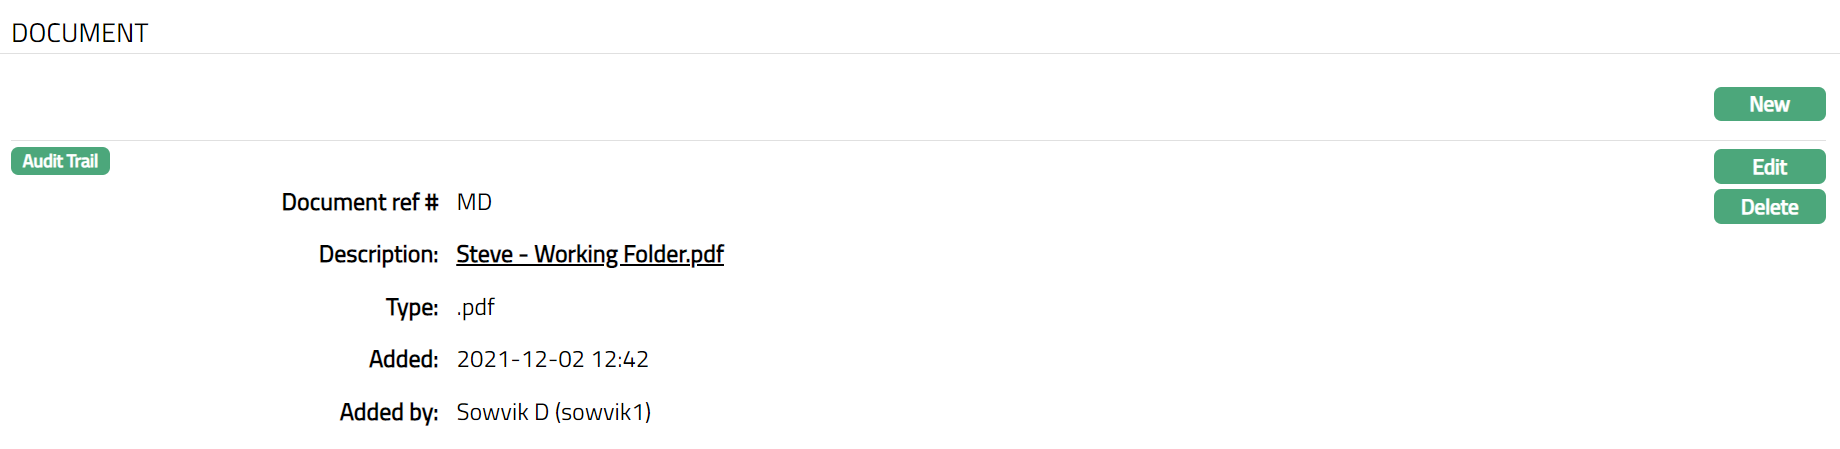
7. Click Save. Document page appears displaying the added details.
Functions: New, Edit, Delete
The following are the additional fields that are displayed:
Added field denotes the date on which the record was added.
Added by field denotes the name of the user who created the record.
Delete: You can delete a Document record saved in Aura by a click on Delete button. Aura will ask for confirmation, on approving which the selected record will be deleted.
To edit Document record,
1. Access Person Due Diligence page and click Document tab.
2. Click Edit. Edit Document page appears.
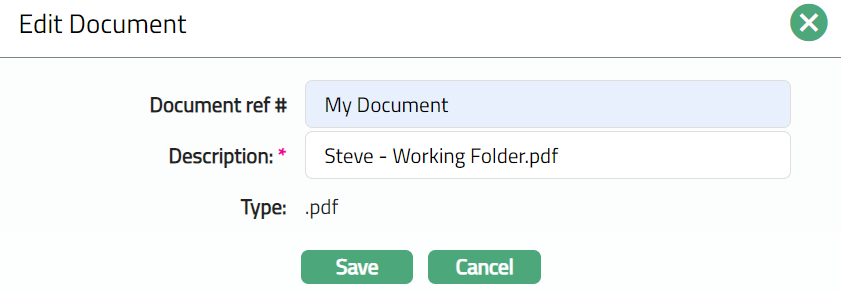
Note: Except Type field, rest all other fields are editable.
3. Make required changes and click Save. Document page appears with the edited details.
 Functions: New, Edit, Delete.
Verification
Verification tab allows you to verify the activities of the person like whether the person is politically exposed and whether the AML check is required for the person.
To add Verification,
1. Access Person Due Diligence page and click Verification tab.
2. Click Add. Add Verification page appears.
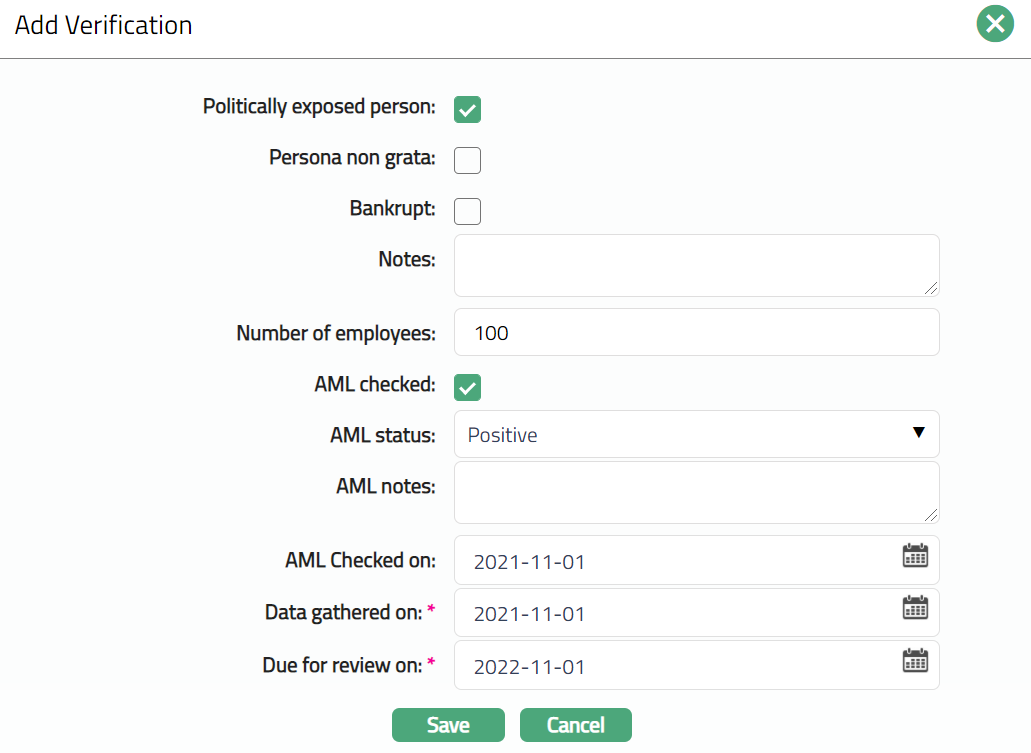
3. Check Politically exposed person check box if the person is politically exposed.
4. Check Persona non grata if the person has been declared as such.
5. Check Bankrupt check box if the person is declared insolvent.
6. Enter Notes, if any, for the Verification.
7. Check AML checked check box if the Anti Money Laundering (AML) check is done for the person.
8. Select AML status, whether the AML check is Positive or Negative, from the drop down. This field will be enabled only when the AML checked field is checked for the person.
9. Enter AML notes as needed.
10. Enter AML checked on date. This is the date on which the AML check was done.
11.Enter Data gathered on date. This is the date on which you received the Due Diligence data for this Person.
12. Enter Due for review on Date. This is the date on which you would like to review the Due diligence data for this Person.
13. Click Save. Verification page appears displaying the added details.
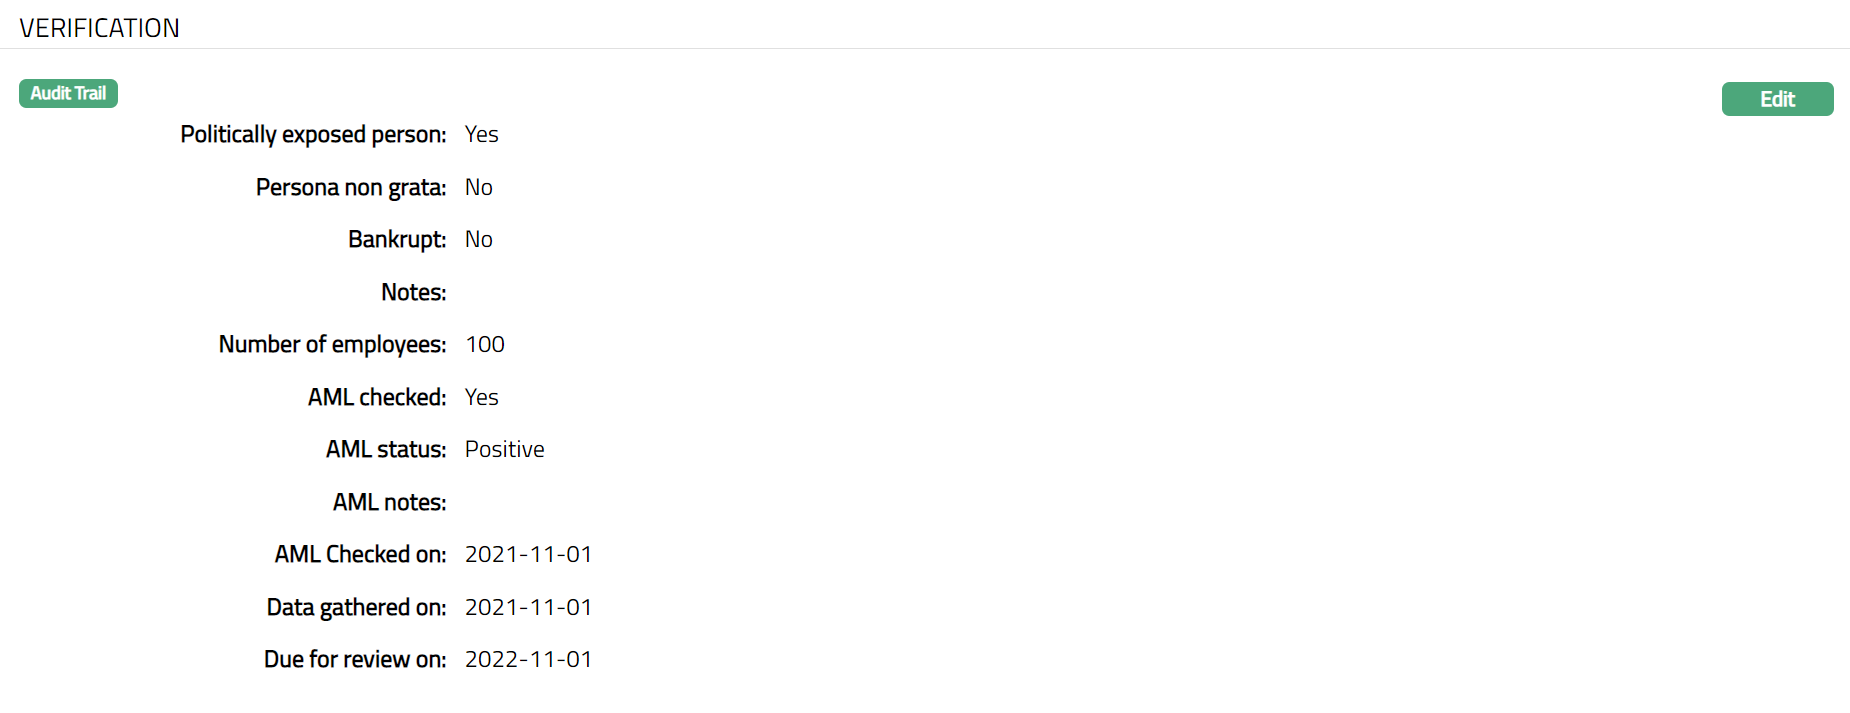
Functions: Edit
To edit Verification record,
1. Access Person Due Diligence page and click Verification tab.
2. Click Edit. Edit Verification page appears.

Note: All fields are editable.
3. Make required changes and click Save. Verification page appears with the edited details.

Functions: Edit
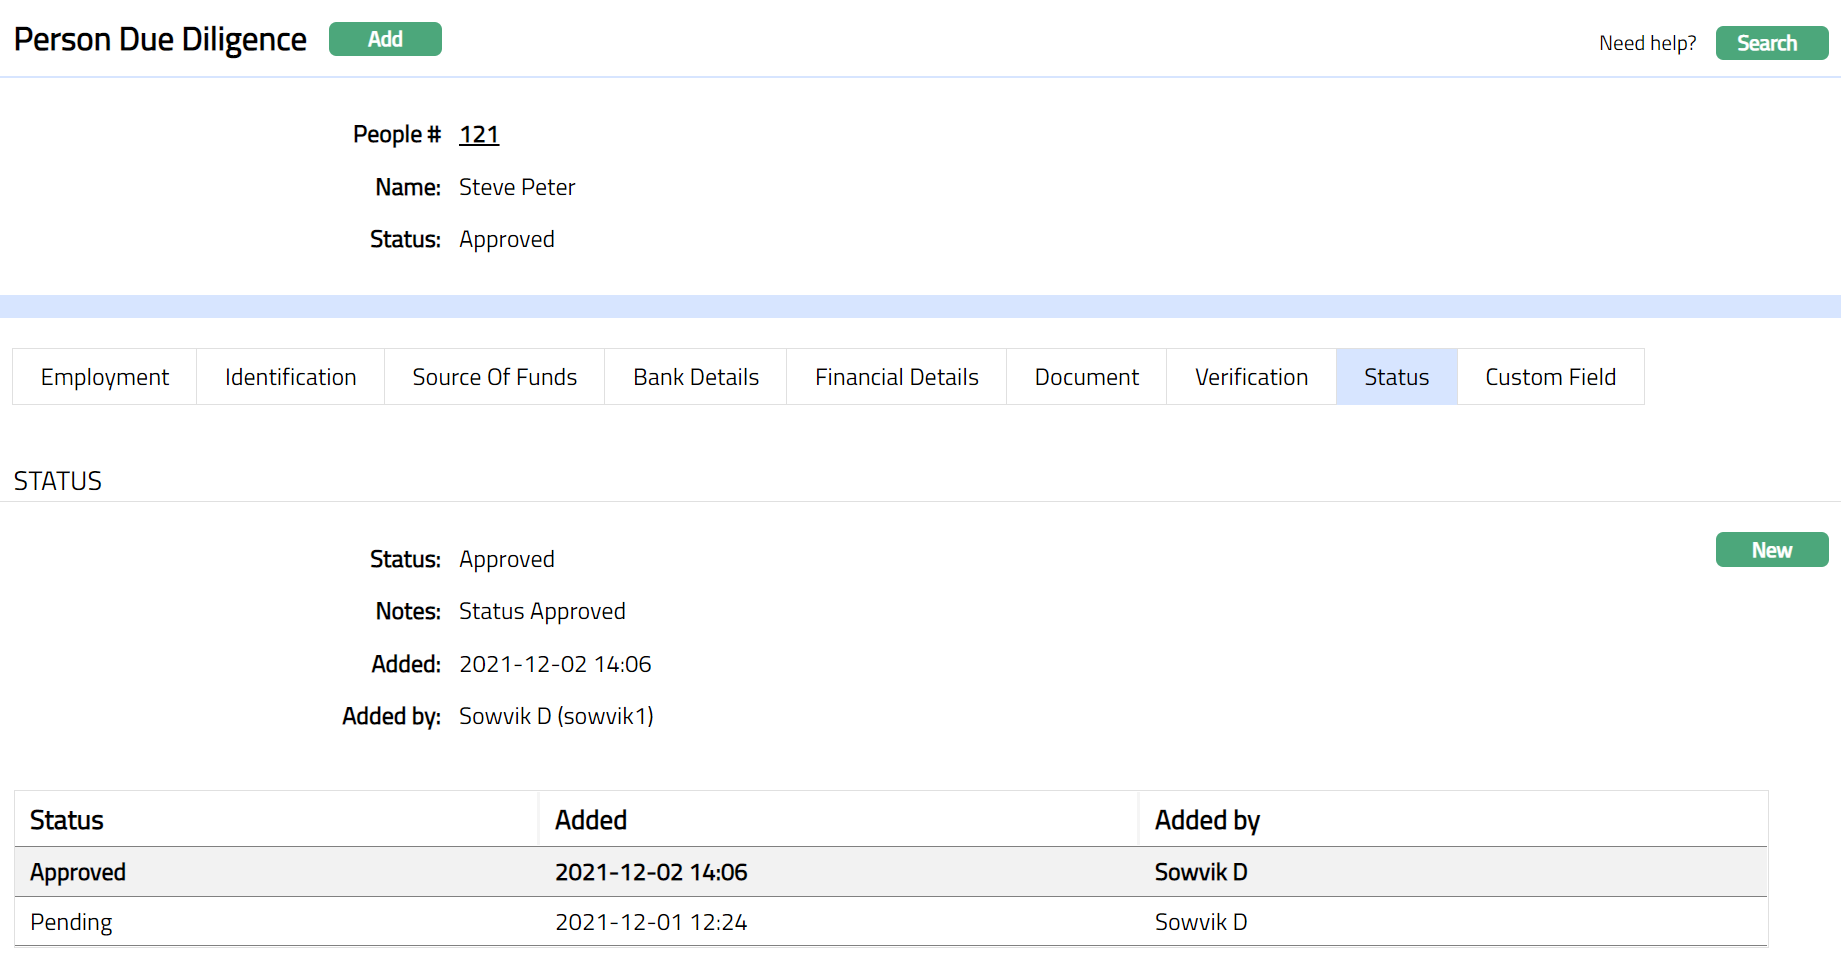
Status
Status tab shows the due diligence status of the Person. By default, the due diligence status of a person is Pending which needs to be Approved.
To add New Status,
1. Access Person Due Diligence page and click Status tab.
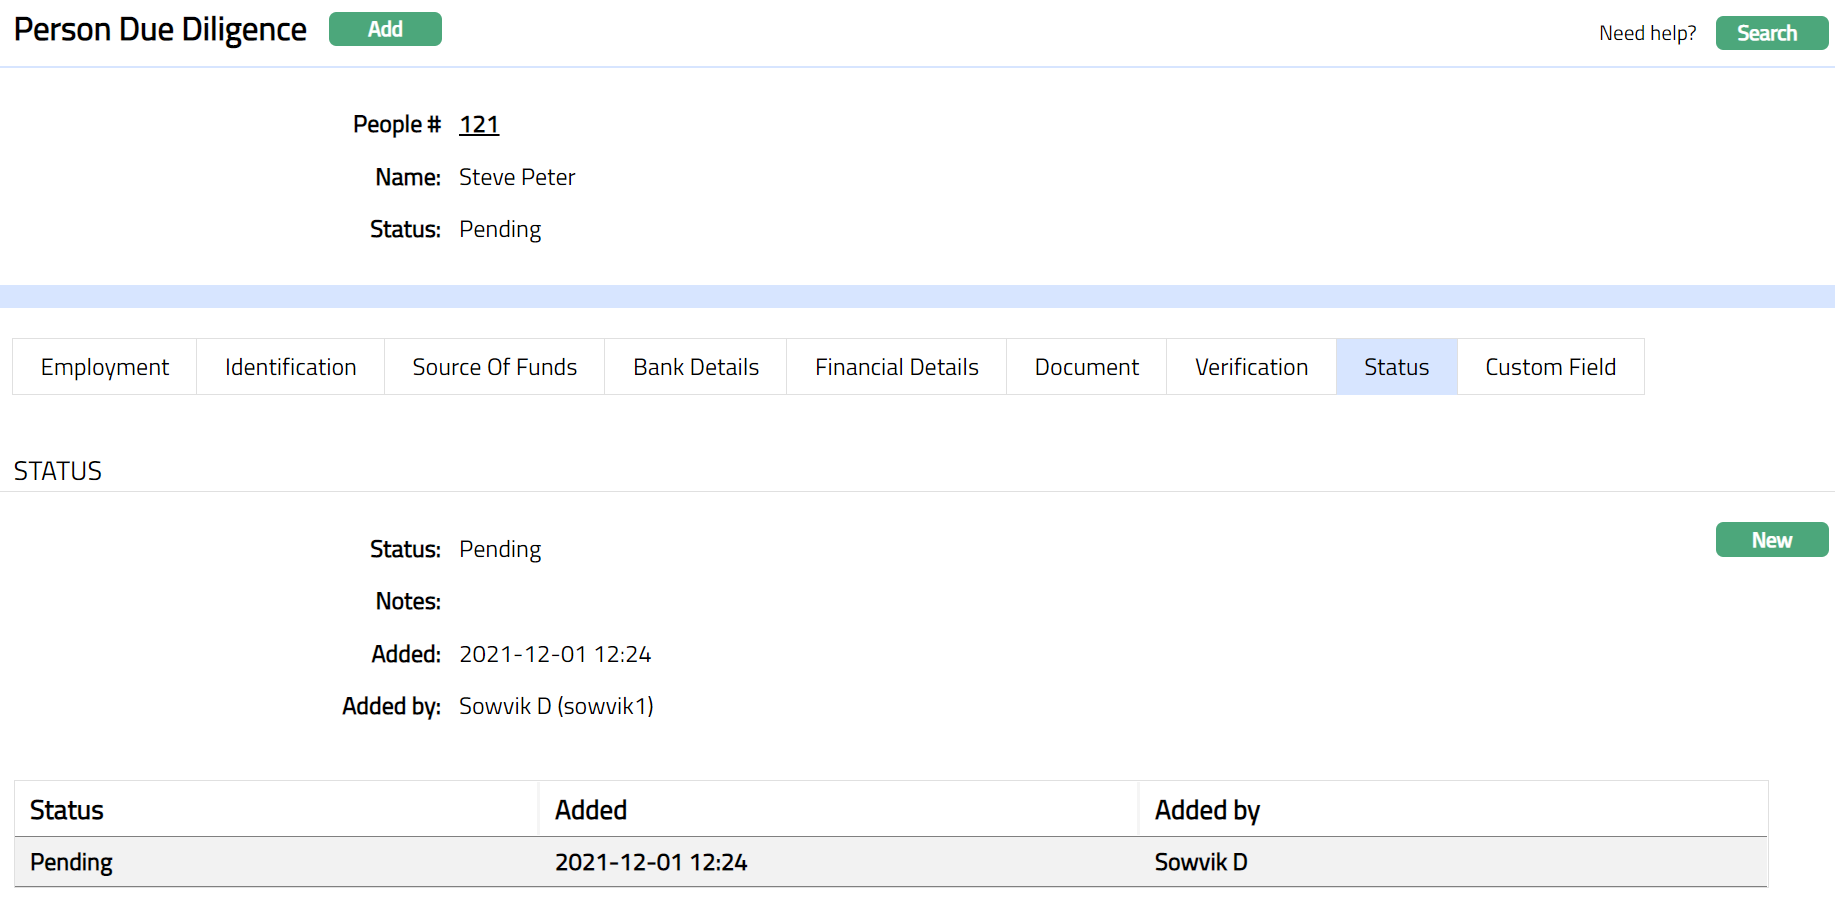
2. Click New. New Status page appears.

3. Initially Status field will be Pending. If you have completed the due diligence exercise and find it to be satisfactory, you can change the status of due diligence for the Person to Approved. To do so, you need to ensure that the Data Gathered On and Data Reviewed On dates are input in Due Diligence → Person → Verification tab
4. Enter Notes for the status selected.
Note: Once the status is Approved, if you make any further changes, then the status has to be updated to Changed, After Approval. The changes may be approved by updating the status to Approved as described above.
5. Enter Notes, if any for the status selected.
6. Click Save to save the changes that you entered.
Functions: New
The additional fields that you can view in the Status screen are explained below:
Status field denotes the status of the record.
Added field denotes the date on which the record was added.
Added by field denotes the name of the user who created the record.
Multiple Citizenships
The Multiple Citizenship tab allows you to maintain additional citizenships of a person for KYC and regulatory requirements. In addition to the primary citizenship maintained in the person profile, you can record and manage multiple citizenships linked to the person using this tab.
To add multiple citizenships,
1. Access the Person Due Diligence screen and click the Multiple Citizenships tab. When a new person record is created, this tab does not display any records by default.

2. Click Add. Add Multiple Citizenships page appears. .

3. Select the citizenship country from the Citizen drop-down list. The drop-down displays the list of countries maintained under Admin → System Codes → Countries. Note the following restrictions when selecting the country:
- The primary citizenship maintained in the person profile is not displayed in the drop-down list.
- Countries already added in the Multiple Citizenships tabs are not displayed again.
- Only valid countries maintained in Aura can be selected.
4. Click Save. Multiple Citizenships page appears with the added record.
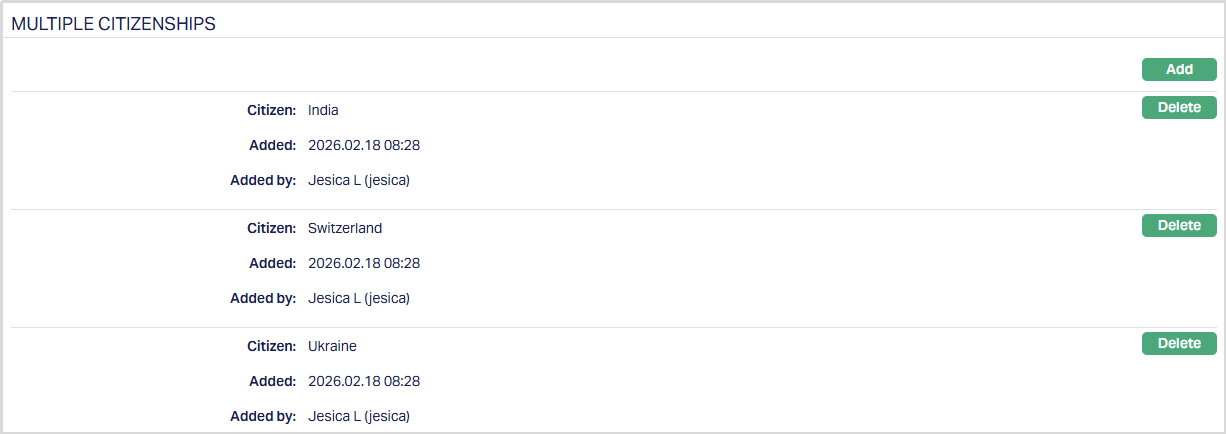
Functions: Add, Delete.
Add: You can add multiple citizenship records by repeating the above steps. Delete: Click Delete against the required citizenship record. Aura will display a validation message Yes/No and then remove the selected citizenship from the list. Once deleted, the country becomes available again in the drop-down list while adding new citizenships.
Validation Rules Aura applies the following validations when maintaining multiple citizenships:
- A primary citizenship must be maintained in the person profile before adding multiple citizenships. If you attempt to add a citizenship without maintaining the primary citizenship, Aura displays a validation message prompting you to add the primary citizenship in the profile.
- Duplicate citizenship countries are not allowed. A country that is already maintained either as primary citizenship or as an additional citizenship cannot be selected again.
Custom Field
This option provides you the flexibility to define fields apart from those that are already available in the standard version of Aura. Thus, it enables you to customize additional data storage and use as required to suit your specific business needs.
Using Custom Field tab, you can maintain the custom fields mapped to the Person. Depending on the custom fields created and mapped to Person using Admin → System Codes → Custom Fields, the fields will be displayed on this tab.
To edit Custom field,
1. Access Person Due Diligence page and click Custom Field tab.

2. Click Edit. Edit Custom Field page appears.

3. Enter details as required and click Save. Custom field page appears with the edited details.

Functions: Edit