Term Deposit
Product menu allows you to maintain the details of Term deposit products that are offered by your bank to its customers. Once the product is created, the values in these products are defaulted to the Term Deposit Accounts that are created under the Product, with an option to change the details at the account level.
The following are the tabs in a Term Deposit Product:
PROFILE
- Profile
- Currency
- Settings
- Availability
- Statement Parameter
- Document Template Settings
- Restrictions
- Reward Group
PRICING
REPAYMENT
ACCOUNTING
CUSTOM FIELD
Adding a Term Deposit Product
To add a new Term Deposit Product
1. From Retail menu, click Setting, and then Product. The Product Search page appears. All Products available in Aura appear on the page.

2. Click Add. The New Product → Profile (1/8) page appears.
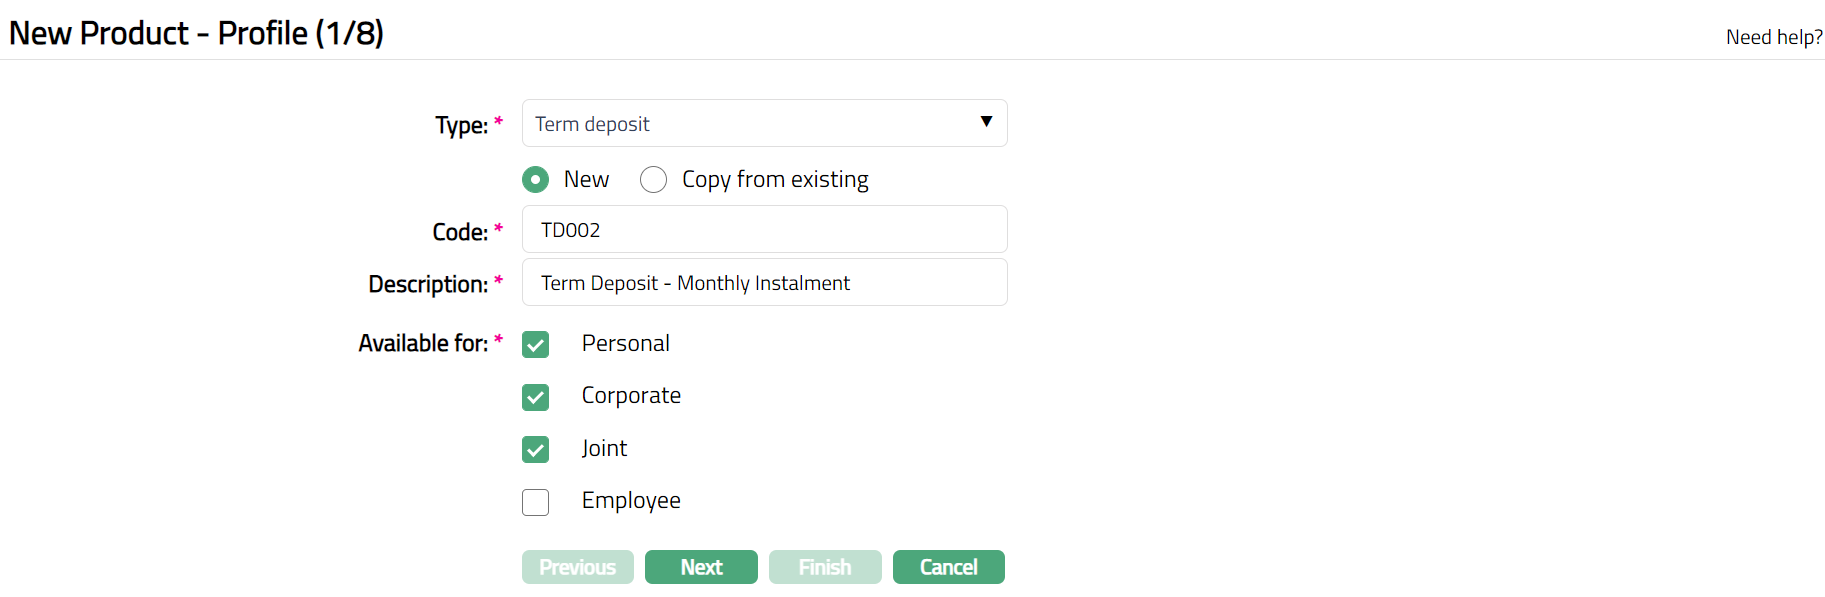
3. Select Term Deposit as the Type from the drop-down list for the Product.
4. Aura allows you to create a new term deposit product or create a term deposit product based on the existing term deposit products in the Aura.
To create a new product, select New.
If you want to create a loan product based on the properties of an existing term deposit product, then select Copy from existing.
5. On selection of Copy from Existing, copy from drop-down list is displayed with the list of all the products of selected product Type.
6. Enter Code for the product. This has to be unique for the entity.
7. Enter Description for the product.
8. Select option for Available for field. This will determine the type of clients to which the product will be available. You can choose from:
Personal -- Single person
Corporate -- Organization
Joint ownership -- Group of two or more persons
Employee -- Employee of the Bank.
Thus, if you want the Product to be available only for Corporate, check only on the corporate checkbox.
Note:
Employee and Joint ownership checkboxes will be enabled only when you select Personal.
If the Joint client type option is Allowed at Admin → Entity → Maintain, only then Joint checkbox is enabled.
9. Click Next. The New Product → Currency (2/8) page appears.

10.Select Currency for the Product from the drop-down list of GL Currencies. More currencies can be added during Edit using the Currency tab, once the Product record is created. Accounts for the product can be opened only in the selected currencies.
11.Enter Minimum amount that can be deposited for opening a Term Deposit account under this product.
12.Enter Maximum amount that can be deposited for opening a Term Deposit account under this product.
13.Click Next. The New Product → Settings (3/8) page appears.
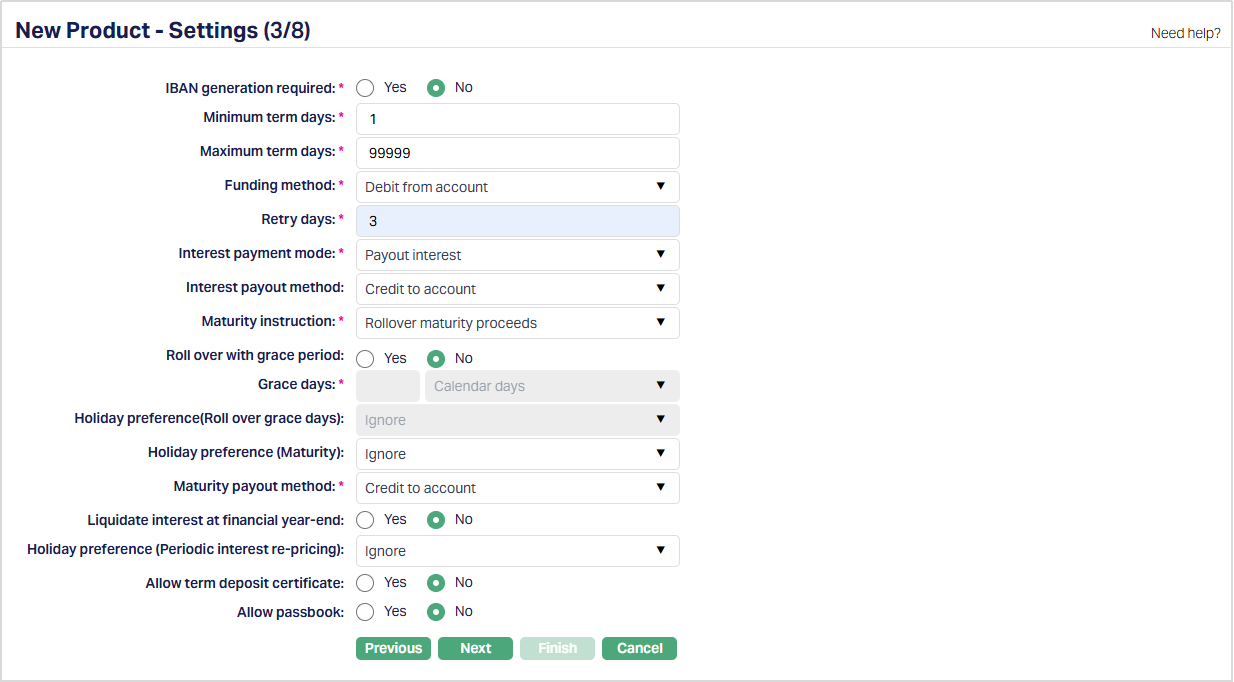
14. Click Yes or No radio button for IBAN generation required for New Product. During Account creation under the Product, if this has been selected as Yes, Aura will automatically create IBAN according to the IBAN format maintained at the Entity level.
15. Enter minimum number of days for which a term deposit account has to be maintained in Minimum term days.
16. Enter maximum number of days for which a term deposit account can be maintained in Maximum term days.
17. Select the Funding method from the drop-down list. This denotes the method in which the amount is to be transferred for opening term deposit. The following are the options available in Aura:
- Debit from account
- Transfer from other bank
- Cash
- Cheque
- Manager's Cheque
The funding options are displayed based on the value date entered:
If you enter a past date as the value date you will see only the option Debit from account. Aura will allow you to post back dated transaction for previous year only if the accounting period for the previous year is open.
If you enter the current business date as value date you will see all the above options.
If you enter a future date as the value date you will see the options Debit from account and Transfer from other bank.
This field can not be edited once it is created.
18. Retry Days specifies the default number of days for which Aura will retry funding of the Term Deposit amount using the Debit From Account funding method and sufficient balance is not available during creation.
This field is applicable only when the funding method for the product allows Debit From Account.
The value maintained here is defaulted to the Term Deposit account during account opening and can be modified at the account level while the account is in Pending status.
- During End-of-Day (EOD) processing, Aura retries debiting the funding amount from the specified account based on the number of Retry Days defined. If funding is successful within the retry period, the Term Deposit is activated.
- If funding is not successful within the specified retry period, the Term Deposit account will be automatically closed.
- If Retry Days is maintained as 0, Aura will not perform any retry attempts after the initial debit attempt and the Term Deposit will be closed if funding fails.
Allowed range: 0 - 30 days.
19. Select Interest payment mode from the drop-down, available options are:
Payout Interest: If it is simple interest to be paid out and not to be compounded, select Payout Interest. In this case interest will be paid into the Client account based on Interest liquidation frequency.
Compound Interest: For interest that is to be compounded, select Compound interest. In this case, the interest is liquidated to the term deposit account based on the interest liquidation frequency. On maturity customer receives Principal + Interest amount.
20. The interest accrual and interest liquidation will depend on the Frequency maintained under Interest payable tab.If you have chosen Payout interest in interest payment option, Interest Payout method drop-down is enabled. This field cannot be edited once the term deposit account is created. Available options are:
- Credit to account: Choose this option if the interest has to be credited to an account in your bank.
- Transfer to other bank: Choose this option if the interest has to be transferred to an account in another bank.
- Cash: Choose this option if the interest has to be paid in Cash.
- Manager’s Cheque: Choose this option if the interest has to be issued through a Manager’s Cheque.
21. Select Maturity instruction i.e. the action that should be taken on the term deposit attaining maturity. The available options are:
- Do not rollover - choose this when the term deposits will not be rolled over (extended) on maturity.
- Rollover maturity proceeds - choose this when the entire maturity proceeds (deposit amount + interest, if any) could be rolled over (extended) on maturity.
- Rollover special amount - choose this when any other amount apart from the entire maturity proceeds could be rolled over (extended) on maturity.
- Rollover principal amount - When this option is chosen, and If the interest payout mode is compound interest, then Current balance + accrued interest will be rolled over. If the interest payout mode is pay out interest, then current balance is rolled over.
22. In case you have chosen Do not rollover option as the Maturity Instruction, Roll over with grace period is by default set to No. If you have chosen Rollover maturity proceeds or Rollover special amount as Maturity Instruction, you can specify if the term deposits can be rolled over with grace period by selecting Yes or No as required.
23. If you select Yes for Roll Over with Grace Period Grace days field will be enabled, where you have to enter the number of days after which the actual roll over will be effective automatically subject to balance in the account to debit.
For example, if the grace period is marked as 2 days, then on the maturity date the deposit will be liquidated to the current account and on day 2 Aura will re-open the term deposit with the same maturity amount provided there is balance in the account. If there is no balance, the deposit is not rolled over. The deposit is rolled over with the same term, same account number and same instructions but with current interest rate (if variable).
24. Select calendar days or Business days from the drop-down list available next to the Grace days field. The preshipped options available in the dropdown list are:
Calendar days -- If this is selected, then all the calendar days will be eligible for Grace Days, including the holidays.
Business days -- If this is selected, then only working days will be eligible for Grace Days, excluding the holidays.
25. Select the holiday preference for payments of loan from the Holiday preference (Roll over grace days) drop-down list. The options available are:
Ignore --
- When this preference is selected No holiday preference will be applicable for term deposit accounts under this product.
Next business day
- When this preference is applied to the term deposit account, On rollover, Aura will check if it is a holiday. If yes then the rollover happens on the next business day.
Previous day
- Same as Next business day. Only previous business day is considered when holiday is encountered.
26. Enter the holiday preference for grace days for penalty from the Holiday preference (Maturity) dropdown list. The options available are:
Ignore --
- When this preference is selected No holiday preference will be applicable for term deposit accounts under this product and the maturity event is processed on the same day.
Next business day
- If the maturity date happens to falls on the branch holiday, then Aura moves the maturity event to the next business day.
Previous day
- When this preference is applied to the term deposit account, on event population Aura checks if the maturity date falls on the holiday. If Yes, then the maturity date will be moved to the previous day business day.
27. Liquidate interest at Financial year-end - This field allows you to specify whether interest accrued up to the financial year-end should be liquidated during financial year-end processing for accounts created under this product. Select Yes for Aura to liquidate the accrued interest as part of the financial year-end process, or No to retain it. The selected value defaults to all Term Deposit accounts created under this product.
28. Select the holiday preference for periodic interest re-pricing from the Holiday preference (periodic interest re-pricing) dropdown list. The options available are:
Ignore --
- When this preference is selected No, then no holiday preference will be applicable for term deposit accounts under this product.
Next business day
When this preference is applied Aura will check if the next TDRATE reset date is a holiday. If yes, then the book date and value date for the event will be updated with next business date.
If TDRATE event is generated for the term deposit account and if the flag Periodic Interest Re-Pricing is checked. In this case if the value date of TDRATE event is same as Next reset date and if it happens to be a holiday. Then interest Re-pricing will occur on the next business day.
Previous day
- Whenever Periodic Interest Re-Pricing flag is selected on the account and when the TDRATE events are generated after activation, a check on the account Holiday preference (Periodic Interest Re-pricing) is done, if the value is next business date, then holiday calendar to be verified if the scheduled date for the TDRATE reset is on a holiday, if yes then previous business day is updated.
29. Select the Maturity Payout Method to define how the Term Deposit Amount will be handled at maturity. The available options are:
- Credit to Account - The Maturity amount will be credited to an internal account within the bank.
- Transfer to Other Bank - The Maturity amount will be transferred to an account in another bank.
- Cash - The Maturity amount will be paid in cash.
- Manager’s Cheque - The Maturity amount will be issued through a Manager’s Cheque.
30. Select option for Allow Term deposit certificate. If you select Yes, then Aura will allow you to issue Term deposit certificates for the accounts created under this product. If you select No, you will not be allowed to issue the Term deposit receipts for the accounts created under this product.
31. Select option for Allow Passbook. If you select Yes, then Aura will allow you to issue Passbook for the accounts created under this product. If you select No, you will not be allowed to issue the Term deposit receipts for the accounts created under this product.
32. Click Next. The New product → Interest Payable (4/8) page appears.
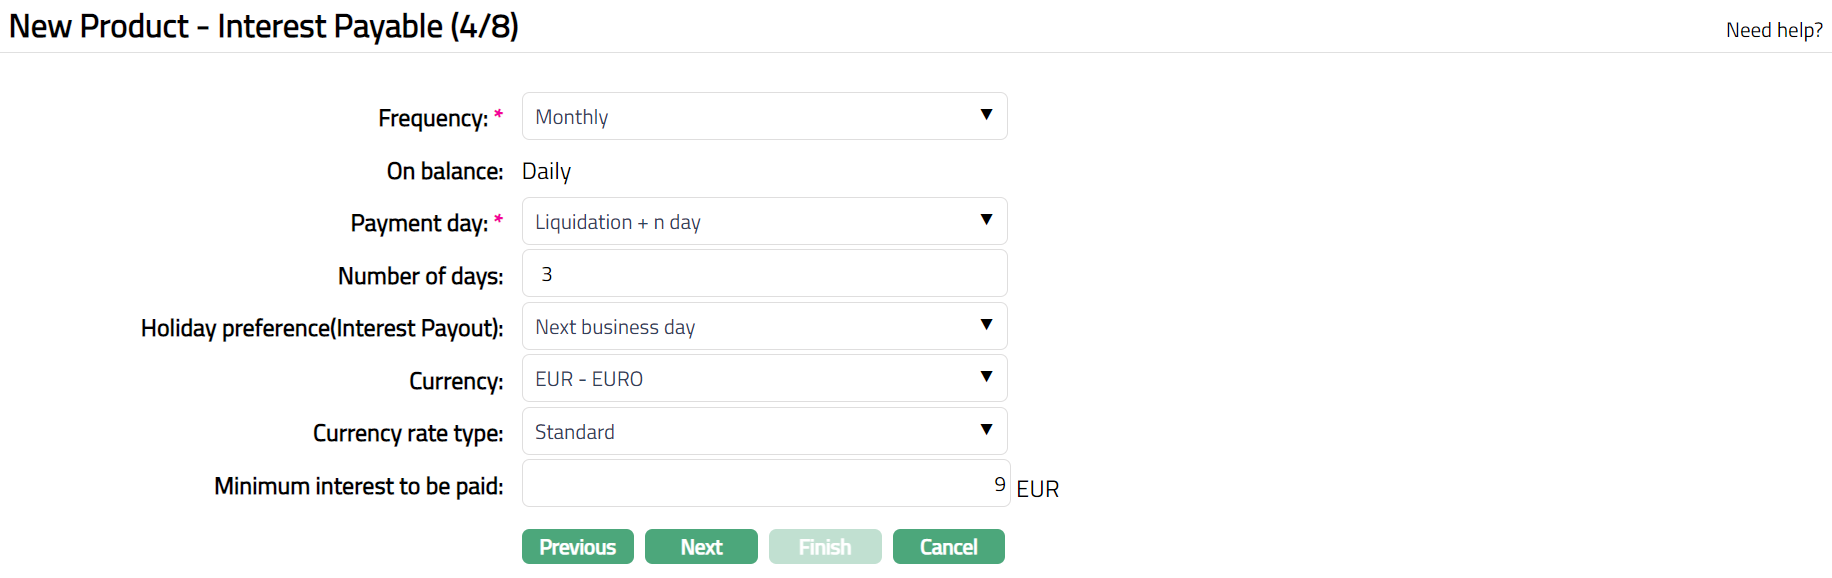
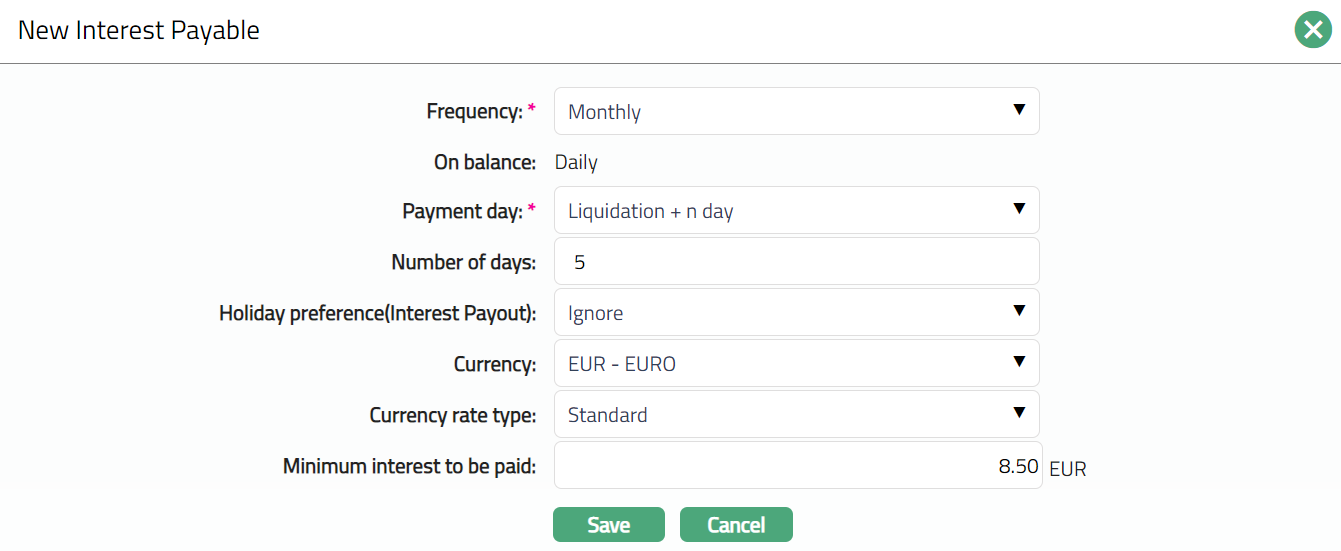
34. Select the Frequency for the Interest payable accrual from the drop-down list. Available options are: Daily, Monthly, Quarterly, Semi-annual and Annual
35. The field On balance denotes the balance amount on which the Interest payable is to be accrued. By default, it is Daily.
Based on the On balance and Frequency Aura accrues the interest. Accrual and Liquidation will be either daily or period end.
36. Select the Payment day for the Interest payable from the drop-down list. Based on this, and the Number of days (next field), the date on which the interest will be paid to the accounts under this product is determined. Available options are On Liquidation day and Liquidation plus n day. The latter will be allowed only on selecting the frequency as Monthly or Quarterly or Semiannual or Annual.
37. Enter the Number of days after which the liquidated interest is to be paid. This field will be enabled only on selecting Payment day as Liquidation plus n day.
If Frequency is Daily, Payment day can be only On Liquidation day and hence, this field is disabled.
If Frequency is Monthly, Payment day can be either of the options and hence this field is enabled. You need to enter the number of days between 1 and 30.
If Frequency is any other option, Payment day can be either of the options and hence this field is enabled. You need to enter the number of days between 1 and 90.
38. If Payment day is selected as Liquidation + n days and Number of Days mentioned is greater than 0, then only Holiday preference (Interest payout) drop-down list enabled.
Ignore
- When this preference is selected No, then no holiday preference will be applicable for term deposit accounts under this product and process the interest payout event on actual event value date.
Next business day
- If the interest payout happens to fall on the branch holiday, then Aura moves the interest payout event to the next business day.
Previous day
- When this preference is applied to the term deposit account, on event population Aura checks if the payout falls on the holiday. If Yes, then the interest payout event is moved to the previous day business day.
39. Select the Currency for the Interest Payable from the drop-down list of GL currencies for the Entity.
40. Select the Currency rate type for the Interest payable. The interest will be accrued in terms of the Account Currency and will be converted into the equivalent amount in terms of the above Currency using this Currency Rate Type, as on the date of Liquidation.
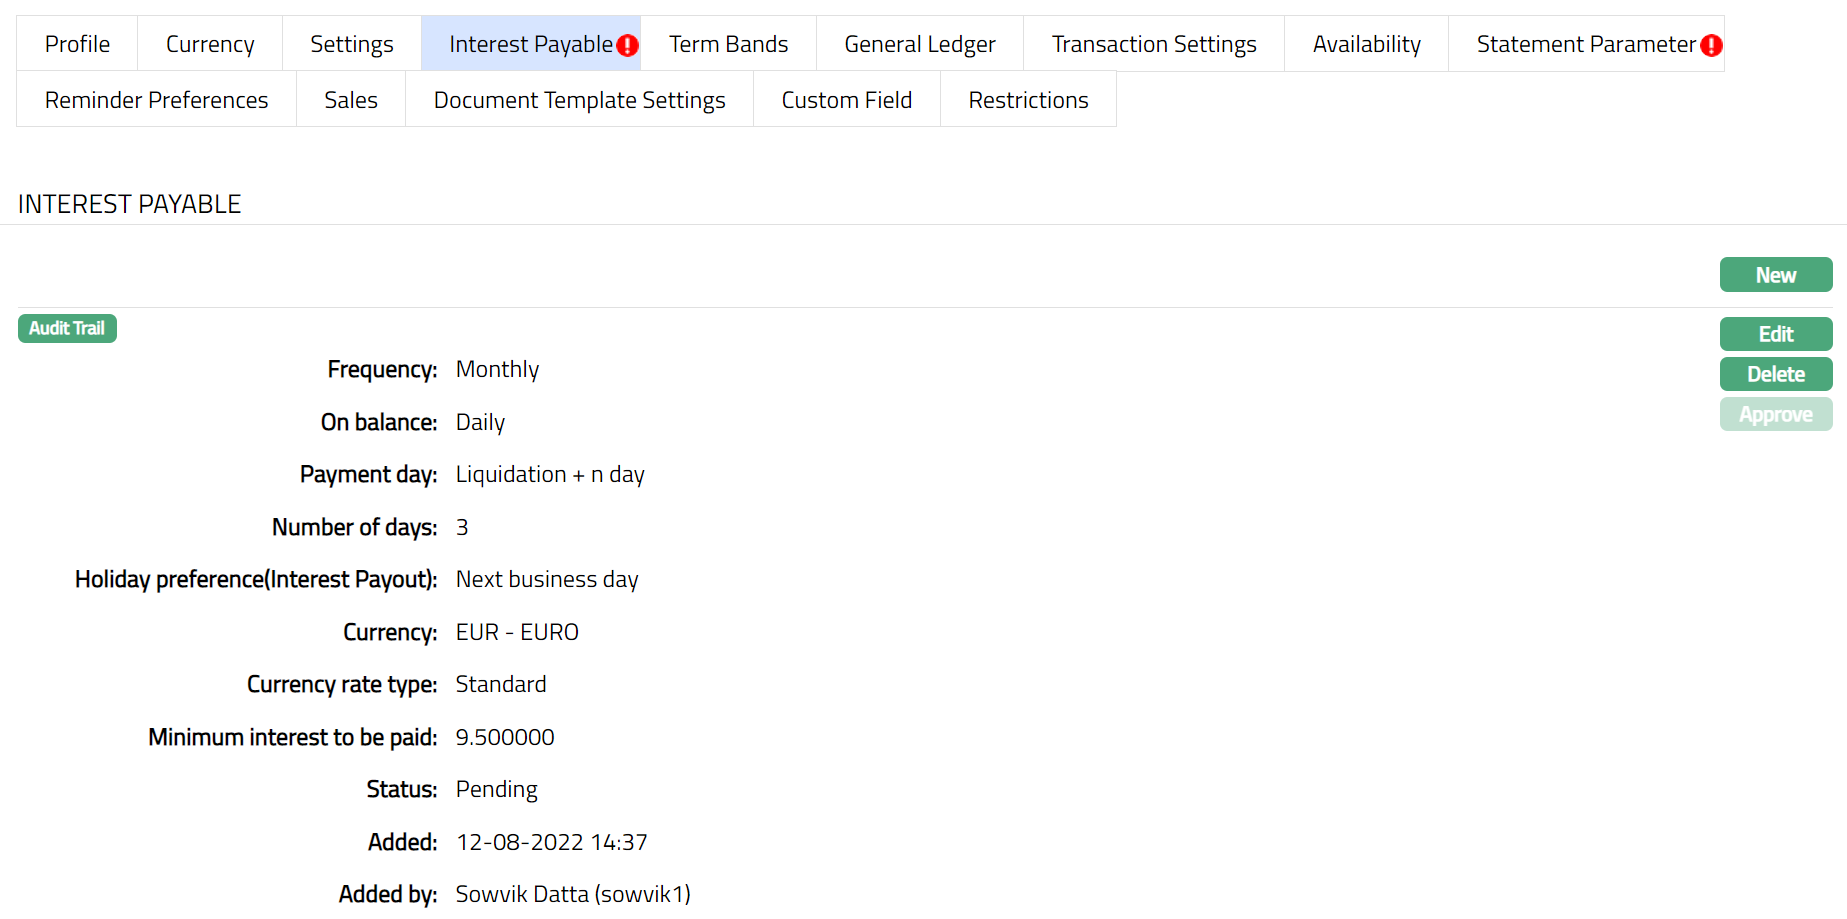
41. Enter the Minimum interest to be paid for the Interest payable. Aura will liquidate the interest only if the accrued interest is greater than or equal to the minimum interest to be paid.
For example, if you have entered the minimum interest to be paid as 100 and the accrued interest is 90, then Aura will not liquidate the interest.
Note: The amount entered in Minimum interest to be paid and Maximum interest to be paid belongs to the currency chosen in Currency field, and the number of decimals will also depend on the same.
42. Click Next. The New Product → General Ledger (5/8) page appears.
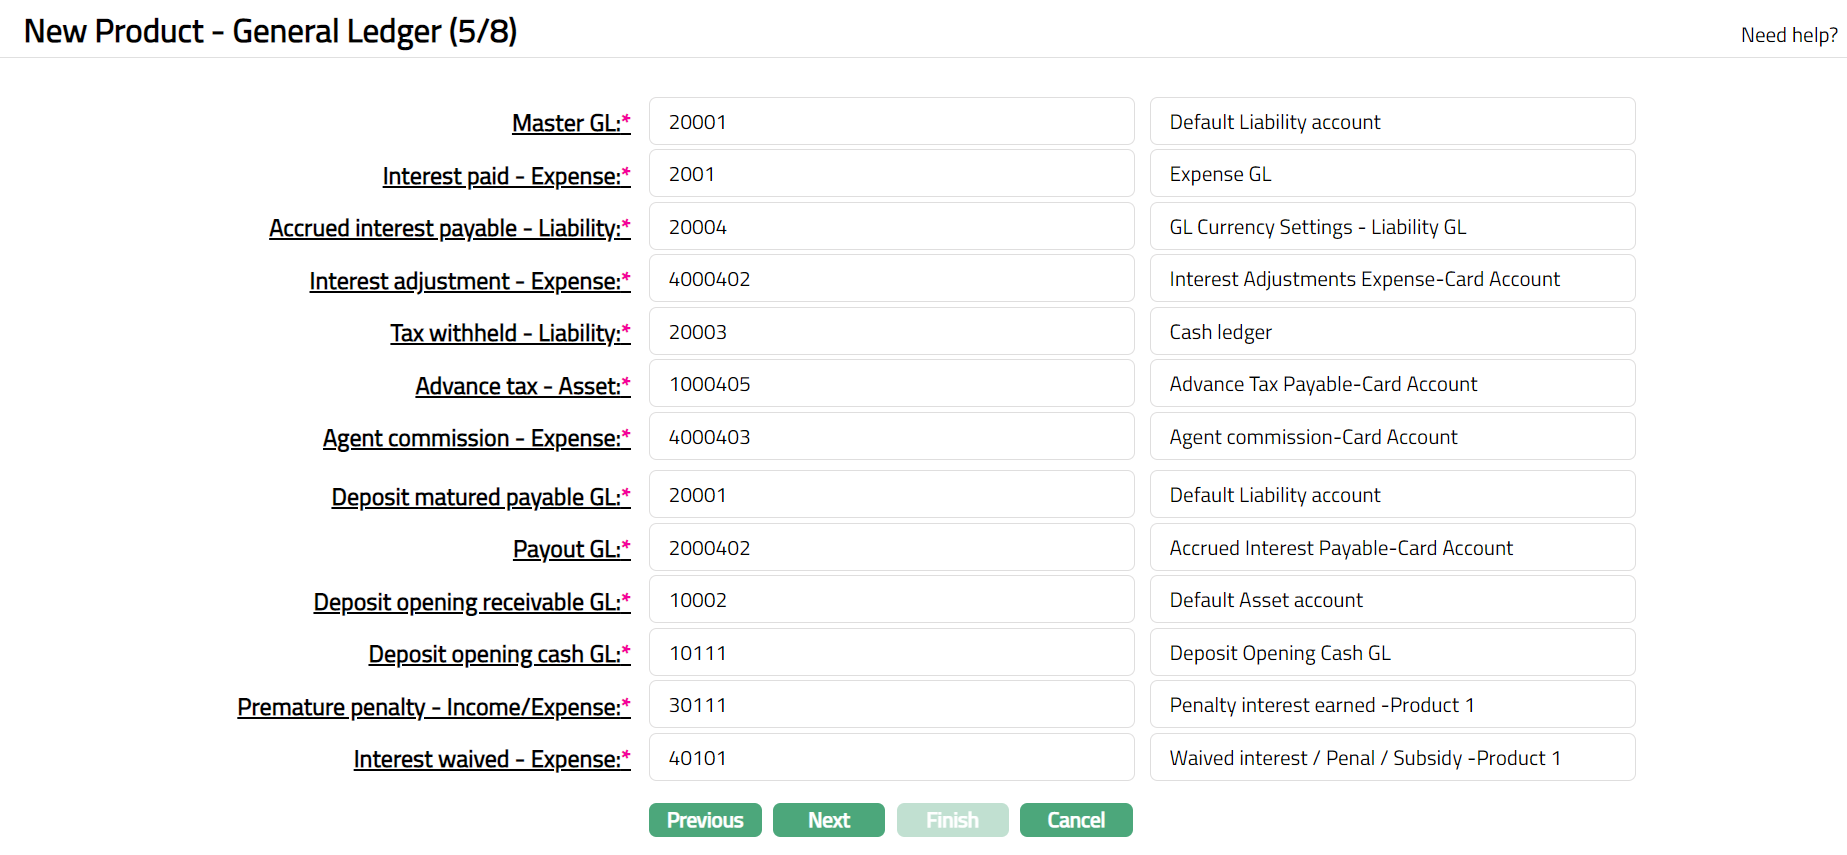
43. You will see the list of various GLs required to account for the events in the life cycle of the Product. The table below gives the fields, the use and the conditions for each of these GLs. You can either directly input the Ledger # or click on the hyperlink to see the list of GLs satisfying these conditions and select the required Ledger #.
| SL. No | Fields | Used | List of Accounts based on |
|---|---|---|---|
| 1 | Master GL | as the Master GL to record all transactions under this product | ledger type Asset, Liability or Neutral where the cash account is No, Manual posting is No, and the FX consolidation is blank |
| 2 | Interest paid – Expense | for accounting the Interest paid on accounts under this product | ledger type Expense |
| 3 | Accrued interest payable – Liability | for accounting the Accrued interest payable on accounts under this product | ledger type Liability |
| 4 | Interest adjustment – Expense | for accounting the Interest adjustment expense on back dated transactions on accounts under this product | ledger type Expense |
| 5 | Tax withheld – Liability | for accounting the Tax withheld on accounts under this product | ledger type Liability |
| 6 | Advance tax - Asset | For accounting the tax to be levied on accounts under this product. | ledger type Asset |
| 7 | Agent commission – Expense | for accounting the Agent commission expense on accounts under this product | ledger type Expense |
| 8 | Deposit matured payable GL | for accounting the Deposit matured payables on accounts under this product. | ledger type Liability |
| 9 | Payout GL | for accounting the Payout GL on accounts under this product | ledger type Liability |
| 10 | Deposit opening receivable GL | for accounting the Deposit opening receivables on accounts under this product. | ledger type Asset |
| 11 | Premature penalty – Expense GL | for accounting the Premature penalty – Expense GL on accounts under this product | ledger type Expense |
44. Click Next. The New Product → Transaction Settings (6/8) page appears

45. Input the required Transaction codes to be used for accounting the various events in the life cycle of the Product. You can directly input the Transaction Code or use the hyperlink to search for and select the required Transaction Code. The list of Transaction codes shown on click of hyperlink is based on certain conditions as listed against each field.
| Sl. No. | Field name of Transaction Settings | Used for | List of Transaction codes based on | Event when it will be used |
|---|---|---|---|---|
| 1 | Master leg (DB/GL) | recording all the debit transactions affecting the accounts under this product | General Ledger Debit | Disbursement and Payments |
| 2 | Master leg (CR/GL) | recording all the credit transactions affecting the accounts under this product. | General Ledger Credit | Disbursement and Payments |
| 3 | Interest paid (DB / GL) | all the transactions liquidating Interest paid in the General ledger Account | General ledger Debit | Liquidation |
| 4 | Interest paid (CR / Client) | all the transactions liquidating Interest paid in the client Account | Client account Credit | Liquidation |
| 5 | Interest paid (CR / GL) | all the transactions liquidating Interest paid in the General ledger Account | General ledger Credit | Liquidation |
| 6 | Interest accrued (DB / GL) | all transactions for Interest accrued in the General Ledger account | General ledger Debit | Liquidation |
| 4 | Interest accrued (CR / GL) | all transactions for Interest accrued in the General Ledger account | General ledger Credit | Liquidation |
| 8 | Interest adjustment (DB / GL) | all Interest adjustment transactions in the General Ledger account | General ledger Debit | Reversal |
| 9 | Interest adjustment (CR / GL) | all Interest adjustment transactions in the General Ledger account | General ledger Credit | Reversal |
| 10 | Tax withheld (DB / Client) | all Tax withheld transactions in the Client account | Client account Debit | Liquidation |
| 11 | Tax withheld (CR / GL) | all Tax withheld transactions in the General Ledger | General Ledger Credit | Liquidation |
| 12 | Tax withheld (DB / GL) | all Tax withheld transactions in the General Ledger | General Ledger Debit | Liquidation |
| 13 | Commission expenses (DB / GL) | all commission expense transactions in the General Ledger account | General ledger Debit | Expense |
| 14 | Commission expenses (CR / Client) | all commission expense transactions in the client account | Client account Credit | Expense |
| 15 | From client account (DB / Client) | All the debit transactions to the client account | Client account Debit | |
| 16 | Deposit opening receivable (DB / GL) | all transactions in the Client account if the Funding method is from a client’s current account in the From client account | General ledger Debit | |
| 17 | By cash (DB / GL) | all transactions in the if the Funding method is by cash. | General ledger Debit | |
| 18 | Term deposit account (CR / Client) | all transactions of the Term deposit account in Term deposit account (CR/Client) | Client account Credit | |
| 19 | Term deposit account (DB / Client) | All the transactions when the term deposit account is debited during premature withdrawal and maturity Term deposit account (DB/Client) | Client account Debit | |
| 20 | To client account (CR / Client) | All the interest or deposit amount credits upon interest payout or maturity into client account (CR/Client). | Client account Credit | |
| 21 | Deposit matured payable (CR / GL) | Recording the transactions related to transfer of maturity proceeds to other bank in Deposit matured payable (CR/GL). | General Ledger Credit | |
| 22 | Deposit matured payable (DB / GL) | recording the transactions related to roll over and transfer of maturity proceeds to other bank in Deposit matured payable (DB/GL). | General ledger Debit | |
| 23 | By cash (CR / GL) | For recording the transactions related to maturity proceeds paid in cash in by cash (CR/GL) | General Ledger Credit | |
| 24 | Penalty amount (CR/GL) | for recording the transactions related to maturity proceeds paid in cash in by cash (CR/GL) | General Ledger Credit | |
| 25 | Advanced tax (DB/GL) | recording the transactions related to the tax deducted and debited from the account under this product. | General ledger Debit | |
| 26 | Advanced tax (CR/GL) | recording the transactions related to the tax deducted from the accounts under this product and credited to the bank’s account. | General Ledger Credit |
46. Click Next. The New product → Statement Parameter (7/8) page appears.
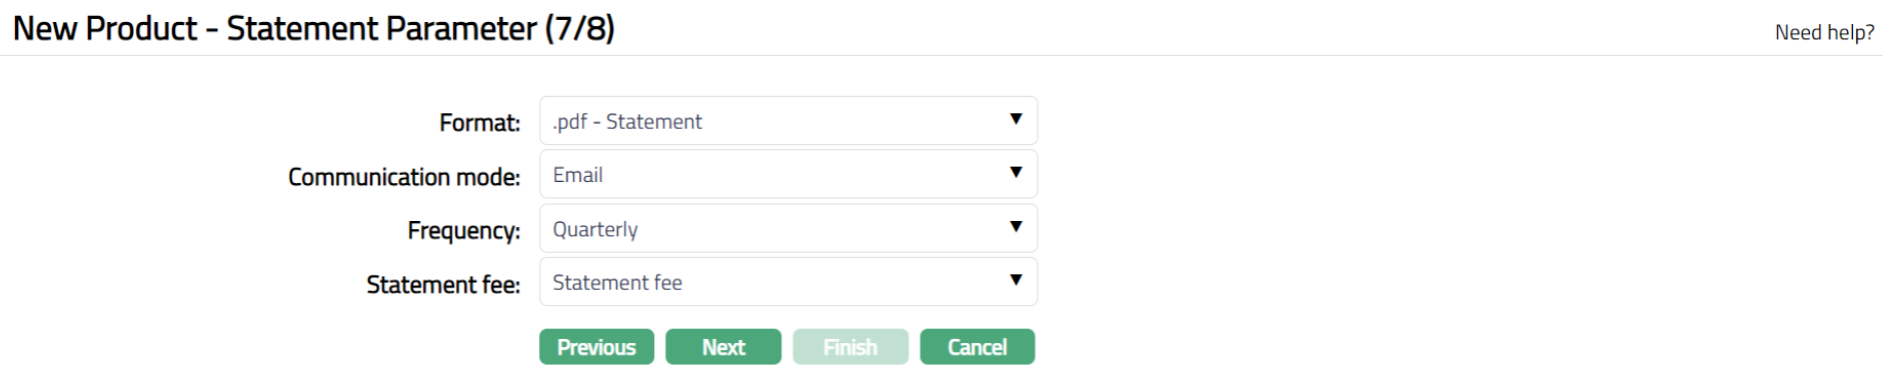
47. Select Format from the drop-down list of formats that have been maintained under Admin → System codes → Generic definition → Statement formats. It is the Format of the statement that is to be generated.
48. Select Communication mode from the drop-down list -- i.e. the manner in which you want to send the statement. Available options are Data handoff, e-invoice, e-mail, paper, SMS and Web Hotel.
49. Select Frequency of the statement to be generated from the drop down. Available options are: Daily, Weekly, Fortnightly, Monthly, Quarterly, Semi-annual, Annual, On Liquidation, On Debit Liquidation date and On Credit Liquidation date.
50. Select Statement fee from drop-down list of Event based Flat or Banded charges maintained under Admin → Pricing → Charges → Charge Scheme. This is the fee that is to be collected from the client for the statement defined above. This charge may be deferred.
Note: Any additional statements that may be required for the accounts under this product may be defined using Statement tab in edit mode for those accounts.
51. Click Next. The New Product → Confirmation (8/8) page appears.
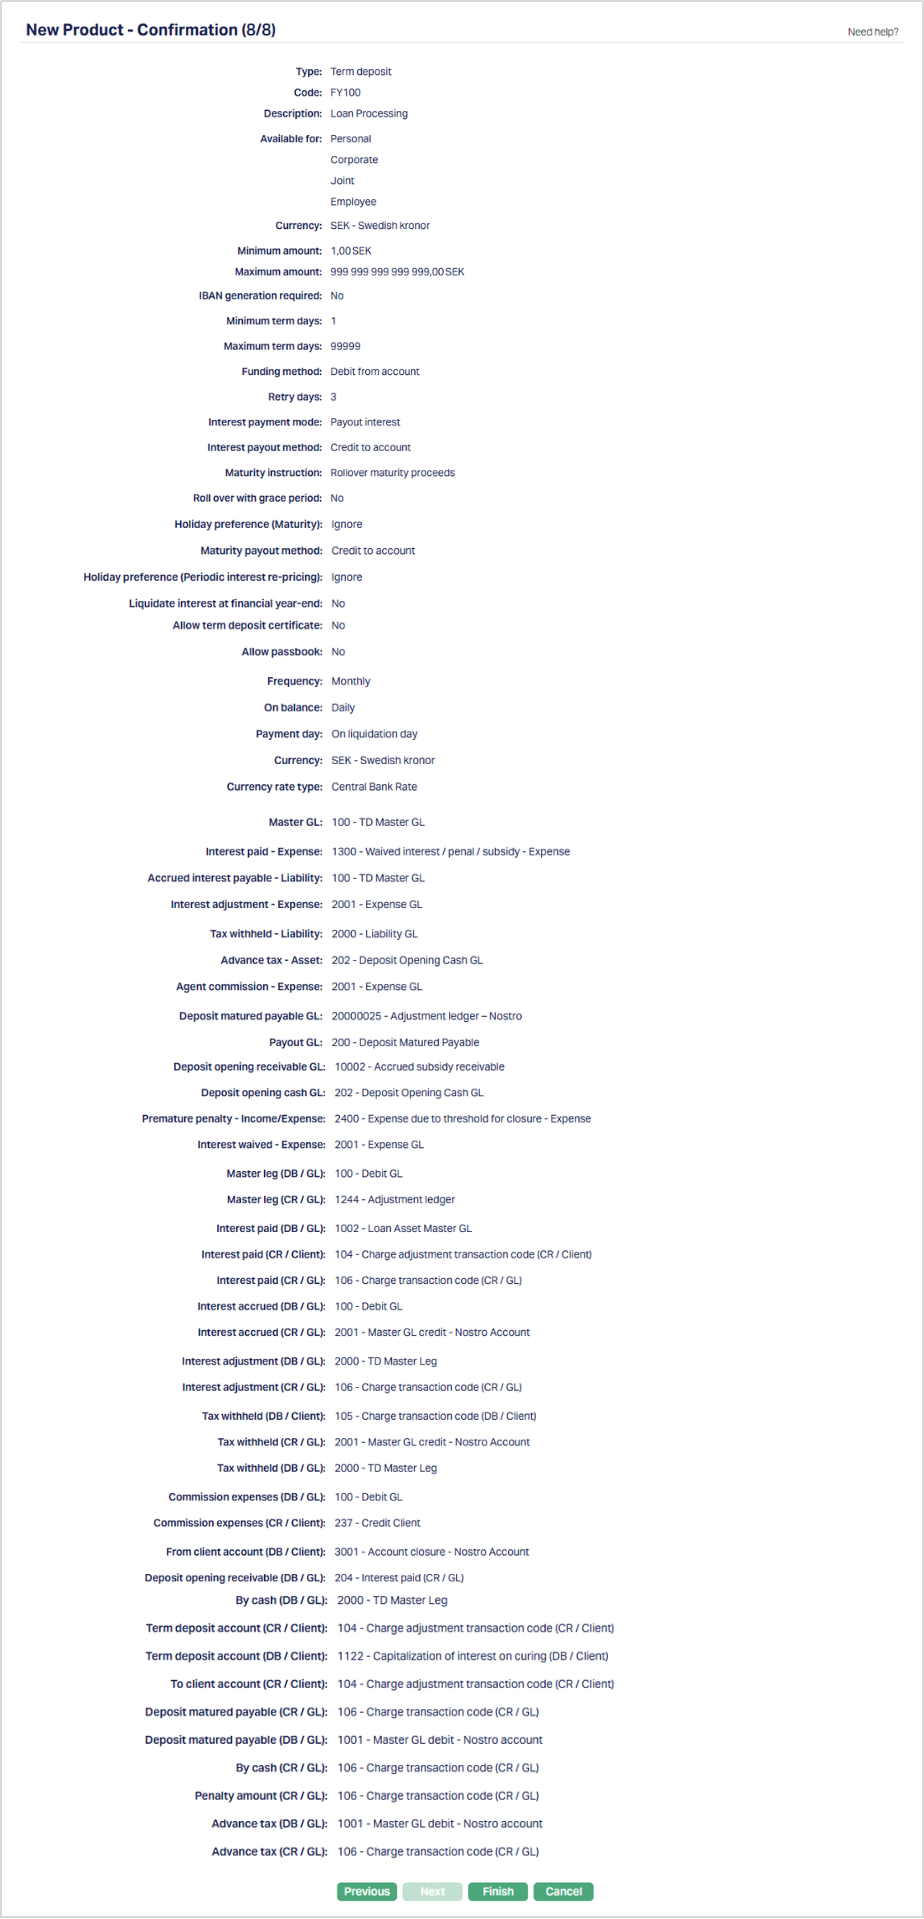
52. Click Finish. The new product record is created, and you will see the Profile tab by default.

Functions: Add, Search, Suspend, Activate, Edit, Delete
Note: The status of the Product is Active as soon as the product is created. The status of the Interest Payable tab is Pending till it is approved by another user. This is indicated by the blue bubble on the tab heading. On approval, the Interest Payable tab status is set to Approved. The Term Bands tab records have to be created and approved.
Suspend: You can suspend the product by a click on Suspend button. When you click on Suspend button, Aura displays an alert message. On confirmation Aura will suspend the product. Suspending a product only makes it unavailable in future for any new account creation / any other drop-down list. Existing accounts under the product continue without any impact. Suspended products can be activated by using Activate button.
Activate: You can activate a suspended product by a click on Activate button. When you click on Activate button, Aura displays an alert message. On confirmation Aura will activate the product. Activation of a product only makes it available in future for any new card creation / any other drop-down list.
Delete: You can delete the record by clicking Delete button. When you click Delete button, Aura displays an alert message. On confirmation Aura will delete the record.
Profile
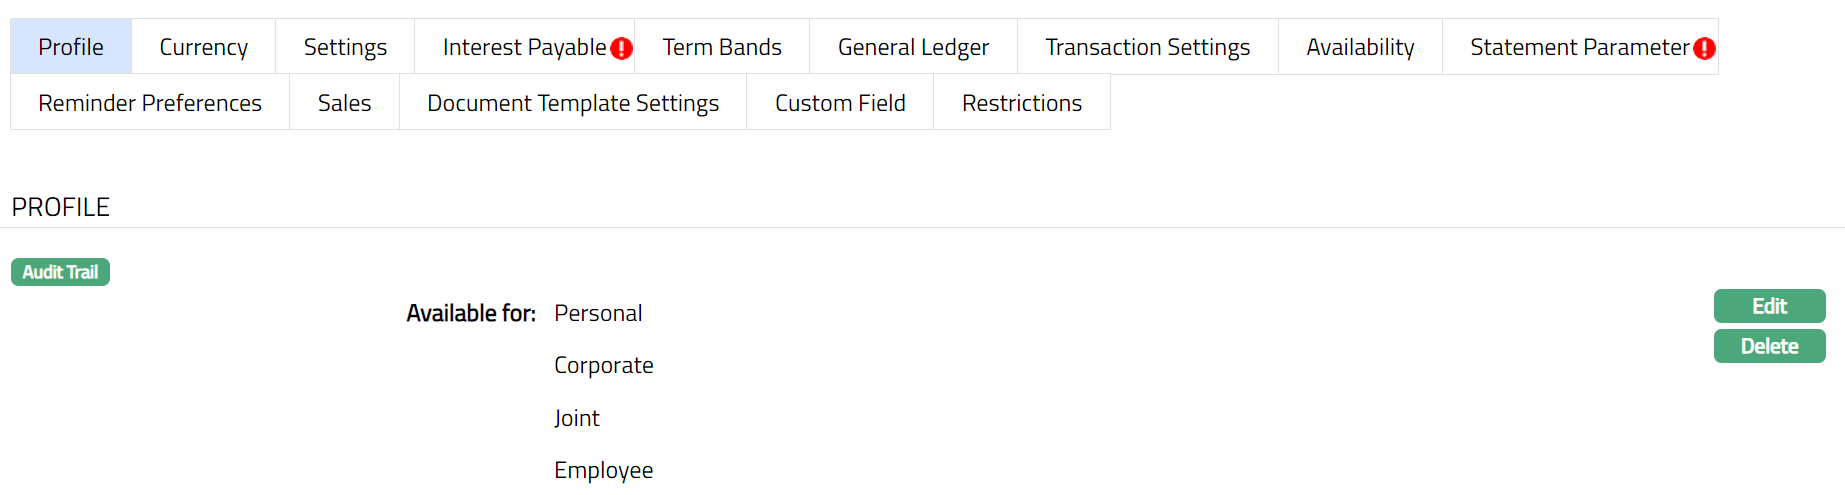
The Profile tab, which is the default tab in the Product Maintenance screen, shows the basic details of the Product.
To view / edit the Profile
1. Access Product page. Click Profile tab to view the details as per sample below. The details are defaulted from the entries that you made during Product creation. For details refer to Term Deposit → New Product → Profile (1/8).
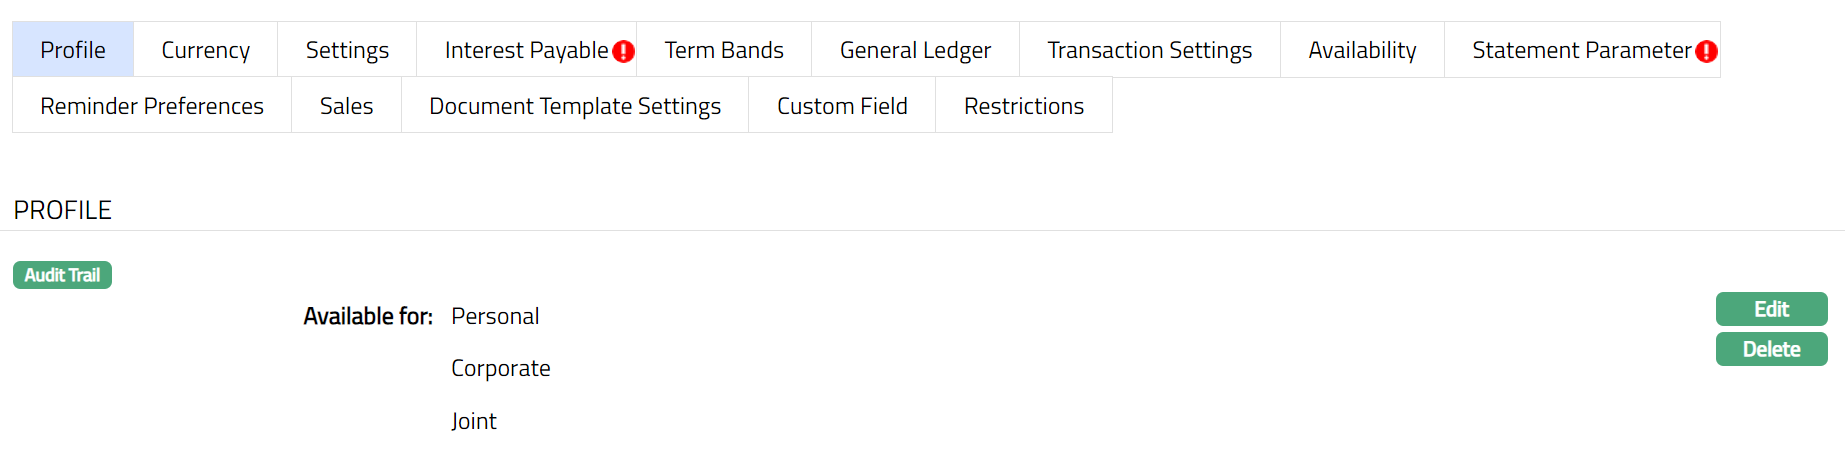
Note: After product creation system displays only selected option for Available For field
2. Click Edit. Edit Product page appears.
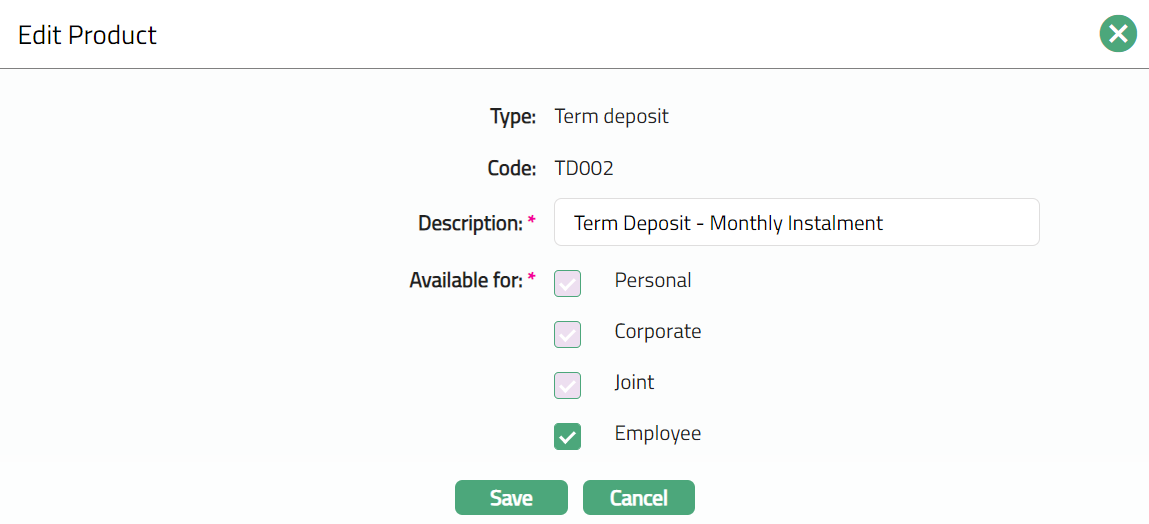
You can edit only the following fields:
Description
Available for
Note: In Available for, you can only add client types to the ones that were already added for the Product. You cannot remove any type that was already selected.
3. Click Save. Profile page appears with the edited details.
Functions: Edit, Delete
Delete: You can delete a product by a click on Delete button. When you click Delete button, Aura displays an alert message. On confirmation Aura will delete the product. The Product can be deleted until it is in use.
Currency
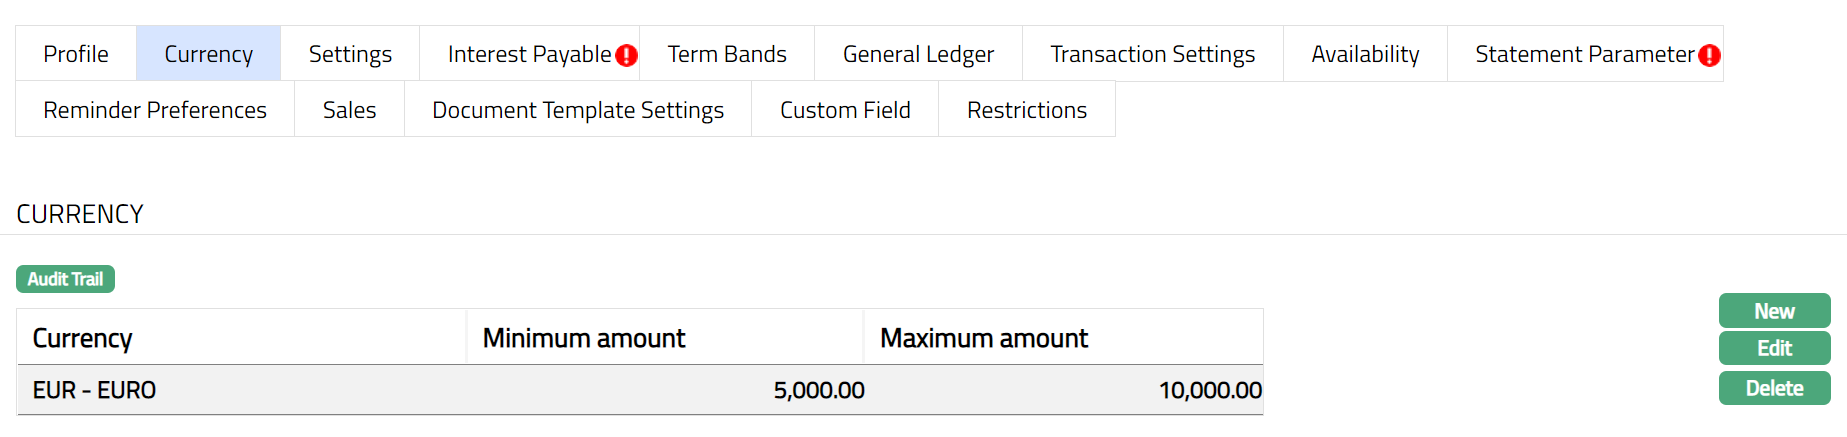
Currency tab allows you to maintain the currency for the Product. One or more currencies can be added using the Currency tab, once the Product record is created. Accounts for the product can be opened only in the selected currencies.
To Add / view / edit the currency
1. Access Product page. Click Currency tab to view the details as per sample below. The details are defaulted from the entries that you made during Product creation. For details refer to Term Deposit → New Product → Currency (2/8).
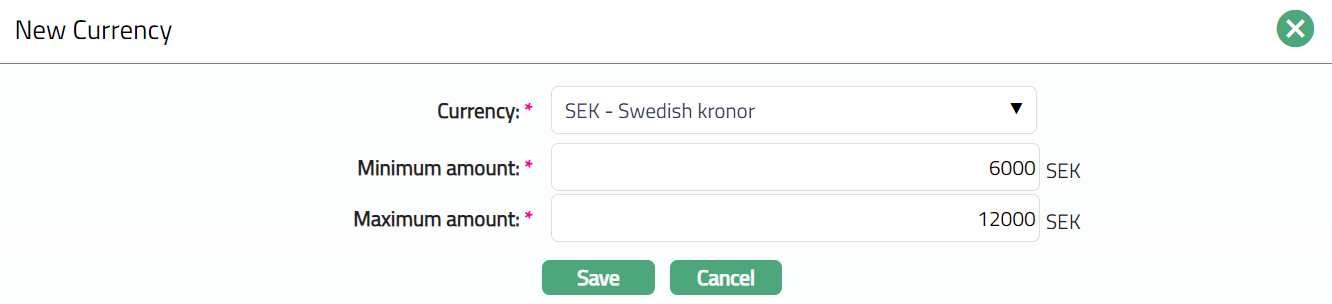
2. Click New / Edit. New Currency or Edit Currency page appears.
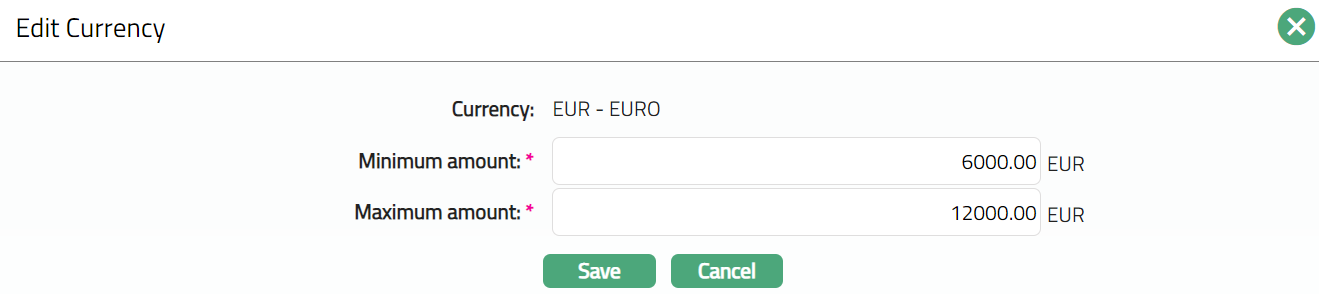
Note: Minimum amount and Maximum amount fields are editable in Edit Currency page.
3. Add new currency, minimum amount and maximum amount for that currency. Or make required changes in Edit Currency page.
4. Click Save. The Currency tab appears with the Added / Edited details.

Functions: New, Edit, Delete
Delete: You can delete a currency by a click on Delete button. When you click Delete button, Aura displays an alert message. On confirmation Aura will delete the currency. On deletion the deleted currency will not be available at the account level for creation of new accounts. The existing records will not be affected.
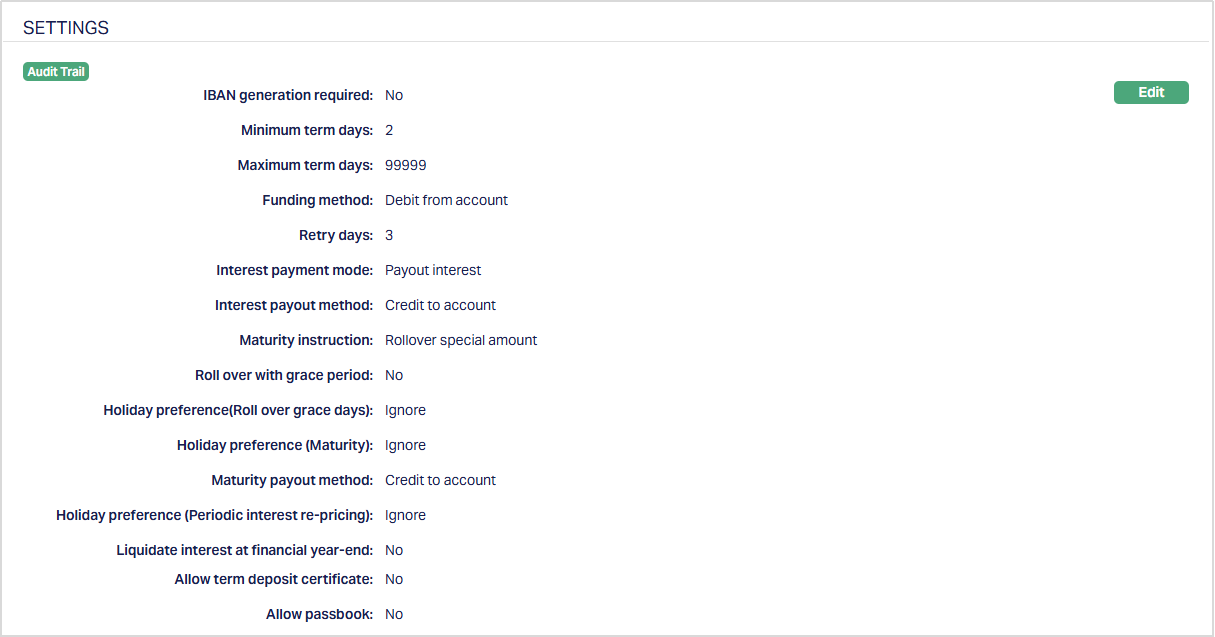
Settings
This Tab allows you to view and maintain certain account settings like IBAN generation required, minimum and maximum term, interest and maturity instructions.
To edit the Settings
1. Access Product page. Click Settings tab to view the details as per sample below. The details are defaulted from the entries that you made during Product creation. For details refer to Term Deposit → New Product → Settings (3/8).
2. Click Edit. Edit Product Settings page appears.
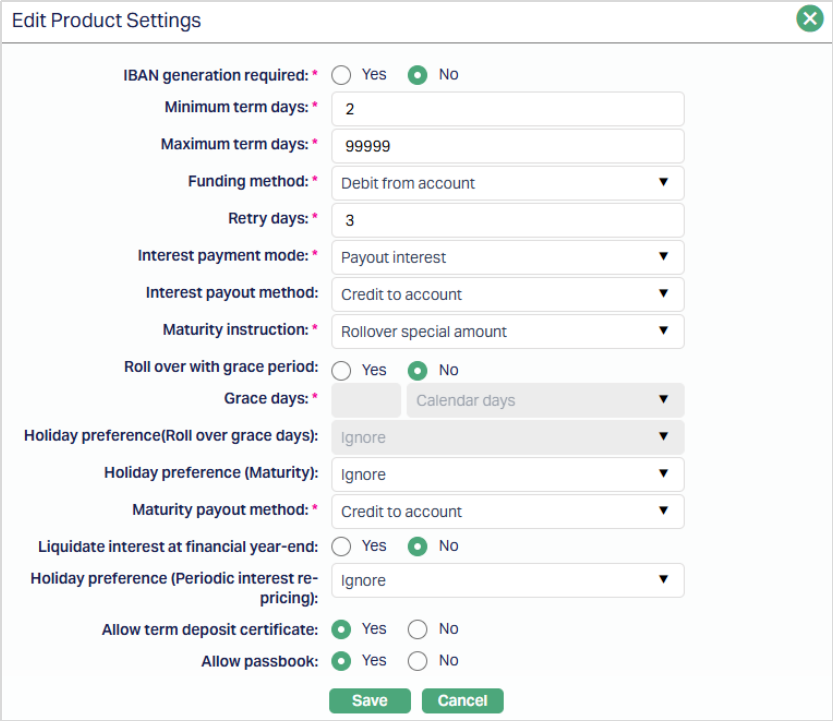
Note: All the fields are editable during Edit Product Settings.
3. Click Save. Settings page appears with the edited details.

Functions: Edit
Availability
This tab can be used to control the availability of the product to specific Branch, Transaction Code, Offering or Client. It has four sub-tabs, one for each of these.
Availability-Branch
Using this tab, you can allow the Product to be available for all the Branches or only specific Branch(es). If you select specific branch, then at the Account level; in the Account branch drop-down list only, selected branch will be available. Else all the branches will be displayed in the Account branch drop-down list.
To select the branch
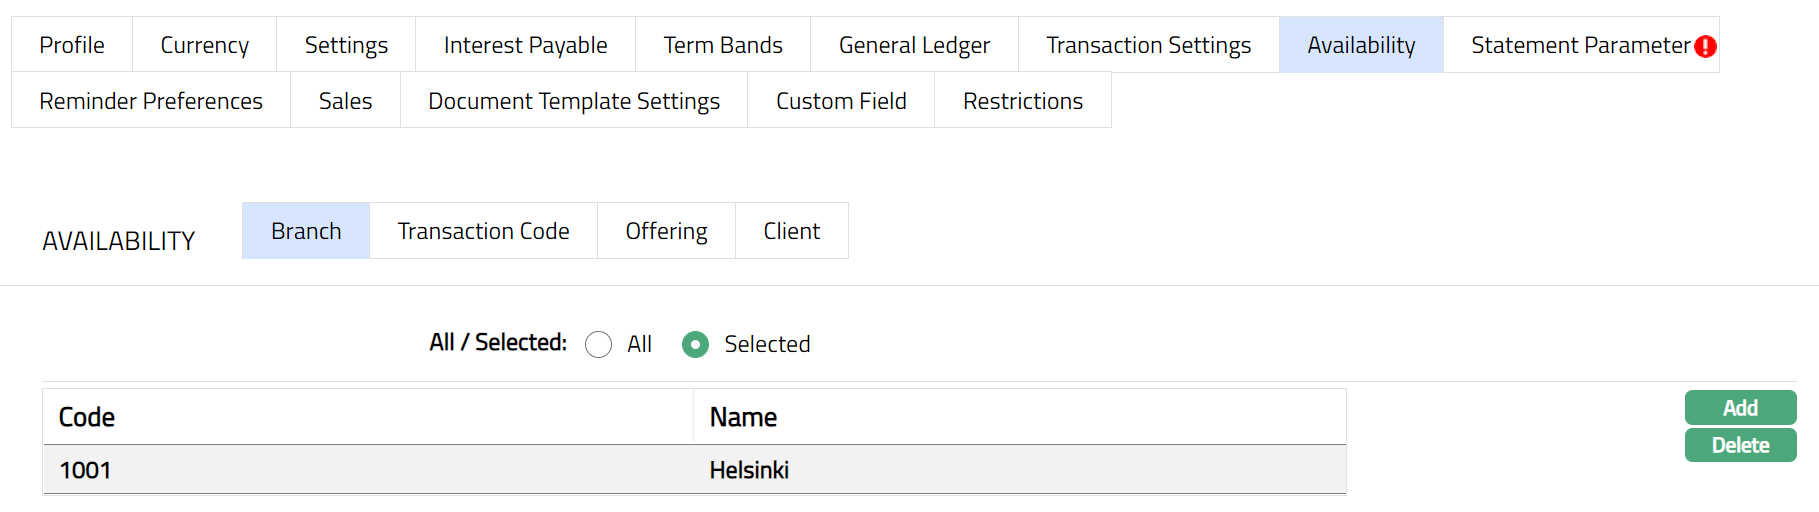
1. Access Product page, click Availability tab, then click Branch sub tab.
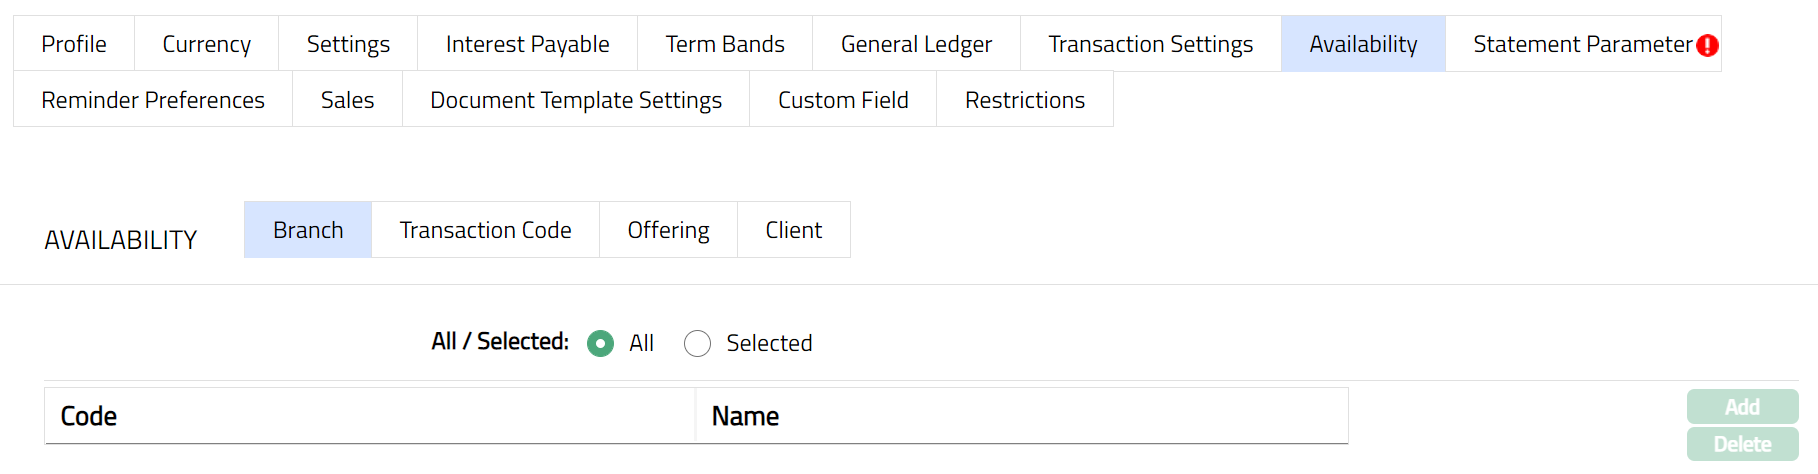
2. By default, All radio button is selected so that this Product is available for all Branches.
3. To restrict the branches for which this Product is available, click Selected radio button. Add button is now enabled.
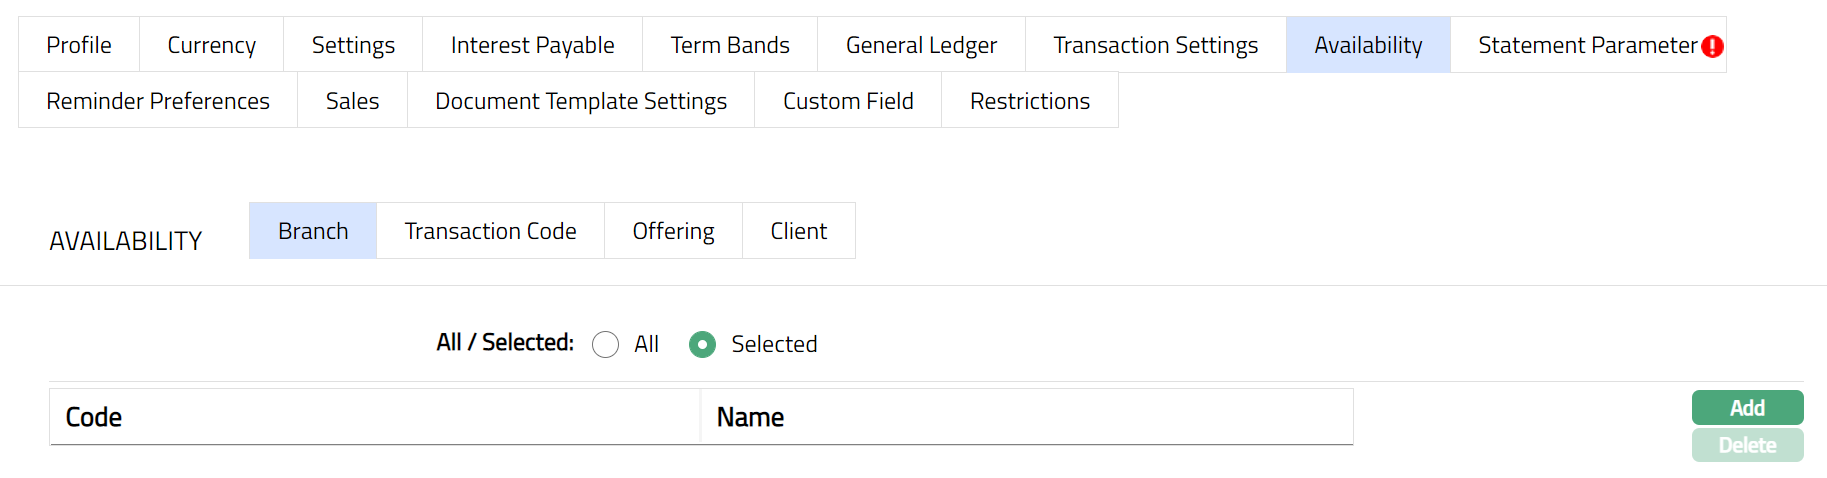
4. Click Add. The Add Branch screen appears where you can select the required branch from the drop-down of all active Branches of the Entity.
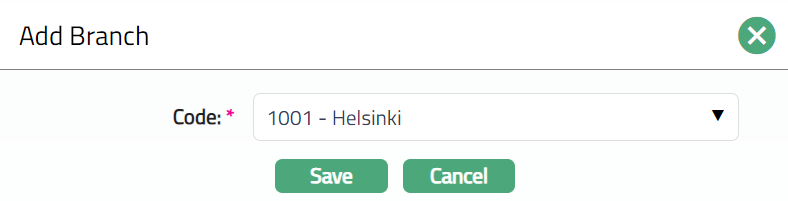
5. Click Save. The Branch sub tab page appears with the added details. The selected Branch(es) will appear in Availability screen.
Function: Add, Delete
Note: You may choose to allow All branches for the product at any time. However, Aura will prompt you to confirm if the selected branches may be deleted. If confirmed, then all the selected branches will be deleted, and the product will be available for ALL Branches.
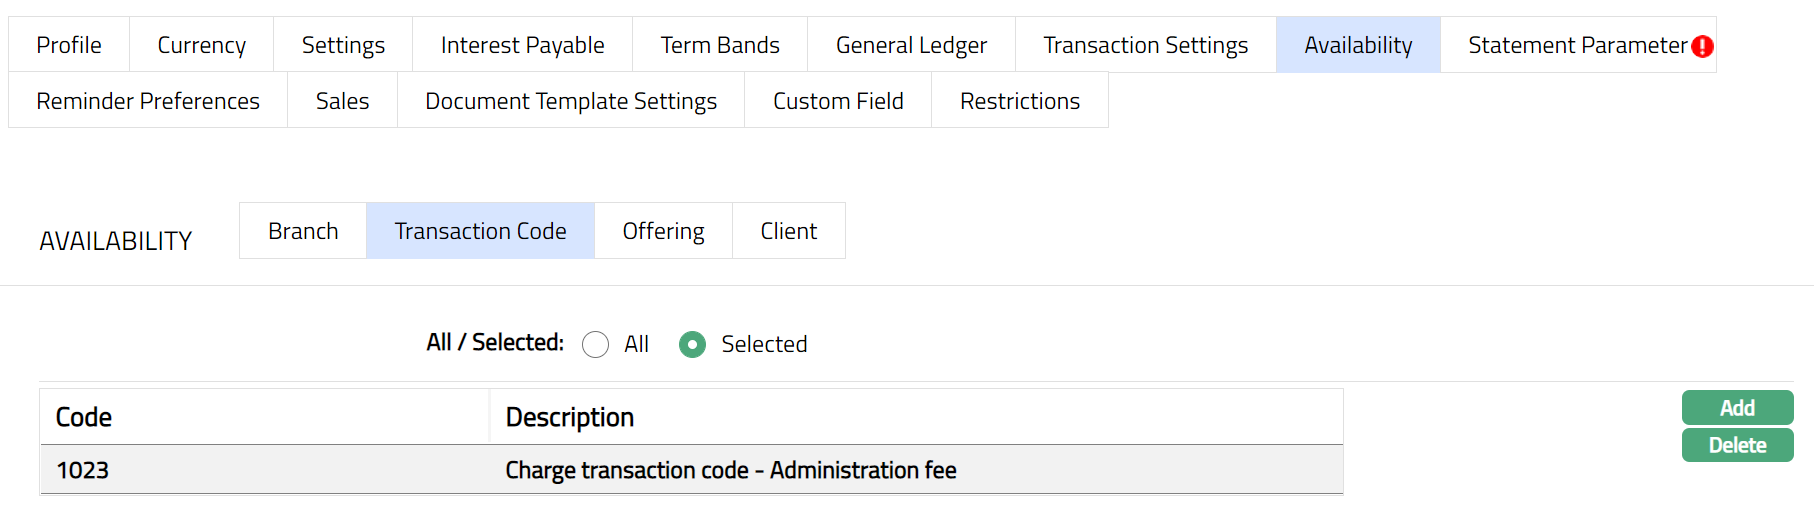
Availability-Transaction Code
Using this tab, you can allow the Product to be available for all the Transaction Codes or only specific Transaction Code(s).
1. Access Product page, click Availability tab, then click Transaction Code sub tab.

2. By default, All radio button is selected so that this Product is available for all Transaction Codes.
3. To restrict the Transaction codes that are available under this product, click on Selected radio button. Add button is now enabled.
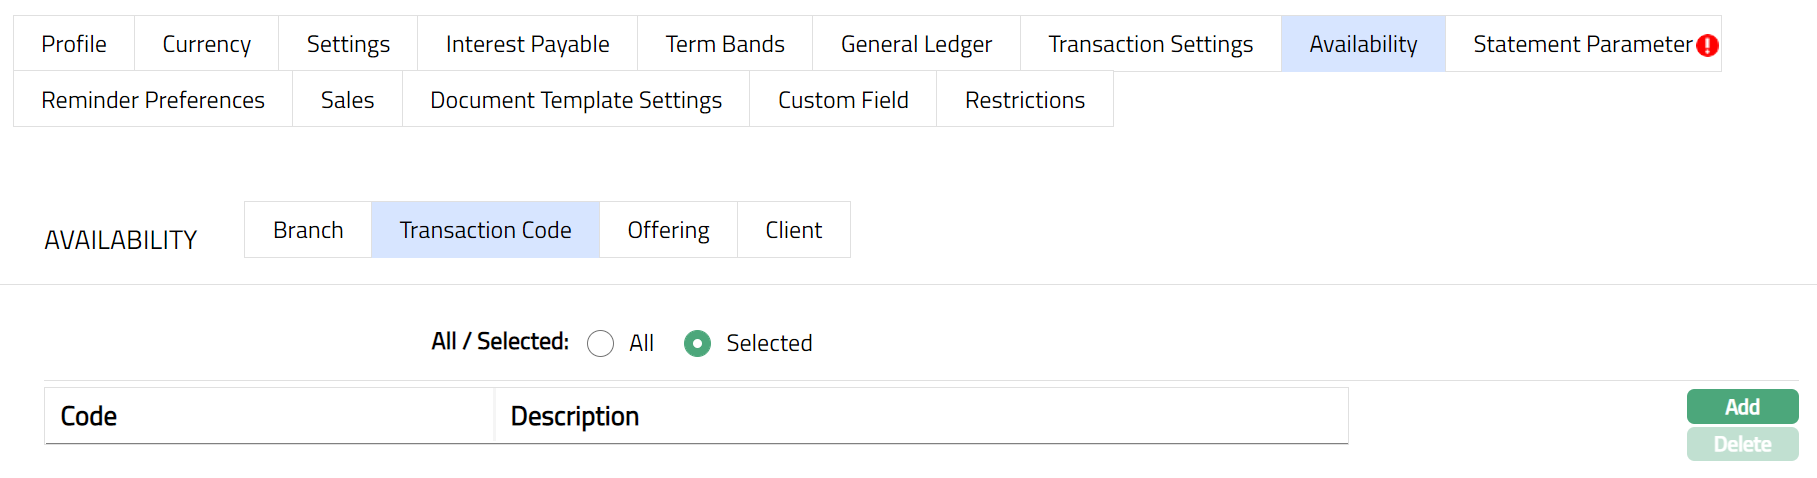
4. Click Add, the Add Transaction Code search page appears. Search for the required Transaction code with relevant criteria and select the required Transaction code.
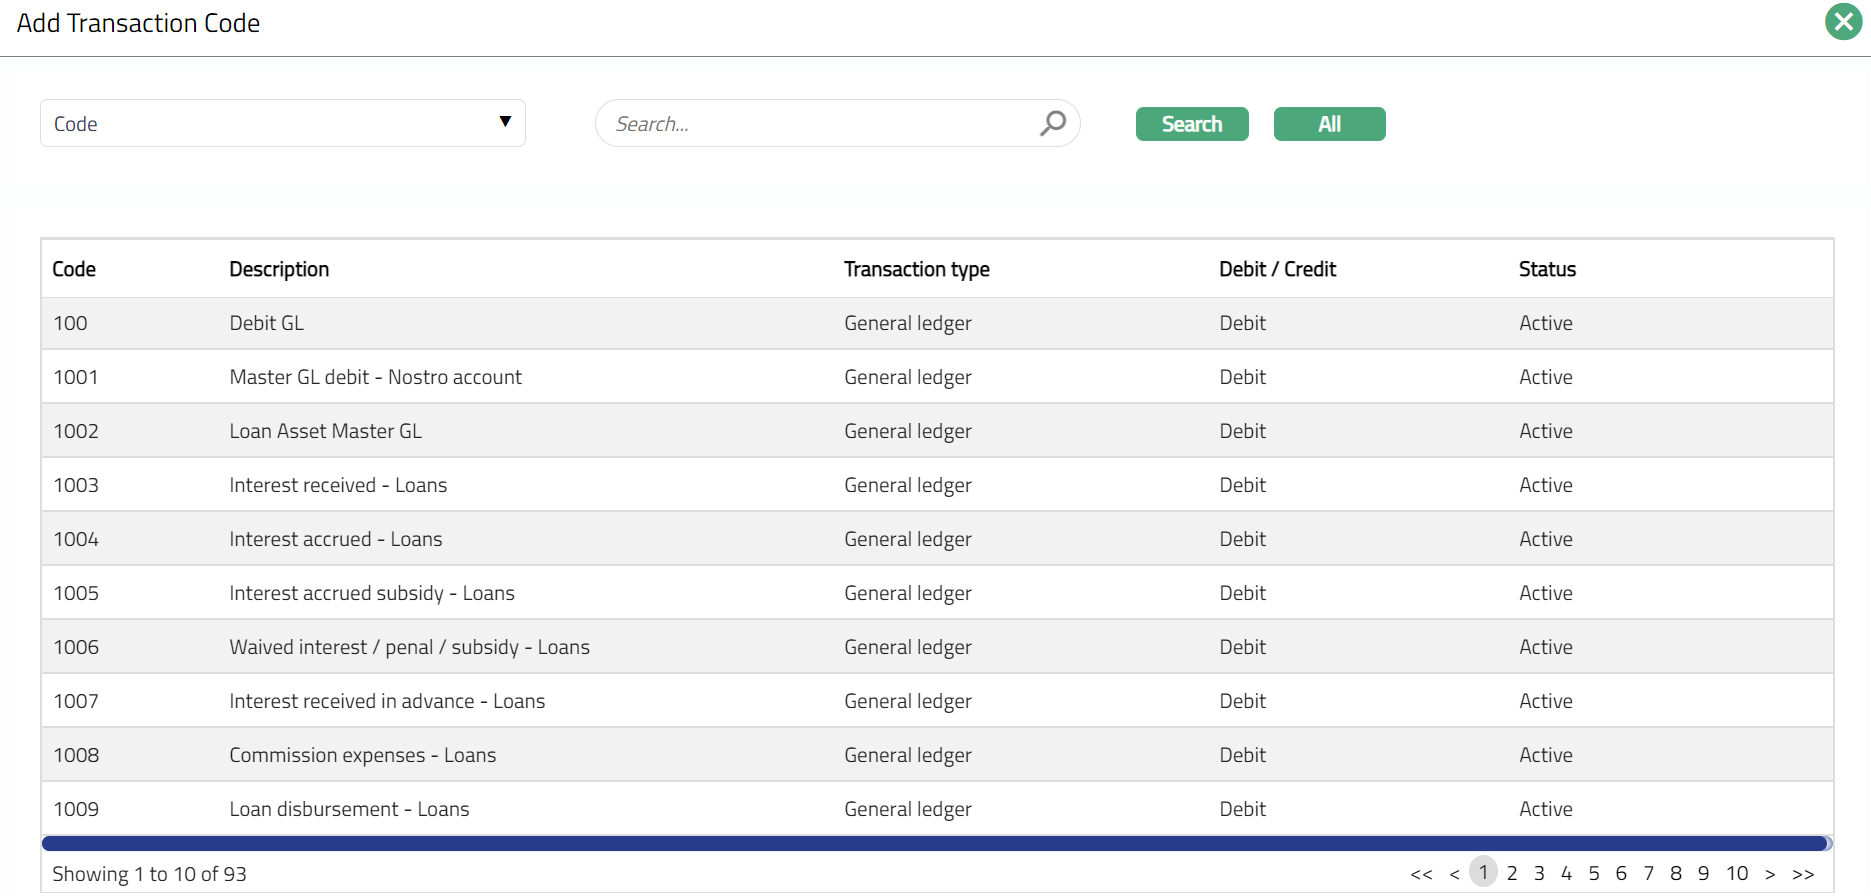
5. The selected Transaction code will appear in Transaction screen as shown below.
Functions: Add, Delete
Note: You may choose to allow All Transaction codes for the product at any time. However, Aura will prompt you to confirm if the selected Transaction code may be deleted. If confirmed, then all the selected Transaction codes will be deleted, and the product will be available for ALL Transaction Codes.
Availability-Offering
Using this tab, you can allow the Product to be available for all the Offerings or only specific Offering(s). If offering has been mentioned at client account product level and client selected at account level do not have similar offering then at client account level under product drop down system will not display the product. Else you will be allowed to select any client and product combination available in the Aura.
1. Access Product page, click Availability tab, then click Offering sub tab.
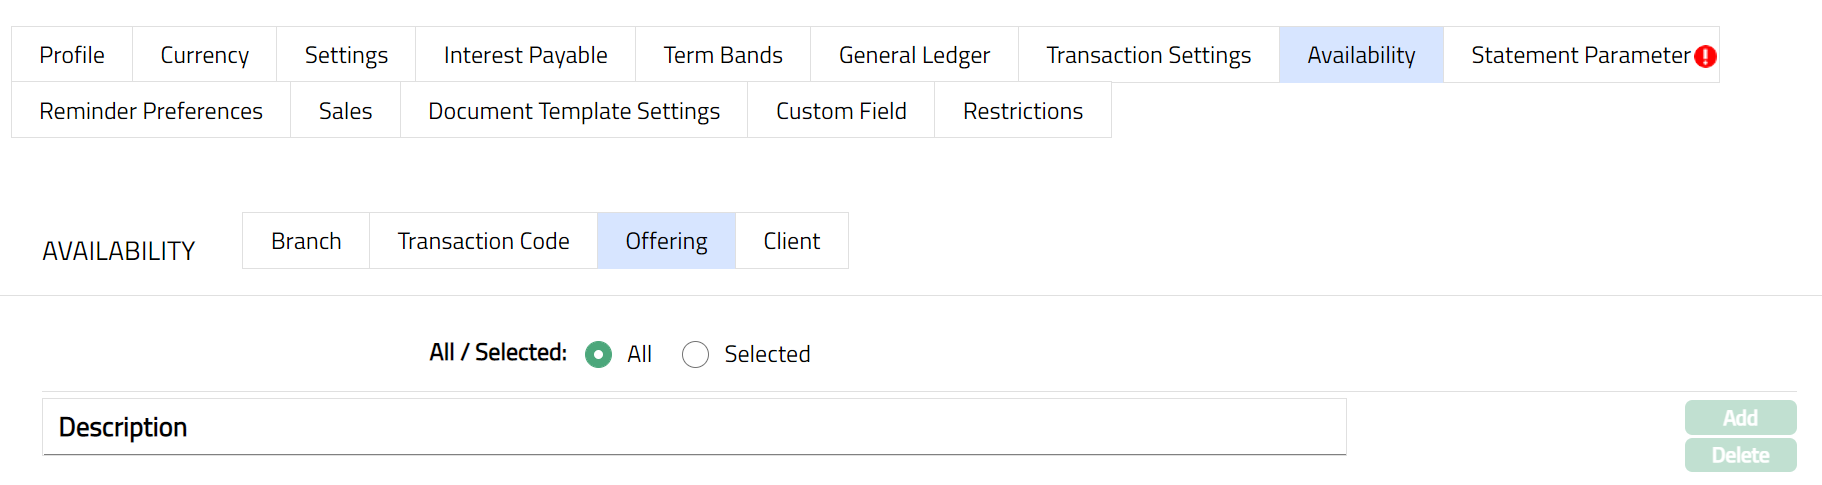
2. By default, All radio button is selected so that this Product is available for all Offerings.
3. To restrict the Offerings that are available under this product, click Selected radio button. Add button is now enabled.
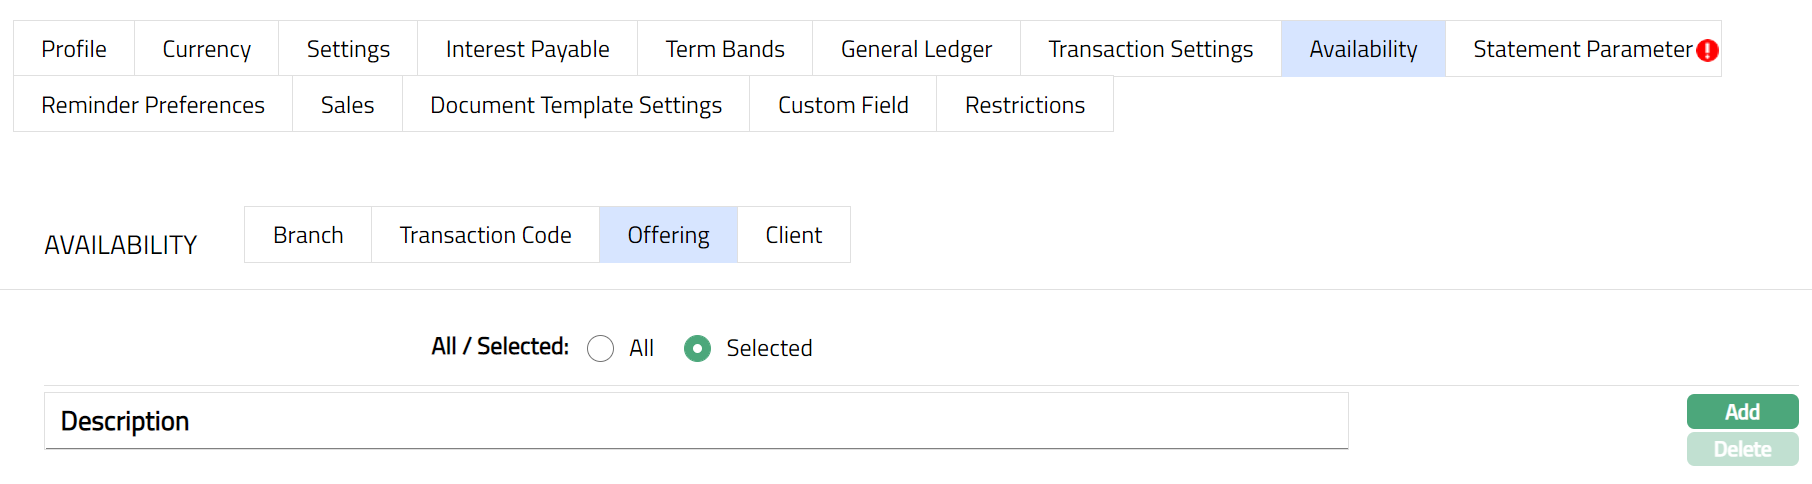
4. Click Add, the Add Offering screen appears where you can select the required Offering from the drop-down
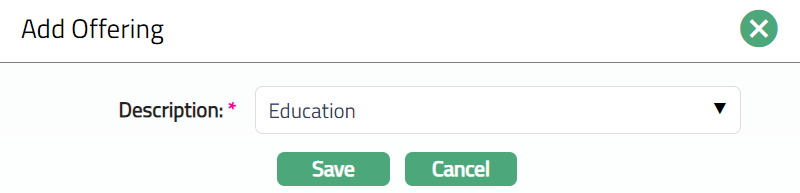
5.Click Save. The Offering page appears with the added details. The selected Offering will appear in Availability screen as shown below.

Function: Add, Delete
Note: You may choose to allow All Offering for the product at any time. However, Aura will prompt you to confirm if the selected Offering may be deleted. If confirmed, then all the selected Offering will be deleted, and the product will be available for ALL Offerings.
Availability-Client
Using this tab, you can allow the Product to be available for all the Clients or only specific Client(s). For client account product clients have been mentioned for product availability and at account level user has selected some other client then client account product will not display under product drop down with availability at product level user will be able to create client account only for the clients available for the product.
1. Access Product page, click Availability tab, then click Client sub tab.
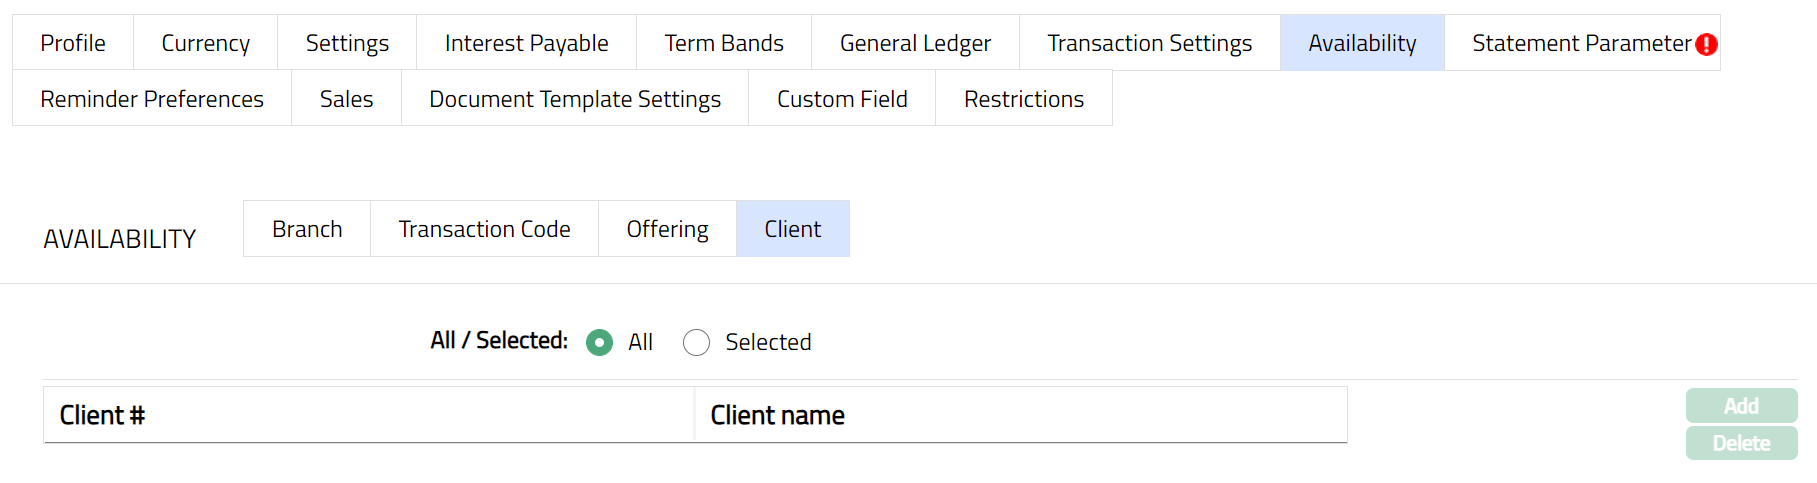
2. By default, All radio button is selected so that this Product is available for all Clients.
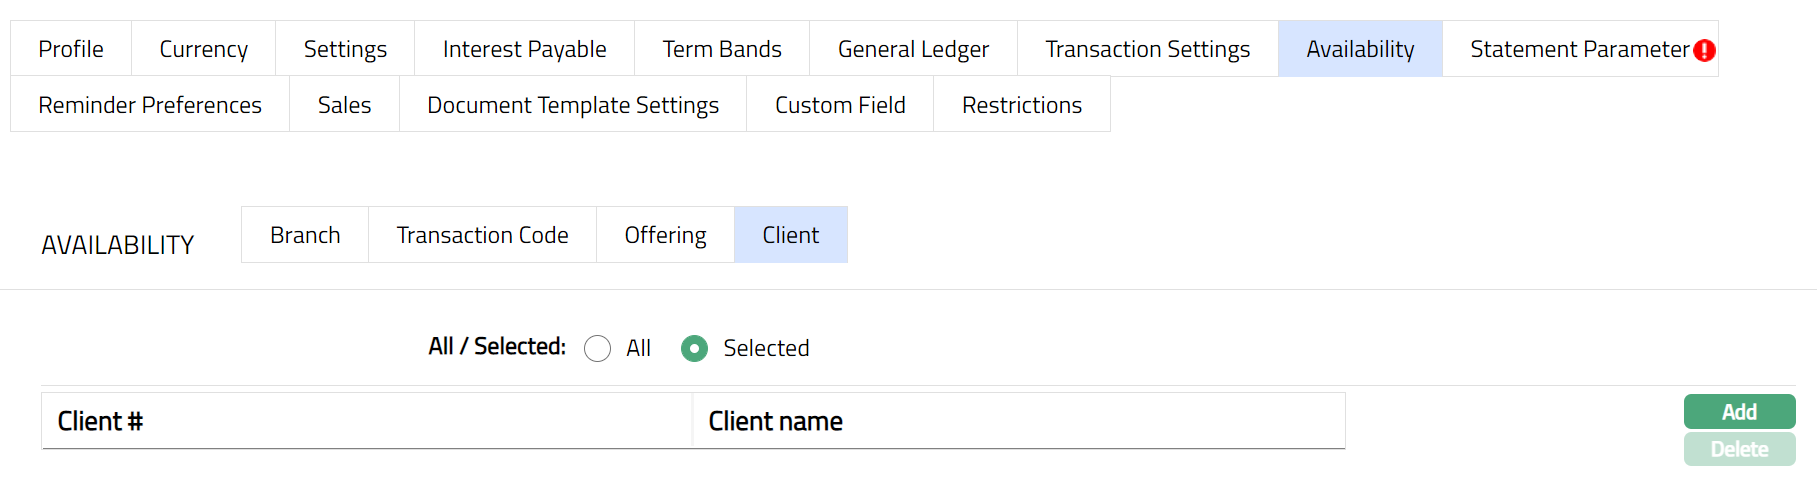
3. To restrict the Clients that are available under this product, click Selected radio button. Add button is now enabled.
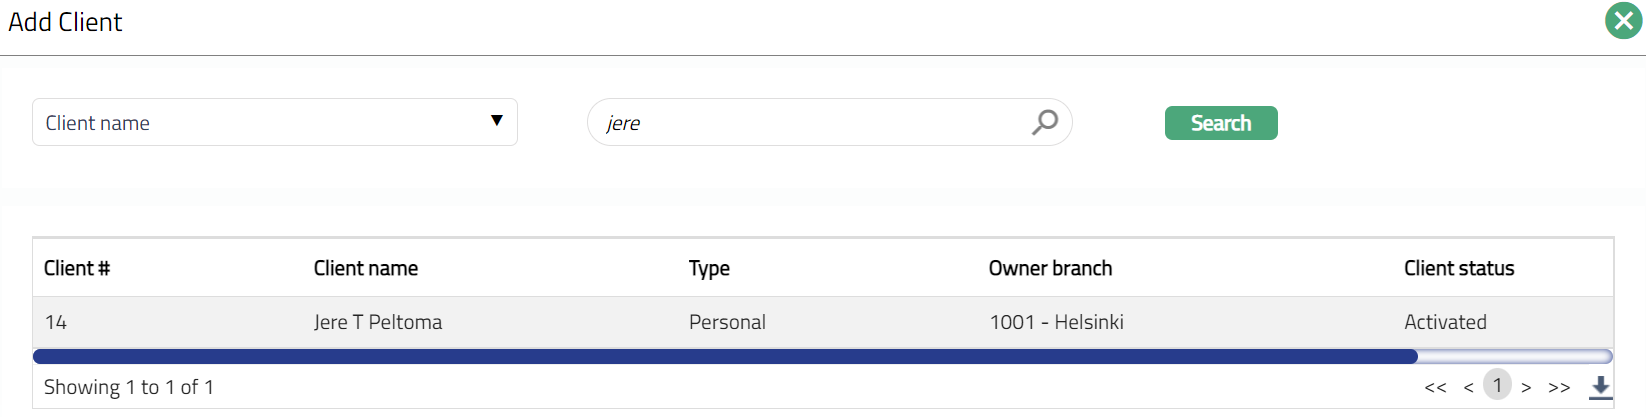
4. Click Add, the Add client page appears, where you can search for the required client with relevant criteria and select the required client
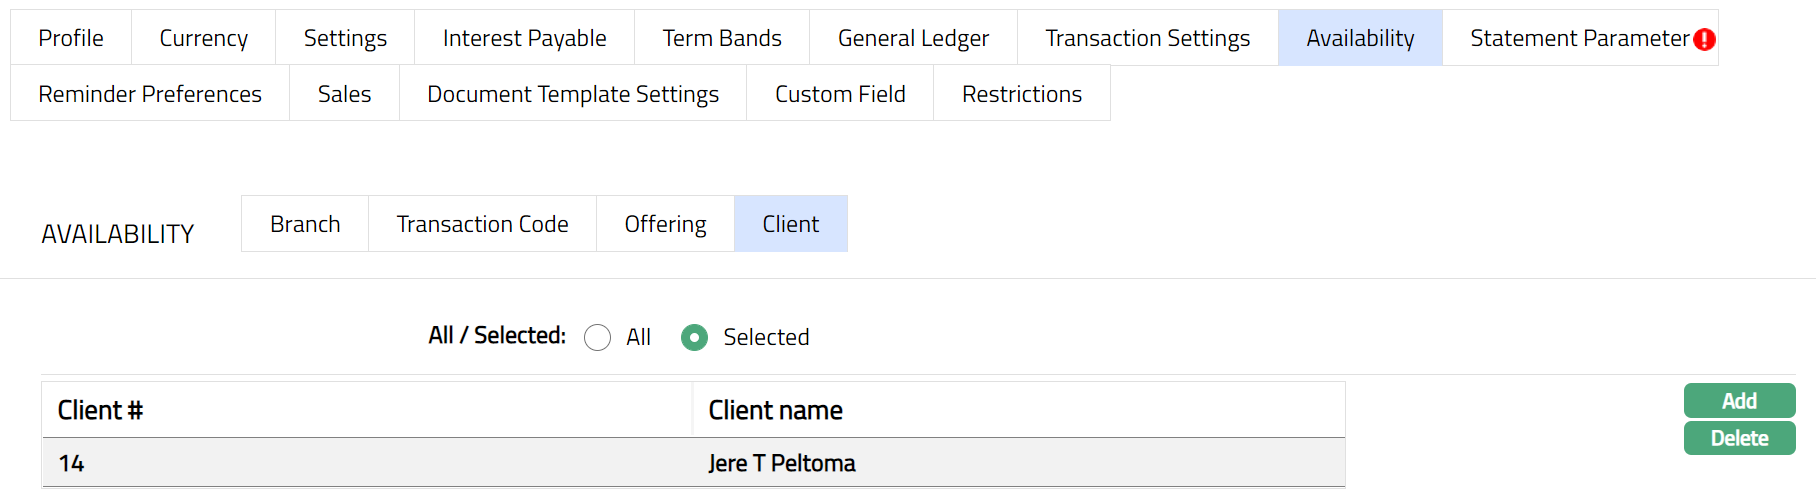
5. The selected Client will appear in Availability screen as shown below.
Function: Add, Delete
Note: You may choose to allow All Clients for the product at any time. However, Aura will prompt you to confirm if the selected Clients may be deleted. If confirmed, then all the selected Clients will be deleted, and the product will be available for ALL Clients.
Delete: You can delete any record by clicking Delete button. When you click Delete button, Aura displays an alert message. On confirmation Aura will delete the record. On deletion the deleted record will not be available at the account level for creation of new accounts.
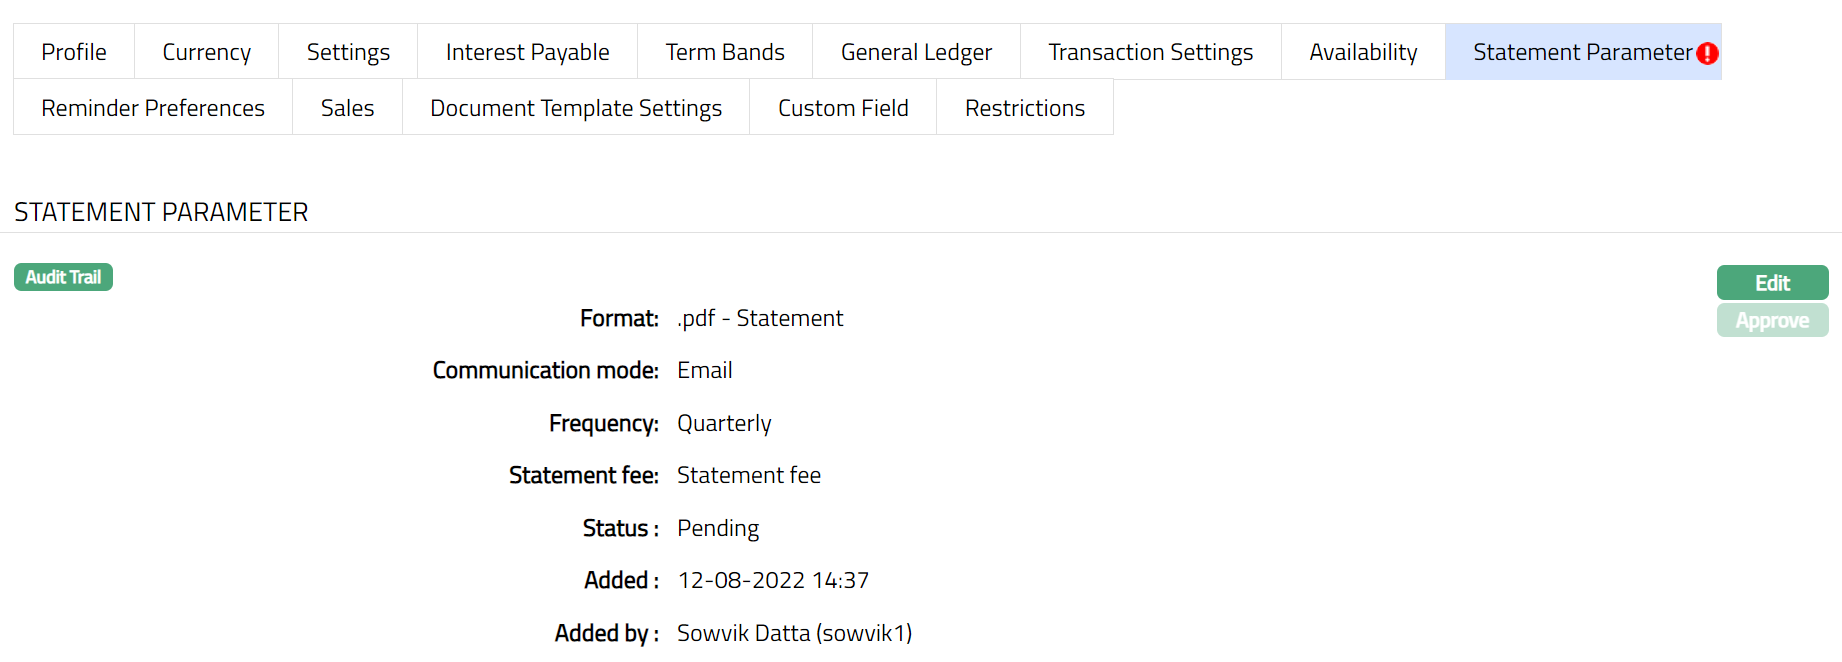
Statement Parameter
Using this tab, you can view and maintain the preferences for generating the statements.
1. Access Product page. Click Statement parameter tab to view the details as per sample below. The details are defaulted from the entries that you made during Product creation. For details refer to Term Deposit → New Product → Statement parameter (7/8).
2. Click Edit. The Edit Statement parameter page appears.
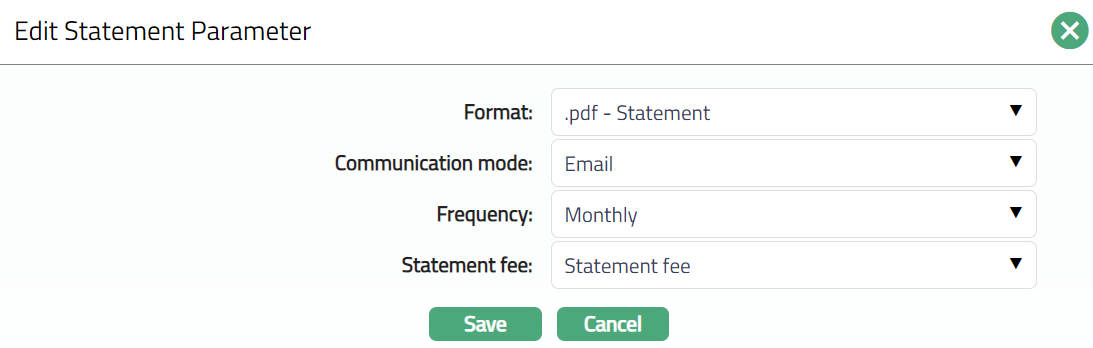
Note: All fields in Edit Statement Parameter are Editable.
3. Click Save. The Statement Parameter page appears with the edited details.

Note: After creation / edit, the tab is in Pending status. To approve, retrieve the record and Click Approve. Once the tab is approved, the red bubble disappears.

Function: Edit, Approve
The additional fields that you can view in the Interest Payable tab are explained below.
Status field denotes the status of the tab.
Added field denotes the date on which the record was added.
Added by field denotes the name of the user who created the record.
Approved field denotes date on which the record was approved and is displayed only for approved records.
Approved by field denotes name of the user who approved the record and is displayed only for approved records.
Document Template Settings
Using this tab, you can maintain the document template which can be used for uploading documents for all the accounts maintained under this Term Deposit account product.
1. Access Product page. Click Document Template Settings tab.

2. Click New. New Document Template page appears.
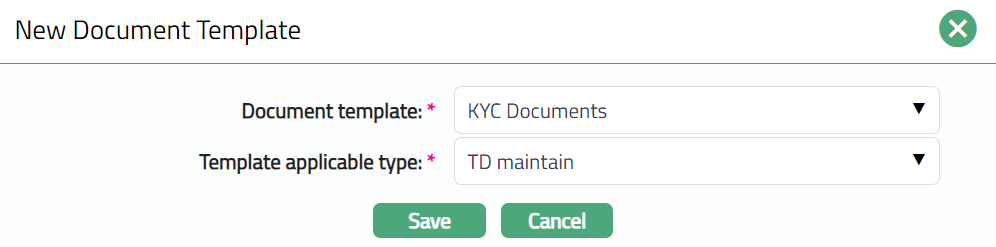
3. Select Document template from the drop-down list of Document Templates as maintained under Admin → System codes → Process → Document templates.
4. Select Template applicable type from the available drop-down. The available option is TD Maintain.
5. Click Save. The Document Template Settings page appears with the added details.
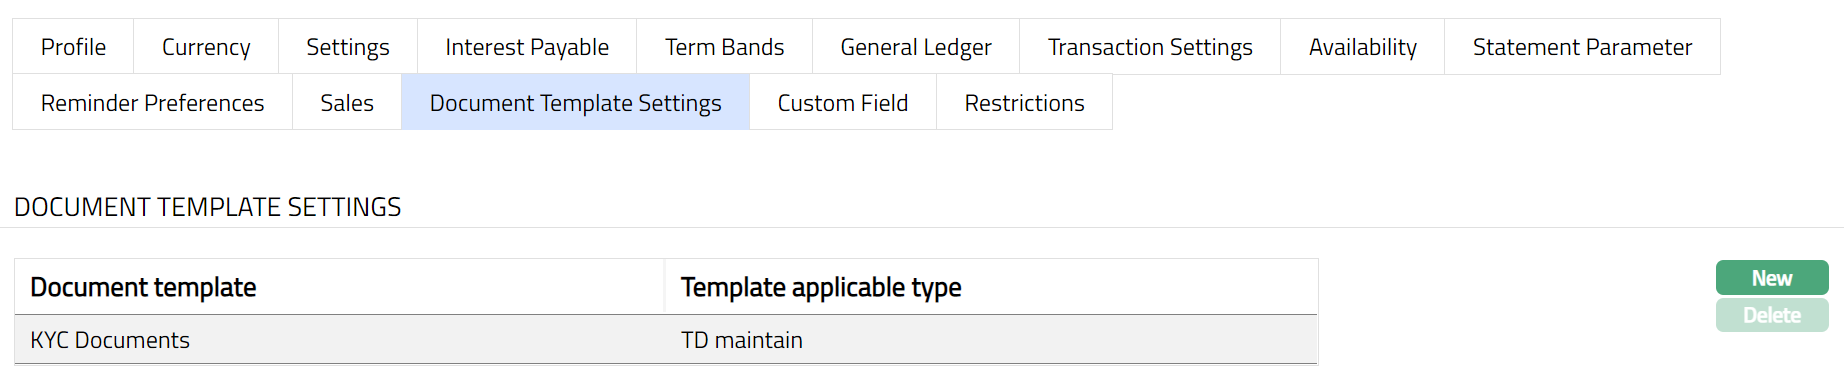
Functions: New, Delete.
Delete: You can delete Document Template by clicking Delete button. When you click Delete button, Aura displays an alert message. On confirmation Aura will delete the Document Template.
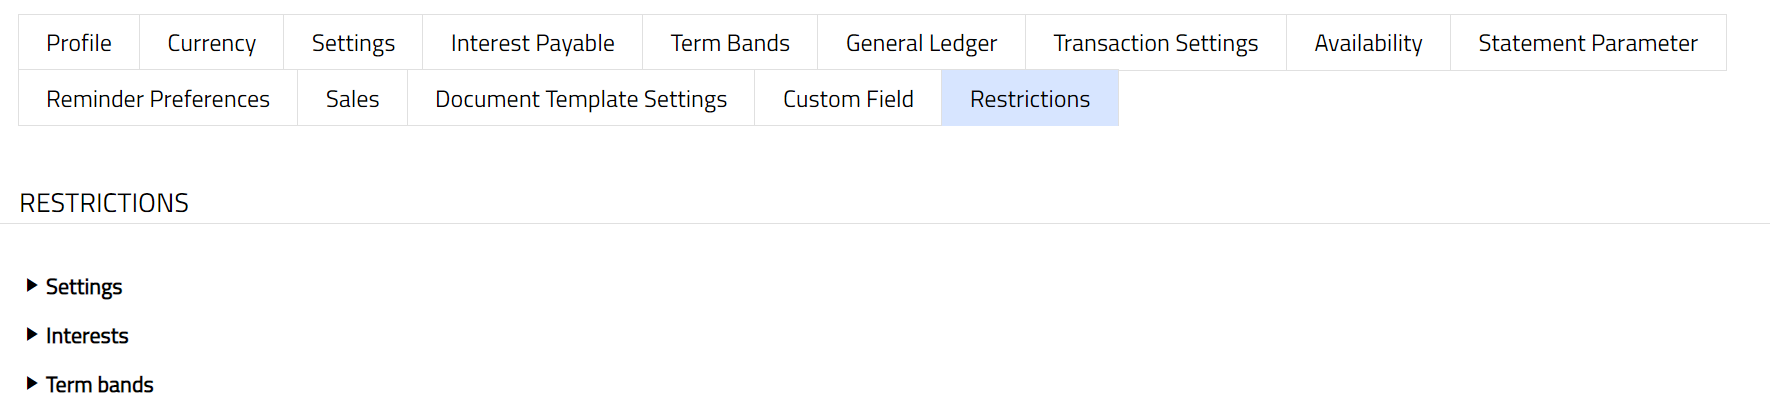
Restrictions
This tab can be used to restrict the parameters of the product to specific Settings, Interests and Term bands. It has three sub-tabs, one for each of these.
Restrictions -- Settings
To select the restrictions for Settings
1. Access Product page, click Restrictions tab, then click Settings sub tab.
2. Click Settings sub tab under Restrictions tab. The parameters under Settings will appear.
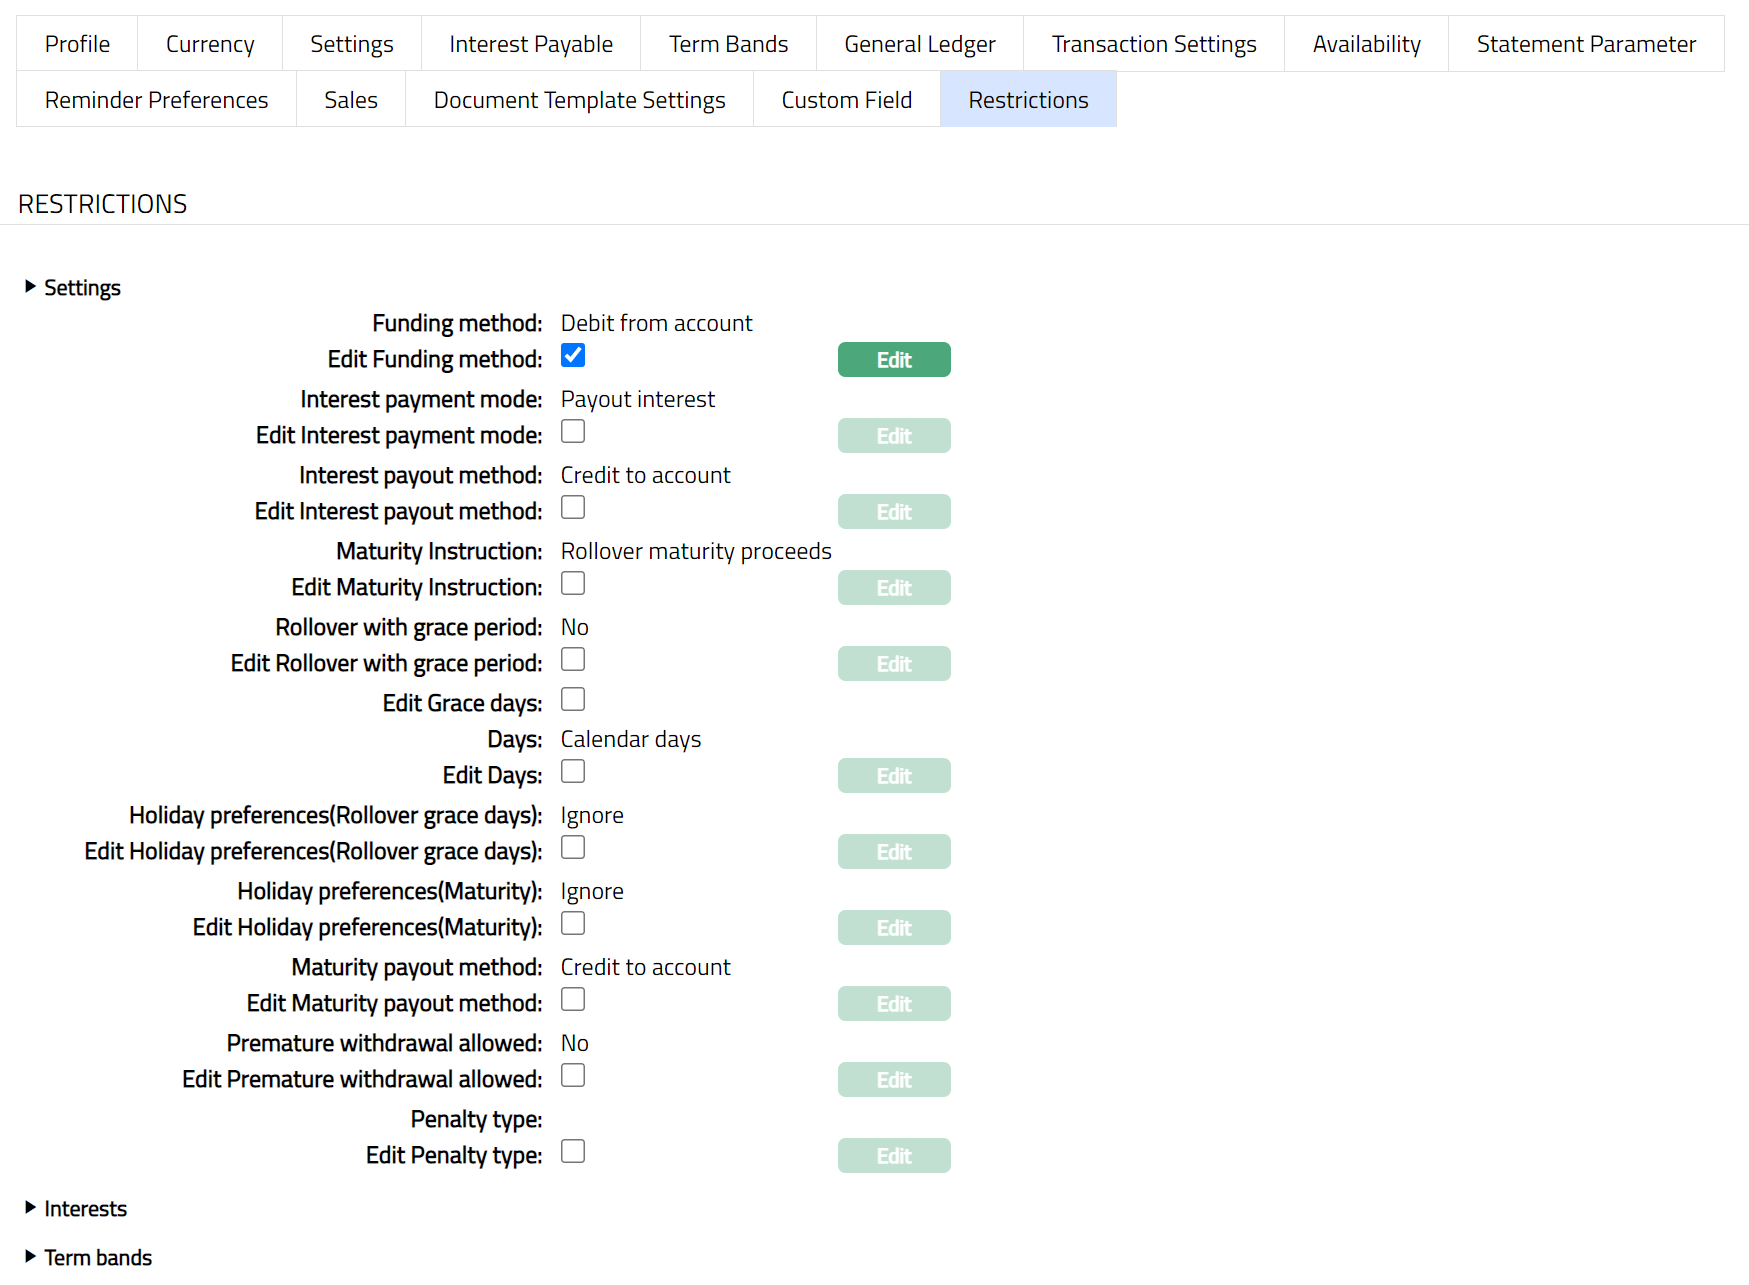
3. Select the parameter under Settings.
4. Click Edit. Edit Restriction page appears.
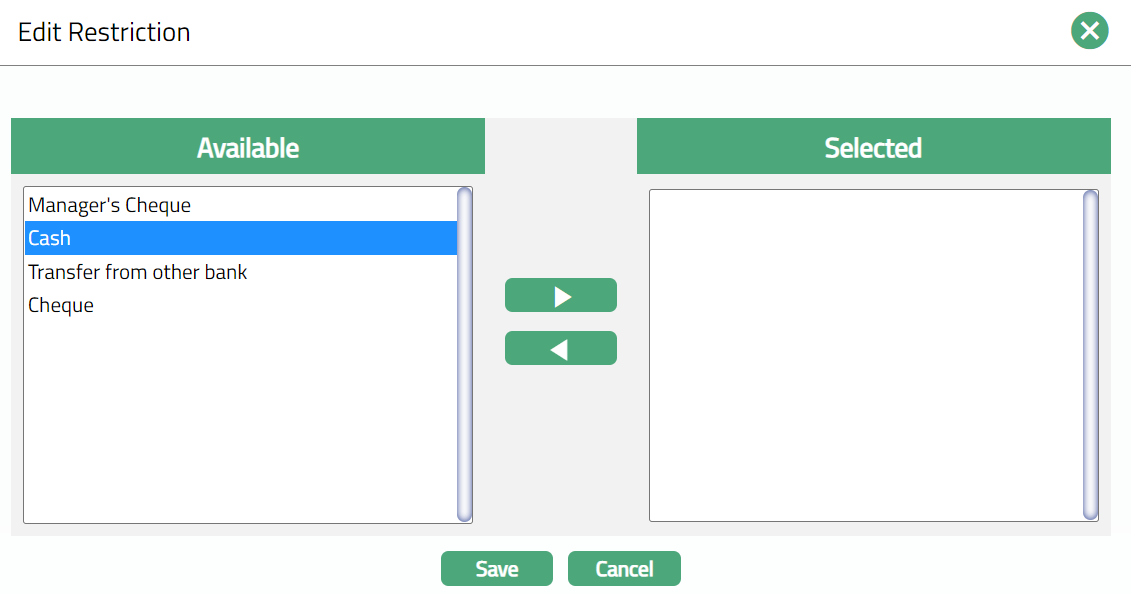
5. Available Restrictions are Manager's Cheque, Cash, Transfer from other bank and Cheque.
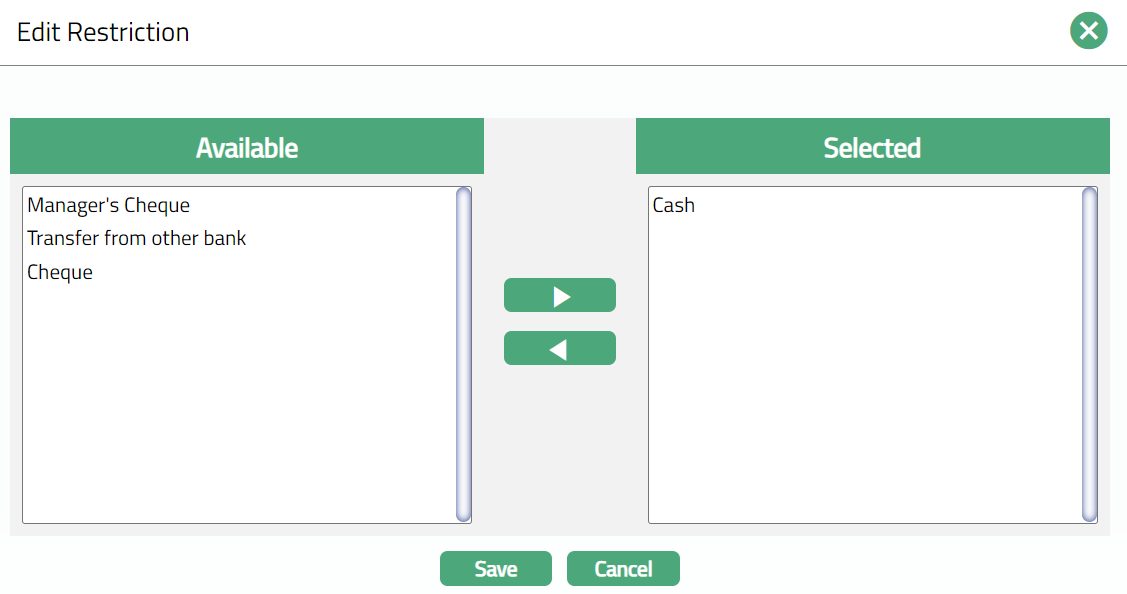
6. Select the required Restriction under Available and click the Right arrow button to move the restriction under Selected as per the sample screen shot shown below.
Function: Edit.
Note: Similarly, you can do necessary changes by selecting the required restriction for Interest Payable under Interests and Term Bands.
Reward Group
The Reward Group tab allows you to associate a Reward Group with the selected Term Deposit Product. A Reward Group defines the generic rewards that are applicable to all Term Deposit accounts created under this Product.
Once a Reward group is mapped, any Term Deposit account created under the Product will automatically inherit the rewards defined in the associated Reward Group, subject to eligibility and approval rules defined at the account level.
To view / edit a Reward Group, 1. Access the Product maintenance page. Click on Profile tab and select the Reward Group tab. If any Reward Group has already been added, these would be displayed; else, it will be blank.

2. Click Edit. The Edit Reward Group page appears.
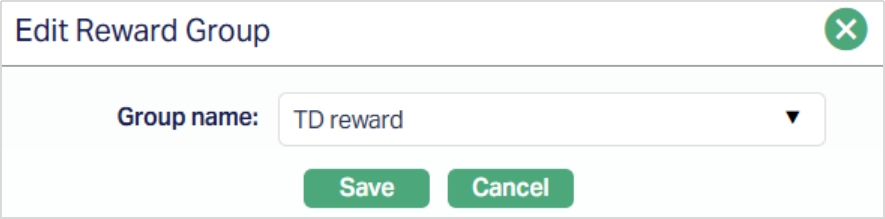
3. Select the required Group from the drop-down list under Group name. The list displays all active Reward Groups defined under CRM → Loyalty Program → Settings → Reward Group that are available for Term Deposit Products.
4. Click Save. The Reward Group tab is displayed with the selected Group name

Function: Edit
Once you save the mapping, the selected Reward Group Name is displayed in the Reward Group tab. The Group Name appears as a hyperlink, which redirects you to the Reward Group maintenance screen for detailed viewing or updates.
Impact of Reward Group mapping: The Reward Group mapped at the Product level controls the generic rewards that will apply to Term Deposit accounts created under this Product. If you want to change the number of rewards or redefine reward configuration for the Product, you must:
- Create a new Reward Group with the required reward setup.
- Map the new Reward Group to the Term Deposit Product After the change is approved, the updated Reward Group will apply only to Term Deposit accounts created after the approval. Existing accounts remain unaffected.
Edit and approval behaviour: You can edit the Reward Group mapping at any time. Changes made to the Reward Group tab are subject to approval as per the standard Product Maintenance workflow. Once approved, the updated configuration becomes effective for subsequent Term Deposit accounts created under the Product.
Note: The list of Reward Groups displays only Active Reward Groups where the Product Type = Term Deposit. For details on how the selected Reward Group behaves at the Term Deposit Account level - such as how rewards are generated, validated, or replaced, refer to Term Deposit Account → Reward Tab user manual.
Pricing
Interest Payable
The Interest Payable tab allows you to create, view and maintain the interest rate offered on a Term Deposit account.
To Add / Edit / Delete the Interest payable
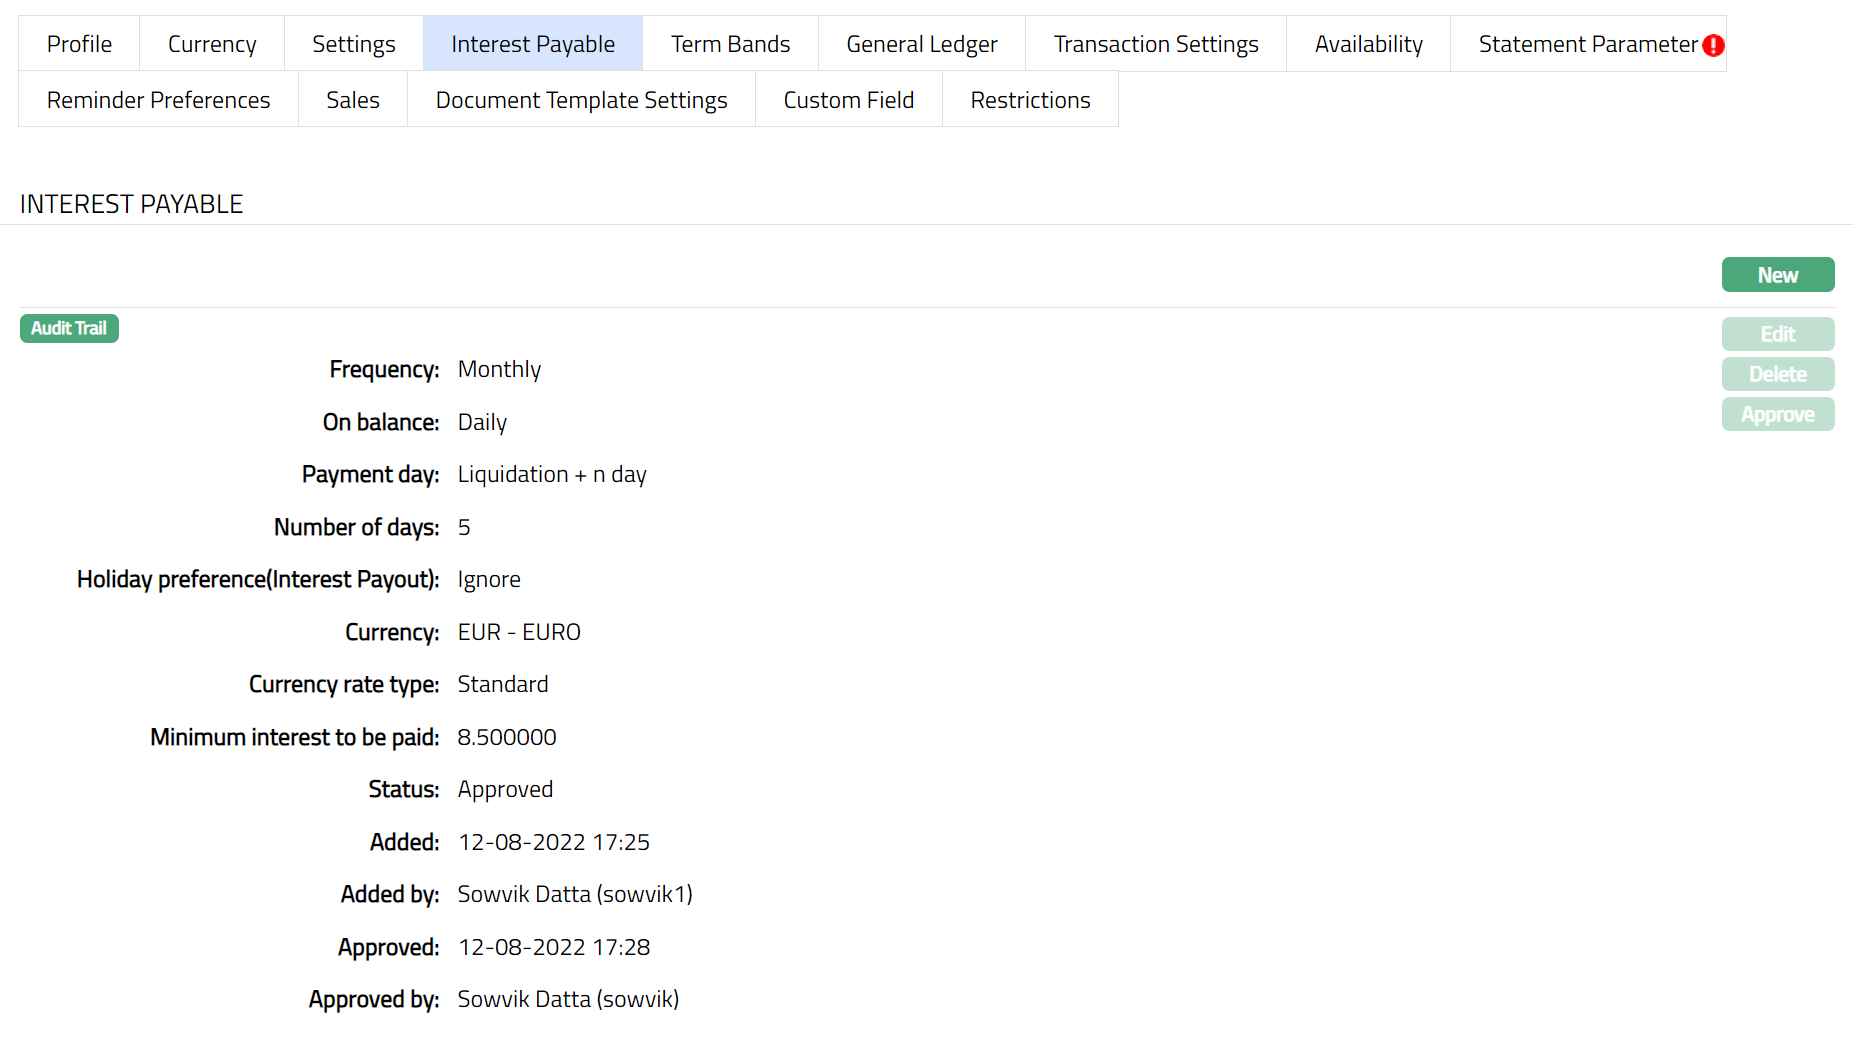
1. Access Product page. Click Interest Payable tab to view the details as per sample below. The details are defaulted from the entries that you made during Product creation. For details refer to New Product → Interest Payable (4/8).
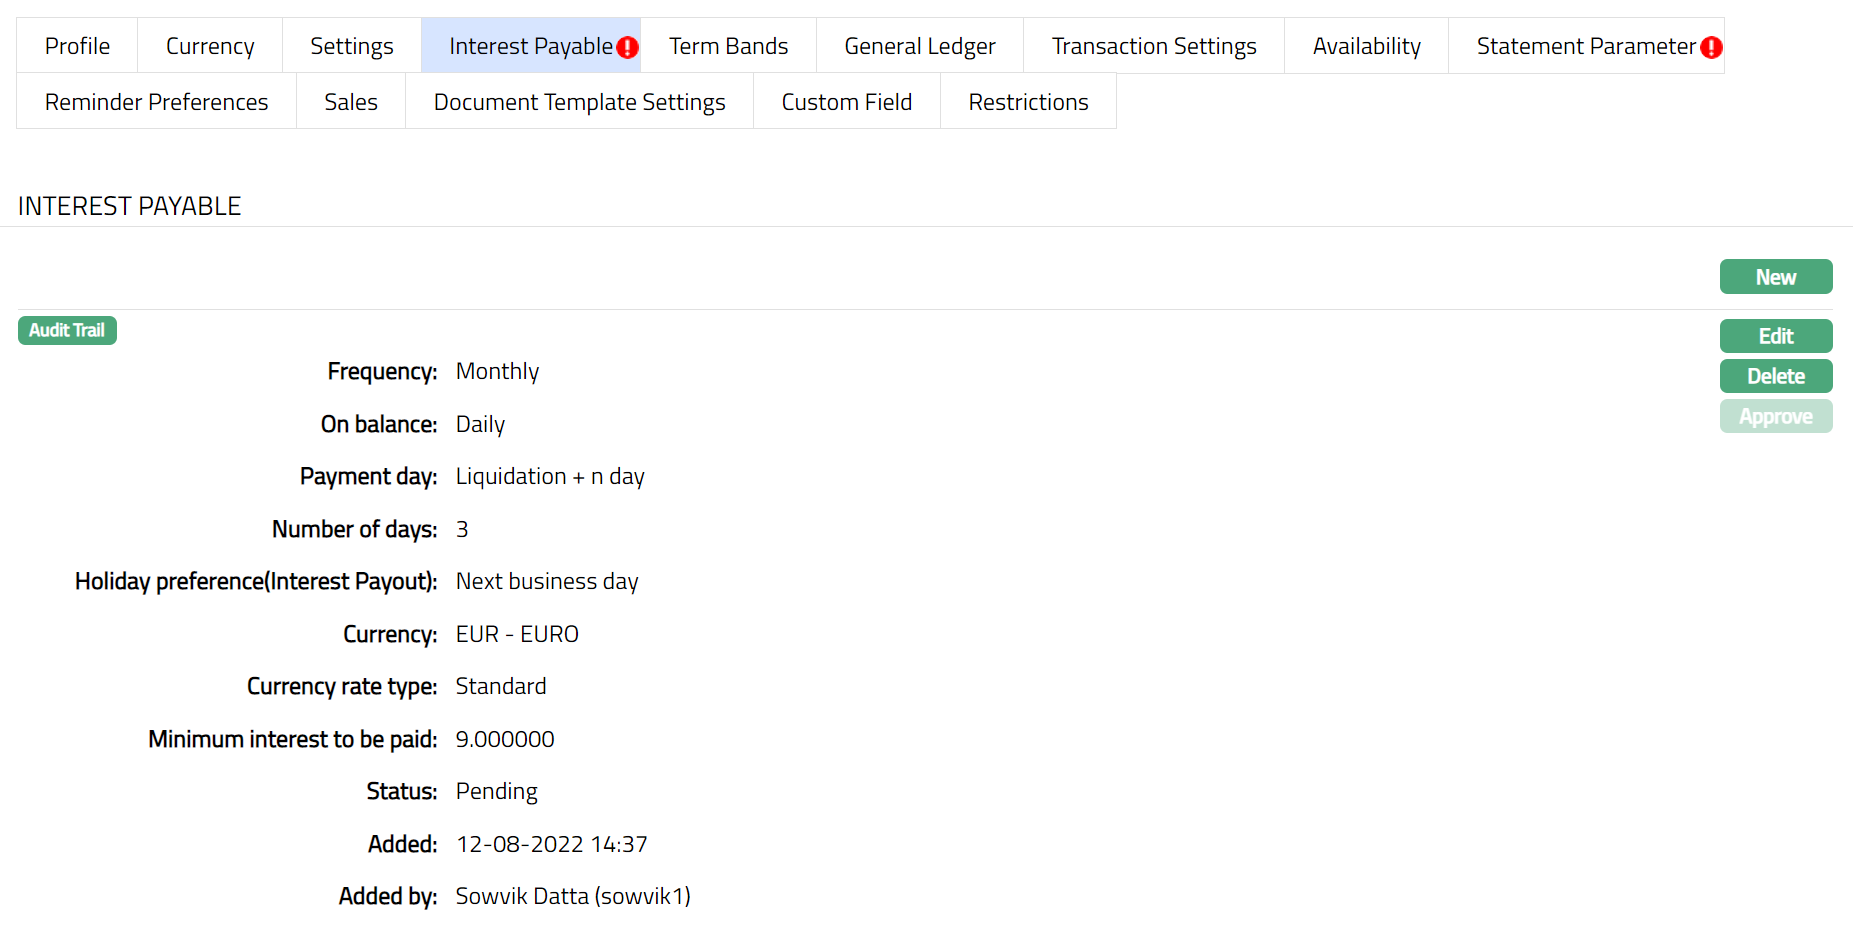
Note: After creation / edit, the tab is in Pending status. To approve, retrieve the record and click Approve. Once the tab is approved, no further changes can be done on the Interest Payable tab. If you want to change any settings for the Product under the Interest payable tab, you have to use the New button.
To Edit Interest Payable
2. Click Edit. The Edit Interest Payable page appears.
Note: All the fields in Interest payable screen are editable during Edit. However, only the person who created the interest payable record can edit it, till it is approved.
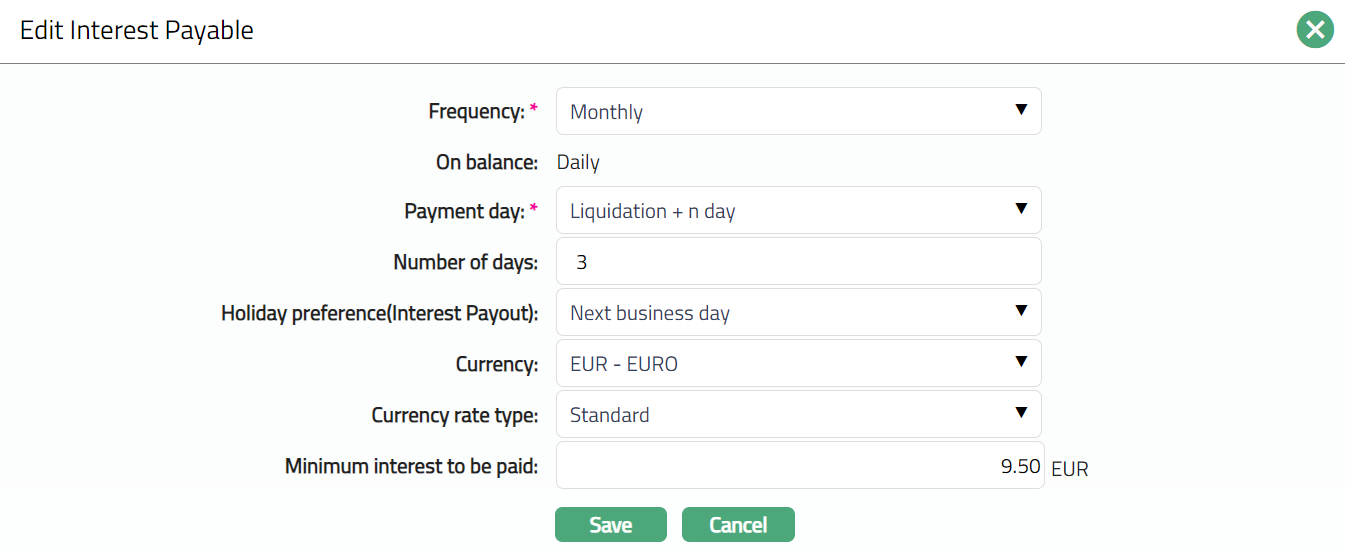
3. Click Save. The Interest Payable page appears with the edited details.
Functions: New, Edit, Delete, Approve.
After creation / edit, the tab is in Pending status. To approve, retrieve the record and Click Approve. Once the tab is approved, no further changes can be done on the Interest Payable tab. If you want to change any settings for the Product under the Interest payable tab, you have to use the New button.

Function: Edit, Delete, Approve
The additional fields that you can view in the Term Bands tab are explained below.
Status field denotes the status of the tab.
Added field denotes the date on which the record was added.
Added by field denotes the name of the user who created the record.
Approved field denotes date on which the record was approved and is displayed only for approved records.
Approved by field denotes name of the user who approved the record and is displayed only for approved records.
To Add New Interest Payable,
1. Click New. The New Interest payable page appears.
2. The details are explained during Product creation. For details refer to Term Deposit → New Product → Interest payable (4/8).

Note: Once saved, the tab status is Pending, till it is approved by another user. Once approved, the Interest payable cannot be edited / deleted. The New Interest payable record will replace the old record and will be applied to all new accounts under the product. Existing accounts will not be affected by any change in the Interest payable parameters.
Function: New, Edit, Delete, Approve
The additional fields that you can view in the Interest Payable tab are explained below.
Status field denotes the status of the tab.
Added field denotes the date on which the record was added.
Added by field denotes the name of the user who created the record.
Approved field denotes date on which the record was approved and is displayed only for approved records.
Approved by field denotes name of the user who approved the record and is displayed only for approved records.
Delete: You can delete Interest Payable by clicking Delete button. When you click Delete button, Aura displays an alert message. On confirmation Aura will delete the Interest payable. On deletion the deleted Interest Payable will not be available at the account level for creation of new accounts. The existing records will not be affected.
Term Bands
| Term days | Interest Rates |
|---|---|
| 1 -100 | 8% |
| 101 – 200 | 10% |
| 201 – 365 | 15% |
If you select the term days as 215 days, then your account will fall under the band 201-365.
To add a new term band,
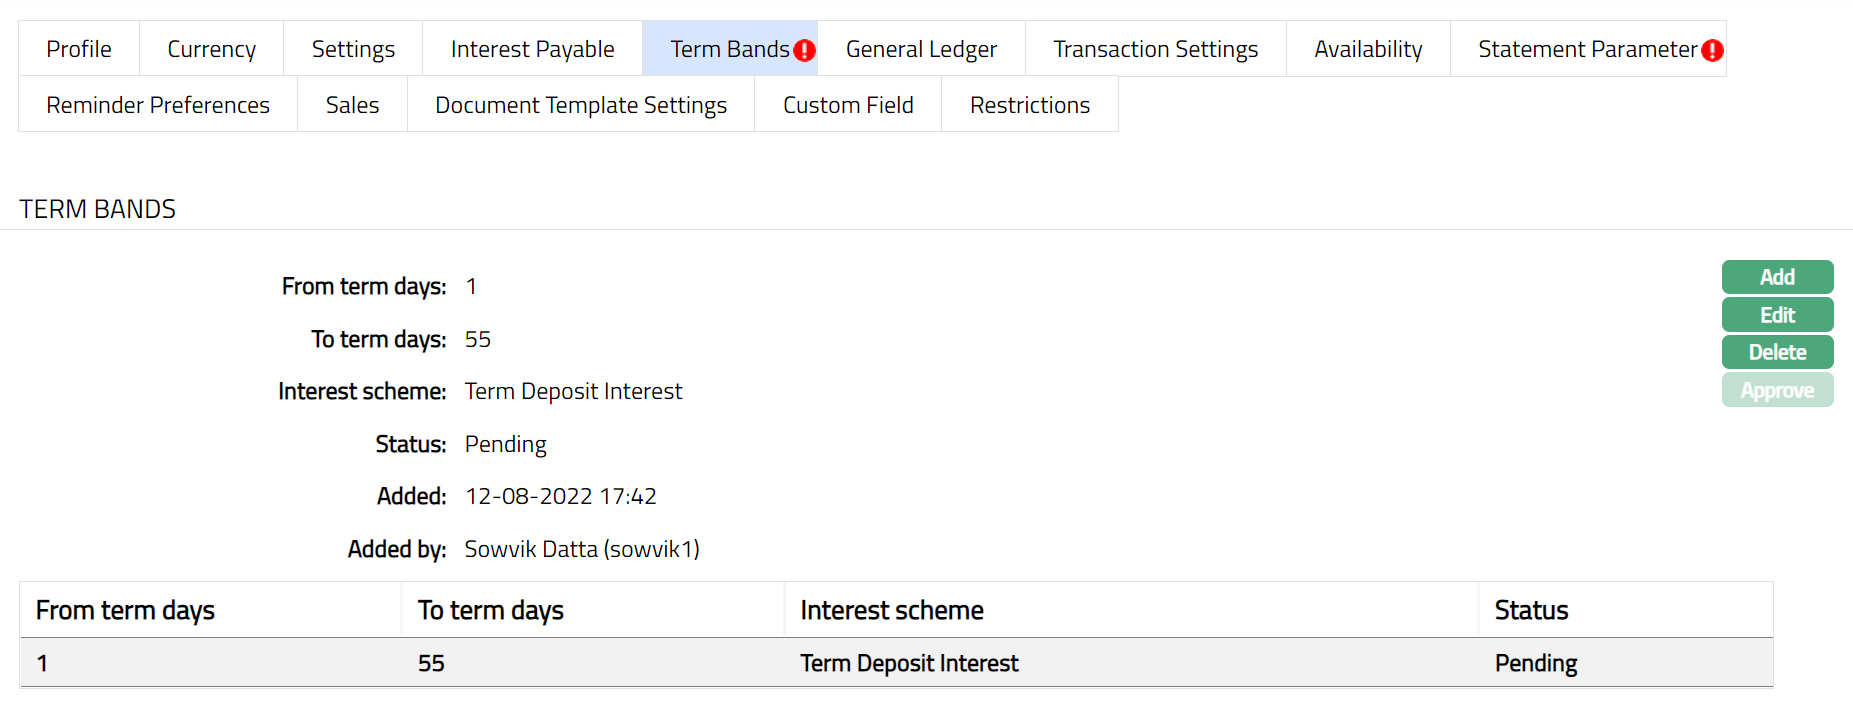
1. Access Product page. Click Term band tab.
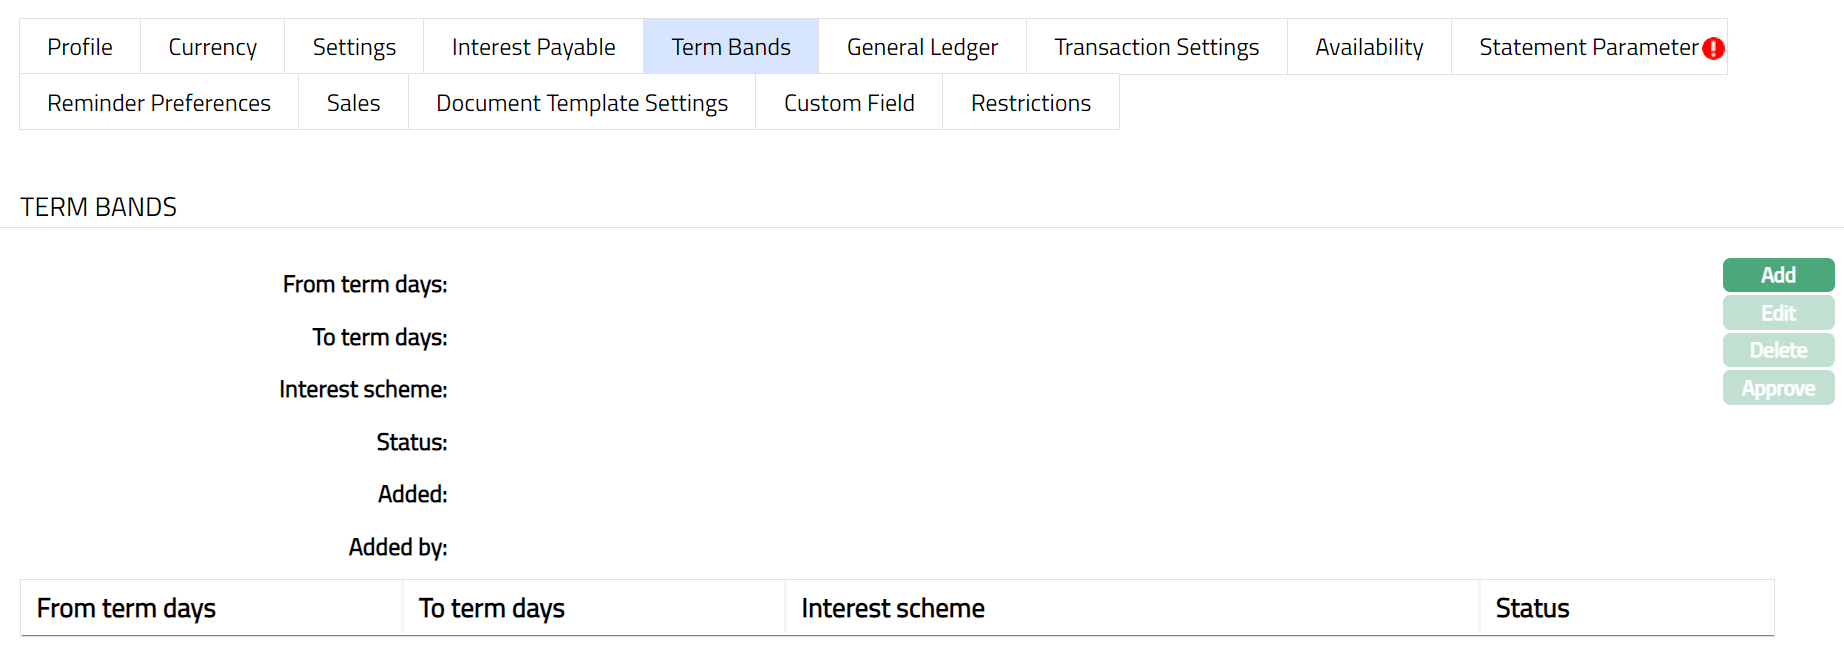
The available fields are:
From term days denotes the day from which the interest scheme maintained for the term band will be applicable.
To term days denotes the day to which the interest scheme maintained for the term band will be applicable.
Interest scheme denotes the interest scheme selected for the term band.
Status field denotes the status of the tab.
Added field denotes the date on which the record was added.
Added by field denotes the name of the user who created the record.
2. Click Add. Add Term Bands page appears.
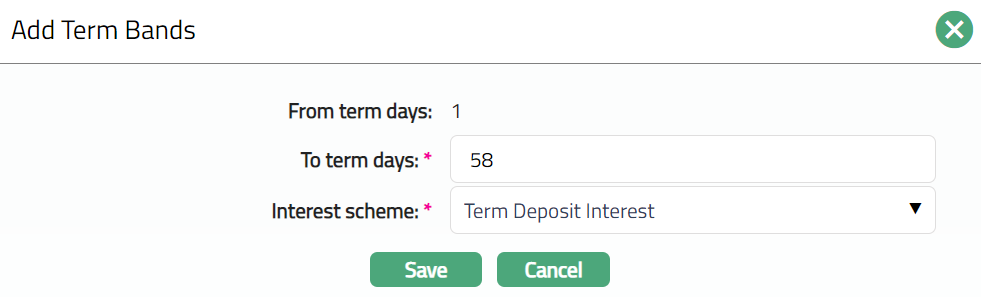
3. From term days will be derived by Aura. For the first band, it is derived based on what you defined as the minimum term days in New Product → Settings (3/8). For subsequent bands, this is derived as To Term Days of previous band + 1.
4. Enter To term days. To term days should not exceed maximum term days as specified in New Product → Settings (3/8).
5. Select the applicable Interest Scheme for this term band from the drop-down list of Cumulative - Flat or Banded interest schemes maintained in Admin → Pricing → Interest → Interest scheme.
6. Click Save. Term Bands page appears with the added details.

Functions: Add, Edit, Delete, Approve.
Note: After creation / edit, the tab is in Pending status. To approve, retrieve the record and Click Approve. Once the tab is approved, no further changes can be done on the Term Bands tab. If you want to change any settings for the Product under the Term Bands tab, you have to use the Add button.
To Edit Term Bands,
1. Click Edit. Edit Term Bands page appears.
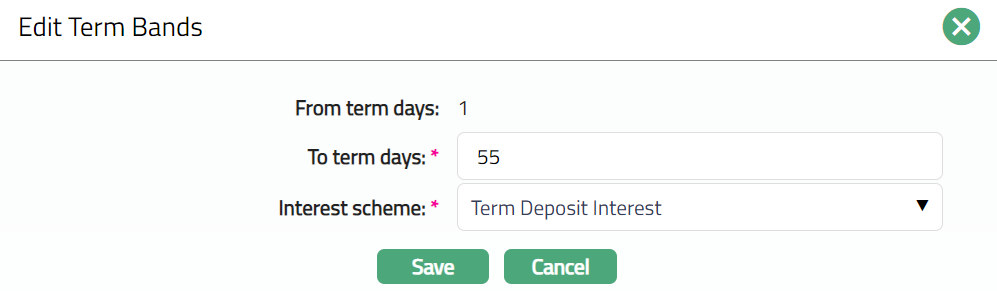
Note: Except Form term days field all other fields are editable.
2. Click Save. Term Bands page appears with the edited details.
Note: After creation / edit, the tab is in Pending status. To approve, retrieve the record and Click Approve. Once the tab is approved, no further changes can be done on the Term Bands tab. If you want to change any settings for the Product under the Term Bands tab, you have to use the Add button.
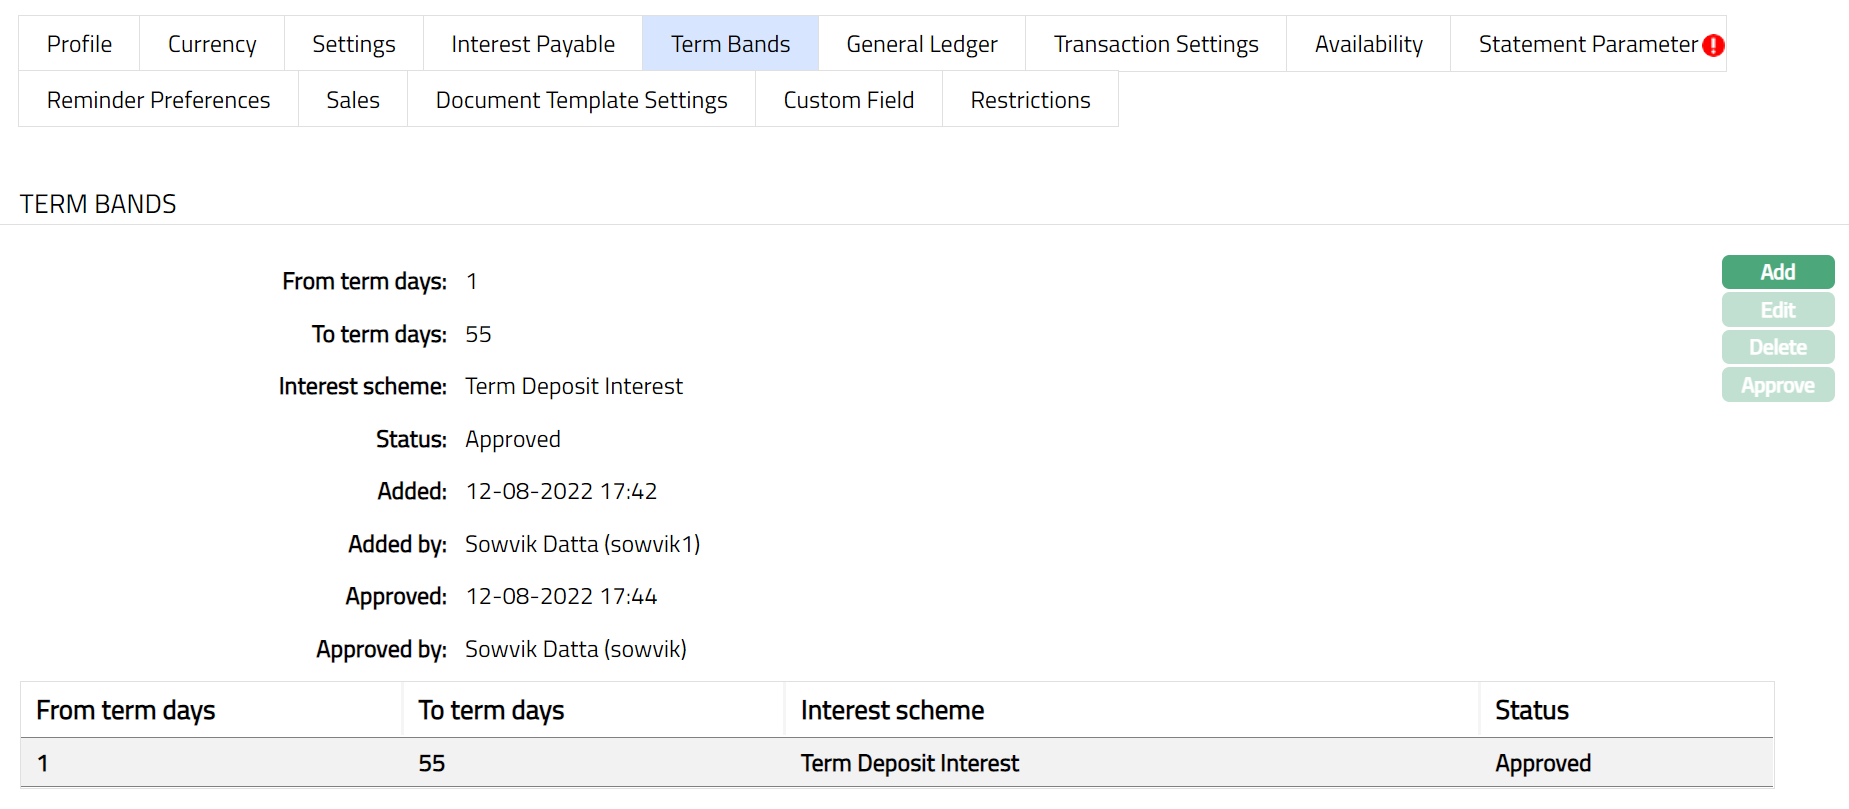
Functions: Add, Edit, Delete, Approve
The additional fields that you can view in the Interest Payable tab are explained below.
Status field denotes the status of the tab.
Added field denotes the date on which the record was added.
Added by field denotes the name of the user who created the record.
Approved field denotes date on which the record was approved and is displayed only for approved records.
Approved by field denotes name of the user who approved the record and is displayed only for approved records.
Delete: You can delete Term bands by clicking Delete button. When you click Delete button, Aura displays an alert message. On confirmation Aura will delete the Interest payable. On deletion the deleted Term Bands will not be available at the account level for creation of new accounts.
Sales
Using this tab, you can view and maintain the sales commission for the product.
1. Access Product page, Click Sales tab.
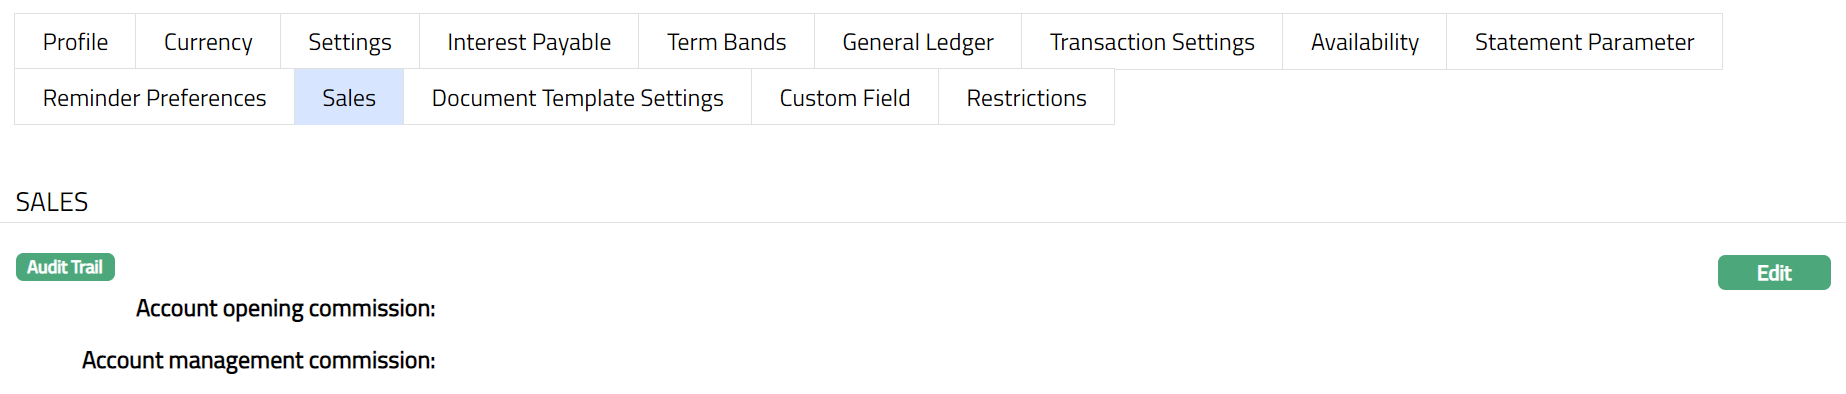
2. Click Edit. Edit Sales page appears.
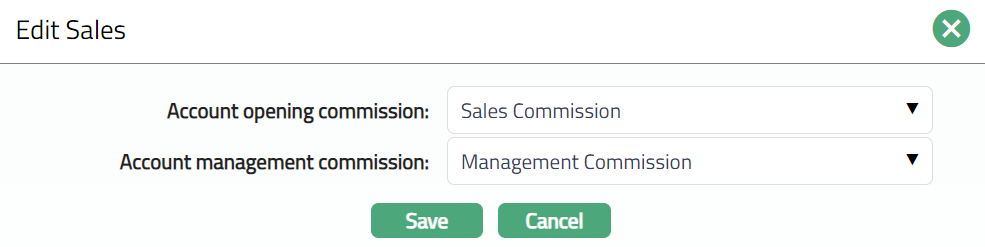
3. If you want to allow a specific commission for account opening, select the Account opening commission from the drop-down list of active Charges maintained under Admin → Pricing → Charges → Charge Schemes, where the Charge type is Event, Flat and Treat as Commission is Yes.
4. If you want to allow a commission for account management, select the Account management commission from the drop-down list of active Charges maintained under Admin → Pricing → Charges → Charge Schemes, where the Charge type is Periodic, Flat or Banded and Treat as Commission is Yes.
5. Click Save. The Sales page appears with the edited details.

Functions:Edit
Premature Withdrawal
The Premature Withdrawal tab allows you to define whether premature withdrawal is permitted for the selected Term Deposit Product and to configure the applicable penalty parameters. Premature Withdrawal is maintained at the Product level and controls whether penalty details are defaulted to Term Deposit accounts created under the Product.
During Term Deposit Product creation, Aura automatically creates a Premature Withdrawal record with Premature withdrawal allowed set to No. This field is not available in the Product Add wizard and can be modified only after the Product is created.
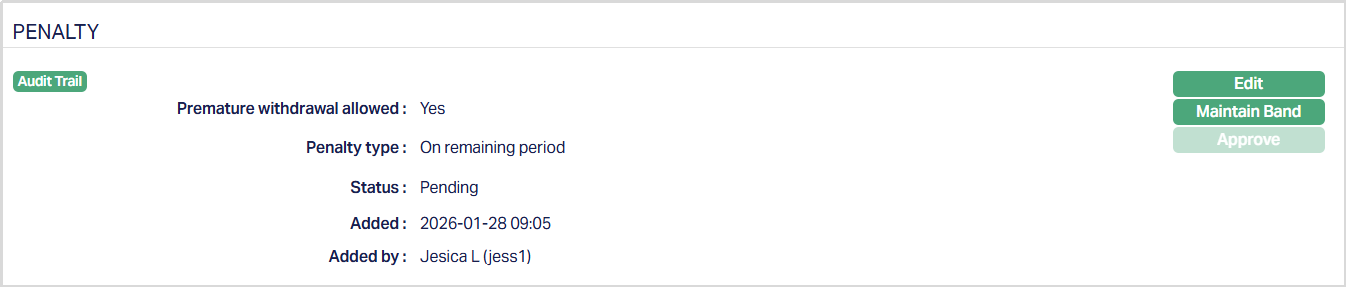
To view / edit Premature Withdrawal, 1. Access the Product maintenance page. Click on Pricing tab and select the Premature Withdrawal tab.

2. Click Edit. The Edit Premature Withdrawal page appears.
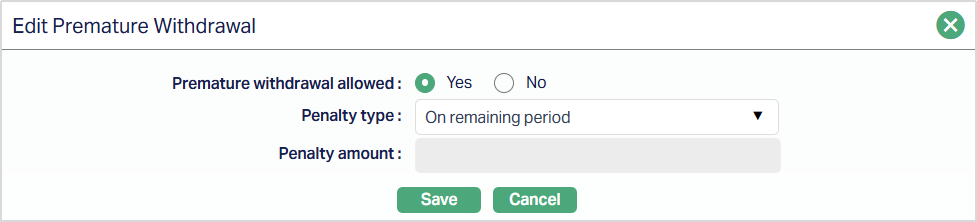
3. Premature withdrawal allowed - This field determines whether premature withdrawal is permitted for the selected Term Deposit Product.
When No is selected:
- Premature withdrawal is not permitted for the Product
- All penalty-related fields remain disabled
- The Premature Withdrawal tab is not displayed at the Term Deposit Account level When Yes is selected:
- Penalty configuration fields are enabled
- You can define the penalty applicable for premature withdrawal
4. Penalty type - The Penalty Type field defines how penalty for premature withdrawal will be calculated for the Product. This field is enabled only when Premature Withdrawal allowed is set to Yes. The following penalty types are available:
- Fixed Amount - A fixed monetary amount is charged as a penalty.
- On Elapsed Period - The penalty is applied based on the elapsed period of the Term Deposit.
- On Remaining Period - The penalty is applied based on the remaining period of the Term Deposit.
- Custom - The penalty is applied based on custom-defined rules using penalty bands.
For On Elapsed Period, On Remaining Period, and Custom penalty types, penalty bands must be maintained before the Premature Withdrawal configuration can be approved. Aura does not allow approval of the configuration unless the required penalty bands are defined.
5. Penalty Amount - The Penalty Amount is used to specify the fixed monetary amount that will be charged as a penalty when a Term Deposit is withdrawn prematurely. This field is enabled only when -
- Premature withdrawal is set to Yes, and
- Penalty Type is selected as Fixed Amount
Sample screenshot is shown below.
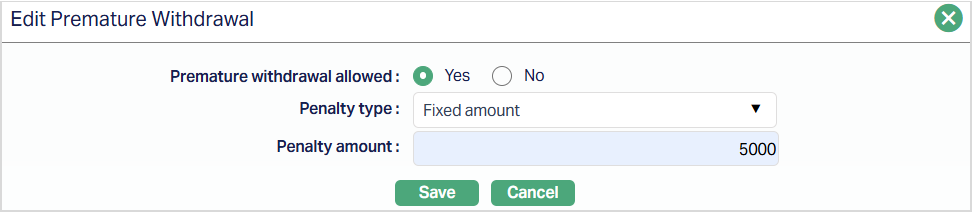
When enabled, you can enter the penalty amount that will be applied uniformly for all premature withdrawals under the Product. The Penalty Amount field is disabled when:
- Premature withdrawal allowed is set to No, or
- Penalty Type is selected as On Elapsed Period, On Remaining Period, or Custom For these penalty types, penalty values are maintained through penalty bands and not through this field.
6. Click Save. The Penalty page under the Premature Withdrawal tab appears with the edited details.
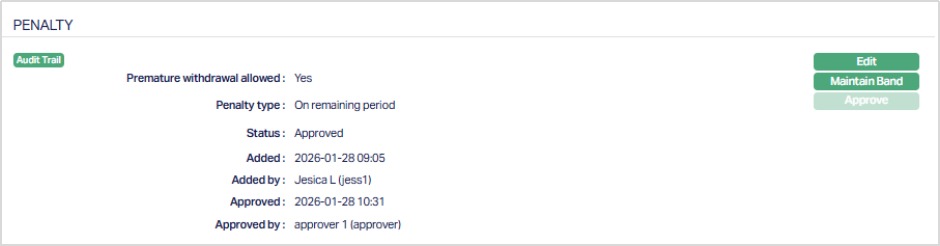
Functions:Edit, Maintain Band, Approve.
Note: The Premature Withdrawal record remains in Pending status until it is approved by another user. If auto approval is enabled for the Product, the record is approved automatically upon saving, and the Pending status is not displayed.
Maintain Band: The Maintain Band button allows you to define penalty bands for premature withdrawal when the penalty is based on the elapsed period, remaining period, or custom logic. The button is enabled only when:
- Premature withdrawal allowed is set to Yes, and
- Penalty Type is selected as On Elapsed Period, On Remaining Period, or Custom
The Maintain Band button remains disabled when Penalty Type = Fixed Amount. Sample screenshot as shown below.

Penalty bands must be maintained before the Premature Withdrawal configuration can be approved.
To add/maintain a band, 1. Access the Penalty page under the Premature Withdrawal tab. Click the Maintain Band button, the Band Maintenance page appears. If any Band has already been added, these would be displayed; else, it will be blank.
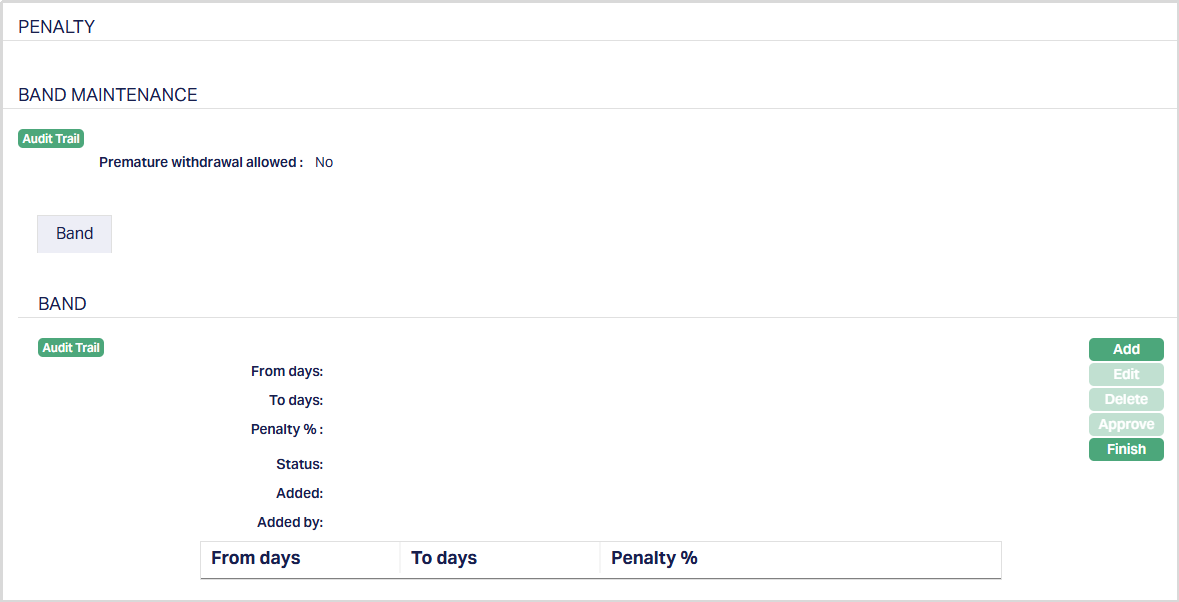
2. Click Add. The Add Penalty Band page appears.
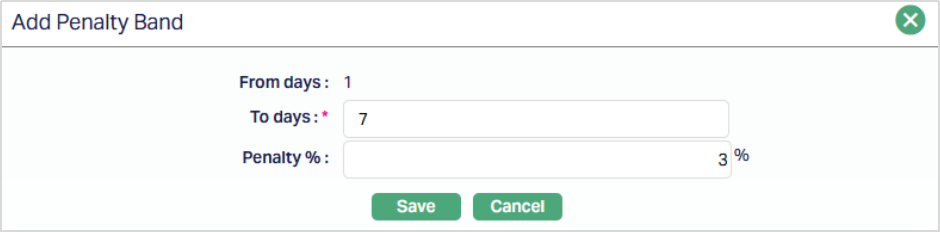
3. The From Days field indicates the starting day of the penalty band. For the first penalty band, this field is defaulted to 1 and is not editable.
Note: For subsequent bands, the From Days value is automatically populated as the next day after the To Days value of the previous band. This field remains non-editable to ensure continuous and non-overlapping band ranges.
4. The To Days field indicates the ending day of the penalty band. This field must be greater than the corresponding From Days value and cannot exceed the maximum term days defined for the Term Deposit product. Aura validates the entered value to ensure that the penalty bands cover valid and continuous day ranges.
5. The Penalty % field defines the percentage used to calculate the penalty for premature withdrawal within the specified band range How this percentage is applied depends on the selected Penalty Type:
- On Elapsed Period - The penalty percentage is deducted during penalty calculation.
- On Remaining Period - The penalty percentage is added during penalty calculation
- Custom - The penalty percentage is applied based on the custom penalty logic defined for the Product.
6. Click Save. The Band page appears with the added details.
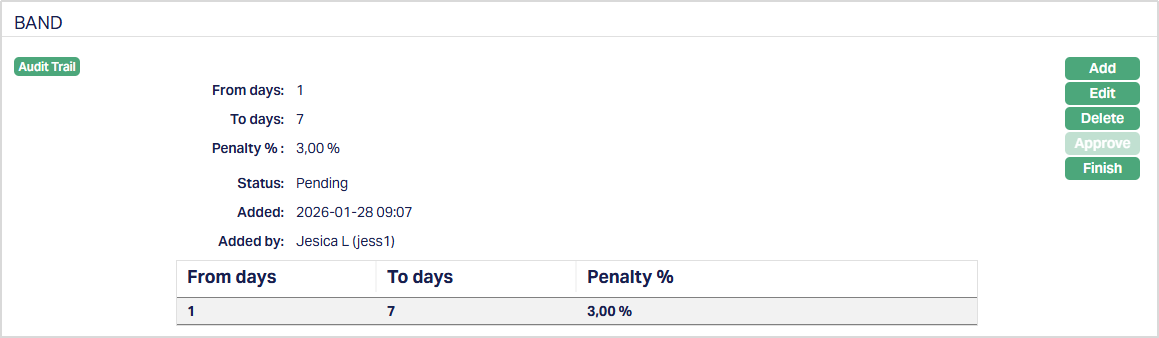
Functions: Add, Edit, Delete, Approve, Finish.
To edit a Penalty Band, 1. Access the Band Maintenance page, click Edit. The Edit Penalty Band page appears.
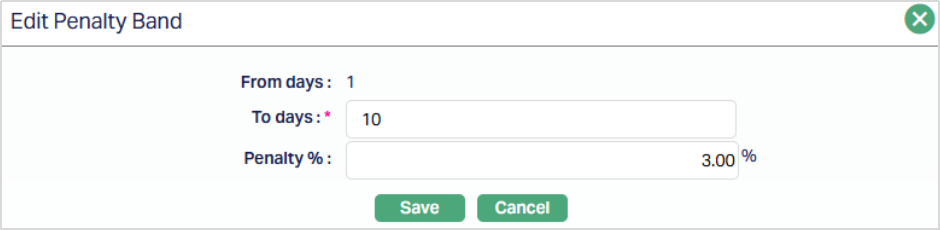
All fields are editable except the defaulted From days field.
2. Click Save. The Penalty Band page appears with the edited details.
Functions: Add, Edit, Delete, Approve, Finish.
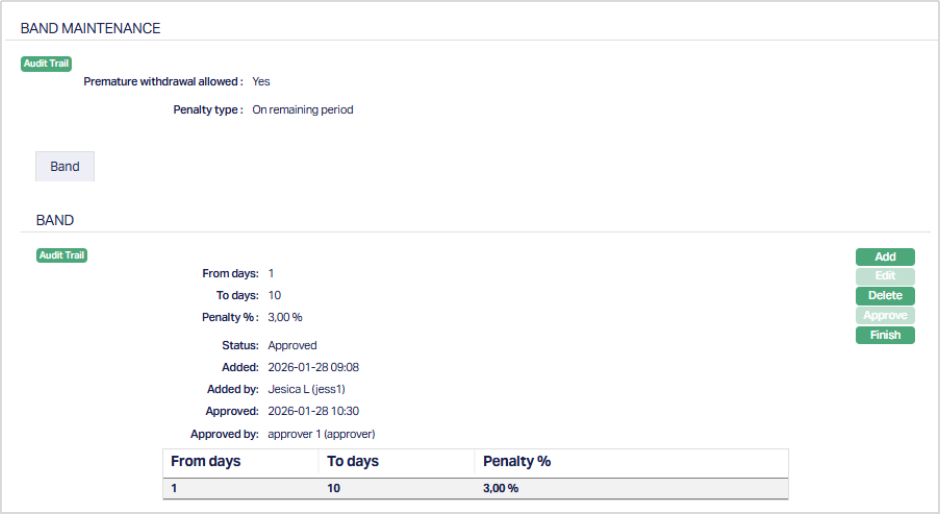
Note: Status of the record is Pending till it is approved by another user. On approval, the tab status is set to Approved. The additional fields that are shown are:
- Status indicates the current state of the record. It will be either: Pending - If the record is waiting for approval or Approved - If the record has been reviewed and finalized.
- Added shows the date and timestamp when the record was created and Added by displays the user ID and full name of the person who created the record.
- Approved shows the date and time when the record was approved and Approved by displays the user ID and full name of the person who approved the record.
Impact on Term Deposit Accounts:
- The Premature Withdrawal configuration maintained at the Product level is defaulted to Term Deposit accounts created under the Product.
- You can modify the defaulted configuration at the account level based on account-specific requirements.
- Changes made at the account level override the Product-level configuration for the selected account only and do not impact other accounts under the same Product.
Validation and approval behavior"
- Penalty bands are mandatory for band-based penalty types.
- The Premature Withdrawal configuration cannot be approved unless the required penalty bands are maintained.
- Standard validations and Audit Trail functionality apply to penalty band maintenance.
Repayment
Reminder Preferences
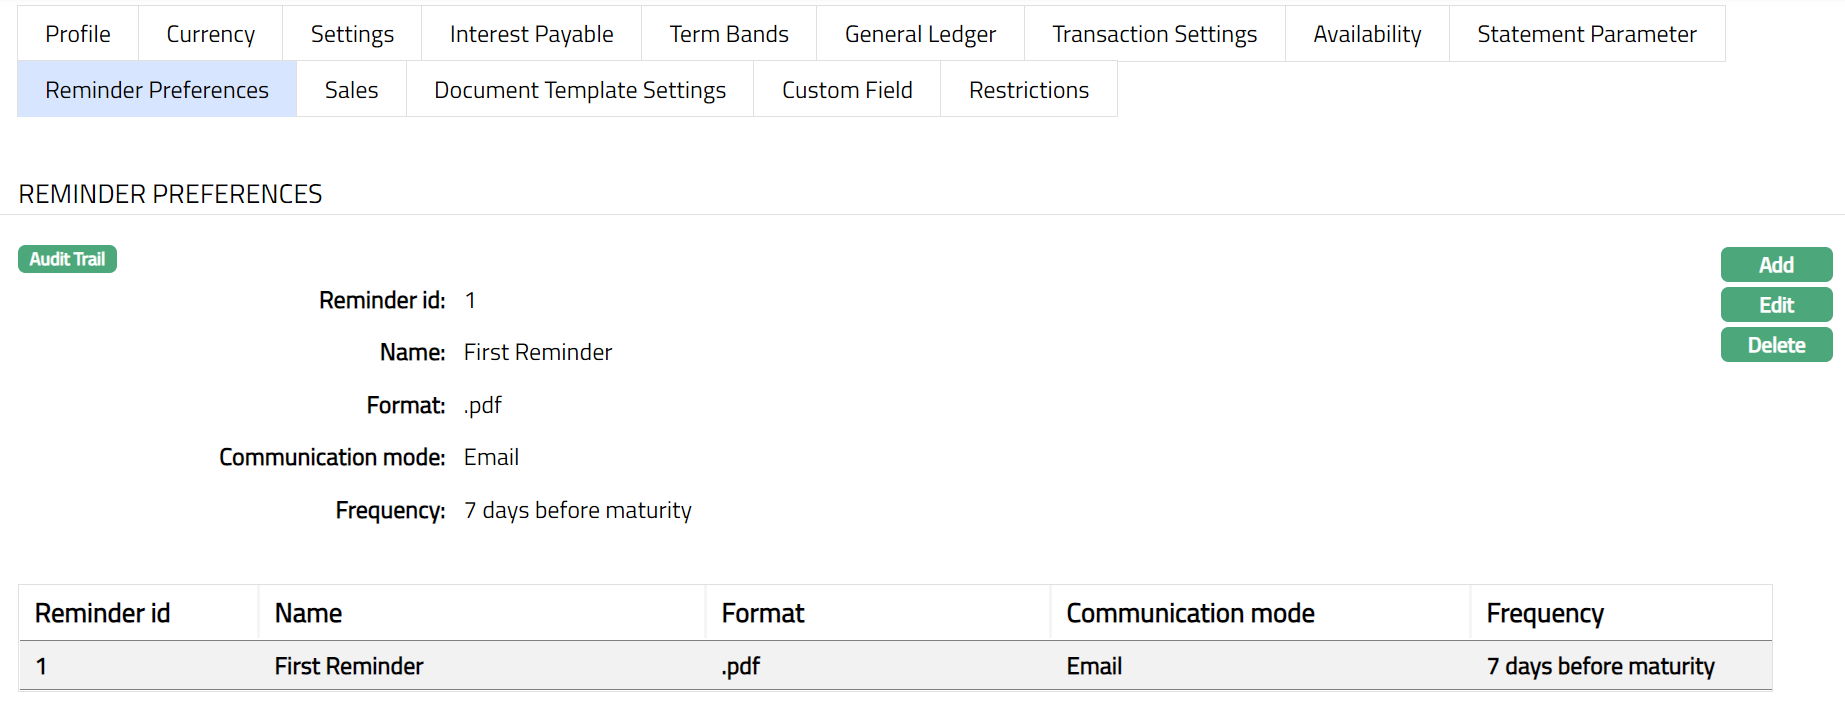
The Reminder preferences tab allows you to add, view and edit the preferences based on which the reminders are sent to client for recovering their dues.
To add / edit / view the Reminder preferences
1. Access Product page. Click Reminder preferences tab to see the list of reminders if already added.
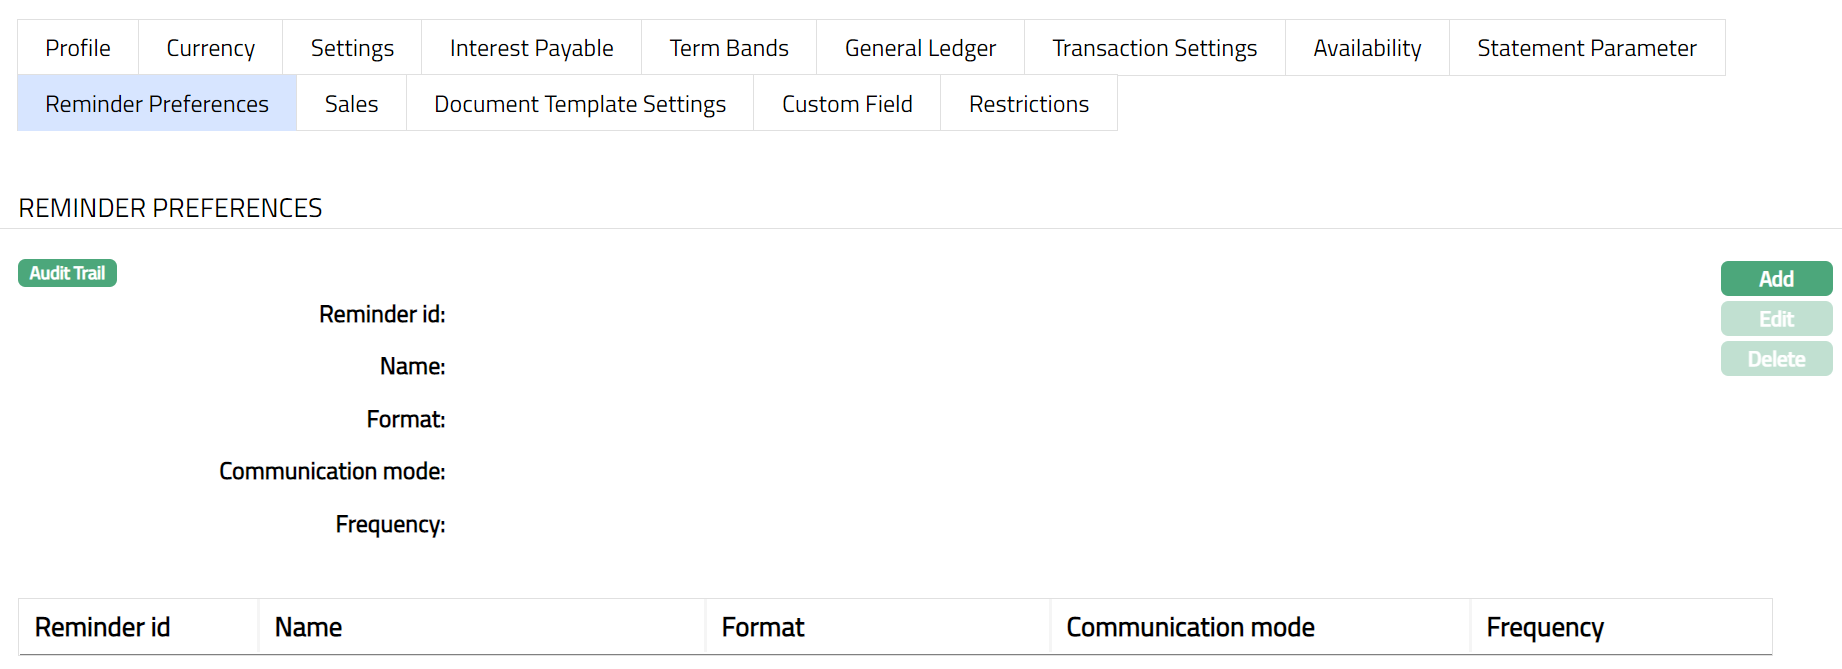
2. Click Add. Add Reminder preferences page appears.
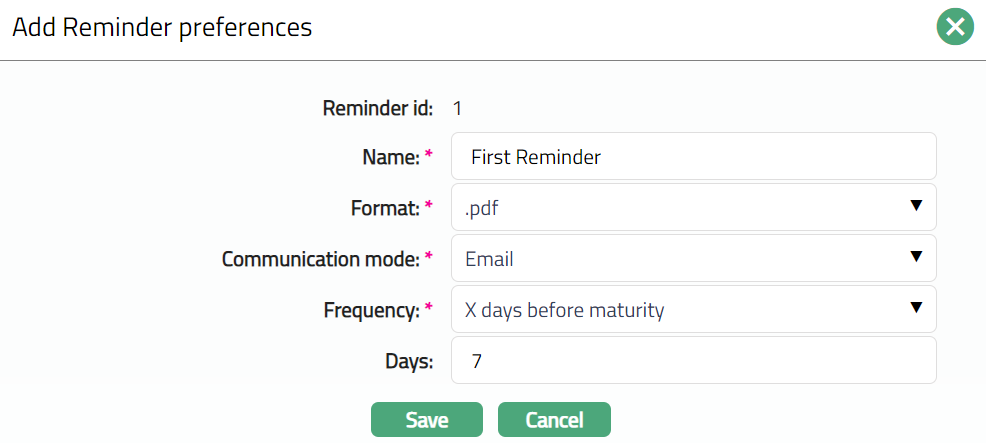
3. By default, Reminder id is auto generated.
4. Enter Name of the reminder.
5. Select Format from the drop-down list of reminder formats that have been maintained under Admin → System codes → Generic definition → Reminder formats. It is the Format of the reminder that is to be generated.
6. Select Communication mode from the drop-down list -- i.e., the manner in which you want to send the statement. Available options are Data handoff, e-invoice, e-mail, paper, SMS and Web Hotel.
7. Select Frequency from the drop-down. The available options are as follows:
On Maturity: The reminder will be sent on the date of maturity.
X days before maturity: If you select this option, enter the number of days in the Days field.
X days after maturity if rolled over: If you select this option, enter the number of days in the Days field.
8. Click Save. The Reminder preferences page appears with the added details.
Functions: Add, Edit, Delete
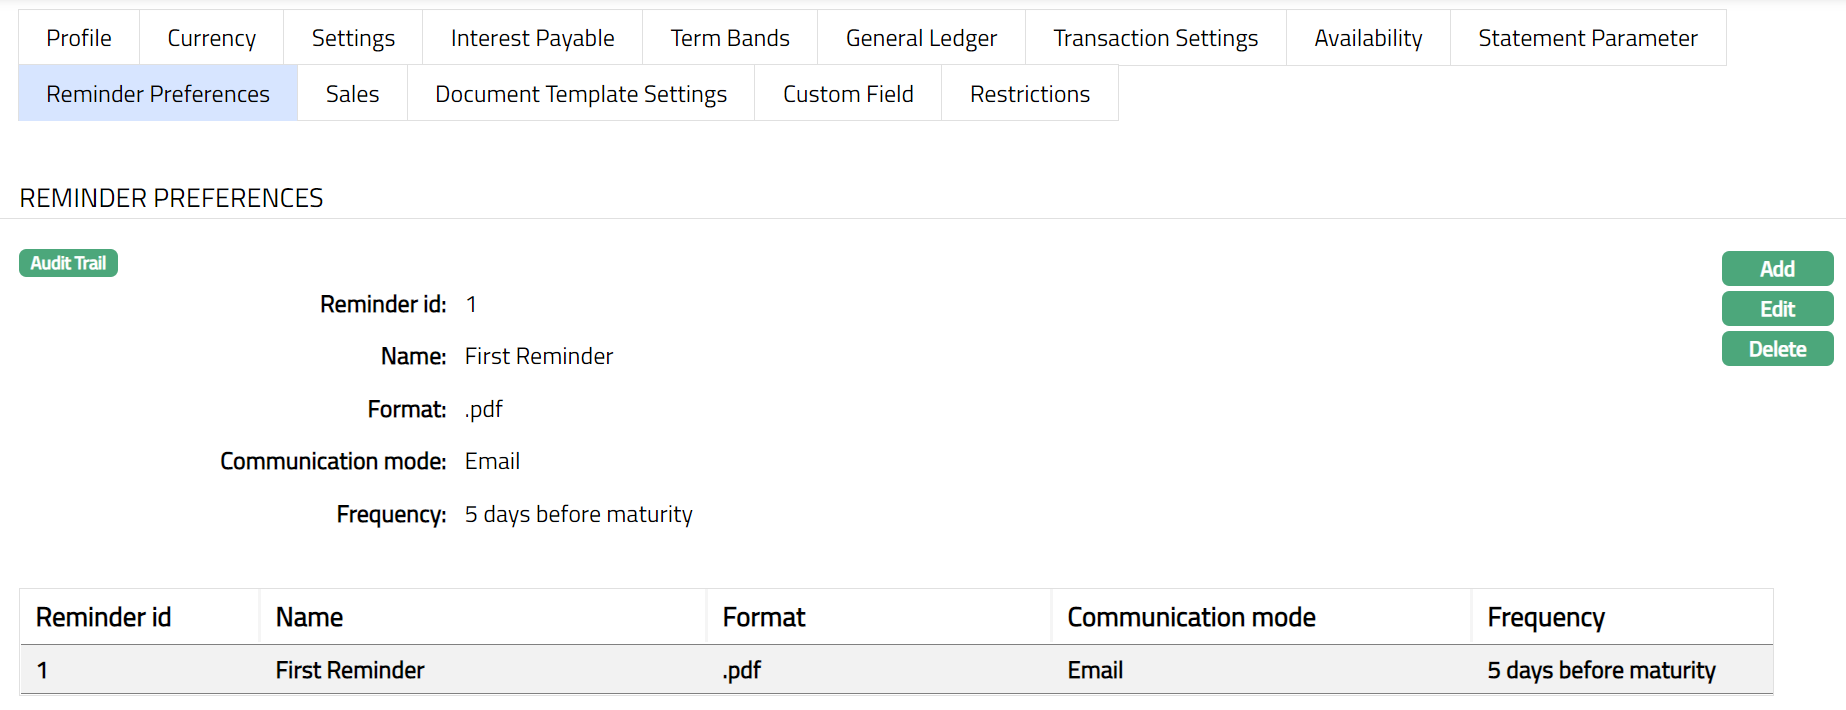
To Edit Reminder preferences
1. Click Edit. Edit Reminder preferences page appears.

2. Click Save. Reminder preferences page appears with the edited details.
Functions: Add, Edit, Delete
Delete: You can delete Reminder preferences by clicking Delete button. When you click Delete button, Aura displays an alert message. On confirmation Aura will delete the Reminder preferences.
Accounting
General Ledger
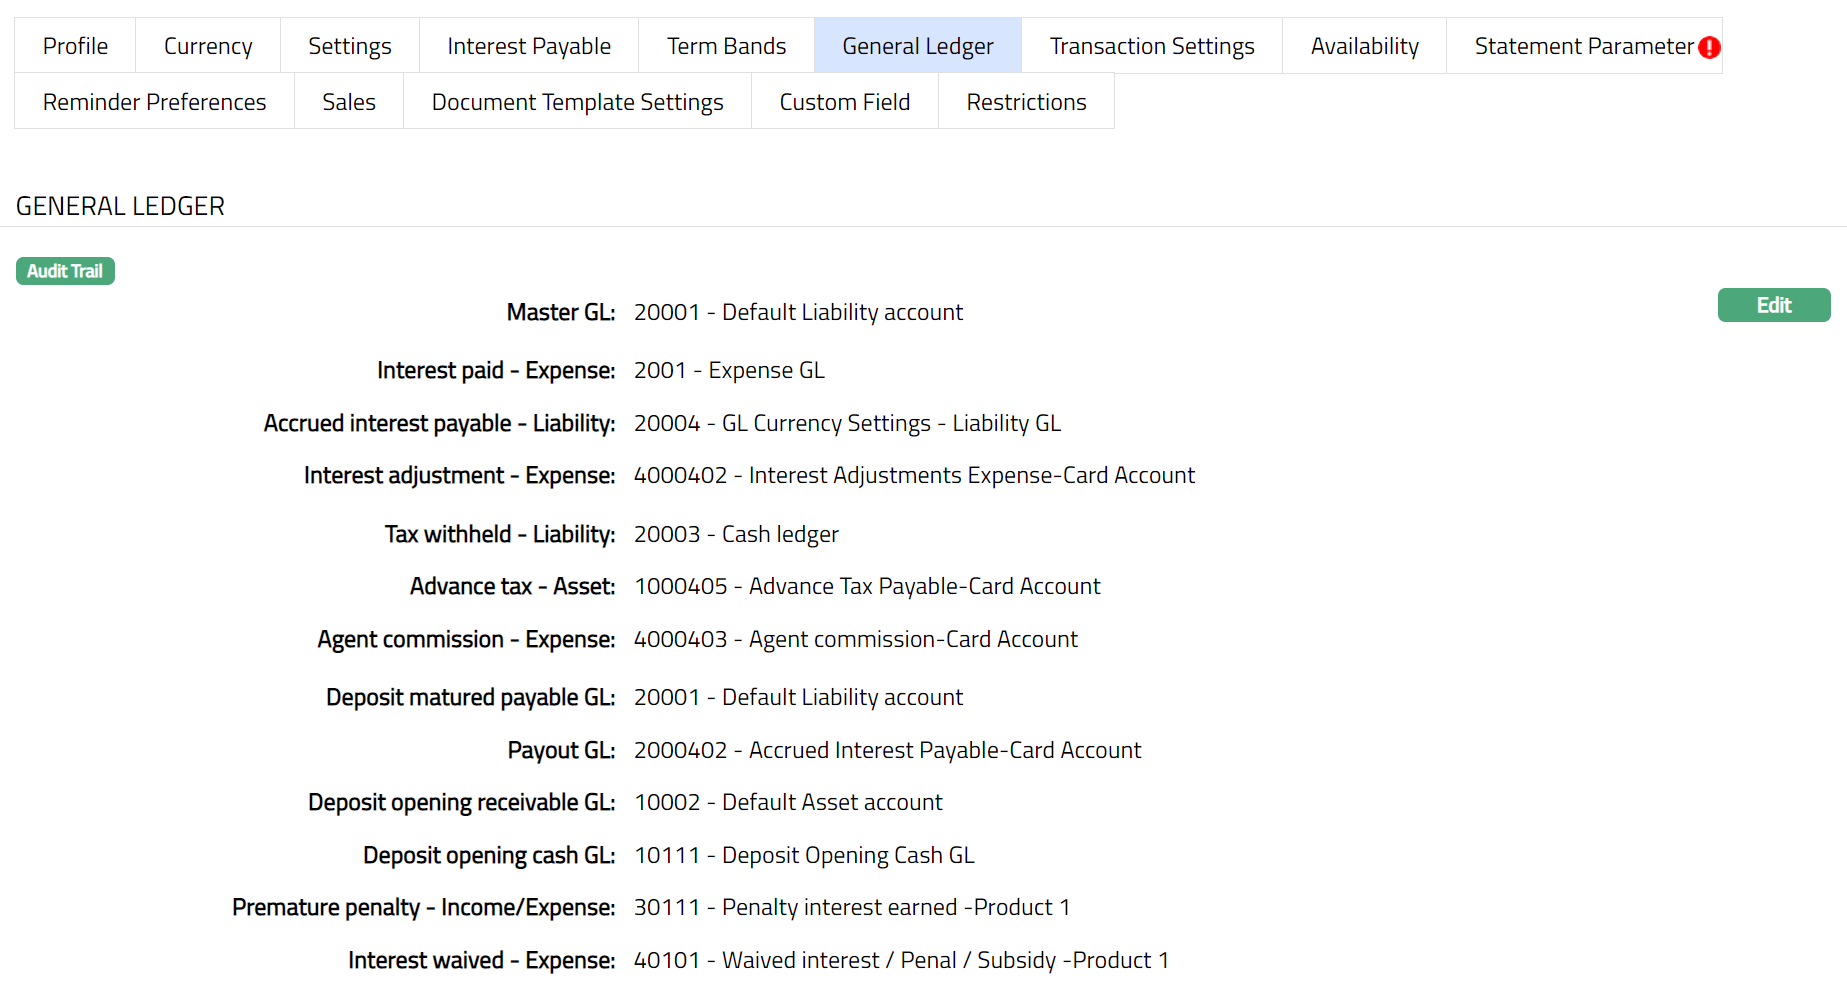
The General Ledger tab allows you to view and maintain the various GL accounts for the Product
1. Access Product page. Click General Ledger tab to view the details as per sample below. The details are defaulted from the entries that you made during Product creation. For details refer to Term Deposit → New Product → General Ledger (5/8).
2. Click Edit. Edit General Ledger page appears.
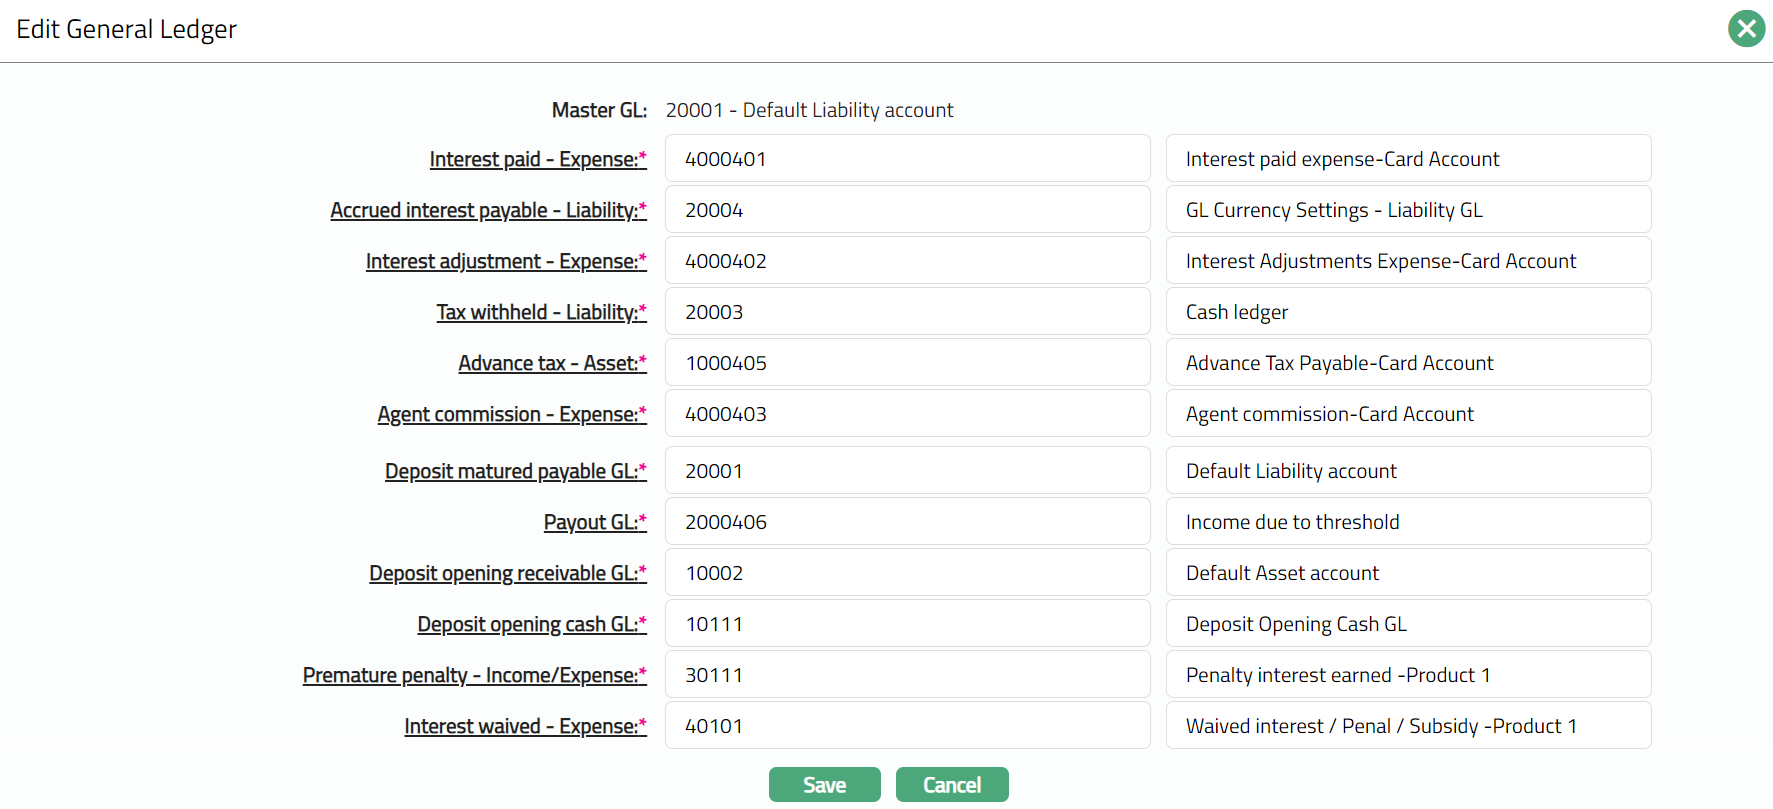
Except Master GL, all other fields in Edit General ledger are Editable.
3. Click Save. The General Ledger page appears with the edited details.

Functions: Edit
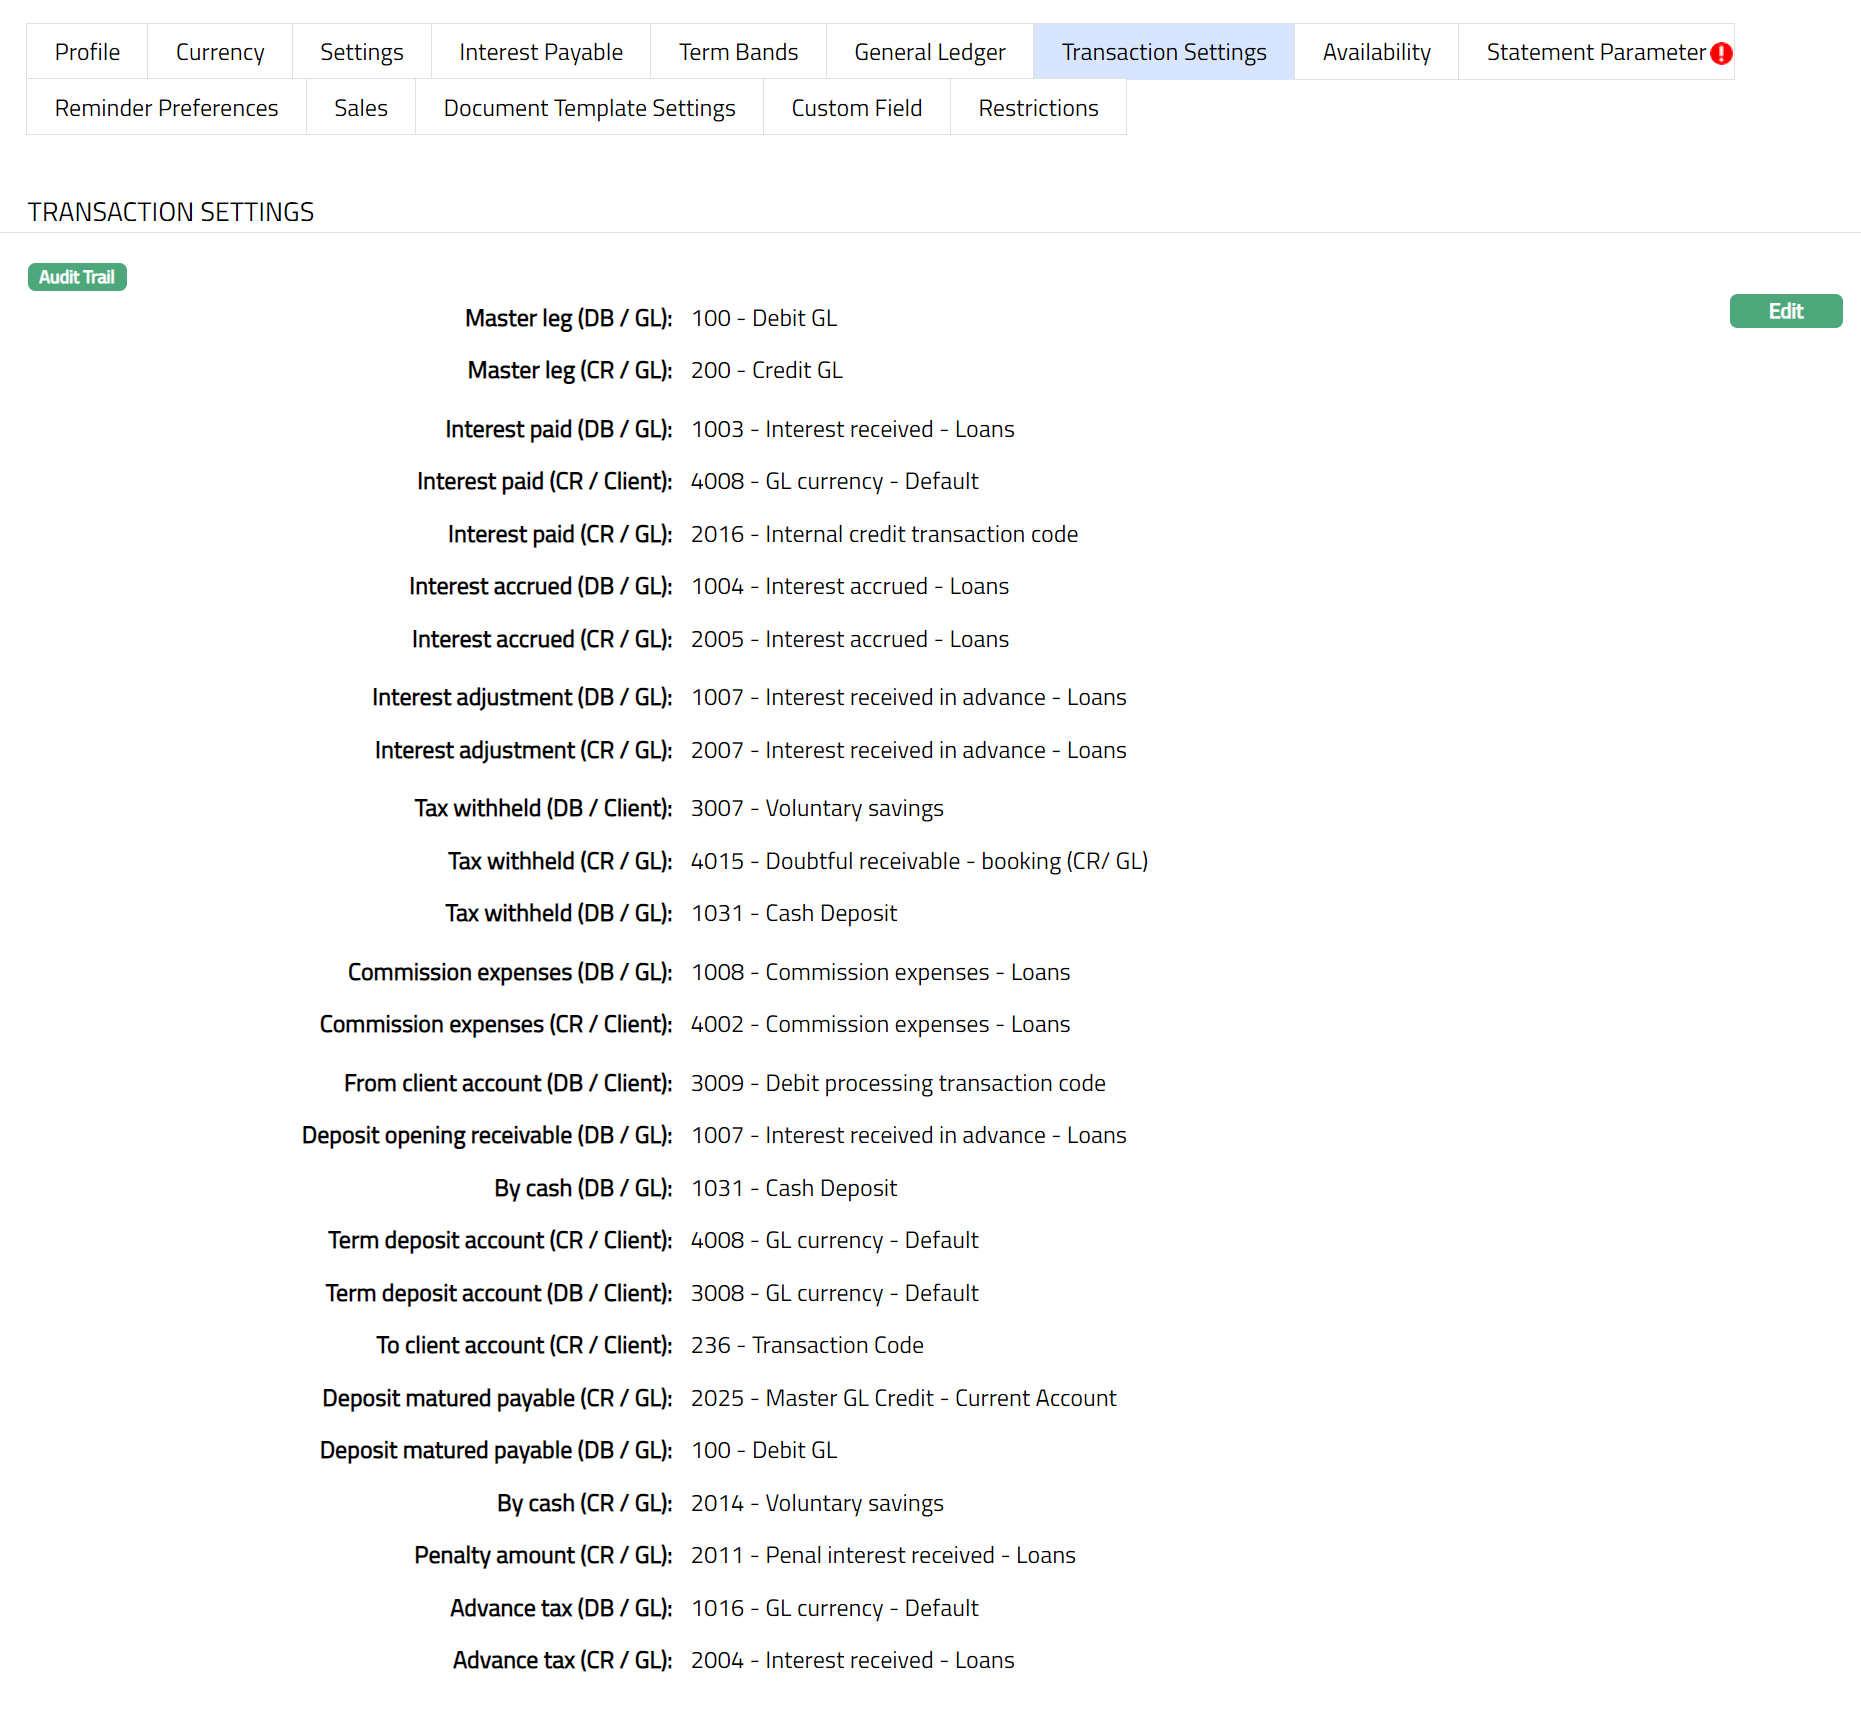
Transaction Settings
Transaction settings tab allows you to specify the transaction codes that are to be used for the various events in the life cycle of the Product. These transaction codes define what description / narration is used for the account postings / statements and may also be used to trigger other charges.
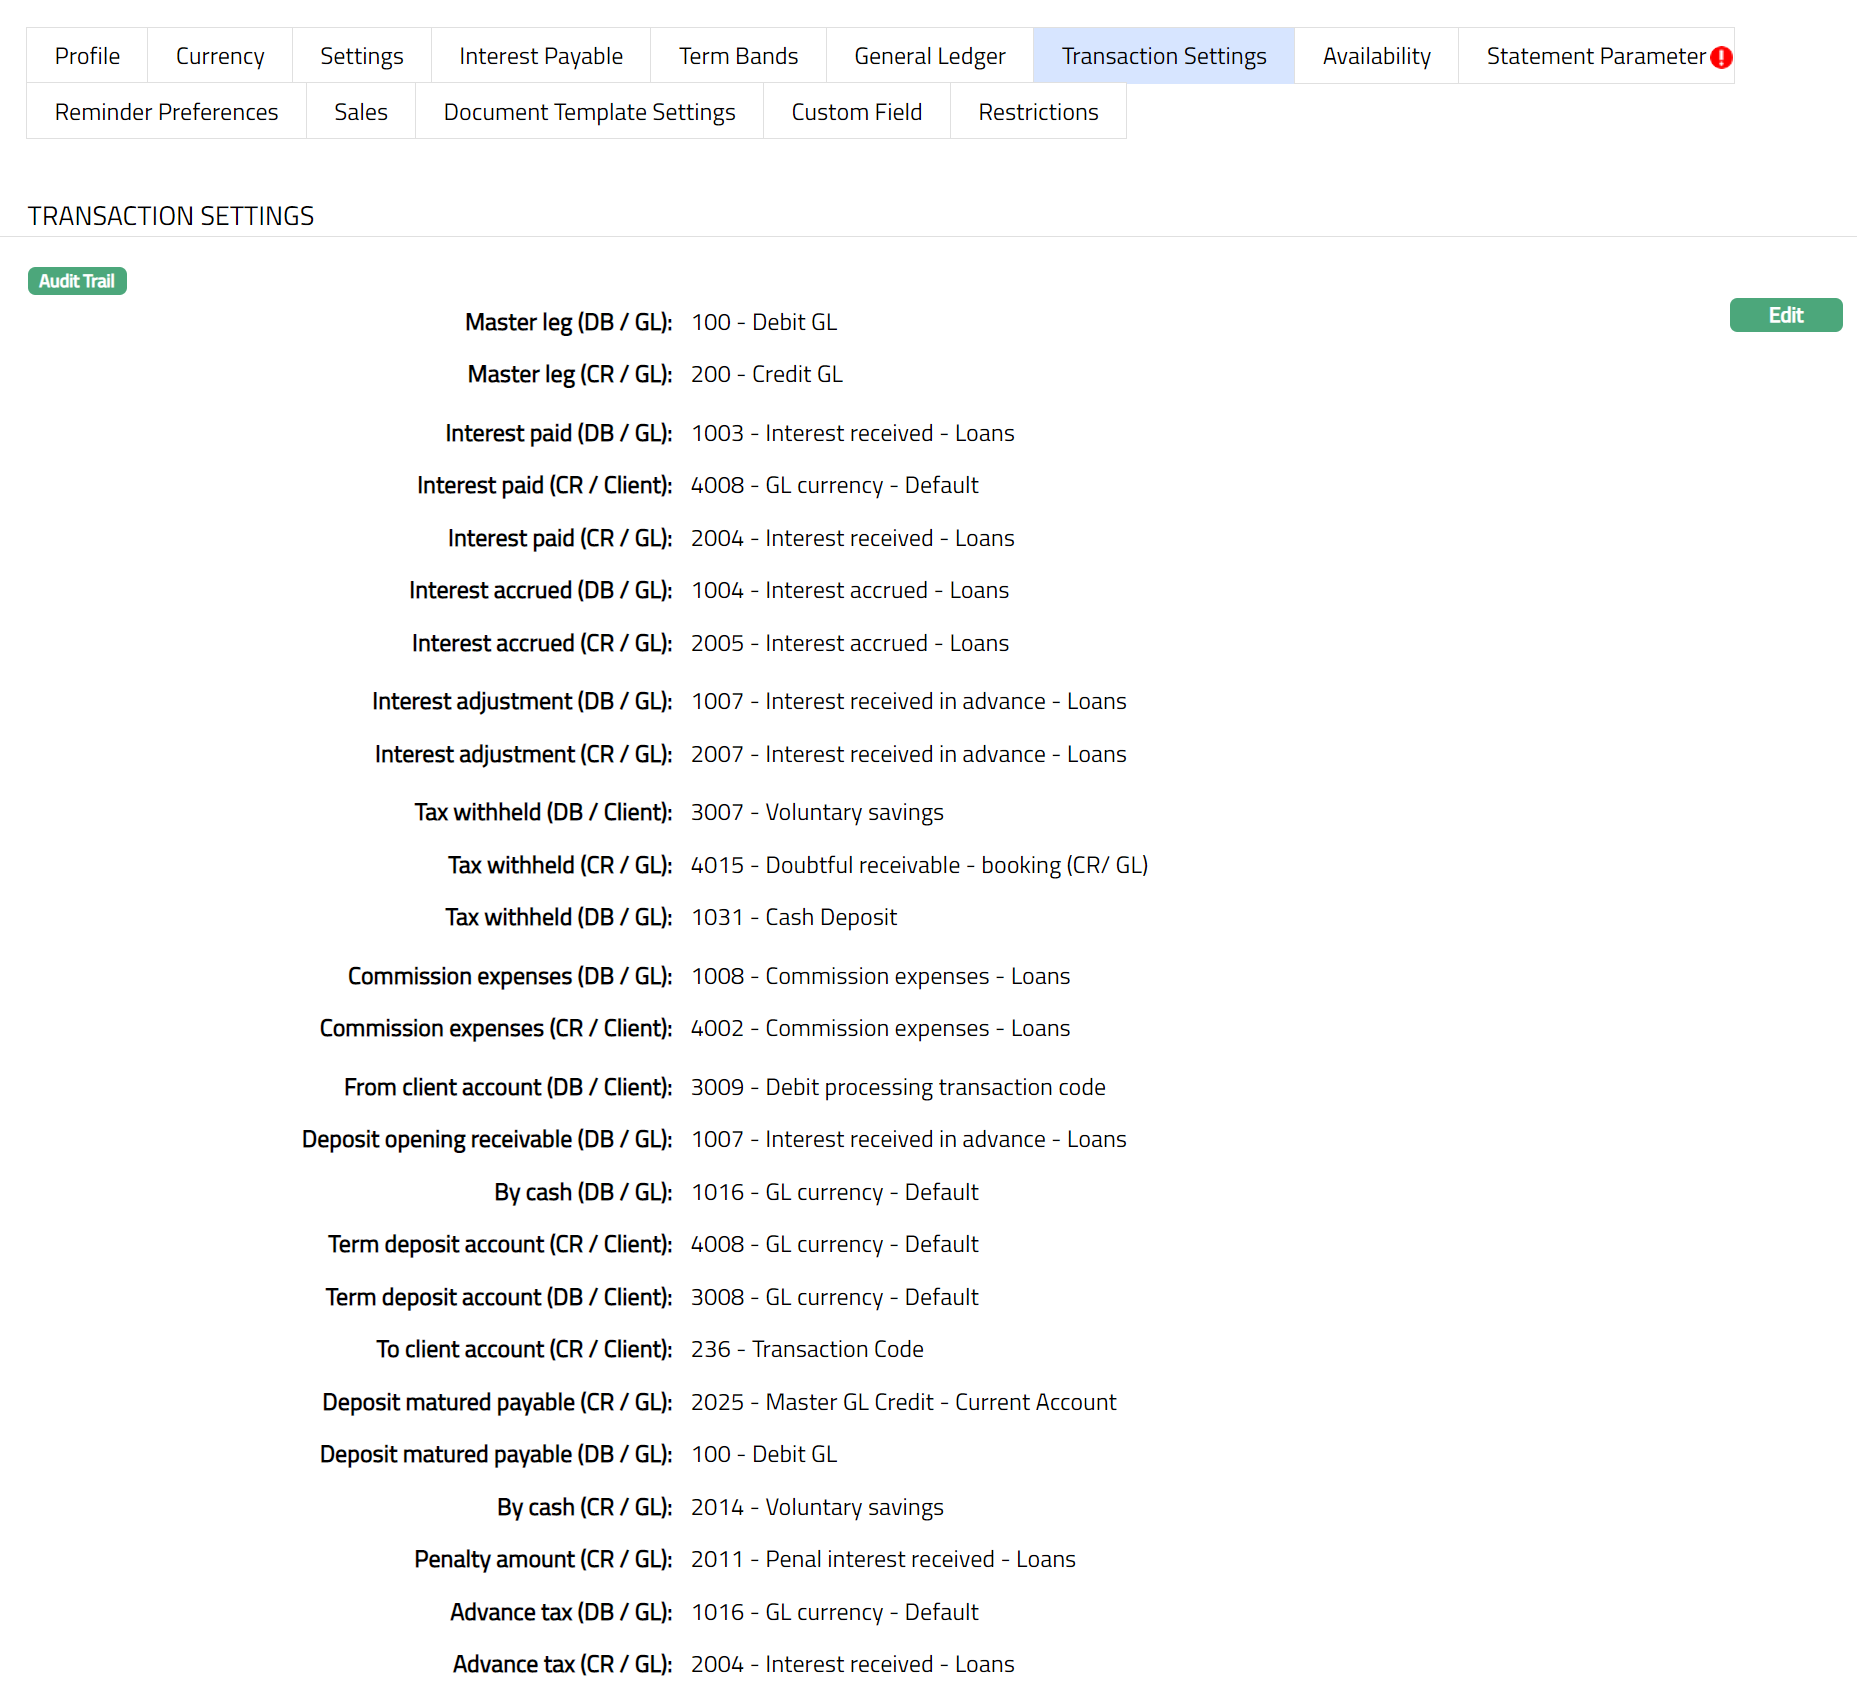
1. Access Product page. Click Transaction settings tab to view the details as per sample below. The details are defaulted from the entries that you made during Product creation. For details refer to Term Deposit → New Product → Transaction settings (6/8).
2. Click Edit. The Edit Transaction Settings page appears.
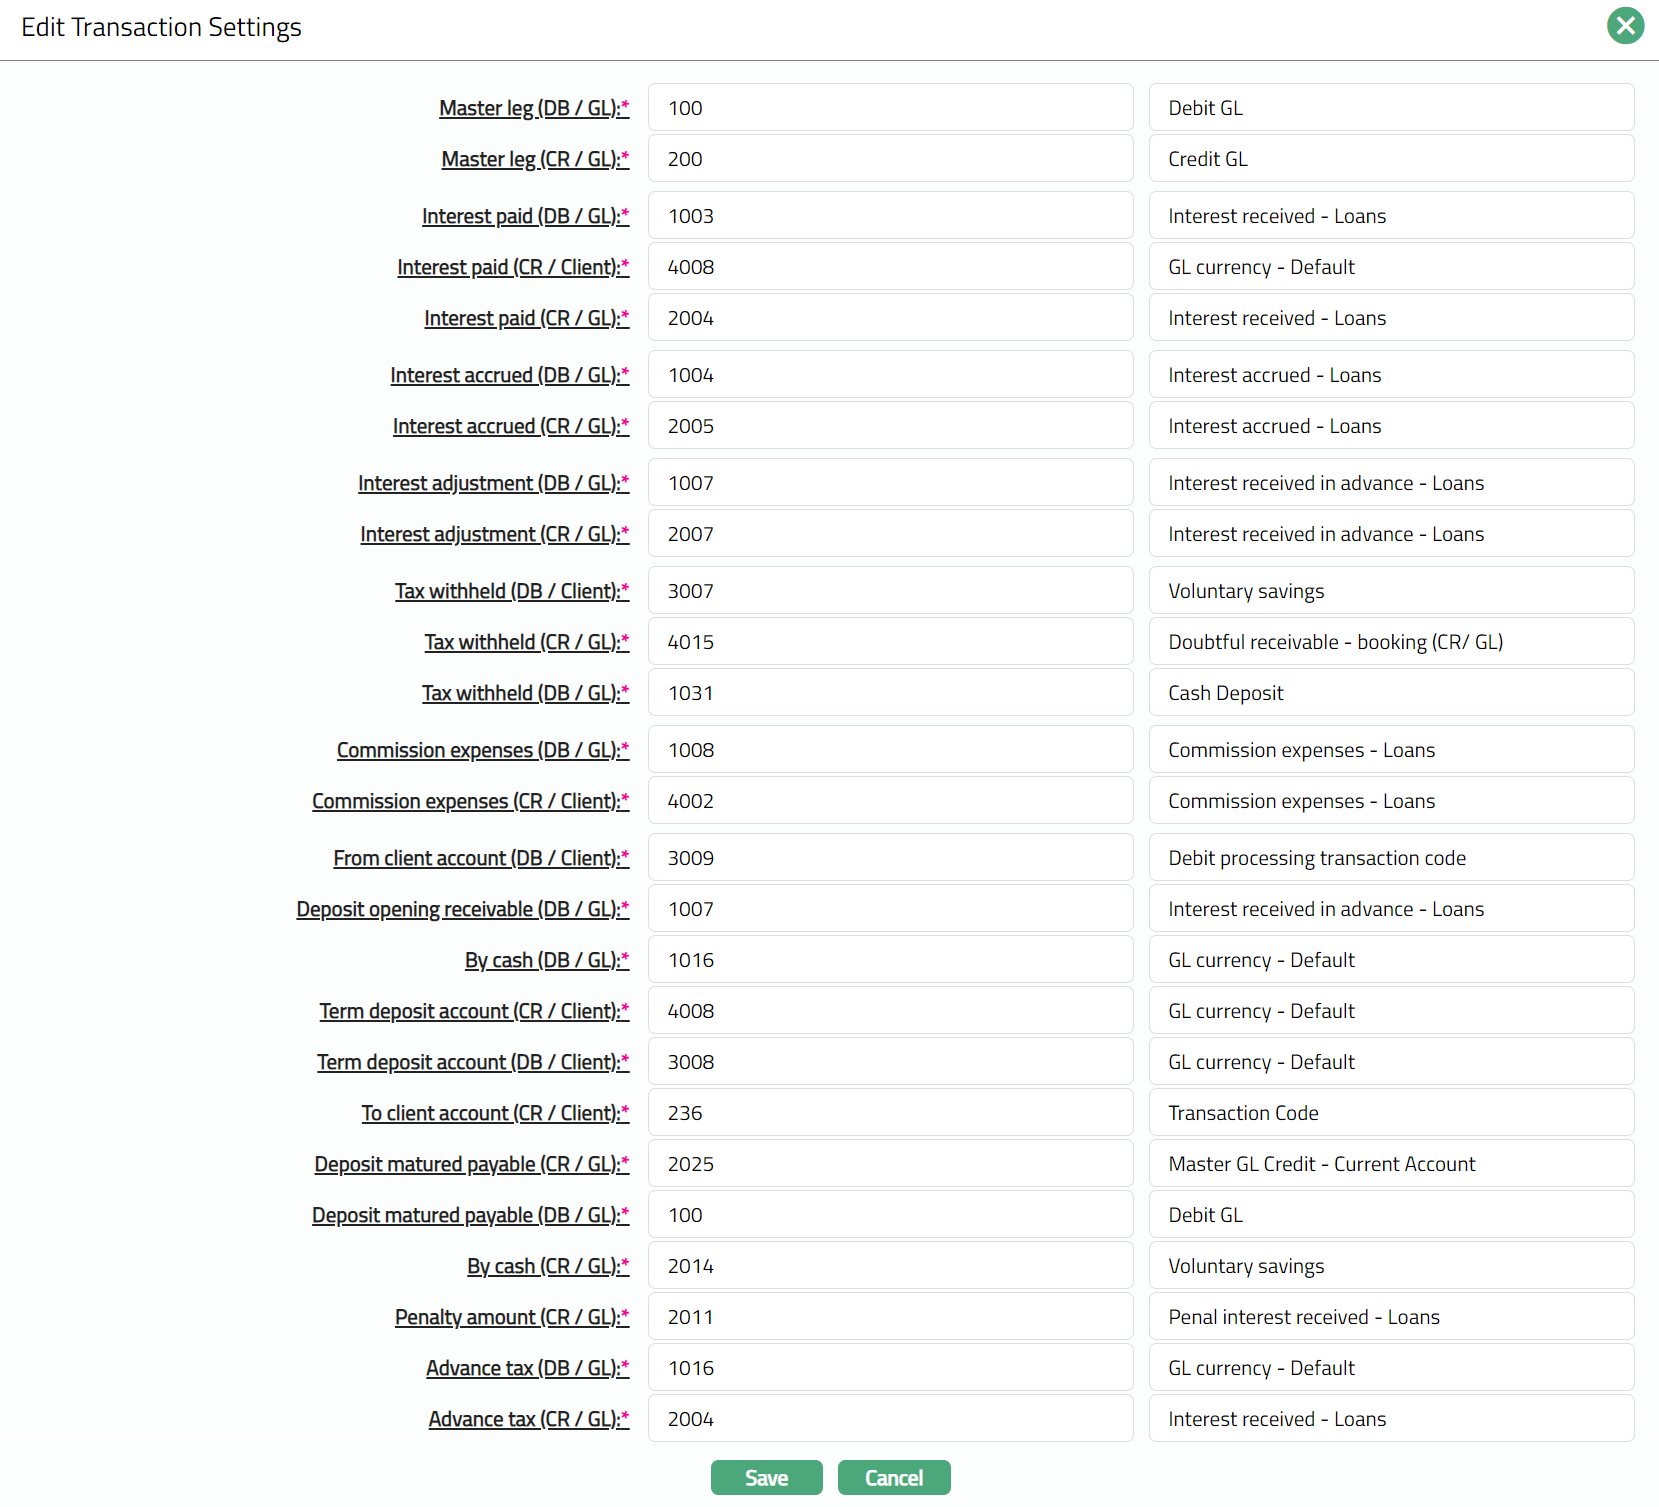
Note: All the fields in Edit Transaction settings page are Editable.
3. Click Save. The Transaction Settings page appears with the edited details.
Functions: Edit
Custom Field
This menu option allows you to define fields apart from those that are already available in the standard version of Aura. Thus, it enables you to customize additional data storage and use as required to suit your specific business needs.
To maintain the Custom Field
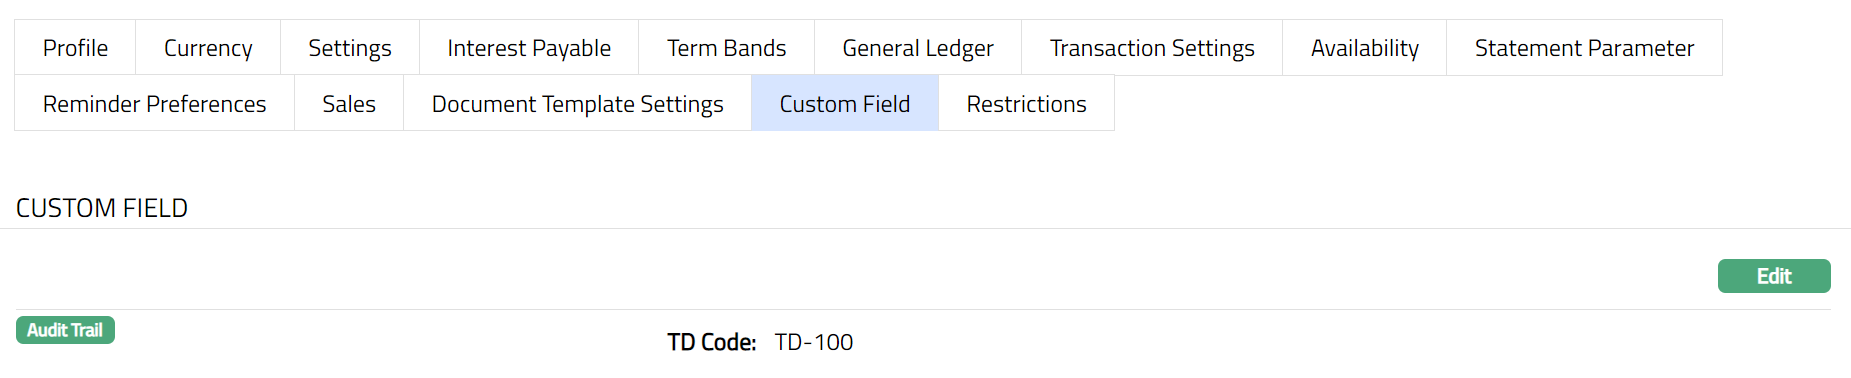
1. Access Product page. Click Custom Field tab.

2. The custom field(s) appears only when it is created in Admin → System codes → Custom fields → Custom fields and linked to specific Product option in Admin → System codes → Custom fields → Field mappings.
3. Click Edit. The Edit Custom Field page appears.

4. Enter TD Code.
5. Click Save. The Custom Field page appears with the edited details.
Function: Edit
Note: Custom field functionality has been explained in detail in Admin → Custom field manual.