Term Deposit
Term deposit menu allows you to create and maintain term deposit accounts. These accounts can be created under the various Term Deposit Products that you have maintained. Based on the Product defined, the account level details are defaulted, with options to modify several parameters for specific accounts, subject to Restrictions as defined in the Product. Thus, it combines ease of maintenance with flexibility to suit the specific needs of each deposit account.
The following are the various tabs that appear on the Term Deposit page:
Adding a Term Deposit Account
To add a Term Deposit account,
1. From Retail menu, click Account then Term Deposit, and then click Maintain. The Term Deposit Search page appears.

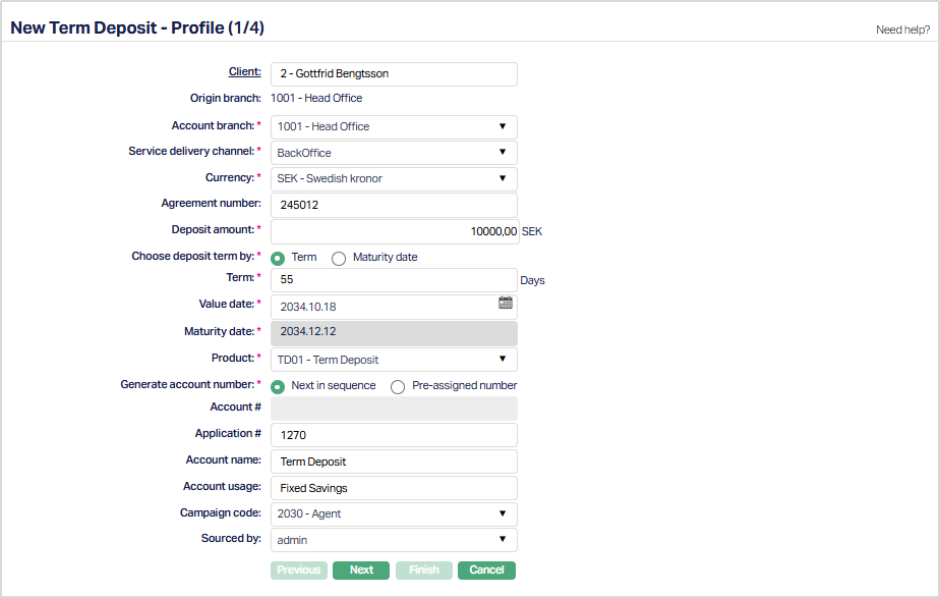
2. Click Add. The New Term Deposit → Profile (1/4) page appears.
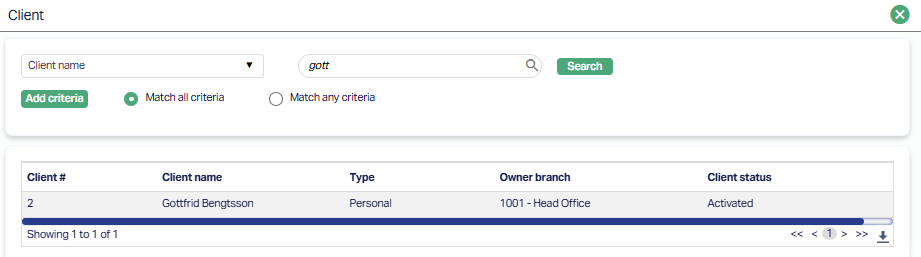
3. Click Client. The Client search page appears where you can search for a Client with relevant criteria and select the required Client. You can also select the Client from the list of Clients displayed by Aura by inputting the Client Name.
4. Origin branch will be defaulted based on the Branch into which you are logged in.
5. Select the Account branch from the drop-down list of active branches to indicate the Branch in which the Account will be maintained. By default, the logged in user's branch is shown, but the same may be changed.
6. Select the Service delivery channel for the account from the drop-down list maintained under Admin → System codes → Categories → Service delivery channel.
7. Select the Currency from the drop-down list of active GL currencies maintained under General Ledger → Settings → Currency.
8. Enter the Agreement number, if any, for the term deposit account.
9. Enter the Deposit Amount.
10. Select Term or Maturity date radio button to Choose deposit term by. If you want to indicate the deposit's term by way of a specific duration / period, choose Term. If you want to indicate the deposit's term by way of a specific maturity date, choose Maturity date.
Note: The option selected here is used only for the limited purpose of arriving at the Maturity Date or deriving the Term Days as explained in the subsequent points. Once these are arrived at, the option chosen here is not considered for any other purpose.
11. Term denotes the period / duration of the deposit account and depends on what was selected for Choose Deposit Term By above. - If you had selected Term, this field is enabled, and you can input the number of days for the deposit. - If you had selected Maturity date, this field is disabled and is automatically calculated as Maturity date minus Value date.
Note: The Term provided here will change automatically when the Funding Method = Debit from Account and the Client Account cannot be debited on the given Value Date and Retry Days have been provided. You can also change the Term during Edit of the Settings Tab, before the Account Status moves to Activated Approved, subject to the Choose Deposit Term By.
12. Select the required Value date for the term deposit. By default, Aura will display the current business date, but you may change the value date to either a future or past date, provided the same falls within an Accounting Period that is currently Open.
Note: The Value Date provided here will change automatically when the Funding Method = Debit from Account and the Client Account cannot be debited on that Value Date and Retry Days have been provided. You can also change the Value Date during Edit of the Settings Tab, before the Account Status moves to Activated Approved.
13. Maturity date denotes the date when the term deposit account will mature and depends on what was selected for Choose Deposit Term By above. - If you had selected Term, this field is not editable. Aura automatically calculates it as Term days plus Value Date. - If you had selected Maturity date, this field is enabled and is mandatory. You need to input a date greater than the Value Date as well as the current booking date.
Note: The Maturity Date provided here will change automatically when the Funding Method = Debit from Account and the Client Account cannot be debited on the given Value Date and Retry Days have been provided. You can also change the Maturity Date during Edit of the Settings Tab, before the Account Status moves to Activated Approved, subject to the Choose Deposit Term By.
15.Based on the combination of Amount of deposit + Currency + Term + Branch + Client + Offering (Branch, Offering, Client are maintained under Availability tab in Term deposit product), Aura will display a list of active Term Deposit Products that are maintained under Retail → Settings → Product. Select the required Product from the list.
16.Input how the account number has to be generated in Generate account number. If you want to auto-generate the account number, choose Next in sequence. If you want to give a specific account number for this account, choose pre-assigned number. In case of the former, Aura will generate account number internally using the account number mask maintained at the entity level. In case of the latter, you need to input the account number in the next field. The account number is unique across the Entity.
17. If you select pre-assigned number in the above field, the next field Account Number will be enabled where you can enter an Account number. Aura will validate the entered account number against the Client account mask format defined at the Entity level as well as check whether it is unique across the Entity. However, if you select Next in sequence, this field is disabled as Aura will generate the Account number internally based on the Client account mask format defined at the Entity level.
18. Enter the Application number to capture the reference number of the application under which the Term Deposit account is opened. It is used for tracking the deposit against the origination application or request/
19. Enter the Account name. This name will be used for the account.
20. Enter the Account usage, i.e. the purpose of the account.
21. Select the Campaign code from the available drop-down list as maintained under CRM > Sales > Campaign.
22. Select Sourced by from the drop-down list maintained under Admin → Users → Maintain.
23. Click Next. The New Term Deposit → Settings (2/4) page appears. Based on the Restrictions that have been set up at the Product, fields and drop-down values will be enabled.
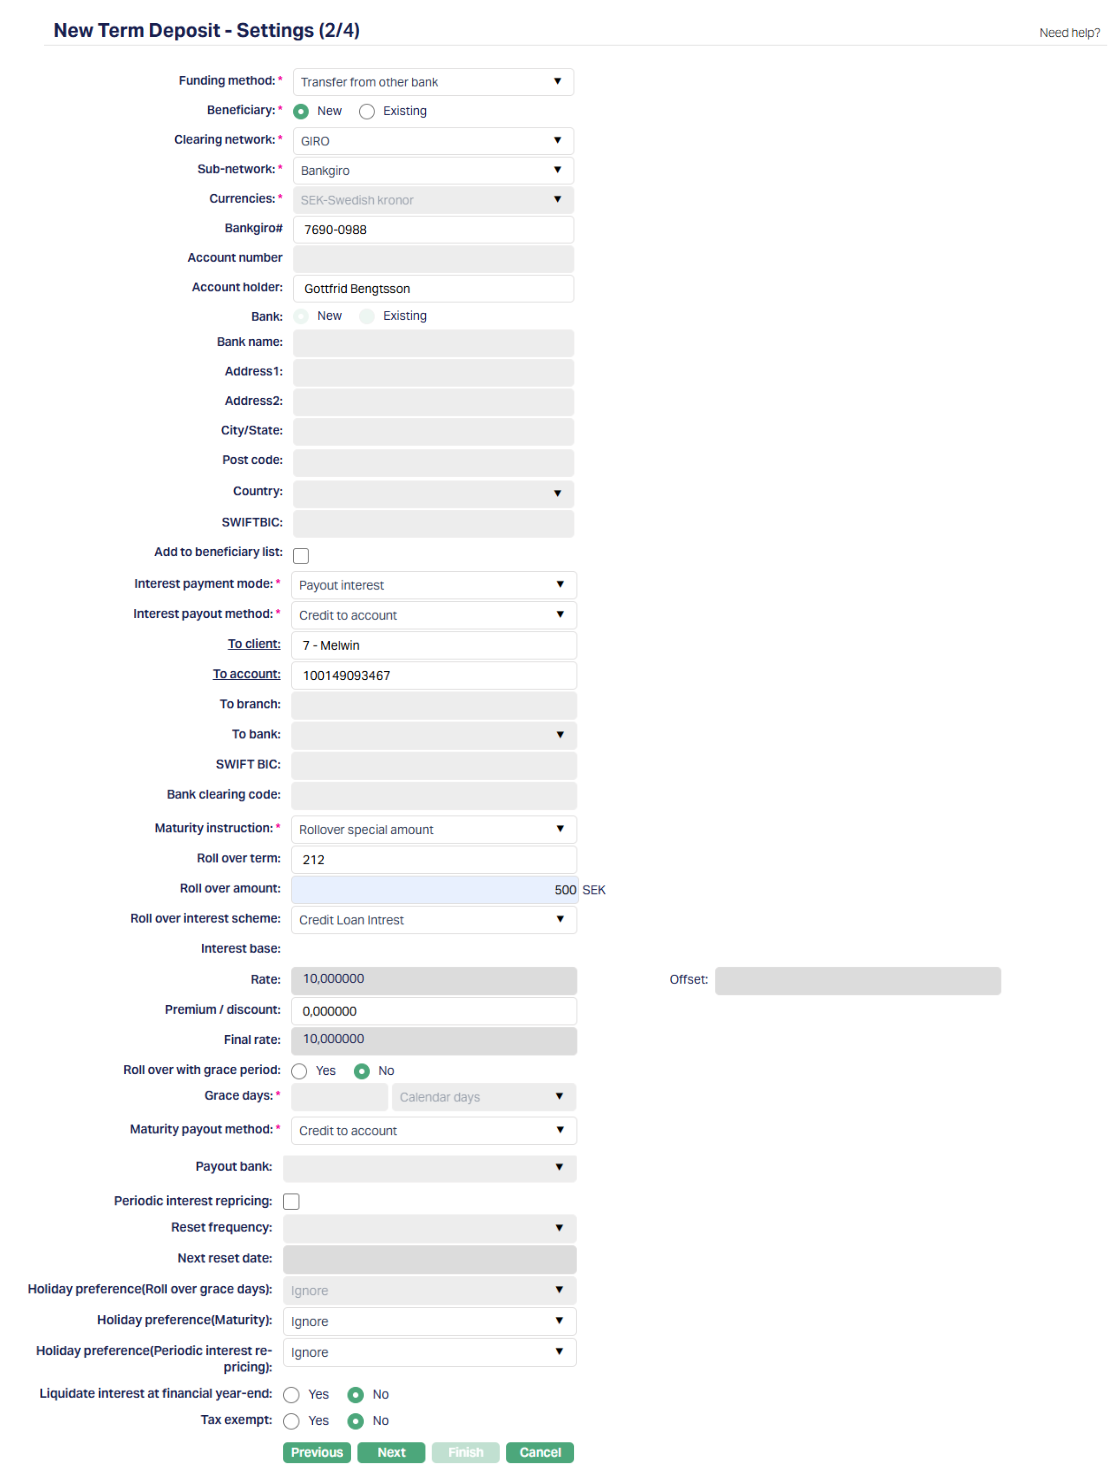
24. Select the Funding method from the drop-down list. This denotes the method in which the amount is to be transferred for opening Term Deposit. The following are the options available in Aura:
- Debit From Account
- Cash
- Transfer From Other Bank
- Cheque
- Manager's Cheque
The fields displayed below will dynamically change based on the selected Funding Method.
- If you enter a past date as the value date you will see only the option Debit From Account. Aura will allow you to post back dated transactions for previous periods only if the accounting period for the same is open.
- If you enter the current business date as a value date you will see all the above options.
- If you enter a future date as the value date you will see the options Debit From Account and Transfer From Other Bank.
This field cannot be edited once the Term Deposit Account is created.
i) If Funding Method = Debit from Account:
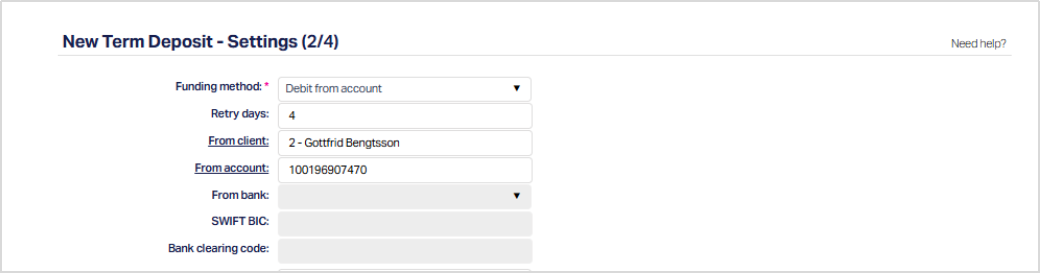
The deposit amount will be debited from a Client Account maintained within the same bank.
25. Retry Days: This field is applicable only when the Funding Method is selected as Debit From Account.
Retry Days specifies the number of days for which Aura will attempt to debit the deposit amount from the selected Client Account if sufficient balance is not available during the initial funding attempt.
Allowed range: 0 - 30 days.
Notes:
- This field is defaulted from the Term Deposit Product.
- It can be modified while the Term Deposit is in Pending status.
- Once the Term Deposit is Activated, this field cannot be edited.
Funding Behaviour:
When the Term Deposit is created -
- Aura makes the first debit attempt immediately if the Value Date is less than or equal to the current booking date.
- If sufficient funds are available, the debit is processed and the Term Deposit proceeds to activation.
- If sufficient funds are not available, the account moves to Activated-Pending status.
End-of-Day (EOD) Retry Logic:
During EOD processing -
- Aura retries debit for the number of days specified in Retry Days.
- If sufficient funds become available within the retry period, Aura debits the amount during EOD and activates the Term Deposit.
- The Value Date and Maturity Date are recalculated based on the actual activation date.
If funding is not successful within the specified retry period:
- The Term Deposit account is automatically closed during EOD
Special Case: Retry Days = 0
If Retry Days is entered as 0 -
- Aura will not perform any retry attempts after the initial debit attempt.
- If the initial funding attempt fails, the account will be closed during EOD
26. From Client - This field is enabled only when the Funding Method is selected as Debit From Account. By default, the Client selected in the previous step, New Term Deposit - Profile (1/4) is displayed in this field. If required, you can change the Client by clicking on the From Client hyperlink. The Client search popup appears, allowing you to select any active Client.
- The Client selected here determines the account from which the deposit amount will be debited.
Only accounts belonging to the selected Client will be available for selection in the From Account field. This field cannot be edited once the Term Deposit account is created.
27. From Account - This field is enabled only when the Funding Method is selected as Debit From Account. Click the From Account hyperlink to open the Client Account search screen. Aura displays the selected Client’s Accounts that meet the following conditions:
- Account Status is Activated or any other eligible status as defined in the system.
- Account Currency matches the Term Deposit account currency.
- Debit is not disallowed on the account.
Select the account from which the deposit amount will be debited.
28. From Bank / SWIFT BIC / Bank clearing code - These fields are disabled and not applicable.
On clicking Finish, Aura attempts to debit the deposit amount from the selected account if the Value Date is less than or equal to the current booking date.
If sufficient funds are available:
- The debit is processed successfully.
- The Term Deposit proceeds to activation.
If sufficient funds are not available:
- The Term Deposit moves to Activated-Pending status.
- Retry logic is applied based on the configured Retry Days.
This field cannot be edited once the Term Deposit account is created.
ii) If Funding Method = Cash:
If this option is selected, the deposit amount will be funded through the configured Cash General Ledger maintained at the Term Deposit Product level.
This method is used when the deposit amount is received in cash at the branch.
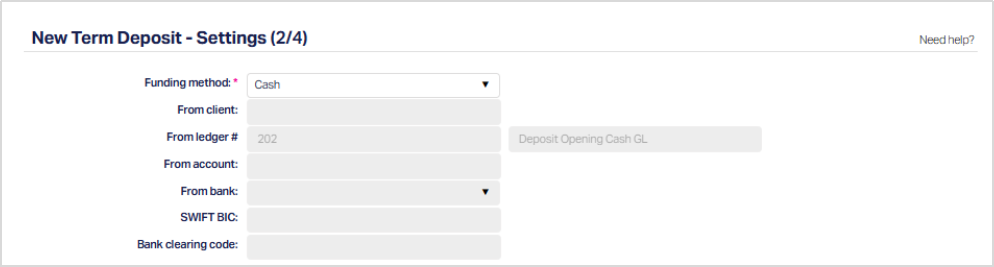
29. The following fields are displayed:
- From Client - This field is disabled and not applicable for Cash Funding since funding does not occur through a client account.
- From Ledger - This field is automatically populated with the Deposit Opening Cash GL defined in the Term Deposit Product. It is displayed in read-only mode and cannot be modified at the account level.
- From Account - This field is disabled, as no client account debit is required.
- From Bank / SWIFT BIC / Bank clearing code - These fields are disabled and not applicable for Cash funding.
Funding Behaviour:
On clicking Finish, If the Value Date is less than or equal to the Current Booking Date -
- The Term Deposit moves to Activated-Pending status.
- Activation requires approval as per the maker-checker process.
If the Value Date is greater than the Current Booking Date -
- The Term Deposit remains Open-Approved status.
- On the Value Date, during Beginning-of-Day processing, the account moves to Activated-Pending.
Activation is completed upon approval by another user.
Notes:
- Retry Days is not applicable when Funding Method = Cash.
- No debit retry logic is performed
- Value Date and Maturity Date are not recalculated based on funding since no debit attempt is involved.
iii) If Funding Method = Transfer from other Bank:
If this option is selected, the deposit amount is expected to be received from an external bank account. This method is used when the customer transfers funds from another bank into the Term Deposit account.
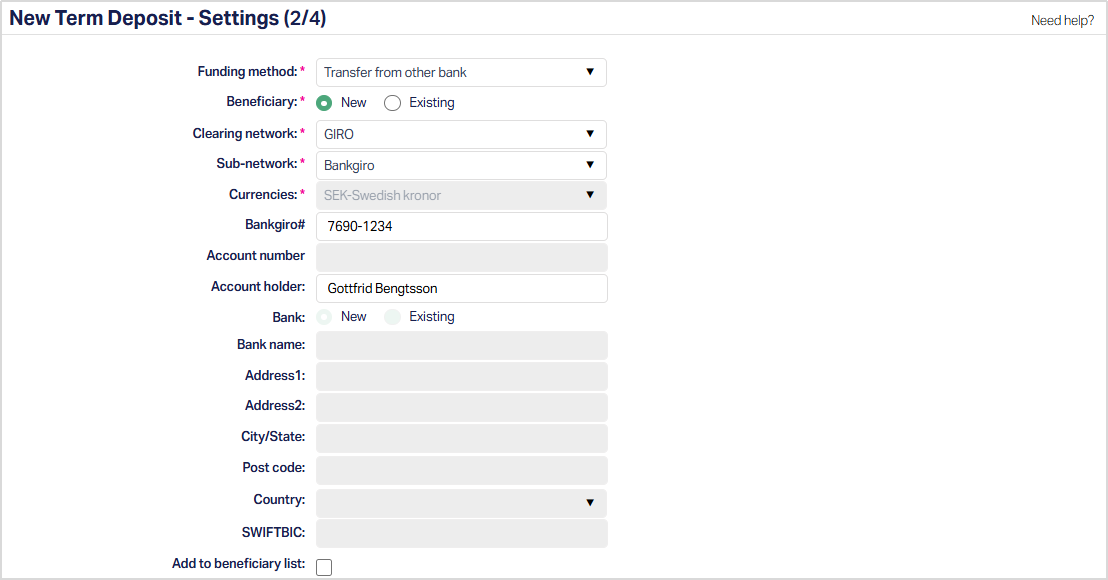
When Transfer from Other Bank is selected, you must provide beneficiary and external bank details from which the deposit amount is expected.
Retry Days is not applicable when Funding Method = Transfer from Other Bank.
30. Beneficiary - Specify whether the external account details are to be captured afresh or selected from records already maintained for the Client.
- New: By default, New is selected. You must manually enter all details of the external account and bank.
- Existing: If selected, you can choose a Beneficiary record maintained under CRM → Client → Maintain.
When Existing is selected -
- External accounts and bank details are auto-populated.
- All related fields become disabled for editing.
If Beneficiary = Existing, the Bank option is automatically defaulted to Existing and disabled.
31. Clearing Network - Select the applicable Clearing Network through which the incoming transfer is expected.
The drop-down list displays the Clearing Networks configured in the system that support the selected Term Deposit currency.
Based on the Clearing Network selected:
- The format of the external account details changes.
- Certain fields become mandatory.
- Some fields may be disabled or hidden.
The behaviour of fields under different Clearing Networks are described below:
External Account Details - Incoming Transfer
| External Account Details | Descriptions | GIRO | TARGET2 | SEPA | SWIFT | Bankgiro | Banking Circle | SEPA-INST | DCL- Bank Account |
|---|---|---|---|---|---|---|---|---|---|
| Sub-network | Sub-network applicable for GIRO transfers. Options include Bankgiro and Plusgiro. | Mandatory | Not displayed | Not displayed | Not displayed | Not displayed | Not displayed | Not displayed | Not displayed |
| Bankgiro # / Plusgiro # | Giro number of the sender’s account from which funds are expected. | Displayed | Not displayed | Not displayed | Not displayed | Not displayed | Not displayed | Not displayed | Not displayed |
| Currency | Currency in which the incoming transfer is expected. The available currency is determined by the selected Clearing Network. | Fixed by network | Fixed by network | Fixed by network | Selectable | Fixed by network | Selectable | Fixed by network | Fixed by network |
| Account number | External bank account number of the sender. | Disabled (blank) | Displayed | Displayed | Displayed | Displayed | Displayed | Displayed | Displayed (Split into Clearing # and Account #) |
| Account holder | Name of the sender holding the external bank account. | Optional | Mandatory | Mandatory | Mandatory | Mandatory | Mandatory | Mandatory | Optional |
| Address1 | Primary address of the sender. | Not displayed | Mandatory | Mandatory | Mandatory | Mandatory | Mandatory | Mandatory | Not displayed |
| Address 2 | Additional address details of the sender. | Not displayed | Optional | Optional | Optional | Optional | Optional | Optional | Not displayed |
| City / State | City or State of the sender. | Not displayed | Mandatory | Mandatory | Mandatory | Mandatory | Mandatory | Mandatory | Not displayed |
| Post Code | Postal code of the sender. | Not displayed | Optional | Optional | Optional | Optional | Optional | Optional | Not displayed |
| Country | Country of the sender. | Not displayed | Mandatory | Mandatory | Mandatory | Mandatory | Mandatory | Mandatory | Not displayed |
External Bank Details - Incoming Transfer
| External Bank Details | Description | GIRO | TARGET2 | SEPA | SWIFT | Bankgiro | Banking Circle | SEPA-INST | DCL-Bank Account |
|---|---|---|---|---|---|---|---|---|---|
| Bank Name | Name of the bank from which the funds are transferred. | Disabled | Mandatory | Mandatory | Mandatory | Mandatory | Mandatory | Mandatory | Mandatory |
| Address1 | Primary address of the sender’s bank. | Disabled | Optional | Optional | Optional | Optional | Optional | Optional | Optional |
| Address 2 | Additional address of the sender’s bank. | Disabled | Optional | Optional | Optional | Optional | Optional | Optional | Optional |
| City / State | City or State of the sender’s bank. | Disabled | Optional | Optional | Optional | Optional | Optional | Optional | Optional |
| Post Code | Postal code of the sender’s bank. | Disabled | Optional | Optional | Optional | Optional | Optional | Optional | Optional |
| Country | Country where the sender’s bank is located. | Disabled | Mandatory | Mandatory | Mandatory | Mandatory | Mandatory | Mandatory | Mandatory |
| SWIFT BIC | Bank Identifier Code of the sender’s bank. | Disabled | Optional | Optional | Optional | Optional | Optional | Optional | Optional |
32. Add to Beneficiary List - Select this option to save the entered beneficiary details for future use.
iv) If Funding Method = Cheque
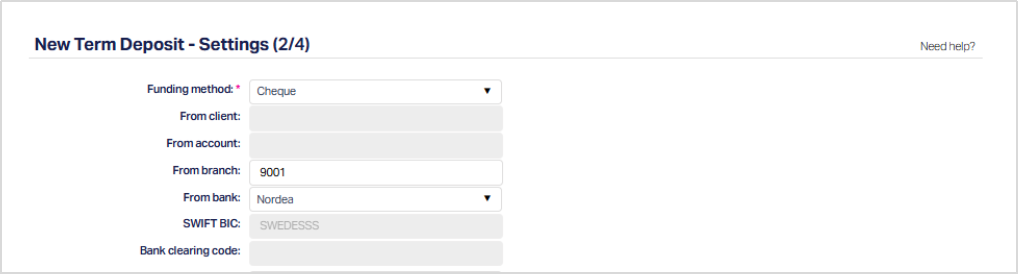
When Cheque is selected as the Funding Method, the deposit amount is expected to be funded through a cheque instrument.
33. The following fields are displayed:
- From Client - Disabled and not applicable.
- From Account - Disabled, as no client account debit is involved.
- From Branch - Displays the branch through which the cheque is being processed.
- From Bank - You must select the bank from which the cheque is issued.
- SWIFT BIC - Auto-populated based on the selected bank and displayed in read-only mode.
- Bank Clearing Code - Displayed based on the selected bank, if maintained.
Cheque funding requires bank details but does not require beneficiary or clearing network selection as in Transfer from Other Bank.
iv) If Funding Method = Manager's Cheque
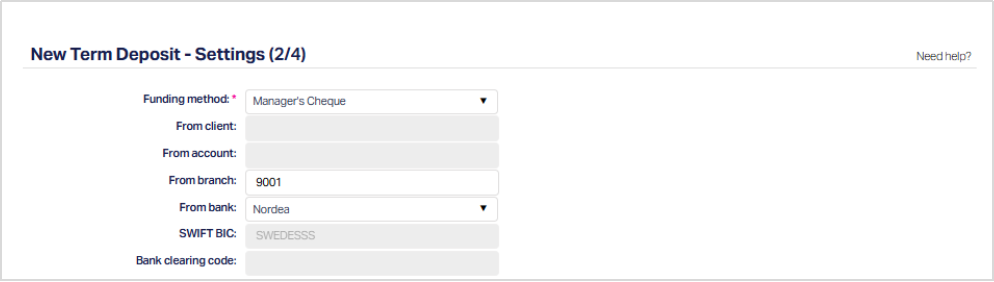
When Manager’s Cheque is selected as the Funding Method, the deposit amount is expected to be funded through a bank-issued cheque.
34. The following fields are displayed:
- From Client - Disabled and not applicable.
- From Account - Disabled.
- From Branch - Displays the processing branch.
- From Bank - You must select the issuing bank of the manager’s cheque.
- SWIFT BIC - Auto-populated based on the selected bank and displayed in read-only mode.
- Bank Clearing Code - Displayed based on the selected bank, if available.
Manager’s Cheque requires bank details but does not require beneficiary or clearing network configuration.
35. Interest Payment Mode - Select the Interest Payment Mode to define how interest earned on the Term Deposit will be handled.
The Available options are:
- Compound Interest
- Payout Interest
Compound Interest - Select this option when interest is to be compounded. When Compound Interest is selected:
- The Interest Payout Method field is disabled.
- All payout destination fields (Client, Account, Branch, Bank, SWIFT BIC, Clearing Code) are disabled.
In this case, interest is liquidated to the Term Deposit account itself based on the interest liquidation frequency defined under the Interest Payable tab.
Payout Interest - Select this option when interest is to be paid out and not added to the principal amount. When Payout Interest is selected -
- The Interest Payout Method field becomes enabled.
- The payout destination fields (such as Client, Account, Branch, Bank, SWIFT BIC, and Clearing Code) are enabled based on the selected payout method.
Interest will be accrued as per the frequency defined under the Interest Payable tab and liquidated according to the configured payout settings.
Interest Payout Method This field is enabled only when the Interest Payment Mode = Payout Interest. Select how the interest amount should be paid from the drop-down. The available options include:
- Credit to Account
- Cash
- Transfer to other bank
- Manager’s Cheque
The fields displayed below will dynamically change based on the selected payout method.
i) If Interest Payout Method = Credit to Account:

Interest will be credited to an internal account within the bank.
- To Client - Enabled, Defaults to the Client selected in the Profile stage. You may change the Client if required.
- To Account - Enabled. Displays eligible accounts of the selected Client matching the deposit currency
- To Branch / To Bank / SWIFT BIC / Bank Clearing Code are Disabled.
ii) If Interest Payout Method = Cash:
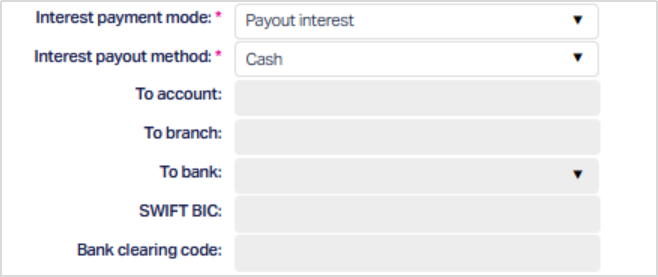
If you select this option, Interest will be paid in cash. Client account selection is not required and Branch selection may be required based on system configuration.
External bank details are not applicable.
iii) If Interest Payout Method = Transfer to other Bank:
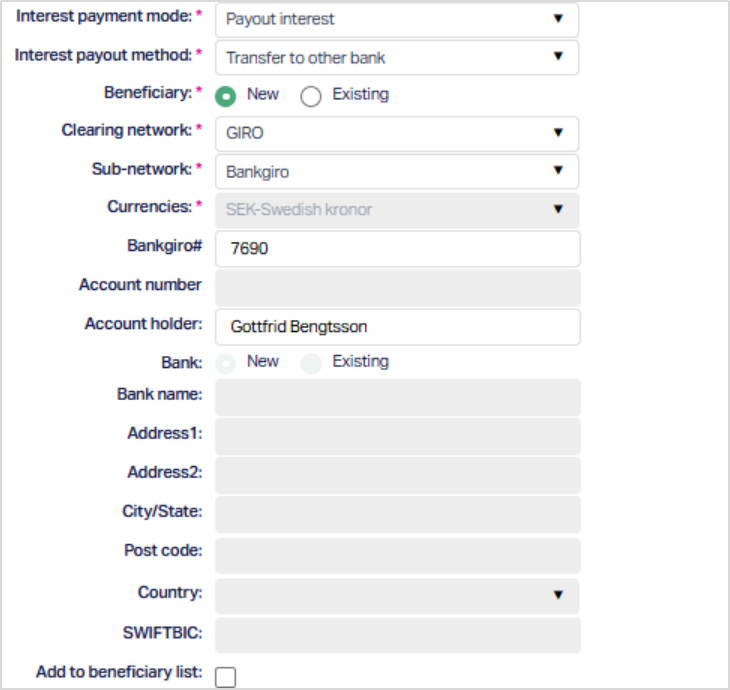
Interest will be transferred to an account in another bank. The following fields are enabled:
- Beneficiary (New / Existing)
- Clearing Network
- Sub-network (if applicable)
- Currencies (Auto-generated depending on the Clearing network selected)
- Account Number / IBAN (based on clearing network)
- Account Holder
- Bank (New / Existing)
- Bank Name and Address (if New)
- SWIFT BIC (mandatory depending on clearing network)
- Bank Clearing Code (mandatory depending on clearing network)
The format and mandatory fields depend on the selected Clearing Network.
If the selected Bank is maintained in the system, SWIFT BIC and Clearing Code are automatically populated. If “Others” or “New” is selected, these details must be entered manually.
iv) If Interest Payout Method = Manager's Cheque:
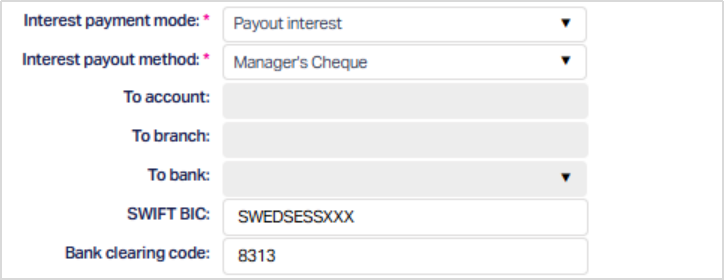
Interest will be issued through a Manager’s Cheque.
The following fields are enabled:
- SWIFT BIC
- Bank Clearing Code
- Client account selection is not required.
Note: Interest accrual and liquidation frequency are controlled under the Interest Payable tab. Interest Payment mode only determines:
- Whether interest is compounded, or- Paid out to a destination
It does not control the accrual calculation logic.
36. Select the Maturity instruction from the drop-down list. The available options are:
Do not rollover - choose this when the Client does not want the term deposit to be rolled over (extended) on maturity.
Rollover maturity proceeds - choose this when the Client wants the entire maturity proceeds (deposit amount + interest, if any) to be rolled over (extended) on maturity.
Rollover special amount - choose this when the Client wants any other amount apart from the entire maturity proceeds to be rolled over (extended) on maturity.
37. Enter the Roll Over Term in days.
38. If you have selected Rollover special amount in Maturity Instruction, the Roll over amount field will be enabled where you can enter the amount which the Client wants to roll over on maturity. However, you cannot enter an amount greater than the maturity proceeds.
39. If you have chosen Rollover maturity proceeds or Rollover special amount in Maturity Instruction, the Roll over with grace period radio button will be defaulted from the Product; but you can change it for the specific account.
40. If you select Yes in Rollover With Grace Period, the Grace days will be enabled, where you have to enter the number of days after which the actual roll over will be effective automatically subject to balance in the account to debit.
For example, if the grace period is marked as 2 days, then on the maturity date the deposit will be liquidated to the current account and on day 2 the system will re-open the term deposit with the same maturity amount provided there is balance in the account. If there is no balance, the deposit is not rolled over. The deposit is rolled over with the same term, same account number and same instructions but with current interest rate (if variable).
41. Select the Maturity Payout Method to define how the Term Deposit Amount will be handled at maturity. The available options are:
- Credit to Account
- Cash
- Transfer to Other Bank
- Manager's Cheque
i) If Maturity Payout Method = Credit to Account:
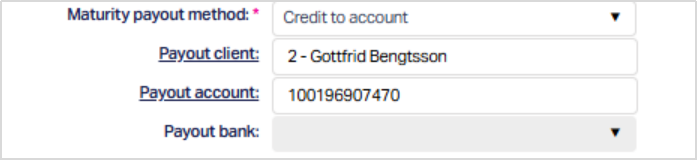
The Maturity amount will be credited to an internal account within the bank.
- Payout Client - Defaults to the Client selected in the Profile stage. You may change the Client if required.
- Payout Account - Displays the eligible accounts of the selected Client matching the deposit currency.
- Payout bank is disabled.
This option is typically used when the maturity amount must be credited back to the customer’s savings or current account.
ii) If Maturity Payout Method = Cash:
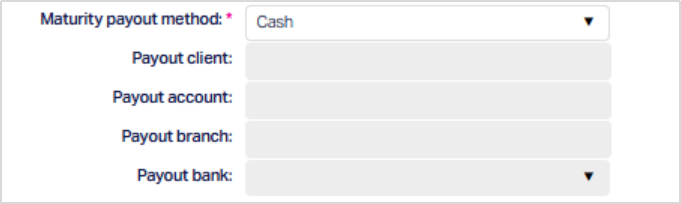
If Cash is selected, the Maturity amount will be paid in cash. Client account selection is not required. Branch selection may be required depending on system configuration.
External bank details are not applicable.
iii) If Maturity Payout Method = Transfer to other Bank:
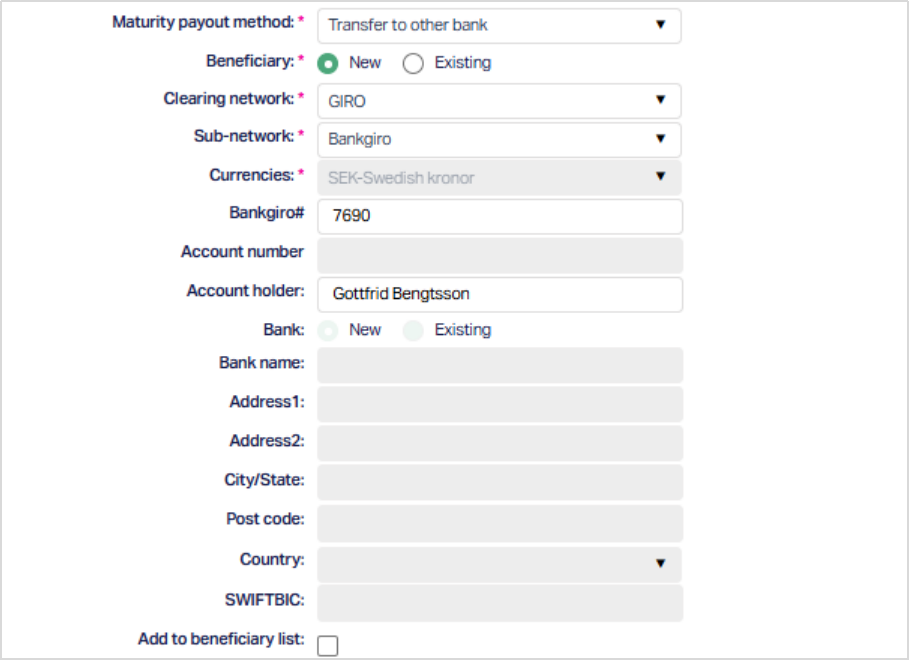
The Maturity amount will be transferred to an account in another bank. The following fields are enabled:
- Beneficiary (New / Existing)
- Clearing Network
- Sub-network (if applicable)
- Currency (Auto-generated depending on the Clearing network selected)
- Account number / IBAN (based on Clearing network)
- Account holder
- Bank (New / Existing)
- Bank name and address (if New)
- SWIFT BIC
- Bank clearing code
The required fields and validation rules depend on the selected Clearing Network.
If the selected bank exists in the system directory, SWIFT BIC, and Clearing Code are auto-populated. If not, they must be entered manually.
iv) If Maturity Payout Method = Manager's Cheque:
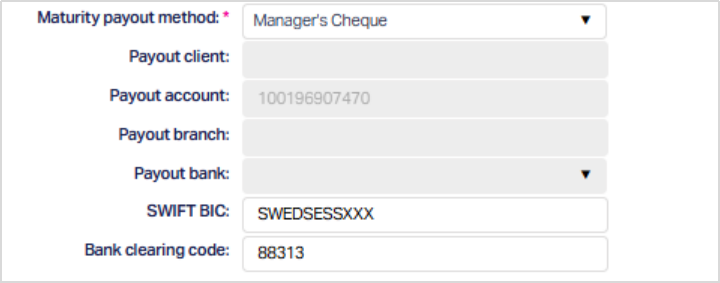
The Maturity amount will be issued through a Manager’s Cheque.
The following fields are enabled:
- Payout account (Auto generated to the Client’s payout account selected)
- SWIFT BIC
- Bank Clearing Code
Note: Maturity Payout Method controls only how the deposit amount is disbursed at maturity. It does not control:
- Whether the deposit is rolled over
- Whether special rollover terms apply
- Grace period handling
Those behaviours are controlled under the Maturity Instruction section.
42. If Required select the Periodic interest repricing radio button. Once selected Reset frequency and Next reset date fields get enabled.
43. Select the Reset frequency from the drop-down list. The available frequencies are Monthly, Quarterly, Semi Annual and Annual.
44. Enter the Next reset date from the available calendar.
45. By default, the Holiday preference (Roll over grace days), Holiday preference (Maturity) and Holiday preference (Periodic interest re-pricing) is selected as Ignore. But you can change the holiday preference only for Holiday preference (Maturity) and Holiday preference (Periodic interest re-pricing) as required from the available list of Ignore, Next Business day and Previous Business day.
Note: Holiday preference (Roll over grace days field will be disabled if the Roll over with grace period is selected as No.
46. Liquidate Interest at Financial year-end: This field specifies whether interest accrued up to the financial year-end should be liquidated as part of financial year-end processing. The value is defaulted from the Term Deposit Product and can be modified before account activation.
47. By selecting Yes or No in the Tax-exempt field you can define if the tax calculation for the account has to be done or not. If No is selected, then the tax will be calculated on interest accrual as per the tax scheme defined for the Entity under Admin > Tax Schemes > Maintain where Applies To = Time Liabilities. If it is No then Tax is not calculated for the account.
48. Click Next. The New Term Deposit → Interest Payable (3/4) page appears.
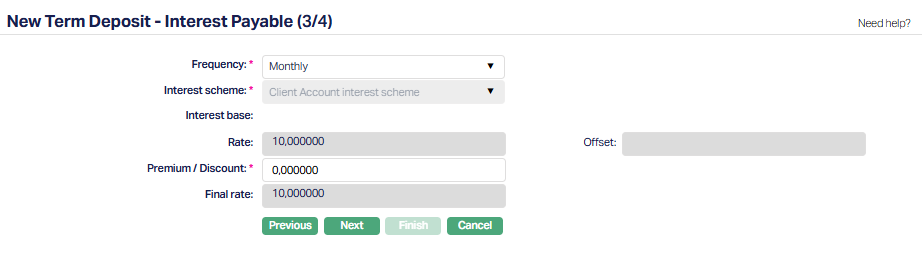
49. Select the Frequency from the drop-down list. The available frequencies are Monthly, Quarterly, Semi Annual and Annual.
50. Interest scheme will be defaulted based on the Term Days for the Deposit from the Term Bands as maintained in the Product.
51. Interest base:
Rate will be defaulted as maintained in the product.
Premium / Discount field will be 0 by default. You can change the details as required.
Final rate will be defaulted as maintained in the product
52. Click Next. New Term Deposit → Confirmation (4/4) page appears.
Note: If the custom field is mapped to Term Deposit Product at Admin → System Codes → Custom fields → Field mapping, then an additional screen will appear before the Confirmation screen. The custom fields will be mandatory or non mandatory based on the rules set at the Field mappings. For more detail on custom field functionality please refer Admin → System codes → Field mapping manual.
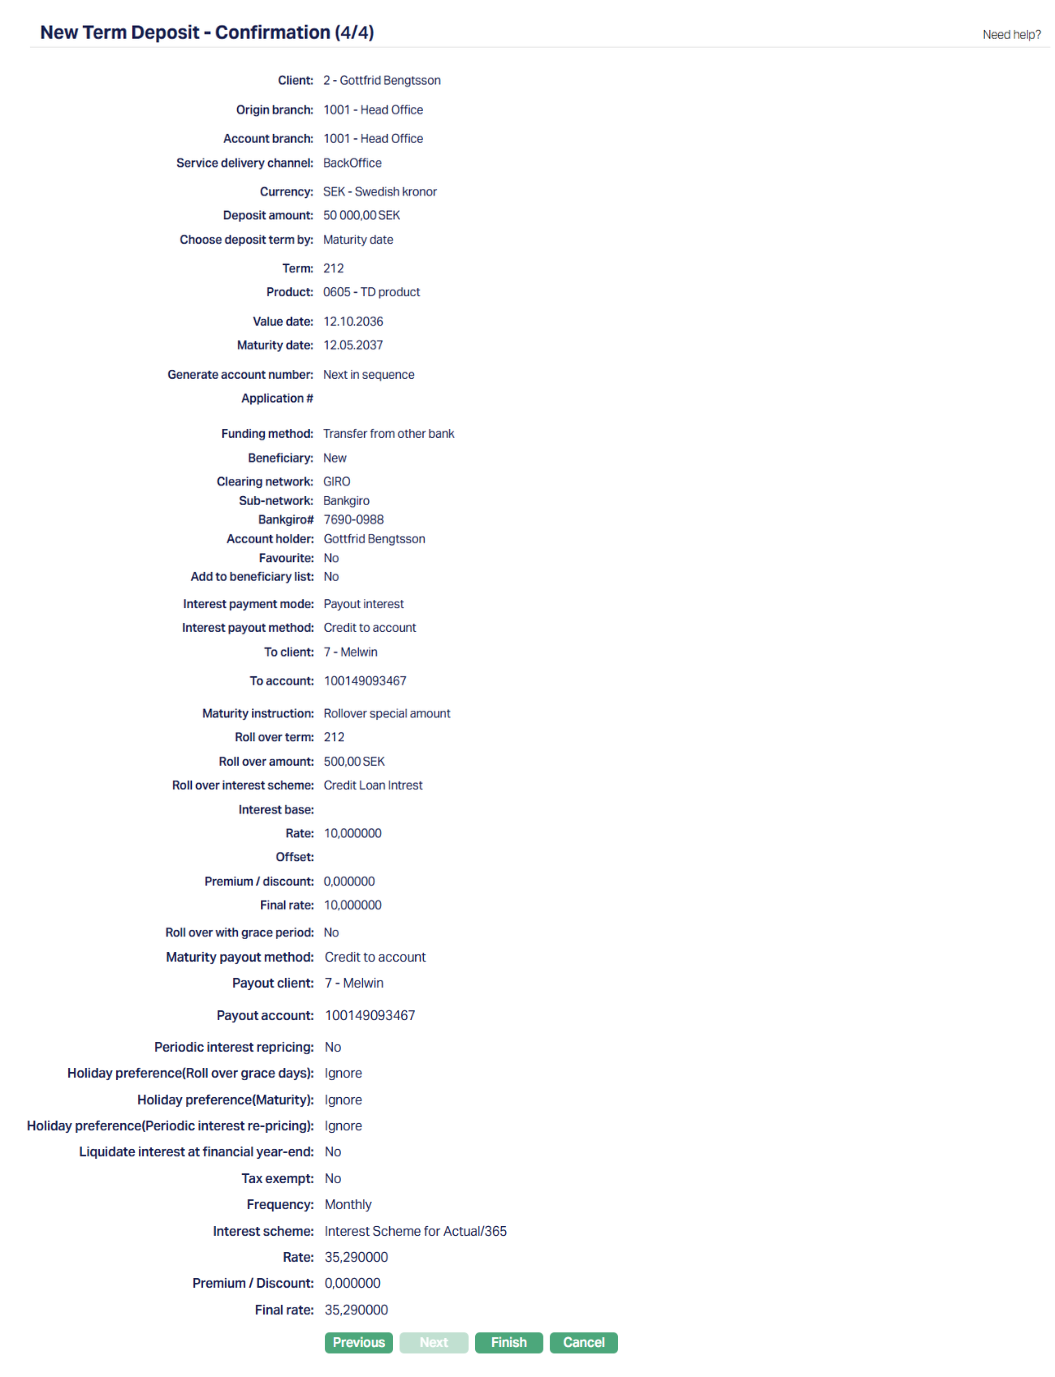
53. Click Finish. Term Deposit account is created, and the Term Deposit page appears displaying the Profile tab of the account that you added.
Functions: Add, Search.
Note:ACCOUNT STATUS BEHAVIOUR:
When the Funding Method is Debit from Account, and Retry Days have been defined, the Status will be as follows:
On click of Finish, Aura will check the Value Date.
If Value Date <= Current Booking Date, Aura will try to debit the funding account.
- If successful, TD Account Status will be Opened Approved, Activated Approved
- If not successful, TD Account Status will be Opened Approved, Activated Pending
- For all Accounts where the Account Status is Activated Pending, based on the Retry Days and Maturity Date of the account, Aura will try to debit the funding Client Account at end of each day till the end of Retry Days or Maturity Date whichever is earlier. If the debit is successful,
- the TD Account Status will be moved to Activated Approved
- the Value Date will be moved to the Current Booking Date on which the debit was successful
- the Maturity Date will be revised based on the Term Days.
- For all Accounts where the Account Status is Activated Pending, based on the Retry Days and Maturity Date of the account, Aura will try to debit the funding Client Account at end of each day till the end of Retry Days or Maturity Date whichever is earlier. If the debit is successful,
If Value Date > Current Booking Date, TD Account Status will be Opened Approved, Activated Pending.
- On the future Value Date (i.e., when Current Booking Date = Value Date), during the Beginning of Day processes, Aura will try to debit the funding account.
- If successful, TD Account Status will be moved to Activated Approved
- If not successful, TD Account Status will remain Activated Pending
- From that date, the system behaviour will be the same as described above
- On the future Value Date (i.e., when Current Booking Date = Value Date), during the Beginning of Day processes, Aura will try to debit the funding account.
Notes: Any user other than the one who created the Account can approve the Status record using the Term Deposit → Status tab. On such approval, if the debit is successful, the Value Date, Term and Maturity Date will remain the same and will not be revised. If reqiured, you can make the required changes in the Value Date, Term / Maturity Date any time before approval and then approve the Status record. TD Account Status will be moved to Activated Approved
If the Client Account debit is unsuccessful till the end of Retry Days or Maturity Date whichever is earlier, the TD Account Status will be moved to Closed Approved. Similarly, if the Client Account debit is unsuccessful till the first Interest Liquidation Date, the TD Account Status will be moved to Closed Approved.
Example:
Current Booking Date when Term Deposit Account is created: 28-Oct-2025
Funding Method: Debit from Account
| Case # | Original Value Date | Original Maturity Date | Original Term | Retry Days | Debited during | Funding Successful On | Revised Value Date | Revised Maturity Date | Revised Term |
|---|---|---|---|---|---|---|---|---|---|
| 1 | 28-Oct-25 | 28-Oct-26 | 365 | 5 | User action | 28-Oct-25 | 28-Oct-25 | 28-Oct-26 | 365 |
| 2 | 28-Oct-25 | 28-Oct-26 | 365 | 5 | User action | 29-Oct-25 | 28-Oct-25 | 28-Oct-26 | 365 |
| 3 | 28-Oct-25 | 28-Oct-26 | 365 | 5 | System action | 30-Oct-25 | 30-Oct-25 | 30-Oct-26 | 365 |
When the Funding Method is not Debit from Account, the Status will be as follows: On click of Finish, Aura will check the Value Date.
- If Value Date <= Current Booking Date, TD Account Status will be Opened Approved, Activated Pending
- If Value Date > Current Booking Date, TD Account Status will be Opened Approved. On the future Value Date (i.e., when Current Booking Date = Value Date), during the Beginning of Day processes, Aura will move the status to Activated Pending.
Any user other than the one who created the Account can approve the Status record using the Term Depost > Status tab. On Approval the status becomes Activated Approved.
Any changes to the Settings, Interest Payable, Signatory, Amount block, Account Status and Linked people tabs will render the status of these tabs to Pending. Only when it is Approved by another user, the changes will be effective.
Overview
Overview tab shows the basic details of the term deposit. The details are defaulted from the Account creation of New term Deposit.
To view Overview,
Access Term Deposit then click Overview tab. The page will display the details from New Term deposit creation.
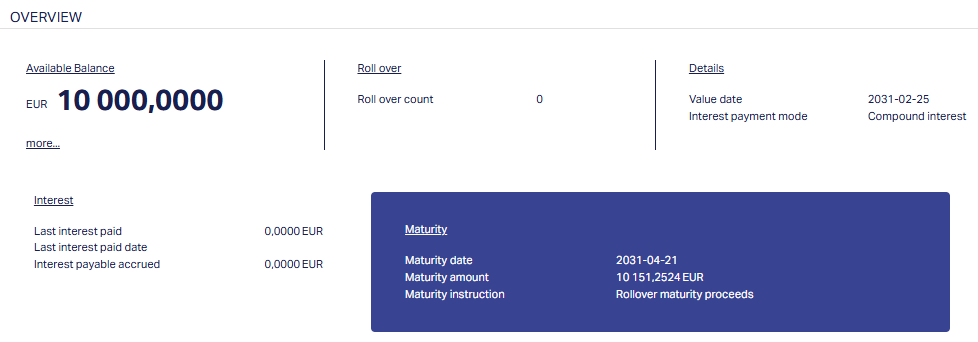
The additional fields that you can view (you cannot edit these) in the Overview tab are explained below:
Maturity amount denotes the total amount after the Term period.
Amount blocked denotes the total amount block on the account. Aura will display the total amount block in account currency.
Remaining deposit amount denotes the deposit amount remaining after premature withdrawals.
Current balance
Current balance = Deposit amount + Interest liquidated (If the interest payment option = Compounded interest)
Current balance = Deposit amount (If the interest payment option = Pay-out interest)
Available balance denotes the available balance amount in the account. That is Current balance minus Amount blocks.
Last interest paid denotes the amount of interest last paid to the customer.
Last interest paid date: This field denotes the date on which interest was last paid.
Interest payable accrued: This field denotes the interest payable accrued as of the previous day as interest payable accrual happens at the end of day.
Roll over count denotes the number of times the term deposit is rolled over.
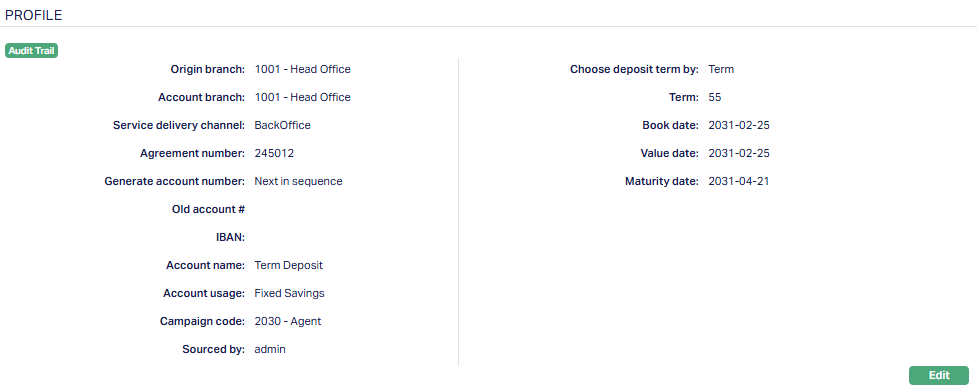
Profile
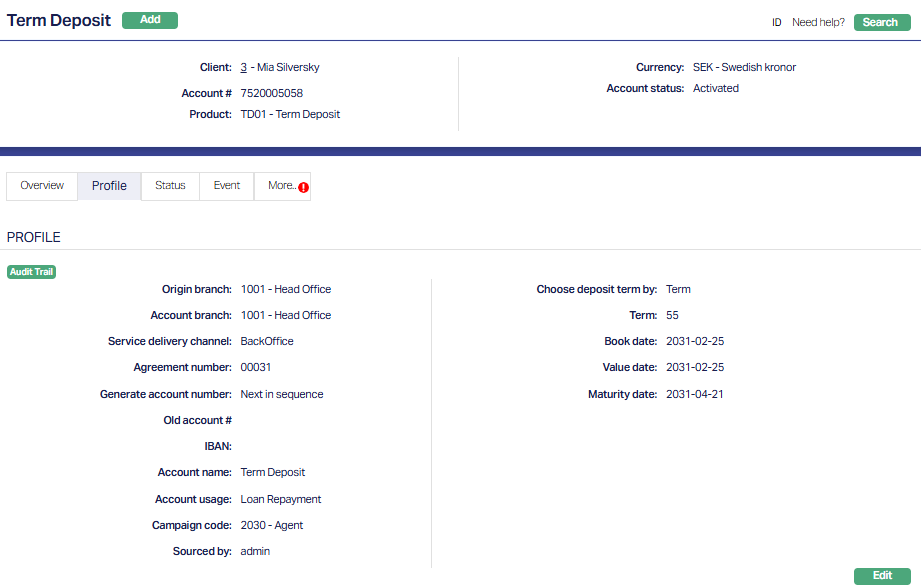
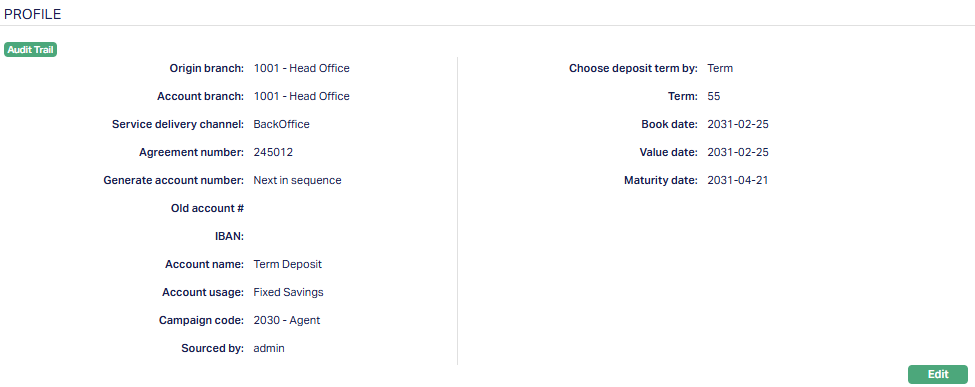
The Profile tab, which is the default screen in the Term Deposit screen, shows the basic details of the term deposit. For details refer to New Term Deposit → Profile (1/4).
To view Profile,
1. Access Term Deposit page system display profile tab details on launch of Client account screen.
Note: The additional fields that you can view (you cannot edit these) in the Profile tab are explained below:
Origin branch denotes the branch name where the Account is opened. This field is non-editable.
Old account #: You can use this field to enter an old account number (perhaps from a legacy system) for information purpose. This field appears only during Edit.
System will generate the IBAN (International Bank Account Number) number only if IBAN generation required is checked as Yes in Product → Settings.
Roll over count denotes the number of times the term deposit is rolled over.
Book date denotes the date when the term deposit is booked.
Value date denotes the value date of the term deposit (Activation date of any Term Deposit account).
Maturity date denotes the date when the term deposit will mature
Deposit amount denotes the amount deposited for opening the term deposit.
Current balance
Current balance = Deposit amount + Interest liquidated (If the interest payment option = Compounded interest)
Current balance = Deposit amount (If the interest payment option = Pay-out interest)
Amount blocked denotes the total amount block on the account. Aura will display the total amount block in account currency.
Available balance denotes the available balance amount in the account. That is Current balance minus Amount blocks.
Last interest paid denotes the amount of interest last paid to the customer.
Last interest paid date: This field denotes the date on which interest was last paid.
Interest payable accrued: This field denotes the interest payable accrued as of the previous day as interest payable accrual happens at the end of day.
To edit the profile,
1. Click Edit. Edit Term Deposit page appears.
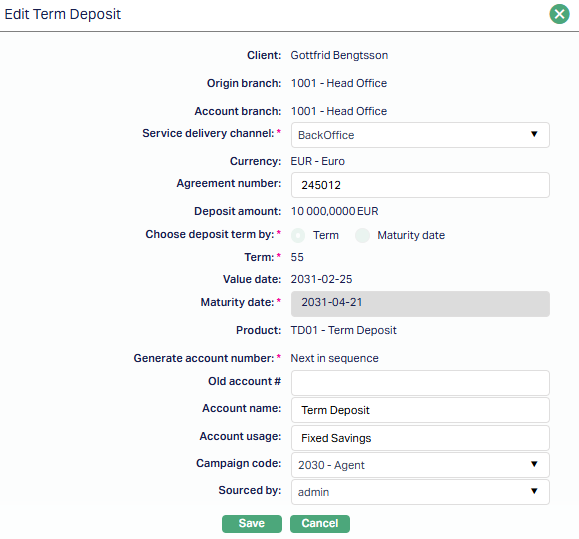
2. Click Save. Profile page appears with the edited details.
Function: Edit
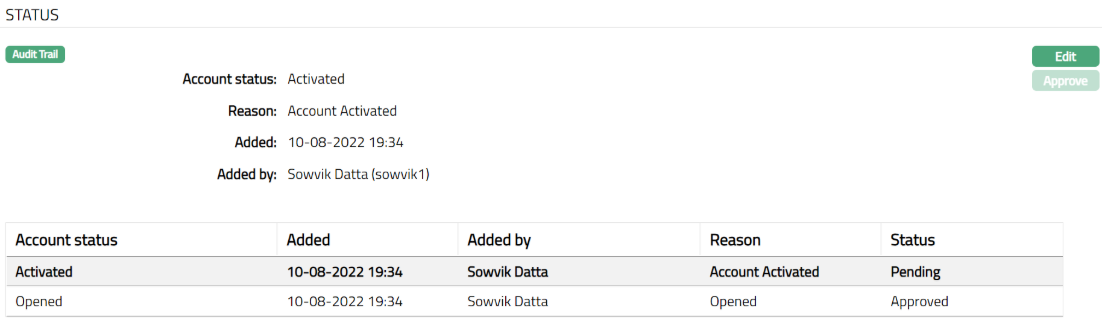
Status
Using this tab, you can view the history of the account status. You can also approve the Status record created by another user.
To View Status tab,
1. Access Term Deposit page then click Status tab.
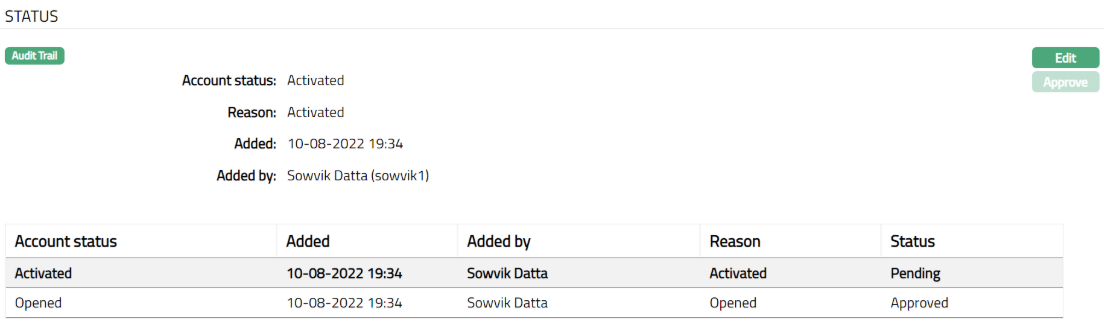
Note: Account status will reflect as Activated and the Status will reflect as Pending. Note: Once approved by another user apart from the user who created the Account, you cannot Edit or Approve further.
The additional fields under Status tab are explained below:
Account Status denotes the current status of the account.
Reason displays the reason for the status selected for the account. In case of automatic status movement, the reason is predefined; while in case of manual status updates, this will display the reason input during the manual status change.
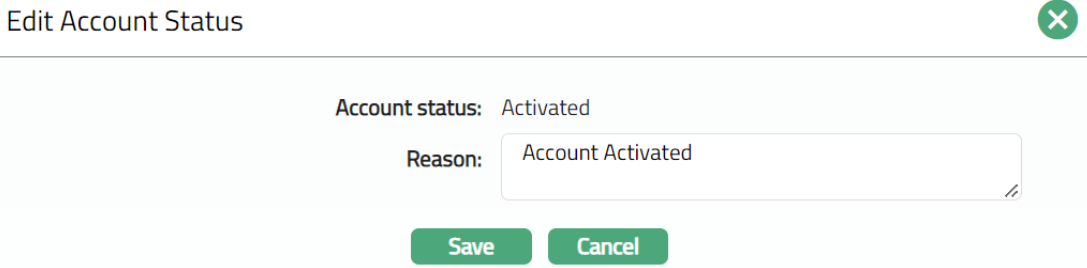
To edit the Status tab,
1. Click Edit. Edit Account Status page appears.
2. Depending on the current status of the term deposit account, the Status could be.
Opened: This is the initial status of the account as soon as it is created.
Activated: This status is automatically set when the value date is equal to current date and the funds for opening have been credited to the term deposit account. The record status should be approved by another user to make it effective.
Await roll over: On maturity, if there is a roll over option chosen for this account, the status of the account is automatically updated to Await roll over.
Matured: On maturity, if there is no roll over option, or, in case of roll over if the grace days have expired, the status of the account is automatically updated to Matured. Once the status of the term deposit account is Matured, it will be available only in view mode and no further actions like edit or delete would be possible.
3. Click Save. Status tab appears with the edited details.
Functions: Edit, Approve
Note: When the Funding method is selected as Transfer from other bank, the Account Status will be activated automatically when the funds are transferred from the given account to the term deposit account and the Status will be Pending.
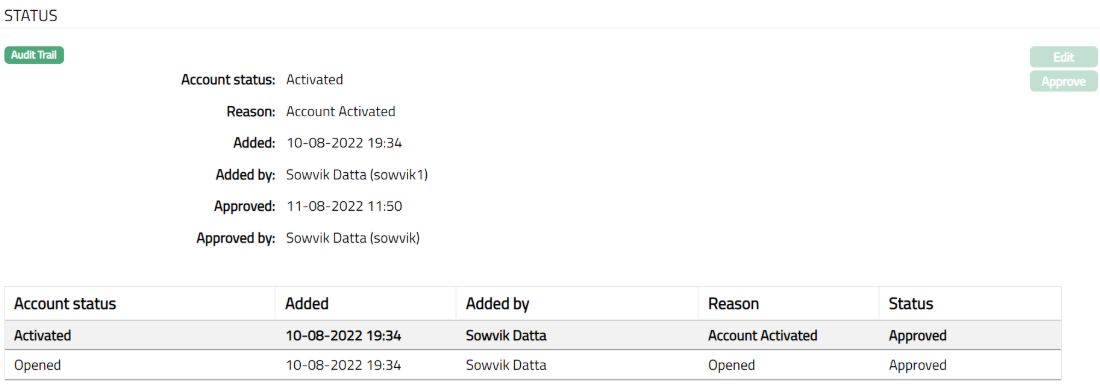
Approval can only be done by a user different from the one who created the record. Once approve the red bubble disappears.
Functions: Edit, Approve
The additional fields available in view are:
Status denotes status of the record.
Added denotes the date and time on which the status record has been added.
Added by denotes the name of the user who has added the status record.
Approved denotes the date and time on which record is approved. This field is displayed for the approved record.
Approved by denotes the name of the user who has approved the record. This field is displayed for the approved record.
Event
Event tab allows you to view the past, current and future events. This tab is non-editable.
To view the Events,
1. Access Term Deposit Maintain page.
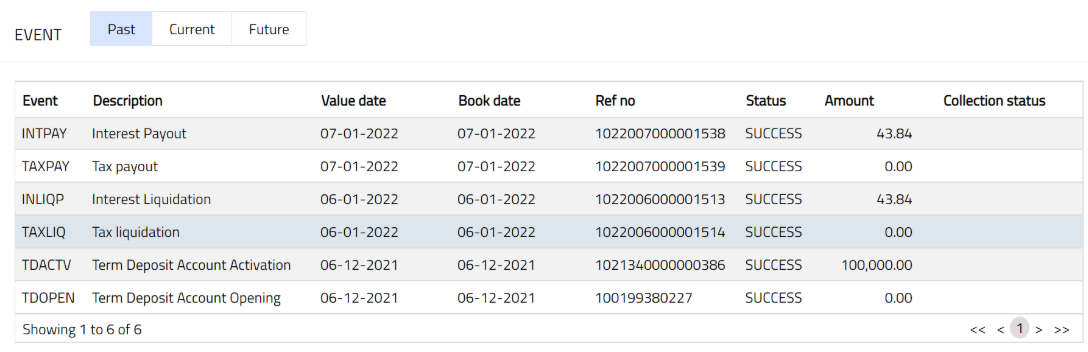
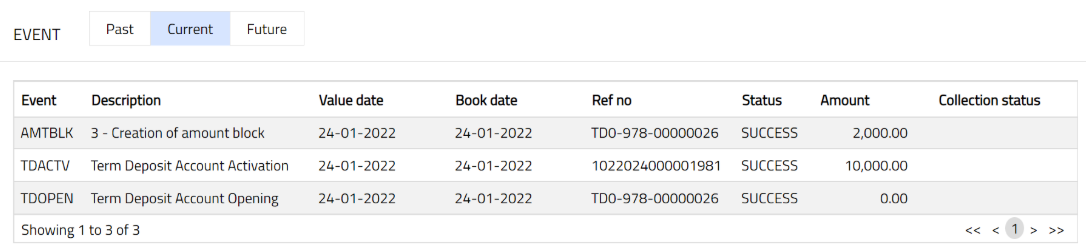
2. Click Events tab. By default, the Current tab is displayed. It shows the details of the Events that have value date = current business date. The Past tab and Future tab show details of events that have value date earlier than / later than the current business date respectively.
All the tabs show the following data:
Event: Code for the event.
Description: Description of the event.
Value Date: The value date for the event
Book Date: The date of entry / input of the event
Ref No: The transaction reference number under which the event is processed
Status: Status of the event:
Pending: Where the event is not yet processed
Success: Where the event has been processed successfully
Failure: Where the event has failed during process
Retry: Indicates a failed event where the system retries to process the event on subsequent business days.
Amount: Indicates the amount processed by the event. Example: Term deposit interest liquidation event will have the amount of interest liquidated.
Collection Status: If the Collection status is Pending, it indicates that the deferred charges has not been collected and if the Collection Status is Success, it indicates that the deferred charges has been collected.
Past
A sample of Past tab is shown below:
Current
A sample of Current tab is shown below:
Future
A sample of Future tab is shown below:
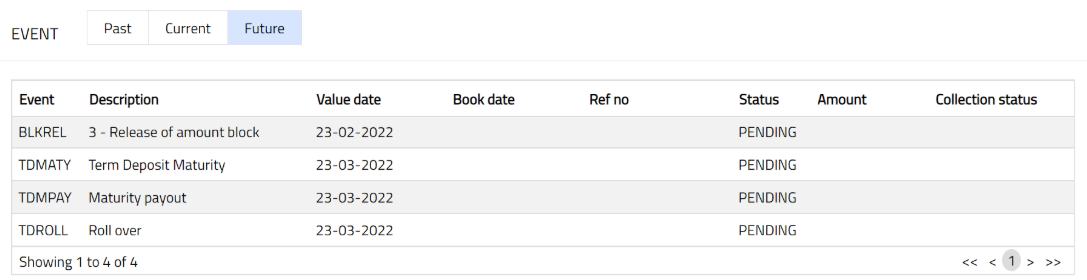
The Events in a Term Deposit account are listed below:
| Event Code | Description | Condition |
|---|---|---|
| TDOPEN | Term Deposit Account Opening | This event occurs when the account is opened, and it occurs only once, i.e., at the time of account opening. The account status will be defaulted to Opened. |
| INACRP | Interest Accrual | This event occurs based on the interest frequency maintained under the Interest Payable tab. |
| INLIQP | Interest Liquidation | This event occurs based on the interest liquidation frequency maintained under the Interest Payable tab. |
| INTPAY | Interest Payout | This event occurs based on the Payment Day maintained under the interest payable tab. |
| TDMATY | Term Deposit Maturity | This event occurs based on the Maturity date. The account status will be changed to Matured. |
| TDROLL | Roll over | This event occurs based on the Maturity instruction — Rollover maturity amount / Rollover special. The account status will be changed to Await Roll Over if the user selects Roll over with grace days. |
| TDLIQD | Premature Liquidation | This event occurs when the user does premature liquidation. The account status will be changed to Matured if the user has done full liquidation; else the event Status Change is not initiated. |
| STATCH | Status Change | This event occurs when the user manually changes the status of the account, and automatically for the events: (i) Account opening and (ii) Account Closure. |
| AMTBLK | Creation of amount block | This event occurs when the user manually creates an amount block on the term deposit balance. |
| BLKREL | Release of amount block | This event occurs when the user manually removes an amount block, or the expiry date of the amount block is reached. |
| TDACTV | Term Deposit Account Activation | This event occurs when System Date equals the Value date. |
| TDBLOC | Term Deposit Block | This event occurs when an amount block is created on the Term Deposit account and is approved. |
| STAGEN | Statement Generation | This event occurs based on the frequency of statement generation mentioned for the term deposit product. |
| TDCLOS | TD Close | This event occurs as the last event in the lifecycle of a term deposit account and is processed immediately after the maturity event. |
| EVNPOP | Event Population | This event occurs when system-generated events are populated for the Term Deposit account. |
| REMGEN | TD Reminder generation | This event occurs when a reminder is generated for the Term Deposit account based on the maintained reminder preferences. |
| TDRATE | TD Interest Rate Revision | This event occurs when an interest rate revision is applied to the Term Deposit account as per periodic interest repricing or approved interest changes. |
| TDRVAC | Term deposit activation reversal | This event occurs when a previously processed Term Deposit activation event is reversed. |
| TDRVMT | Term deposit maturity reversal | This event occurs when a previously processed Term Deposit maturity event is reversed. |
| TDRVRL | Term deposit roll over reversal | This event occurs when a previously processed Term Deposit rollover event is reversed. |
| TDRVLQ | Term deposit premature withdrawal reversal | This event occurs when a previously processed premature withdrawal of a Term Deposit is reversed. |
| TDRVCL | Term deposit closer reversal | This event occurs when a previously processed Term Deposit closure event is reversed. |
| INRVLQ | Interest liquidation reversal | This event occurs when a previously processed interest liquidation event is reversed. |
| INRVPY | Interest Payable reversal | This event occurs when a previously processed interest payable event is reversed. |
| DBTPRO | Debit processing | This event occurs when a debit transaction is processed on the Term Deposit account. |
| TDMPAY | Maturity payout | This event occurs when the maturity proceeds of the Term Deposit are paid out based on the configured maturity payout method. |
| TDCISU | Term deposit certificate issue | This event occurs when a Term Deposit certificate is issued for the account. |
| TDCINV | Term deposit certificate invalidated | This event occurs when a Term Deposit certificate is marked as invalid. |
| PBKISU | Passbook issue | This event occurs when a passbook is issued for the Term Deposit account. |
| PBKCLS | Passbook close | This event occurs when the passbook linked to the Term Deposit account is closed. |
| TDCCLS | Term deposit certificate closed | This event occurs when a Term Deposit certificate is closed. |
| DSTCHG | Documentation stamp tax charge issue | This event occurs when a documentation stamp tax charge is applied to the Term Deposit account. |
| TAXLIQ | Tax liquidation | This event occurs when accrued tax amounts are liquidated from the Term Deposit account as per configured tax rules. |
| TAXPAY | Tax payout | This event occurs when tax amounts payable are paid out from the Term Deposit account. |
| TAXACR | Tax accrual | This event occurs when tax amounts are accrued on the Term Deposit account based on the configured tax scheme and accrual frequency. |
| TDINFL | Term Deposit Inflow | This event occurs when funds are credited to the Term Deposit account based on the selected funding method. |
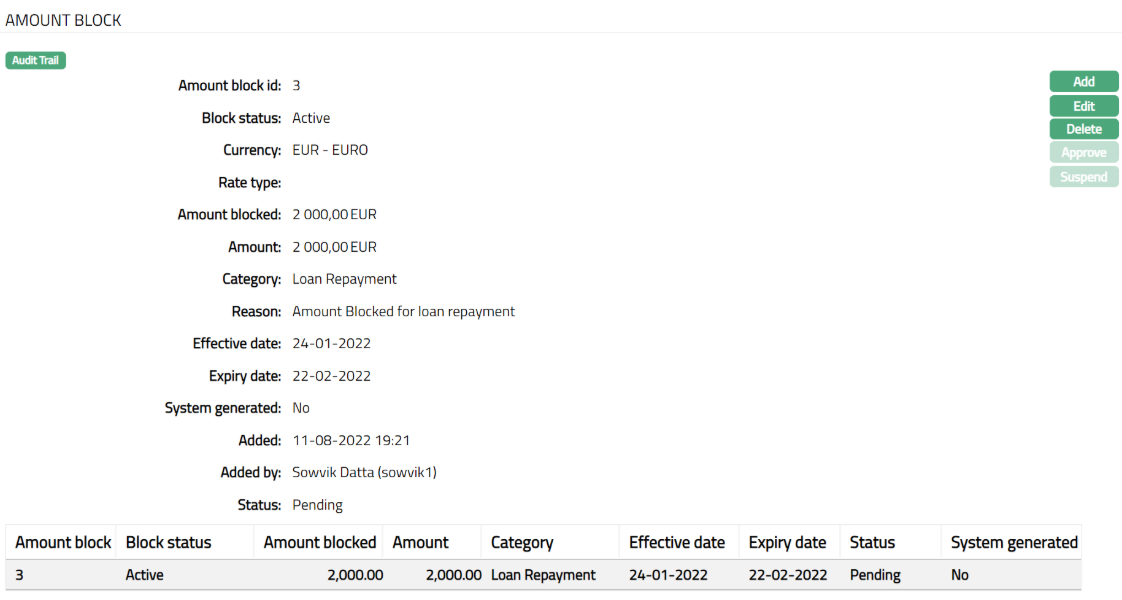
Amount Block
Using this tab you can set certain settings to block the amount. Any entry / change in this tab will set the tab status to Pending till it is approved by another user. On approval, the tab status is set to Approved. The total amount block will be displayed in the profile tab only when the amount block is approved. You can add an amount block only if the term deposit account is activated and approved.
To add a new Amount block,
1. Access Term Deposit page. Click Amount Block tab.

2. Click Add. Add Amount Block page appears.
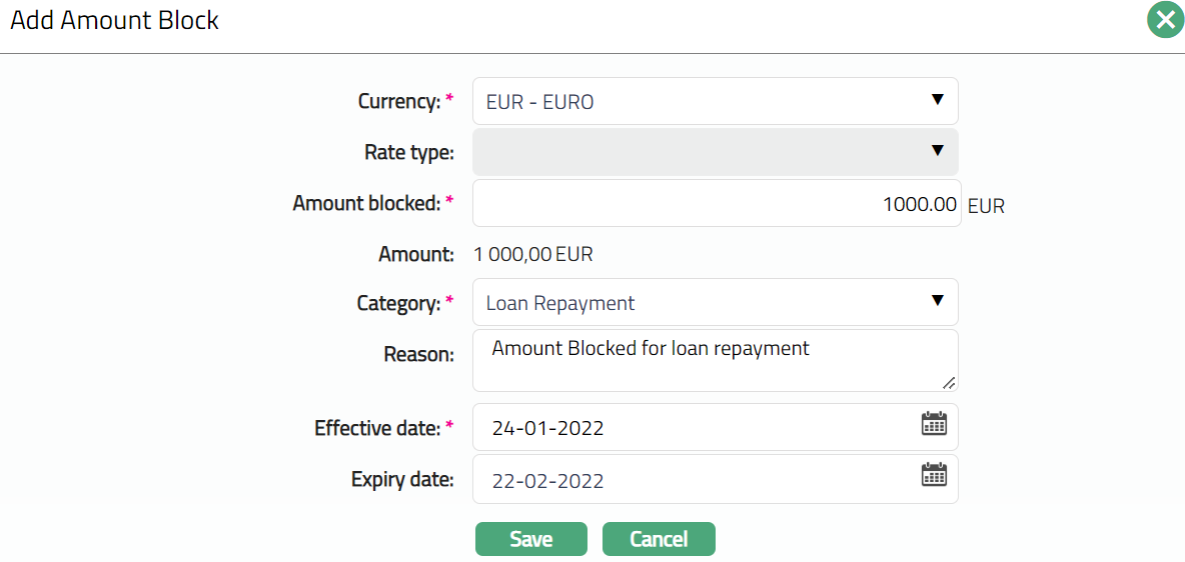
3. Select Currency from the drop-down list. The currencies maintained in GL will be displayed in the drop-down. This is the currency in which you want the amount to be blocked (block currency).
4. Select Currency Rate type from the drop-down list. Aura will display the list of rate types maintained at Admin → System codes → Currency → Currency rate types. This field will be enabled only when you select a Currency other than the Account currency.
5. Enter Amount blocked. It is the block amount in block currency. This field can be edited.
6. Aura will retrieve the mid-rate for the currency pair (block currency and account currency) and convert Amount blocked to Amount. If block currency and account currency are same, then Aura will default amount blocked in Amount.
7. Select block Category from the drop-down list. It is the category to which the amount block belongs and should have been maintained under System Codes → Categories → Block categories.
8. Enter Reason for amount block.
9. Enter Effective date. It is the date from which the amount block is effective. You cannot enter a past date. The effective date will be defaulted to current business day and may be changed to a future date. This field can be edited.
10. The Expiry date is calculated on the basis of the expiry days maintained for the chosen Block Category. It is equal to the Effective Date + Number of expiry days -- 1. If the expiry day is blank or 0, Effective date will also be blank. However, user can still choose the expiry date.
11. Click Save. The Amount Block page appears with the added details.
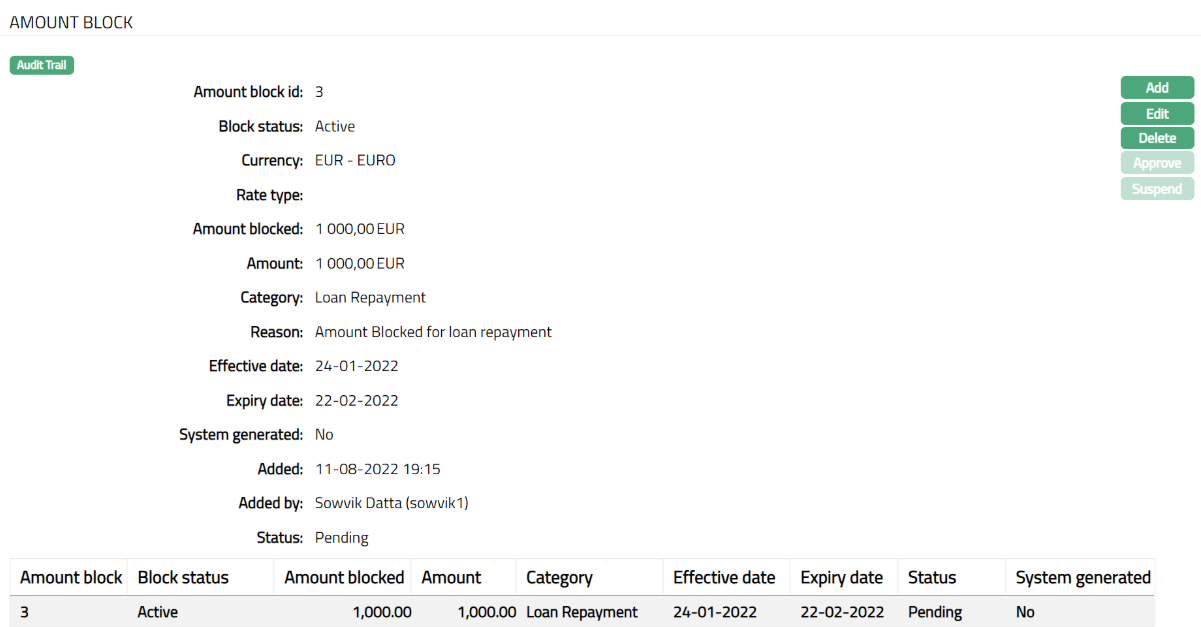
Functions: Add, Edit, Delete, Approve, Suspend
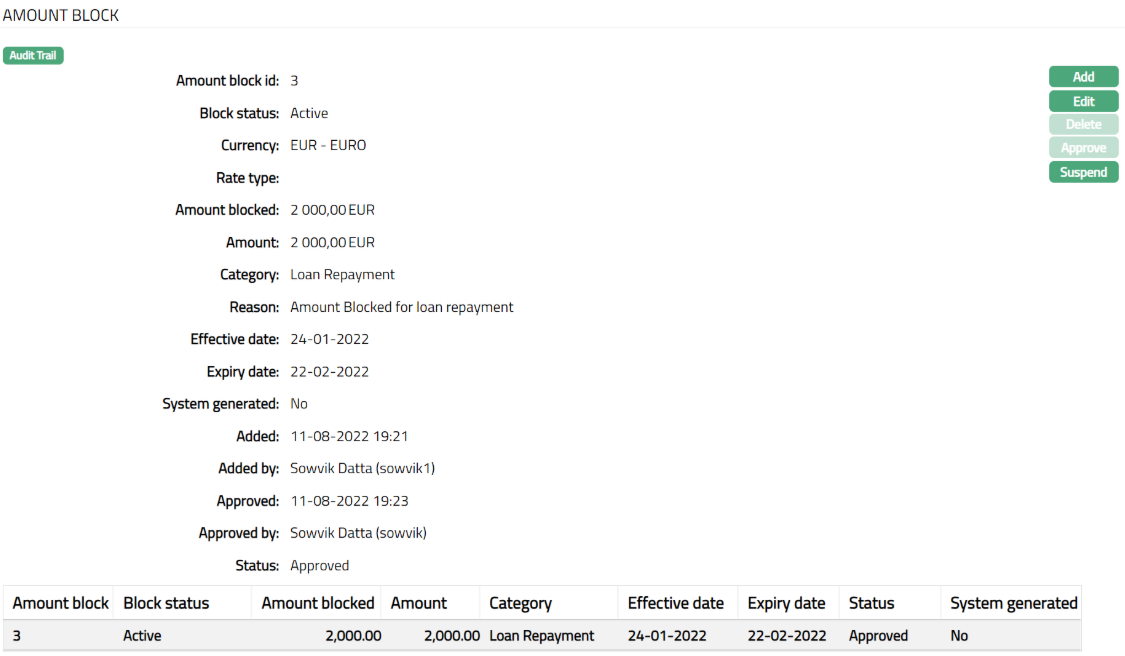
Note: On save, the status of the record is Pending. It can be approved only by a user different from the one who created it. To approve, access the Amount block View from the Search page and click Approve.
To Edit Amount Block,
1. Click Edit. Edit Amount Block page appears.
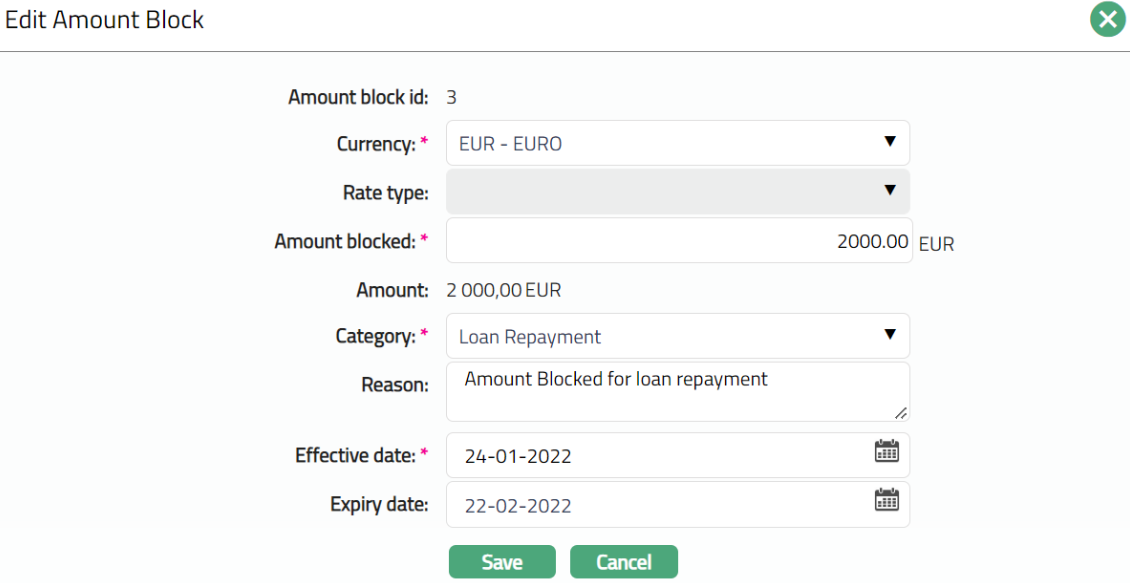
Note: Except Amount Block id, Rate Type and Amount all other fields are editable.
2. Click Save. Amount Block page appears with the edited details.
Note: On save, the status of the record is Pending. It can be approved only by a user different from the one who created it. To approve, access the Amount block View from the Search page and click Approve.
Functions: Add, Edit, Delete, Approve, Suspend
Delete: You can delete Amount Block record by a click on Delete button. When you click on Delete button, Aura displays an alert message. On confirmation Aura will delete the Amount Block record.
Note: Suspend button will be enabled only for amount blocks where the expiry date is on or after current business date and where the amount block has been approved.
The additional fields available in view are:
Status denotes status of the record.
Added denotes the date and time on which the amount block record has been added.
Added by denotes the name of the user who has added the amount block record.
Approved denotes the date and time on which record is approved. This field is displayed for the approved record.
Approved by denotes the name of the user who has approved the record. This field is displayed for the approved record.
Let us take an example to understand the permissible amount blocks:
There is a term deposit for One year from 1-Jan-2014 to 31-Dec-2014 for the amount 5000 SEK
Assume the exchange rate for EUR: SEK = 10 and USD: SEK = 5 and three amount blocks are created as follows:
1. Amount block from FEB to JUN - 200 EUR (i.e., 2000 SEK)
2. Amount block from MAR to AUG - 300 SEK
3. Amount Block from MAY - OCT - 250 USD (i.e. 1250 SEK)
After these amount blocks are created and approved, the further permissible Amount blocks (i.e. Deposit amount minus Total amount block for the period) would be as follows:
| Month | Deposit Amount (SEK) | Amount Blocked (SEK) | Further Permissible (SEK) |
|---|---|---|---|
| Jan | 5000 | 0 | 5000 |
| Feb | 5000 | 2000 | 3000 |
| Mar | 5000 | 2300 | 2700 |
| Apr | 5000 | 2300 | 2700 |
| May | 5000 | 3550 | 1450 |
| Jun | 5000 | 3550 | 1450 |
| Jul | 5000 | 1550 | 3450 |
| Aug | 5000 | 1550 | 3450 |
| Sep | 5000 | 1250 | 3750 |
| Oct | 5000 | 1250 | 3750 |
| Nov | 5000 | 0 | 5000 |
| Dec | 5000 | 0 | 5000 |
Beneficial Ownership
The Beneficial Ownership tab allows you to view and edit the beneficial ownership details for the Term Deposit. In case the account is for Personal or Corporate Client, you can only view the details of the beneficial owner. In case of Joint Client, you can view and edit the details of the beneficial owners.
To view the Beneficial ownership details,
1. Access Term Deposit page and click Beneficial ownership tab to view the details as per samples below.
In case of Personal / Corporate

2. Click Add in case of Joint. Add Beneficial Ownership page appears.
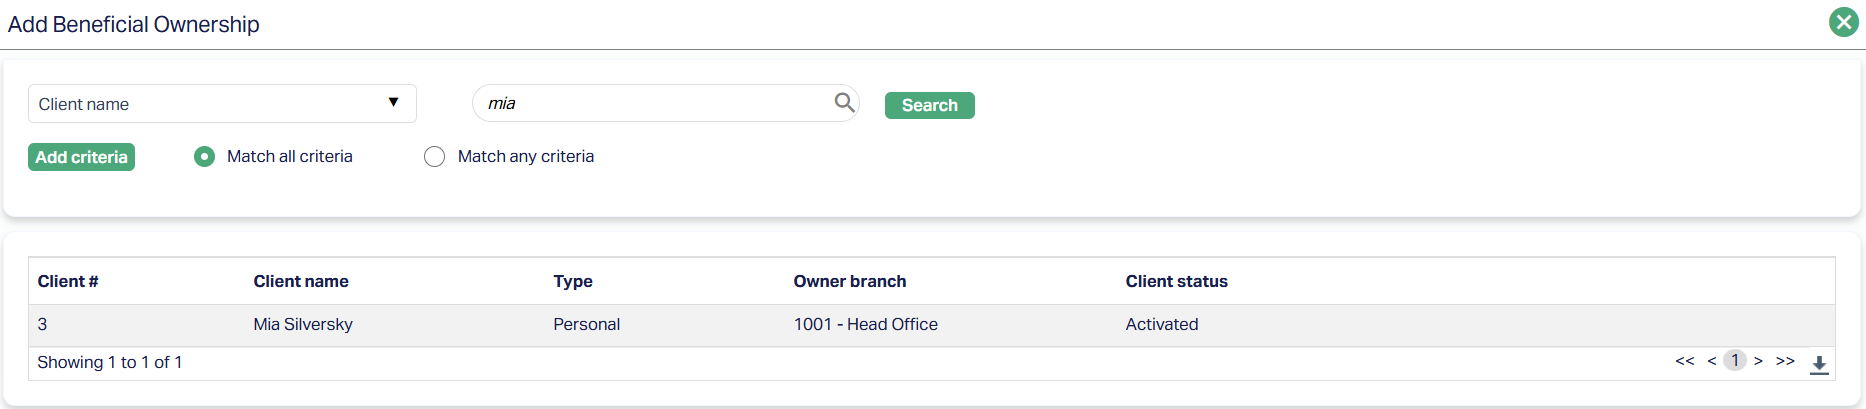
3. Search the Client and click on the same. The selected Client gets added with 50% ownership each as per the screenshot shown below.

To edit,
1. Click Edit. Edit Beneficial Ownership page appears.

Note: You can edit the Ownership percentage. The total of the ownership should be equal to 100%.
2. Click Save. Beneficial Ownership page appears with the edited details.

Functions: Edit
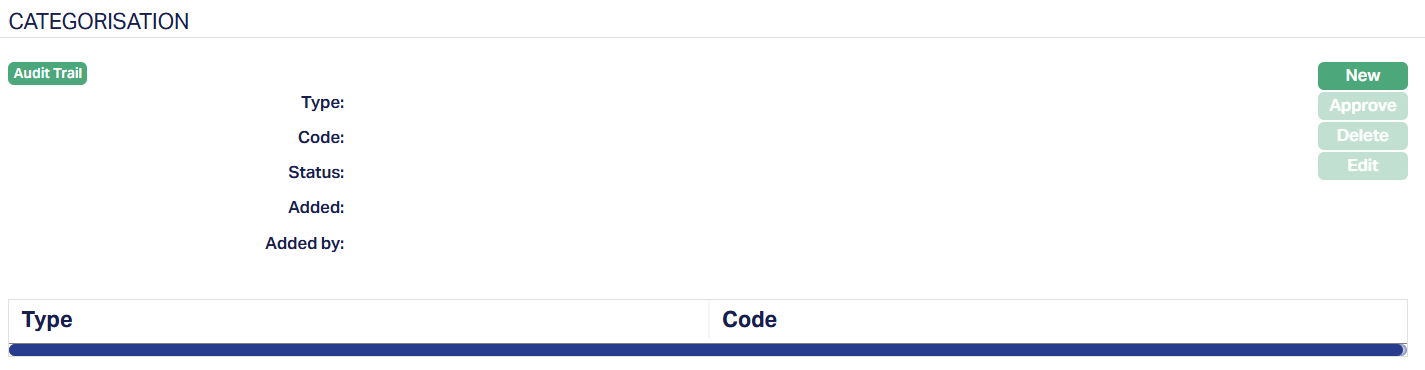
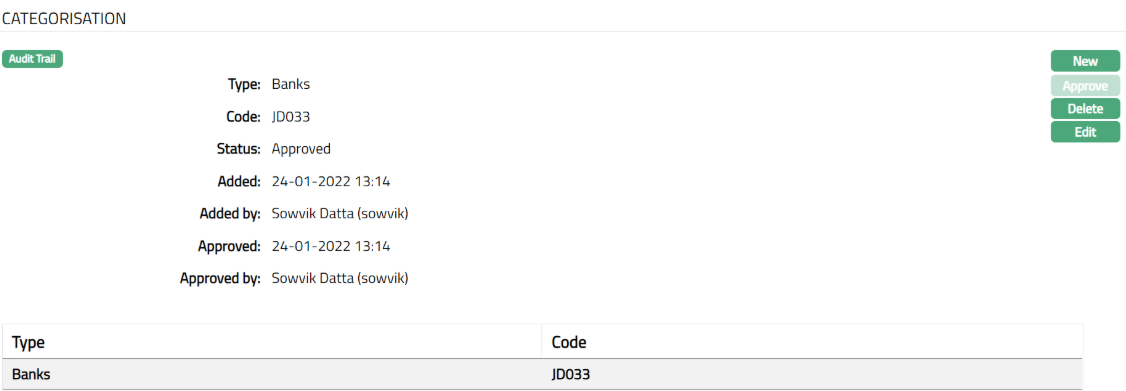
Categorisation
Categorisation tab allows you to categorise the accounts and add the parameters in the status rules. Based on the Categorisation done, the account can be moved to the required statuses.
To add Category,
1. Access Term Deposit page and click Categorisation tab. The following screen appears.
To Add new category,
2. Click New. New Category page appears.
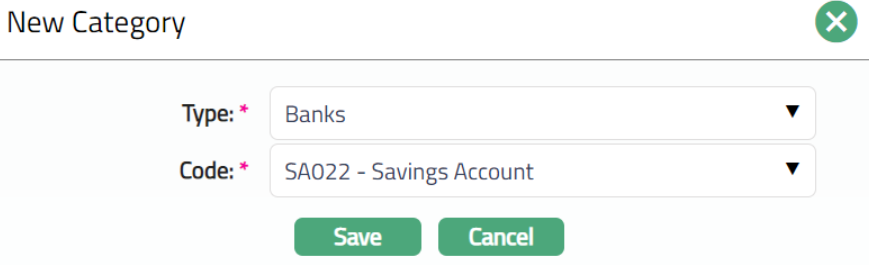
3. Select Category Type from the drop-down list maintained under Admin → System Code → Categories → Category type for which Applicable for is selected as Account.
4. Select Code from the drop-down list, maintained under the selected category type at Admin → System Code → Categories → Category type.
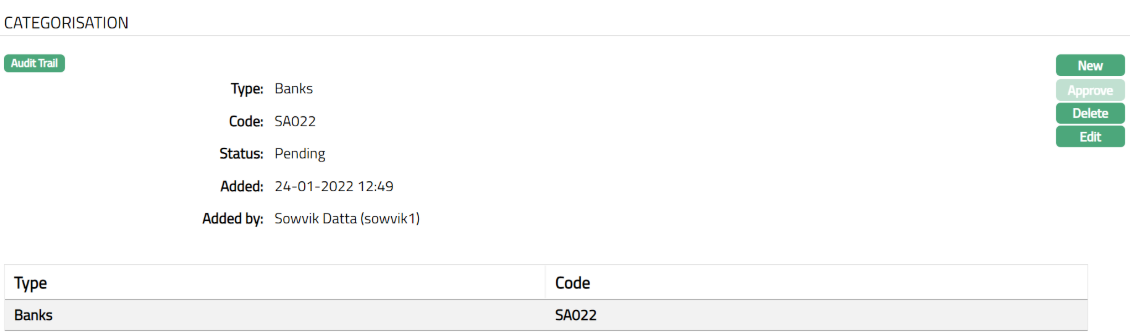
5. Click Save. Category page appears with the added category.
Note: The categorisation added has to be unique.
Functions: New, Approve, Edit, Delete.
Delete: Click on the Delete button to delete the Categorisation record. A flexible schedule can be deleted until it is approved.
Approve: A Categorisation schedule record has to be approved by any user other than the one who has initiated the record.
To edit the Category record,
1. Select the required Category record you wish to Edit.
2. Click Edit. Edit Category page appears.
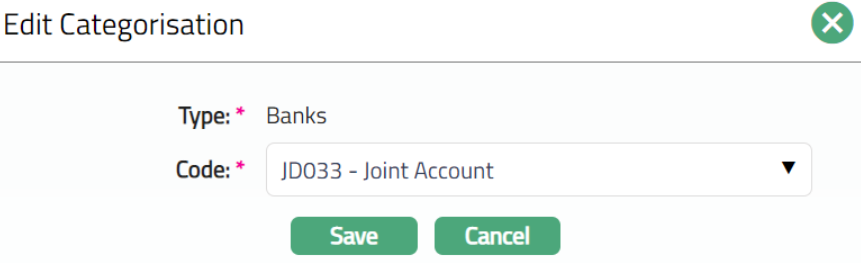
Note: Only the Code field is editable.
3. Click Save. Categorisation page appears with the edited details.
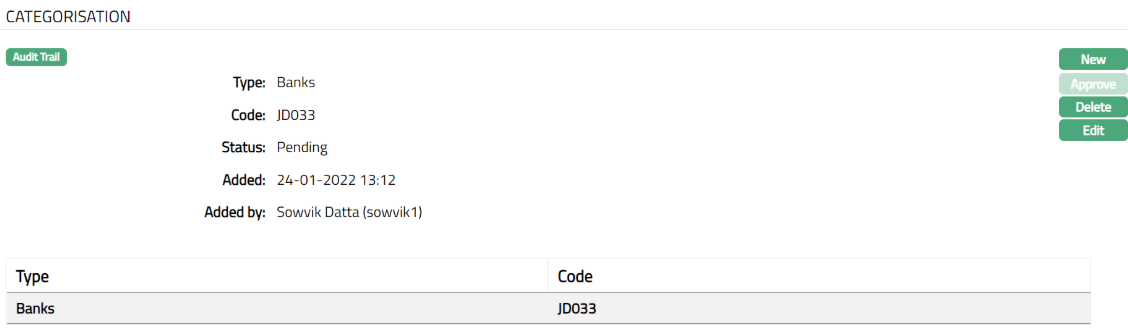
Note: The Status will reflect as Pending. Approval can only be done by a user different from the one who created the record. Once approve the red bubble disappears.
Functions: New, Approve, Edit, Delete
The additional fields available here are:
Status field denotes the status of the tab.
Added field denotes the date on which the record was added.
Added by field denotes the name of the user who created the record.
Approved field denotes date on which the record was approved and is displayed only on approval.
Approved by field denotes name of the user who approved the record and is displayed only on approval.
Communication
The communication tab allows you to configure, track and manage all communication preferences related to a Term Deposit account. This ensures that notifications are sent in line with Client requirements and account activity.
The tab is divided into three sub-tabs:
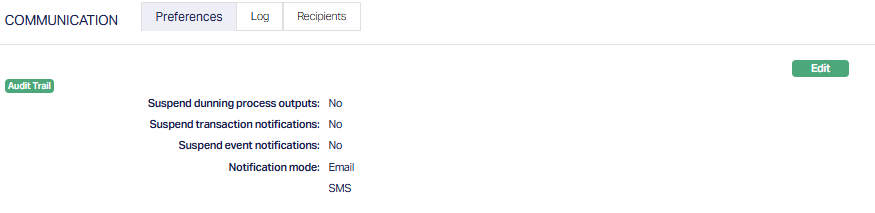
Preferences
The Preferences sub-tab is used to suspend specific types of notifications and to set the preferred notification mode. It defines how notifications are handled and the communication channels to be used.
To view/edit Preferences,
1. Access Term Deposit maintain page. Click Communication tab, then Preference sub-tab. The default value will be displayed on each field.
2. Click Edit. Edit Communication Preferences page appears.
All fields are editable.
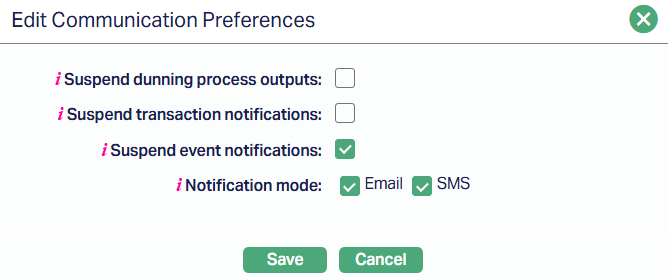
3. Suspend dunning process outputs - Choose whether dunning outputs (such as reminders or overdue notices) should be suspended for the account.
Checked = Dunning outputs are suspended.
Unchecked = Dunning outputs are generated as usual.
4. Suspend transaction notifications - Controls whether transaction-related notifications should be sent.
Checked = Transaction notifications are not sent.
Unchecked = Transaction notifications continue.
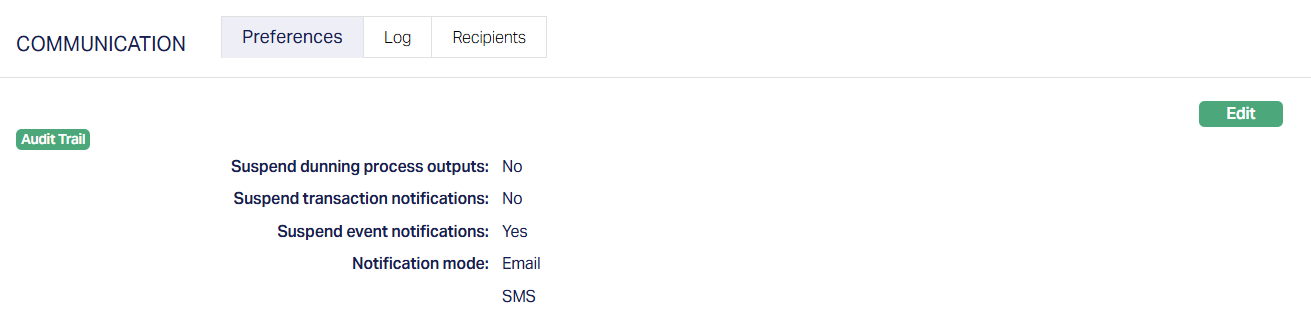
5. Suspend event notifications - Allows you to suspend notifications generated for system or account-related events.
Checked = Event notifications are not sent.
Unchecked = Event notifications continue.
6. Notification mode - Defines the medium through which notifications will be sent. You may select one or more of the following modes:
Email
SMS
7. Click Save. The preference page appears with the edited details.
Functions: Edit
Log
The Log sub-tab provides a record of all communication messages triggered for the Term Deposit account.
To view/edit Log,
1. Access Term Deposit maintain page. Click Communication tab, then Log sub-tab. This tab will show no records until you enter/select a particular log or notification sent date.
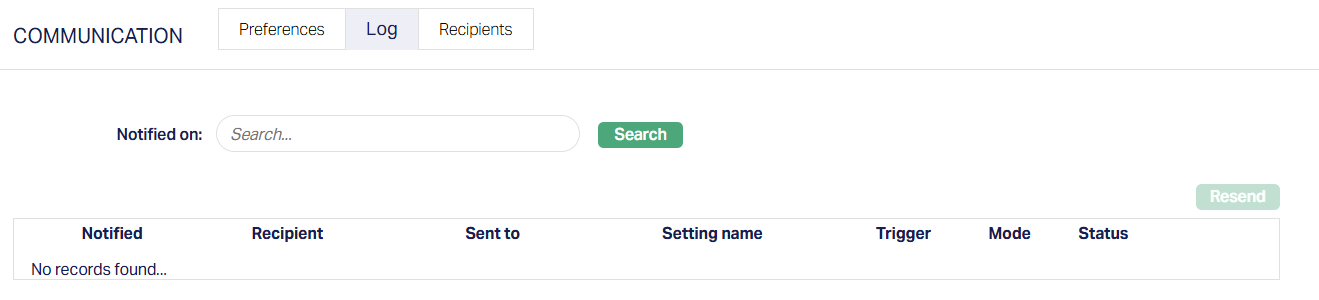
2. Notified on - A search field where you can select the date for which communication logs should be retrieved.
Clicking inside the field opens a calendar, allowing you to select the date, month and year.
After selecting a date, click Search to view the communication records for that day.
The additional fields that are shown on the grid are -
Notified - Date and time when the notification was triggered.
Recipient - The selected Client who was designated to receive the communication.
Sent To - The actual phone number or email address used for delivery.
Setting name - The communication setting that triggered the notification.
Trigger - The event or process in Aura that generated the notification (e.g., maturity alert, deposit renewal).
Mode - The communication channel (Email/SMS)
Status - The delivery status (e.g., Sent, Pending, Failed)
Search - The search button retrieves the log entries for the chosen date.
Resend - Allows you to resend a selected notification if it failed or needs to be reissued.
Recipients
The recipient sub-tab lets you define who will receive the notification for the Term Deposit account.
To view//add a recipient,
1. Access Term Deposit maintain page. Click Communication tab, then Recipient sub-tab. This tab will show no records until you enter/add a recipient.

2. Click Add. Add Notification Recipients page appears.
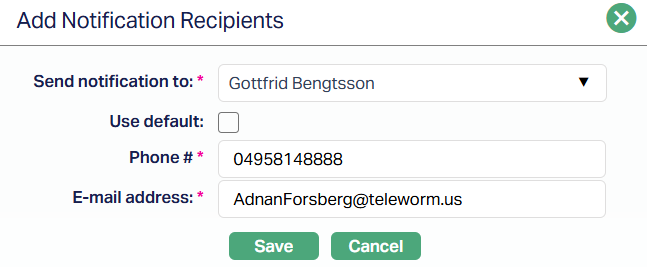
3. Select the Client to send the notification to from the drop-down list. The listing contains the primary Client of the account and any linked Clients associated with the account.
4. Use default checkbox determines whether the Client's default contact details (phone and email) are used.
If checked, the Phone # and Email Address are auto-filled and read-only.
If unchecked, you can manually enter alternate contact details.
5. Phone # - The phone number where SMS notifications will be delivered. This is mandatory if SMS is chosen in Notification Preferences.
6. E-mail address - The email address where notifications will be sent. This is mandatory if Email is chosen in Notification Preferences.
7. Click Save. Recipients page appears with the details entered.
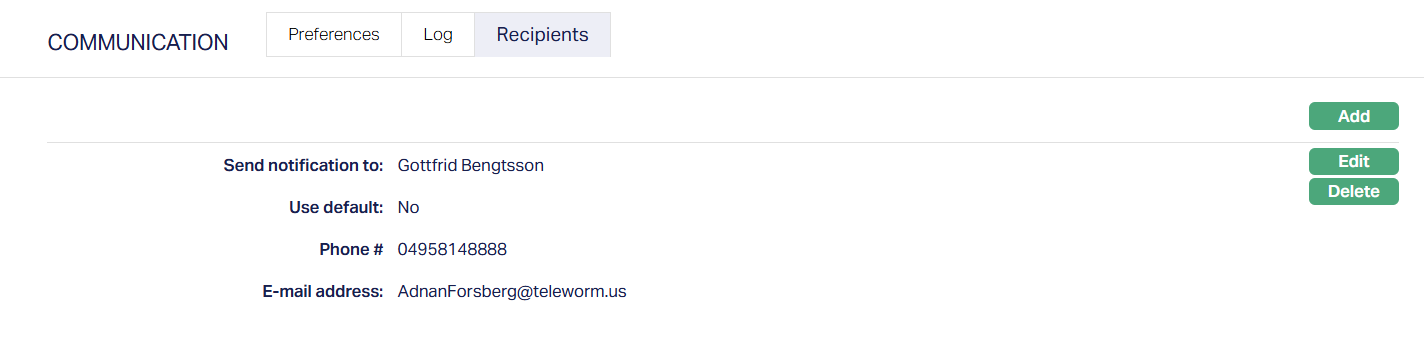
Functions: Add, Edit, Delete
To edit,
1. Click on Edit. Edit Notification Recipient page appears.
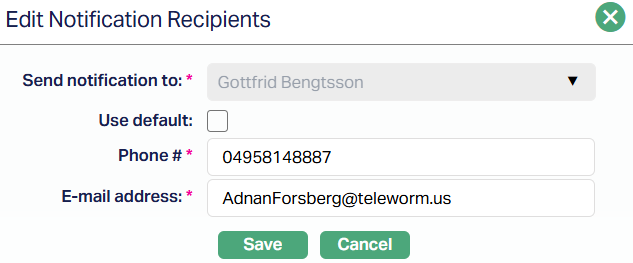
All fields are editable except the Send notification to drop-down.
2. Click Save. Recipients page appears with the edited details.
Note: If the Term Deposit account has linked Clients, you can add multiple recipients. In such cases, you may select the Primary Client or any Linked Client from the Send Notification To dropdown and add them as separate recipients. This allows more than one individual to receive notifications related to the account.
Document
The Document tab allows you to upload documents related to the Term Deposit Account. These can be in the form of scanned images or files on your computer. You can categorise the documents as per Document Type and store with a document reference number.
1. Access Term Deposit Maintain page. Click Document tab.

2. Click New, New Document page appears.
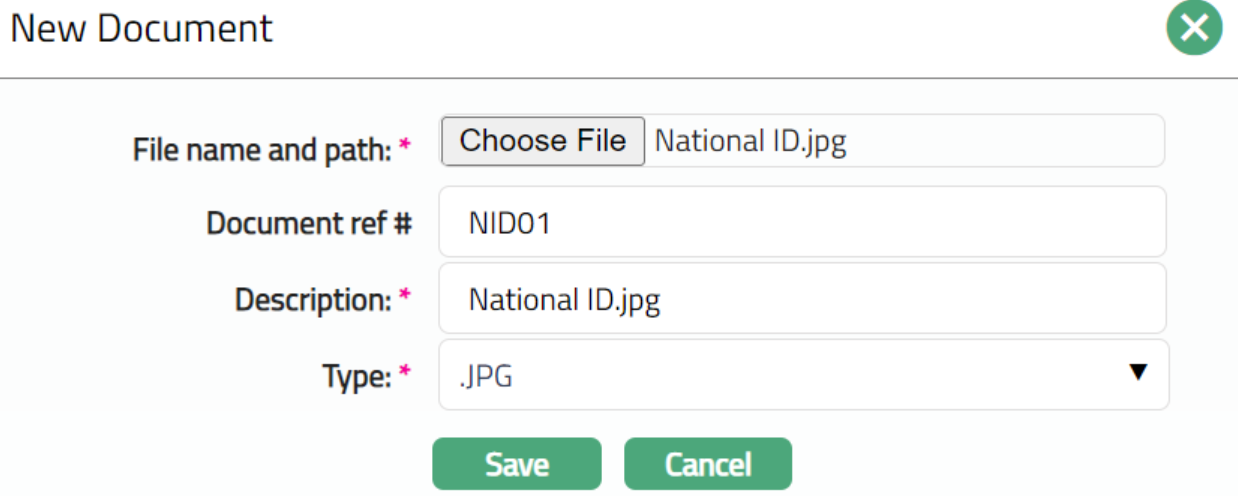
3. Click Choose File button to select the File name and path of the document.
4. Enter Document ref no. for the document. This document reference number is used in Branch view → Documents.
5. Based on the file selected the Description field will be derived. If required, you can change the description.
6. Select the Type of the Document uploaded. The document types should have been maintained using Admin → System codes → Documents → Document types. Once entered, this cannot be edited.
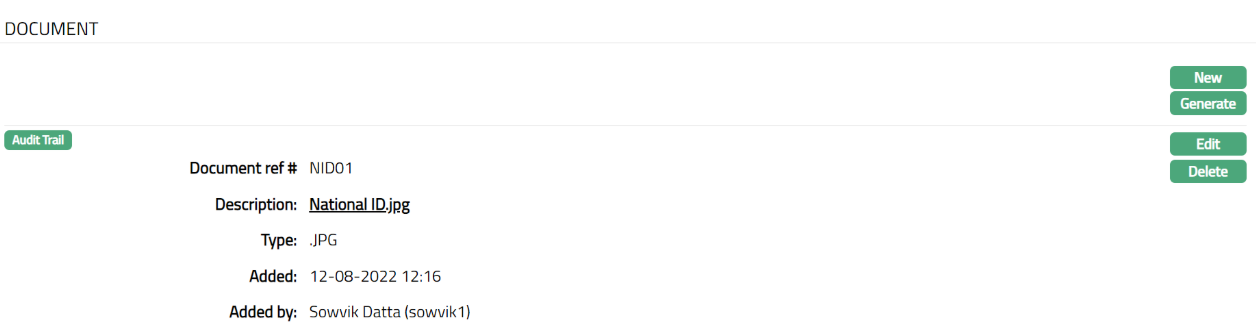
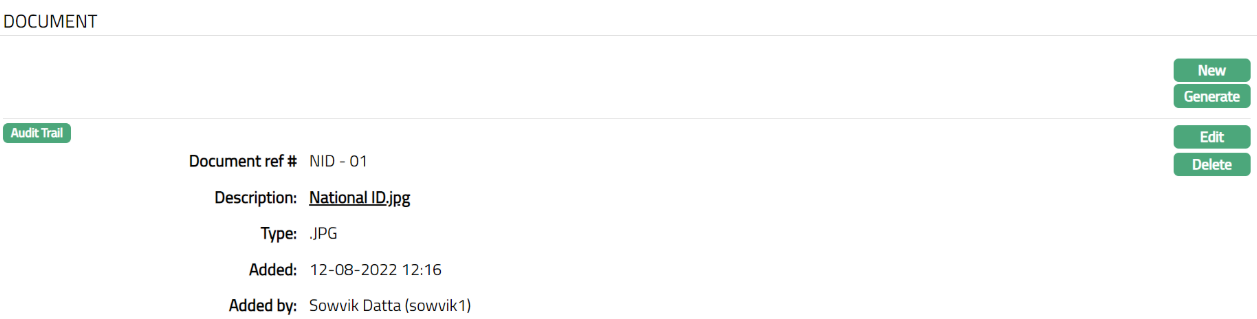
7. Click Save. Document page appears with the added details.
Functions: New, Generate, Edit, Delete.
To generate document,
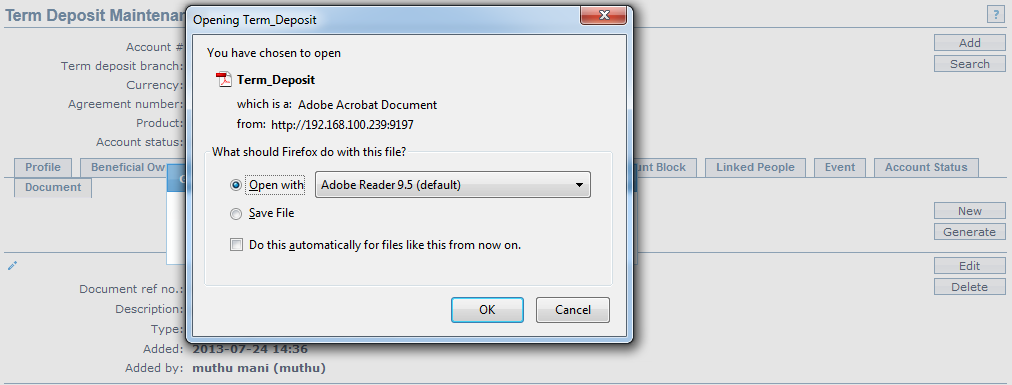
1. Click Generate to generate the pdf file using the template as maintained under Admin → System codes → Process → Document templates. You have to map the document template for Term Deposit account under Document template settings as maintained under Retail → Settings → Product. New Document page will appear where the mapped templates will be displayed.
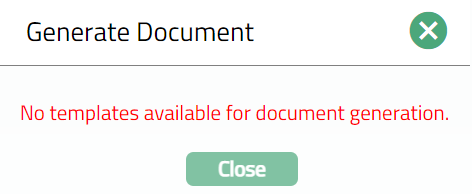
2. Click on any template from the list of templates after which the document will be generated based on the selected template as shown below.
Functions: New, Generate, Edit, Delete
To Edit document,
1. Access Term deposit page. Click Document tab.
2. Click Edit. The Edit New Document page appears.
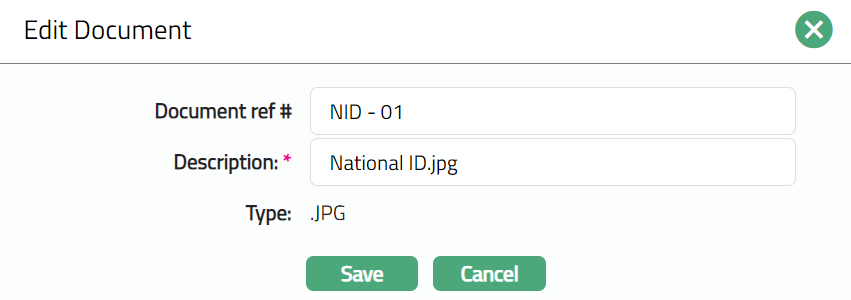
Note: Only Document ref no and Description fields are editable.
3. Click Save. The Document page appears with the edited details.
Functions: New, Generate, Edit, Delete
The additional fields available in view are:
Added denotes the date and time on which the Person record has been added.
Added by denotes the name of the user who has added the person.
Delete: You can delete a Document record by a click on Delete button. When you click on Delete button, Aura displays an alert message. On confirmation Aura will delete the Document record.
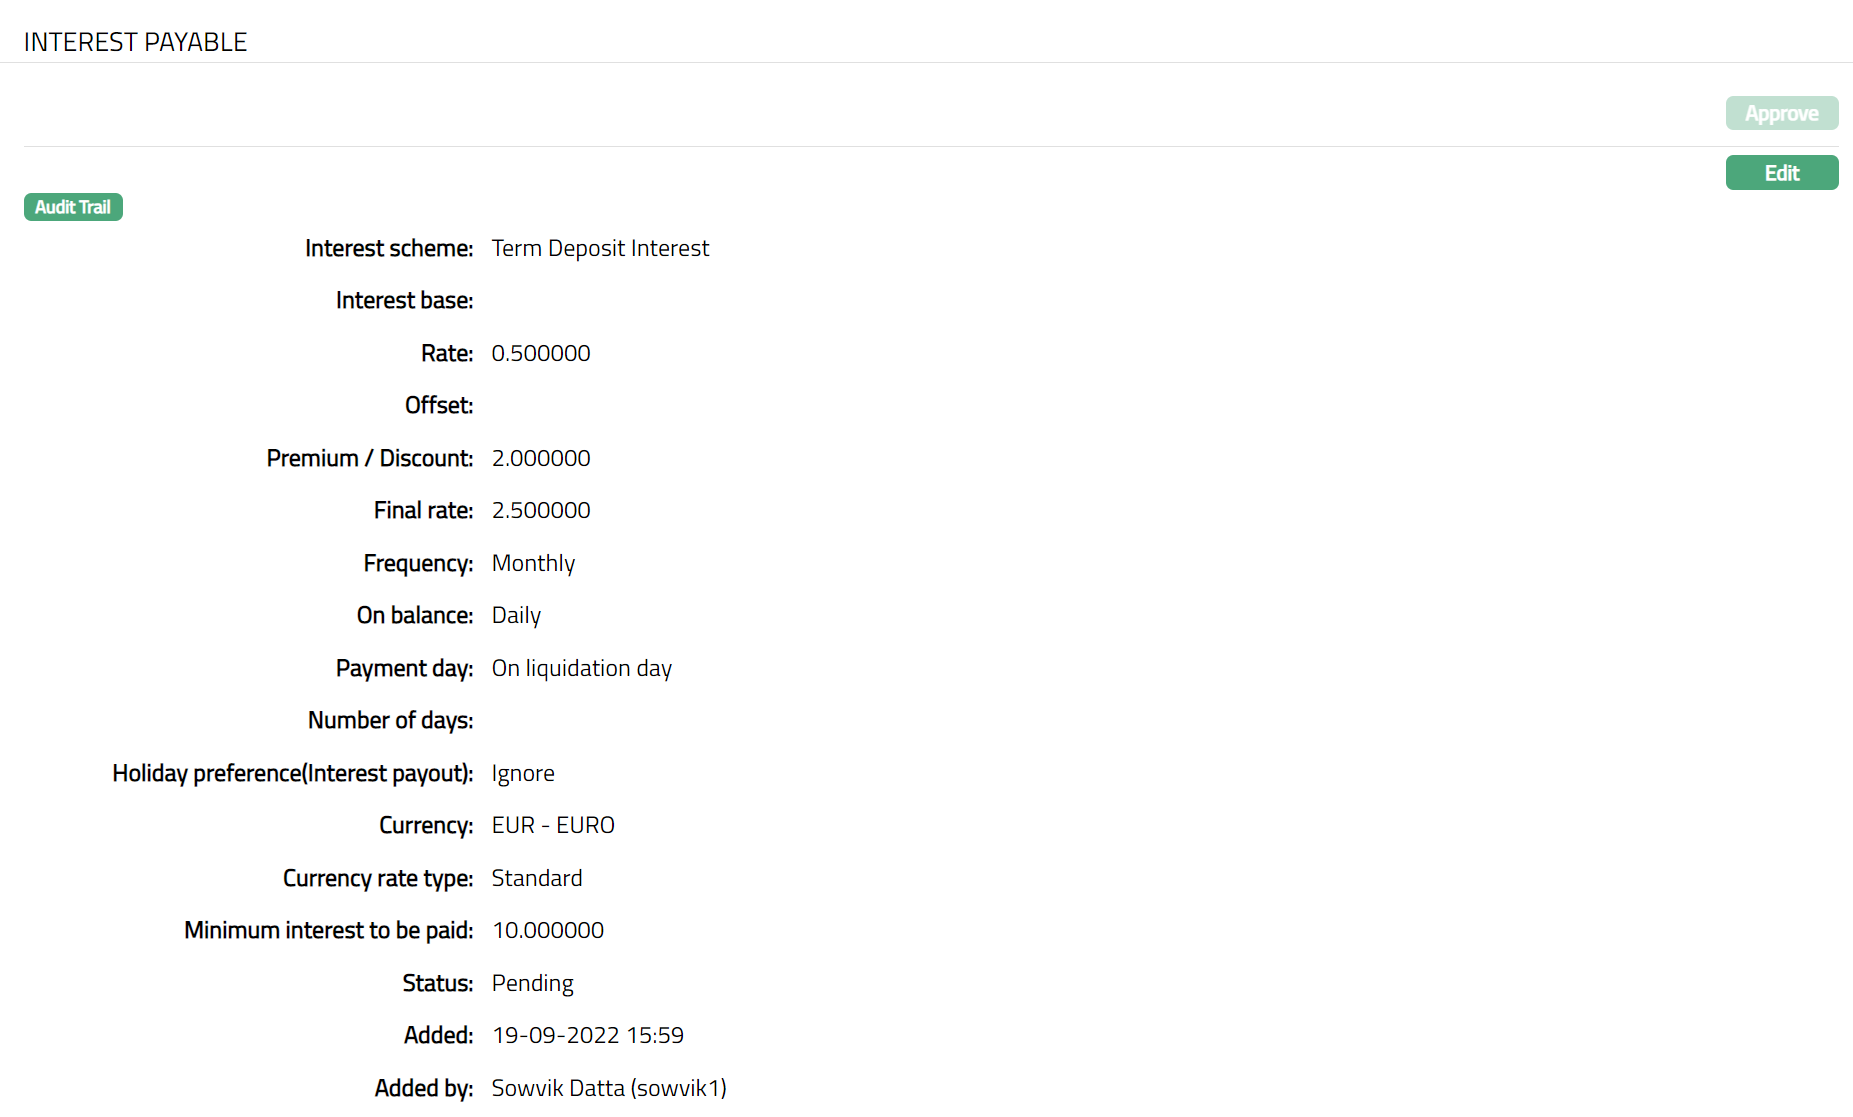
Interest Payable
The Interest Payable tab allows you to create, view and maintain the interest rate offered on a Term Deposit account.
To Add / Edit / Delete the Interest payable
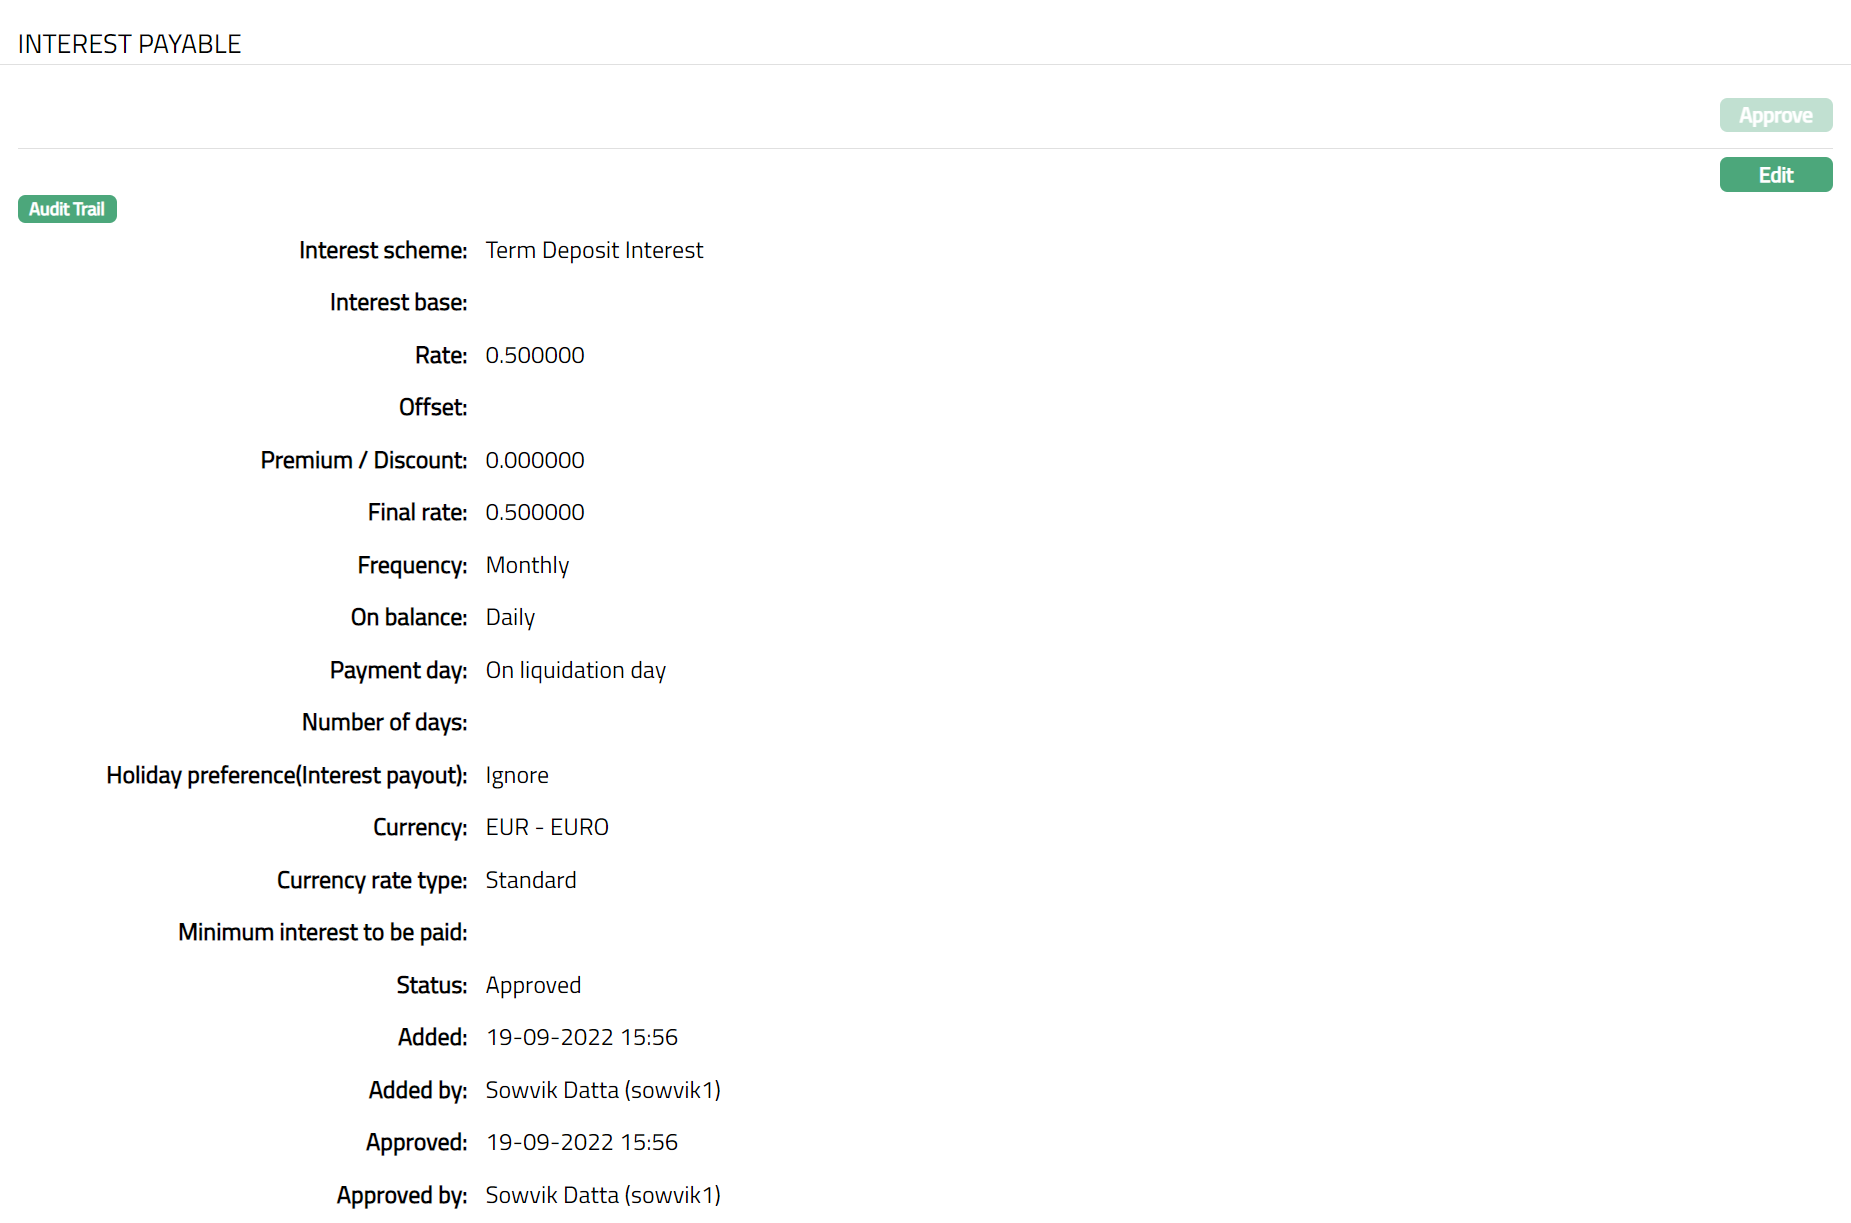
Access Term Deposit page. Click Interest Payable tab to view the details as per sample below. The details are defaulted from the entries that you made during Product creation. For details refer to New Term Deposit → Interest Payable (3/4).
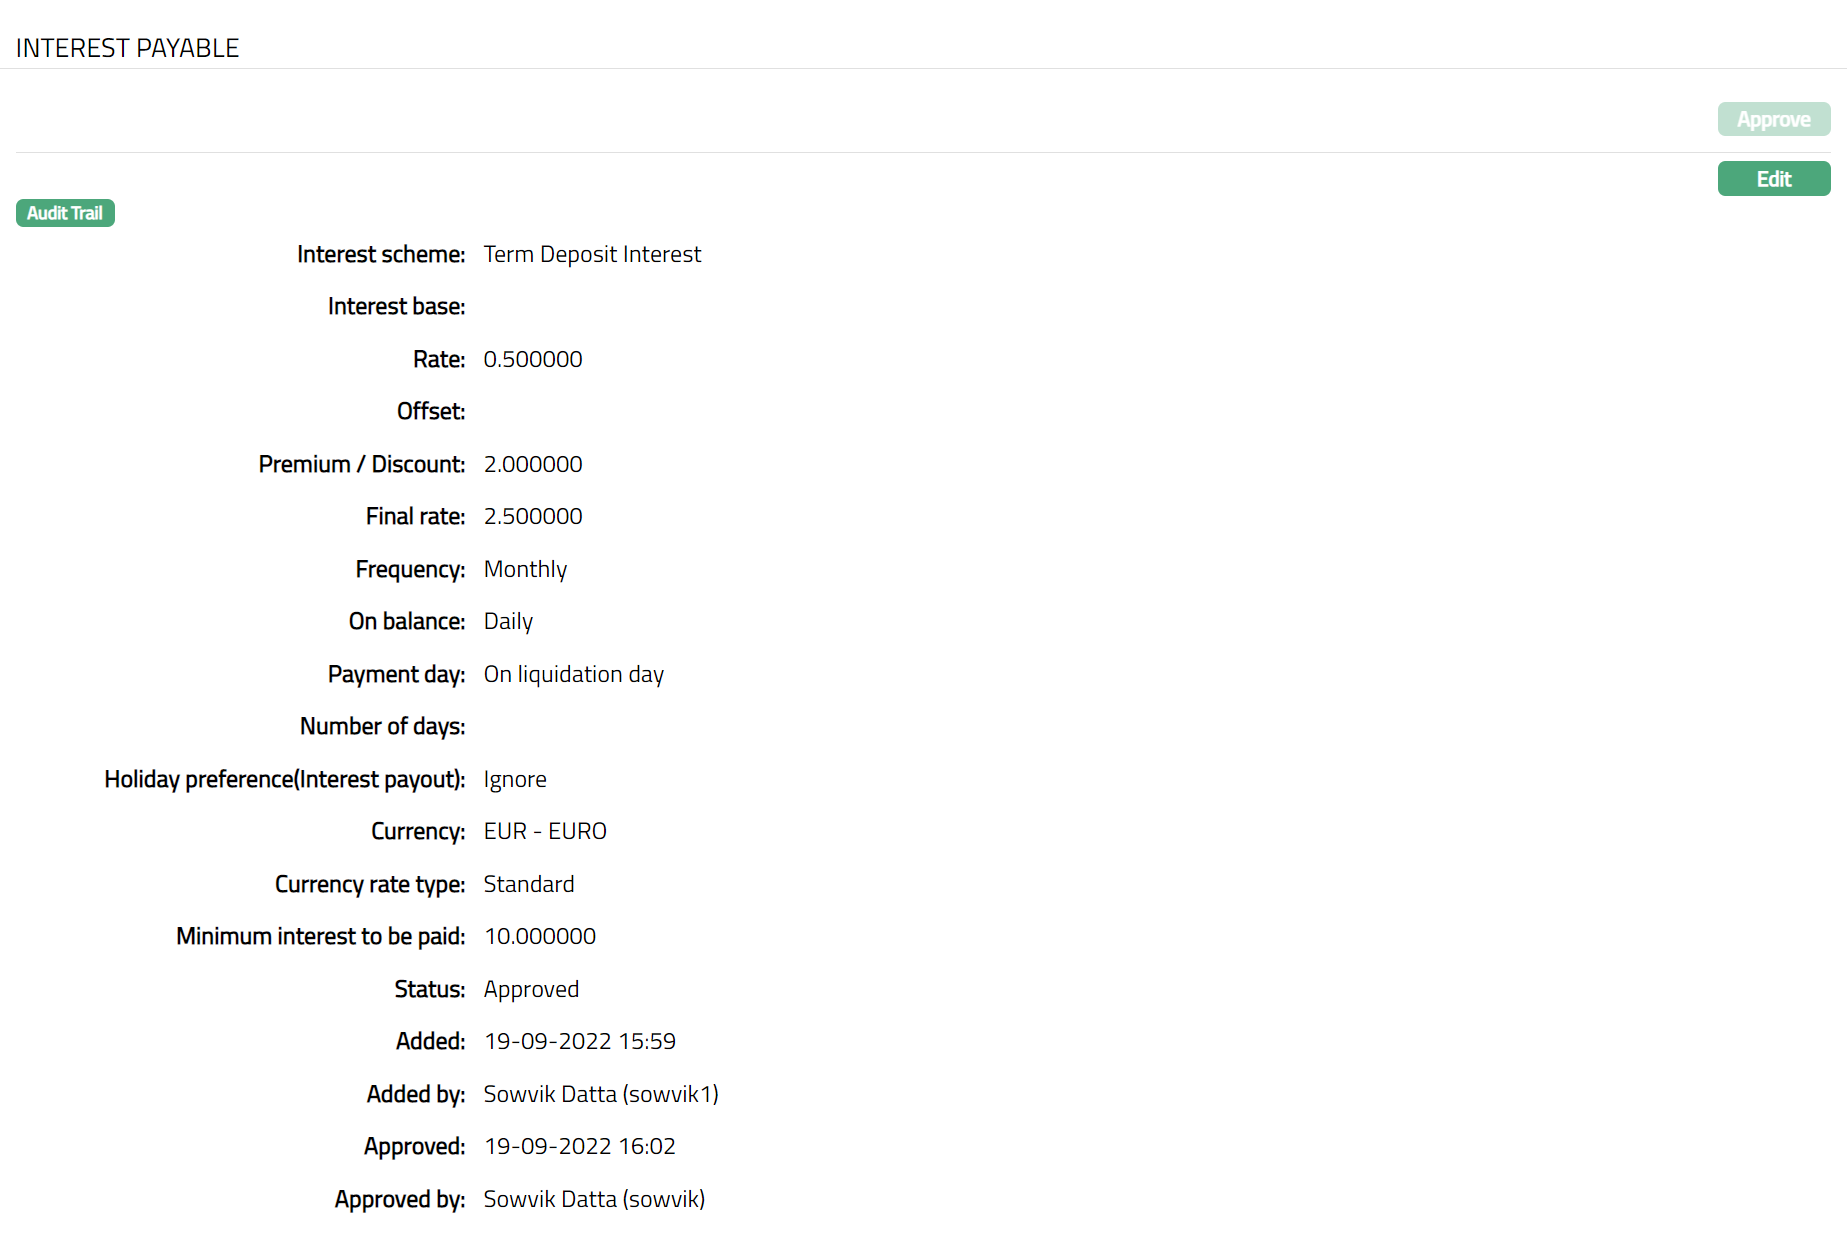
Note: After creation / edit, the tab is in Pending status. To approve, retrieve the record and click Approve. Once the tab is approved, the status field will display as Approved. Note: Once Status Tab is Approved, no further changes can be done on the Interest Payable tab.
To Edit Interest Payable,
1. Click Edit. Edit Interest Payable page appears.
Note: Except Interest scheme, Rate, Offset, Final rate, On balance, Payment day & Number of days fields, all other fields in Edit Interest payable screen are editable. However, only the person who created the interest payable record can edit it, till it is approved.
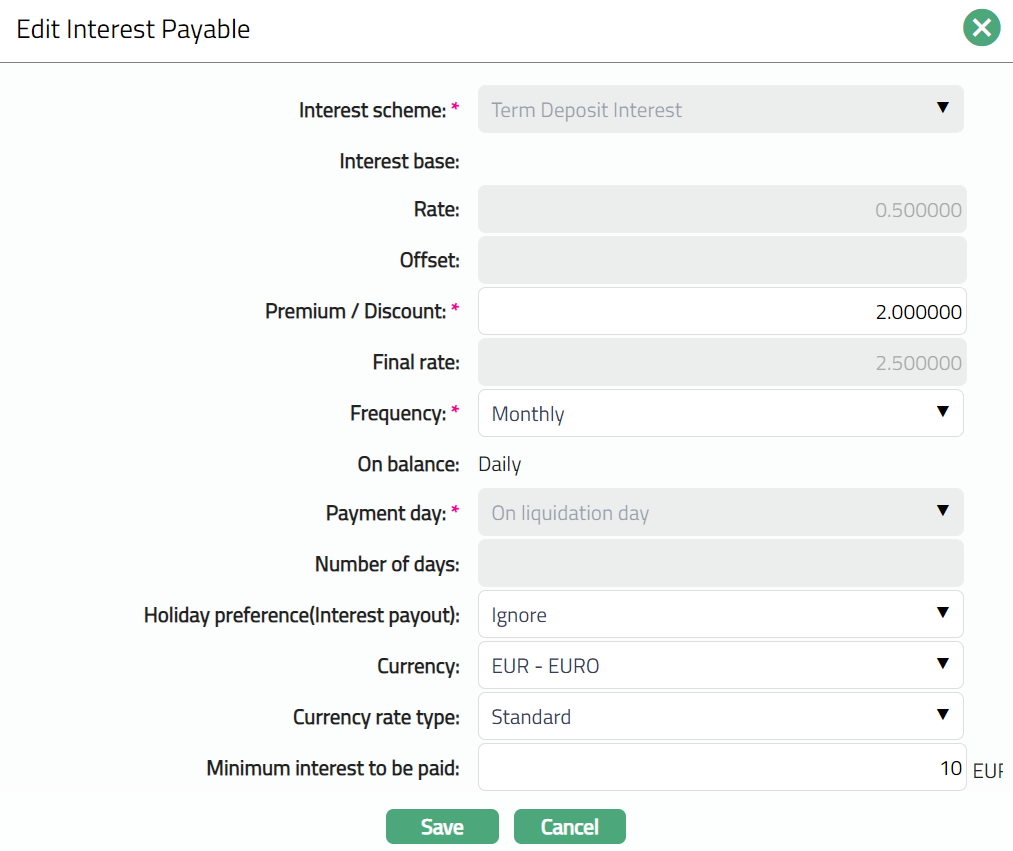
2. Click Save. Interest Payable page appears with the edited details.
Note: After creation / edit, the tab is in Pending status. To approve, retrieve the record and click Approve. Once the tab is approved, the status field will display as Approved. Note: Once Status Tab is Approved, no further changes can be done on the Interest Payable tab.
Function: Edit, Approve
The additional fields are explained below.
Status field denotes the status of the tab.
Added field denotes the date on which the record was added.
Added by field denotes the name of the user who created the record.
Approved field denotes date on which the record was approved and is displayed only for approved records.
Approved by field denotes name of the user who approved the record and is displayed only for approved records.
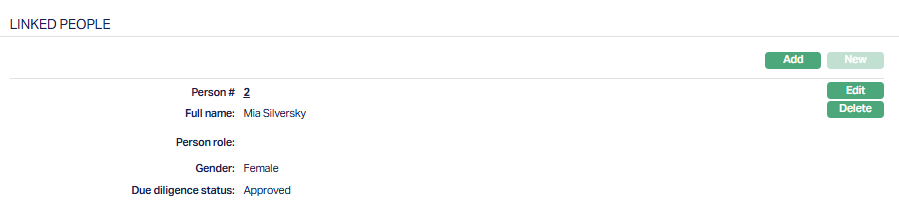
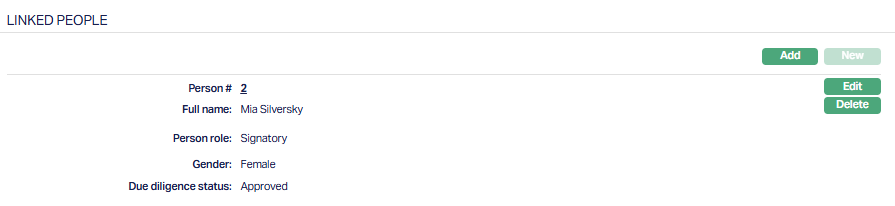
Linked People
This tab allows you to link an unlimited number of people to the term deposit account.
To Add the linked people,
1. Access Term Deposit page. Click Linked People tab.

2. If you want to link a person who has already been created as a Person under CRM → Person Maintenance, then click Add. Aura will display the Add linked people window with the list of people maintained in the system. Select the required person.
3. The selected person gets added to the linked people.
4. Click Edit. The Edit Linked people window appears. Select the Person role from the available drop-down which is maintained under Admin → System codes → Generic definitions → Person role.
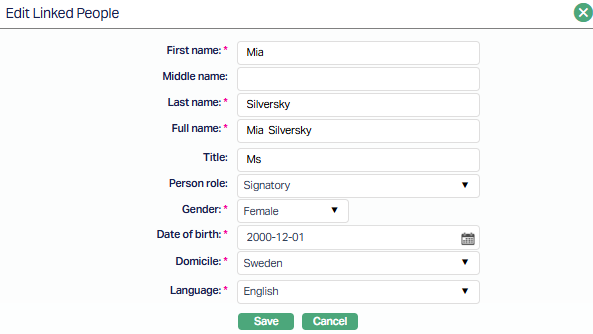
5. Click Save. Linked People page appears with the edited details.
Functions: Add, Edit, Delete
Delete: You can delete a Linked People record by clicking Delete button. When you click Delete button, Aura displays an alert message. On confirmation Aura will delete the Linked People record.
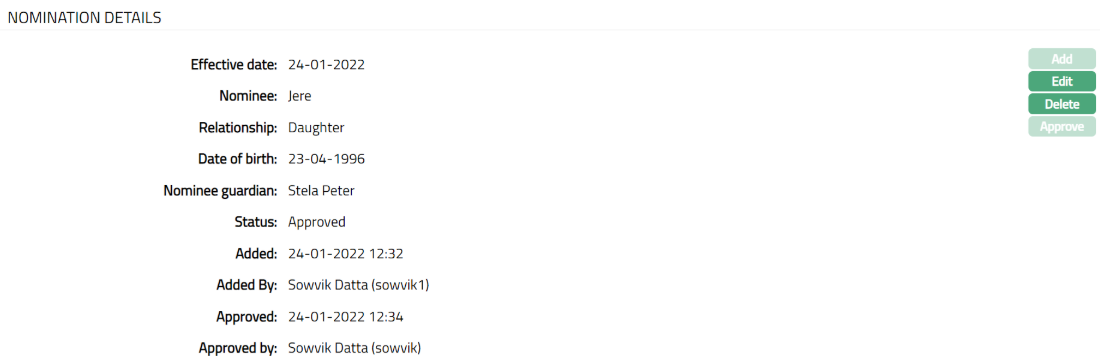
Nomination Details
The Nomination Details tab allows you to Add and edit the nominee details for the Term Deposit. In case the account is corporate Client, you can only view the details of the nominee owner. In case of Personal and Joint Client, you can view and edit the details of the nominee.
To add new Nomination details,
1. Access Term Deposit screen and click Nomination tab.

2. Click Add. Add Nomination Details screen appears.
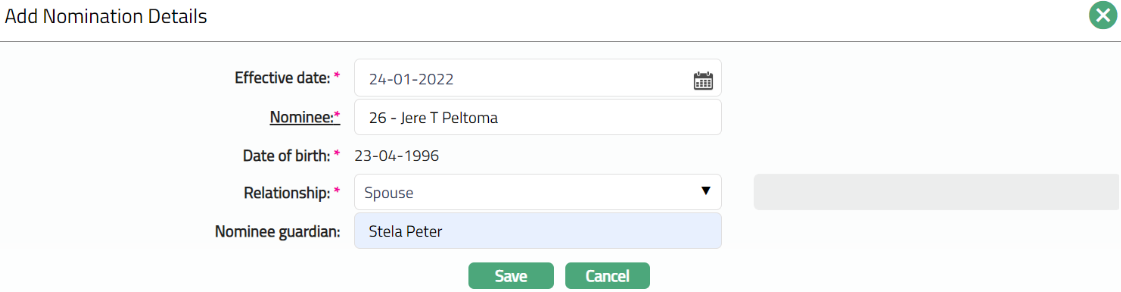
3. Enter the Effective date from the calendar. Note: The effective date should always be >= to the current booking date.
4. Select the Nominee by clicking on Nominee hyperlink. The search person page appears, where you can select the name of the nominee.

5. Once you select the nominee their Date of Birth will be displayed by default.
6. Select Relationship from the drop-down list. The Available list are Father, Mother, Spouse, Son, Daughter and others.
7. Enter the name of the Nominee Guardian.
8. Click Save. Nomination Details page appears with the added details.
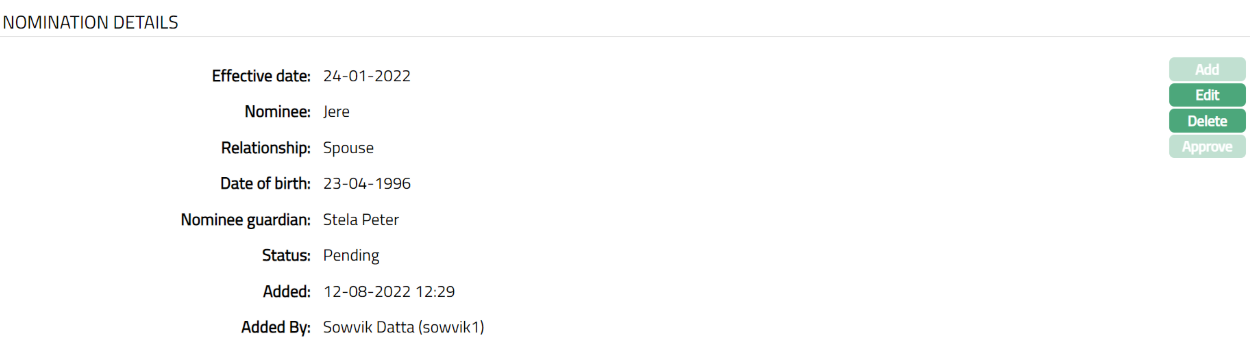 Functions: Add, Edit, Delete, Approve
Note: Any change in the tab will set the tab status to Pendingtill it is approved by another user. On approval, the tab status is set to Approved and the red bubble disappears.
To Edit Nomination Details,
1. Click Edit. Edit Nomination Details page appear.
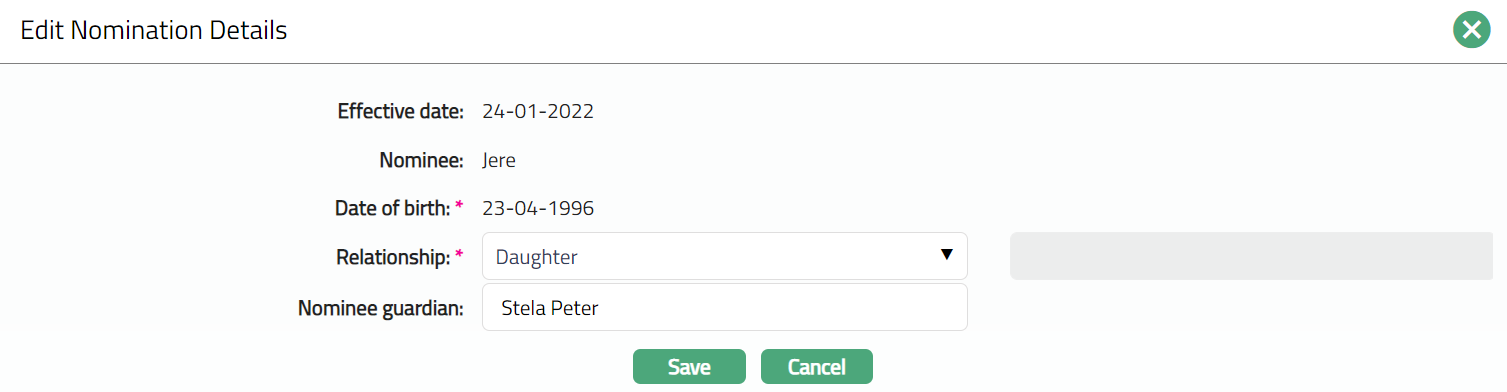
Note: Only Relationship and Nominee guardian fields are editable.
2. Click Save. Nomination Details page appears with the edited details.

Note: Any change in the tab will set the tab status to Pending till it is approved by another user. On approval, the tab status is set to Approved and the red bubble disappears.
Functions: Add, Edit, Delete, Approve
The additional fields available are:
Status field denotes the status of the tab.
Added field denotes the date on which the record was added.
Added by field denotes the name of the user who created the record.
Approved field denotes date on which the record was approved and is displayed only for approved records.
Approved by field denotes name of the user who approved the record and is displayed only for approved records.
Delete: You can delete a Document record by clicking Delete button. When you click Delete button, Aura displays an alert message. On confirmation Aura will delete the Document record.
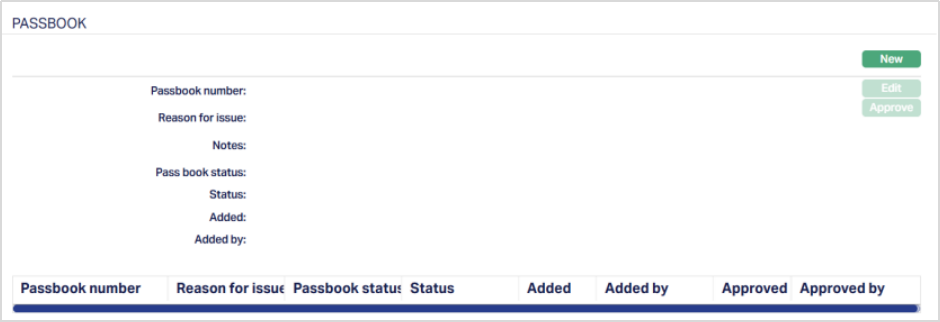
Passbook
The Passbook tab allows you to issue, close, and approve Term Deposit passbooks for the selected Term Deposit account. This tab appears only if the Term Deposit product is configured with Allow Passbook = Yes in the product setup.
When you create a Term Deposit account for the first time, Aura checks the product setup to determine whether the Passbook tab should be displayed. After the account is created, the tab’s availability is controlled at the account level.
Any later change to the product setting will not affect the existing accounts.
To add/issue a new Passbook,
1. Access Term Deposit maintenance screen, click the Passbook tab. This tab will show no records until you add a new passbook.
Note: The New button is enabled only when the Term Deposit account status is Activated.
2. Click New. New Passbook Issue page appears.
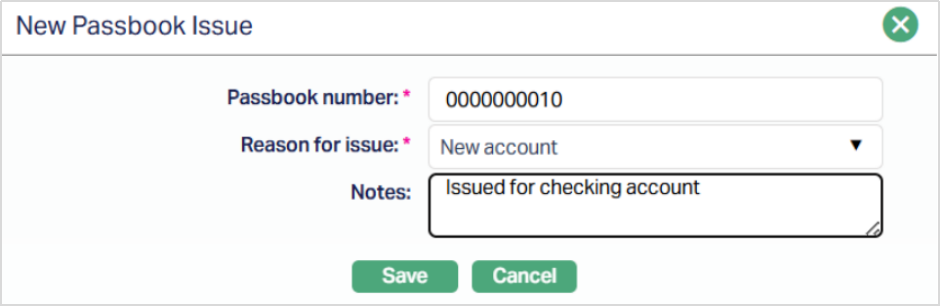
3. Enter the Passbook number - this is a mandatory field and is maintained under Admin → Secured Stationery → Series with Type = Passbook and Status = Approved and Printed, and should be associated with the selected account branch.
4. Select the Reason for issue from the drop-down list. The available values are -
- Continuation - When a new passbook is issued after the old one is complete.
- New Account - When a passbook is issued for a newly opened account.
- Request for Duplicate - When a passbook is reissued due to loss or misplacement.
Note: The default value is Continuation. Once a new passbook is issued for an Account, the previously issued passbook for that account is automatically marked as Closed, ensuring that only passbooks with status Issued can be used for transactions.
5. You can use the Notes field to capture the purpose of issuance or any other notes related to the passbook.
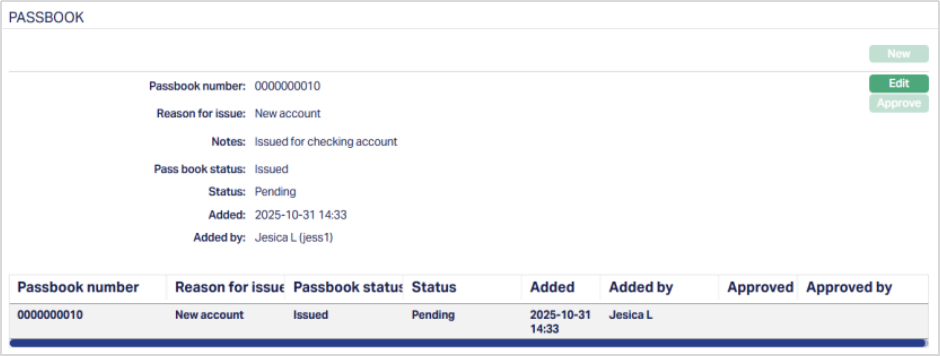
6. Click Save. The Passbook page appears with the added details.
Functions: New, Edit, Approve.
Note: If the entered passbook number is invalid, not in stock, not printed, or from another branch, Aura displays the relevant validation message.
To Edit Passbook,
1. Click Edit. Edit Passbook Issue page appears.
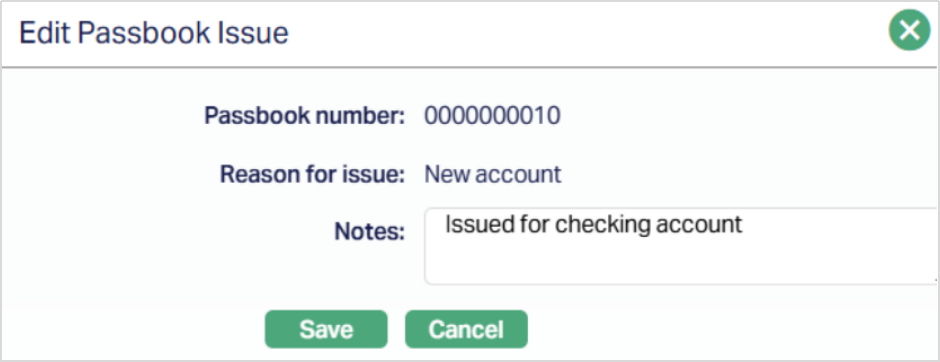
Note: Only the Notes field is editable.
2. Click Save. The Passbook page appears with the edited details.
Note: When you save, Aura creates an event - PBKISU (Passbook Issue) with the status set to Pending. This event can be viewed under the Event tab of the Term Deposit Maintenance Account.
Status of the passbook is pending till it is approved by another user. On approval, the status is set to approved. When you approve, Aura updates the record status from Pending to Approved and marks the related event (PBKISU) as Success in the Event Master table.
Functions: New, Edit, Approve.
The Edit button remains enabled even after a record is approved. However, if any changes are made, the updated details will require re-approval from another user as per the maker-checker process.
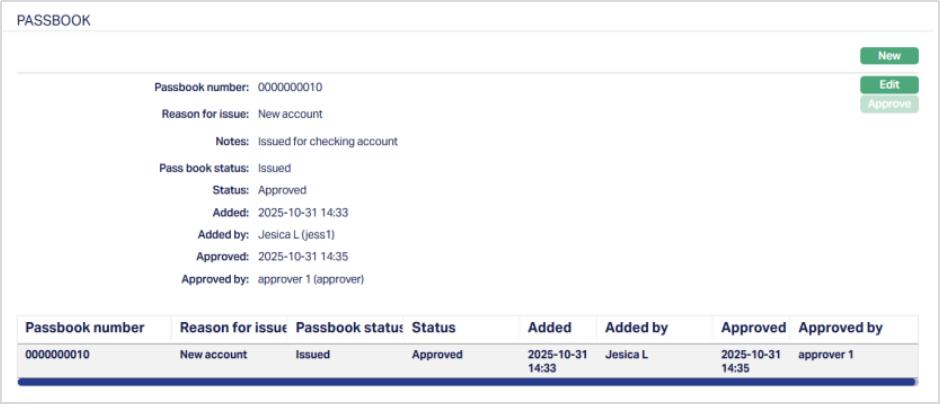
The additional fields that are shown are:
- Status indicates the current state of the record. It will be either: Pending - If the record is waiting for approval or Approved - If the record has been reviewed and finalized.
- Added shows the date and timestamp when the record was created and Added by displays the user ID and full name of the person who created the record.
- Approved shows the date and time when the record was approved and Approved by displays the user ID and full name of the person who approved the record.
Passbook Status
When you Issue or update a Passbook, Aura tracks its lifecycle through the following statuses:
- Issued - Indicates the active passbook currently issued for the account.
- Closed - Indicates the passbook has been deactivated because the account has been closed.
Passbook Close (PBKCLS) Event
This event is triggered when a passbook is closed. Aura automatically generates the PBKCLS (Passbook Close) event in the following cases:
- When a new passbook is issued with the reason Continuation or Request for Duplicate, the previously issued passbook is automatically marked as Closed.
- When the Term Deposit account itself is closed, the active passbook linked to that account is also marked as closed.
The event is created with the status Pending and can be viewed under the Event tab of the Term Deposit account. Once the record is approved, Aura updates the event status from Pending to Success.
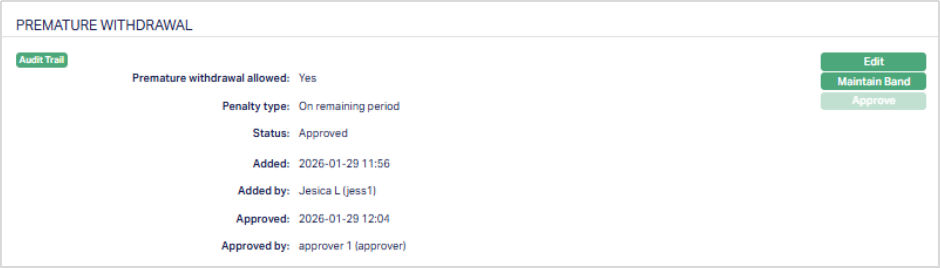
Premature Withdrawal
The Premature Withdrawal tab in a Term Deposit account allows you to view and modify the premature withdrawal settings applicable to the selected account. The Premature Withdrawal configuration defined at the Term Deposit Product level is automatically defaulted to the account during account creation. You can modify these settings at the account level to define account-specific premature withdrawal rules. Changes made in this tab apply only to the selected Term Deposit account and do not impact the Product configuration or other accounts.
Default Behaviour
When a Term Deposit account is created:
- The Premature Withdrawal configuration defined at the Product level is defaulted to the account.
- You can modify the defaulted configuration if required.
- The account-level configuration overrides the Product-level setup for that account. All changes are subject to approval as per standard maker-checker workflow.
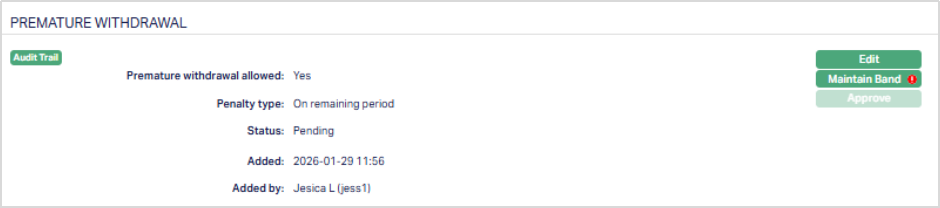
To view / edit Premature Withdrawal,
1. Access the Term Deposit account maintenance page and click on the Premature Withdrawal tab. The Premature Withdrawal page appears with the default configuration inherited from the Product.
2. Click Edit. The Edit Premature Withdrawal page appears.
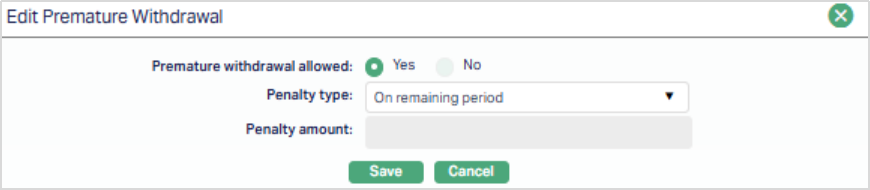
3. Premature withdrawal allowed - This field determines whether premature withdrawal is permitted for the selected Term Deposit account.
- Yes - Premature withdrawal is allowed and penalty configuration fields become editable.
- No - Premature withdrawal is not allowed and penalty fields remain disabled. You can change this value at the account level even if it was defaulted from the Product.
4. Penalty type - The Penalty Type field defines how the penalty for premature withdrawal will be calculated for the Term Deposit account. This field is enabled only when Premature withdrawal allowed is set to Yes. The following penalty types are available:
- Fixed Amount - A fixed monetary amount is charged as a penalty.
- On Elapsed Period - The penalty is applied based on the elapsed period of the Term Deposit.
- On Remaining Period - The penalty is applied based on the remaining period of the Term Deposit.
- Custom - The penalty is applied based on custom-defined rules using penalty bands.
5. Penalty Amount - The Penalty Amount is used to specify the fixed monetary amount that will be charged as a penalty when a Term Deposit is withdrawn prematurely. This field is enabled only when -
- Premature withdrawal is set to Yes, and
- Penalty Type is selected as Fixed Amount When enabled, enter the fixed amount that will be applied as penalty for premature withdrawal. This field remains disabled for band-based penalty types.
6. Click Save. The Premature Withdrawal page appears with the edited details.
Functions: Edit, Maintain Band, Approve.
Maintain Band The Maintain Band button allows you to define penalty bands for premature withdrawal when the penalty is based on elapsed period, remaining period, or custom logic. The button is enabled only when:
- Premature withdrawal allowed is set to Yes, and
- Penalty Type is selected as On Elapsed Period, On Remaining Period, or Custom
Note: The Maintain Band button remains disabled when Penalty Type = Fixed Amount.
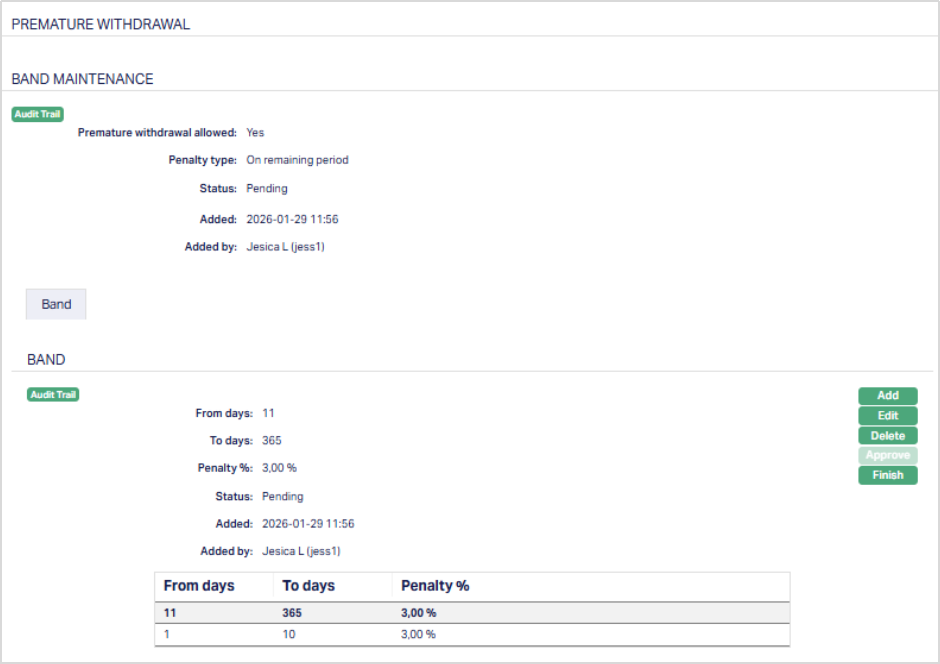
Functions: Add, Edit, Delete, Approve, Finish.
To add / edit penalty bands,
1. Access the Band Maintenance page, click Edit. The Edit Penalty Band page appears.
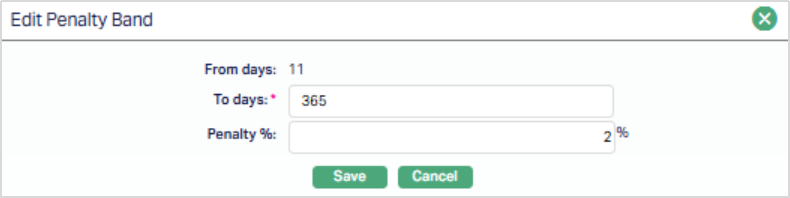
2. The From Days field indicates the starting day of the penalty band. For the first penalty band, this field is defaulted to 1 and is not editable.
Note: For subsequent bands, the From Days value is automatically populated as the next day after the To Days value of the previous band. This field remains non-editable to ensure continuous and non-overlapping band ranges.
3. The To Days field indicates the ending day of the penalty band. This field must be greater than the corresponding From Days value and cannot exceed the maximum term days defined for the Term Deposit product. Aura validates the entered value to ensure that the penalty bands cover valid and continuous day ranges.
4. On Elapsed Period - The penalty percentage is deducted during penalty calculation.
- On Remaining Period - The penalty percentage is added during penalty calculation
- Custom - The penalty percentage is applied based on the custom penalty logic defined for the Product.
5. Click Save. The Band page appears with the edited details.
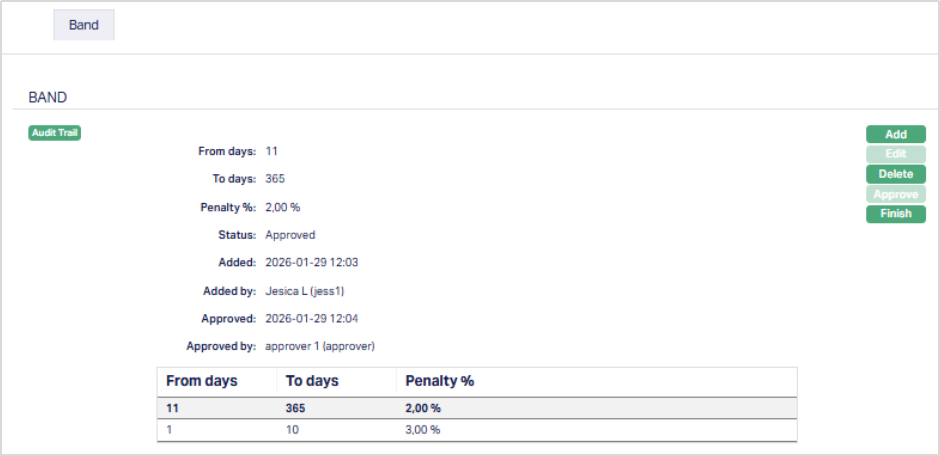
Functions: Add, Edit, Delete, Approve, Finish
Status of the record is Pending till it is approved by another user. On approval, the tab status is set to Approved and the Edit button is disabled. The additional fields that are shown are:
- Status indicates the current state of the record. It will be either: Pending - If the record is waiting for approval or Approved - If the record has been reviewed and finalized.
- Added shows the date and timestamp when the record was created and Added by displays the user ID and full name of the person who created the record.
- Approved shows the date and time when the record was approved and Approved by displays the user ID and full name of the person who approved the record.
Notes:
- Account-level configuration overrides Product-level configuration for the selected account only.
- Changes made here do not affect other accounts under the same Product.
Reminder Preferences
The Reminder Preferences tab allows you to add, view and edit the preferences based on which the reminders are sent to Client or any linked person informing about the Loan account, for recovering their dues. As soon as the Loan Account is created, the reminder added at the product level is (are) defaulted and is displayed under this tab. Later, apart from the defaulted reminder, any other reminders that are added at the account are listed under this tab.
To add a Reminder,
1/. Access Loan Account page and click Reminder preferences tab. If any reminders are added at the product level are displayed by default.
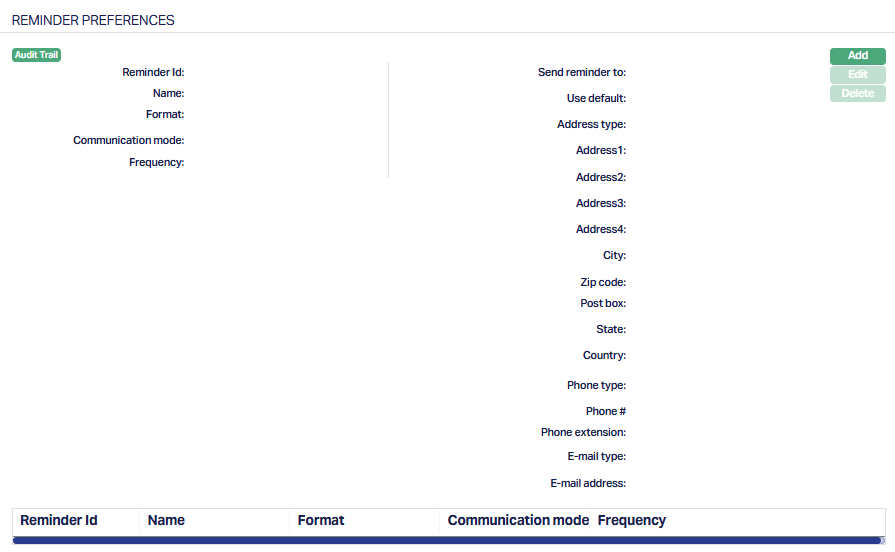
2. Click Add. Add Reminder Page appears.
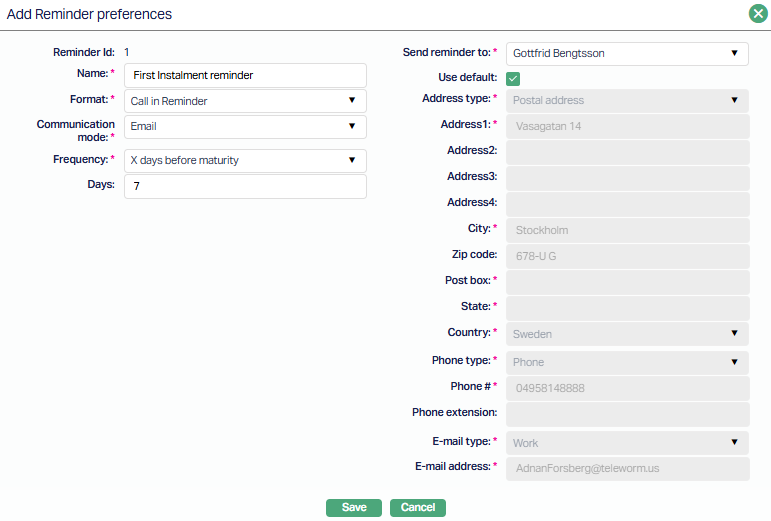
3. Enter description in the Description field.
4. Select Reminder Format from the drop-down. Aura lists reminder formats that have been maintained under Admin → System codes → Generic definition → Reminder formats. It is the Format of the reminder that is to be generated.
5. Select Frequency at which this reminder has to be sent.
The available options are:
On Payment Due Date: The reminder will be sent on the payment due date.
X days before Payment due date: The Reminder will be generated X number of days before the payment due date. If you select this option, enter the number of days in the Days field.
X days after payment due date: The Reminder will be generated X number of days after the payment due date. If you select this option, enter the number of days in the Days field.
X days after grace days if overdue: If the payment is overdue, then the Reminder will be generated X days after grace days. If you select this option, enter the number of days in the Days field.
X days after reminder Y: The Reminder will be generated X number of days after reminder Y. If you select this option, enter the number of days in the Days field and select the Reminder from the drop-down list.
6. The Days field will be displayed only if the below mentioned options are chosen as Frequency.
X days before Payment due date
X days after payment due date
X days after grace days if overdue
X days after reminder Y
7. The Reminder field will get displayed only if X days after reminder Y option is chosen as Frequency. Select the Reminder from the drop-down list of options maintained for the Reminder.
Note: Only after the default reminder is generated, any other reminders that are added at the account appears in the drop-down list.
8. Select the required Generation fee from the drop-down. Aura will display the list of Charges from Admin → System codes → Charges where the charge is Active, Event-based and it is either Banded or Flat amount charge. In case of Banded charges, the charge amount will be calculated on the basis of the amount sanctioned. Charge amount is collected from the Client, if an invoice fee is associated with invoice generation whenever an invoice is generated for the account. Fee is reflected in the invoice whether charge account is linked to the loan account or not.
If a Charge account is attached to the loan account, then the charge amount is debited from the charge account on invoice generation; else the charge is collected during repayment.
9. Select person from the list of current loan account holders to whom the Reminder will be sent. The options shown will depend on the type of Client.
Personal: The name of the Person will get displayed in the drop-down list.
Joint Client: The names of the Joint account holders will get displayed in the drop-down list.
Corporate: The name of the corporate Client will get displayed in the drop-down list.
The list will also include the people who are linked to the Client / account under the Linked People tab under Client Maintain / Account Maintain.
10. By default, the field Use Default flag is checked. However, if you want the Reminder to be sent to a different address, you can uncheck the flag and enter the required address details.
If the flag is checked, Aura will consider the default address maintained at CRM → Person → Maintain, for the person chosen under Send Reminder To as the address to which the Reminder has to be dispatched.
If the flag is unchecked, below mentioned fields will be enabled and you can enter the address details.
Select the Address type from the drop-down list. The address types maintained under Admin → System Codes → Address details → Address types are displayed in the drop-down list.
Enter address details of the receiver in Address 1 and Address 2 fields.
Enter City of the receiver.
Enter Zip code of the receiver.
Enter Post box number of the receiver.
Enter State of the receiver.
Select Country from the drop-down list which is maintained under Admin → System codes → Generic definitions → Countries.
Select Phone type from the drop-down list which is maintained under Admin → System Codes → Address details → Phone types.
Enter Phone# of the receiver.
Enter Extension of the receiver.
Select E-mail type from the drop-down list which is maintained under Admin → System Codes → Address details → E-mail types.
Enter E-mail address of the receiver.
11. Click Save. The Reminder Preferences page appears with the added details.

Functions: Add, Edit, Delete
To Edit the Reminder Preferences settings,
1. Click Edit. The Edit Reminder Preferences page appears.
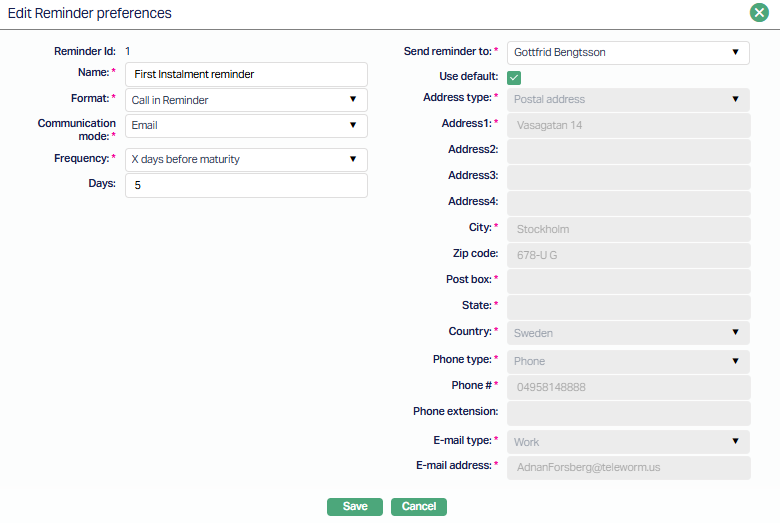
All the fields are editable except Reminder id.
Note: The fields from Address type to E-mail address will be Editable only if the Use default radio button is unchecked.
2. Click Save. Reminder Preferences page appears with the edited details.
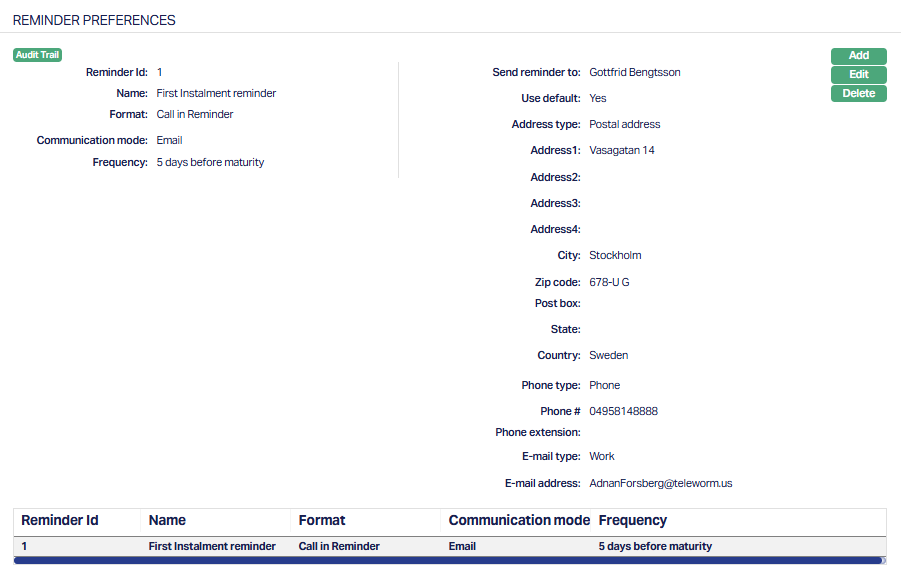
Functions: Add, Edit and Delete.
Reward
The Reward tab in a Term Deposit Account allows you to view, manage, and apply rewards that are applicable to the selected Term Deposit account. Rewards can be:
- Inherited from the Term Deposit Product through a Reward Group (General Reward) or,
- Added Specifically for an individual Term Deposit account (Specific Reward)
The Reward tab contains the following sub-tabs:
- General Reward
- Specific Reward
- Reward Schedule
The availability and behaviour of rewards depend on the configuration defined at the Term Deposit Product Level.
General Reward
The General Reward sub-tab shows the Reward Group that is applied to the Term Deposit Account. When a Term Deposit account is created, Aura automatically defaults the Reward Group mapped to the Term Deposit Product into the General Reward sub-tab. The defaulted Reward Group is created with Status = Pending and requires Approval.
To view/edit General Reward,
1. Access the Term Deposit Account maintenance page. Click on the Reward tab and select the General Reward tab.
Note: If no Reward Group is mapped at the product level, the sub-tab will be blank. Please refer to the sample screenshot below.
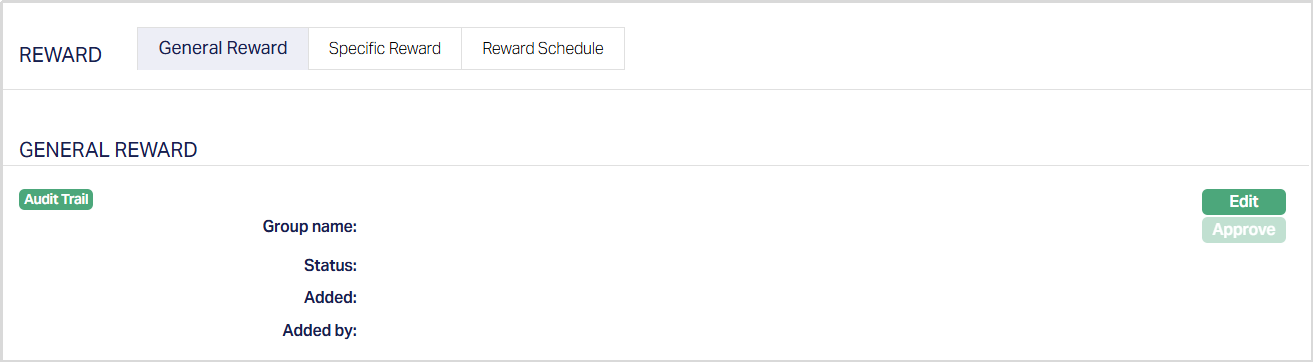
2. Click Edit. Edit Settings page appears.
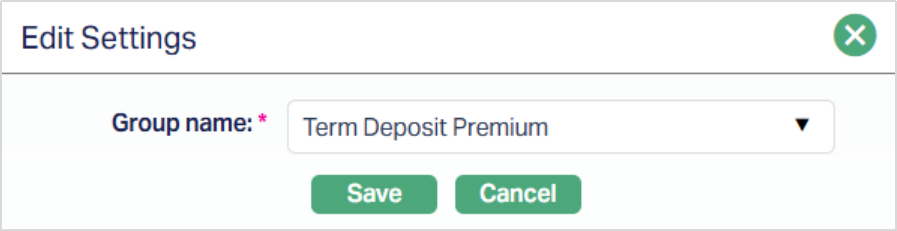
3. Select the Group name from the drop-down list of all active Reward Groups applicable to Term Deposit Products. This is maintained under CRM → Loyalty Program → Settings → Reward Group.
4. Click Save. The General Reward sub-tab appears with the edited details with the status as Pending.
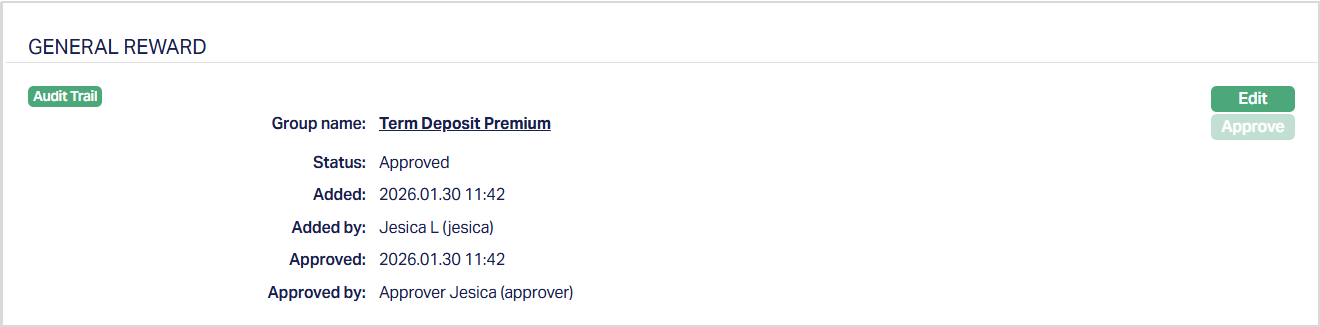
Function: Edit
Status of the reward is Pending until it is approved by another user. On approval, the tab status is set to Approved. The General Reward tab remains editable until the Term Deposit Account is closed.
Edit behaviour and restrictions:
- The General Reward can be edited, but cannot be deleted at the account level.
- Editing the General Reward allows you to change the Reward Group applied to the Term Deposit account.
- The General Reward sub-tab remains editable until the Term Deposit account reaches maturity minus one day.
- Changes to the General Reward are subject to approval.
Impact of editing General Reward When the General Reward is approved:
- Aura marks the Term Deposit account for Reward Schedule generation.
- Rewards from the approved Reward Group are evaluated for eligibility and scheduling.
- Only rewards that meet the defined eligibility and availability criteria are considered. Rewards with availability dates later than the applicable date are handled during subsequent Reward Schedule evaluation.
Specific Reward
The Specific Reward sub-tab allows you to define rewards that apply only to the selected Term Deposit account. Specific Rewards are used to introduce account-level reward exceptions or additional benefits that are not inherited from the Product-level Reward Group.
Specific Rewards are independent of the General Reward and are evaluated individually for the Term Deposit account.
To view / add a Specific Reward,
1. Access the Term Deposit Account maintenance page. Click on the Reward tab and select the Specific Reward tab.
Note: When a Term Deposit account is created, the Specific Reward sub-tab is blank. No Specific Rewards are created automatically. You can add Specific Rewards at any time, subject to the rules defined for reward availability, eligibility, and approval.
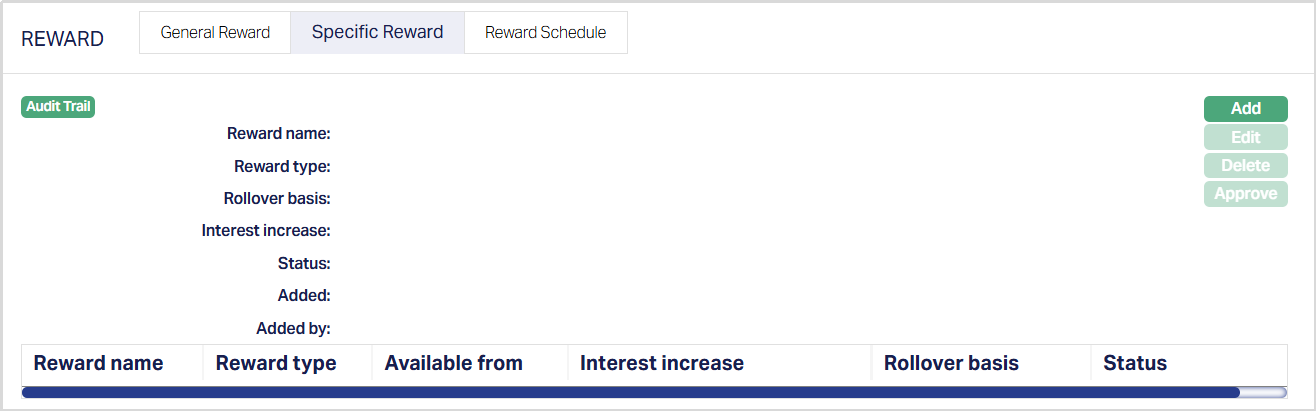
2. Click Add. The Add Specific Reward tab appears.

3. The Reward Name field is used to enter a description for the reward. This name helps you differentiate rewards that apply at different stages of the Term Deposit Account’s lifecycle.
4. The Reward Type field defines the type of reward being offered for the Term Deposit account. Currently, the drop-down provides only one option: Rollover with Special Interest - This reward allows the Term Deposit to be rolled over with a special interest rate when the reward is accepted.
5. Available From - Specify when the reward becomes available for the Term Deposit Account. This value is used to derive the Valid From date in the Reward Schedule. You can choose one of the following options:
- X months before maturity - makes the reward available a specific number of months before the maturity date of the Term Deposit.
- Date - makes the reward available from a specific calendar date.
6. Months - The Months field specifies the number of months before the Term Deposit maturity date when the reward should become available. This field is enabled and mandatory only when Available From is set to X months before maturity.
7. Date - The Date field specifies the exact date from which the reward becomes available. This field is enabled and mandatory only when Available From is set to Date. You can use this option when the reward must be offered to all eligible accounts on a specific date. A calendar icon is provided to select the required date.
8. Validity - Define how long the reward remains available to the customer after it becomes active. You can choose Days, where the reward is available for a fixed number of days, or Always, where the reward remains available until the Term Deposit maturity date.
9. Days - Enter the number of days for which the reward remains available. This field is mandatory when Validity is set to Days. If the reward is not accepted within this period, it expires.
10. Rollover Basis - The Rollover basis field defines how the Term Deposit will be rolled over when the reward is accepted. The available options ar:
- Rollover maturity proceeds - The full maturity proceeds (principal and interest) are rolled over.
- Rollover principal amount - Only the principal amount is rolled over. This selection determines how the Term Deposit will be renewed when the reward is applied.
- Interest Increase - The Interest Increase field specifies the percentage increase that will be applied to the prevailing final interest rate when the reward is accepted. When the reward is availed, Aura increases the existing final interest rate of the Term Deposit by the specified percentage. Example: If the current final interest rate is 8% and the interest increase is defined as 10% of the prevailing rate, the increase applied will be 0.8%. The revised rate will therefore become 8.8%
12. Click Save. The Specific Reward tab appears with the details you have entered with the Status as Pending.
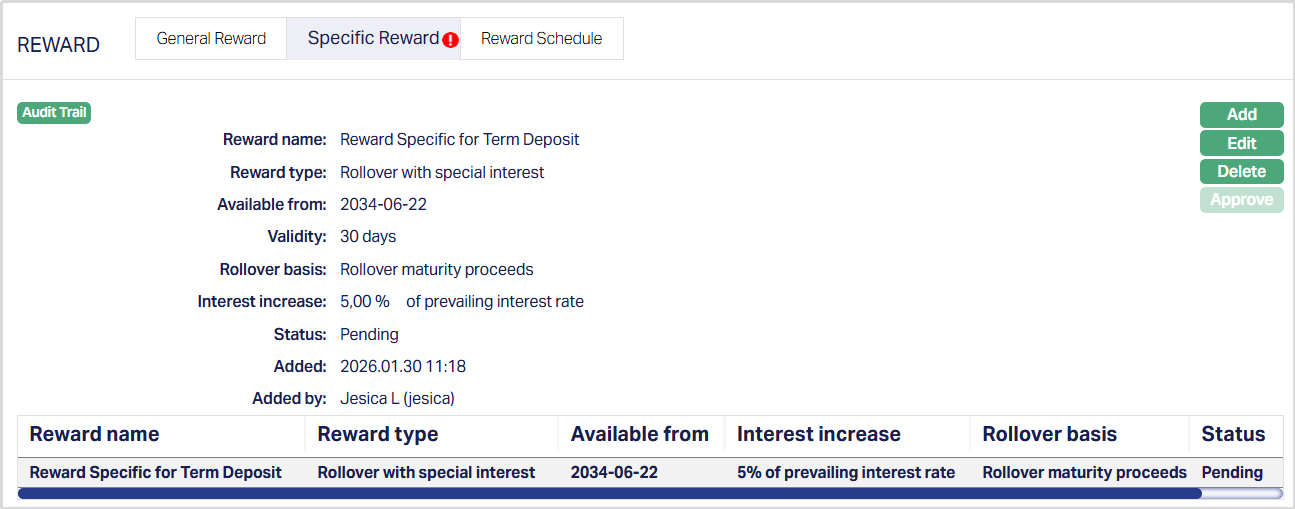
Status of the reward is Pending till it is approved by another user. On approval, the tab status is set to Approved.
The reward is not added to the Reward Schedule until it is approved.
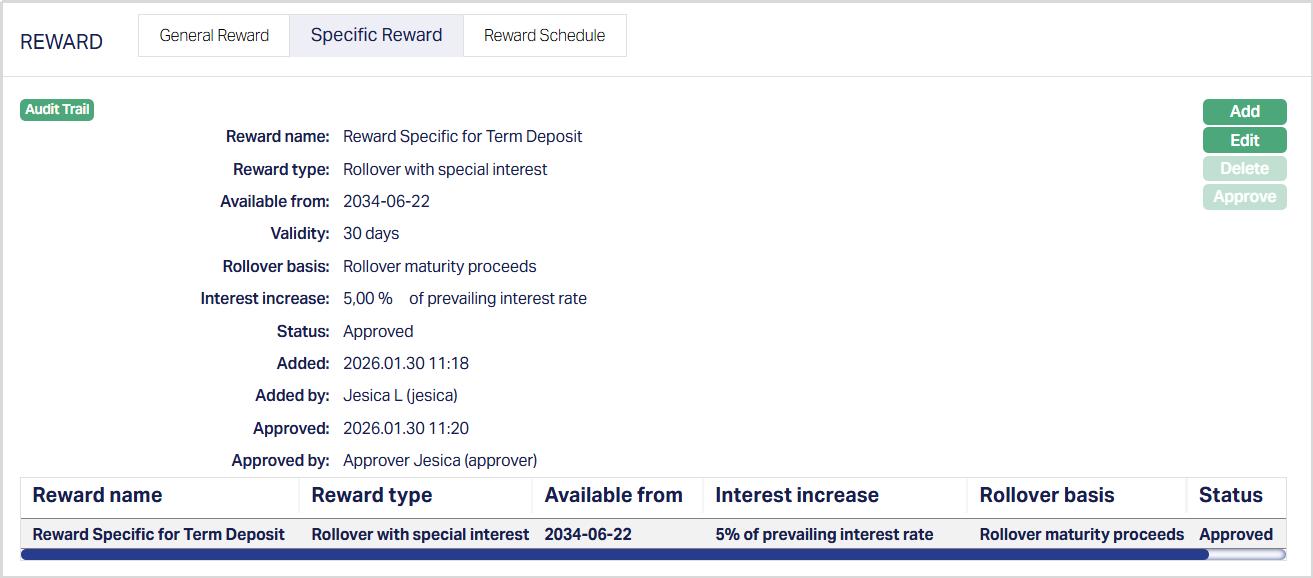
Functions: Add, Edit, Delete, Approve.
Edit: You can edit a Specific Reward as long as the reward has not yet become available, and the Term Deposit account is not closed.
Delete: Delete is allowed only when Status is Pending and before it becomes available. Once approved and available, the Specific Reward cannot be deleted.
All Edits and deletions are subject to standard maker-checker rules.
Reward Schedule
The Reward Schedule sub-tab shows all rewards applicable to the Term Deposit Account. This includes:
- Generic rewards inherited from the approved General Reward
- Specific rewards added and approved at the Term Deposit account level. The Reward Schedule allows you to view reward availability, eligibility, and acceptance status.
How the Reward Schedule is populated: Aura populates or updates the Reward Schedule in the following cases:
- When the Term Deposit account is activated and approved rewards exist
- When a change to the General Reward is approved, during EOD processing
- When a Specific Reward is approved, through online processing Rewards that become available on or after the maturity date of the Term Deposit account are excluded from the Reward Schedule.
To view the Reward Schedule, Access the Term Deposit Account maintenance page. Click on the Reward tab and select the Reward Schedule sub-tab.
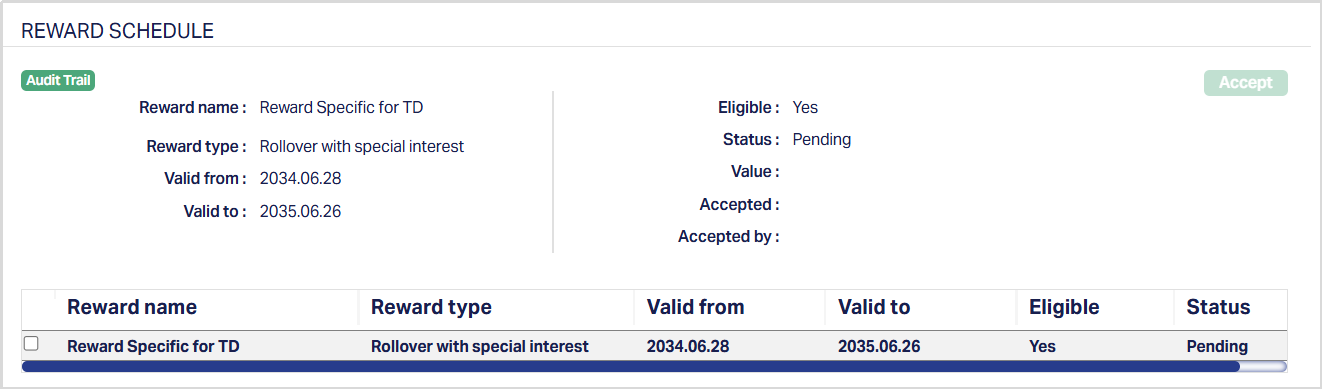
For each reward, Aura displays:
- Reward Name - Shows the name of the reward as defined in the Reward Group or Specific Reward setup.
- Reward Type - Indicates the type of reward, such as Rollover with Special Interest
- Valid From - Shows the date from which the reward becomes available for the Term Deposit Account. This date is derived from the reward availability configuration and must fall between the activation date and maturity date minus one.
- Valid To - Shows the last date on which the reward can be accepted. If the reward is not accepted by this date, it expires.
- Eligible - Indicates whether the Term Deposit account qualifies for the reward. Eligibility is evaluated during end-of-day (EOD) processing on the day before the Valid From date.
- Until Evaluation -> status shown as Pending
- If eligible -> displays Yes
- If not eligible -> displays No
- Value - Displays the incremental increase in interest rate offered through the reward. For example, if the interest rate increases from 8%, the Value field displays 0.8%.
- Status - Shows the current status of the reward.
- Pending - reward not yet accepted within validity period
- Availed - reward has been accepted
- Expired - reward validity period ended without acceptance
- Accepted - Displays the Date on which the reward was accepted.
- Accepted By - Displays the user ID and name of the user who accepted the reward.
Eligibility and reward availability: Eligibility is evaluated during EOD processing on Valid From minus one day. Until eligibility is evaluated, the Eligible status is shown as Pending. The reward remains locked and cannot be accepted.
All rewards in the Reward Schedule are initially locked. A reward is unlocked only after the Term Deposit Account passes the eligibility check during EOD processing on the day before the Valid From date. If eligibility fails, the reward remains locked. Expired rewards are indicated once the validity period ends.
Accepting a Reward: You can accept a reward only when -
- Eligible = Yes
- Status = Pending Only one reward can be accepted at a time.
To accept a reward, 1. Select the checkbox against the eligible reward.
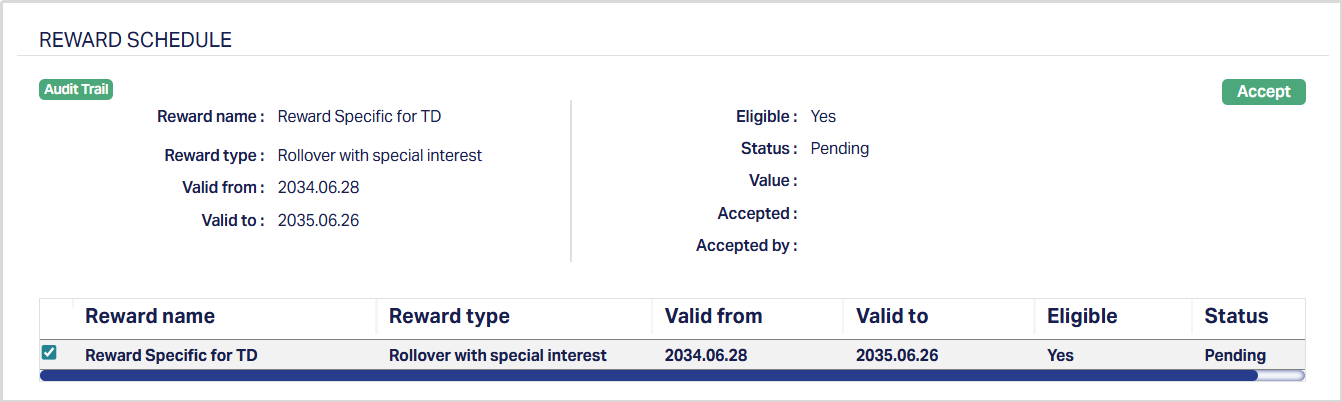
2. Click Accept. Accept Reward page appears.

3. Select Yes. The Reward Schedule is now accepted with the status changed to Availed.

On acceptance:
- Aura updates the Maturity instruction of the Term Deposit account based on the reward configuration.
- The rollover basis and Special Interest rate are applied.
- Reward status changes to Availed.
- Acceptance date and user details are recorded.
Expiry of Rewards:
- If a reward is not accepted within its validity period. Aura marks it as Expired automatically during end-of-day (EOD) processing on the Valid To Date.
- Expired rewards cannot be accepted.
Notes:
- Rewards remain locked until eligibility is evaluated and confirmed
- Rewards that fall on or after the maturity date are not considered
- If the maturity instruction is changed after reward acceptance, the reward becomes inapplicable
- Specific Rewards should be used only for Account-level exceptions. Rewards inherited from the Product do not need to be re-added.
Settings
The Settings tab allows you to maintain the funding method, interest payment option, interest payout method and maturity instruction details of the term deposit account that you created. For details refer to New Term Deposit → Settings (2/4).
To edit the Settings,
1. Access Term Deposit page. Click Settings tab to view the details as per sample below. The details are defaulted based on what you entered during account creation.
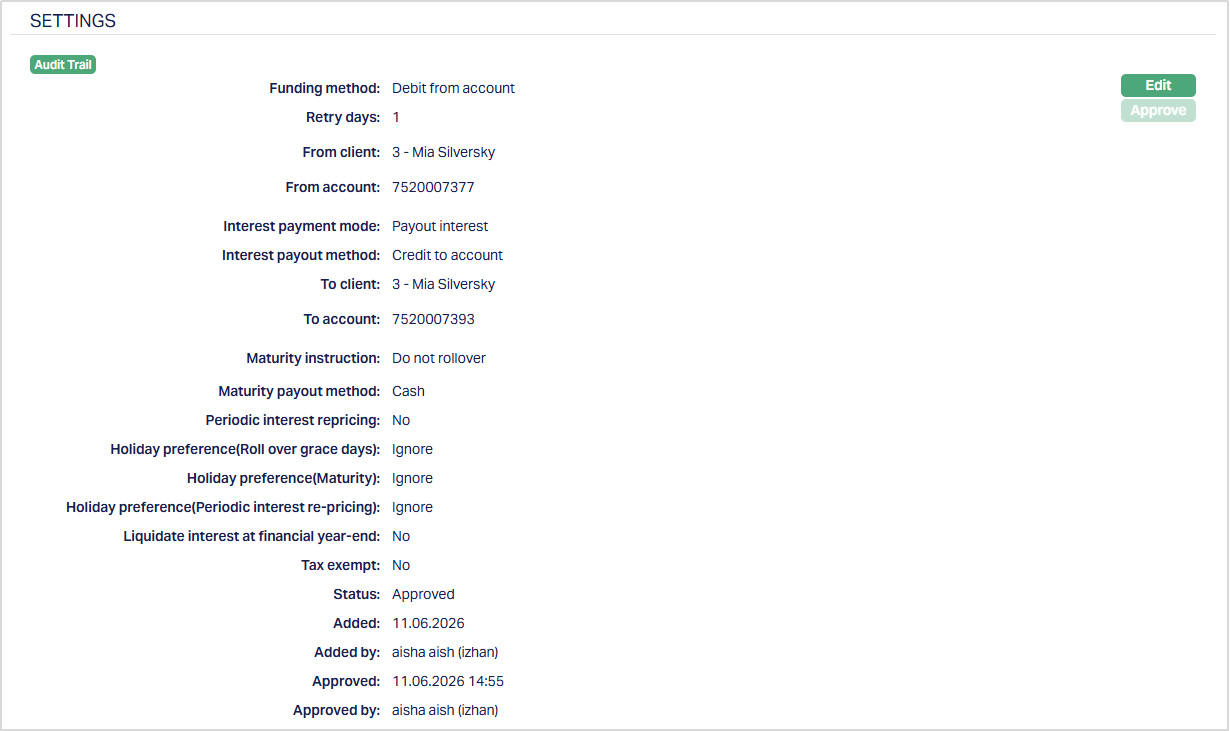
Additional fields available are:
Status field denotes the status of the tab.
Added field denotes the date on which the record was added.
Added by field denotes the name of the user who created the record.
Approved field denotes date on which the record was approved and is displayed only for approved records.
Approved by field denotes name of the user who approved the record and is displayed only for approved records.
2. Click Edit. Edit Settings page appears.
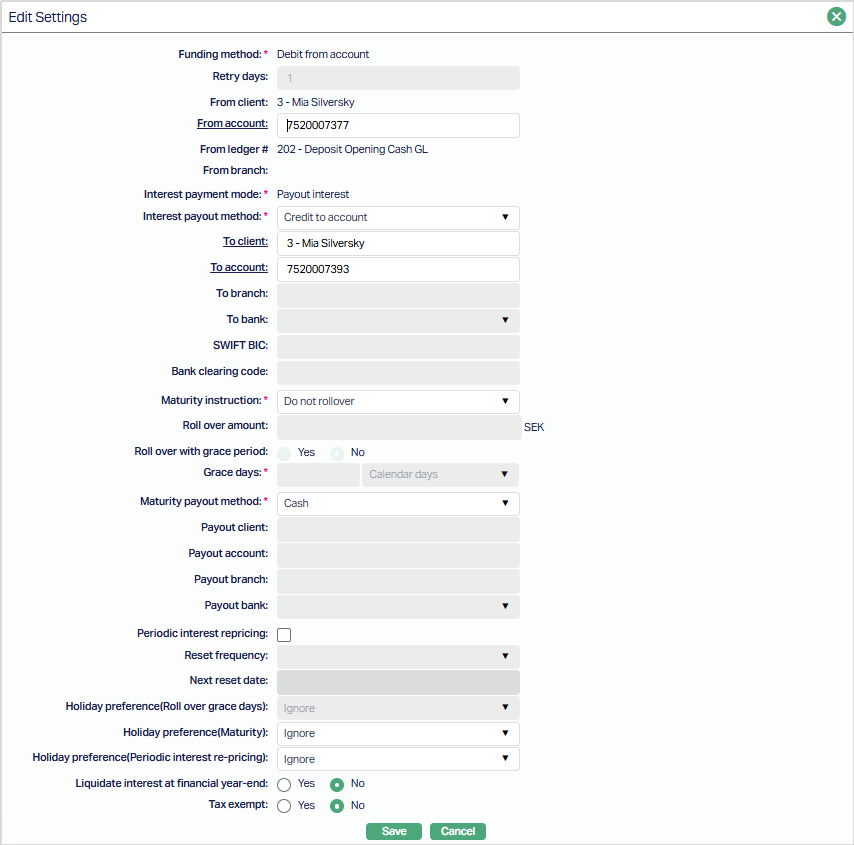
Note: Based on the Interest Payout Method selected, To Client, To Account, To Branch, To Bank, SWIFT BIC Code and Bank Clearing Code fields can be edited. Any change in the tab will set the tab status to Pending till it is approved by another user. On approval, the tab status is set to Approved.
3. Click Save. Term Deposit page appears with the edited details.
Functions: Edit. Approve.
Note: Status will reflect as Pending. Approval can only be done by a user different from the one who created the record.
Functions: Edit. Approve.
Signatory
This tab allows you to add, view and maintain the signatories for the account. You have to first add the details of the Signatory group and then add persons to each group.
To add a new Signatory group,
1. Access Term Deposit screen and click Signatory tab
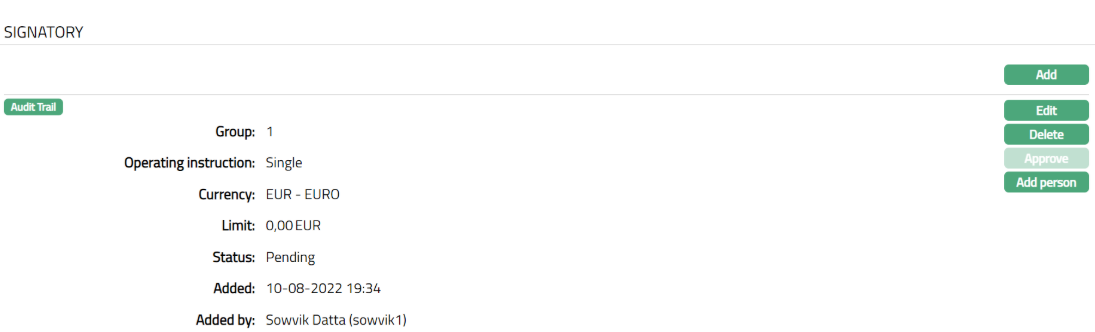
2. Click Edit. Edit Signatory page appears.
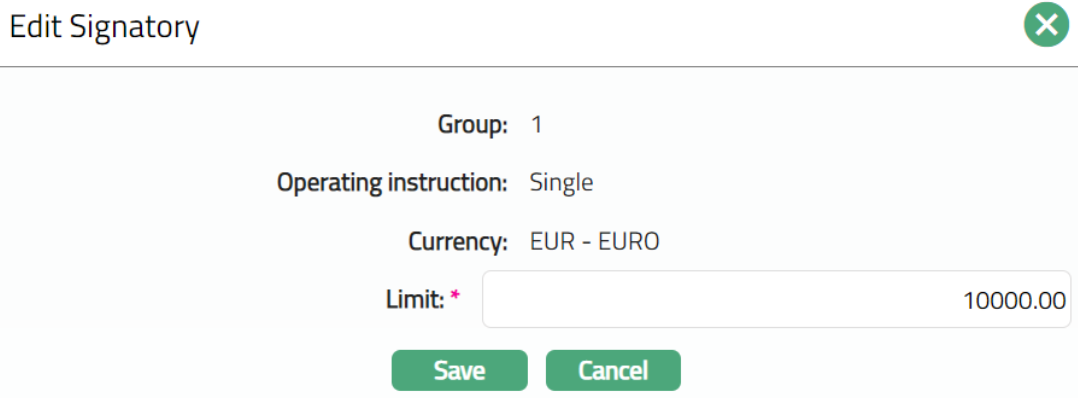
Note: Only Limit field is editable in Edit Signatory page.
3. Click Save and then Approve the Record. Signatory page appears with the Edited details.
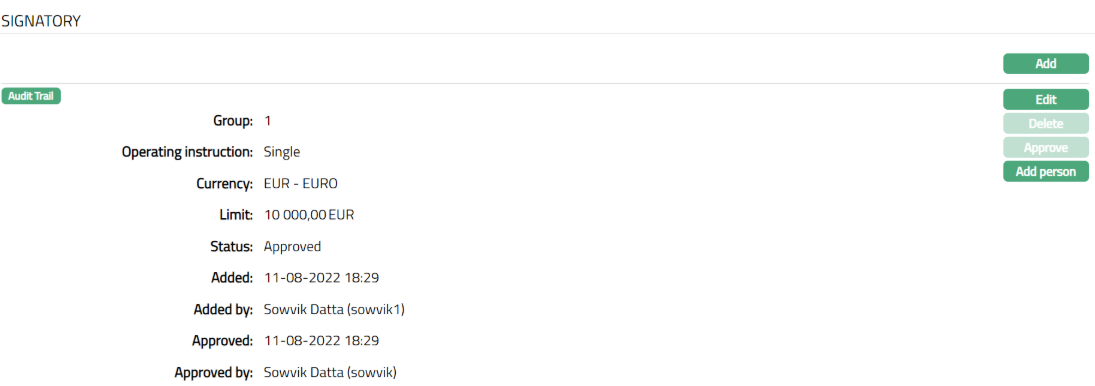
Functions: Edit, Delete, Approve, Add Person.
The additional fields available in view are:
Status denotes status of the record.
Added denotes the date and time on which the Person record has been added.
Added by denotes the name of the user who has added the person.
Approved denotes the date and time on which record is approved. This field is displayed for the approved record.
Approved by denotes the name of the user who has approved the record. This field is displayed for the approved record.
To Add another Signatory,
1. Click Add. Add Signatory screen appears.
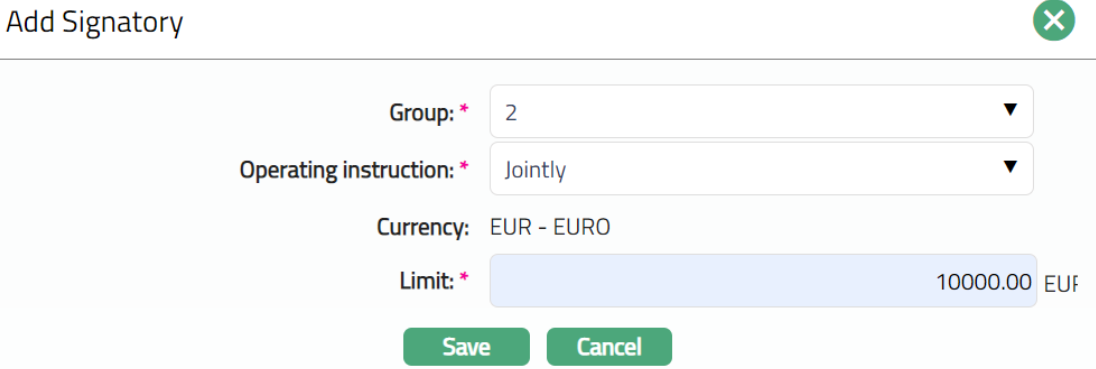
2. Select Group from the drop-down list. You can add a maximum of 9 groups with varying signing powers.
3. Select Operating instruction whether Single, Jointly as appropriate for this Group.
4. Aura will display the account Currency and will not allow you to change the currency.
5. Enter Limit amount for the group in terms of account currency.
6. Click Save. Signatory page appears with the added details.
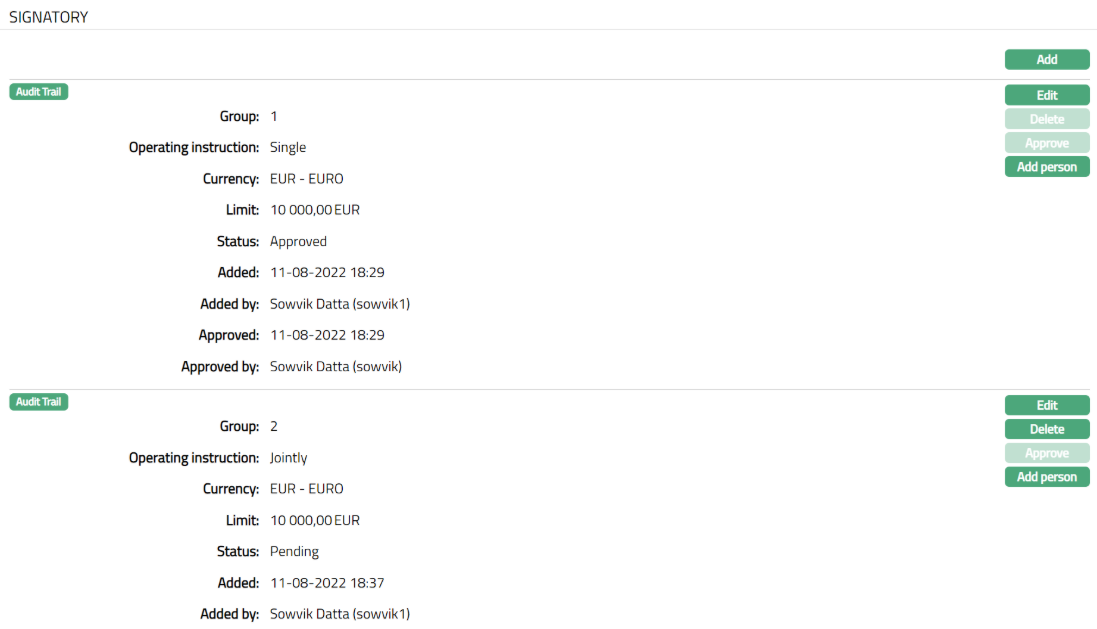
Functions: Add, Edit, Delete, Approve, Add Person
Note: On save, the status of the record is Pending. It can be approved only by a user different from the one who created it. A Signatory record can be deleted until Approval.
To add a person as signatory,
1. Access Term Deposit screen and click Signatory tab.
2. Click Add Person. The Person tab appears.
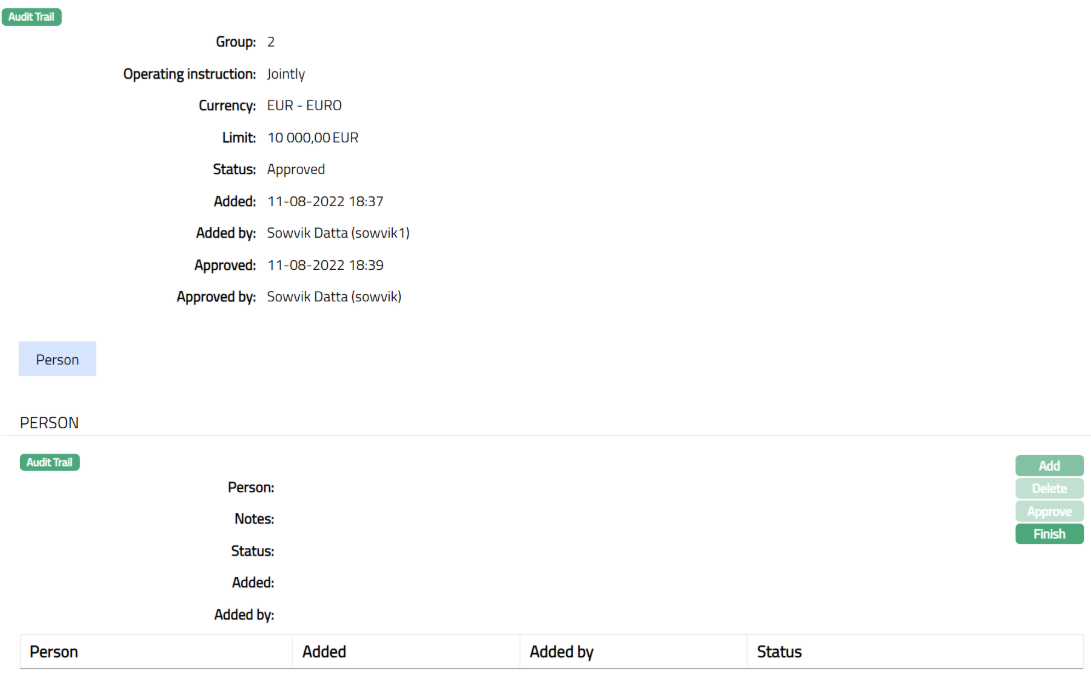
3. Click Add. The Add Person page appears.

4. Select Person by clicking Person hyperlink. The Person Search page displays the list of people linked to the Client with the role signatory.
5. Enter Notes, if any, for the person.
6. Click Save. The Person Sub tab appears with the added person.
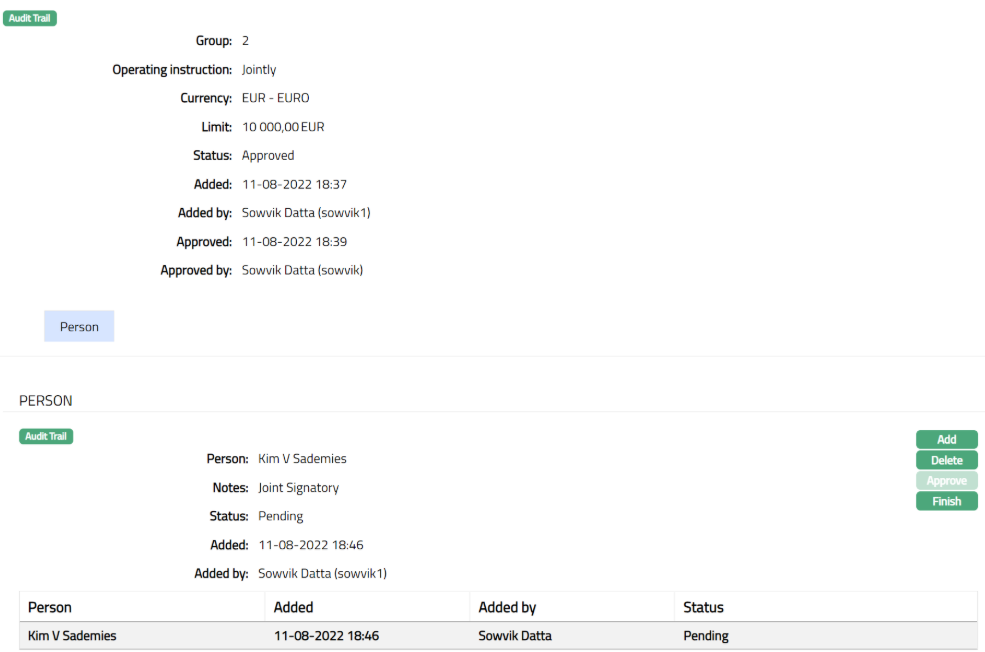
Note: On save, the status of the record is Pending. It can be approved only by a user different from the one who created it.
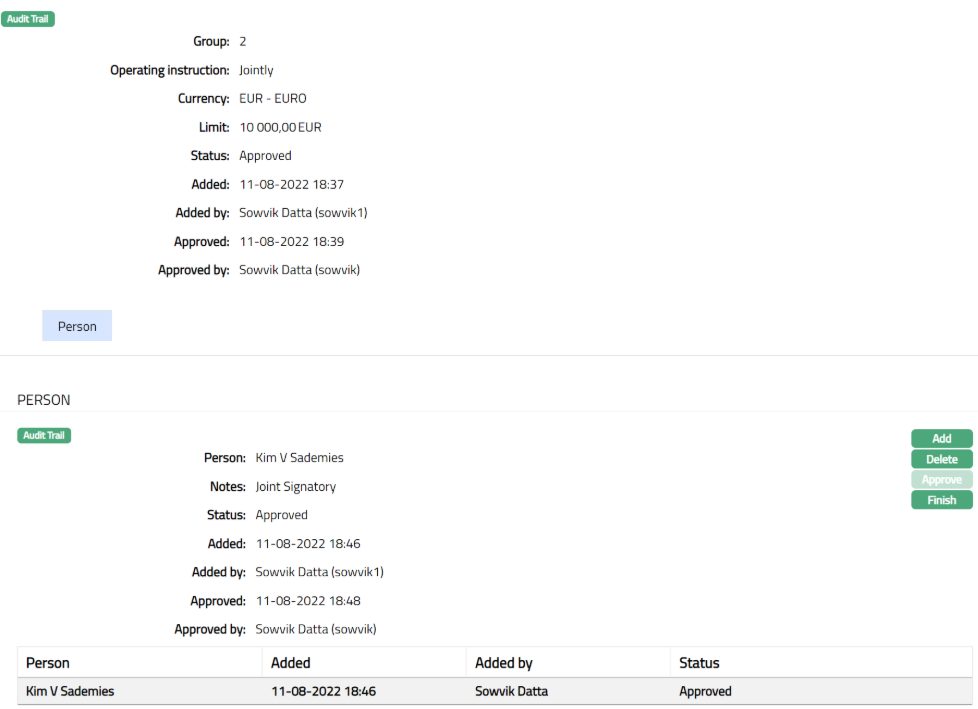
Functions: Add, Delete, Approve, Finish
The additional fields available in view are:
Status denotes status of the record.
Added denotes the date and time on which the Person record has been added.
Added by denotes the name of the user who has added the person.
Approved denotes the date and time on which record is approved. This field is displayed for the approved record.
Approved by denotes the name of the user who has approved the record. This field is displayed for the approved record.
Note: More than one person can be maintained as signatory. A Person record can be deleted until Approval.
1. Click Finish and then Approve the record.
2. Once approved Signatory page appears.
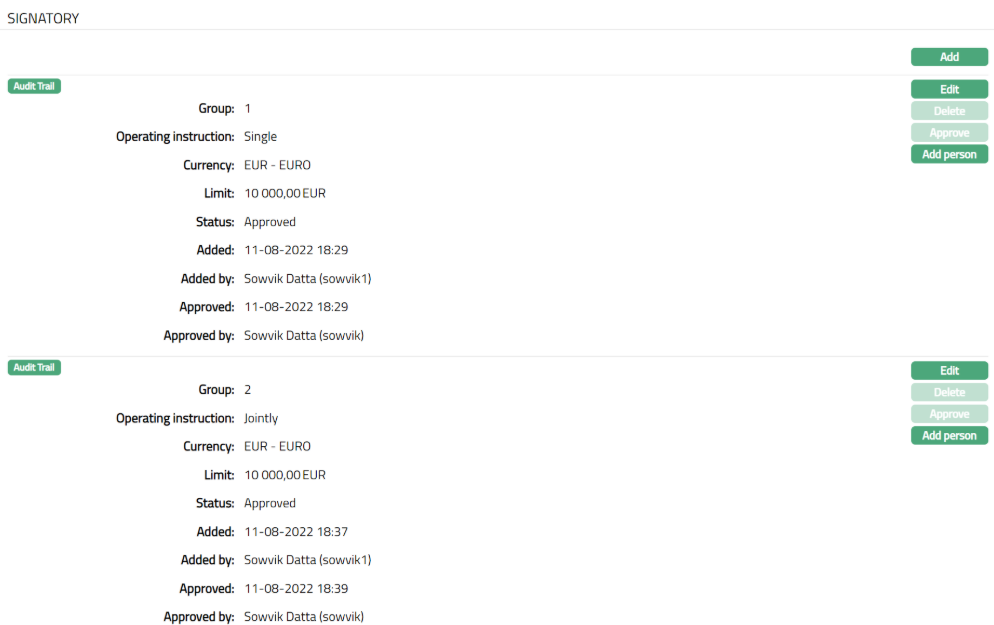
Functions: Add, Edit, Delete, Approve, Add Person
The additional fields available in view are:
Status denotes status of the record.
Added denotes the date and time on which the Person record has been added.
Added by denotes the name of the user who has added the person.
Approved denotes the date and time on which record is approved. This field is displayed for the approved record.
Approved by denotes the name of the user who has approved the record. This field is displayed for the approved record.
Delete: You can delete a Signatory record by a click on Delete button. When you click on Delete button, Aura displays an alert message. On confirmation Aura will delete the Signatory record. Note: A Person record can be deleted until Approval.
Statements
Using this tab, you can set the preferences for generating the statements for the term deposit account. The details are defaulted from the Product, but you may make specific changes that are required for the term deposit account.
To Add new statement parameter,
1. Access Term Deposit screen and click Statements tab
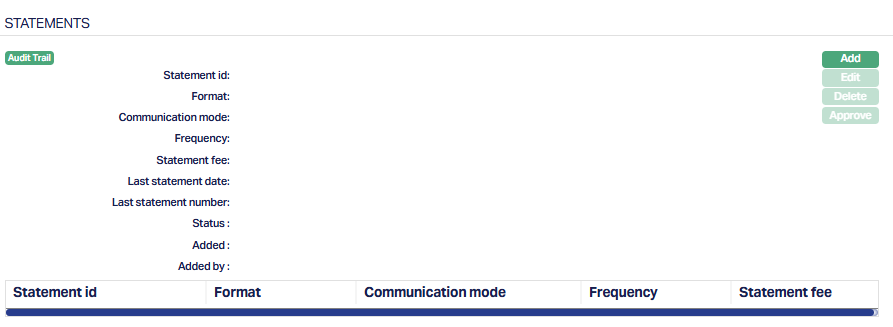
2. Click Add. Add Statement screen appears.
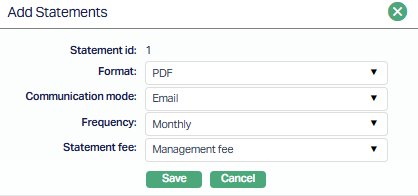
3. Select Format from the drop-down list of formats that have been maintained under Admin → System codes → Generic definition → Statement formats. It is the Format of the statement that is to be generated.
4. Select Communication mode from the drop-down list -- i.e the manner in which you want to send the statement. Available options are Data handoff, e-invoice, e-mail, paper, SMS and Web Hotel.
5. Select Frequency of the statement to be generated from the drop down. Available options are: Daily, Weekly, Fortnightly, Monthly, Quarterly, Semi-annual, Annual, On Liquidation, On Debit Liquidation date and On Credit Liquidation date.
6. Select the Statement fee from drop down list of Event based Flat or Banded charges maintained under Admin → System code → Charges. This is the fee that is to be collected from the Client for the statement defined above. This charge may be deferred.
7. Click Save. Statement page appears with the added details..
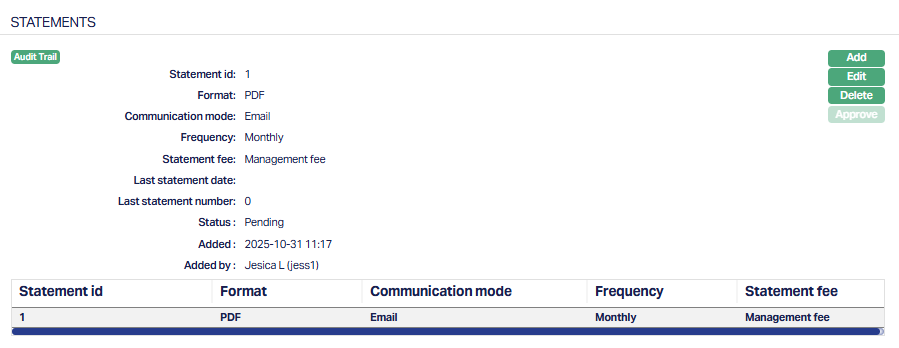
Functions: Add, Edit, Delete
The additional fields that you can view in the Statement tab are explained below:
Last statement date -- It denotes the last date of the statement generated.
Last statement number -- It denotes the number of statement last generated.
To edit Statement,
1. Click Edit. Edit Statement page appears.
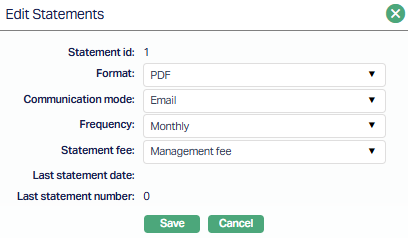
Note: Except Statement id, Last statement date and Last ststement number rest all the fields are editable.
2. Click Save. Statement page appears with the edited details.
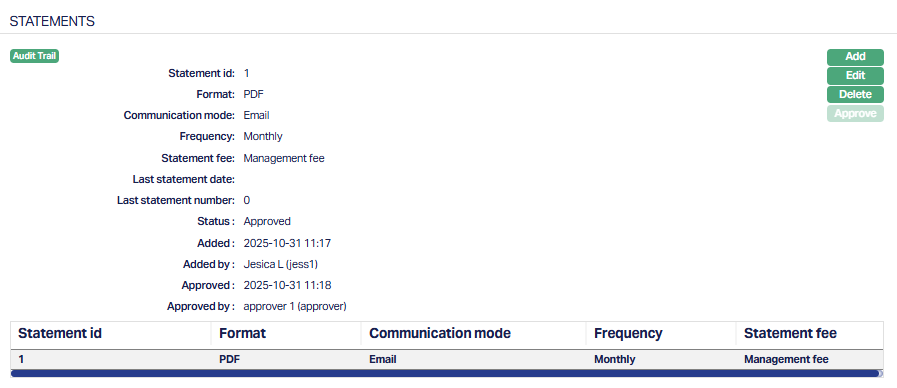
Note: Once Add or Edited the Status will reflect as Pending. Approval can only be done by a user different from the one who created the record. Once approve the red bubble disappears.
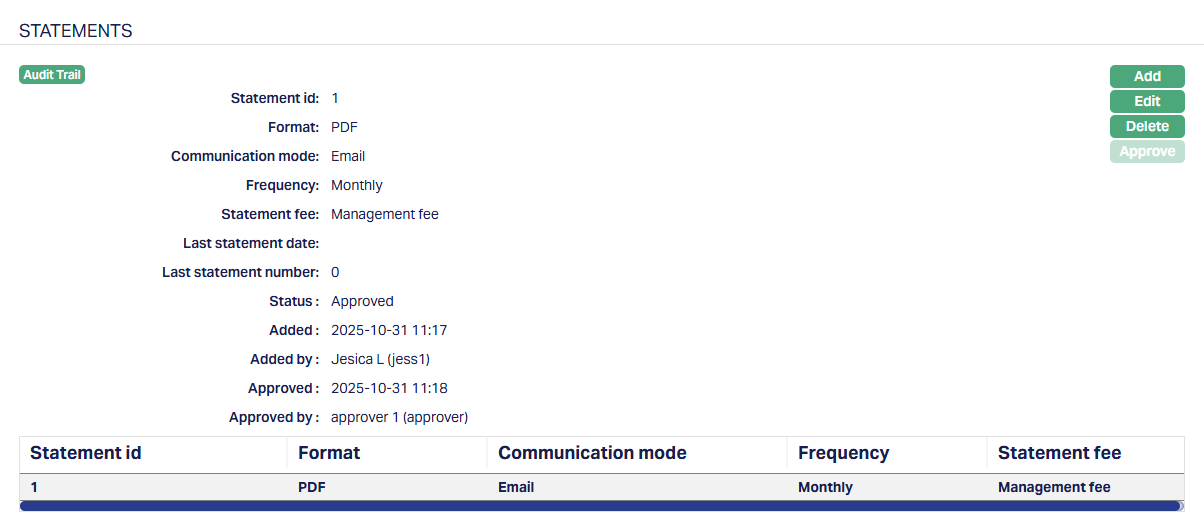
Function: Add, Edit, Delete, Approve
The additional fields available here are:
Status field denotes the status of the tab.
Added field denotes the date on which the record was added.
Added by field denotes the name of the user who created the record.
Approved field denotes date on which the record was approved and is displayed only on approval.
Approved by field denotes name of the user who approved the record and is displayed only on approval.
Delete: You can delete Statement record by a click on Delete button. When you click on Delete button, Aura displays an alert message. On confirmation Aura will delete the Statement record.
Term Deposit Certificate
The Term Deposit Certificate tab allows you to issue, invalidate, and approve Term Deposit Certificates for the selected Term Deposit Account. This tab is displayed only if the associated Term Deposit Product is configured with Allow Term Deposit Certificate = Yes in the product setup.
When you open a Term Deposit account for the first time, Aura checks the product setup to determine whether the Term Deposit Certificate tab should be displayed. After the account is created, the tab’s availability is controlled at the account level.
Any later change to the product setting will not affect the existing accounts.
To add/issue a new Term Deposit Certificate,
1. Access Term Deposit maintenance screen, click Term Deposit Certificate tab. This tab will show no records until you add a new certificate.
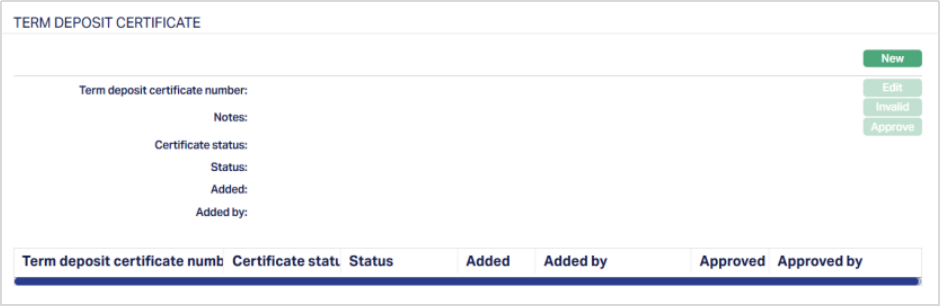
Note: The New button is enabled only when the Term Deposit account status is Activated.
2. Click New. New Term Deposit Certificate issue page appears.
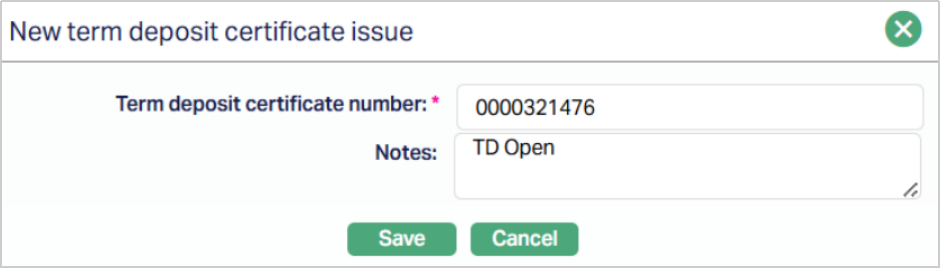
3. Enter the Term Deposit Certificate number - this is a mandatory field and is maintained under Admin → Secured Stationery → Series with Type = Term Deposit Certificate and Status = Approved and Printed, and should be associated with the selected account branch.
4. You can use the Notes field to capture the purpose of issuance or any other notes related to the certificate.
5. Click Save. The Term Deposit Certificate page appears with the added details.
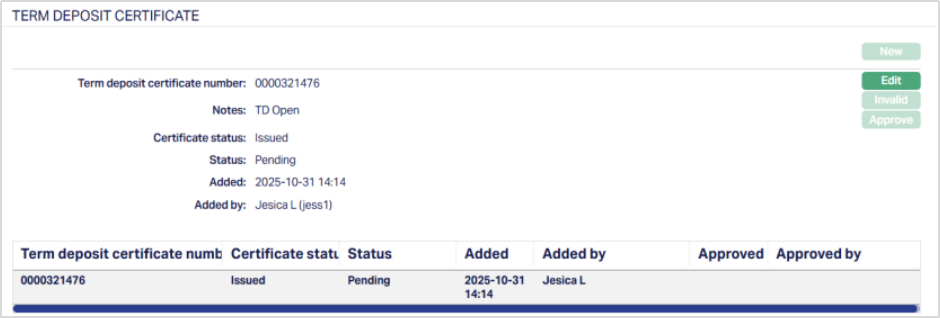
Functions: New, Edit, Invalid, Approve.
Note: If the entered certificate number is invalid, not in stock, or not issued from the same branch, Aura displays an appropriate error message.
When you issue or update a Term Deposit Certificate, Aura tracks its lifecycle through the following statuses:
- Issued - The certificate is active and currently issued for the account.
- Closed - The certificate becomes inactive when the Term Deposit account is closed. If the deposit is rolled over or renewed, Aura marks the existing certificate as Closed and a new certificate is issued.
- Invalidated - The certificate has been manually marked as invalid.
To edit Term Deposit Certificate,
1. Click Edit. Edit Term Deposit Certificate Issue page appears.
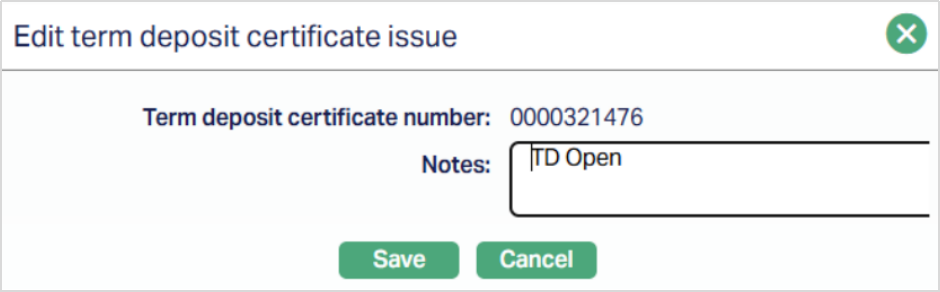
Note: Only the Notes field is editable.
2. Click Save. The Term Deposit Certificate page appears with the edited details.
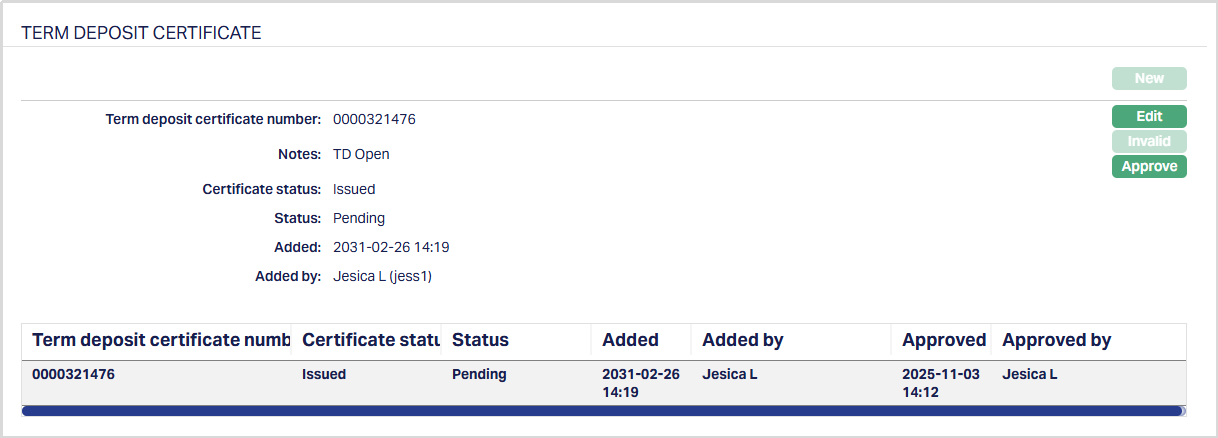
Note: When you save, Aura creates an event - TDCISU (Term Deposit Certificate Issue) with the status set to Pending. This event can be viewed under the Event tab of the Term Deposit Maintenance Account.
Status of the certificate remains pending until it is approved by another user. On approval, the status is set to approved. When you approve, Aura updates the record status from Pending to Approved and marks the related event (TDCISU) as Success in the Event Master table.
The Approve button is enabled only when the record status is Pending and the certificate status is either Issued or Invalidated.
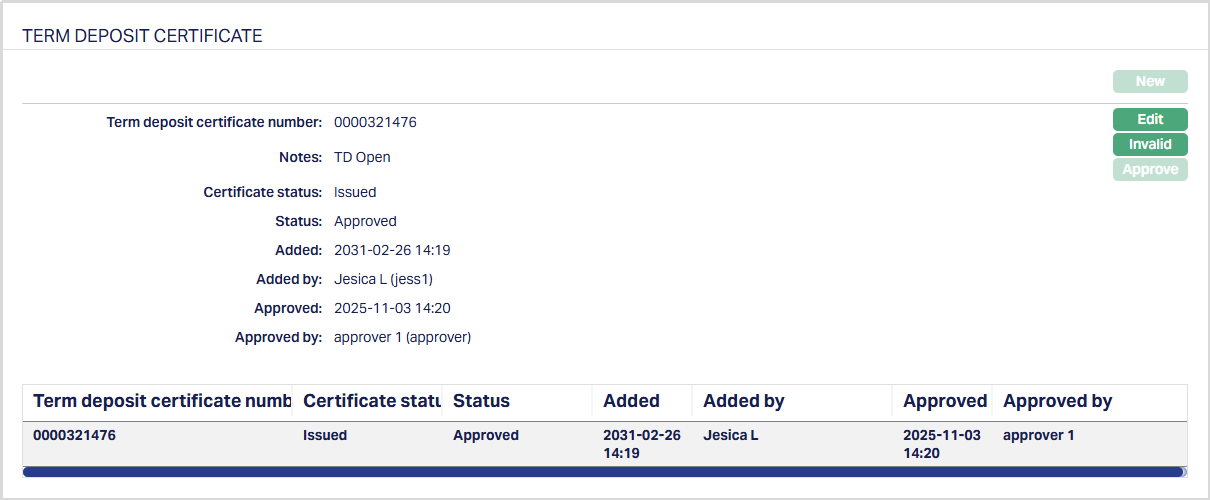
Functions: New, Edit, Invalid, Approve.
The Edit button remains enabled even after a record is approved. However, if any changes are made, the updated details will require re-approval from another user as per the maker-checker process.
To mark Term Deposit Certificate as invalid,
1. Click the Invalid button. Mark as invalid page appears.
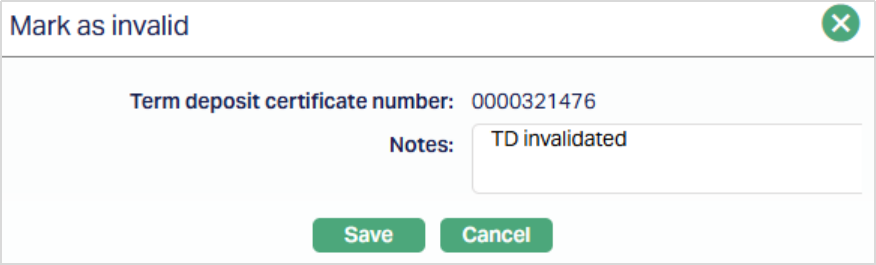
Enter the reason for invalidation in the Notes field.
2. Click Save. Status of the Certificate will be changed to Invalidated and will be marked pending till it is approved by another user.
Note: When you save, Aura creates an event TDCINV (Term Deposit Certificate Invalidated) with the status set to Pending. This event can be viewed under the Event tab of the Term Deposit Maintenance Account.
When you approve, Aura updates the record status from Pending to Approved and marks the related event (TDCINV) as Success in the Event Master table.
Functions: New, Edit, Invalid, Approve.
The additional fields that are shown are:
- Status indicates the current state of the record. It will be either: Pending - If the record is waiting for approval or Approved - If the record has been reviewed and finalized.
- Added shows the date and timestamp when the record was created and Added by displays the user ID and full name of the person who created the record.
- Approved shows the date and time when the record was approved and Approved by displays the user ID and full name of the person who approved the record.
Custom Field
This menu option allows you to define fields apart from those that are already available in the standard version of Aura. Thus, it enables you to customize additional data storage and use as required to suit your specific business needs.
To maintain the Custom Field,
1. Access Term Deposit page. Click Custom Field tab.

2. The custom field(s) appears only when it is created in Admin → System codes → Custom fields → Custom fields and linked to specific Product option in Admin → System codes → Custom fields → Field mappings.
3. Click Edit. Edit Custom Field page appears.

4. Enter Account Name.
5. Click Save. The Custom Field page appears with the edited details.

Function: Edit
Note: Custom field functionality has been explained in detail in Admin → Custom field manual.