Insurance plan
This option allows you to define insurance plans and once these insurance plans are created, they can be made available for Products to achieve module specific insurance plan requirements.
The following are the tabs in Insurance Plan
To add an Insurance Plan,
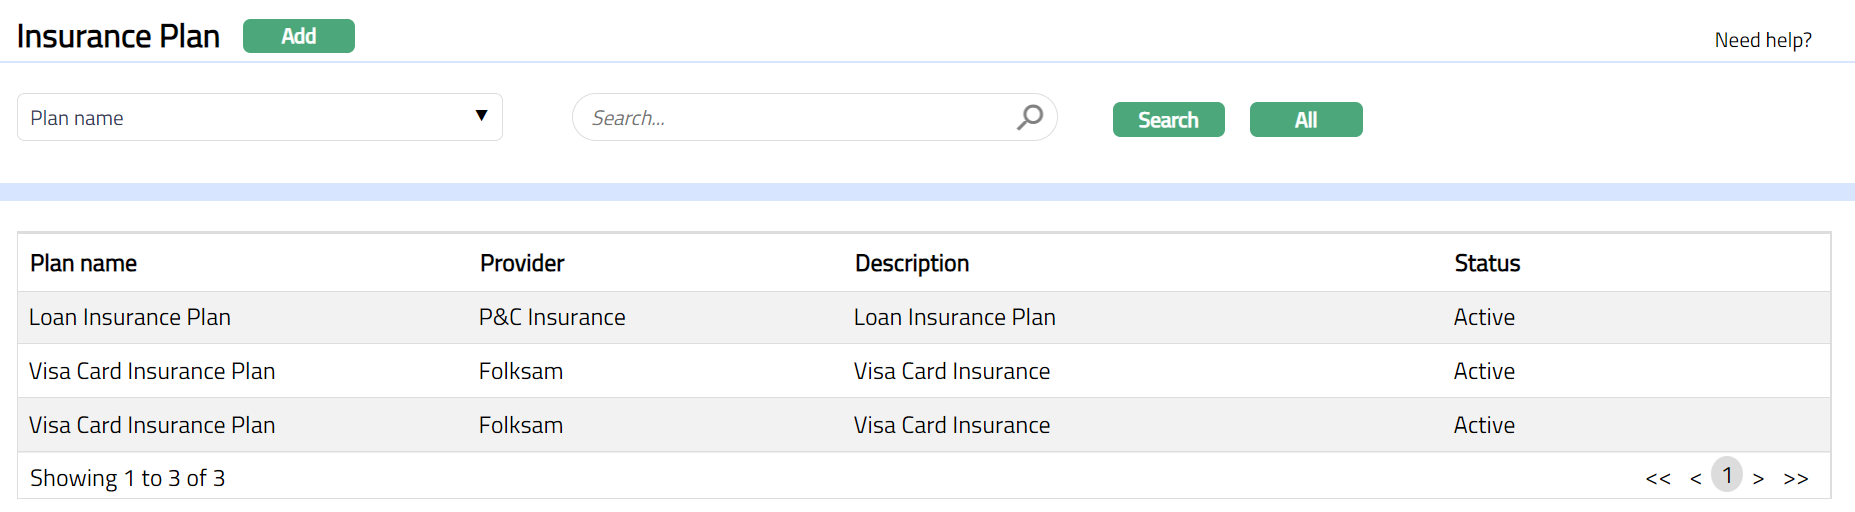
1. From Admin menu, click System Codes, Generic definitions and then Insurance Plan. The Insurance Plan Search page appears. All Insurance Plans available in Aura appear on the page.
2. Click Add. New Insurance Plan → General (1/2) page appears.
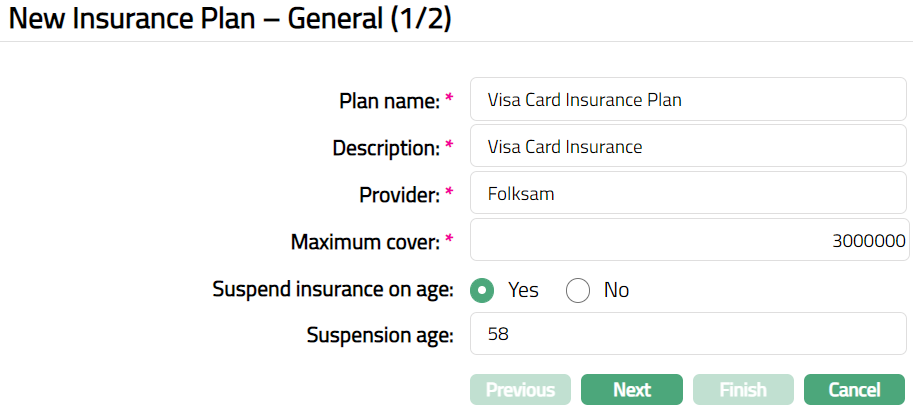
3. Enter Insurance Plan name.
4. Enter Description for the Insurance Plan.
5. Enter name of the Provider who will be providing the insurance.
6. Enter Maximum insurance cover for an agreement i.e., a card account. Maximum cover amount will be in base currency.
7. If Insurance plan has to be suspended based on the age of the insured, click Yes for Suspend insurance on age. You have to enter the suspension age in the next field. By default, suspend insurance on age is No.
8. Suspension age field is enabled only when the Suspend insurance on age is selected as Yes. Enter the age after which the insurance cover for the insured will be stopped.
9. Click Next. New Insurance Plan → Confirmation (2/2) page appears.
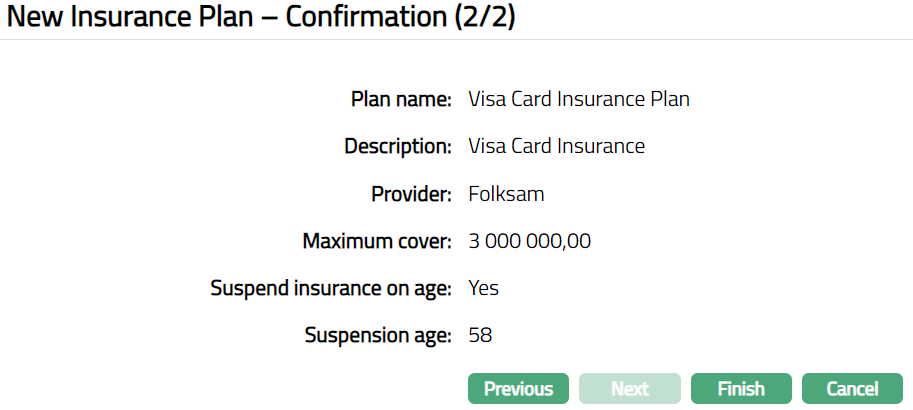
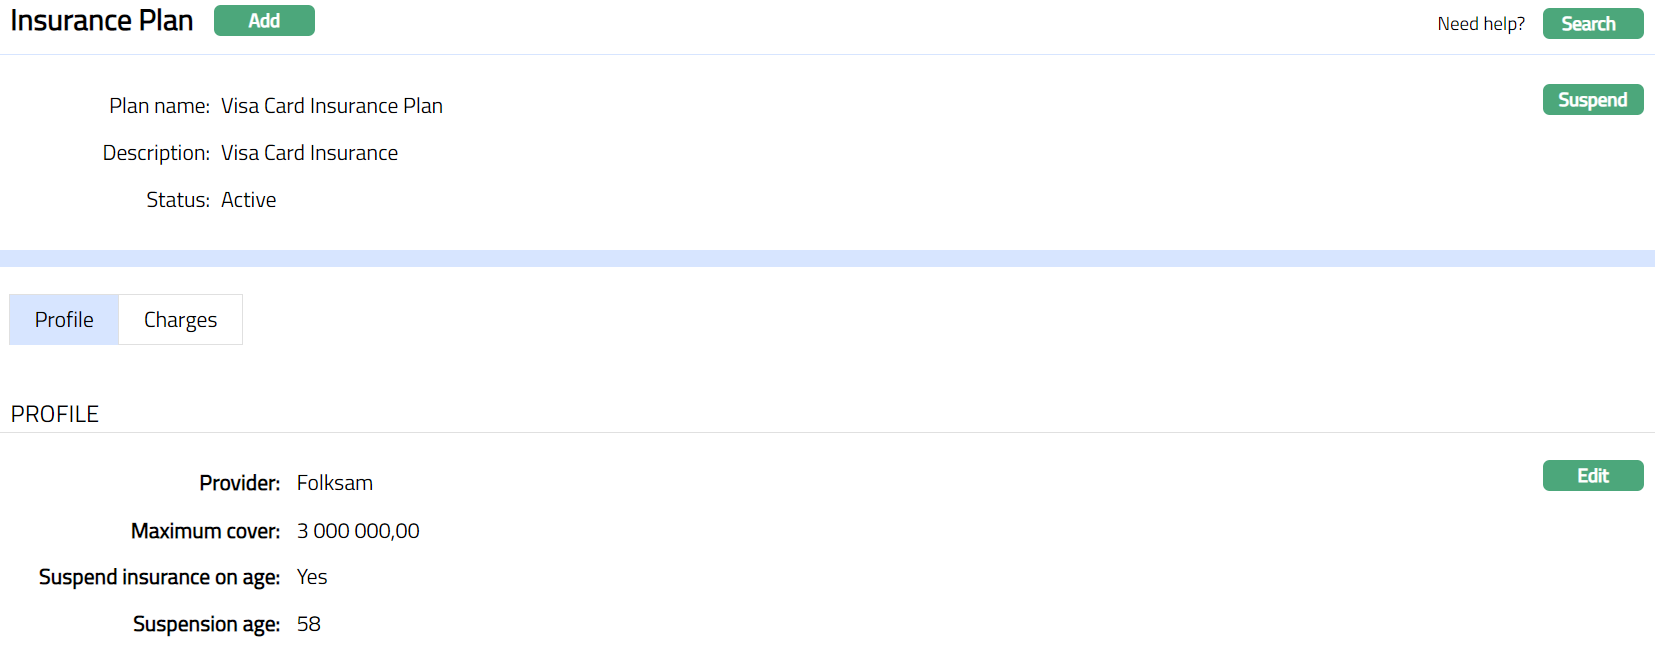
10. Click Finish. The Insurance Plan page appears with the added details displaying Profile page by default.
Functions: Add, Search, Suspend, Activate
Note: Status of the Insurance Plan will be Active as soon as the Insurance Plan is created.
Suspend: You can suspend the Insurance Plan by a click on Suspend button. When you click on Suspend button, Aura displays an alert message. On confirmation Aura will suspend the Insurance Plan. Once the Insurance Plan is suspended, it becomes unavailable in the drop-down list in other modules in Aura. Suspended Insurance Plans can be activated by using Activate button.
Activate: You can activate the Insurance Plan by a click on Activate button. When you click on Activate button, Aura displays an alert message. On confirmation Aura will activate the Insurance Plan. Once the Insurance Plan is activated, it becomes available in the drop-down list.
Profile
Profile tab, which is the default tab in the Insurance Plan screen, shows the basic details of the Insurance Plan.
To view / edit Profile,
1. Access Insurance Plan page and click Profile tab to view the Insurance Plan details as per sample below. The details are defaulted from the entries that you made during Insurance Plan creation. For details refer to New Insurance Plan → General (1/2).

2. Click Edit. Edit Profile page appears.
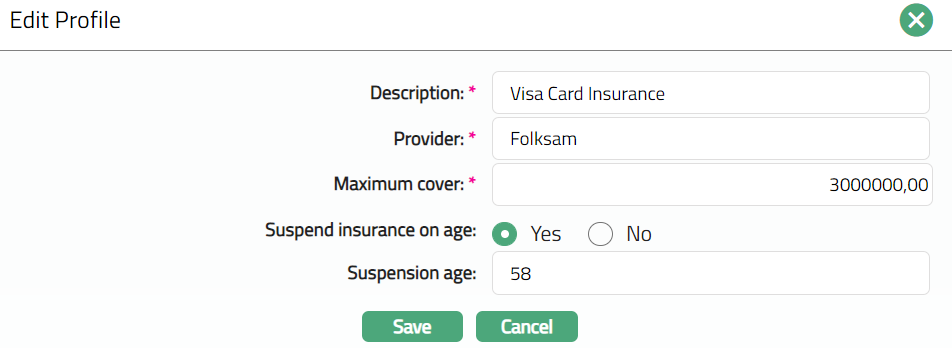
Note: All fields are editable.
3. Click Save. Profile page appears with the edited details.

Functions: Edit
Charges
This tab will allow you to maintain the charges for the insurance plan.
To view / edit charge,
1. Access Insurance Plan page and click Charge tab to view the details. On creation of the Insurance Plan, by default the charge scheme fields will be empty.

2. If you want to input / edit any charges for the Insurance Plan, then click Edit. Edit Charge page appears.
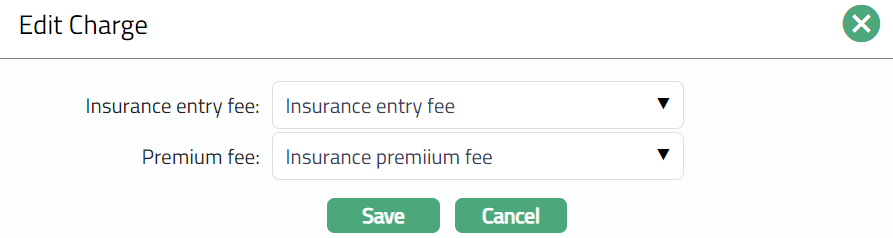
3. If you want to introduce / change Insurance Entry fee for the Insurance Plan, you can select the required Charge Scheme from the drop-down list of all the active Event charges, where basis is Flat.
4. If you want to introduce / change the Premium fee for the Insurance Plan, you can select the required Charge Scheme from the drop-down list of all the active Periodic charges, where basis is Flat or Banded. If charge scheme is Banded, then, at the Product level, you can specify the basis on which the charge has to be calculated.
5. Click Save. Charge page appears with the edited details.

Functions: Edit.
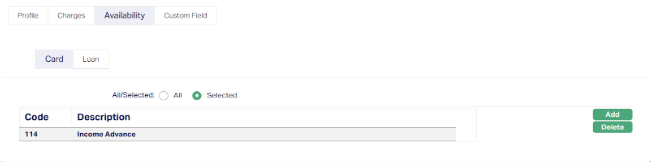
Availability
Availability tab allows you to control access by specifying which Card Account Products or Card Loan Products can use the particular Insurance Plan. This tab ensures that only authorized products can initiate or apply the Insurance Plan during transactions or batch processes.
The Availability tab has two sub-tabs:
- Card: This sub-tab allows you to control the availability of the Insurance Plan for Card Account Products maintained in Card → Settings → Card Account Product.
- Loan: This sub-tab allows you to control the availability of the Insurance Plan for Card Loan Products maintained in Card → Settings → Card Loan Product.
To define Card Account Product or Card Loan Product availability,
1. Access the Insurance Plan screen and navigate to the Availability tab.
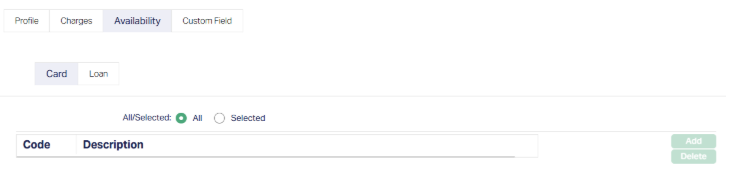
By default, the Card sub-tab is opened.
2. Choose the extent of access - All radio button will allow all products to access Insurance Plan, and is selected by default, while Selected radio button will restrict access to only certain products.
When Selected is chosen, the Add button will be enabled.
Note: This setting is the same for both Card and Loan sub-tabs.
3. Select Card sub-tab if you want to allow access based on Card Products defined in Aura. After the Selected radio button is chosen, click Add. This will open the list of products defined and maintained under Card → Settings → Card Account Product.
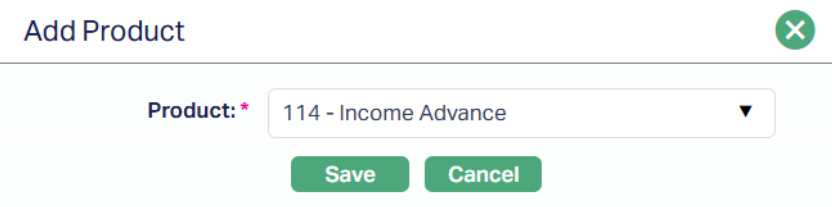
4. Select Loan sub-tab if you want to allow access to Loan Products. After the Selected radio button is chosen, click on Add, this will open the list of products defined and maintained under Card → Settings → Card Loan Product.
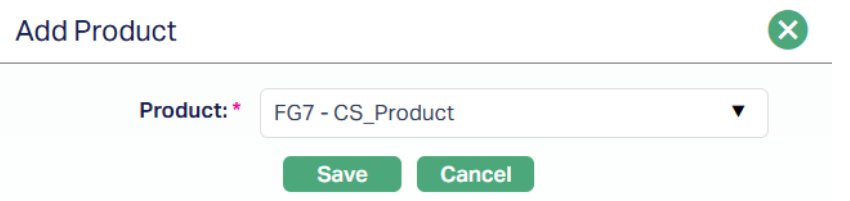
5. Once selected, the product will appear under the Description field.
You can add one or more products and delete them accordingly.
Notes:
- When a product is deleted/removed from the Availability records in the Card/Loan sub-tab, the removed Card/Loan product can no longer avail the particular insurance plan.
- You may switch between All and Selected anytime. If switching from Selected to All, Aura will prompt for confirmation before deleting all selected entries.
Custom Field
This option provides you the flexibility to define fields apart from those that are already available in the standard version of Aura. Thus, it enables you to customize additional data storage and use as required to suit your specific business needs.
To Maintain Custom Field,
1. Access Insurance Plan page. Click the Custom Field tab.

2. The field appears only when it is created in Admin > System codes → Custom fields → Custom fields and linked to specific Insurance Plan option in Admin → System codes → Custom fields → Field mappings. Based on the rule set in the rule builder at Admin → System codes → Custom fields → Field mappings, certain custom maintenance will be mandatory.
3. Click Edit. The Edit Custom Field page appears. In the following illustration, the custom fields, Age limit and Number of Children have been mapped to the Insurance Plan as shown in the screen shot below.

4. Enter the new values for Age limit and Number of Children.
5. Click Save. Insurance Plan screen appears displaying the details of the new custom field that you added.

Functions: Edit