Entities
An Entity is an organisation which uses Aura. It denotes a legal entity that has its own existence and with which it is possible to conduct business. A Bank is an example of an Entity.
An Entity is created during the process of Aura installation. On installation the Entity details will be displayed at Admin → Entities → Maintain. Bank users can only view / edit the Entity details
Following are the tabs under Entity:
Profile
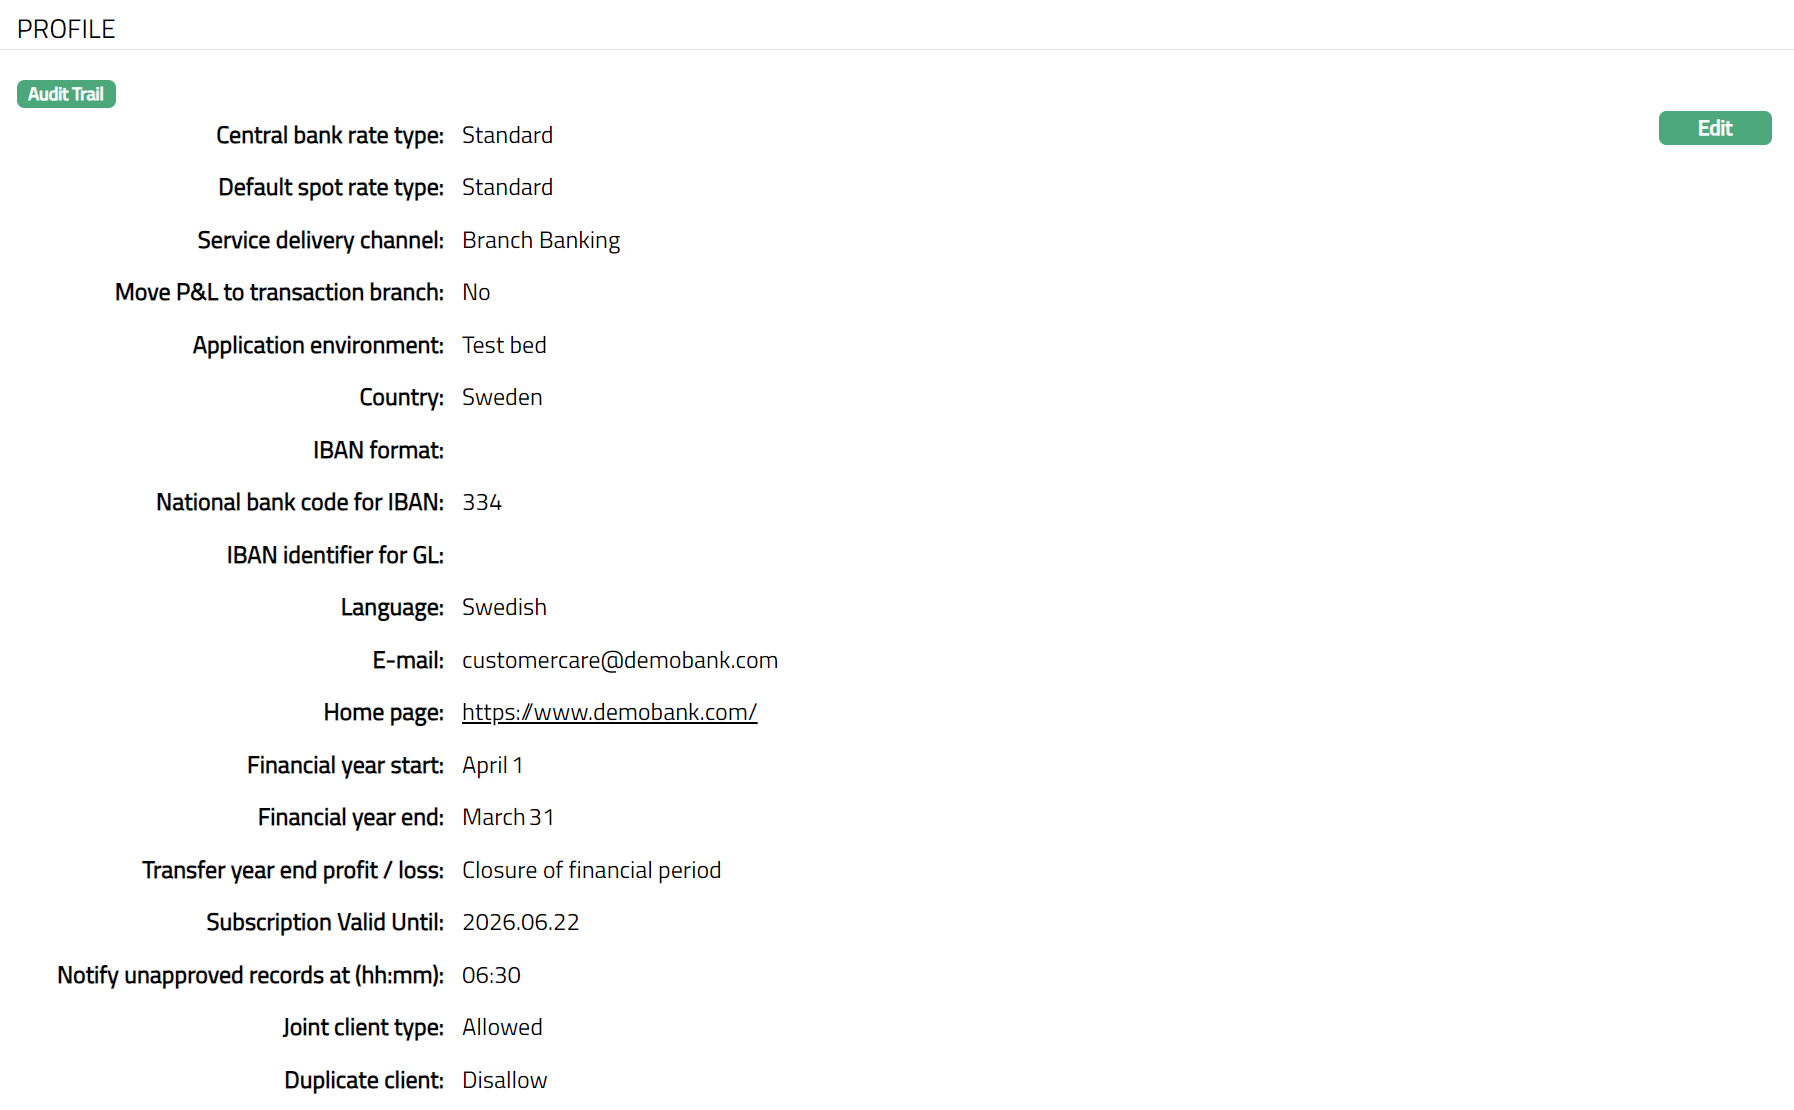
The Profile tab, which is the default screen in the Entity screen, shows the basic details of the Entity.
To view / edit basic Profile details.
1. From Admin menu, click Entities and then Maintain. Entity Search Page appears with the list of Entity records already created.
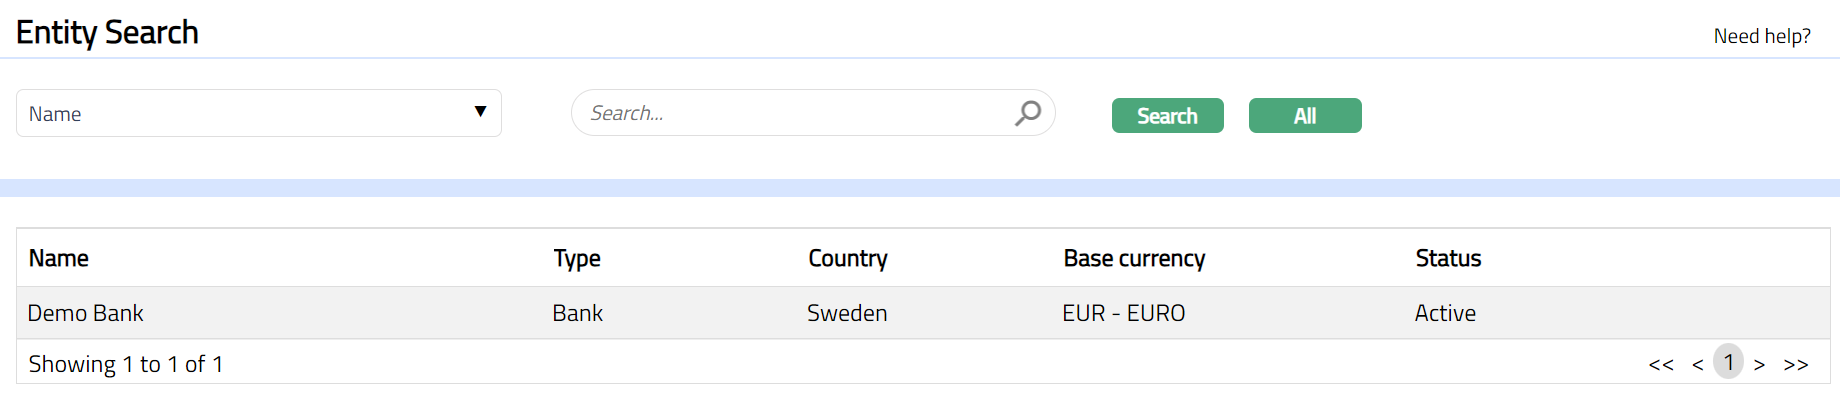
2. Click any one of Entity records. Profile tab of that Entity will display by default.

To edit Profile,
1. Click Edit. Edit Entity page appears.
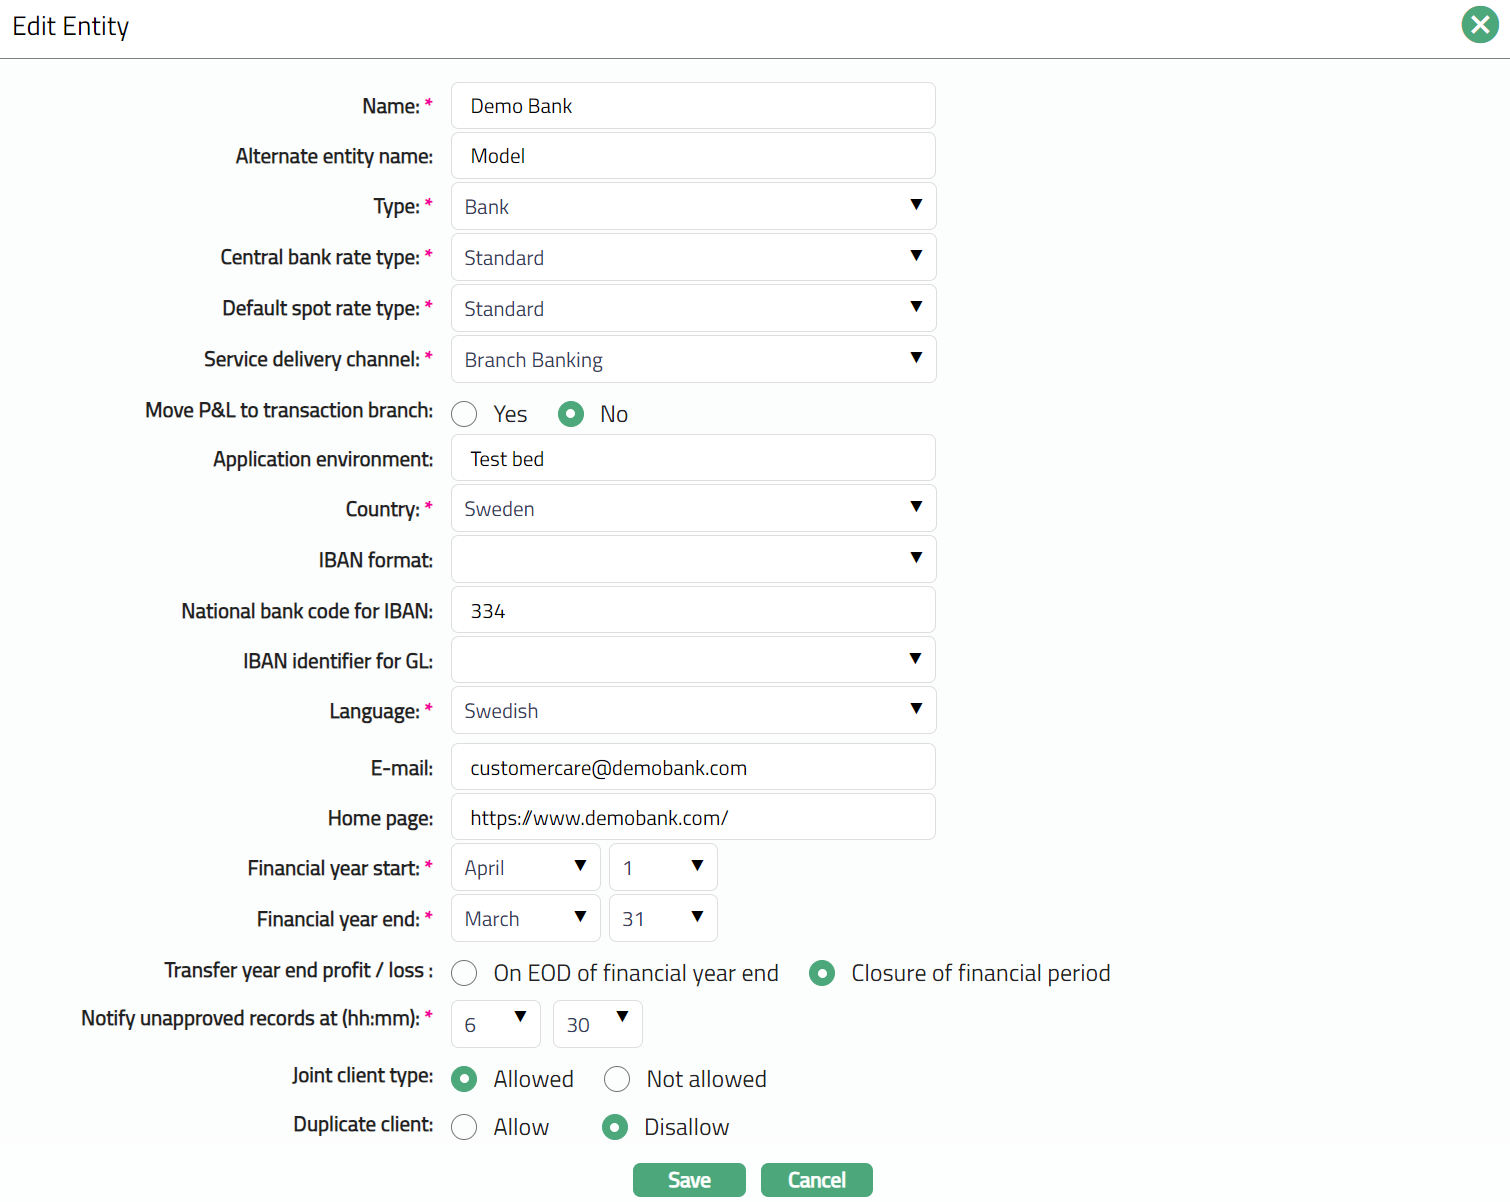
Note: All fields are editable.
The available fields are:
1. Name: This field denotes the name of the Entity
2. Alternate entity name: This field denotes the alternate name given to the Entity and can be used as a part of a Client Account Mask.
3. Type: This field denotes the type of the Entity. The available options are:
Bank: A financial institution that serves as a financial intermediary and channels funds between surplus and deficit agents. A bank's responsibilities include conducting current accounts for its customers, making payments drawn on its customers, and collecting payments for its customers.
Company: A form of business organisation, comprising of an association or collection of individual real persons and/or other companies, who each provide some form of capital. This group has a common purpose or focus and, usually, an aim of gaining profits.
Foundation: Also called a charitable foundation, it is a legal categorization of non-profit organisations that typically either donate funds and support to other organisations or provide the source of funding for its own charitable purposes.
Fund: An entity that creates capital (funds) through 'fundraising' for purposes such as Collective investment scheme, mutual fund, hedge fund, etc.
Non-profit organisation: Also called a Not-for-profit organisation, it is one that does not issue stock shares or distribute its surplus funds to owners or shareholders, but instead uses the funds to help achieve its goals. Examples of Non-profit organisations include charities, trade unions, trade associations and public arts organisations.
Trust: A corporation, especially a commercial bank, organised to perform the fiduciary of trusts and agencies. It is normally owned by an independent partnership, a bank, or a law firm, each of which specializes in being a trustee of various kinds of trusts and in managing estates.
3. Central bank rate type: This field denotes the default rate type that is to be used to get the exchange rate for currency conversions initiated internally by Aura. Select the required rate type from the list of active Currency rate types maintained at Admin → System Codes → Currencies → Currency rate type.
4. Default spot rate type: This rate type will be used to default the spot rate based on which the Forward rates will be calculated. Select the required rate type from the list of active Currency rate types maintained at Admin → System Codes → Currencies → Currency Rate Type
5. Service delivery channel: This field denotes the default Service Delivery Channel that will be used for transactions initiated by the Backoffice. You can select the required Service Delivery Channel from the list of active Service delivery channels maintained at Admin → System Codes → Categories → Service delivery channel.
6. Move P&L to transaction branch: This field denotes if the transaction profit and loss due to exchange rate is moved to the transaction branch or not. If this is set as Yes, then all transaction profit and loss due to exchange rate is moved to the transaction branch by default; else it remains in the debit branch.
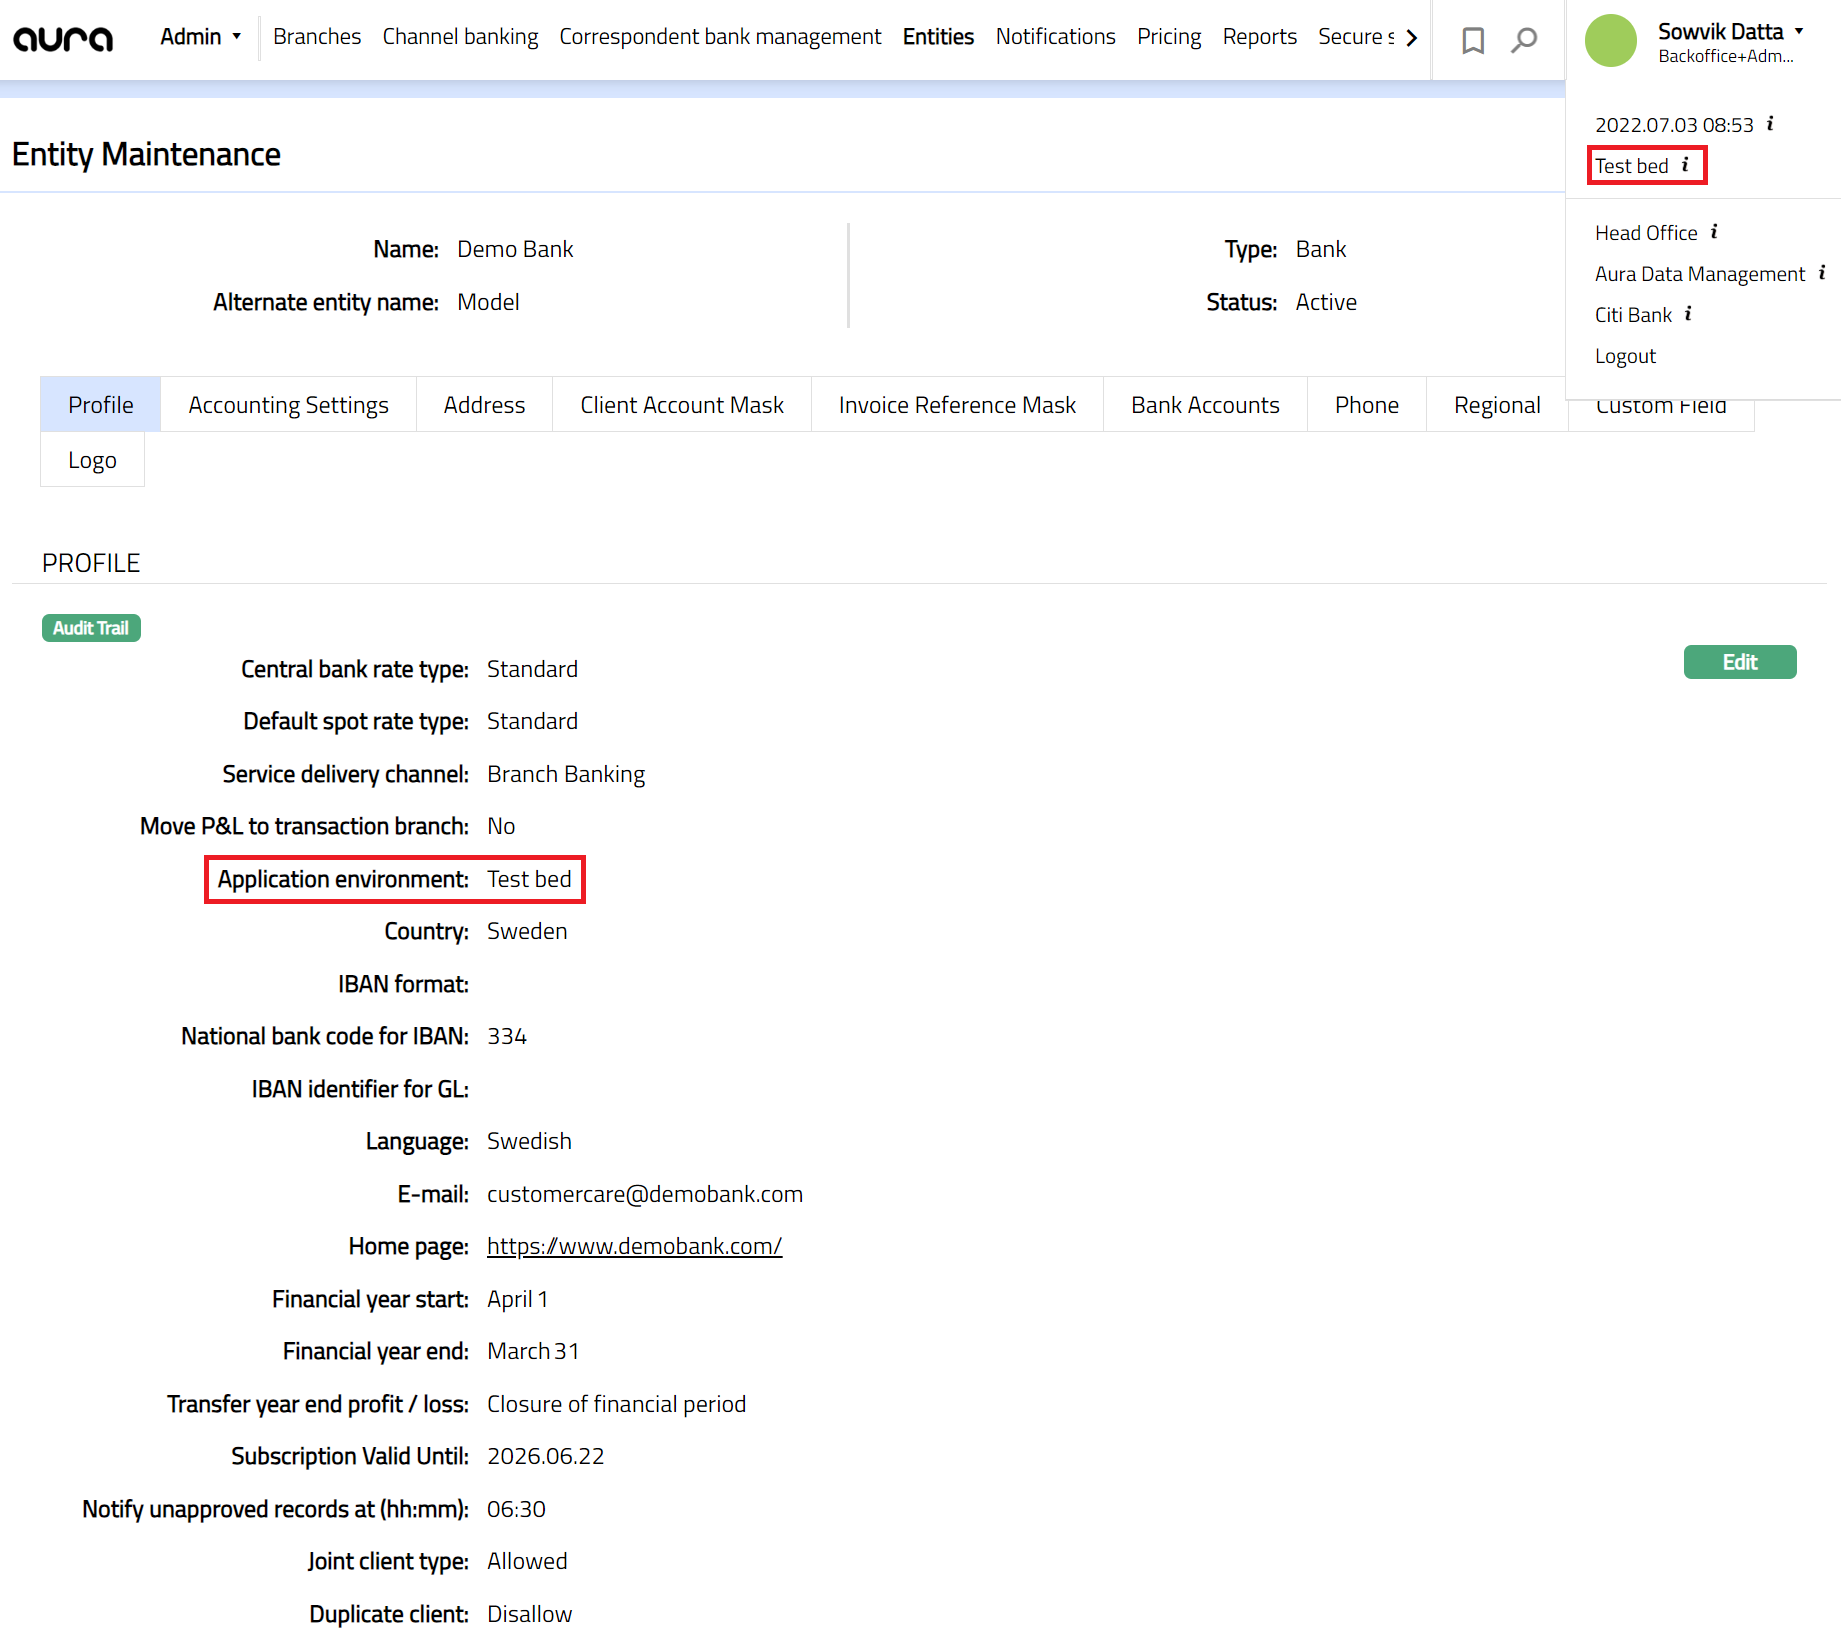
7. Application Environment: This field denotes the name of the application environment. The alternate application name given for the Entity will be displayed on the Menu bar of the Aura application as shown in the figure below.
8. Country: This field denotes the country that has [jurisdiction](javascript:TextPopup(this)) (legal responsibility) over the Entity and will generally be the country in which the Entity is registered. Select the required country from the list of active Countries maintained at Admin → Generic Definitions → Countries.
9. IBAN format: This field denotes the IBAN format selected for the Entity -- as provided in the IBAN Registry at the Society for Worldwide Interbank Financial Telecommunication (SWIFT) website. The values for this field are pre-shipped. For example, for Sweden, the IBAN format would be SEKK BBBC CCCC CCCC CCCC CCCK. The International Bank Account Number (IBAN) is an international standard under ISO 13616-1:2007 for identifying bank accounts across national borders so as to minimize the risk of propagating transcription errors. In the IBAN format for Sweden:
SE stands for the ISO Country Code
kk after the two characters (SE) stands for the check digits calculated from the rest of the IBAN characters.
B stands for the bank and branch code.
C represents the Account number
K (the last character) represents the National check digit.
10. National bank code for IBAN: This field denotes the National bank code for IBAN. For the above example, enter 334 (should be 3 characters to match the number of Bs in the IBAN format). The validations for this field will depend on the IBAN format specified above.
11. IBAN identifier for GL: This field denotes the default branch code for GL, to be used for IBAN generation for GL.
12. Language: Denotes the language set for the Entity. Select the required language from the list of active Languages maintained at Admin → Generic Definitions → Languages.
13. Email: This refers to the email address of the Entity.
14. Home page: This refers to the URL of the Entity's website.
15. Financial year start: This field denotes the month and date on which the financial year of the Entity starts.
16. Financial year end: This field denotes the month and date on which the financial year of the Entity ends.
17. Transfer year end profit/loss: This field denotes when to transfer the year end profit/loss. The available options are On EOD of financial year end OR on Closure of financial period.
18. Subscription valid until: This field denotes the date till which the subscription to Aura services will be valid; and is only shown in the View screen.
19. Notify unapproved records at (hh:mm): This field denotes the time at which the Aura application will send a notification to the Queue indicating that there are unapproved records in the system for a Branch.
20. Joint Client type: This field denotes whether or not the branches under the entity are allowed to create joint clients. Based on this field, at the Product level, the joint checkbox will be enabled or disabled.
21. Duplicate client: This field denotes whether or not the branches under the entity are allowed to create duplicate clients using the same Person / Organisation record. Based on this field, in CRM → Client → Maintain → Add, the creation of the Client using the same Person / Organisation record will be allowed / disallowed..
22. Click Save. Profile page appears with the edited details.
Functions: Edit
Note:
The Financial Year setup determines when the Year-End Profit and Loss Transfer (PNLTRF) is triggered.
For more details on how Aura processes this transfer, see: Year-End Profit and Loss Transfer (PNLTRF)
Accounting Settings
Accounting Settings tab allows you to maintain the General Ledger (GL) Parameters of the Entity. The currency of the entity is set during installation. It will be available only for view and is not editable.
1. From Admin menu, click Entities and then Maintain. The Entity Search Page appears with the list of Entity records already created. Select the Entity and the Entity page appears.
2. Click Accounting Settings tab. It will display the base currency of the entity by default along with those GL parameters maintained during creation of an Entity (Installation).

To edit Accounting Settings details,
1. Click Edit. Edit Accounting Settings page appears.

Note: Base currency is not editable.
2. Click External transfer GL hyperlink. GL Account Search page appears. All ledgers belonging to ledger type Asset, Liability or Neutral are shown.
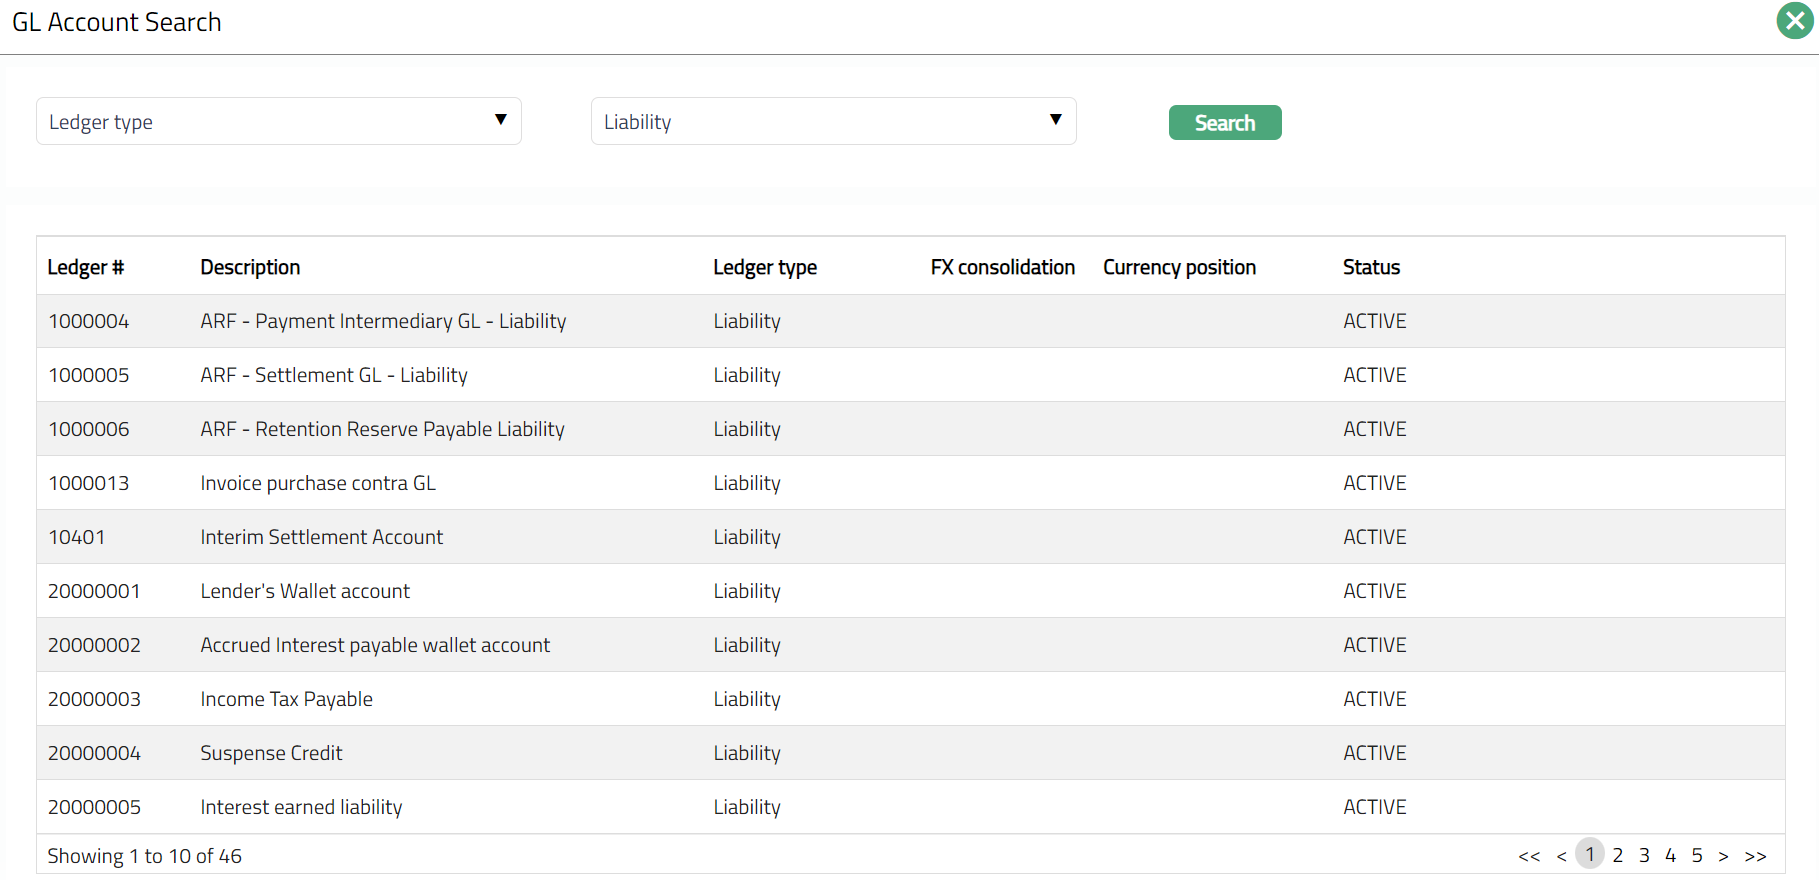
3. Select appropriate GL and click Save. The updated -- Accounting Settings page appears with the added details.

Functions: Edit
Address
The Address tab allows you to maintain the address details of the Entity.
1. Click Address tab. Initially no address will be maintained.

2. Click New. New Address page appears.
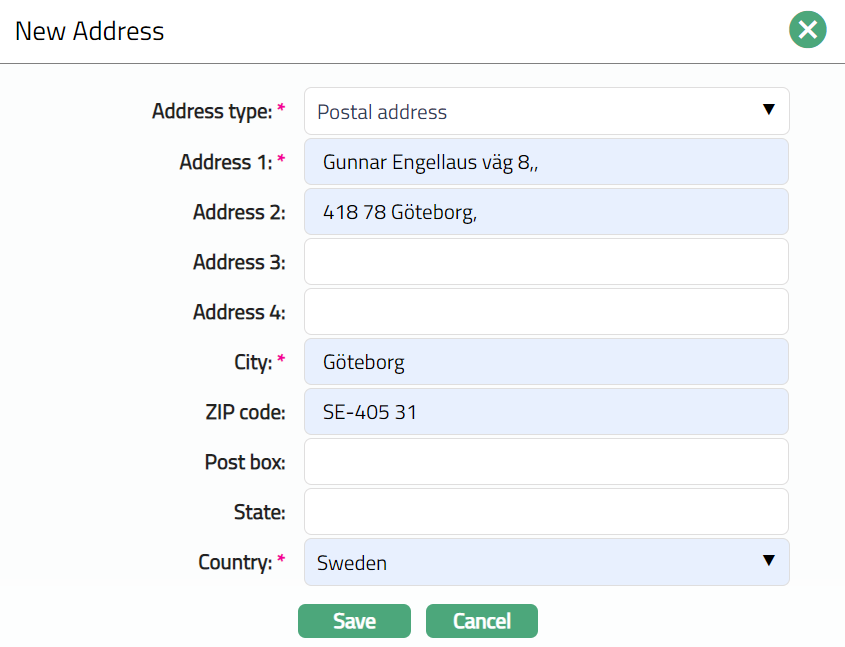
3. Select Address type from the list of Address types maintained at Admin → System Codes → Address Details → Address types.
4. Enter address details in Address 1, Address 2, Address 3 and Address 4 i.e., any additional locator such as name of Apartment / Building, a prominent landmark, etc, which will help locate the Entity's address more easily.
5. Enter City or the town of the Entity's address as designated by the post office.
6. Enter Zip code or postal code in full, if used in the Entity's address.
7. Enter Post box details of the address, if applicable.
8. Enter State in which the address exists, if applicable.
9. Select Country from the list of countries maintained at Admin → Generic Definitions → Countries.
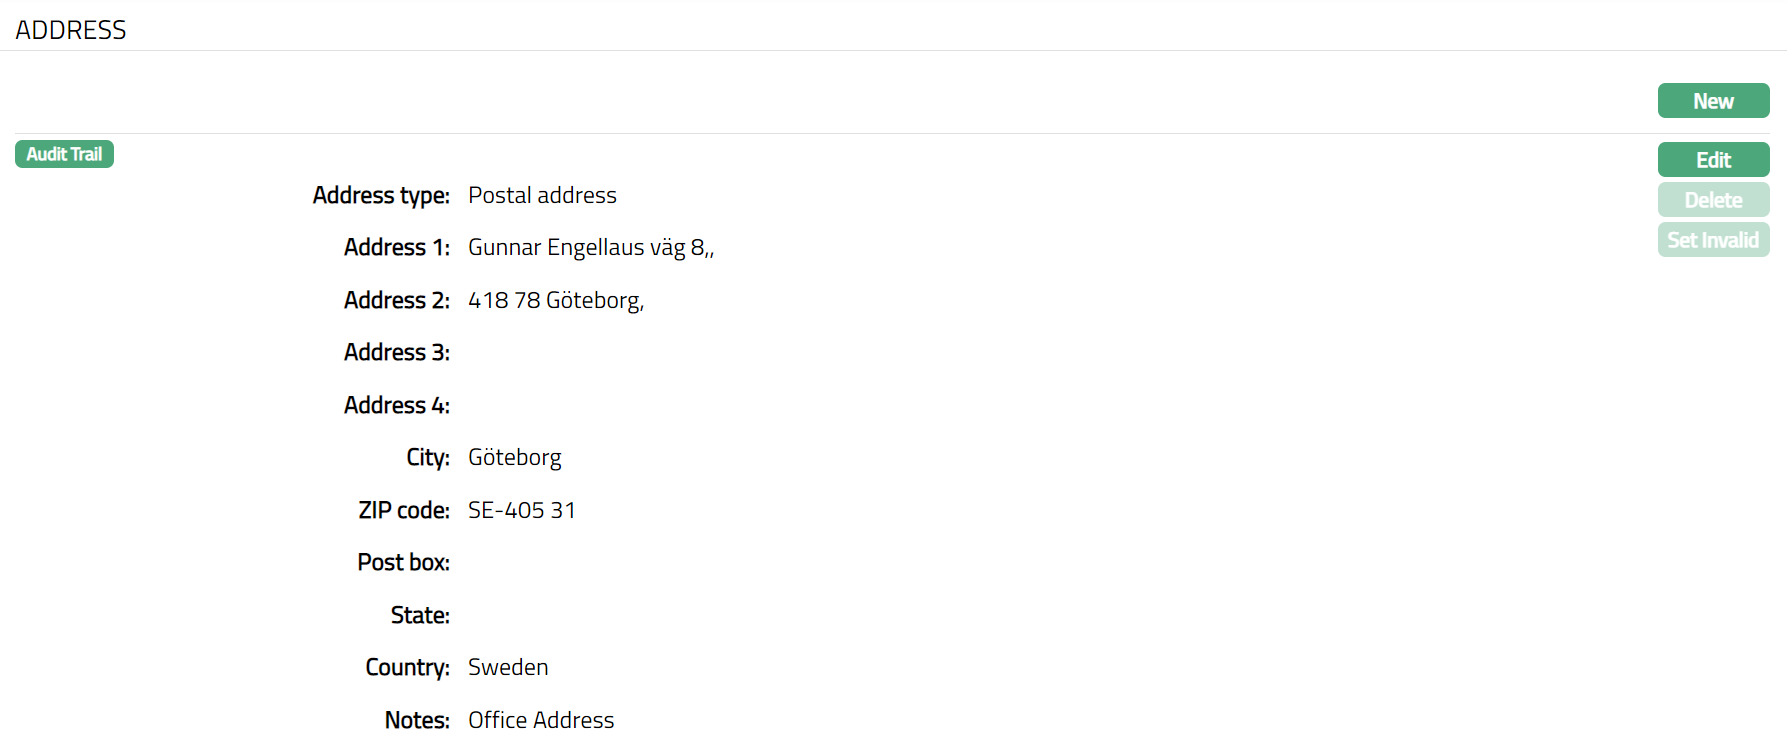
10. Click Save. Address page appears with the added details.
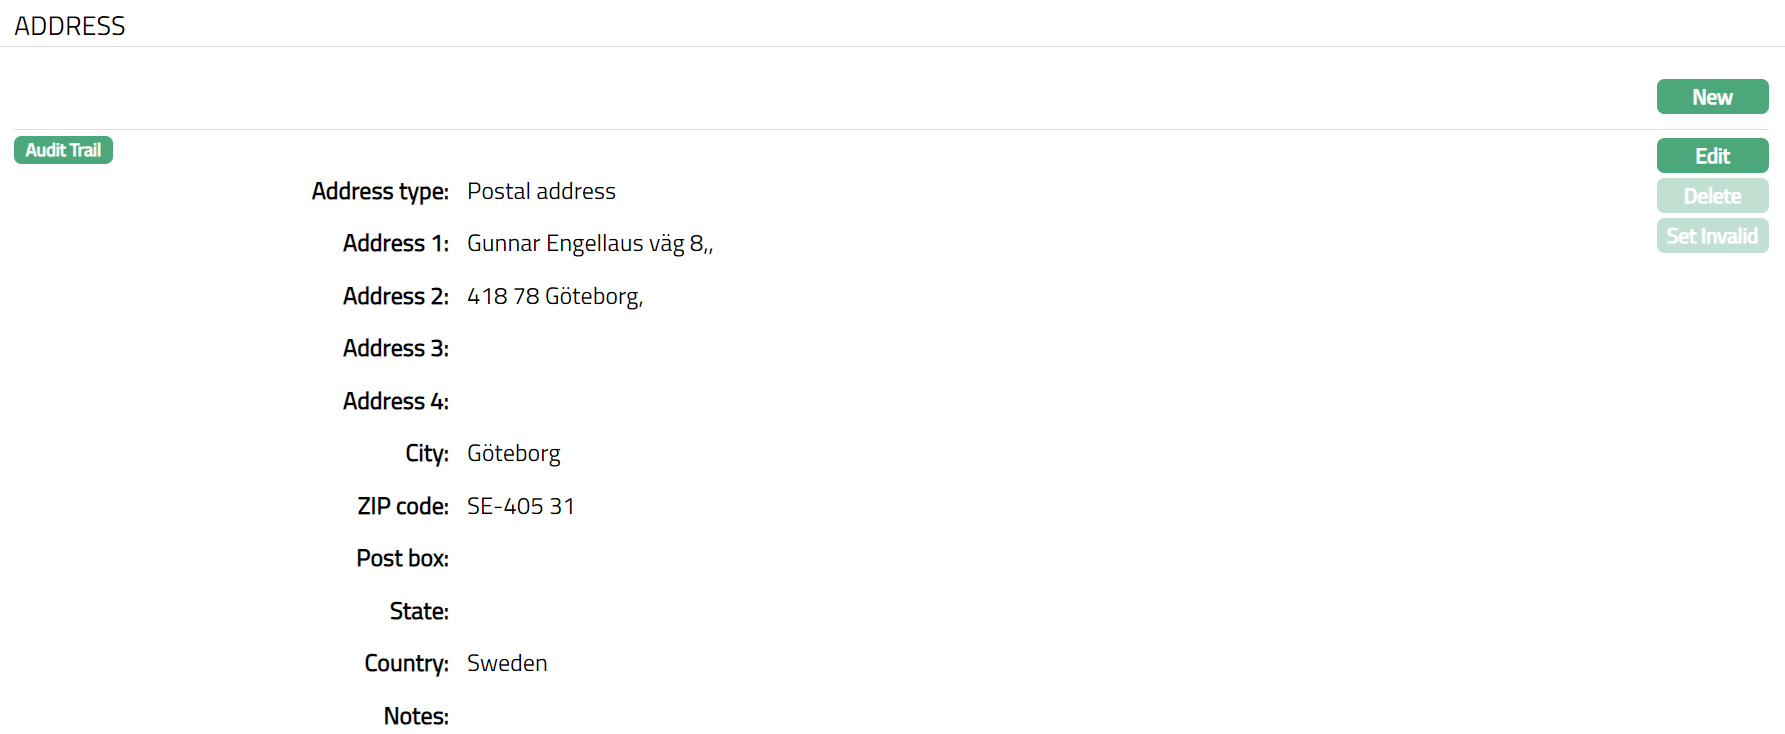
Functions: New, Edit, Delete, Set Invalid, Set Valid, Set Default
Set Invalid: This option is used to set the selected address as invalid.
Set Valid: This option is used to set an invalid address as valid.
Set Default: When you create multiple address records, you can set one of them as the default address using this button. When there is only one address, the same is taken as the default address.
Delete: This option is used to delete the address. Aura will ask for confirmation, on confirmation of which the address will be deleted.
Once saved, there will be an additional field -- Notes, with which you can add any additional information that you wish regarding the Address record (using Edit and Save function).
To Edit Address,
1. Click Edit. Edit Address screen appears.
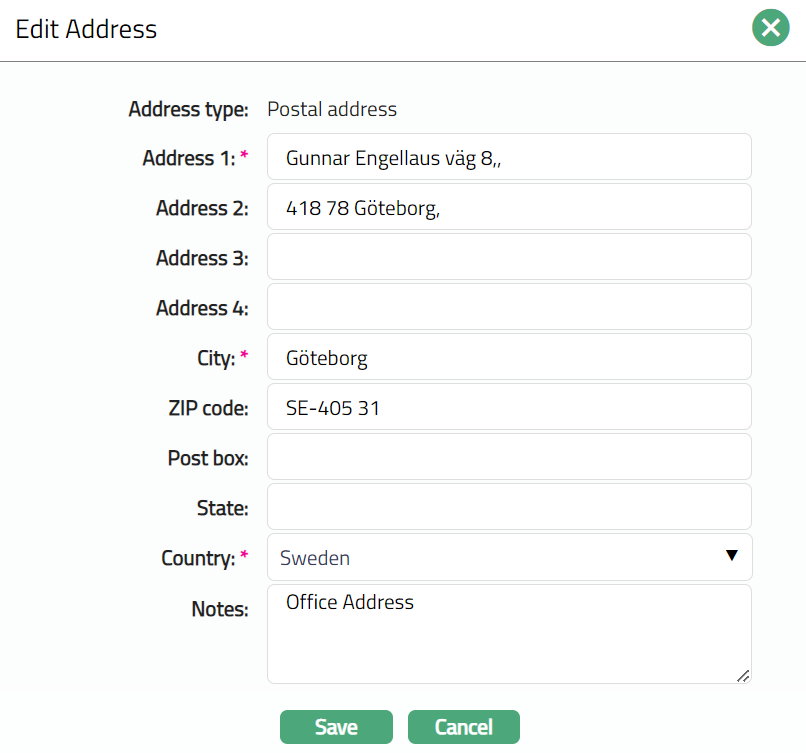
Note: Except Address type, all other fields are editable.
2. Click Save. Address page appears with the edited details.
Functions: New, Edit, Delete, Set Invalid, Set Valid, Set Default
Note: You can add multiple address as required by clicking on New button.
Client Account Mask
Client Account Mask tab allows you to select a format for the Account Numbers created in Aura.
1. To Access Client Account Mask tab, click Admin and then Entity. Entity screen is displayed.
2. Click Client Account Mask tab. Default mask settings will be displayed.
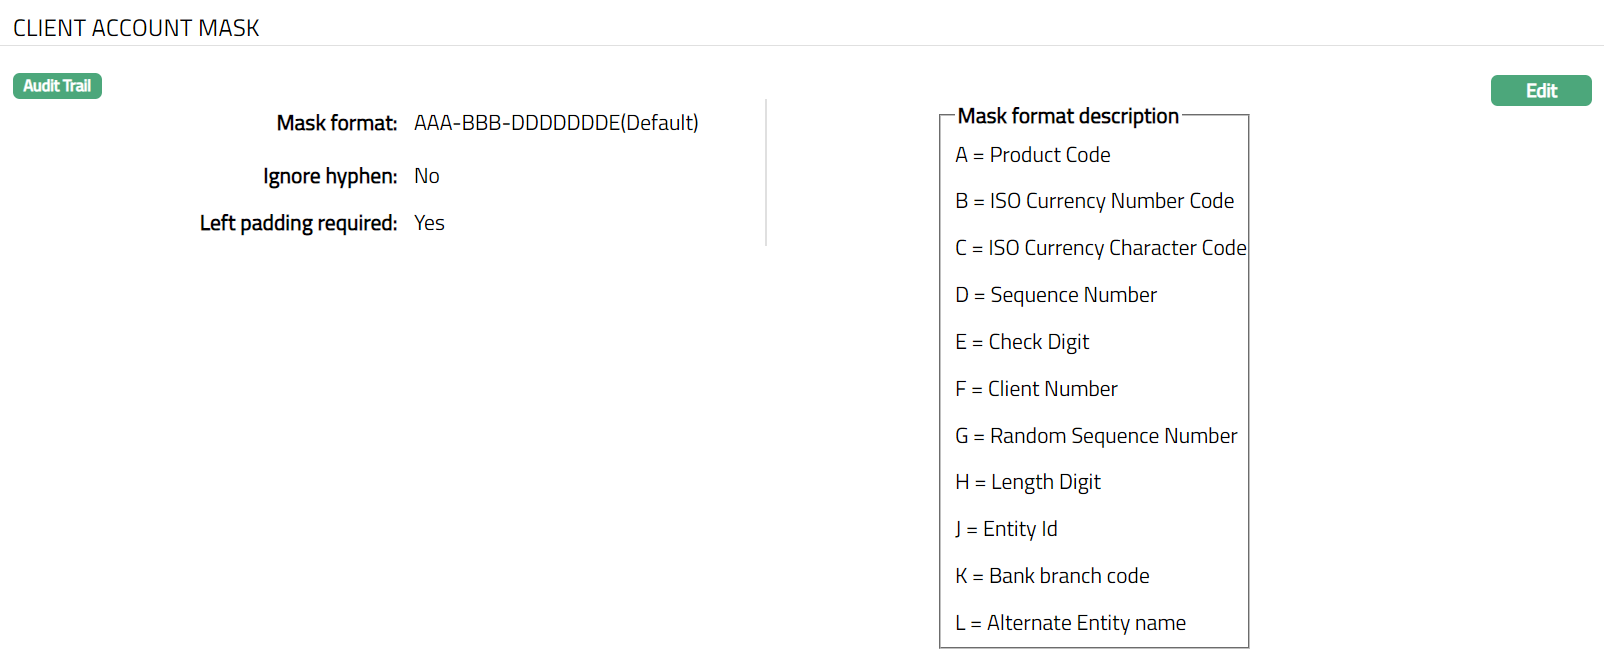
3. By default, Aura sets a default Mask format for an Entity i.e., AAA-BBB-DDDDDDDE(Default). This field is editable in the Edit Client Account Mask page. The values in the drop-down list for this field are pre-shipped.
4. Ignore hyphen enables you to set if the Account numbers created as per the Client Account Mask chosen should actually have the hyphen or not. If this is Yes, then the hyphens in the mask format will not be included in the account number as per the Account mask specified. For example, if "AAA-BBB-DDDDDDDE" is the account mask selected and ignore hyphen is Yes, then the account number will be generated as "CAP75200000159". If it is No then the hyphens in the account mask will be included in the account number and it will be generated as CAP-752-00000159.
5. Left padding required enables you to set whether or not the Account number created as per the Client Account Mask chosen should be a prefixed with zeroes when the number of characters in the Client Account Mask component actually is less than what is required. For example, if the Client Account Mask is "AAA-BBB-DDDDDDDE" where AAA stands for product code of 3 characters. If the product code of the product attached to an account is of 2 characters, for example CA, then the account number will be generated as 0CA-752-00000159. If it is No, then the zero will not be prefixed and e account number will be generated as CA-752-00000159
To Edit the Client Account Mask,
1. Click Edit. Edit Client Account Mask page appears.
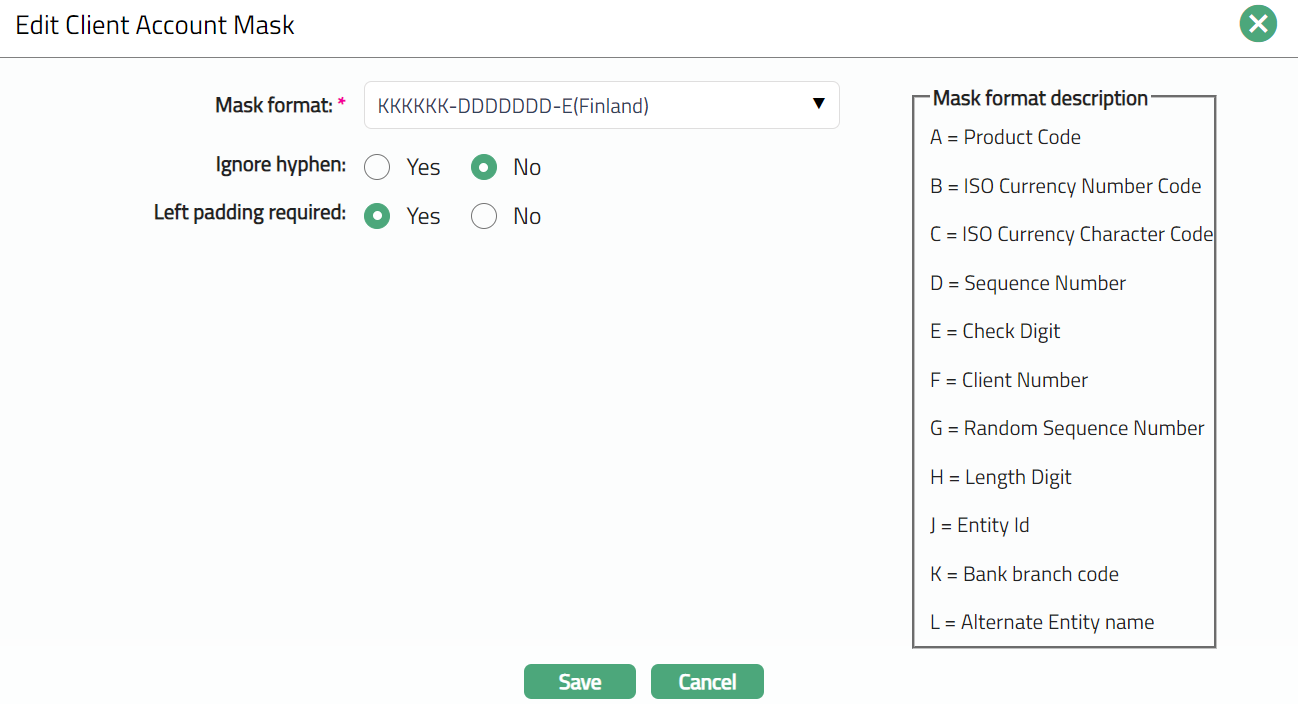
Note: All fields are editable.
The formats for Client Account Numbers available in Aura along with their descriptions are given below:
| Sl. No | Mask Format | Mask Description |
|---|---|---|
| 1. | AA A-BBB-DDDDDDDE (Default) | A = Product code B = ISO Currency Number Code C = ISO Currency Character Code D = Sequence Number E = Check Digit F = Client Number G = Random Sequence Number J = Entity Id H = Length Digit K = Bank Branch Code L = Alternate Entity name |
| 2. | AAA-BBB-FFFFFFFF (-D) | |
| 3. | BBB-AAA-FFFFFFFF (D) | |
| 4. | CCC-AAA-FFFFFFFF-D | |
| 5. | AAA-FFFFFFFF-D | |
| 6. | AAA-FFFFFFFF-GGGG-HE | |
| 7. | FFFFFFFF-GGGG-HE | |
| 8. | AAA-FFFFFFFF-GGHE | |
| 9. | AAA-BBB-GGGGGGHE | |
| 10. | KK KKKK-DDDDDDD-E (Finland) | |
| 11. | JJJJJJJ-DDDDDDD-E | |
| 12. | LLLL LLLL-AAAAAAAA-DDDDDDD-E | |
| 13. | KKKK-DDDDDD-E | |
| 14. | LLL-DDDDDDDDDD-E | |
| 15. | KKK-ADDDDDD-E | |
| 16. | LLLLLL-DDDDDD-E(Finland) |
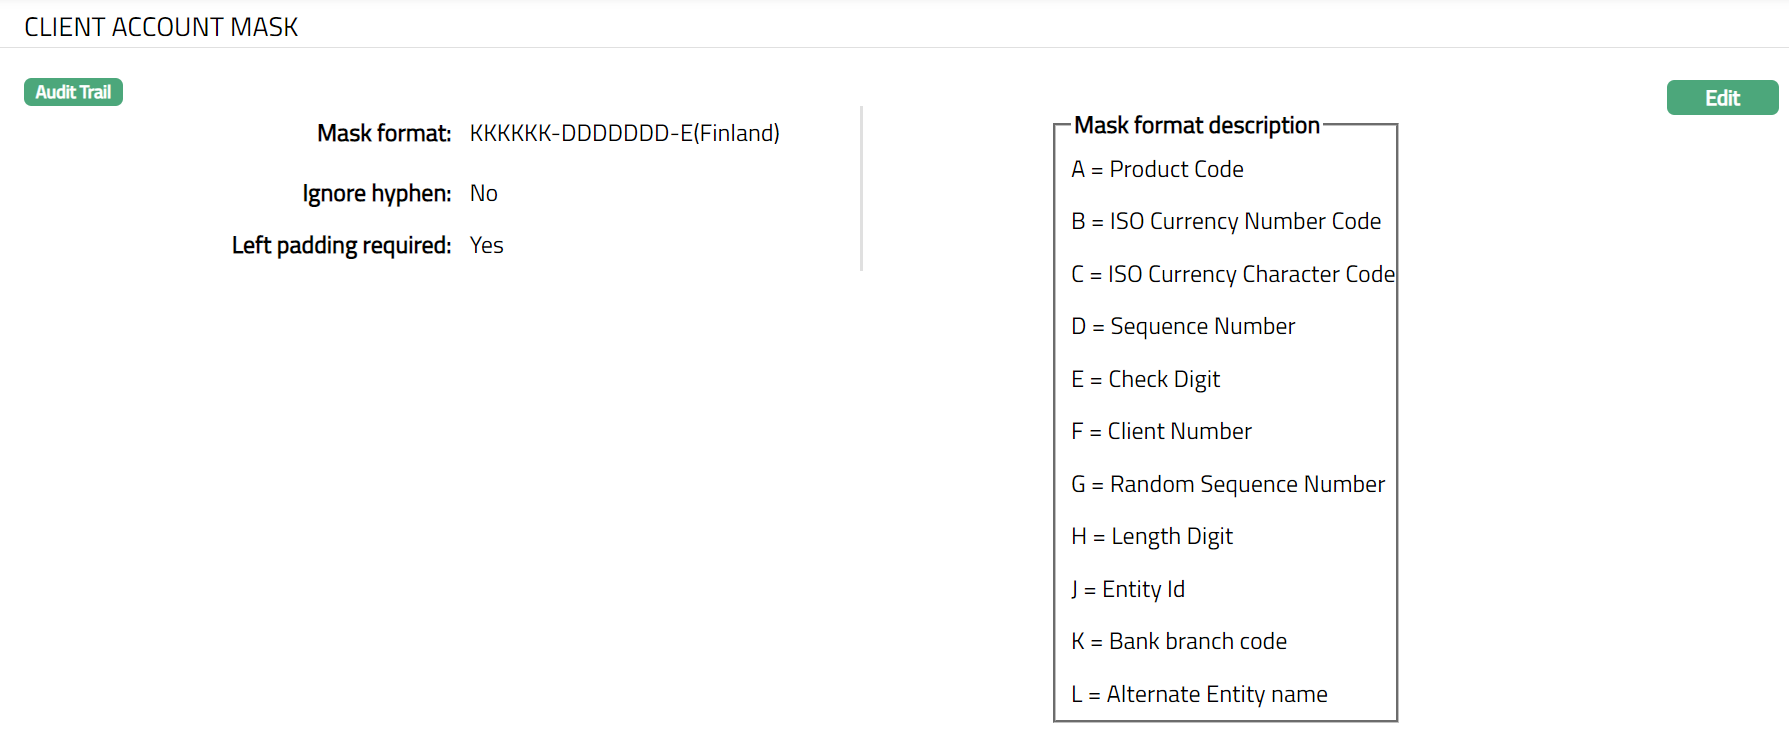
2. Click Save. Client Account Mask page appears with the edited details. On changing the account mask, the changed account mask will be applied to the new account created from the point of change and the account number will be generated as per the new account mask
Note:
If you select an account mask which is not compatible with the configured IBAN format then an error message will be displayed stating the same.
If the actual values for the components have length greater than what is required for the Mask, the value will be truncated beyond the required length. Thus, for example, if the Product Code required in the Account mask is 3 characters and the actual product code is 4 characters, the first three characters will only be used when the Account number is generated.

- On creation or addition of an account in Aura, if Pre-assigned option is chosen; there will be no validation on the account number mask. Any account number can be entered but the number must not exist in Aura.
Functions: Edit
Invoice Reference Mask
Invoice Reference Mask tab allows you to select a format for the Invoice Numbers generated by Aura.
1. To access Invoice Reference Mask tab, click Admin and then Entity. Entity screen is displayed.
2. Click Invoice Reference Mask tab. Default mask settings will be displayed.
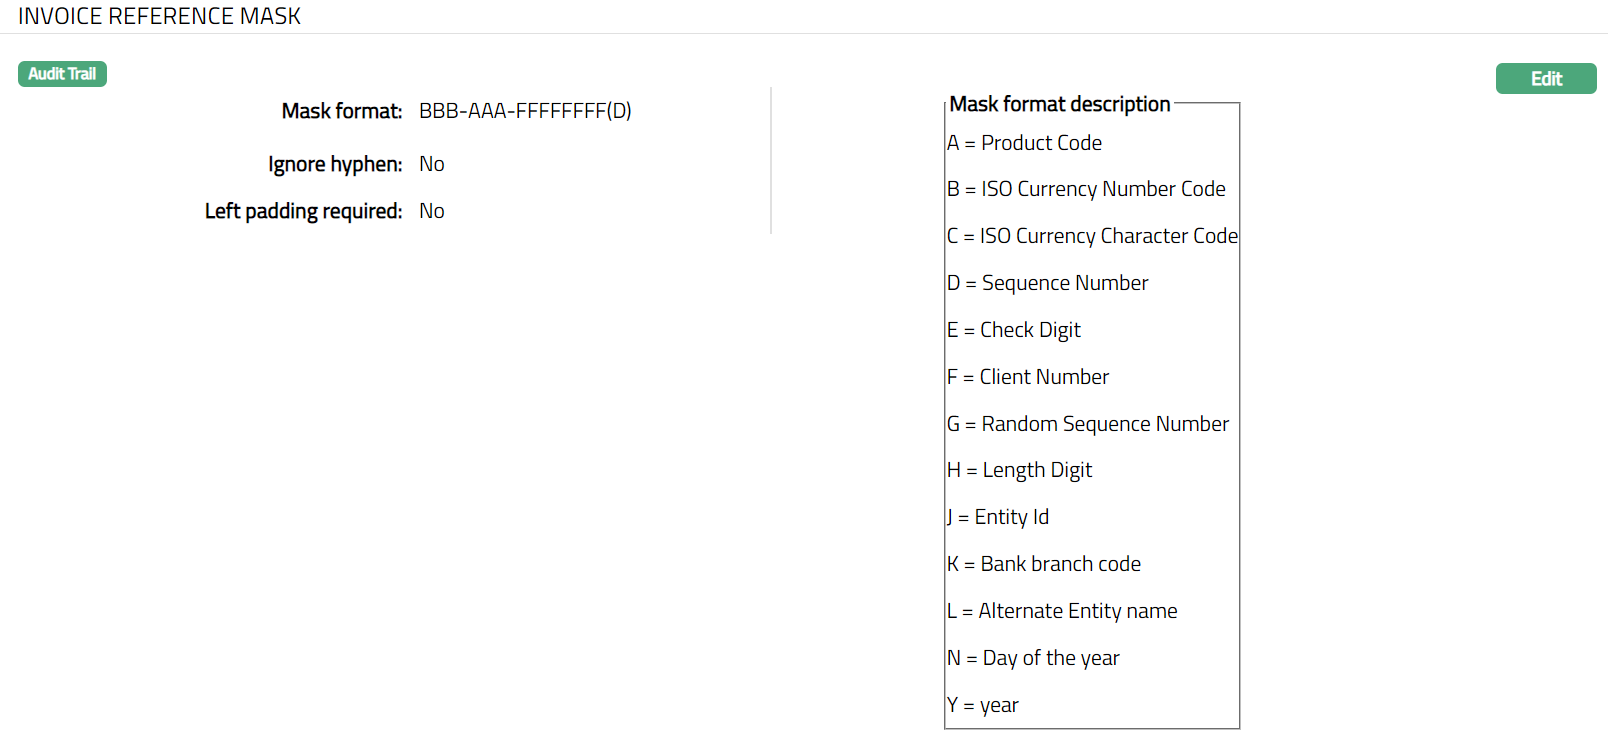
3. By default, Aura sets a default Mask format for an Entity i.e., BBB-AAA-FFFFFFFF(D). This field is editable in the Edit Invoice Reference Mask page. The values in the dropdown list for this field are pre-shipped.
4. Ignore hyphen enables you to set if the Invoice Reference numbers created as per the Invoice Reference Mask chosen should actually have the hyphen or not. If this is Yes, then the hyphens in the mask format will not be included in the Invoice Reference number as per the Invoice Reference mask specified. For example, if "BBB-AAA-FFFFFFFF" is the Invoice Reference mask selected and ignore hyphen is Yes, then the Invoice Reference number will be generated as "CAP75200000159". If it is No then the hyphens in the Invoice Reference mask will be included in the Invoice Reference number and it will be generated as CAP-752-00000159.
5. Left padding required enables you to set whether or not the Invoice Reference number created as per the Invoice Reference Mask chosen should be a prefixed with zeroes when the number of characters in the Invoice Reference Mask component actually is less than what is required. For example, if the Invoice Reference Mask is "BBB-AAA-FFFFFFFF" where AAA stands for product code of 3 characters. If the product code of the product attached to an Invoice Reference is of 2 characters, for example CA, then the Invoice Reference number will be generated as 0CA-752-00000159. If it is No, then the zero will not be prefixed and e account number will be generated as CA-752-00000159
To Edit Invoice Reference Mask,
1. Click Edit. Edit Invoice Reference Mask page appears.
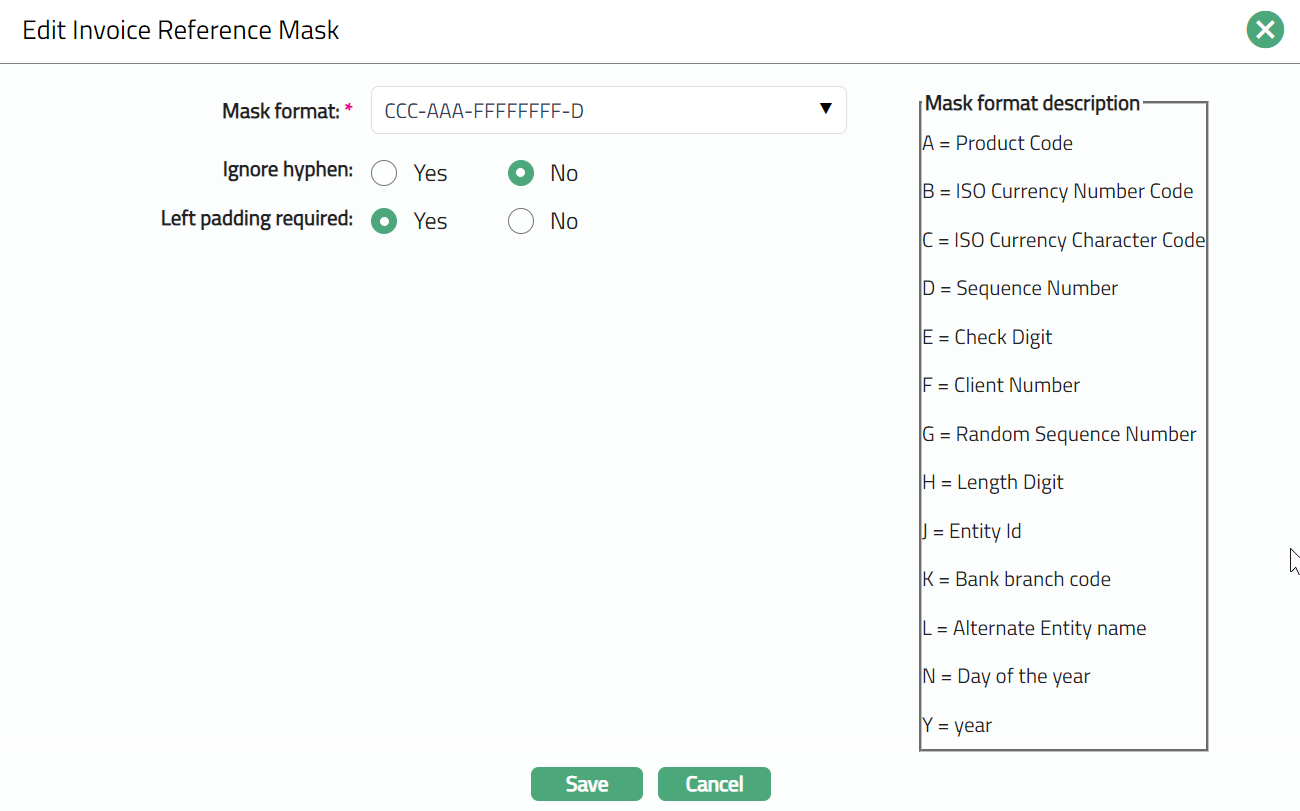
Note: Formats for Invoice Reference Numbers available in Aura along with their descriptions are given below:
| Sl. No | Mask Format | Mask Description |
|---|---|---|
| 1. | AA A-BBB-DDDDDDDE(Default) | A = Product code B = ISO Currency Number Code C = ISO Currency Character Code D = Sequence Number E = Check Digit F = Client Number G = Random Sequence Number J = Entity Id H = Length Digit K = Bank Branch Code L = Alternate Entity name N = Day of the Year Y = Year |
| 2. | AAA-BBB-FFFFFFFF(-D) | |
| 3. | BBB-AAA-FFFFFFFF(D) | |
| 4. | CCC-AAA-FFFFFFFF-D | |
| 5. | AAA-FFFFFFFF-D | |
| 6. | AAA-FFFFFFFF-GGGG-HE | |
| 7. | FFFFFFFF-GGGG-HE | |
| 8. | AAA-FFFFFFFF-GGHE | |
| 9. | AAA-BBB-GGGGGGHE | |
| 10. | KK KKKK-DDDDDDD-E(Finland) | |
| 11. | JJJJJJJ-DDDDDDD-E | |
| 12. | LLLL LLLL-AAAAAAAA-DDDDDDD-E | |
| 13. | KKKK-DDDDDD-E | |
| 14. | LLL- DDDDDDDDDD-E | |
| 15. | KKK-AA-DDDDDD-E | |
| 16. | LLLLLL-DDDDDDD-E(Finland) | |
| 17. | YY-NNN-DDDDDDDD-E |
2. Click Save. Invoice Reference Mask page appears with the edited details. On changing the Invoice Reference mask, the changed Invoice Reference mask will be applied to the new Invoices created from the point of change and the Invoice Reference number will be generated as per the new Invoice Reference mask.

Functions: Edit
Note:
- If the actual values for the components have length greater than what is required for the Mask, the value will be truncated beyond the required length. Thus, for example, if the Product Code required in the Invoice Reference mask is 3 characters and the actual product code is 4 characters, the first three characters will only be used when the Invoice Reference number is generated.
Bank Accounts
Bank Accounts tab allows you to maintain the details of the Entity's bank account(s). You can add any number of bank accounts.
1. To access Bank Accounts tab, click Admin and then Entity. Entity screen is displayed.
2. Click Bank Accounts tab. Initially no beneficiaries will be maintained.

3. Click New. New Beneficiary page opens up. Depending on the Country chosen, the details to be entered will change. The following screenshots show the different details for different countries:
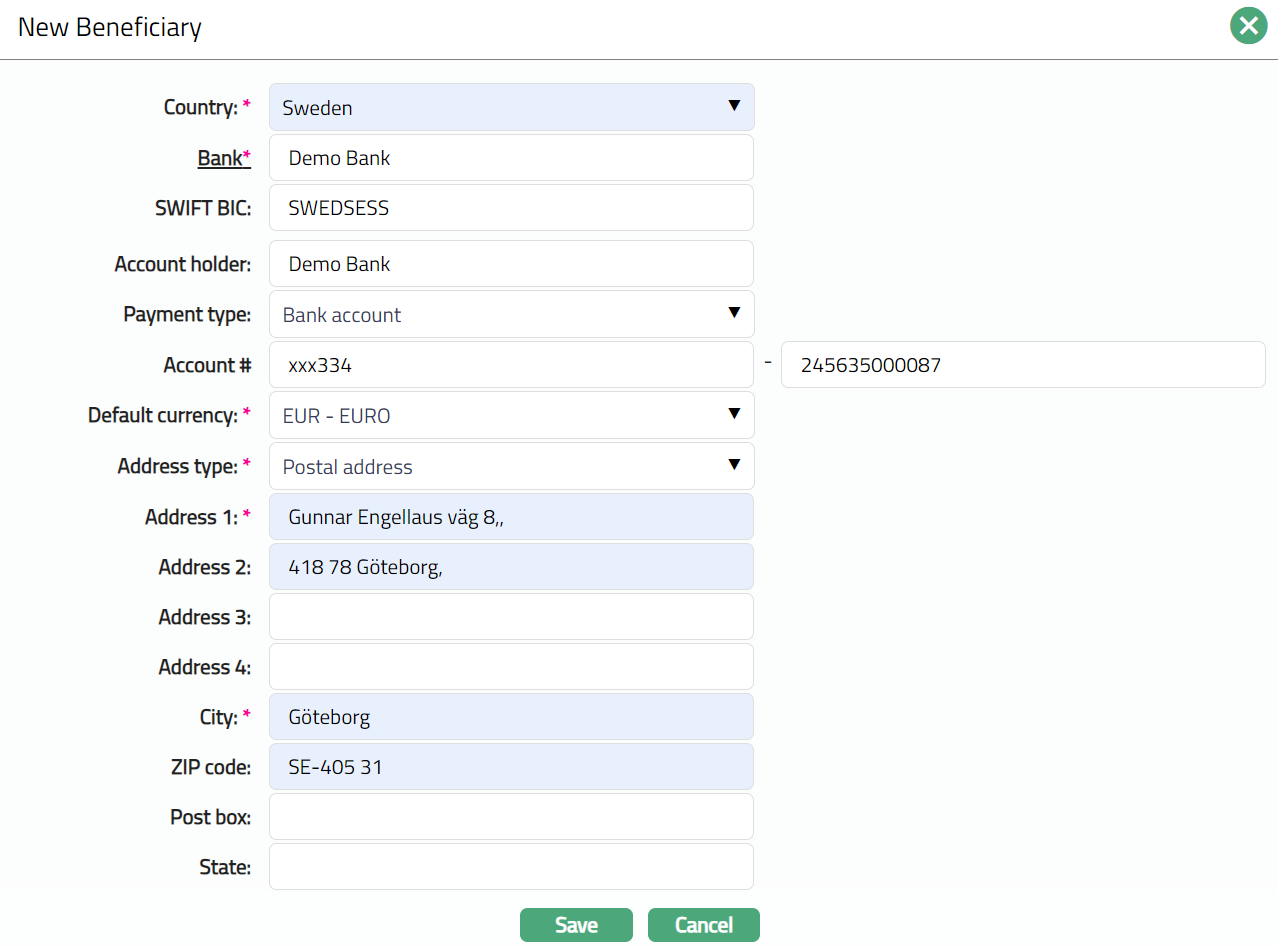
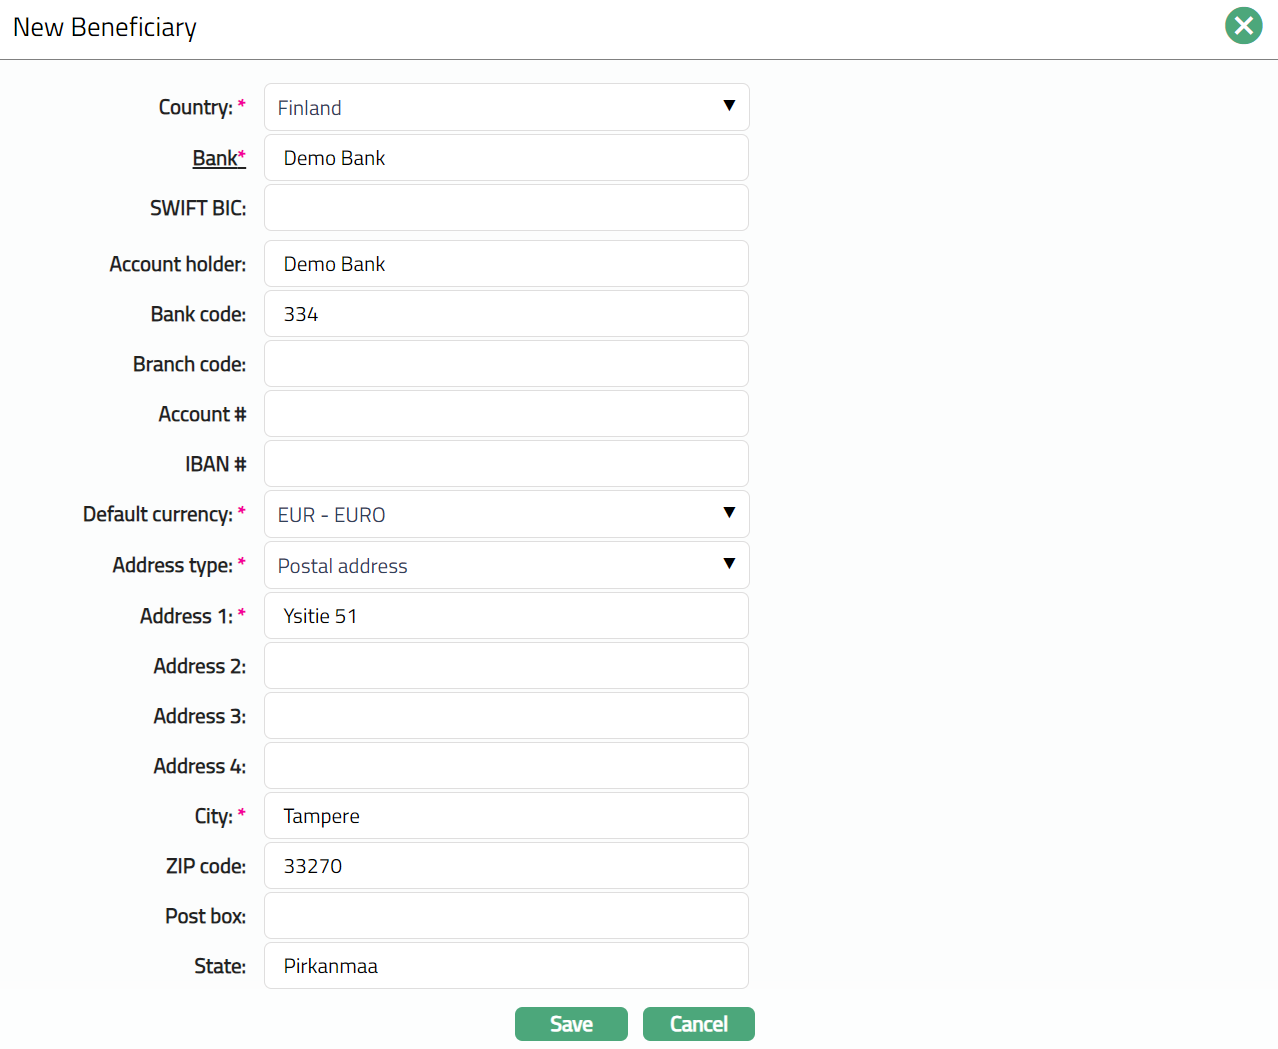
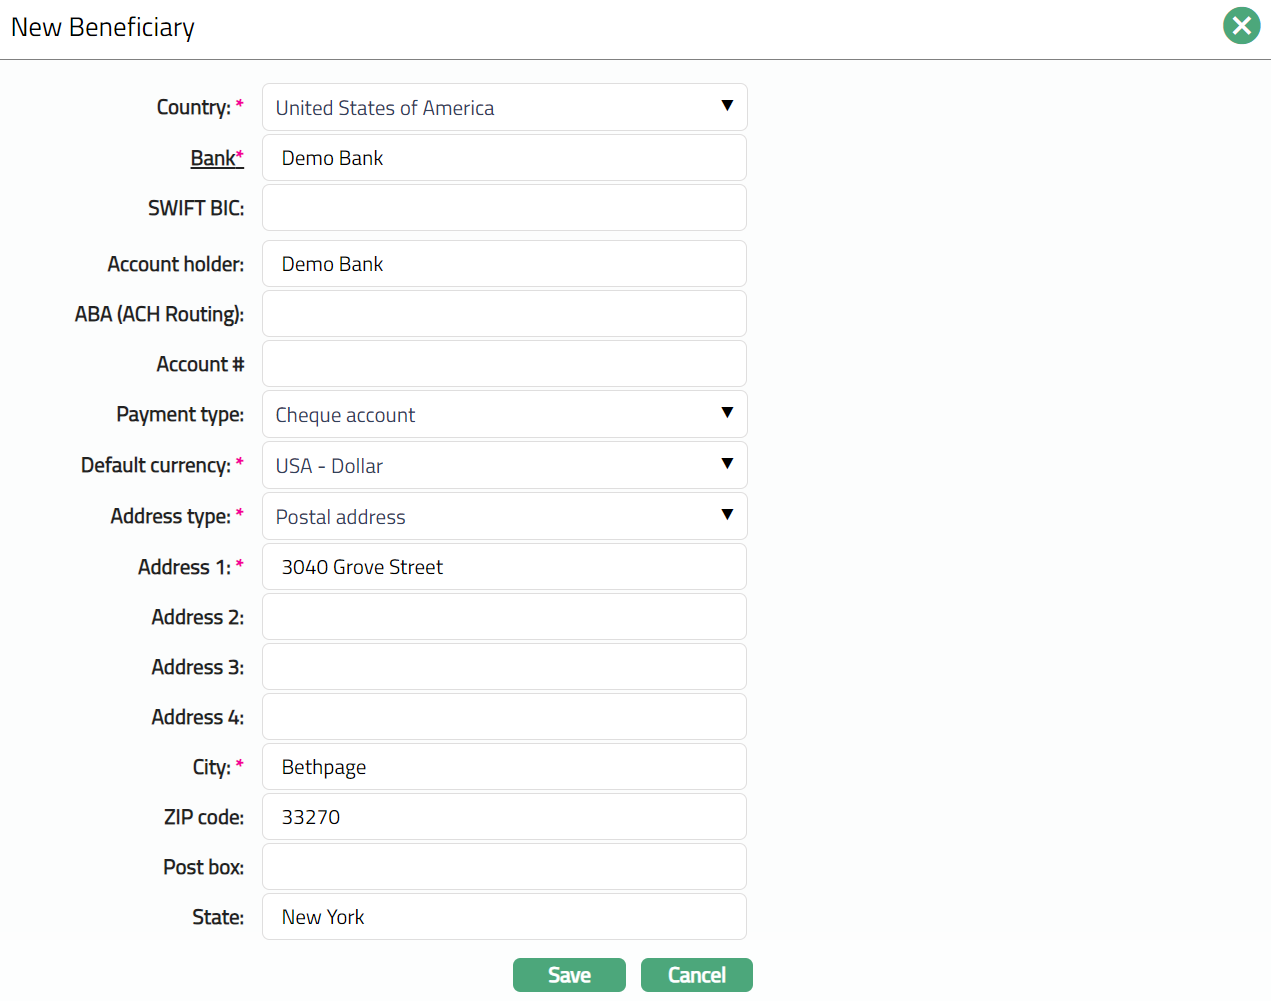
4. Select Country from the drop down. The countries should have been maintained using Admin → System Codes → Generic Definitions → Countries.
5. Click Bank hyperlink and select the name of the bank in which the Entity holds an account, from the available list of banks maintained under Admin → Correspondent Bank Management → Maintain.
6. The next field is called the SWIFT BIC (or SWIFT Bank Identifier Code), which is a unique code that identifies the bank in which the Entity holds an account. This is not editable when an existing Bank is selected -- and will be auto-populated with the SWIFT BIC that was used while maintaining the bank details in Admin → Correspondent Bank Management → Maintain. Enter name of the Account Holder of the Entity's bank account. Generally, the system retains the Entity's name that was specified earlier. However, you can update it.
7. Enter name of the Account Holder of the Entity's bank account. Generally, the system retains the Entity's name that was specified earlier. However, you can update it.
8. Enter Bank code of the beneficiary's bank where the account has been maintained.
9. Enter Branch code of the beneficiary's bank.
10. Enter ABA (ACH Routing) of the beneficiary's bank.
11. Select Payment type for the account held by the Entity, from the available list of dropdown options. The options change with the country. For example, for Sweden, the options available here are, Autogiro, Bankgiro, Bank Account and Plusgiro. For USA, the options available here are Cheque Account and Savings Account.
12. Enter Account for the Entity's account. The format of Account number field changes with the Payment type. For Bank account and Autogiro, there are two text boxes; for the remaining options, there is a single text box.
13. Enter IBAN \ for the account.
14. Select Default currency from the list of active currencies maintained at Admin → System Codes → Currencies → Currencies. By default, the Base currency is selected, but this can be changed.
15. Select Address type from the list of Address types maintained at Admin → Address Details → Address types.
16. Enter address details in Address 1, Address 2, Address 3 and Address 4 fields. i.e., any additional locator such as name of Apartment / Building, a prominent landmark, etc, which will help locate the Entity's address more easily.
17. Enter City or the town of the Entity's address as designated by the post office. For example, enter Stockholm.
18. Enter Zip code or postal code in full, if used in the Entity's address.
19. Enter Post box details of the address.
20. Enter State in which the address exists, if applicable.
21. Click Save. The Bank Accounts page appears with the added details. A sample of the screen is shown below when the country chosen in Sweden.
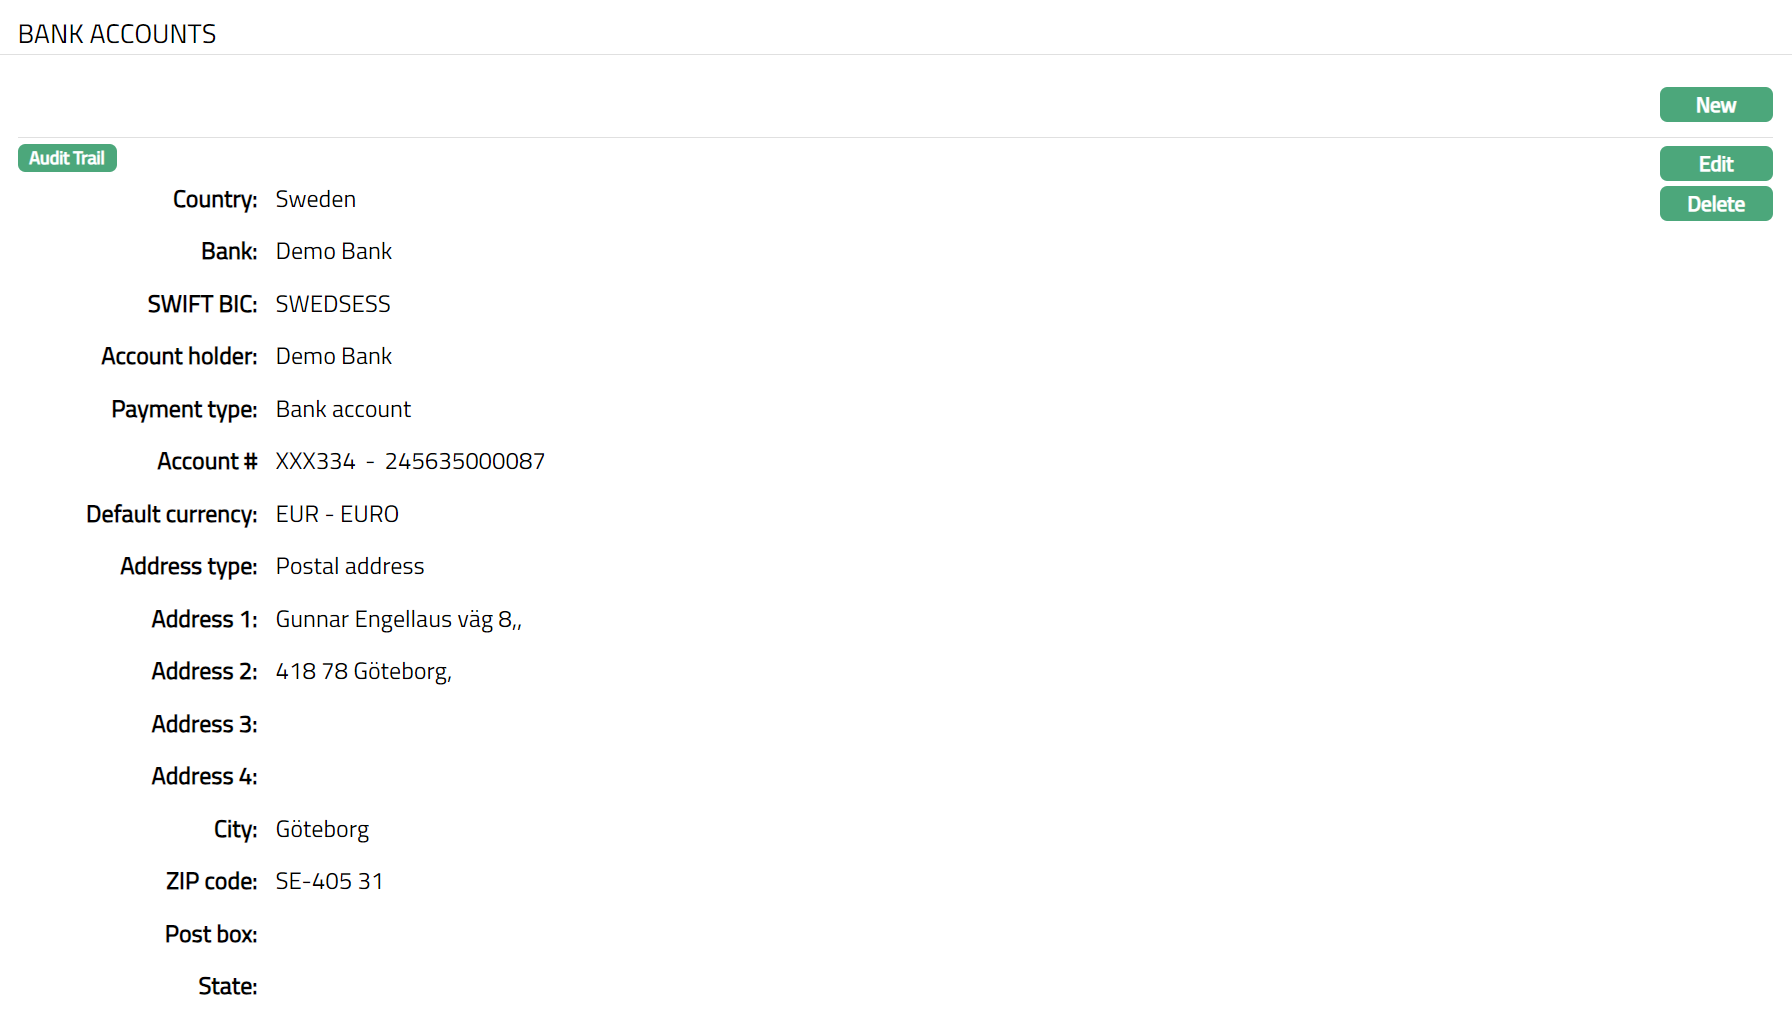
Functions: New, Edit, Delete
To Edit Bank Accounts,
1. Click Edit. Edit Beneficiary page appears.
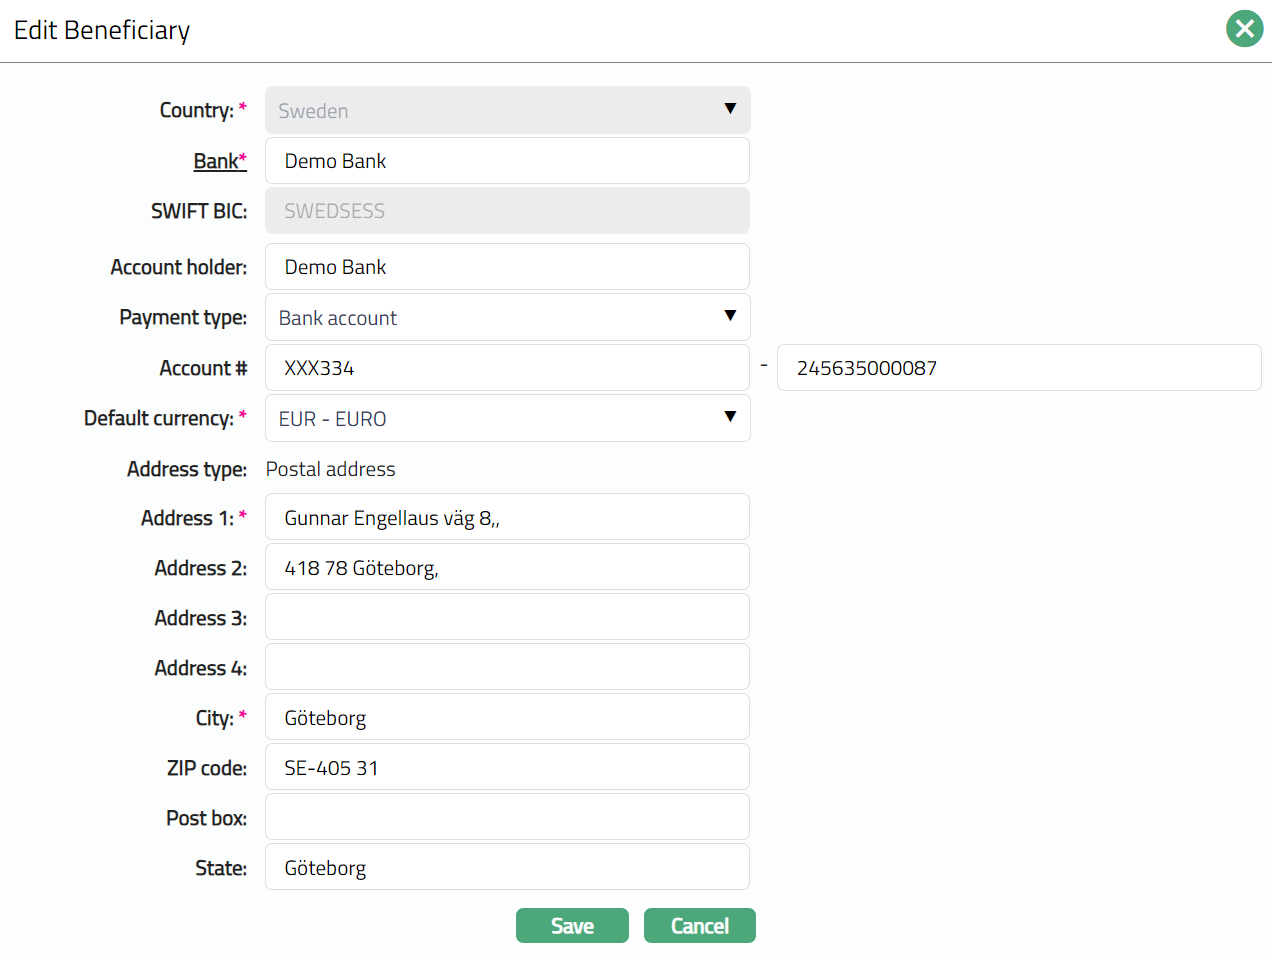
Note: Except Address type field all other fields are editable.
2. Click Save. Bank Account page appears with the edited details.

Functions: New, Edit, Delete
Phone
Phone tab allows you to maintain the phone details of the Entity.
To Add Phone details,
1. Click Admin and then click Entity. Entity screen is displayed. Click Phone tab.

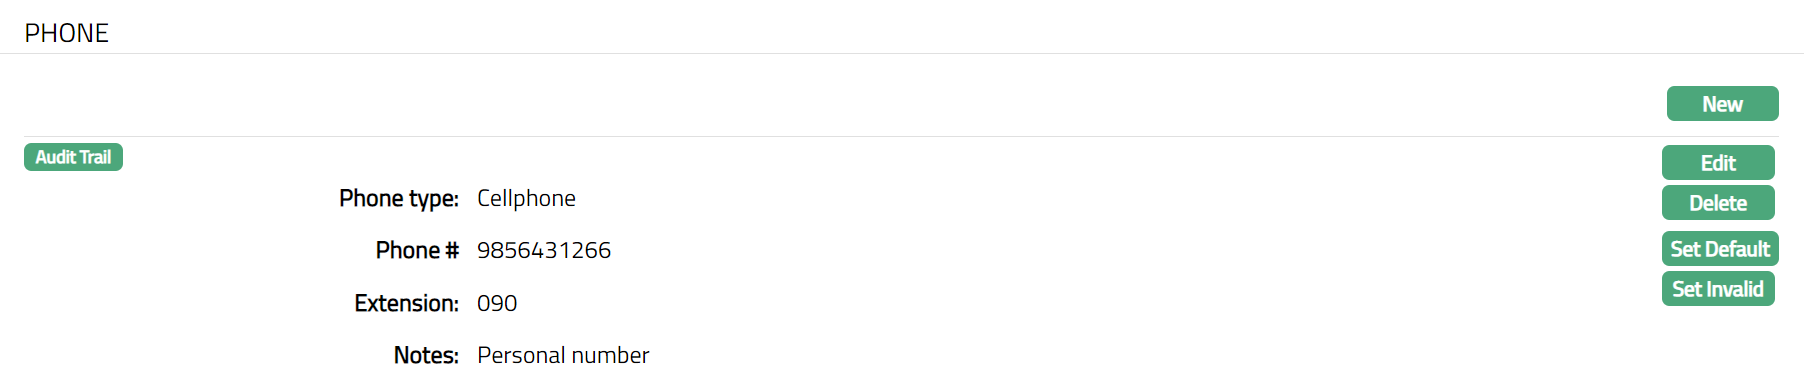
2. Click New. New Phone page appears.

3. Select Phone type from the dropdown list. The Phone type should be maintained at Admin → Address Details → Phone types.
4. Enter Phone i.e., the phone number of the Entity.
5. Enter Extension, if any, for the Phone #.
6. Enter Notes, if there is any additional information that you wish to capture regarding the phone record.
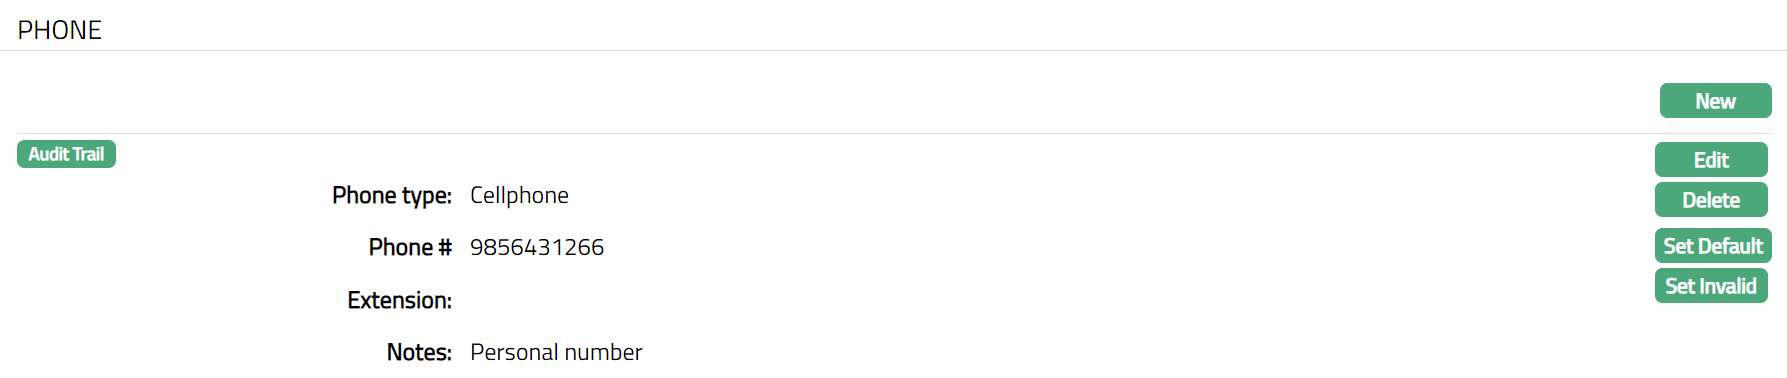
7. Click Save. Phone page appears with the added details.
Functions: New, Edit, Delete, Set Valid, Set Invalid, Set Default
Set Invalid: This option is used to set the selected phone number as invalid.
Set Valid: This option is used to set an invalid phone number as valid.
Set Default: When you create multiple phone records, you can set one of them as the default phone number using this button. When there is only one phone number, the same is taken as the default phone number.
Delete: This option is used to delete the phone number. Aura will ask for confirmation, on confirmation of which the phone number will be deleted.
To Edit Phone,
1. Click Edit. Edit Phone page appears.
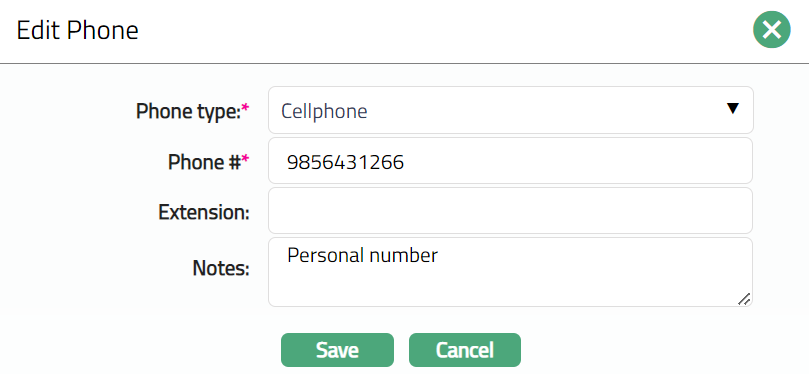
Note: All fields are editable.
2. Click Save. Phone page appears with the edited details.
Functions: New, Edit, Delete, Set Valid, Set Invalid, Set Default
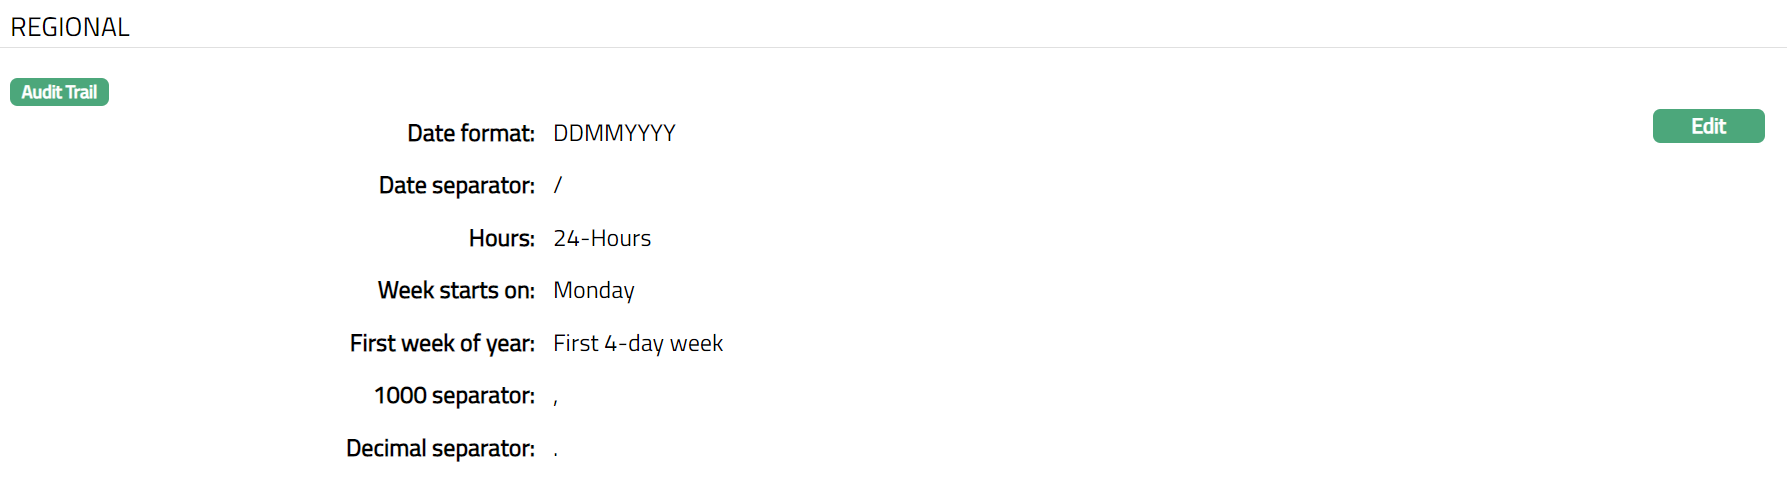
Regional
Regional tab allows you to specify how details like dates, time and numbers are displayed for the Entity.
1. To access Regional tab, click Admin and then click Entity. Entity screen is displayed.
2. Click Regional tab. Default regional settings are displayed.
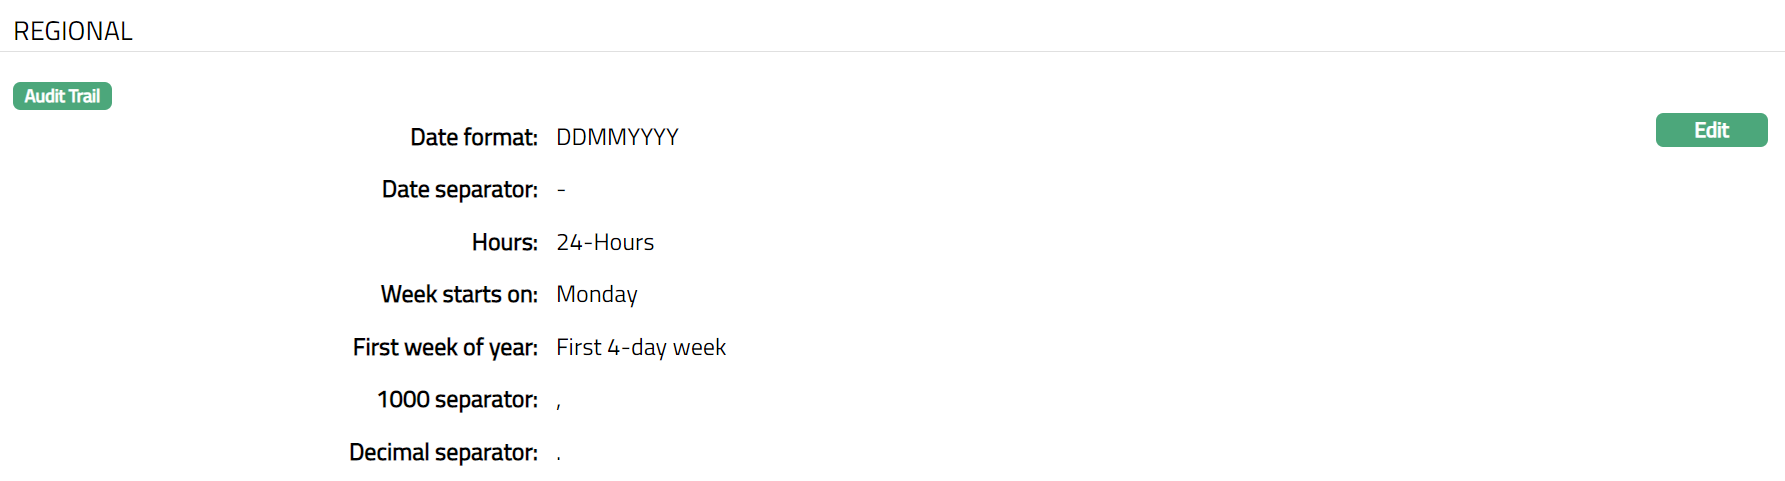
The available fields are:
Date format: This field denotes format in which the date has to appear throughout the application. YYYYMMDD is the default value, which can be changed as needed. The other available options are: DDMMYYYY and MMDDYYYY.
Date separator: This field denotes the character to be placed between the year, month and day parts of a date. The hyphen (-) is the default value, which can be changed as needed. The other available options are forward slash (/), period (.) and space ( ).
Hours: This field denotes if the time should be shown as on a 24-hour clock or as on a 12-hour clock.
Week Starts on: This field denotes the day set as the start day of a working week. The default value is Monday, which can be changed to any other day as needed.
First week of the year: This field specifies how the first week of any financial year should be identified. Following are the options for this field:
First 4-day week - The week which contains the first four working days.
Contains Jan 1 - The first week of the year containing the date 1st January.
First full week - The first full week from the first Monday to Sunday
1000 separator: This field denotes the symbol to be used to subdivide large numbers (Amounts) into sections for ease of reading. The comma (,) is the default value. However, in some European countries, the period (.) is used instead. Available options are comma (,), period (.) and space ().
Decimal separator: This field denotes the format to be used to separate decimal places in a number. Normally, the period (.) is used in this field and has been set as the default value. The other available option is a comma (,).
To Edit Regional settings,
1. Click Edit. Edit Regional page appears.
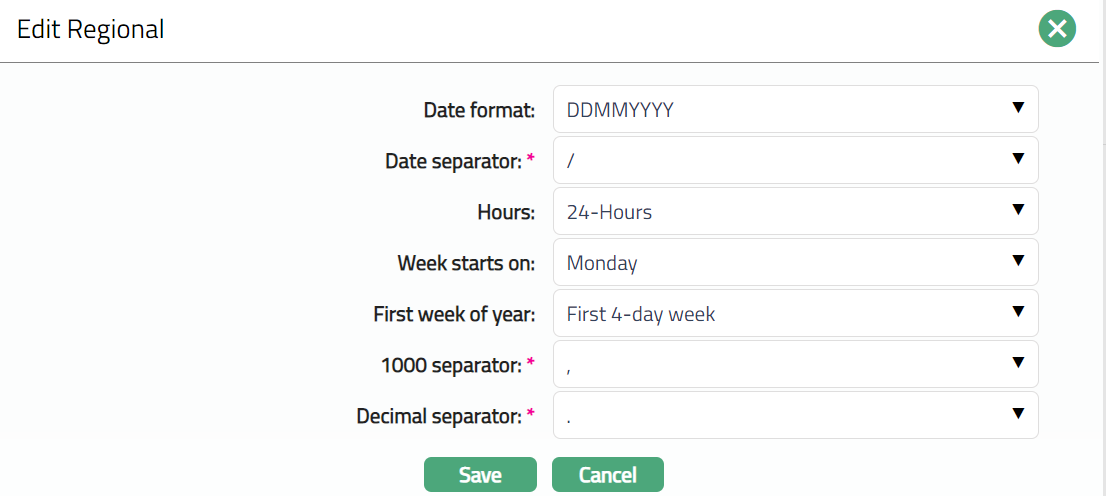
Note: All fields are editable.
2. Click Save. Regional page appears with the edited details.
Functions: Edit
Custom Field
This option provides you the flexibility to define fields apart from those that are already available in the standard version of Aura. Thus, it enables you to customize additional data storage and use as required to suit your specific business needs.
The Custom Field tab allows you to maintain the custom fields mapped to Entities module. Depending on the custom fields created and mapped to Entities module (using System Codes → Custom Fields), the fields will be displayed on this tab.
To edit custom field,
1. Access Entity page. Click Custom Field tab.

2. The field appears only when it is created in Admin → System codes → Custom fields → Custom fields and linked to Entity option in Admin → System codes → Custom fields → Field mappings.
3. Click Edit. Edit Custom Field page appears.

4. Select AML (Anti Money Laundering) option by clicking the hyperlink. The List of Value Search page appears. Select the required option.
5. Click Save. Custom Field page appears with the edited details.

Functions: Edit
Logo
Logo tab will allow you to upload the logo of the Entity.
To upload logo,
1. Access Entity page and click Logo tab. Logo page appears.

2. Click Upload. Upload Logo page will appear.
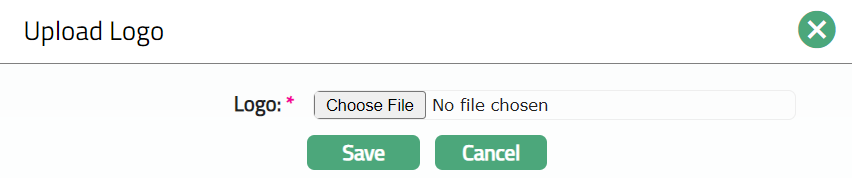
3. Click Choose file button. The system will display File upload window. Select the file to be uploaded.
4. Click Open. The path of the file will be displayed in the Logo field.
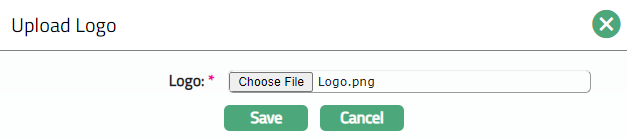
5. Click Save. Logo page will appear with the uploaded details.

Functions: Upload, Delete.
On uploading the logo, the logo will appear on the left top corner of the Header.
