Agreement
Agreement tab allows you to maintain details of agreements with your clients for various purposes. Using this option, you will be able to maintain mandates related to direct debits, customer outputs, etc. Agreements with customers could be related to
Creation and maintenance of an Agreement for each of the above is explained below.
SEPA
To create an agreement for SEPA,
1. Access CRM menu, click Clients and then Agreement. The Agreement Search page appears.

2. Click Add button. Agreement -- Profile (1/3) page appears.
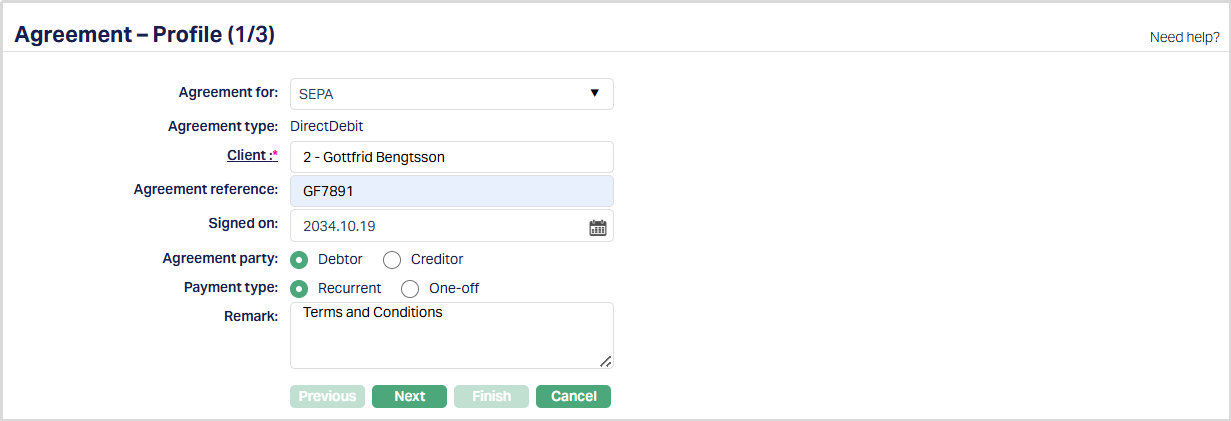
3. Select SEPA from the Agreement for drop-down list.
4. By default, the Agreement type will be DirectDebit.
5. Select Client by clicking on client hyperlink. The Client search page appears where you can search for a client with relevant criteria and select the required client. You can also input the client's name and select the required client from the list displayed by Aura. Based on criteria, Aura will display the list of all the clients maintained under CRM → Client → Maintain.
6. Enter the Agreement reference number. This reference number should be unique.
7. Select / enter the date on which the agreement is Signed.
8. Select the Debtor or Creditor as an option for the Agreement party.
If your client is a Debtor, then select Debtor as your option for the Agreement party.
If your client is a Creditor, then select Creditor as your option for the Agreement party.
Based on the Agreement Party selection done here, you will have to fill in the Creditor and Debtor details in the Agreement → Details (2/3) page.
9. Select Recurrent or One-off as an option for Payment type. If you select Recurrent, Direct debit will happen recurrently based on the payment settings made at the account level. If you have selected One-off, then the Direct Debit will happen only once on the date mentioned in the payment settings at the account level.
10. Enter reason for recording the agreement in the Remark field.
11. Click Next. The Agreement → Details (2/3) page appears.
If your client is a Debtor, the following screen will appear.
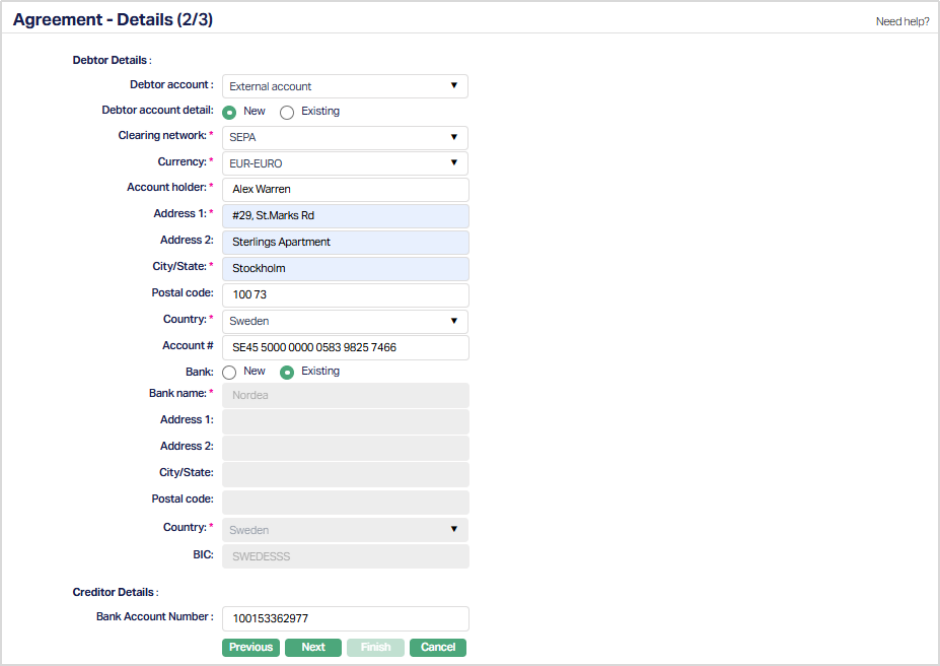
Execute the steps mentioned below:
Under Debtor Details,
i. Click Account# (IBAN) hyperlink. The search page will display the list of Active accounts held by the client selected in the previous step. Only the accounts for which the IBAN generation is marked as Yes at the product level are listed here.
ii. Select Account number from the list displayed.
Under Creditor Details, enter the data for the following fields.
i. Enter Name of the creditor.
ii. Enter Identifier of creditor. Ex- CCNNZZZX, where CC is ISO Country code, NN is check digit, ZZZ is Creditor business code and X is Country specific details used to identify the Creditor without ambiguity.
iii. Enter Account# (IBAN) of creditor.
iv. Enter BIC code of bank where the creditor's account is maintained.
v. Select Address type from the dropdown. The options available here are maintained at Admin > System codes > Address types
vi. Enter address details in Address 1 and Address 2 fields.
vii. Enter name of the City.
viii. Enter Zip code of the city
ix. Enter Postbox number.
x. Select Country from the dropdown list. The options available here are maintained at Admin > System codes > Generic Definitions > Countries.
If your client is a Creditor, the following screen will appear.
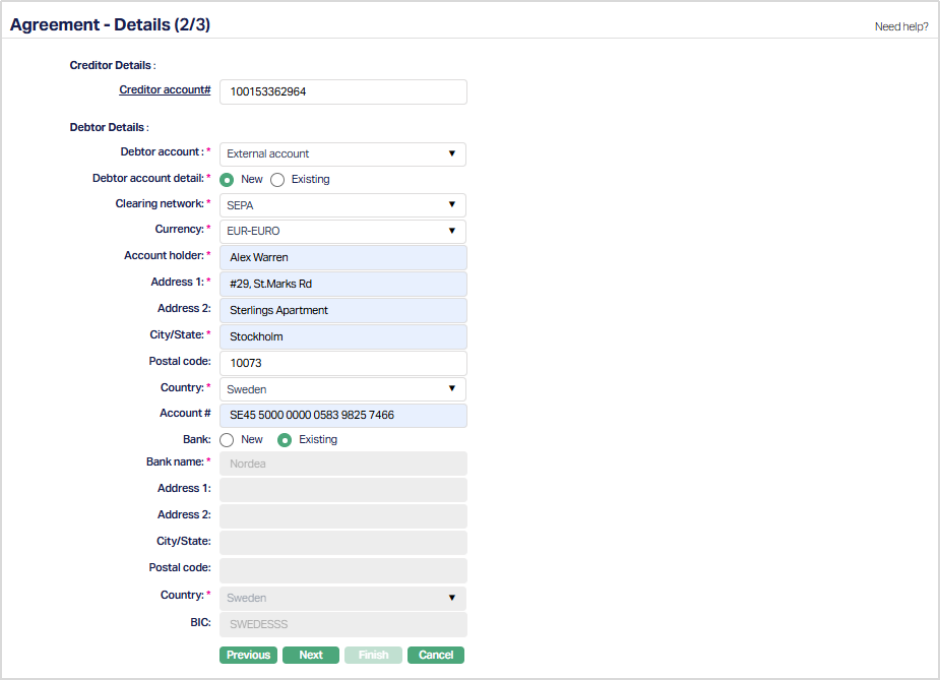
Execute the steps mentioned below:
Under Creditor Details, enter the following data:
i. Click Account# (IBAN) hyperlink. The search page will display the list of Active accounts held by the client selected in the previous step. Only the accounts for which the IBAN generation is marked as Yes at the product level are listed here.
ii. Enter Identifier of creditor. Ex- CCNNZZZX, where CC is ISO Country code, NN is check digit, ZZZ is Creditor business code and X is Country specific details used to identify the Creditor without ambiguity.
Under Debtor Details, enter the data for the following fields.
i. Enter Name of the debtor.
ii. Enter Account# (IBAN) of debtor.
iii. Enter BIC code of bank where the debtor's account is maintained.
iv. Select Address type from the dropdown. The options available here are maintained at Admin > System codes > Address types
v. Enter address details in Address 1 and Address 2 fields.
vi. Enter name of the City.
vii. Enter Zip code of the city.
viii. Enter Postbox number of the city.
ix. Select Country from the dropdown list. The options available here are maintained at Admin > System codes > Generic Definitions > Countries.
Click Next. Agreement -- Confirmation (3/3) page appears.
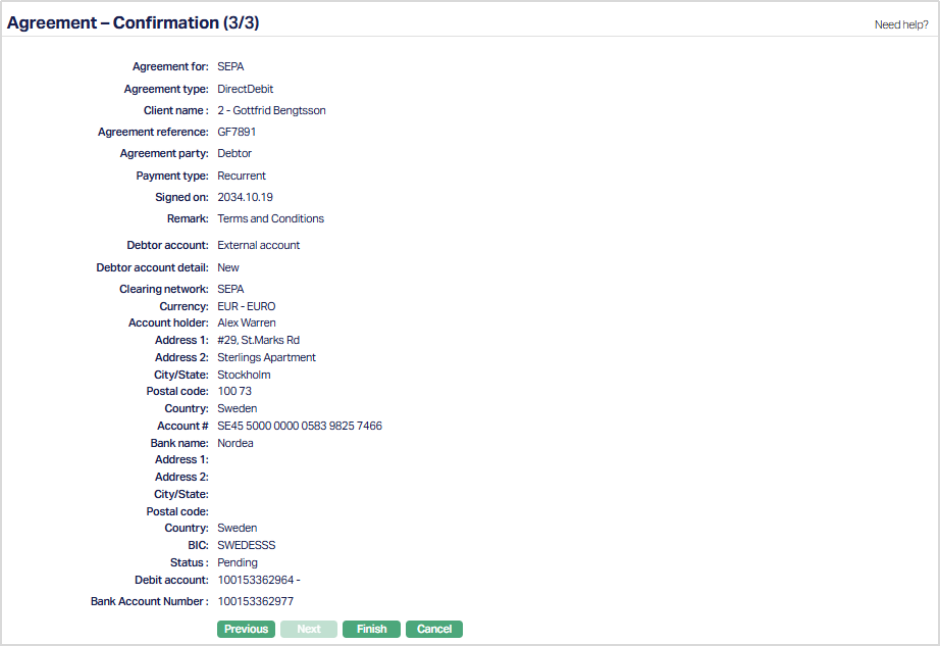
Click Finish. Agreement page appears with the added details, displaying the Profile tab by default.
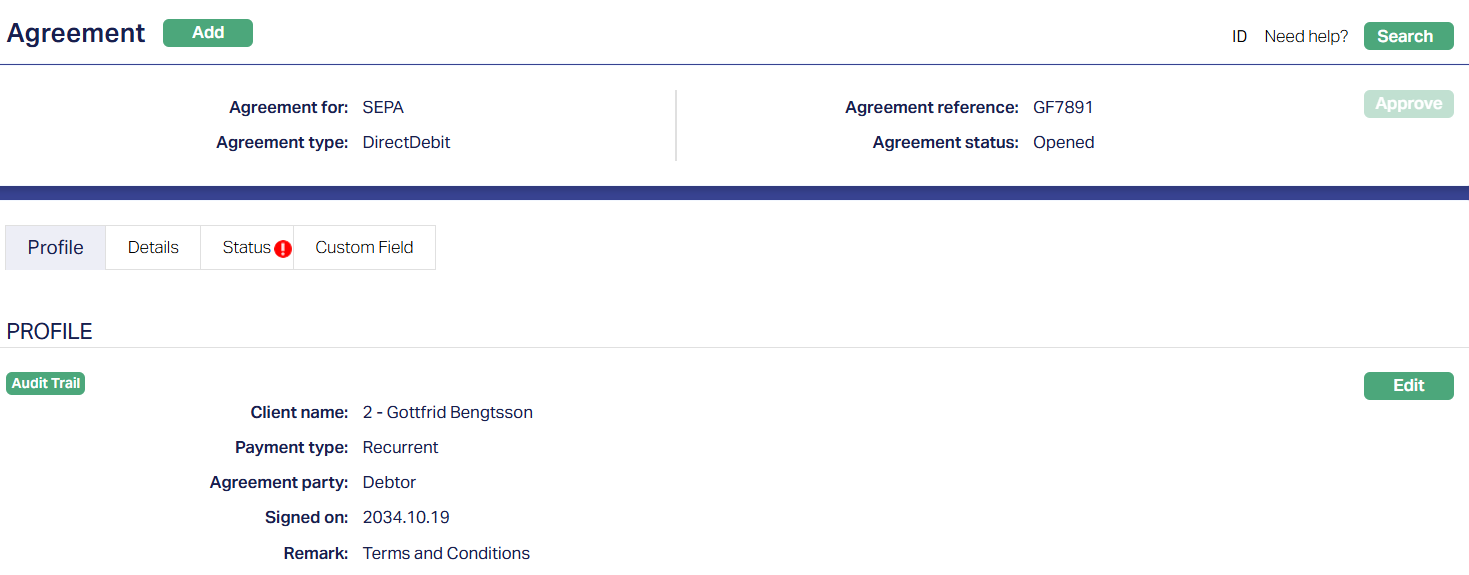
Functions: Add, Search, Approve.
Note: Under Status tab, the Agreement status is Opened, and the record status is Approved. Unless the Agreement Status is Activated and record status is Approved, this agreement will not be available for use elsewhere in Aura.
To activate and approve the Agreement Status
- Add Activated Agreement status using Status tab. This will make the Agreement Status Activated, but the record status is Pending.
- Another user should approve the Activated Agreement status, so that the record status becomes Approved.
Note: If the custom field is mapped to Agreement under Admin > System Codes > Custom fields > Field mapping, then an additional screen will appear before the confirmation screen. The custom fields will be mandatory or non mandatory based on the rules set at the Field mappings. For more detail on custom field functionality please refer Admin> System codes > Custom fields > Field mappings manual.
Profile
Profile tab, which is the default screen in the Agreement screen, shows the basic details of the Agreement. For details refer to Agreement for SEPA > Agreement -- Profile (1/3).

Functions: Edit
To view / edit Profile,
- Access Agreement page and click Edit. Edit -- Profile page is displayed.
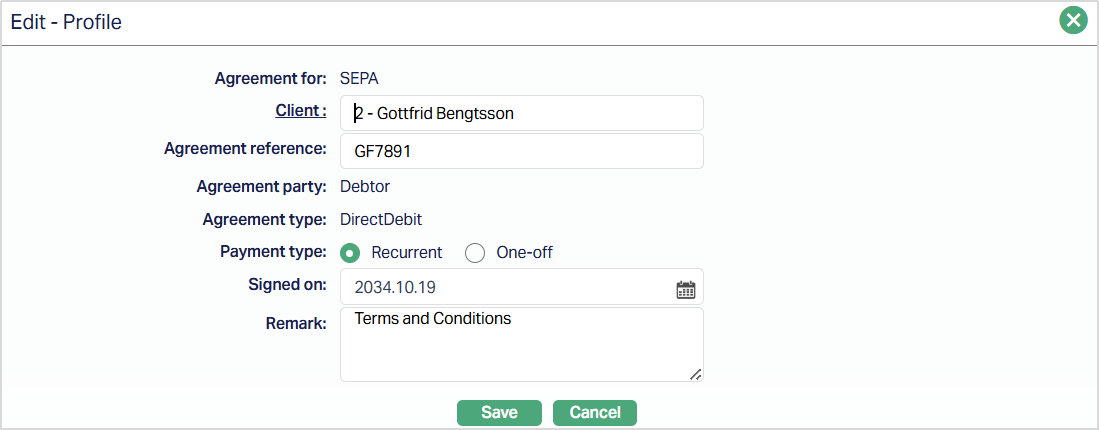
The editable fields are:
Agreement reference
Amendment Reason: This field will not be available until the first approval. For next edits -- Amendment reason field will be available.
Remark
Click Save. The Profile page appears with the edited details.
Details
The creditor and debtor details entered in the Agreement for SEPA > Agreement -- Details (2/3) are displayed under the Details tab.
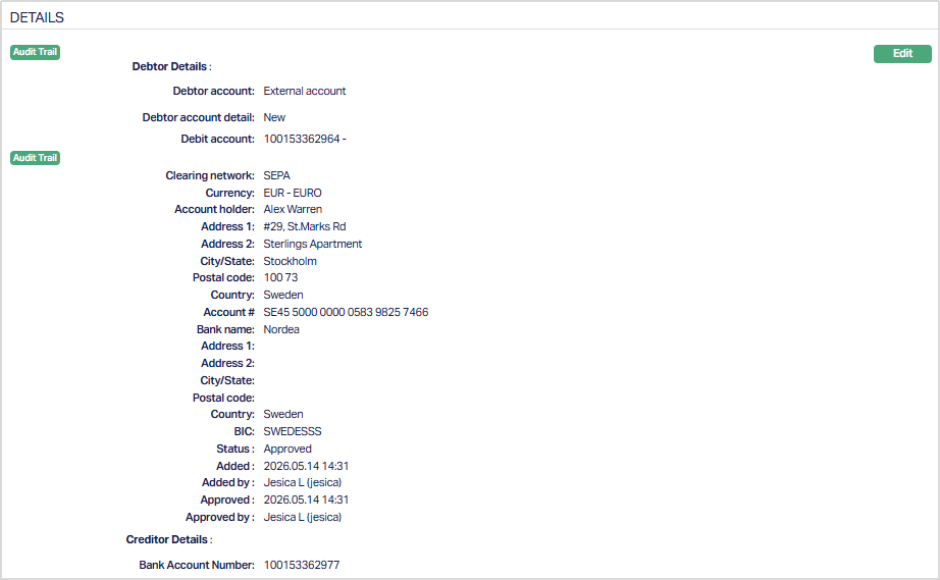 Functions: Edit
To view / edit Details
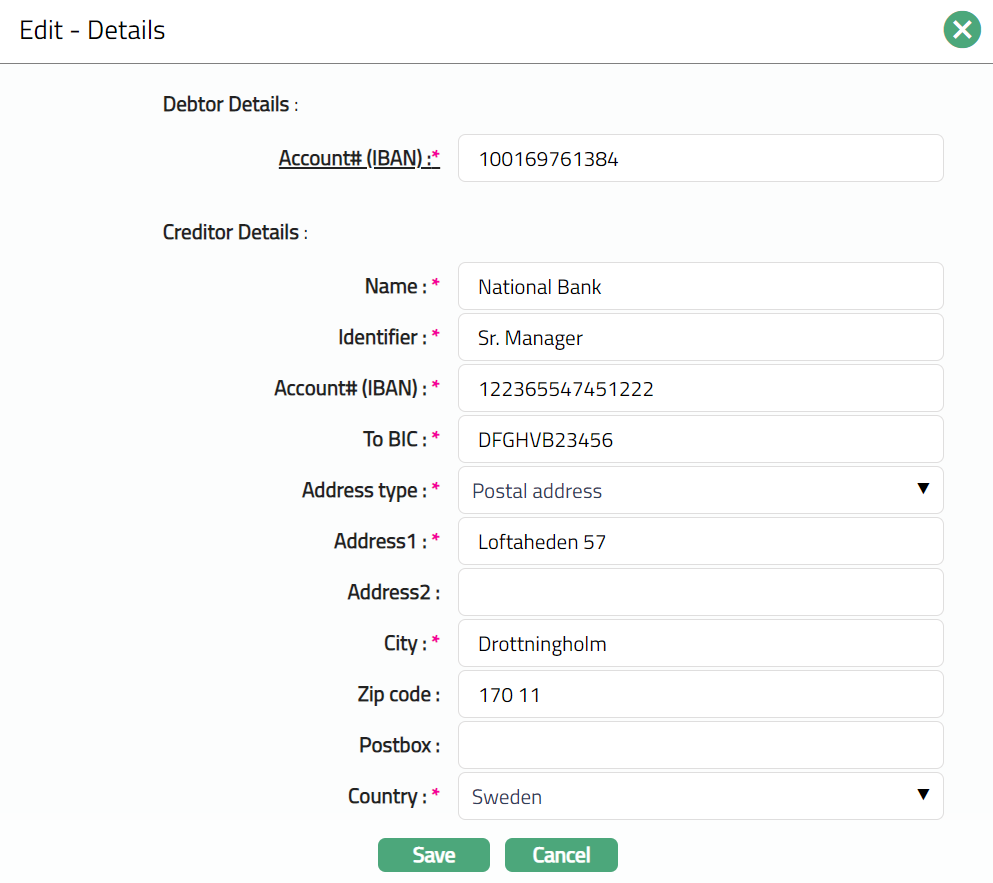
Access Agreement page and click Edit. Edit -- Details page is displayed.
If your Agreement party is a Debtor, the following screen is displayed.

The editable fields are:
Creditor Details
Account# (IBAN)
Identifier
Debtor Details
Name
Amendment reason: This field will not be available until the first approval. For next successive edits -- Amendment reason field will be available.
If your Agreement party is a Creditor, the following screen is displayed.
Note: All fields are editable.
Click on Save. Details page appears with the edited details.
Functions: EditStatus
Status tab allows the user to change and approve the status of the agreement.
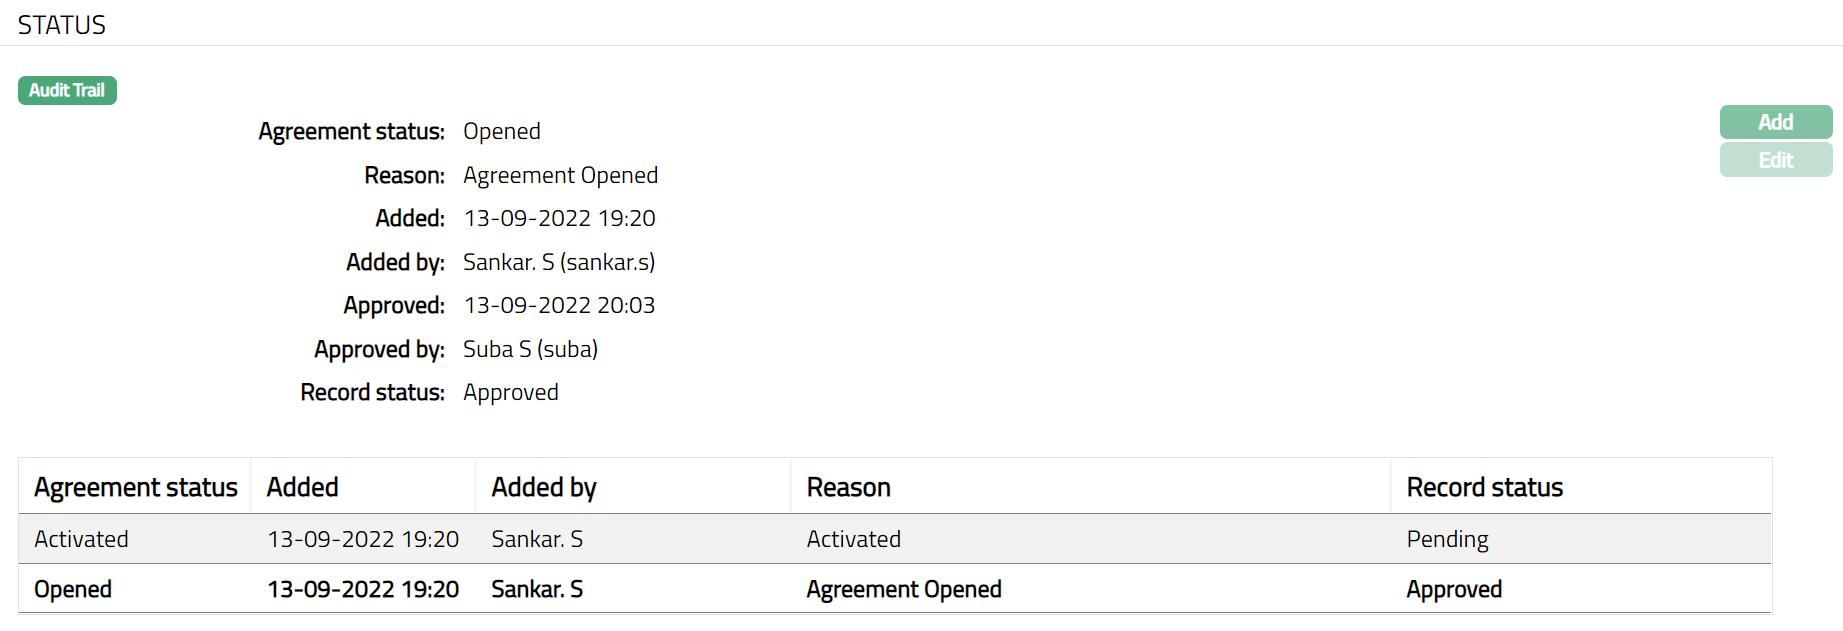
As soon as the Agreement is created, the Agreement status is Open, and the record status is Approved as shown below.
Functions: Add and Edit
To add status,
- Access Agreement page and click Add under Status tab Add Agreement Status page appears.
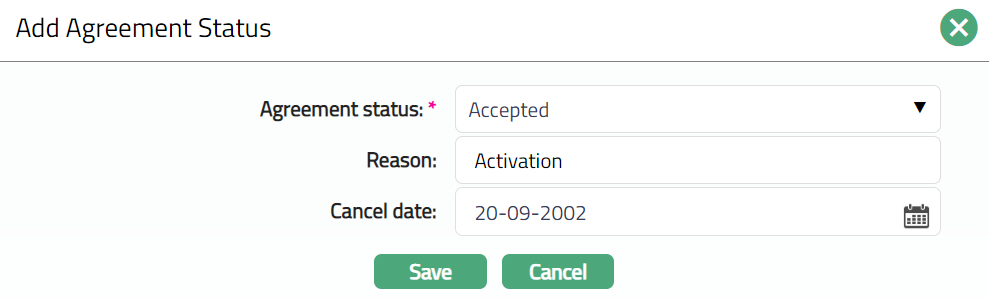
Select required Agreement status from the drop-down.
An Agreement can move between the pre-shipped statuses as follows:
When agreement status is Opened and the record status is Approved, The Agreement status can be changed to Accepted, Rejected or Cancelled.
When Agreement status is Accepted and the record status is Approved, the Agreement can be Cancelled.
Enter Reason for adding the agreement status.
Enter agreement Cancel date.
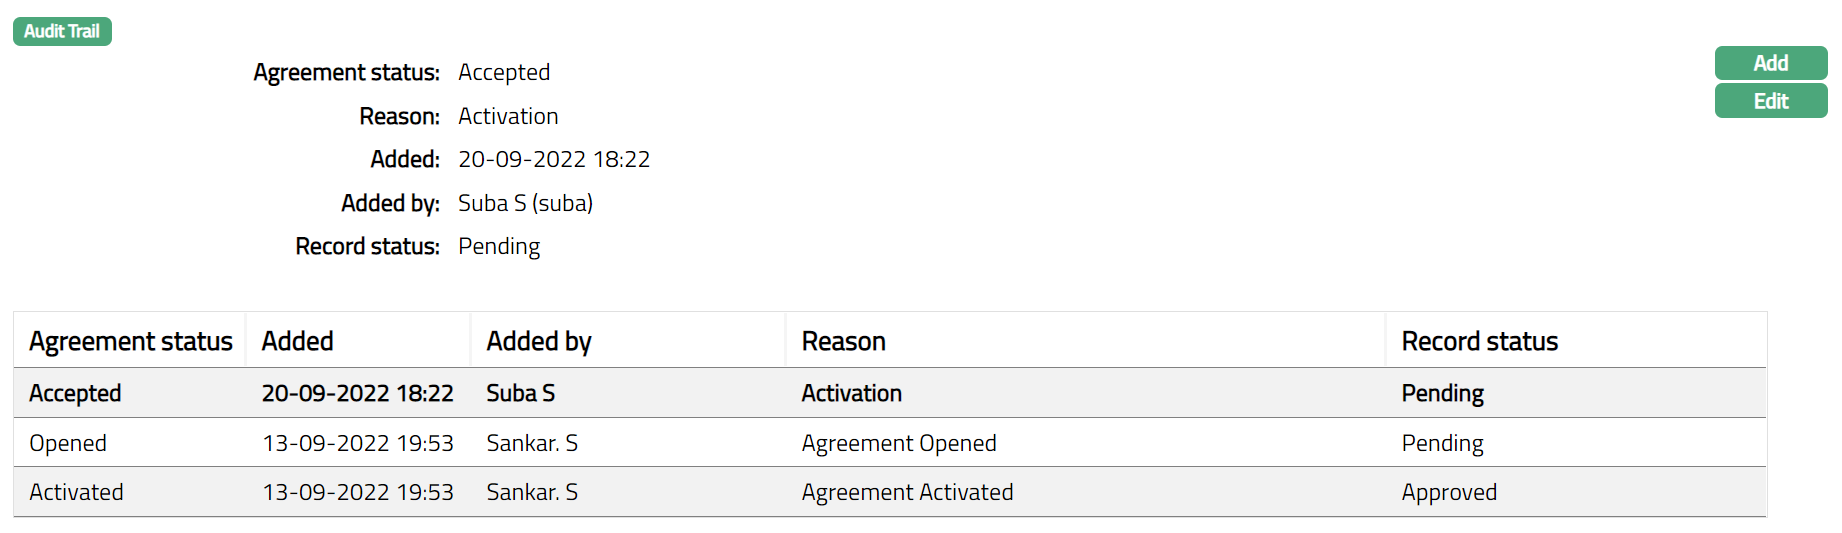
Click Save. The Agreement status will be Accepted and the Record status will be Pending.
Functions: Add, Edit
On edit / adding a new agreement status, the Record status will be Pending. Any user other than the one who has edited / added the Agreement Status can Approve the Status
The additional fields are:
Status field denotes the status of the tab.
Added field denotes the date on which the record was added.
Added by field denotes the name of the user who created the record.
Approved field denotes date on which the record was approved and is displayed only for approved records.
Approved by field denotes name of the user who approved the record and is displayed only for approved records.
Record status field denotes the status of the record.
Custom Field
This option provides you the flexibility to define fields apart from those that are already available in the standard version of Aura. Thus, it enables you to customize additional data storage and use as required to suit your specific business needs.
Using the Custom Field tab, you can maintain the custom fields mapped to the Agreement. Depending on the custom fields created and mapped to Agreement (using Admin > System Codes > Custom Fields), the fields will be displayed on this tab
To edit Custom field
- Access Agreement page.

- Click Edit. The Edit Custom Field page appears.

- Click Save. The Custom Field page appears with the edited details.
 Functions: Edit
Agreement for Autogiro
To create an Agreement for Autogiro,
Access CRM menu, click Clients and then Agreement. Agreement Search page appears.
Click Add button. Agreement -- Profile (1/3) page appears.
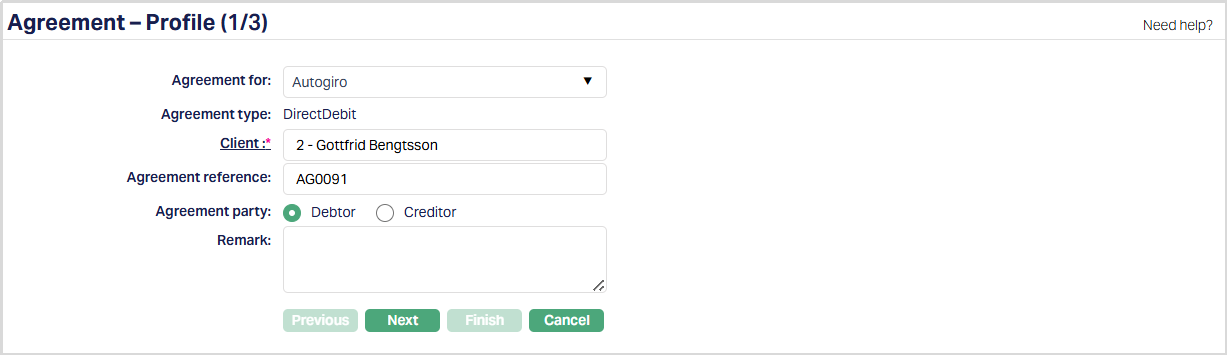
Select Autogiro from the Agreement for drop-down list.
By default, Agreement type will be DirectDebit
Select Client by clicking on client hyperlink. The Client search page appears where you can search for a client with relevant criteria and select the required client. You can also input the client's name and select the required client from the list displayed by Aura. Based on criteria, Aura will display the list of all the clients maintained under CRM > Client > Maintain.
Enter Agreement reference number. This reference number should be unique.
Select Debtor or Creditor as an option for Agreement party.
If your client is a Debtor, then select Debtor as your option for the Agreement party.
If your client is a Creditor, then select Creditor as your option for the Agreement party.
Note:
Based on the Agreement Party selection done here, you will have to fill in the Creditor and Debtor details in the Agreement -- Details (2/3) page.
Enter reason for recording the agreement in the Remark field.
Click Next. Agreement -- Details (2/3) page appears.
If your client is a Debtor, the following screen will appear.
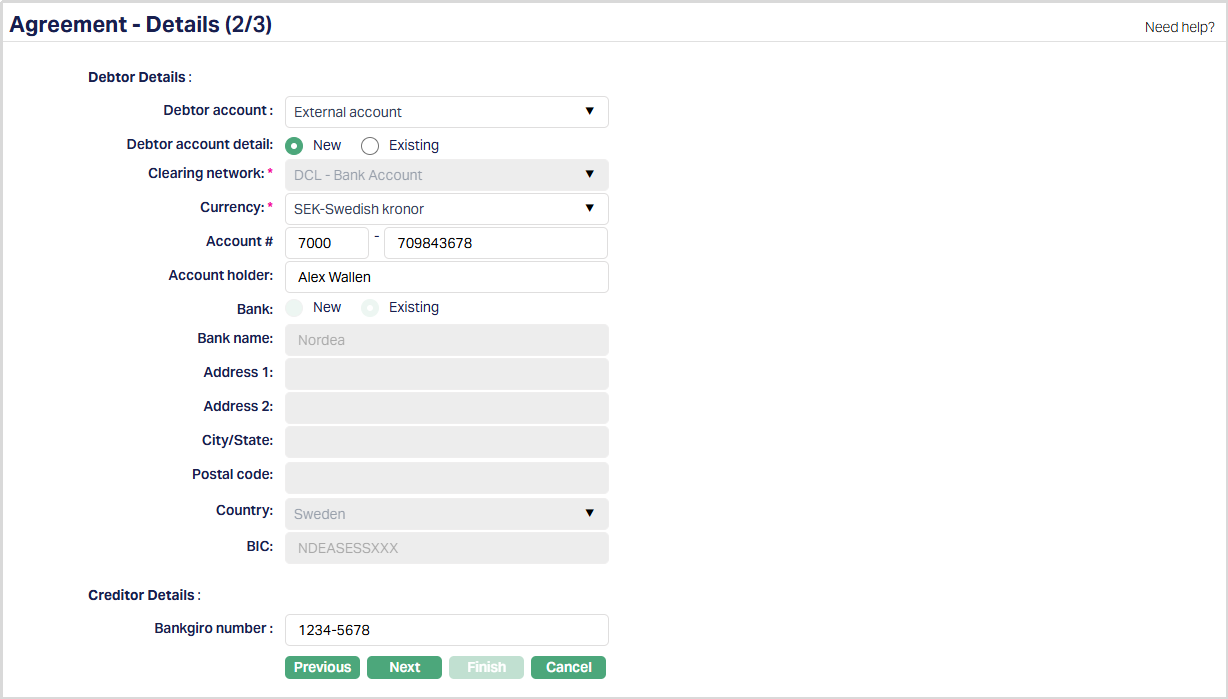
Under Debtor details,
i. Enter Debtor account#. It is a unique number provided by the creditor to identify the debtor. This can be a Corporate Identity number, Civic registration number, Account number or a Bankgiro number. For Debtors that have Bankgiro number, the Debtor number is always the Bankgiro number.
Under Creditor details,
i. Enter Bankgiro Account#. It is an address that points to a bank account.
If your client is a Creditor, the following screen will appear.
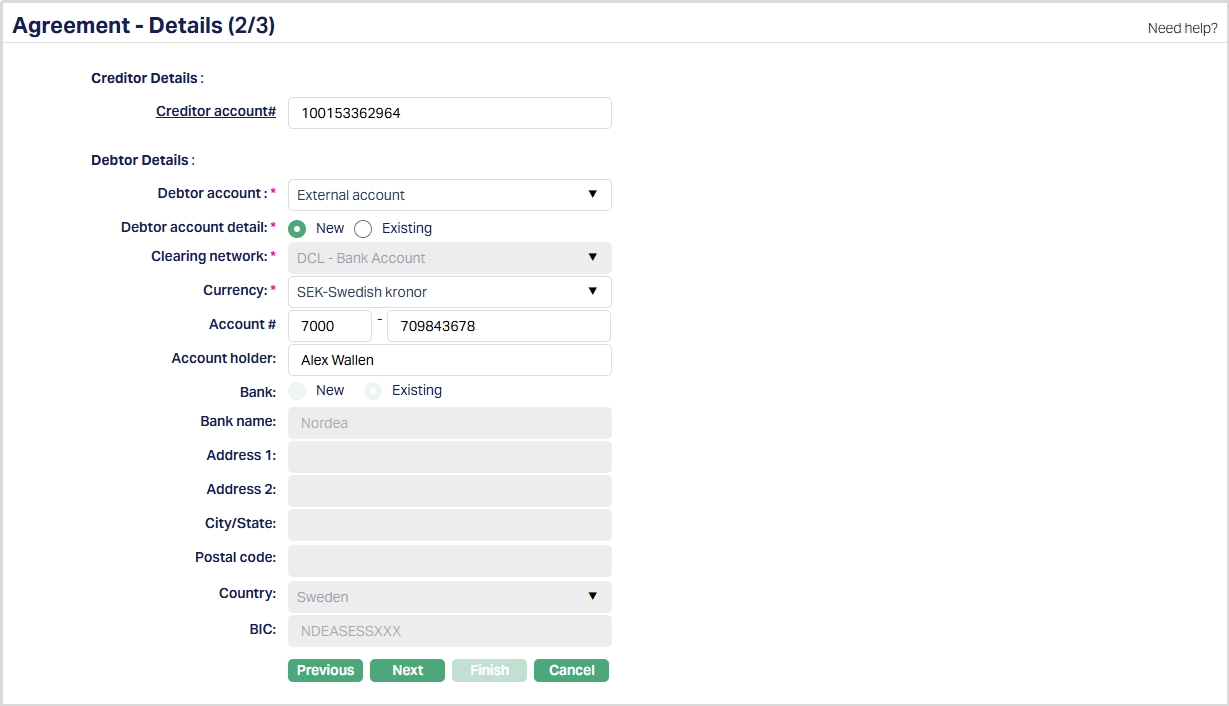
Under Creditor details,
i. Enter the Bankgiro Account#. It is an address that points to a bank account.
Under Debtor details,
i. Enter the Debtor account#. It is a unique number provided by the creditor to identify the debtor. This can be a Corporate Identity number, Civic registration number, Account number or a Bankgiro number. For Debtors that have Bankgiro number, the Debtor number is always the Bankgiro number.
- Click Next. Agreement Confirmation (3/3) page will appear.
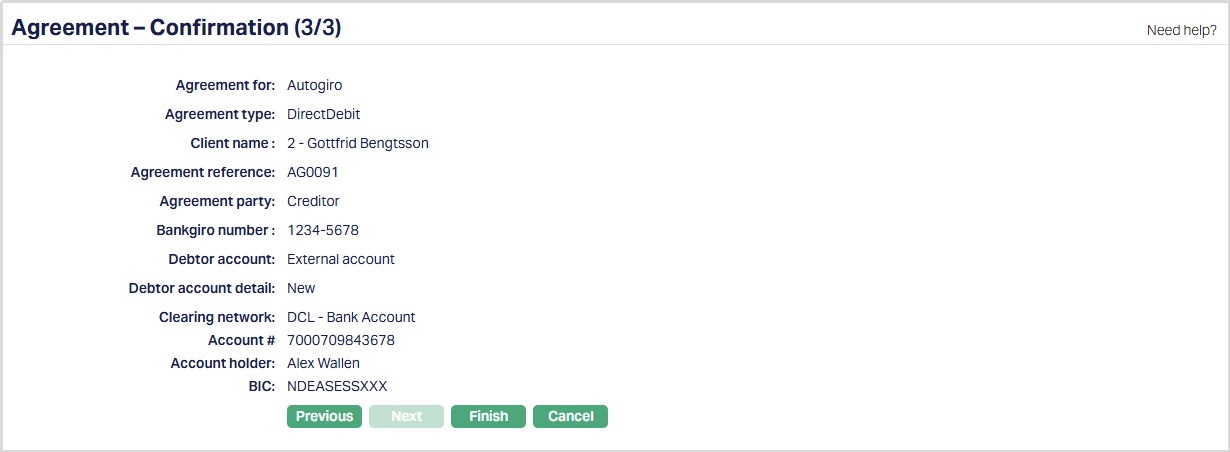
- Click Finish. Agreement page will appear, displaying the Profile tab as a default tab.
Functions: Add, Search, Approve
Note:
Under Status tab, the Agreement status is Opened, and the record status is Approved. Unless the Agreement Status is Activated and record status is Approved, this agreement will not be available for use elsewhere in Aura.
To activate and approve the Agreement Status
- Add the Activated Agreement status using Status tab. This will make the Agreement Status Activated, but the record status is Pending.
- Another user should approve the Activated Agreement status, so that the record status becomes Approved.
Note: If the custom field is mapped to Agreement under Admin > System Codes > Custom fields > Field mapping, then an additional screen will appear before the confirmation screen. The custom fields will be mandatory or non mandatory based on the rules set at the Field mappings. For more detail on custom field functionality please refer Admin> System codes > Custom fields > Field mappings manual.
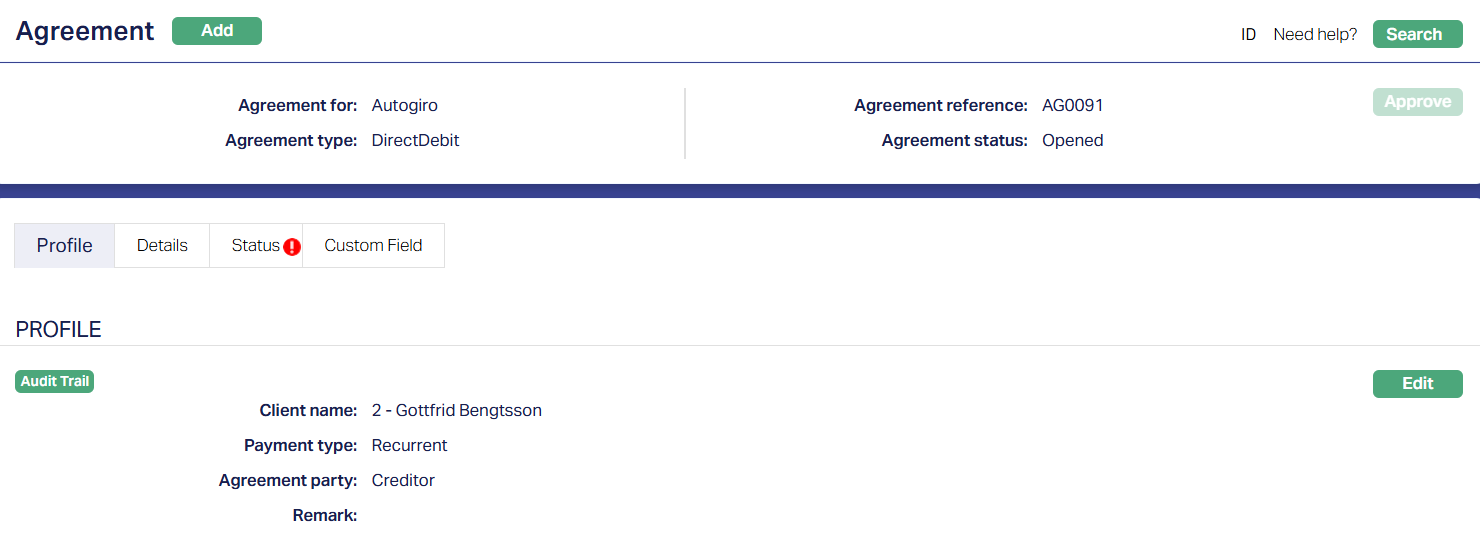
Profile
Profile tab, which is the default screen in the Agreement screen, shows the basic details of the Agreement. For details refer to Agreement for Autogiro > Agreement -- Profile (1/3).

The additional fields available here are
- **Payment type**: This field denotes how the Direct debit will
happen based on the payment settings made at the account level.
To view / edit Profile,
Access Agreement page and click Edit button under Profile tab The Edit -- Profile page is displayed.
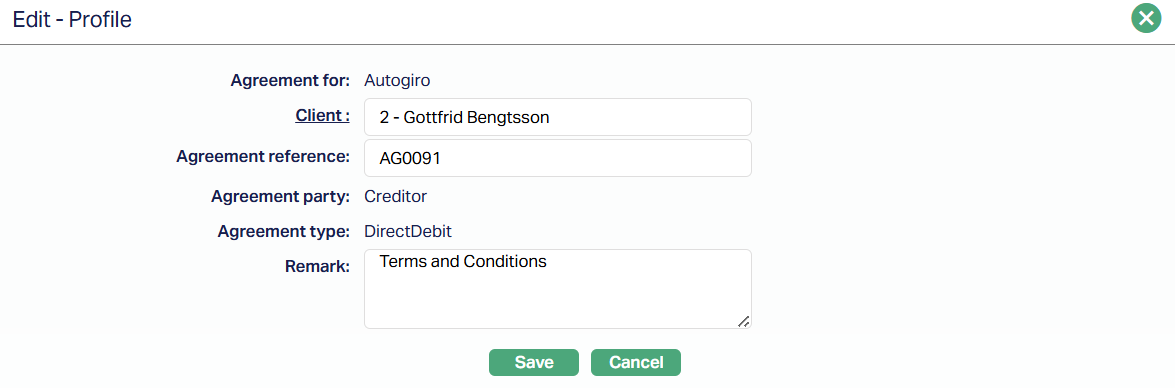
The editable fields are:
Client
Agreement reference
Remark
Note: Until the first approval Amendment reason will not be available. For the next successive edits -- Amendment reason field will be available.
Click Save. Profile page appears with the edited details. The Profile page appears with the edited details.
Details
The creditor and debtor details entered in the Agreement -- Details (2/3) are displayed under the Details tab.
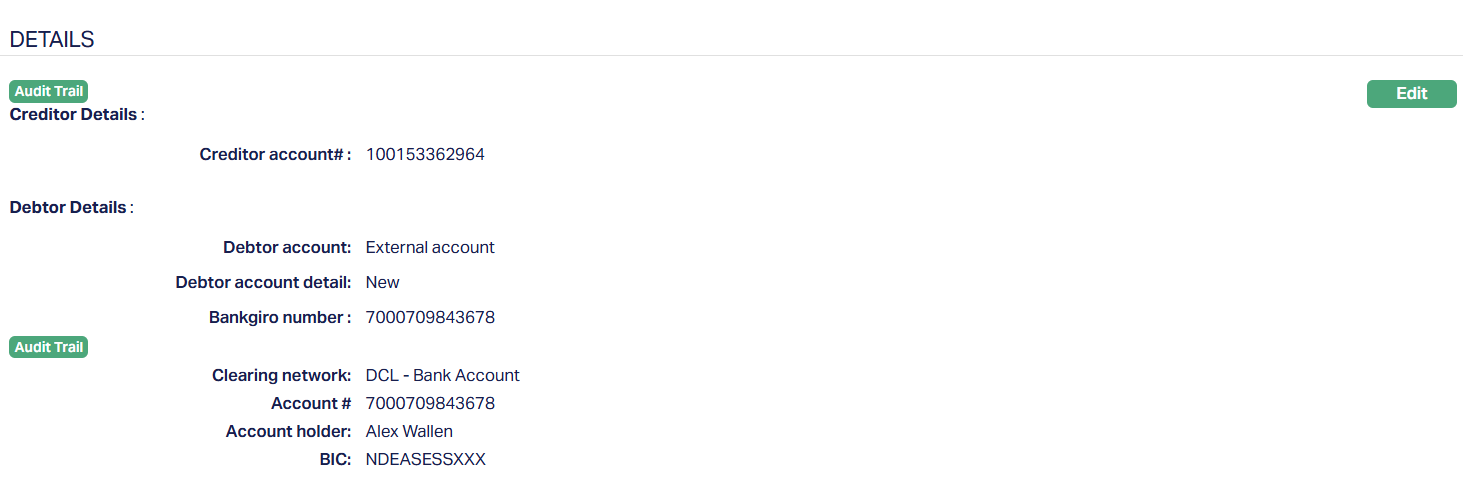
To view / edit the Details,
Access Agreement page and click Edit button under Details tab The Edit -- Details page is displayed.
- If your client is a Creditor, the following screen will appear.
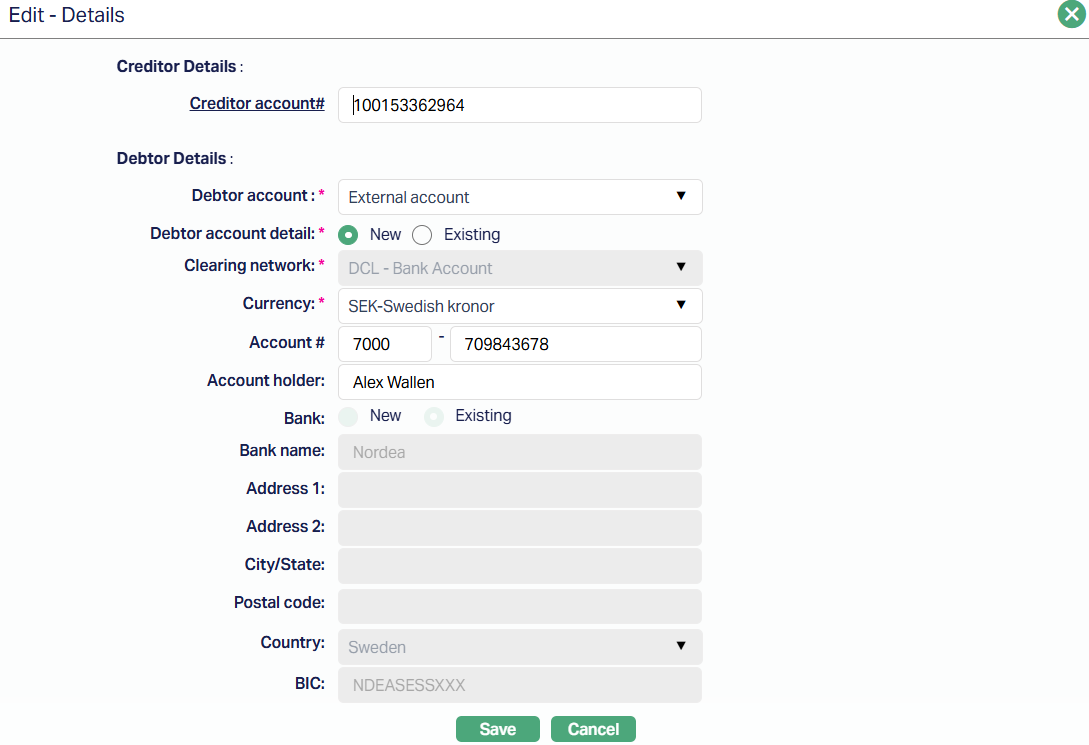
Note: All fields are editable.
Click Save. Details tab appears with the edited details.
Function: EditStatus
Refer to the Status section under the Agreement for SEPA.
Custom Field
Refer to the Custom Field section under the Agreement for SEPA
Agreement for e-Invoice
To create an agreement for e-invoice,
Access CRM menu, click Clients and then Agreement. Agreement Search page appears.
Click Add button. Agreement -- Profile (1/4) page appears.
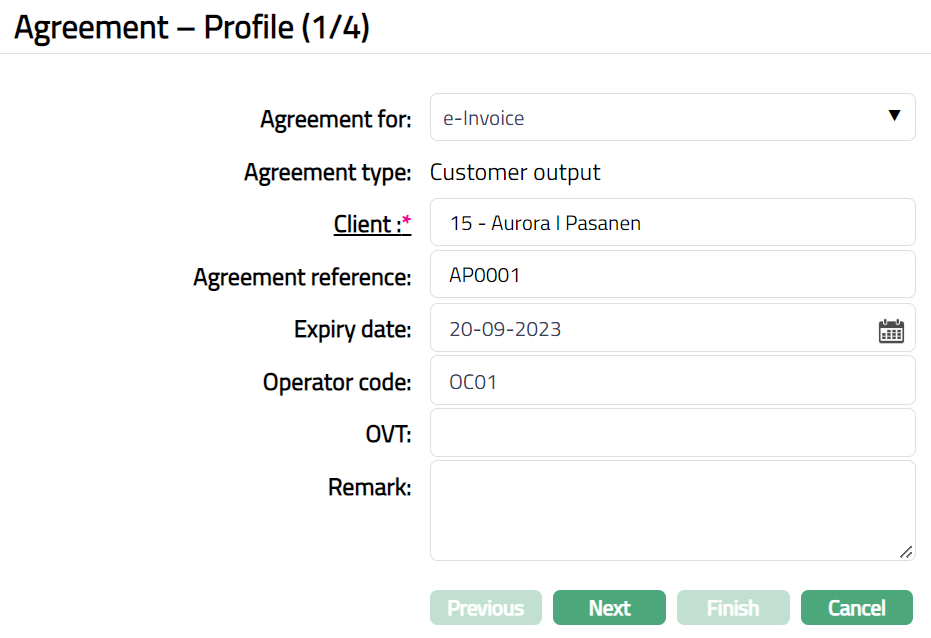
Select e-Invoice from the Agreement for drop-down list.
By default, Agreement type will be Customer output.
Select Client by clicking client hyperlink. The Client search page appears where you can search for a client with relevant criteria and select the required client. You can also input the client's name and select the required client from the list displayed by Aura. Based on criteria, Aura will display the list of all the clients maintained under CRM > Client > Maintain.
Enter Agreement reference number. This reference number should be unique.
Enter Expiry date for the agreement. The expiry date should be greater than the current date.
Enter Operator code. This is the Code of the organization which provides service.
Enter OVT.
Enter reason for recording the agreement in the Remark field.
Click Next. Agreement -- Details (2/4) page appears.
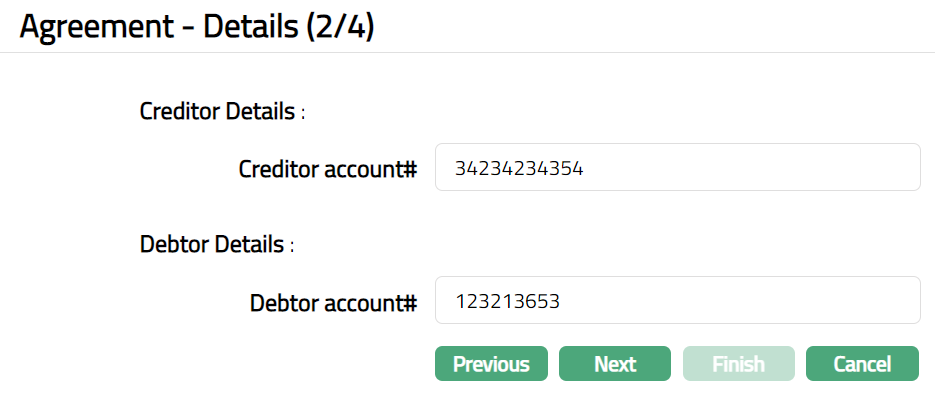
Under Creditor details, enter Creditor account # number. It is the Creditor Bank account number.
Under Debtor details, Enter Debtor account#. It is a unique number provided by the creditor to identify the debtor. This can be a Corporate Identity number, Civic registration number, Account number or a bankgiro number. For Debtors that have Bankgiro number, the Debtor number is always the Bankgiro number.
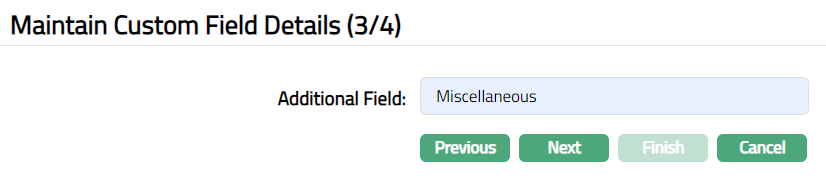
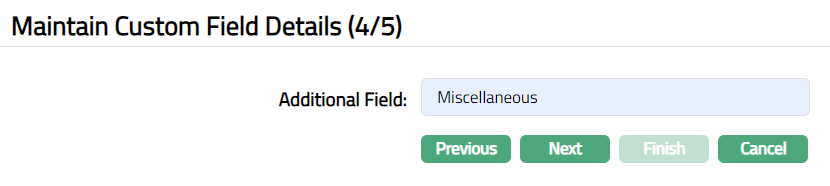
Click Next. Maintain Custom Field Details (3/4) page appears.
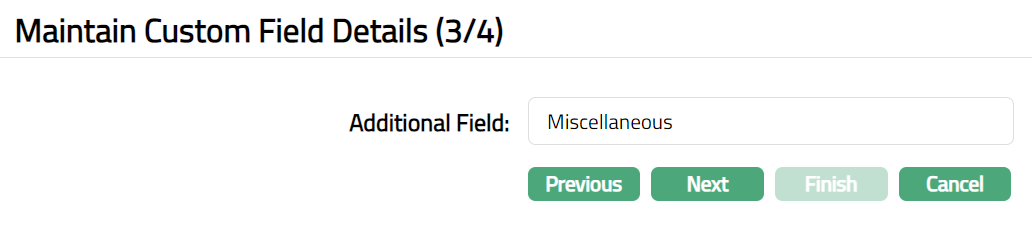
Click Next. Agreement -- Confirmation (4/4) page appears.
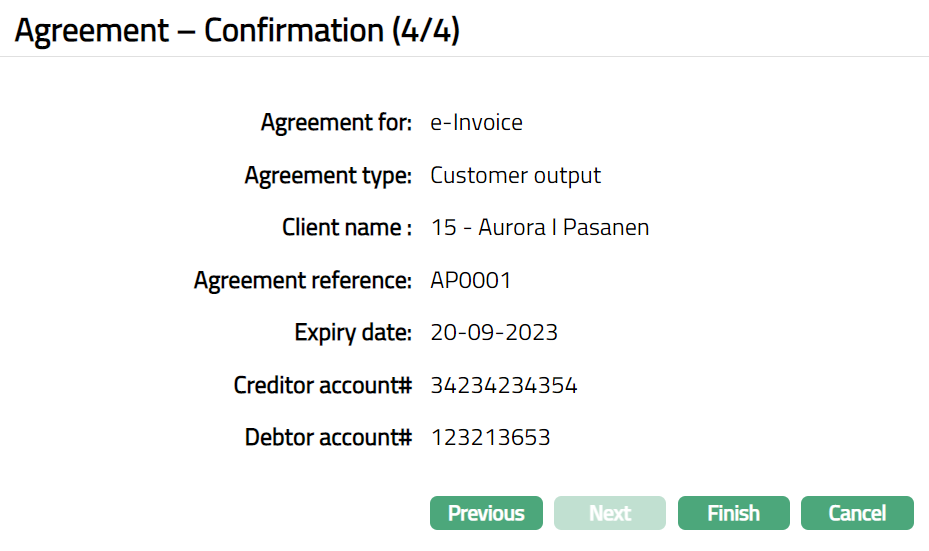
16. Click Finish. Agreement page appears displaying the Profile tab by default.
 Functions: Add, Search, Approve.
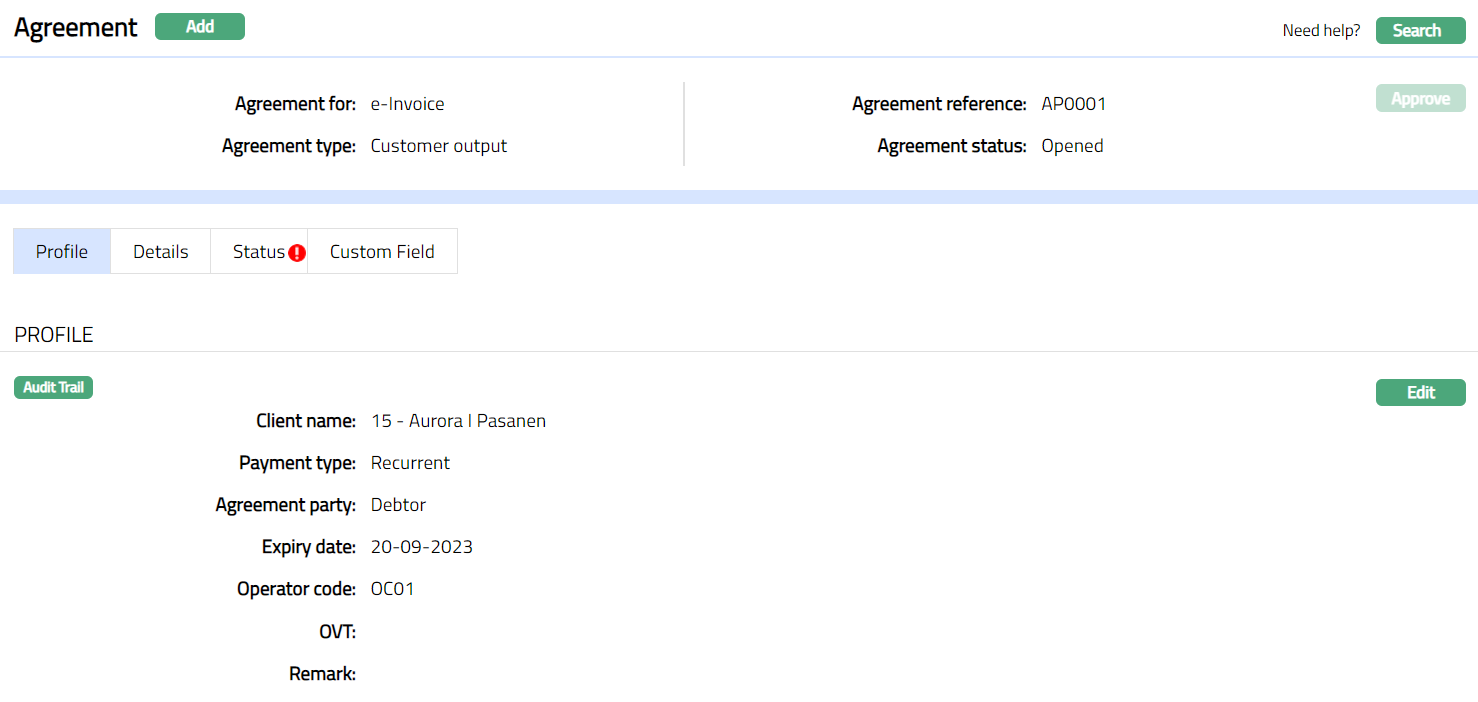
Note:
Under status tab, the Agreement status is Opened, and the record status is Approved. Unless the Agreement Status is Activated and record status is Approved, this agreement will not be available for use elsewhere in Aura.
To activate and approve the Agreement Status
- Add the Activated Agreement status using Status tab. This will make the Agreement Status Activated, but the record status is Pending.
- Another user should approve the Activated Agreement status, so that the record status becomes Approved.
Note: If the custom field is mapped to Agreement under Admin > System Codes > Custom fields > Field mapping, then an additional screen will appear before the confirmation screen. The custom fields will be mandatory or non mandatory based on the rules set at the Field mappings. For more detail on custom field functionality please refer Admin> System codes > Custom fields > Field mappings manual.
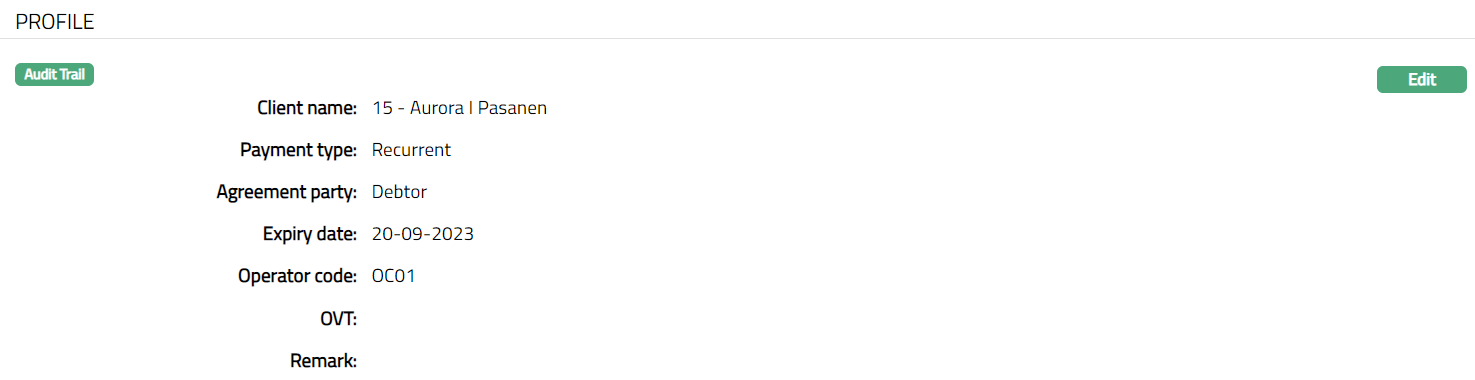
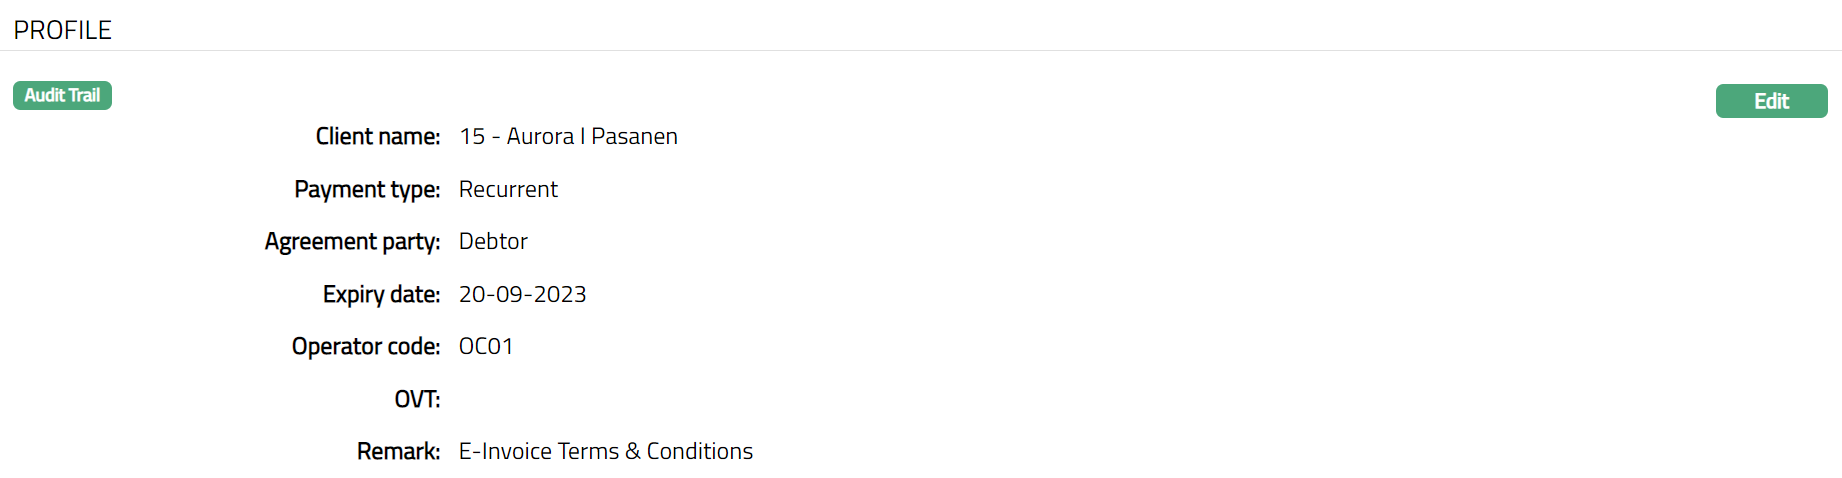
Profile
The Profile tab, which is the default screen in the Agreement screen, shows the basic details of the Agreement. For details refer to Agreement for e-invoice > Agreement -- Profile (1/4).
Functions: Edit
Additional fields available here are
- Payment type: This field denotes how Direct debit will happen based on the payment settings made at the account level.
To view / edit the Profile,
Access Agreement page and click Edit button under Profile tab The Edit -- Profile page is displayed.
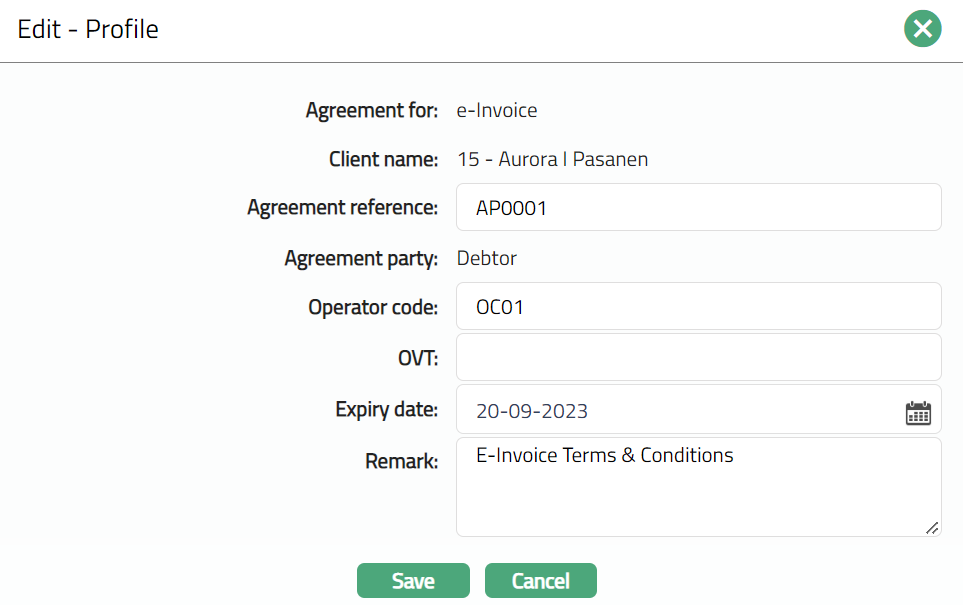
The editable fields are:
Client
Agreement reference
Expiry date
Remark
Note: Until the first approval Amendment reason will not be available. For the next successive edits -- Amendment reason field will be available.
Click Save. The Profile page appears with the edited details.
 Functions: Edit
Details
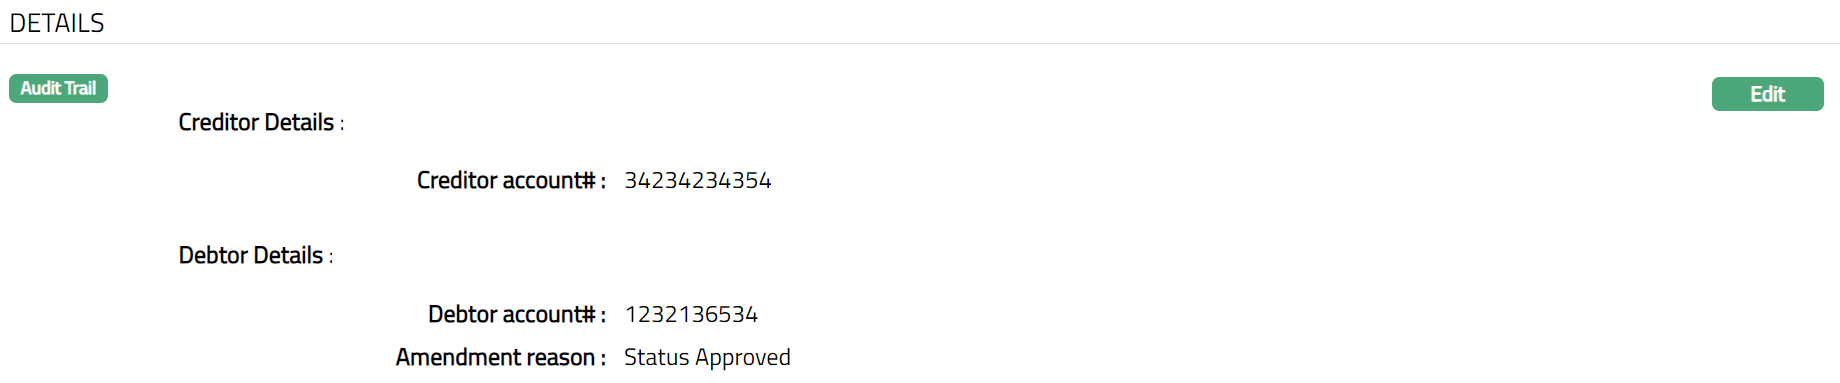
The creditor and debtor details entered in the Agreement -- Details (2/3) are displayed under the Details tab.

Functions: Edit
To edit
To view / edit Details,
Access Agreement page and click Edit button under Details tab The Edit -- Details page is displayed.
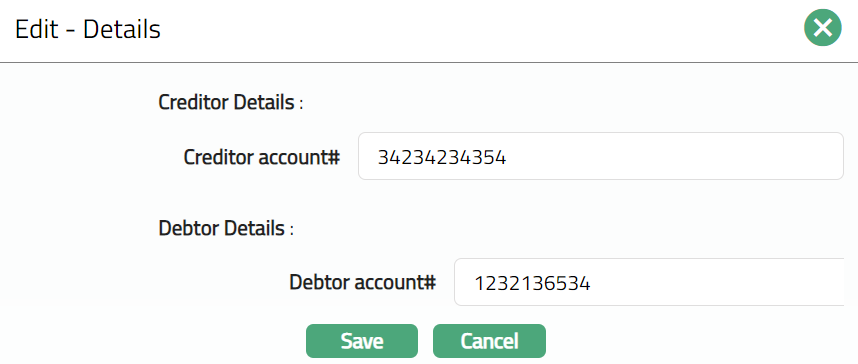
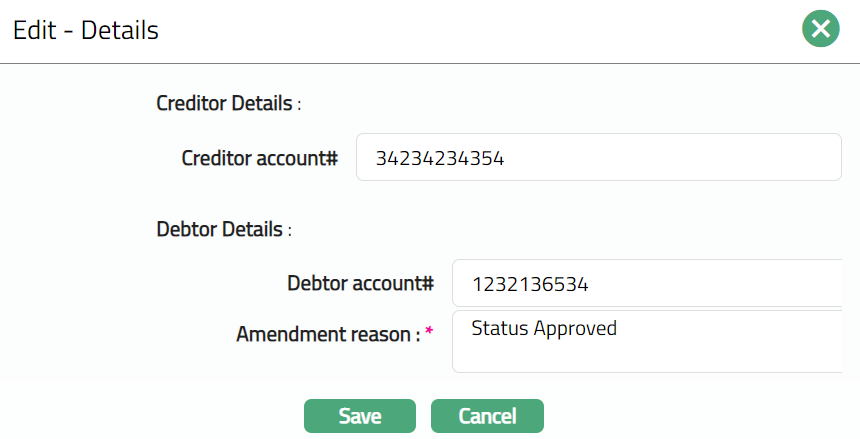
Note: Until the first approval, only Creditor account# and Debtor account# fields will be available for editing. For the next successive edits -- Amendment reason field will be available as shown in a sample screen shot shown above.
The editable fields are:
Creditor account#
Debtor account#
Amendment reason
Click Save. Details tab appears with the edited details.

 Function: Edit
Status
Refer to the Status section under the Agreement for SEPA.
Custom Field
Refer to the Custom Field section under the Agreement for SEPA
Agreement for Invoice
To create an agreement for Invoice,
Access CRM menu, click Clients and then Agreement. The Agreement Search page appears.
Click Add button. Agreement -- Profile (1/4) page appears.
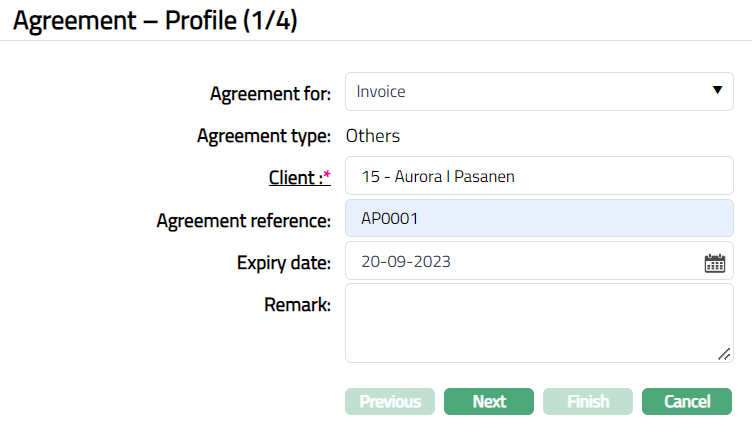
Select Invoice from the Agreement for drop-down list.
By default, Agreement type will be Others.
Select Client by clicking on client hyperlink. The Client search page appears where you can search for a client with relevant criteria and select the required client. You can also input the client's name and select the required client from the list displayed by Aura. Based on criteria, Aura will display the list of all the clients maintained under CRM > Client > Maintain.
Enter Agreement reference number. This reference number should be unique.
Enter Expiry date. The expiry date should be greater than the current date.
Enter reason for recording the agreement in the Remark field.
Click Next. Agreement -- Details (2/3) page appears.
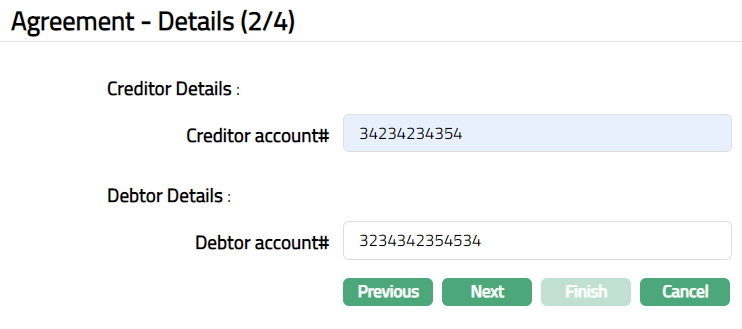
Under Creditor details, enter Creditor account # number. It is the Creditor Bank account number.
Under Debtor details, enter Debtor account#. It is a unique number provided by the creditor to identify the debtor. This can be a Corporate Identity number, Civic registration number, Account number or a bankgiro number. For Debtors that have Bankgiro number, the Debtor number is always the Bankgiro number.
Click Next. Maintain Custom Field Details (3/4) page appears.
Click Next. Agreement -- Confirmation (4/4) page appears.
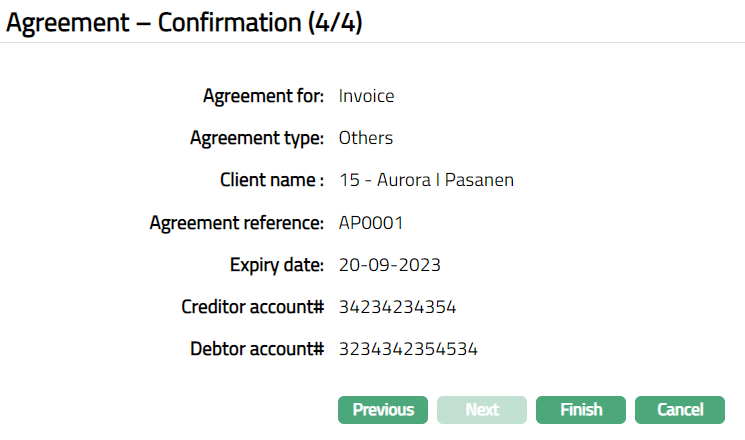
Click Finish. Agreement page appears displaying Profile tab by default.
Functions: Add, Search, Approve.
Note:
Under status tab, the Agreement status is Opened, and the record status is Approved. Unless the Agreement Status is Activated and record status is Approved, this agreement will not be available for use elsewhere in Aura.
To activate and approve the Agreement Status
- Add Activated Agreement status using Status tab. This will make the Agreement Status Activated, but the record status is Pending.
- Another user should approve the Activated Agreement status, so that the record status becomes Approved.
Note: If the custom field is mapped to Agreement under Admin > System Codes > Custom fields > Field mapping, then an additional screen will appear before the confirmation screen. The custom fields will be mandatory or non mandatory based on the rules set at the Field mappings. For more detail on custom field functionality please refer Admin> System codes > Custom fields > Field mappings manual.
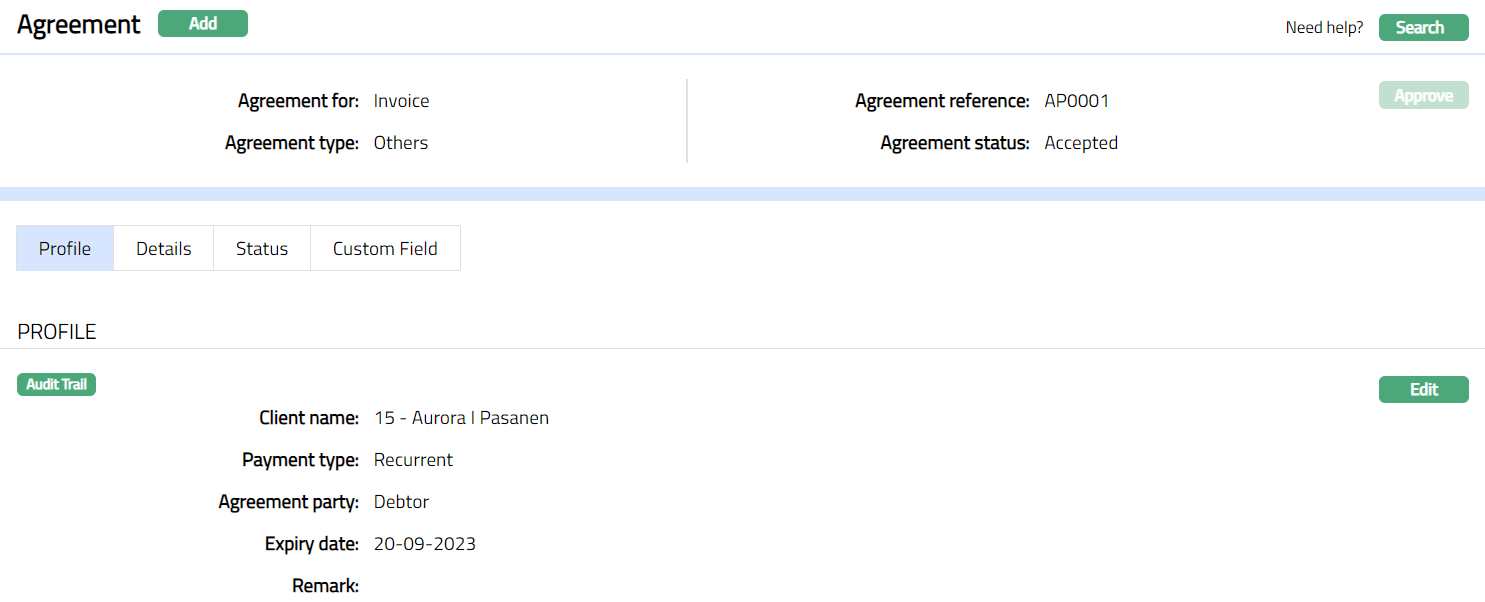
Profile
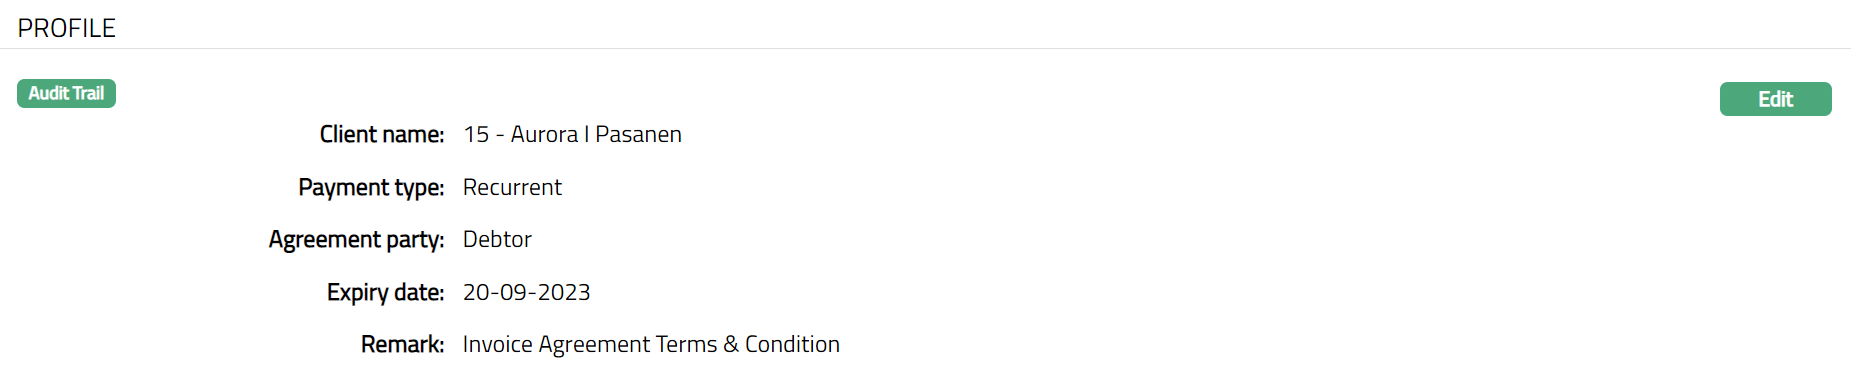
Profile tab, which is the default screen in the Agreement screen, shows the basic details of the Agreement. For details refer to Agreement for Invoice > Agreement -- Profile (1/4).

Additional fields available here are
- Payment type: This field denotes how Direct debit will happen based on the payment settings made at the account level.
To Edit Profile
Click Edit. Edit -- Profile page is displayed.
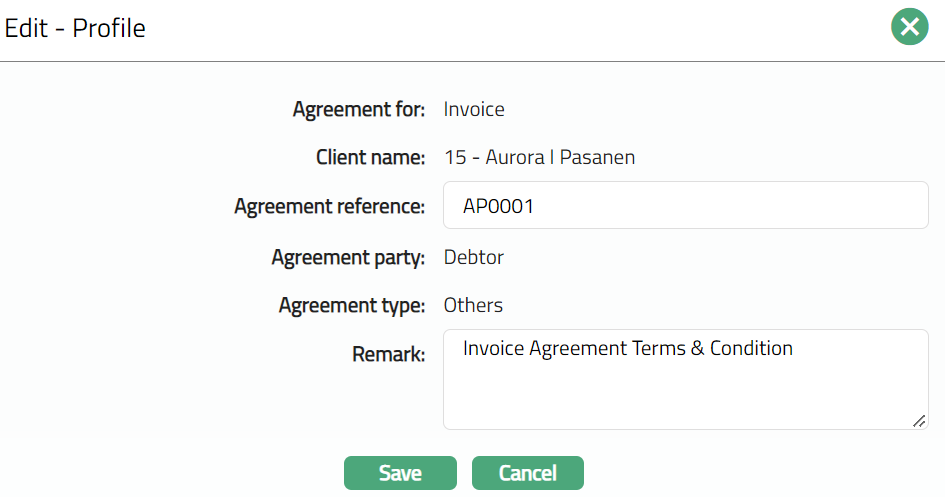
The editable fields are:
Agreement reference
Remark
Click Save. Profile page appears with the edited details.
Function: Edit
Details
Refer to the Details section under the Agreement for e-Invoice.
Status
Refer to the Status section under the Agreement for SEPA.
Custom Field
Refer to the Custom Field section under the Agreement for SEPA
Agreement for External account
To create an agreement for External Account,
Access CRM menu, click Clients and then Agreement. Agreement Search page appears.
Click Add button. Agreement -- Profile (1/4) page appears.
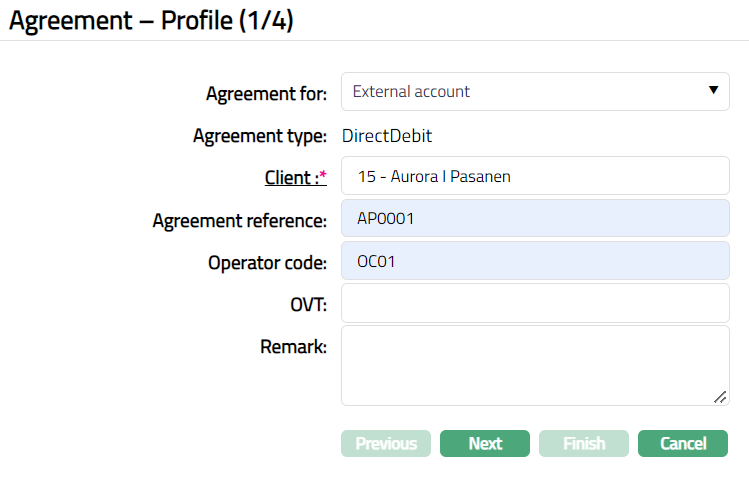
Select External account from the Agreement for drop-down list.
By default, Agreement type will be DirectDebit.
Select Client by clicking on client hyperlink. The Client search page appears where you can search for a client with relevant criteria and select the required client. You can also input the client's name and select the required client from the list displayed by Aura. Based on criteria, Aura will display the list of all the clients maintained under CRM > Client > Maintain.
Enter Agreement reference number. This reference number should be unique.
Enter Service provider ID. This is the ID of the organization which provides service.
Enter OVT.
Enter reason for recording the agreement in the Remark field.
Click Next. Agreement -- Details (2/4) page appears.
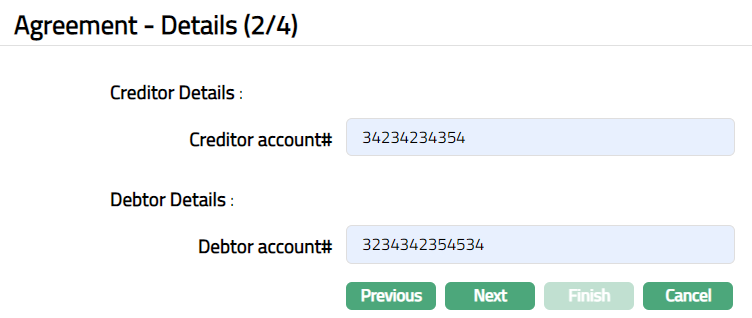
Under Creditor details, enter Creditor account # number. It is the Creditor Bank account number.
Under Debtor details, Enter Debtor account#. It is a unique number provided by the creditor to identify the debtor. This can be a Corporate Identity number, Civic registration number, Account number or a bankgiro number. For Debtors that have Bankgiro number, the Debtor number is always the Bankgiro number.
Click Next. Maintain Custom Field Details (3/4) page appears.
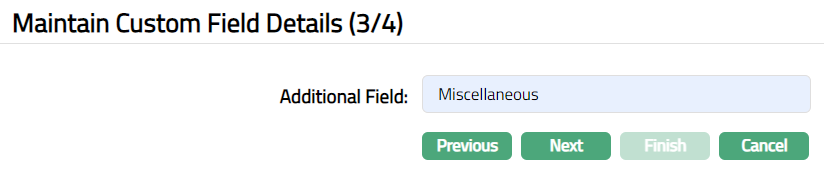
Click Next. Agreement -- Confirmation (4/4) page appears.
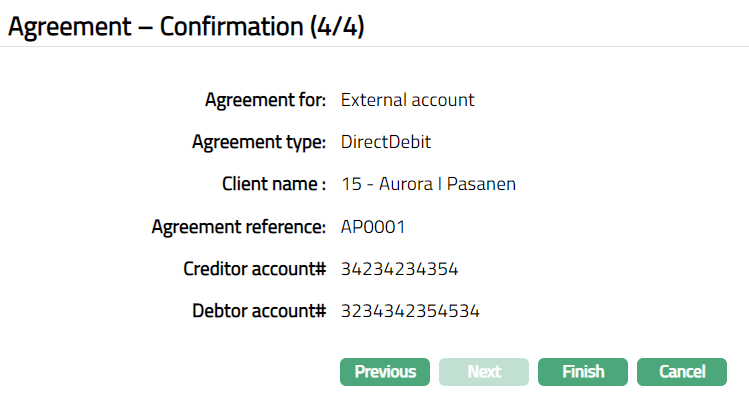
Click Finish. Agreement page appears displaying the Profile tab by default.
Functions: Add, Search, Approve.
Note:
Under status tab, the Agreement status is Opened, and the record status is Approved. Unless the Agreement Status is Activated and record status is Approved, this agreement will not be available for use elsewhere in Aura.
To activate and approve the Agreement Status
- Add Activated Agreement status using Status tab. This will make the Agreement Status Activated, but the record status is Pending.
- Another user should approve the Activated Agreement status, so that the record status becomes Approved.
Note: If the custom field is mapped to Agreement under Admin > System Codes > Custom fields > Field mapping, then an additional screen will appear before the confirmation screen. The custom fields will be mandatory or non mandatory based on the rules set at the Field mappings. For more detail on custom field functionality please refer Admin> System codes > Custom fields > Field mappings manual.
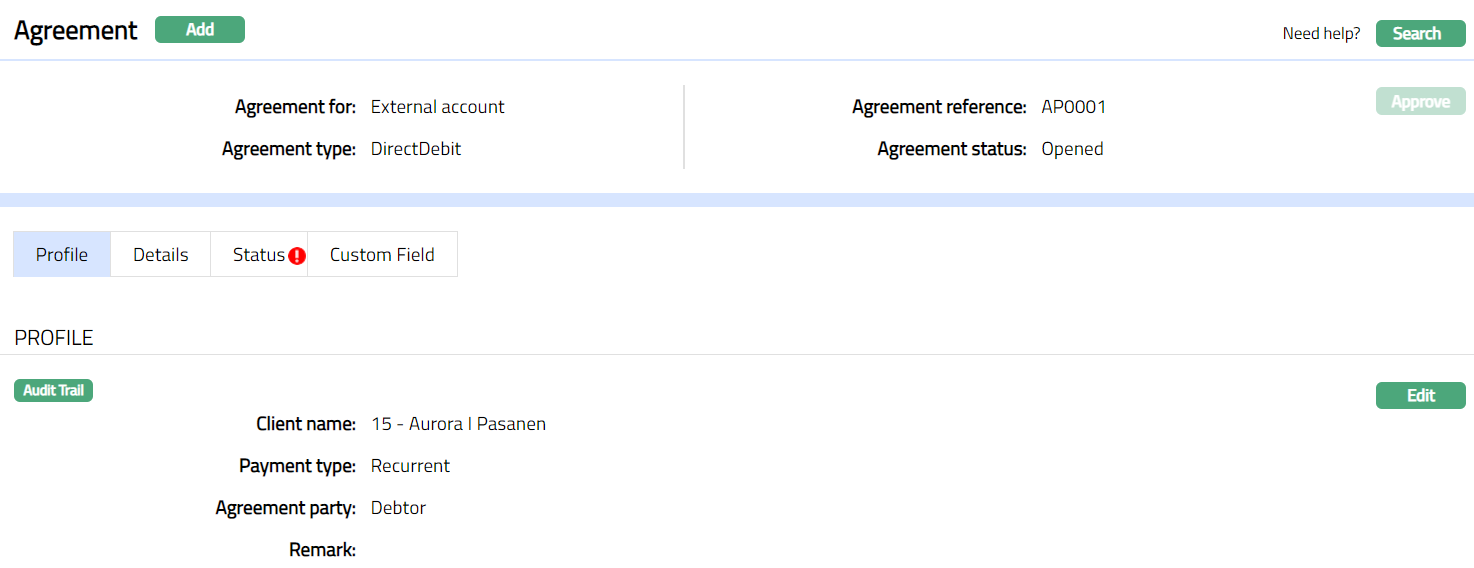
Profile
Refer to the Profile section under the Agreement for Invoice.
Details
Refer to the Details section under the Agreement for e-Invoice.
Status
Refer to the Status section under the Agreement for SEPA.
Custom Field
Refer to the Custom Field section under the Agreement for SEPA
Agreement for Service Provider
To create an agreement for Service Provider,
Access CRM menu, click Clients and then Agreement. Agreement Search page appears.
Click Add button. Agreement -- Profile (1/4) page appears.
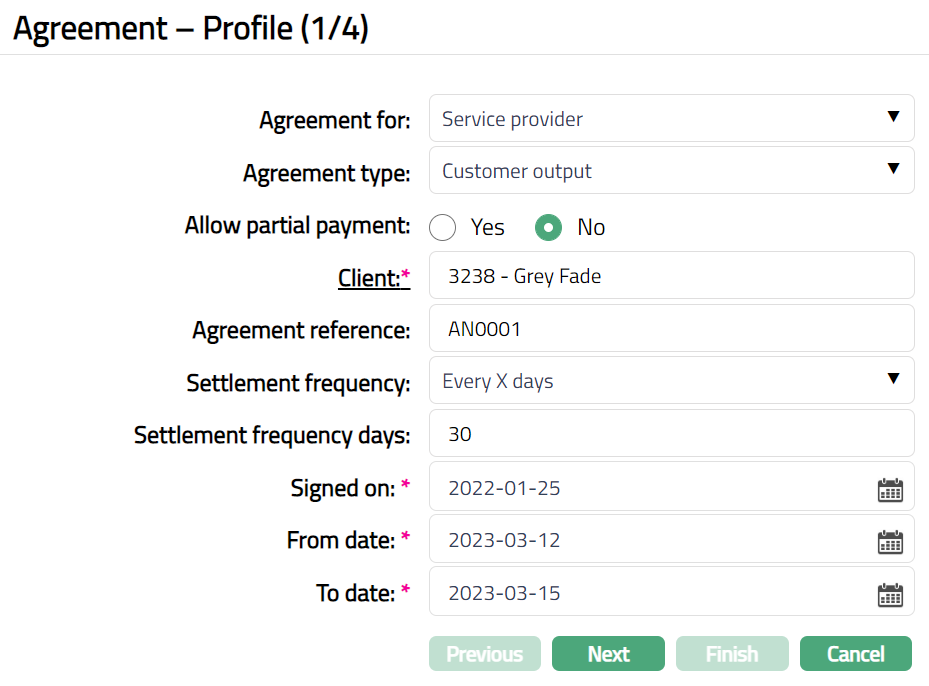
Select Service Provider from Agreement for drop-down list.
By default, Agreement type will be Customer Output. However, you can choose any other option from the drop-down list of pre-shipped values. The available options are
Direct Debit
Others
Customer Output
Utility payments
Factoring
Select Yes or No to Allow partial payment. If Yes option is chosen, Aura will allow partial payment for Direct debit and Utility payments. If No option is chosen, partial payment will not be allowed for Direct debit and Utility payments.
Select the Client by clicking on client hyperlink. The Client search page appears where you can search for a client with relevant criteria and select the required client. You can also input the client's name and select the required client from the list displayed by Aura. Based on criteria, Aura will display the list of all the active clients maintained under CRM > Client > Maintain.
Enter a unique reference number in Agreement reference.
Select Settlement frequency from the drop-down list. The List includes the following pre - shipped values.
Every day
Every month
Every quarter
Every half year
Every year
Last day of every month
Last day of every quarter
Last day of every half year
Last day of every year
Every x day
This field will appear only if the Agreement for Service provider option is chosen.
Enter Settlement Frequency days to specify the number of days for settlement. This field will appear only if Settlement frequency is selected as Every X day.
For example: If settlement frequency is specified as 10. Aura will perform the settlement every 10days.
Select date from the date picker to specify when the Agreement with the Service Provider is Signed on.
Select From date from the date picker to specify the start date of the agreement.
Select To date from the date picker to specify the end date of the agreement.
Click Next. Agreement -- Details (2/4) page appears.
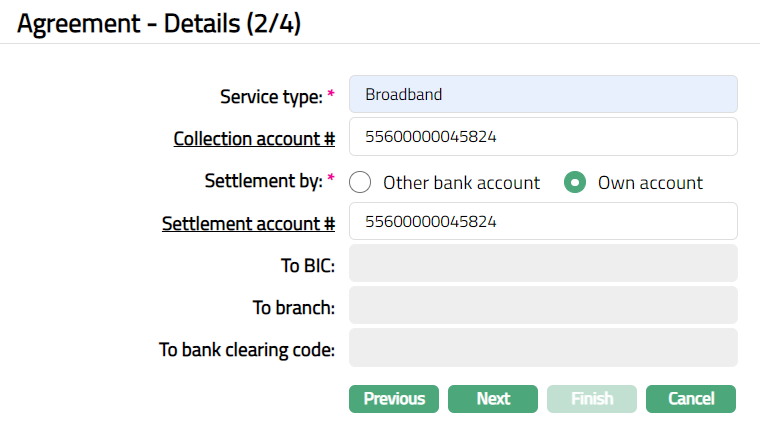
- Enter type of Service provided by the Service Provider.
For Example: Service Provider: Airtel
Service Type: Mobile, Broadband, Digital TV, Wireless internet.
Select Collection account # by clicking on the hyperlink. The Search Client Account page appears with the list of all the active accounts pertaining to the selected Client maintained under Retail > Account > Client Account. Collection Account specifies the account number of the service provider to which the collections will be credited.
Select Settlement by option. If Other bank account option is chosen, then the settlement is made through other bank account. If the Own account option is chosen, then the settlement is made through own account.
Note: Based on the option chosen in the above field, Settlement account # will appear as a hyperlink or textbox.
- If another bank account option is chosen as Settlement type, then the Settlement account # will appear as a text. Enter the settlement account number of another bank.
If the Own account option is chosen as Settlement type, then the Settlement account # will appear as a hyperlink. Click on the hyperlink, the Search Client Account page appears with the list of active client accounts. Select the account through which settlement will be done.
Click To bank hyperlink. The To Bank page appears with the list of all active banks maintained under Admin > Management > Settlement Directory. This field will appear only when Settlement by is chosen as other bank account.
To specify the branch of To Bank, enter the To branch. This field will be enabled only when Settlement by is chosen as other bank account.
To BIC will be defaulted based on the Bank and BIC mapping done in Settlement Directory on selection of To bank. This field will be enabled only when Settlement by is selected as other bank account.
Enter To Bank clearing code, to specify the clearing code of To bank. This field will be enabled only if Settlement type is selected as other bank account.
Click Next. Agreement -- Charges (3/4) page appears.
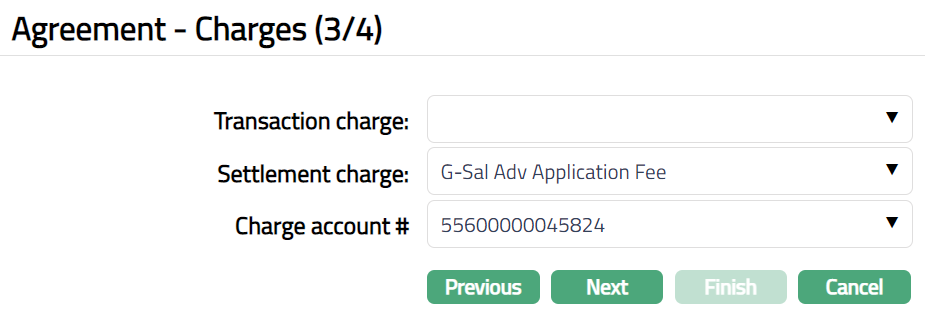
Select Transaction charge from the drop-down list of active charges maintained under Admin > Pricing > Charge scheme. The charge Type is Transaction and Basis is Flat or Banded. If a charge is Banded, then charge has arrived based on transaction amount of a transaction with the lower and upper bands maintained.
Select Settlement charge from the drop-down list of active charges maintained under Admin > Pricing > Charge scheme. The charge Type is Event and Basis is Flat or Banded.
Select Charge account # from the drop-down list of active current accounts maintained under Retail > Client Account > Maintain. Charge account# specifies the charge account number of the service provider.
26. Click Next. Confirmation (4/4) page appears.
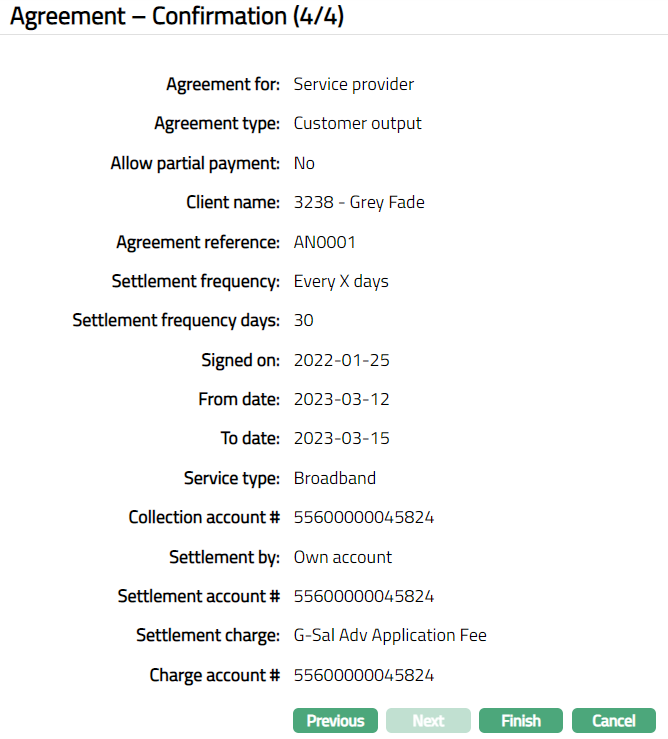
27. Click Finish. Agreement page appears displaying the profile tab by default.
Functions: Add, Search
Note:
Under Status tab, the Agreement status is Opened, and the record status is Pending. Unless the Agreement Status is Activated and record status is Approved, this agreement will not be available for use elsewhere in Aura.
To activate and approve the Agreement Status
- Add Activated Agreement status using Status tab. This will make the Agreement Status Activated, but the record status is Pending.
- Another user should approve the Activated Agreement status, so that the record status becomes Approved.
Note: If the custom field is mapped to Agreement under Admin > System Codes > Custom fields > Field mapping, then an additional screen will appear before the confirmation screen. The custom fields will be mandatory or non-mandatory based on the rules set at the Field mappings. For more detail on custom field functionality please refer Admin> System codes > Custom fields > Field mappings manual.
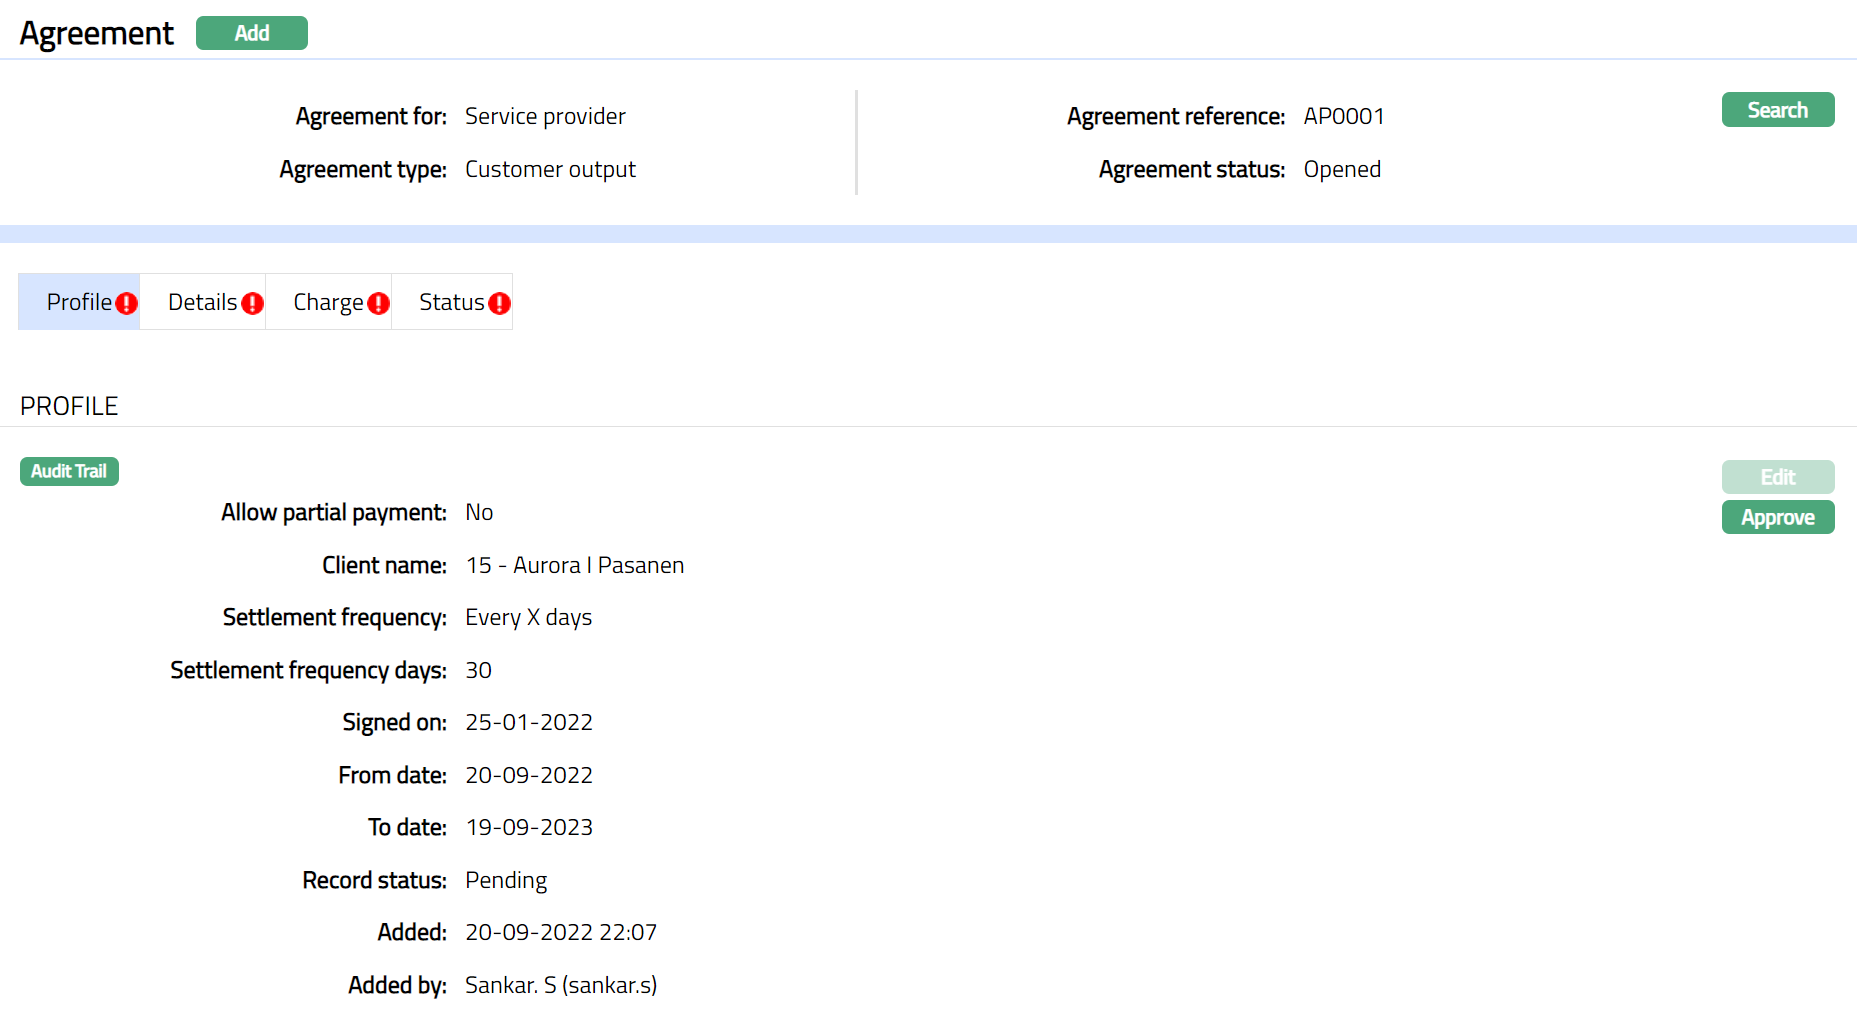
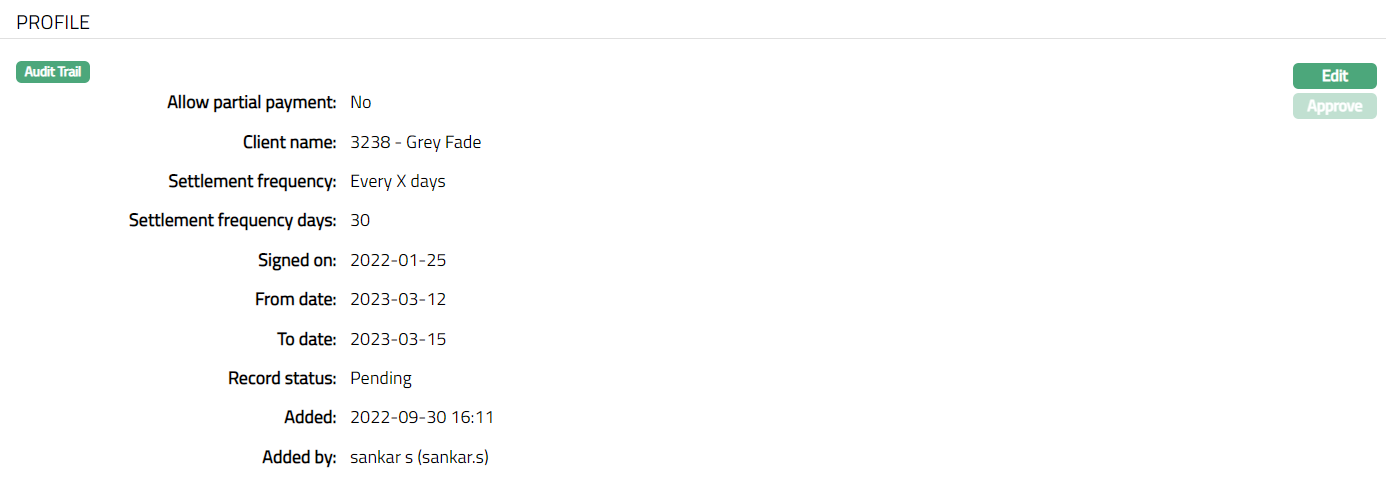
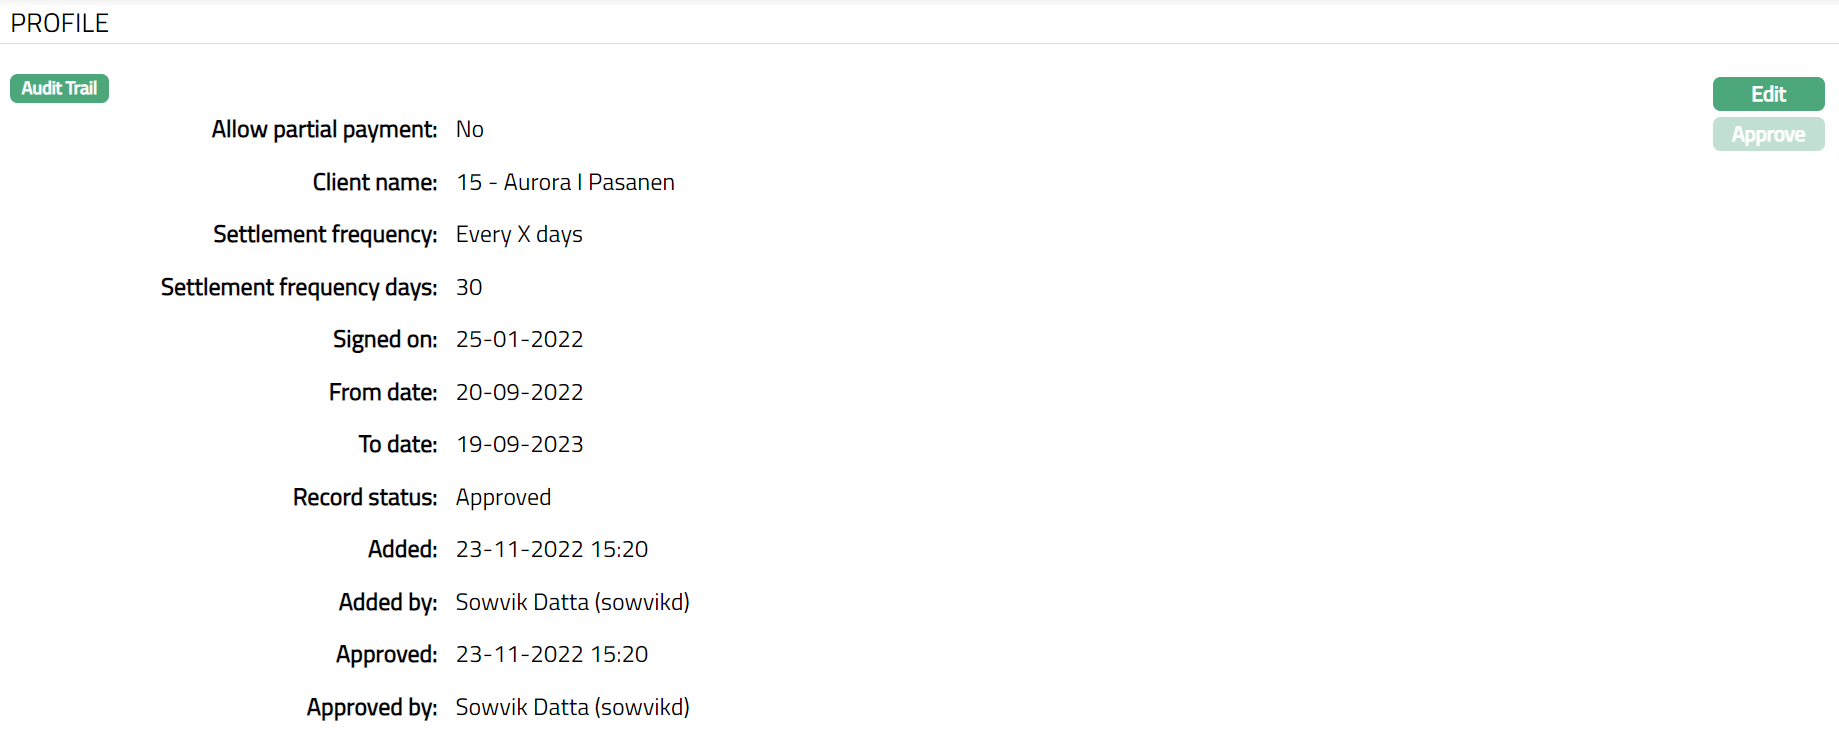
Profile
Profile tab, which is the default screen in the Agreement screen, shows the basic details of the Agreement. For details refer to Agreement -- Profile (1/4).
To view / edit Profile,
- Click Edit. Edit -- Profile page is displayed.
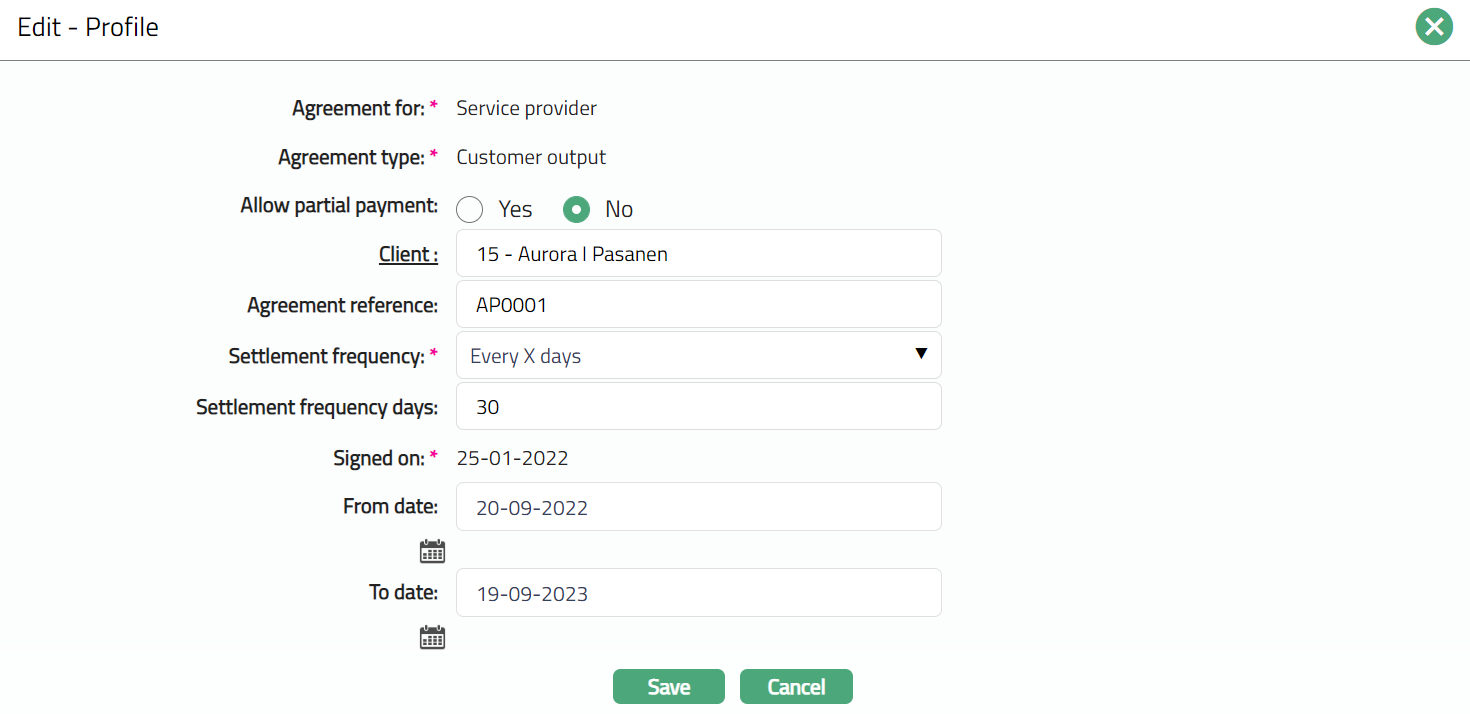
Note: Except Agreement for, Agreement type and Signed on fields, rest all other fields are editable.
Click Save. Profile page appears with the edited details.
Functions: Edit, Approve.
The additional fields that you can view in the tab are explained below:
Status field displays the status of the tab.
Added field displays the date on which the record was added.
Added by field displays the name of the user who created the record.
Approved field displays date on which the record was approved and is displayed only for approved records.
Approved by field displays name of the user who approved the record and is displayed only for approved records.
Note: Any change in the tab will set the tab status to Pending till it is approved by another user. On approval, the tab status is set to Approved.
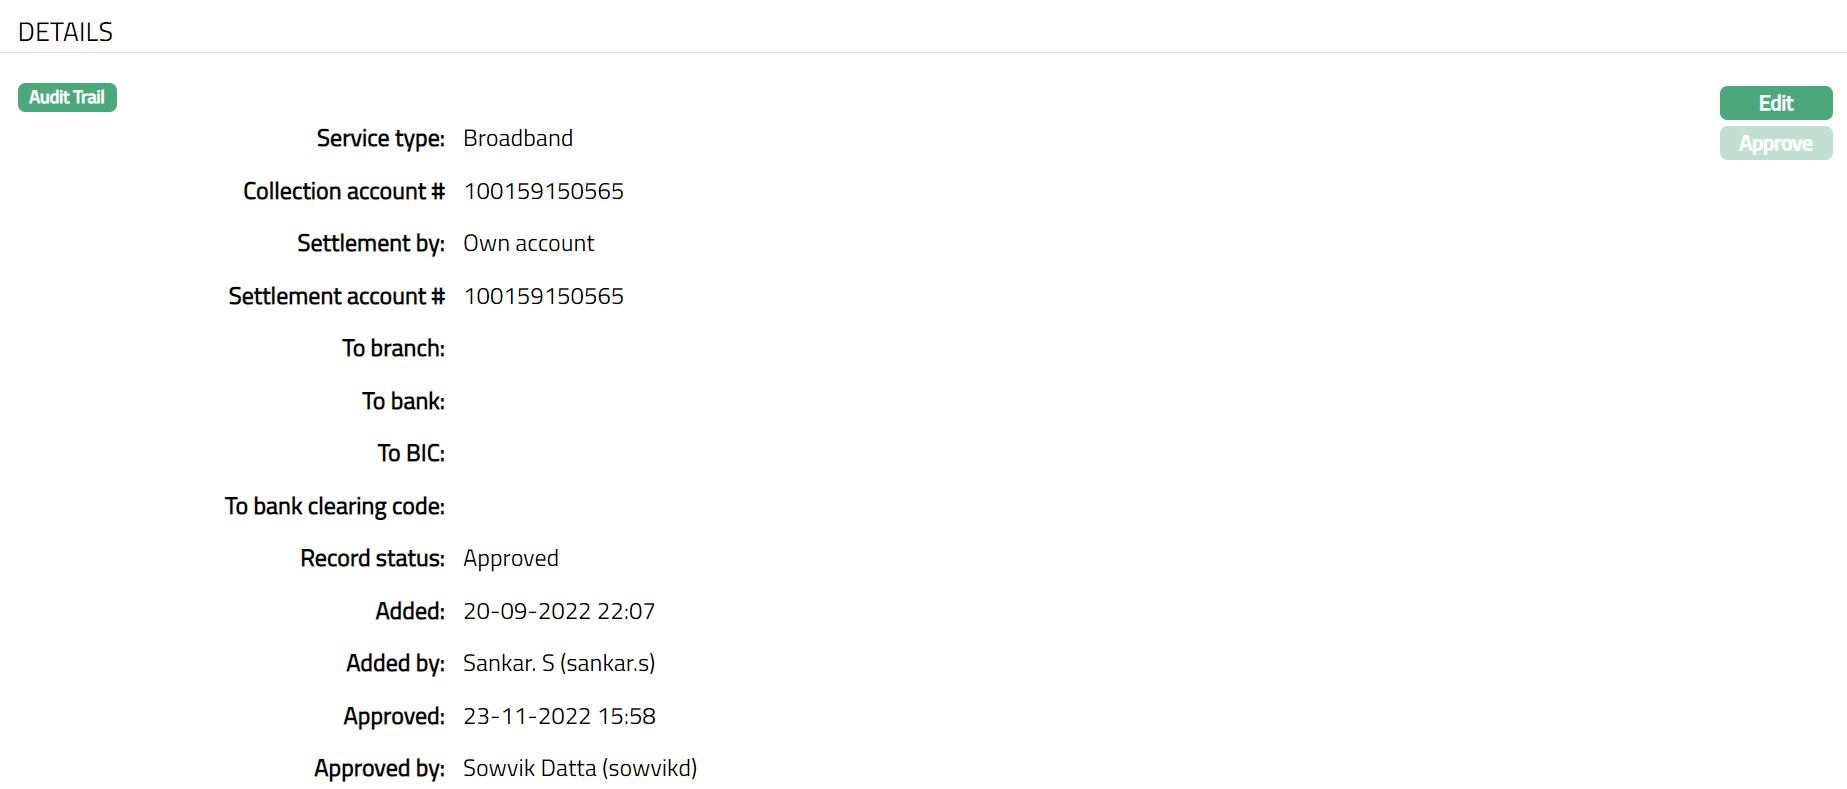
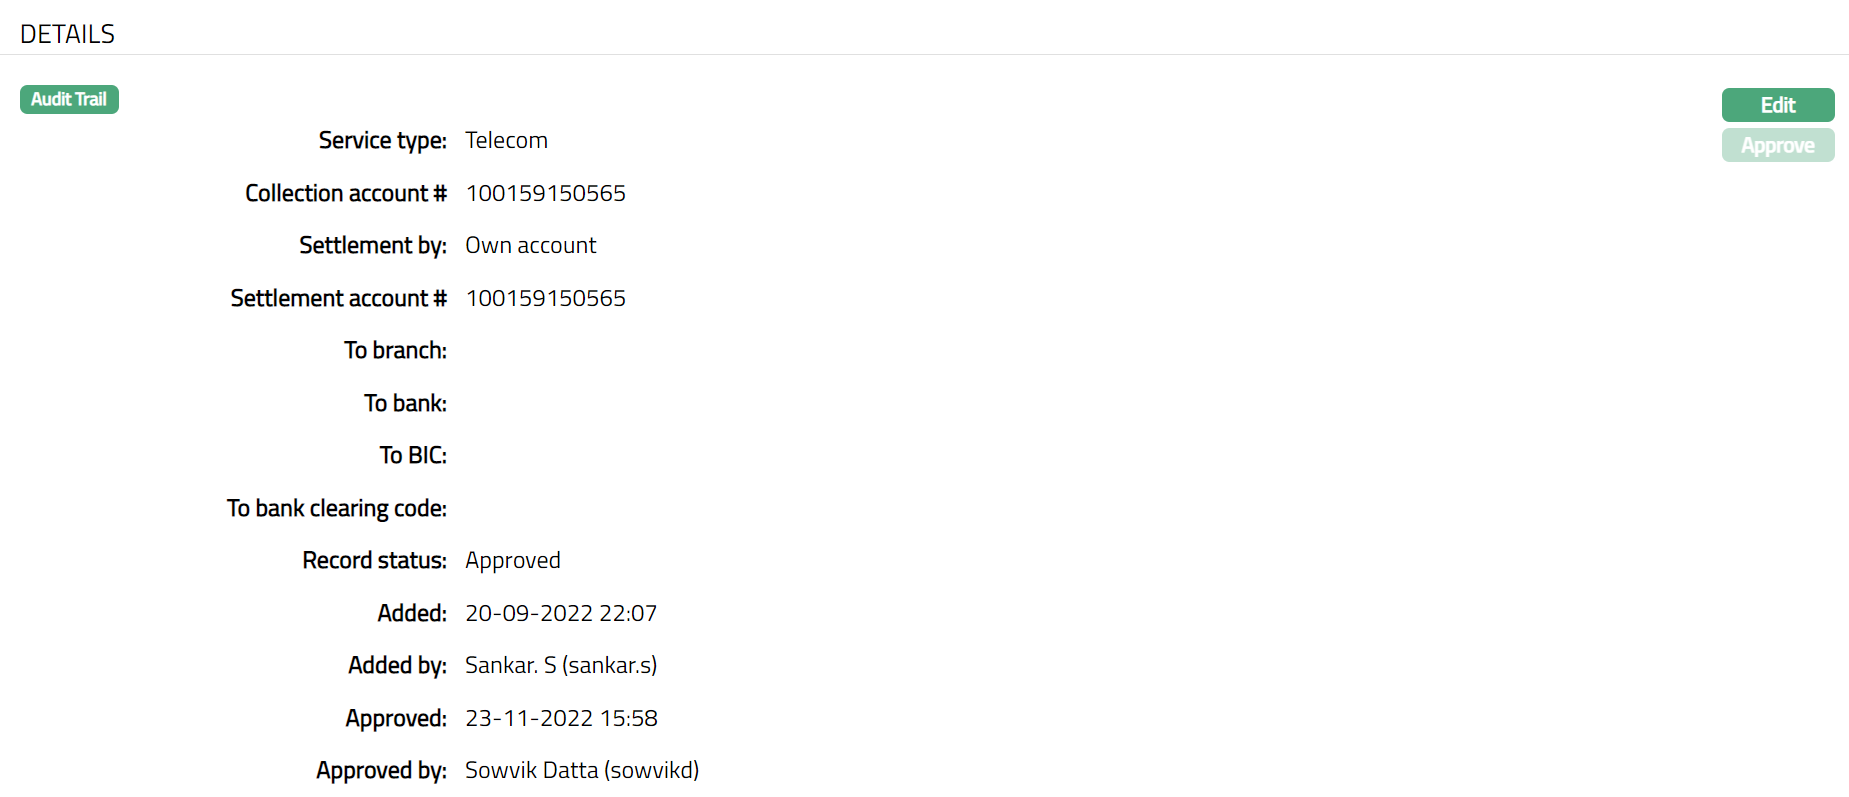
Details
The service provider details entered in the Agreement for Service Provider > Agreement -- Details (2/4) are displayed under the Details tab.
Functions: Edit, Approve
To view / edit the Details
Click Edit. Edit -- Details page is displayed.
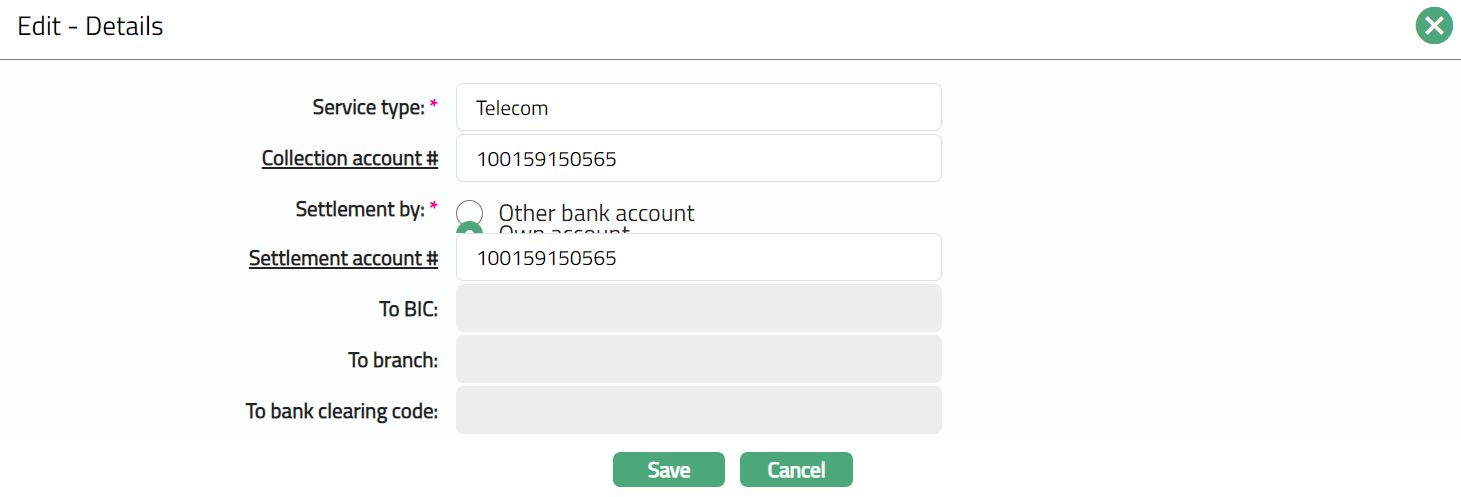
Note: Based on the option selected in Settlement by field, all fields are editable.
Click Save. Details page appears with the edited details.
Functions: Edit, Approve
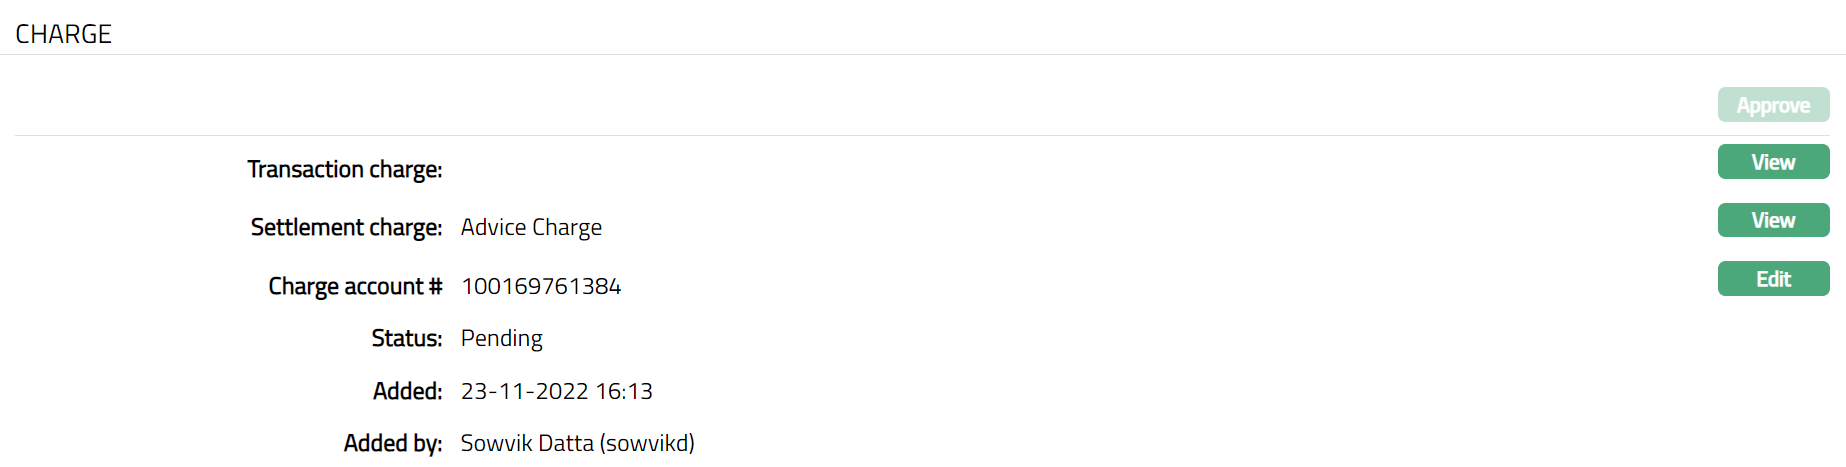
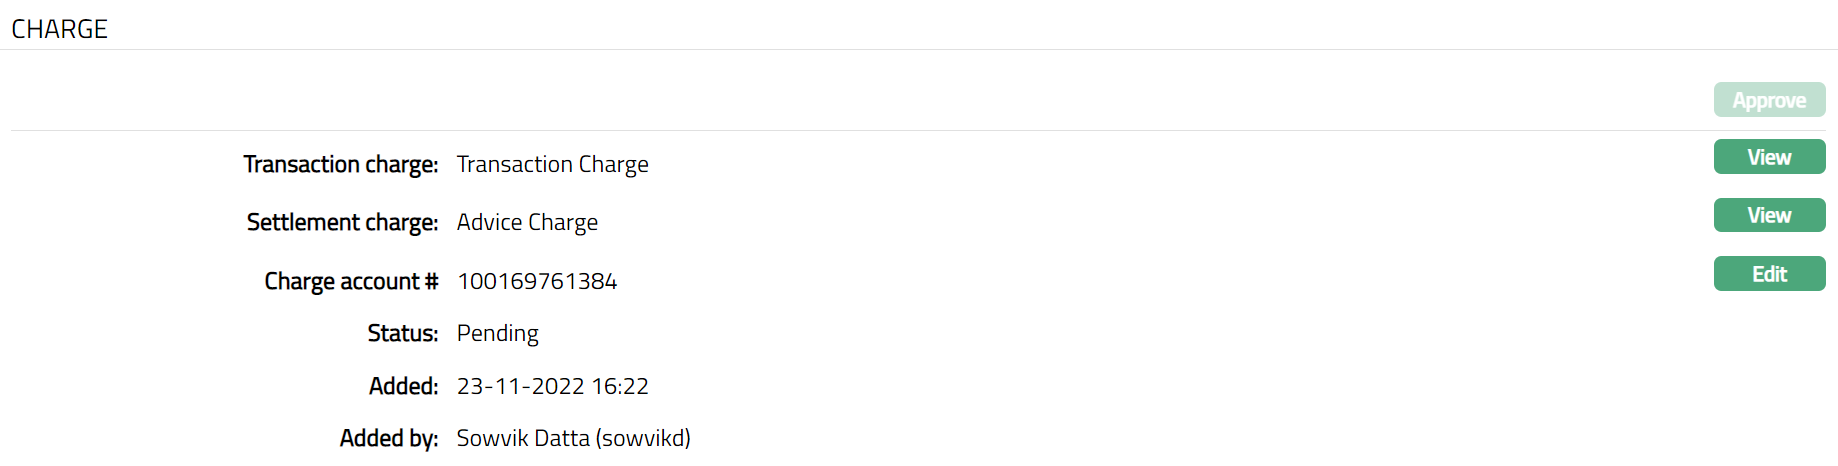
Charges
The service provider details entered in the Agreement for Service Provider > Agreement -- Charges (3/4) are displayed under the Charge tab.
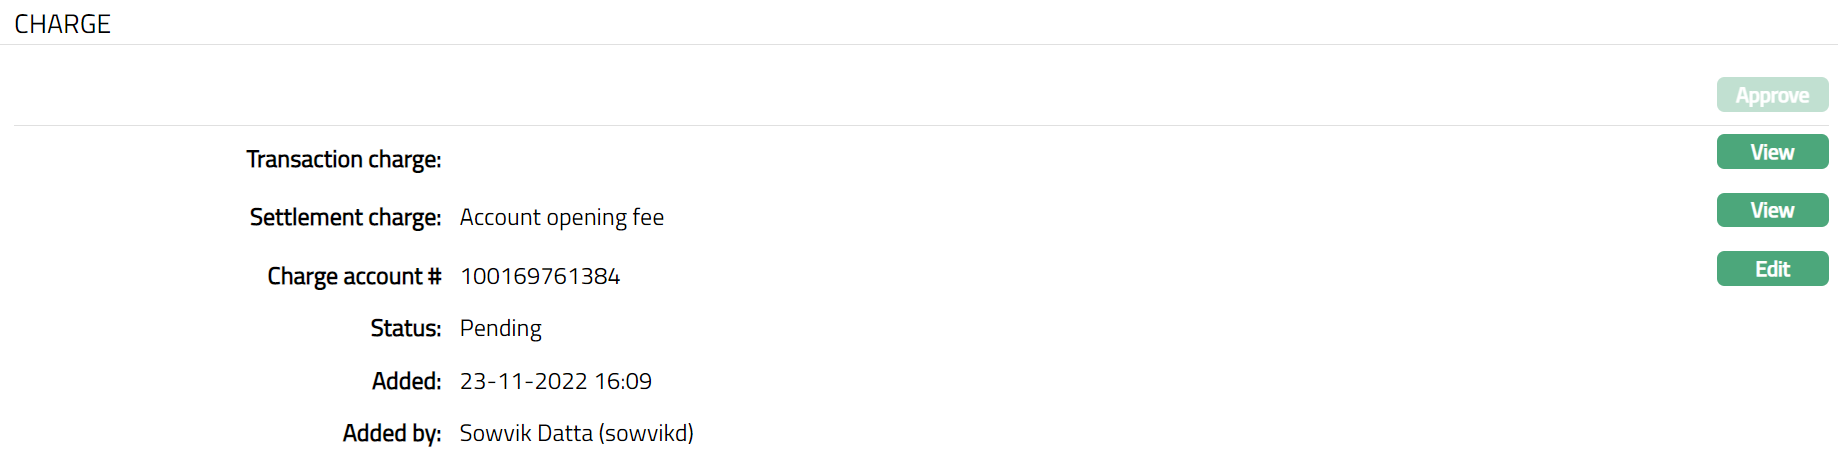
To view / edit the Details
Access Agreement page Charges tab.
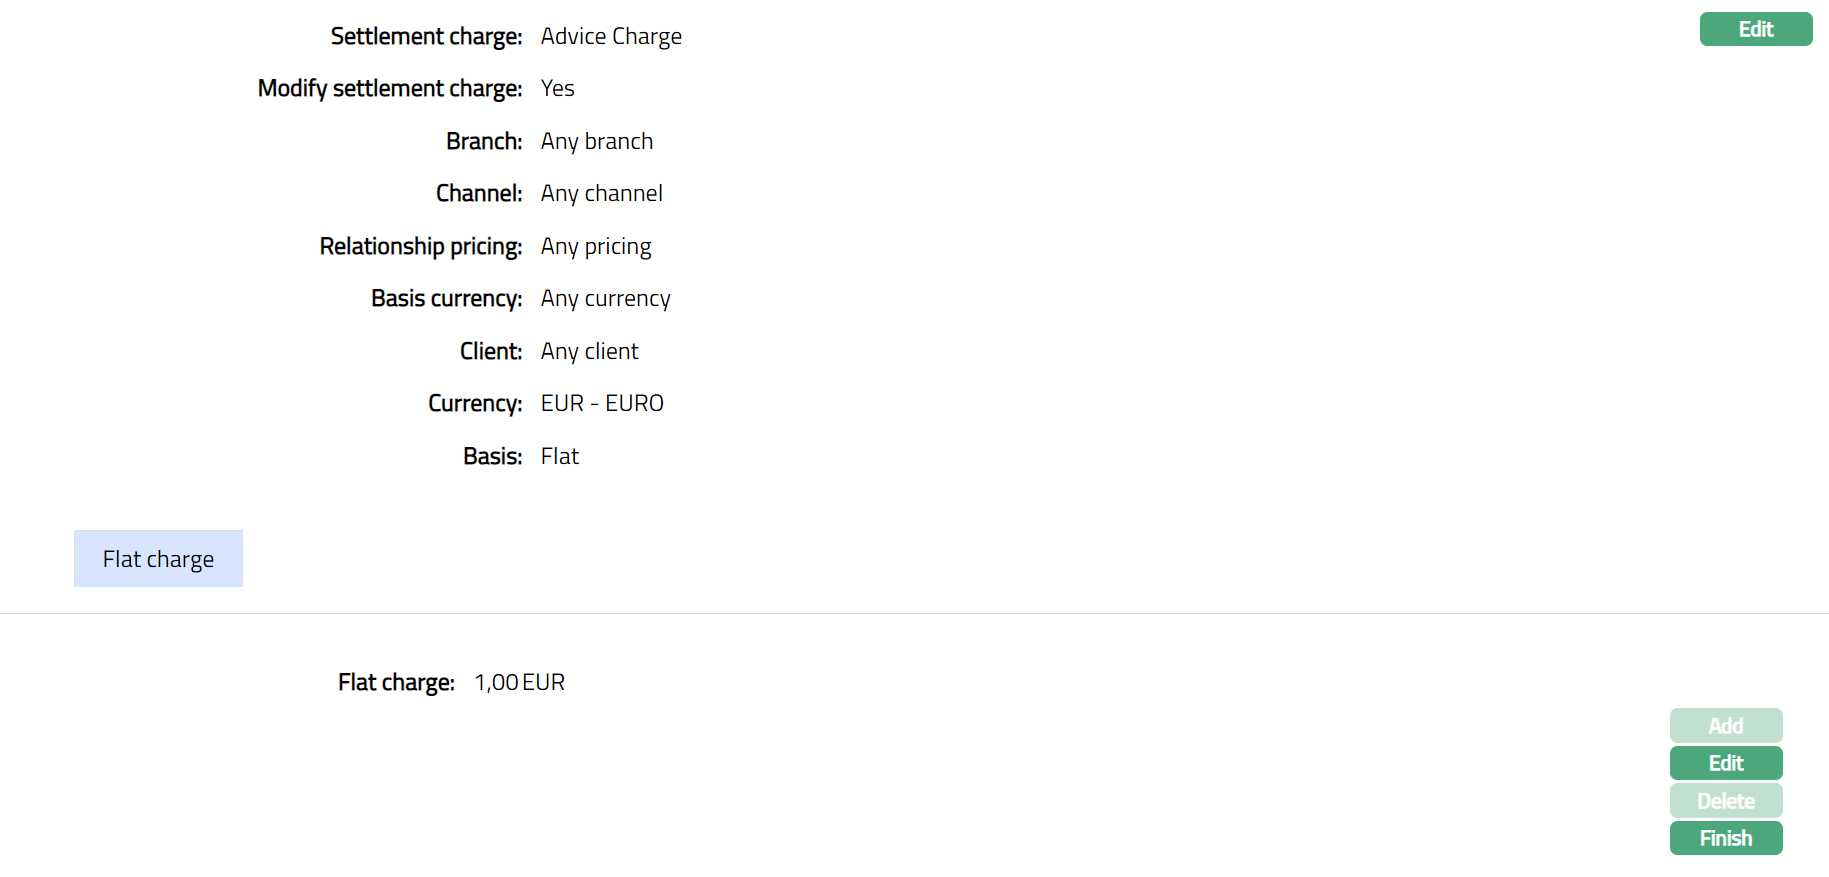
Click View against each defaulted charges to see the charge details and other parameters for the Charge. The details of the band of an attached charge Scheme is also displayed. The sample of the page is shown below.
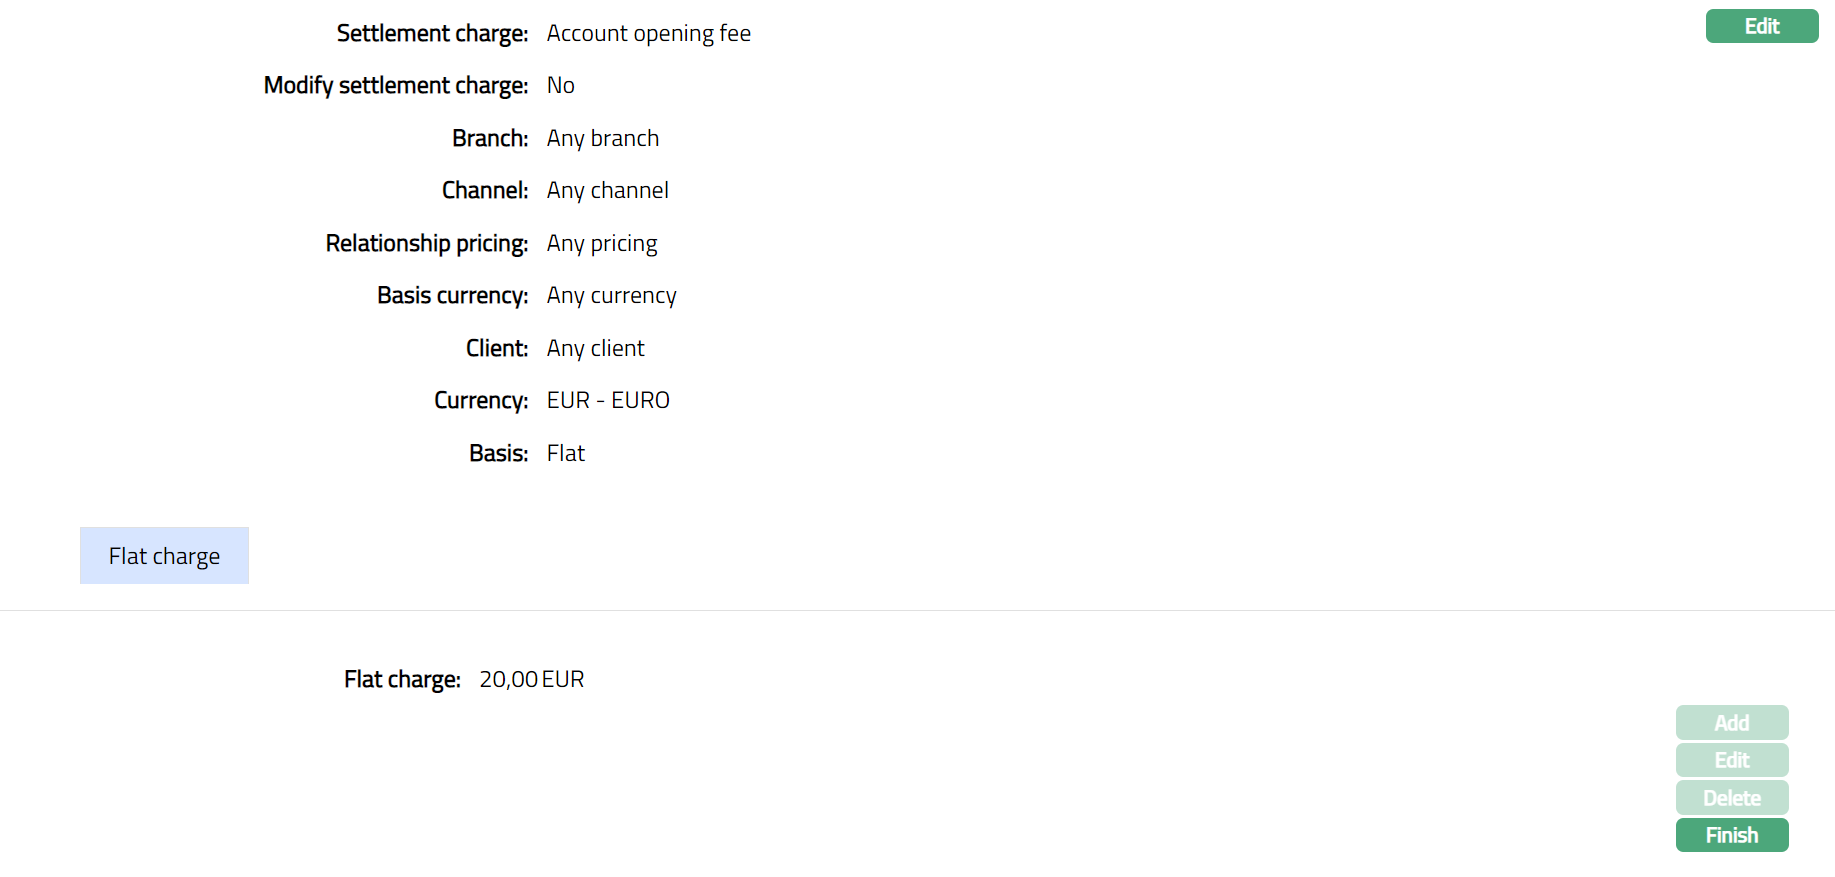
Click Edit to change the Charge Scheme and modify the parameters attached to the charge scheme. Edit Scheme page appears.
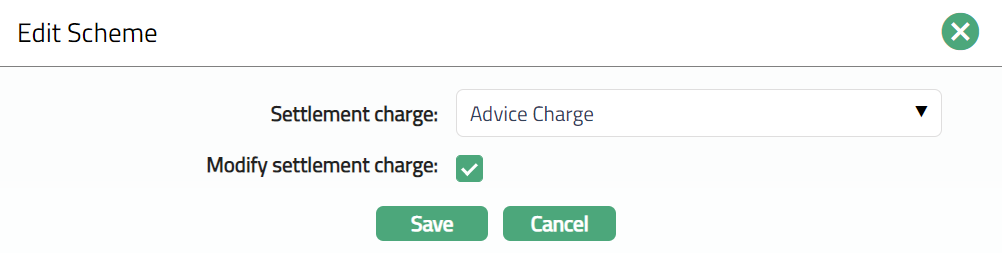
If you want to change Charge scheme, select the required Charge Scheme from the drop-down list of all active schemes that are shown in the drop-down list. You can modify this field irrespective of the Modify charge parameters flag. If the scheme is modified when the Modify parameters flag is checked, then all the details of the modified scheme will be displayed in the view screen and the flag will be unchecked.
Using the Modify Charge parameters check box you can specify if you want to delink the Charge parameters applicable to this account from the Charge scheme details that are maintained under Admin > Pricing > Charges > Charge schemes for this charge scheme. Thus, it enables you to customize the charge applicable to a specific account and keep it tailor-made for that account even if there are changes at the charge scheme level. If this is checked (Yes) the Add, Edit and Delete buttons will be enabled (only for last band) and you can make changes in the charge scheme parameters. If this is unchecked (No) then all the band and band details will get populated from the charge scheme and the Add, Edit & Delete buttons will be disabled. Finish button is always enabled and can be used to close Band view or Flat view. By default, modify charge parameters will be unchecked (No), which will display the default values that are retained.
Click Save. Charge Scheme page appears with edited details.
To edit Flat Charge details
Click Edit. Edit Flat Charge page appears.
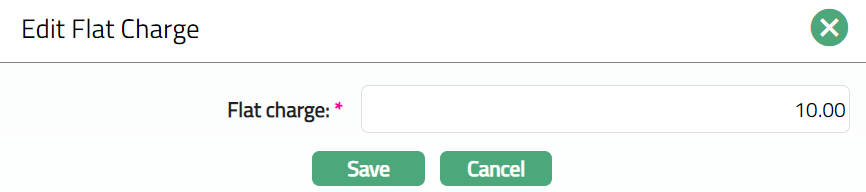
Click Save. Flat charge appears with the edited details.
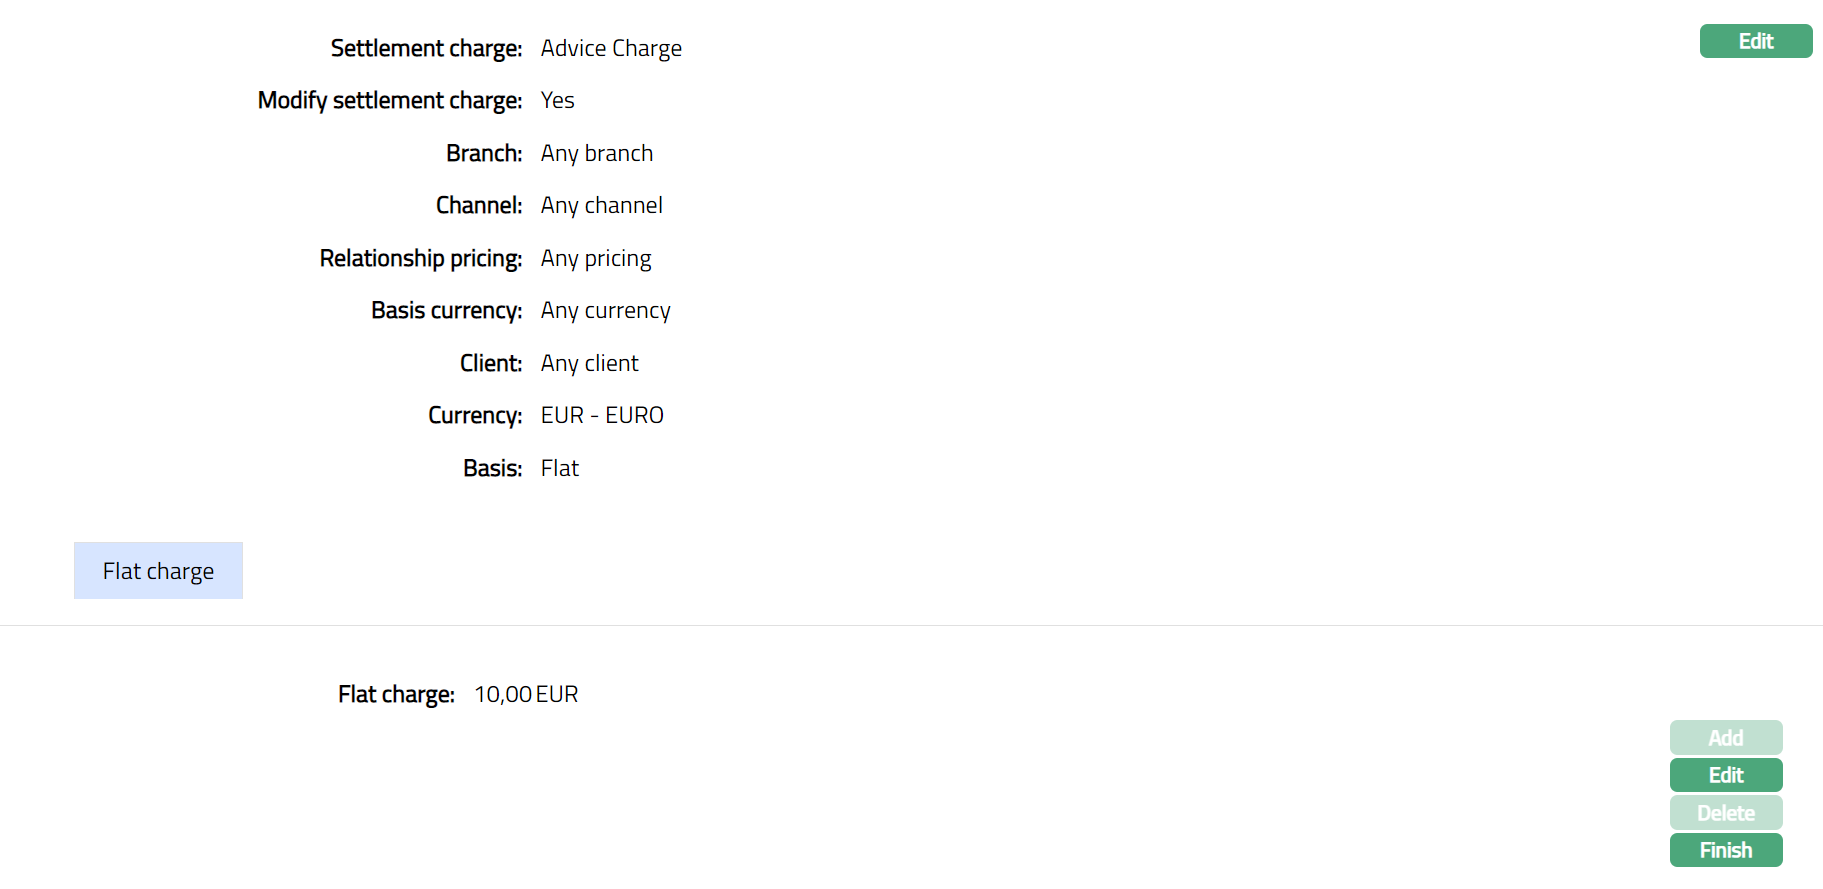
Click Finish. Charge page appears with the edited details.
Note: Any change in the tab will set the tab status to Pending till it is approved by another user. On approval, the tab status is set to Approved.
To edit Charge
Click Edit. Edit Charge Account page appears.

Click Save. Charge page appears with edited details.
 Functions: Approve, View, Edit
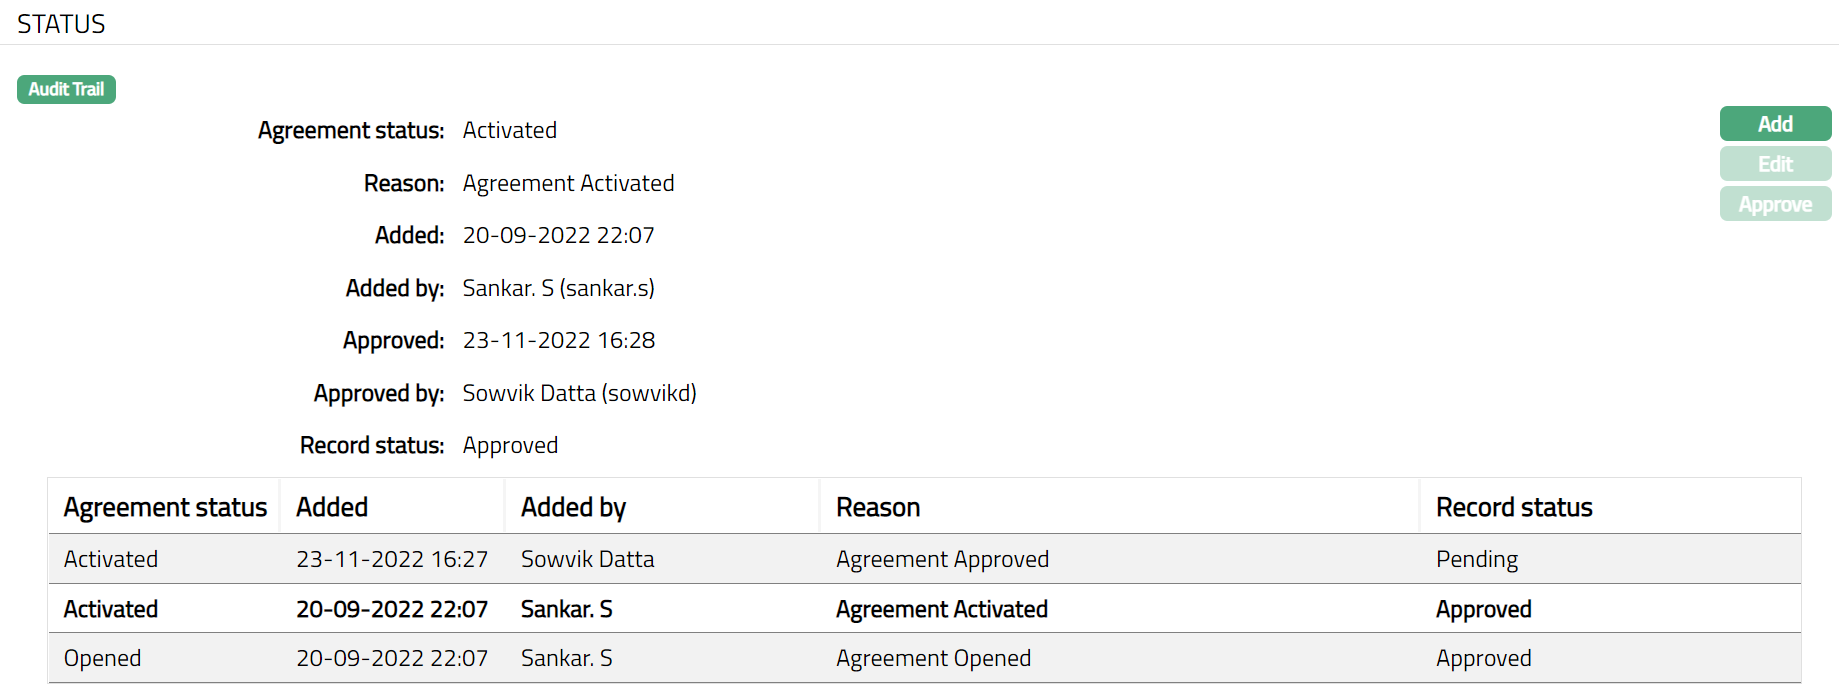
Status
Status tab allows the user to change and approve the status of the agreement.
As soon as the Agreement is created, the Agreement status is Open, and the record status is Approved as shown below.

To add Status
Click Add. Add Status page is displayed.
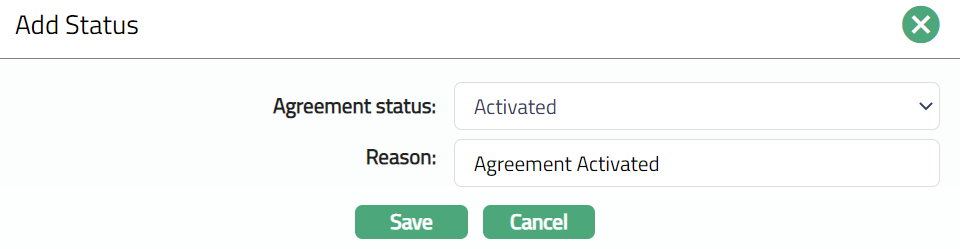
Select required Agreement status from the dropdown.
An Agreement can move between the pre-shipped statuses as follows:
When the agreement status is Opened and the record status is Approved, The Agreement status can be changed to Activated, Rejected or Cancelled
When the Agreement status is Activated and the record status is Approved, the Agreement can be Cancelled.
Enter Reason for adding the agreement status.
Click Save. Agreement status will be Activated, and the Record status will be Pending.
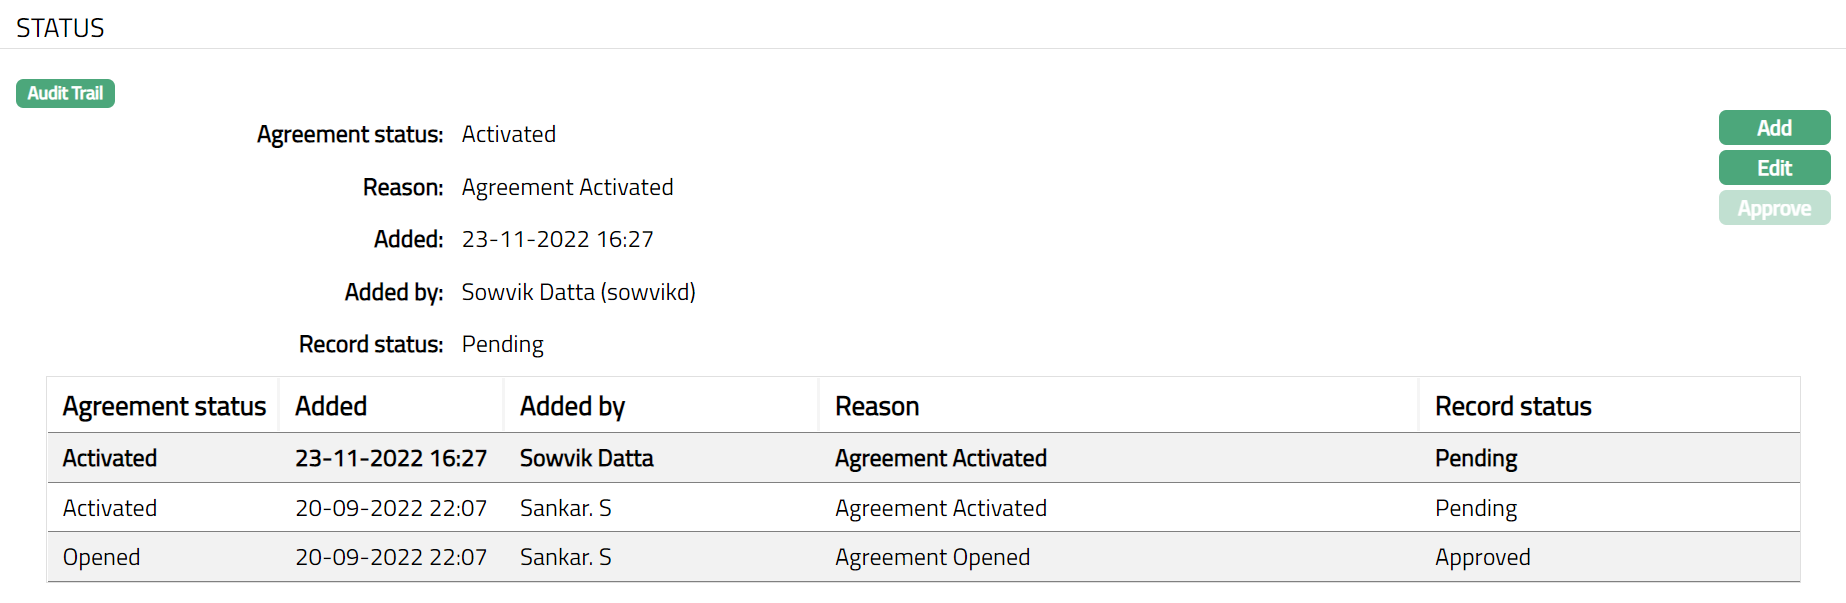
Note: On edit / adding a new agreement status, the Record status will be Pending. Any user other than the one who has edited / added the Agreement Status can Approve the Status
Functions: Add, Edit, Approve
Additional fields are:
Status field denotes the status of the tab.
Added field denotes the date on which the record was added.
Added by field denotes the name of the user who created the record.
Approved field denotes date on which the record was approved and is displayed only for approved records.
Approved by field denotes name of the user who approved the record and is displayed only for approved records.
Custom Field
Refer to the Custom Field section under the Agreement for SEPA