Charge Bundle Setting
Charge Bundle Setting allows you to set up a consolidated charge for your client for all the types of transactions the client executes in Aura. Charge bundling is applicable to Event and Transaction types of charges only. Charge Bundle Setting allows you maintain multiple combinations based on the currencies and for each of these combinations, you can select various charge schemes separately. It also allows you to define bands and based on this bands, charges are presented to the client. There are four sub tabs that allow you to maintain the charge bundle setting.
Sub tabs are as follows:
To add Charge Bundle Setting
- From Admin menu, click Pricing and then click Charge bundle setting under Charges. Charge Bundle Setting Search page appears.

- Click Add. New Charge Bundle Setting - Profile (1/4) appears.

Enter Description for the Charge Bundle Setting.
Select Liquidation frequency from the drop-down list of pre-shipped values Weekly, Daily, Monthly, Quarterly, Semiannual and Annual. By default, Monthly is selected.
Weekly: Monday to Sunday
Monthly: 1st to end of month
Quarterly: January to March, April to June, July to September, October to December
Semi-annual: January to June, July to December
Annual: January to December
Daily: Each day
- Click Next. New Charge Bundle Setting - Combination (2/4) page appears.
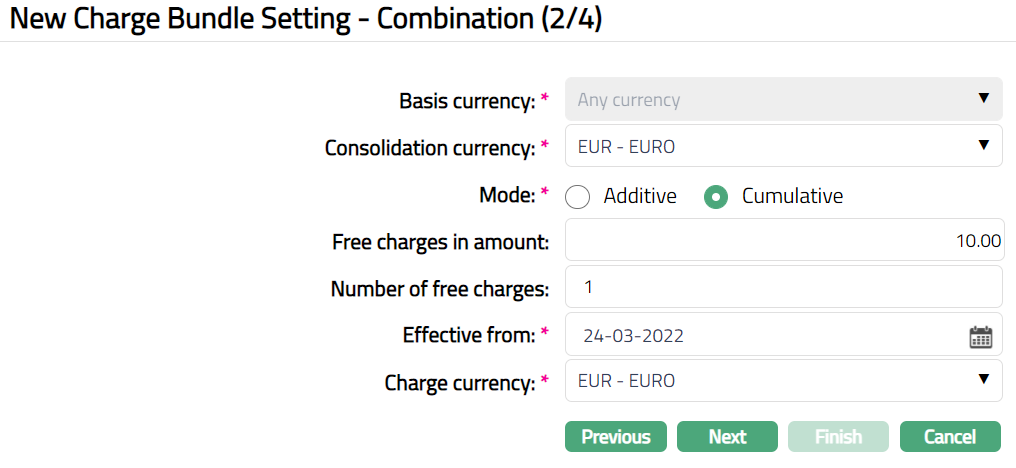
Basis Currency is the transaction basis currency. For the first combination, by default Any currency is displayed and the field is disabled. Only from the second combination, you can select the Basis currency from the drop-down list of active currencies. Currency with commodity as Yes will not be available in the drop-down list.
Consolidation currency is the currency in which any transaction currency is consolidated to. Select the Consolidated currency from the drop-down list of active currency. The field is applicable only on value based transactions and will populate only under Value tab.
Select Mode for processing the charge. The available options are Additive or Cumulative.
- Additive: If this option is chosen, then the Charge Bundle will pick additive charges. Additive charges are calculation of charges based on Bands maintained in an additive form.
For example:
Mode: Additive and Transactions = 1600
| Bands | Calculation | Total charge amount |
|---|---|---|
| 0 -- 500 = 1.0 | 500 * 1.0 | 500 |
| 501 -- 1000 = 0.9 | 500 * 0.9 | 450 |
| 1001 -- 2000 = 0.8 | 600 * 0.8 | 480 |
| 2001 -- 3500 = 0.7 | ||
| Total additive charge = 1430 |
- Cumulative: If this option is chosen, then the Charge Bundle will pick cumulative charges. Cumulative charge is the total charge picked based on the Band range. By default, cumulative mode is checked.
For example:
Mode: Cumulative and Transactions = 1600
| Bands | Total charge amount |
|---|---|
| 0 -- 500 = 1.0 | |
| 501 -- 1000 = 0.9 | |
| 1001 -- 2000 = 0.8 | 1600 * 0.8 = 1280 |
| 2001 -- 3500 = 0.7 | |
| Total cumulative charge = 1280 |
Enter Free charges in amount. It is the amount up to which the free transactions will be allowed. By default, will be 0. This field will populate only under Value tab.
Enter Number of free charges. It is the number of times the free charges are applicable. By default, it is 0. This field will populate in both Number and Value tab.
Enter Effective from date from the date picker. It is the date from which the charge bundle setting is effective. By default, the date will be the current system date. The date can be changed to current date or any future date.
Select Charge currency from the drop-down list of active currencies. It is the currency in which the charge is processed.
Click Next. New Charge Bundle Setting -- Accounting (3/4) page appears.
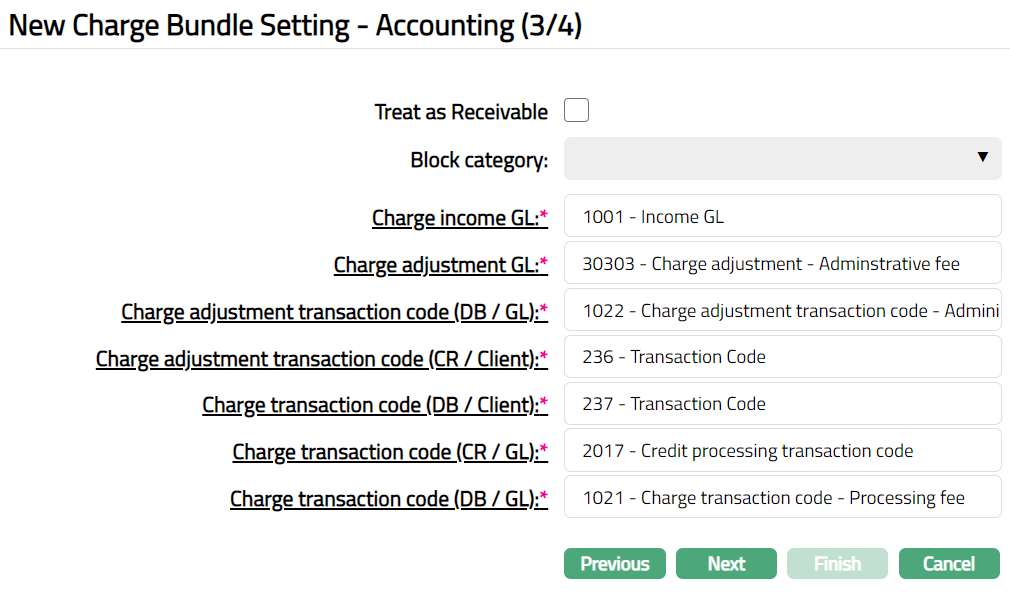
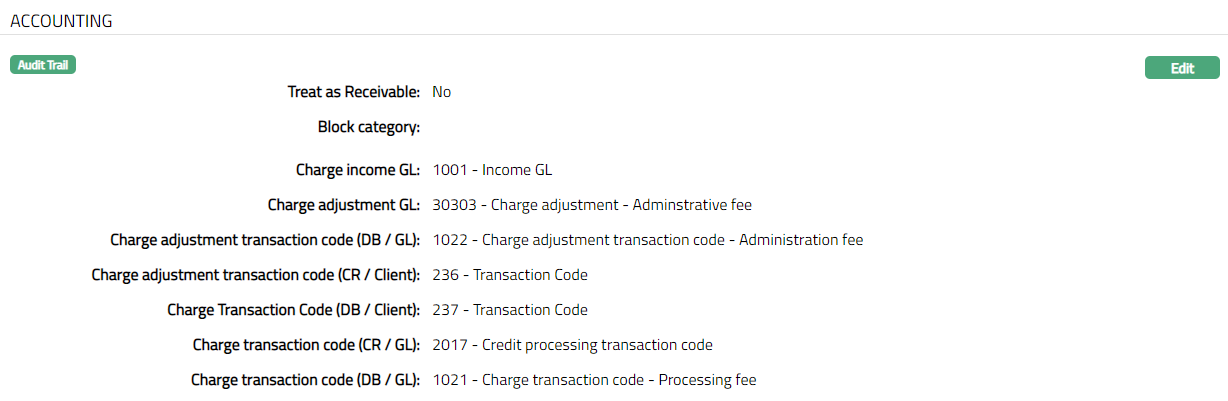
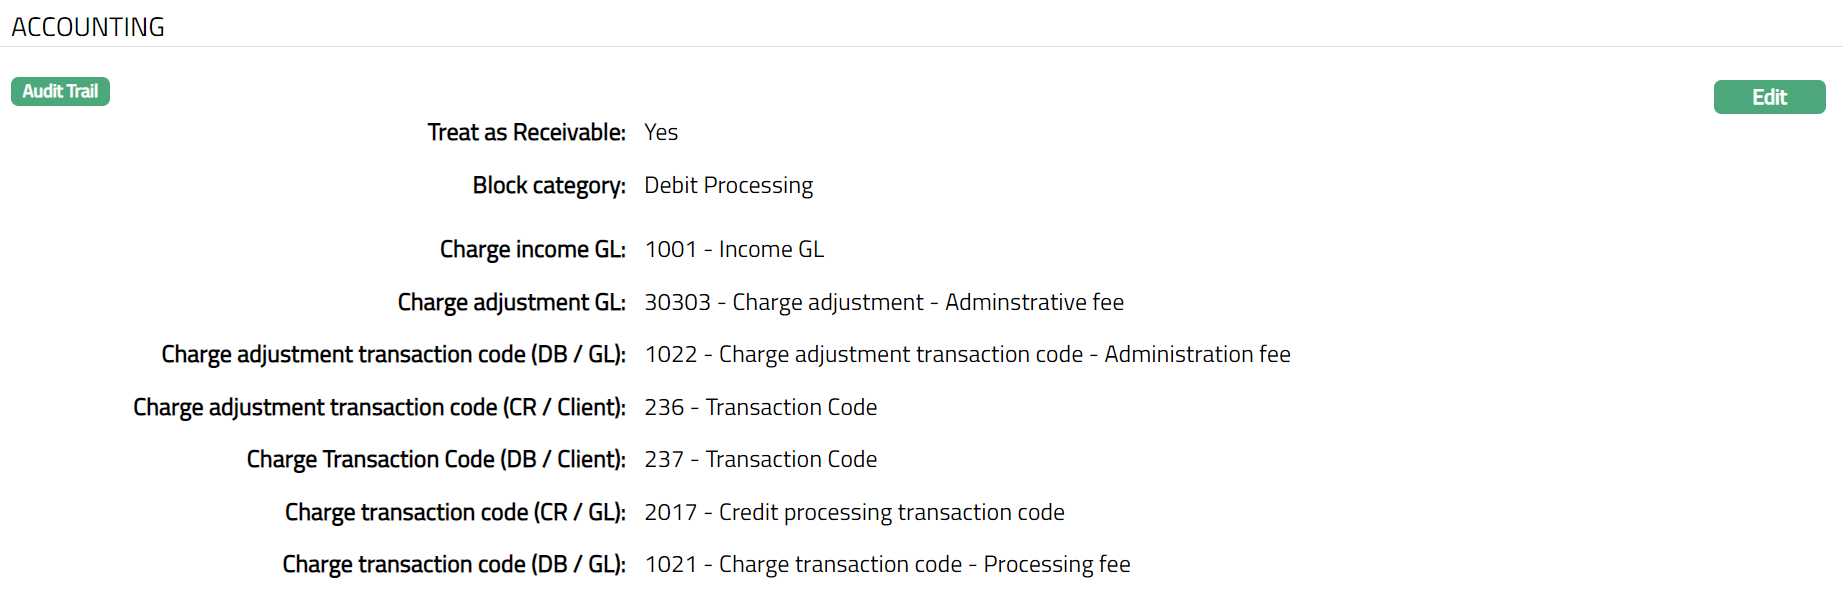
By checking Treat as Receivable checkbox, you can specify that the charge amount must be treated as a Receivable if at the time of booking of the charge, funds are not available to be debited from the account. By default, Treat as Receivable is unchecked.
If Treat as Receivable is checked, then Block Category field will be enabled, and you can select a block category from the drop down list of all the active block categories maintained under Admin > System codes > Categories > Block categories. Based on the balance check maintained for the block category, Aura will check for the balance. If the condition satisfies, then the charge will be applicable and if the condition is not satisfied then the charges will be treated as receivable. If the balance check for the block category is maintained as No check, then Aura will not check for the balance and the charge will be treated as receivable; but if there are insufficient funds in the account when the transaction is posted, the charge amount will be blocked.
You will see the list of various GLs and Transaction Codes required to account for the charges.
In the table below you will find the description of the fields, the use and the conditions for each of the GLs / Transaction Codes. You can either directly input the Ledger / Transaction Code or click on the hyperlink to see the list of GLs / Transaction Codes satisfying these conditions and select the required Ledger / Transaction Code.
| Fields | Used | List of Accounts/Transaction codes based on |
|---|---|---|
| Charge Income GL | For charge income received by the bank | Ledger type Income |
| Charge adjustment GL | For any adjustment in charges | Ledger type Income / Expense |
| Charge adjustment transaction code (DB/GL) | For any adjustment in charges in the GL account | Transaction type Debit General Ledger |
| Charge adjustment transaction code (CR/Client) | For any adjustment in charges in the client account | Transaction type Credit Client Account |
| Charge transaction code (DB/Client) | For debiting the charges from the client account | Transaction type Debit Client Account |
| Charge transaction code (CR/GL) | For crediting the charges to the GL account | Transaction type Credit General Ledger |
| Charge transaction code (DB/GL) | For debiting the charges from the GL account | Transaction type Debit General Ledger |
17. Click Next. New Charge Bundle Setting -- Confirmation (4/4) page appears.
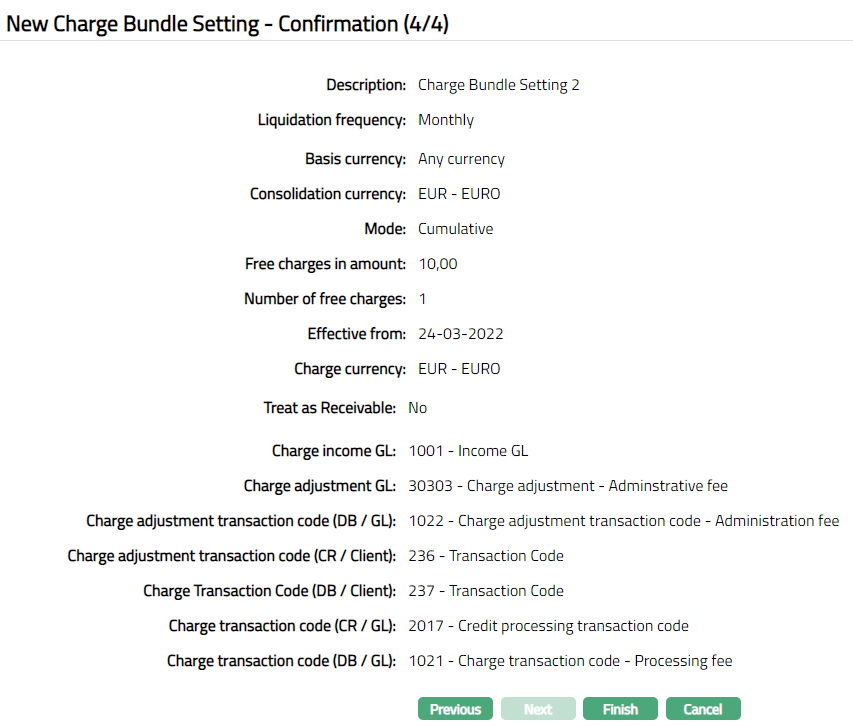
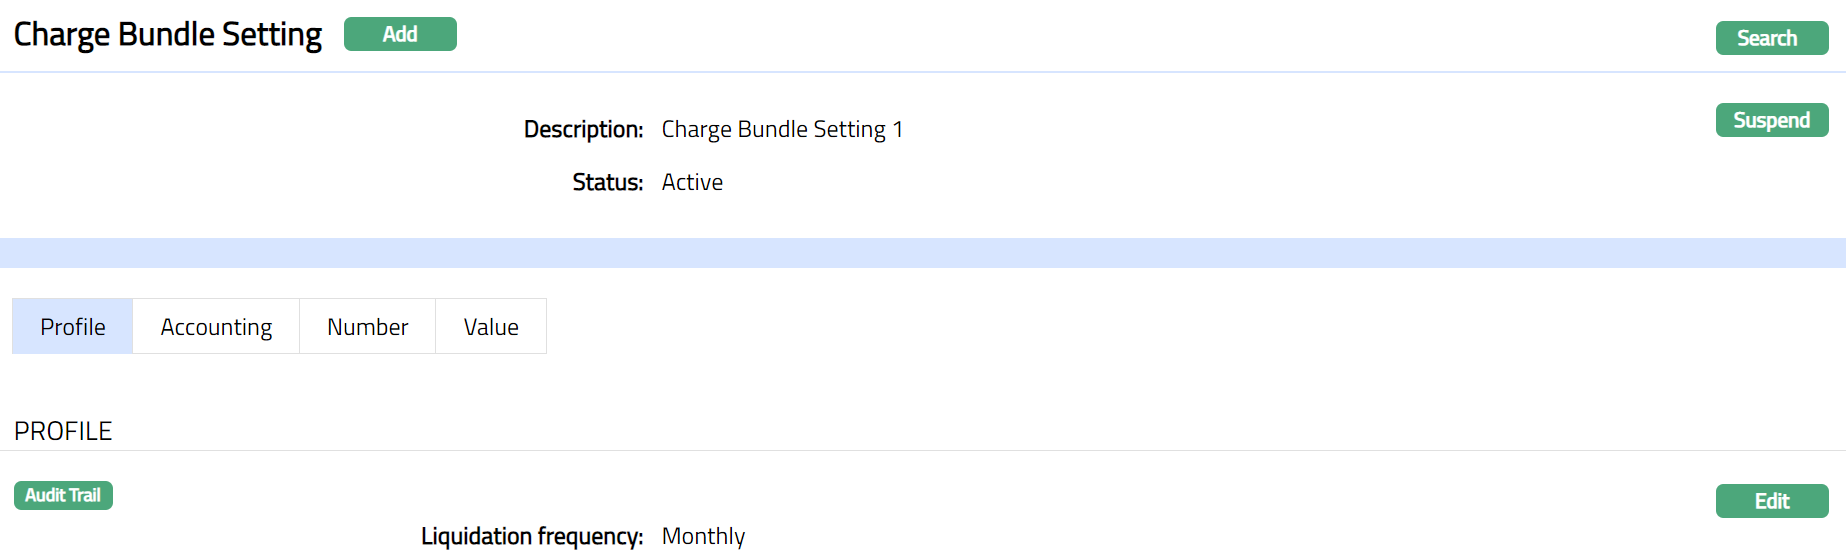
- Click Finish. Charge Bundle Setting page appears with the added details. Note: Status will display as Active.
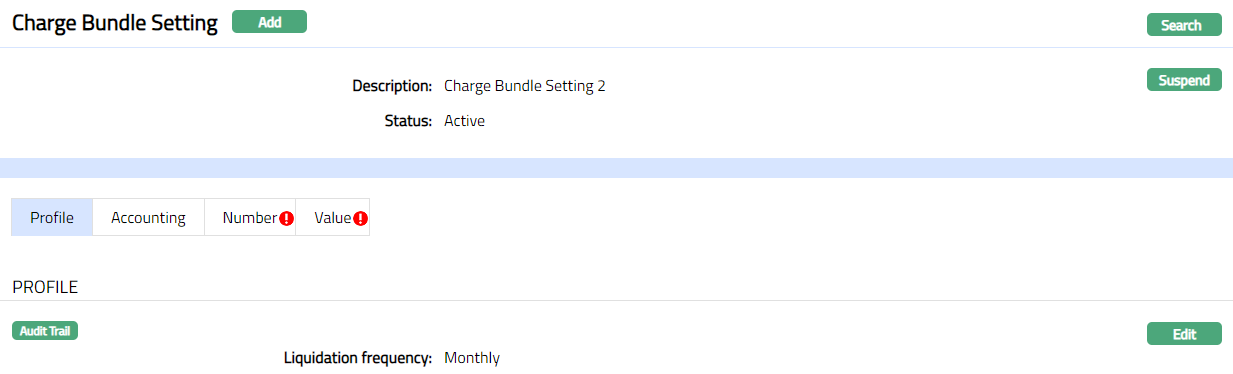
Functions: Add, Search, Suspend, Activate
Note: On creation of a new record, the Status of the record by default will be Pending in Value tab and Number Tab and a red bubble appears on the Number tab and Value tab. Once the record is Approved, the record status gets changed to Approved and the red bubble on the tabs disappears.
Suspend: You can suspend a Charge Bundle Setting by clicking on Suspend button. When you click on Suspend button, Aura will ask for confirmation. On confirmation Aura will suspend the Charge Bundle Setting and Activate button will appear in place of the Suspend button. On suspension of the charge bundle setting, the charge aggregation will be stopped, and the charge bundle setting will not be available to the client or charge bundle group.
Activate: If you want to activate a suspended Charge Bundle Setting then click on Activate button. Aura will ask for confirmation. On confirmation Aura will Activate the Charge Bundle Setting and Suspend button will appear in place of Activate button. Once activated, Aura will start aggregation of charges and the charge bundle setting will be available to the client or charge bundle group.
Note: Once the Charge Bundle Setting is created, then the aggregated charges get debited into the client's charge account.
Aggregation is a charge bundle process wherein any transactions which are only Event based or Transaction based are processed. It specifies whether the charges to be aggregated for charge bundle process or existing charge scheme on the account to be applied.
Profile
Profile tab, which is the default tab in the Charge Bundle Setting screen, shows the basic details of the Setting created for Charge Bundle.
To view / edit Profile.
- Access Charge Bundle Setting page and click Profile tab to view the detail as per sample below. The details are defaulted from the entries that you made during creation of a new Charge Bundle Setting. For details refer to Charge Bundle Setting -- Profile (1/4).

- Click Edit. Edit Profile page appears.
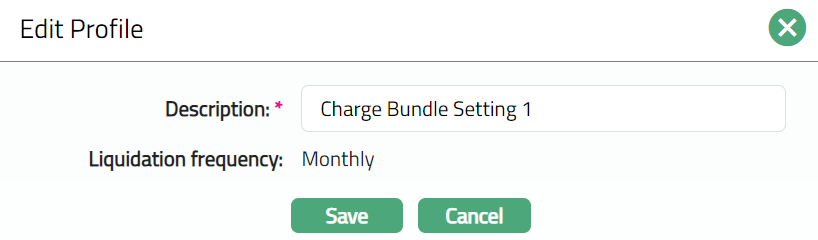
Note: Only Description field is editable.
- Click Save. Profile page appears with the edited details.
Functions: Edit
Accounting
Accounting tab allows you to view and maintain the fields relevant to accounting entries for Charge Bundle Setting.
To add /edit Accounting fields.
- Access Charge Bundle Setting screen and click Accounting tab. The details are defaulted from the entries that you made during creation of a new Charge Bundle Setting. For details refer to Charge Bundle Setting -- Accounting (3/4).
- Click Edit. Edit Accounting page appears.

Note: All fields are editable
- Click Save. Accounting page appears with the edited details.
Functions: Edit
Number
Number tab allows you to define the parameters for charging the client for the number of transactions that has been made. Using this tab, you can add multiple combinations and attach multiple Flat charge schemes to the combinations and maintain multiple bands for the combinations.
To add/ edit combination.
- Access Charge Bundle Setting screen and click Number tab. The details are defaulted from the entries that you made during creation of a new Charge Bundle Setting. For details refer to Charge Bundle Setting - Combination (2/4).
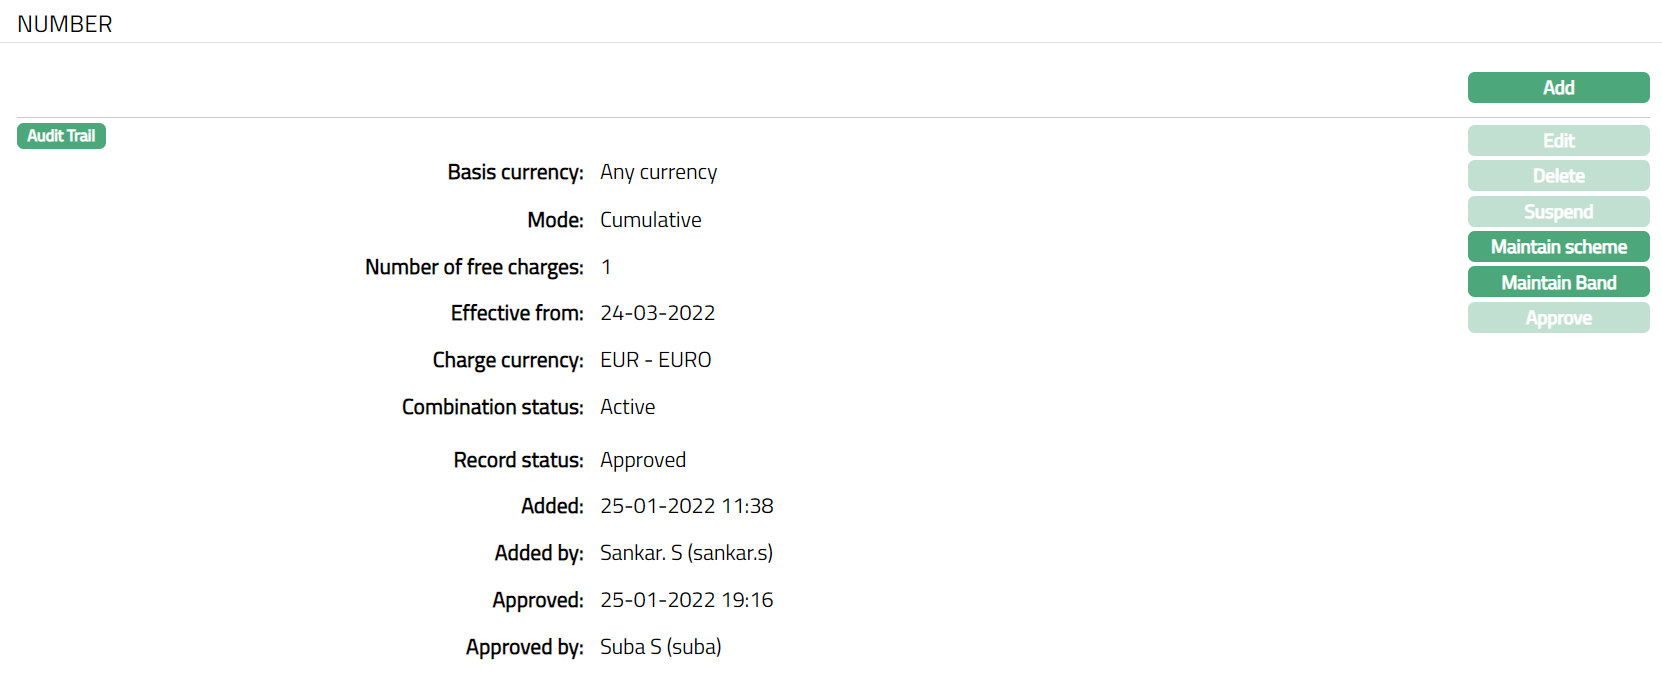
The additional fields displayed are as follows:
Combination Status: It displays the status of the combination.
Record Status field denotes the status of the record.
Added field denotes the date on which the record was added.
Added by field denotes the name of the user who created the record.
Approved field denotes date on which the record was approved and is displayed only for approved records.
Approved by field denotes name of the user who approved the record and is displayed only for approved records.
- Click Add. Add Combination page appears.
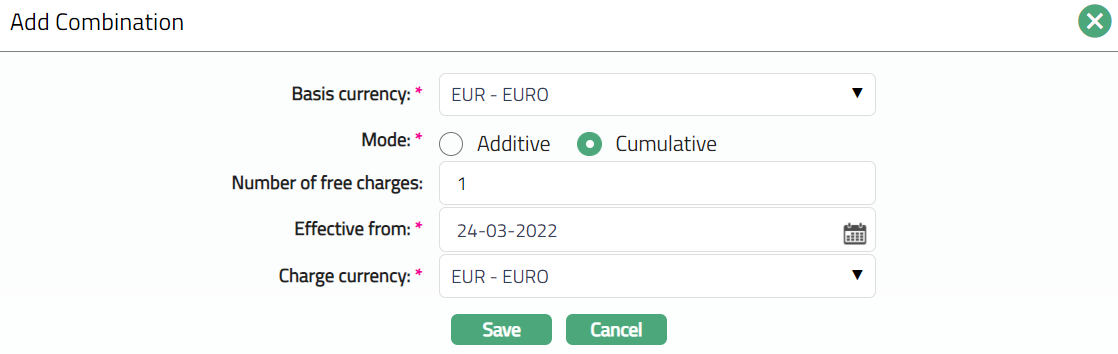
Note: Please refer Charge Bundle Setting - Combination (2/4) section for the details regarding the fields.
- Click Save. Combination page appears with the added details.
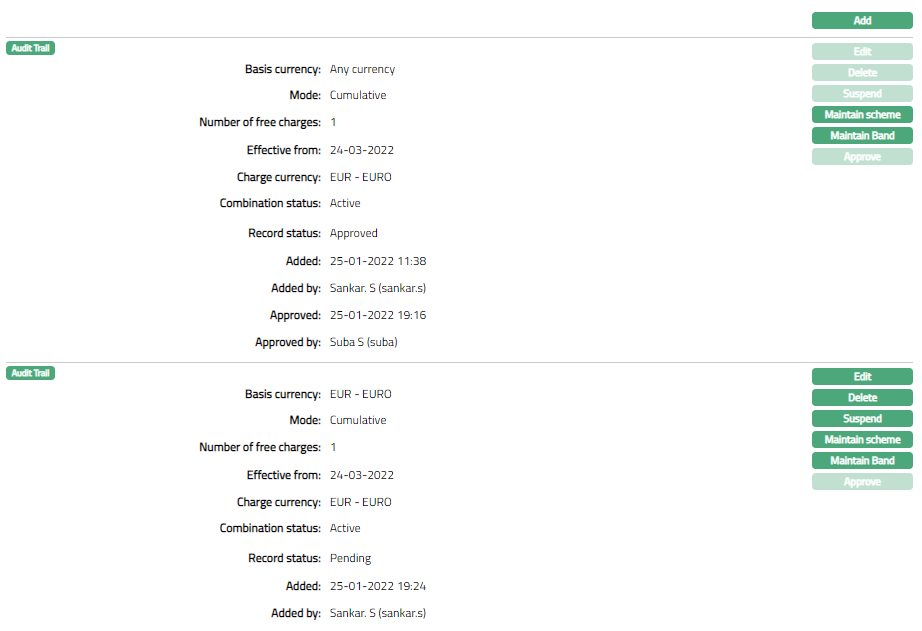
Functions: Add, Edit, Delete, Suspend, Activate, Approve, Maintain scheme, Maintain Band.
Note: If a combination is added, then the Edit, Delete, Suspend, Maintain scheme and Maintain Band buttons will be enabled. On approval of the combination, the, Edit, Delete and Suspend button will be disabled for the first combination, but will be enabled from the second combination. For suspension of a combination, Approval is required. You can Edit a combination only before Approval. Once the record is approved, Combination cannot be edited.
Status: The status of the combination is Active as soon as the combination is created.
Delete: You can delete a charge bundle combination saved in Aura by a click on Delete button. Aura will ask for confirmation, on approving which the selected record will be deleted. For the first combination, the Delete button will be disabled and will be enabled only from the second combination.
Suspend: You can suspend the combination by clicking on Suspend button. When you click on Suspend button, Aura will ask for confirmation. On confirmation Aura will suspend the Combination and the combination will not be available in Aura; but Charge Bundle Setting will be available. However, you cannot suspend the first combination. Suspension of a combination is allowed only from the second combination.
Activate: You can activate the Combination by clicking on Activate button. When you click on Activate button, Aura will ask for confirmation. On confirmation, Aura will activate the Combination. Once the combination is activated, it becomes available in Aura.
Approve: If you want to Approve a suspended combination, then retrieve the record and Click on Approve. Aura will ask for confirmation. Once the combination is approved, record status gets changed from Pending to Approved. Approve button will be enabled only when a combination is added/ edited/suspended. Once a combination is approved, cannot be deleted.
Validation for Approval is as follows:
- If there is any Combination of Basis Currency
Combination status -- Active
Record status -- Pending.
Result: Error Message as "Unapproved combination for the created basis currency exists" gets displayed in Aura.
- If there is Any Combination of Basis Currency
Combination status -- Suspended.
Record Status -- Pending/Approved
Result: Error Message as "Suspended combination for the created basis currency exists in the system" gets displayed.
Maintain Scheme
Maintain scheme option allows you to maintain multiple schemes for each combination. A list of flat charge schemes will be displayed. Charge scheme with charge amortization as Yes will not be displayed.
To add/ edit combination.
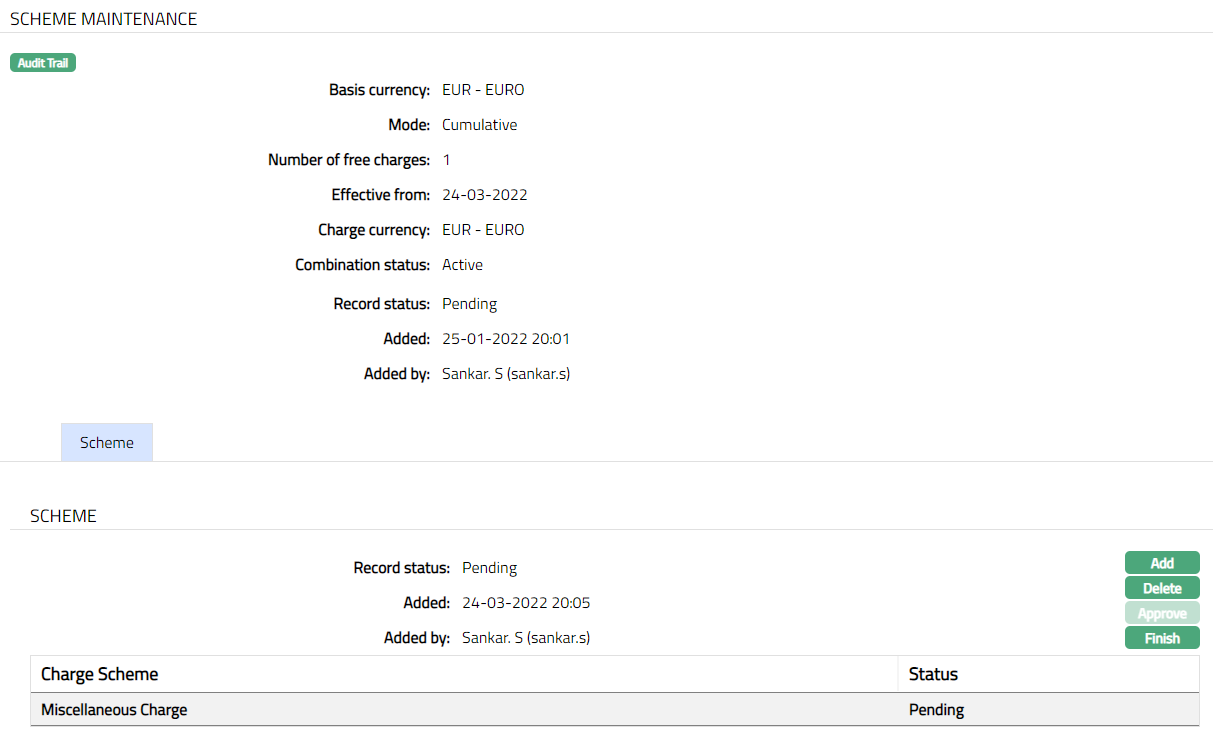
- Access Charge Bundle Setting screen and click Number tab. Go to the combination for which you want to attach a charge scheme and click Maintain Scheme. The combination that already exists will get displayed.
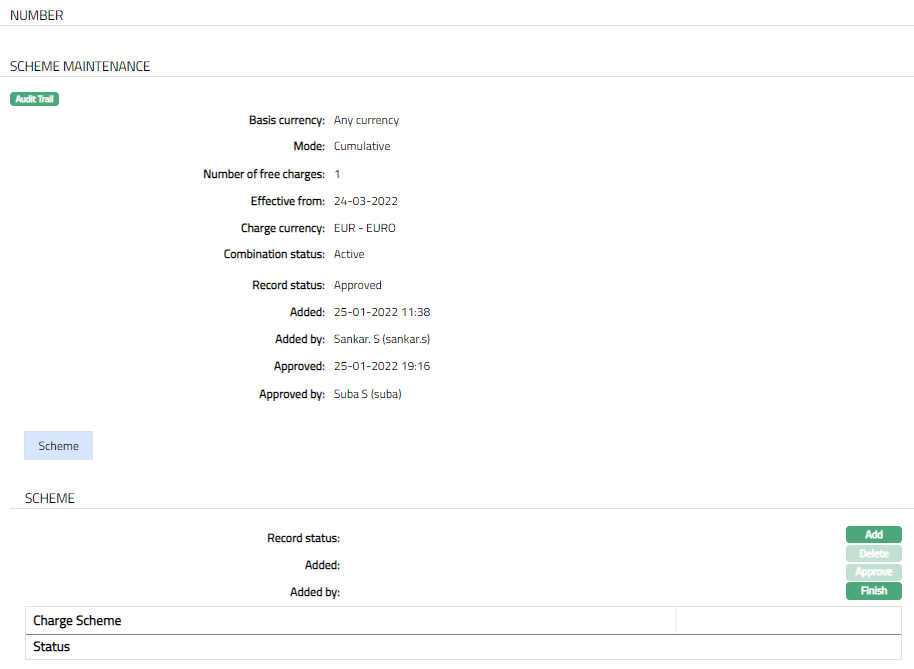
The values for Basis currency, Mode, Number of free charges, Effective from, Charge Currency, Combination Status are derived from the Combination that is maintained.
Click Add. Add Charge Scheme page appears.
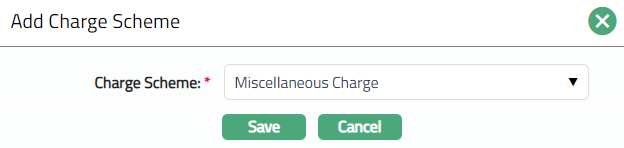
Select Charge Scheme from the drop-down list of active flat charge schemes maintained under System codes > Charges > Charges. Charge Schemes maintained with Charge amortization as Yes will not be displayed in the list. If any Charge scheme is attached to other combination, those charge schemes will also be displayed in the list.
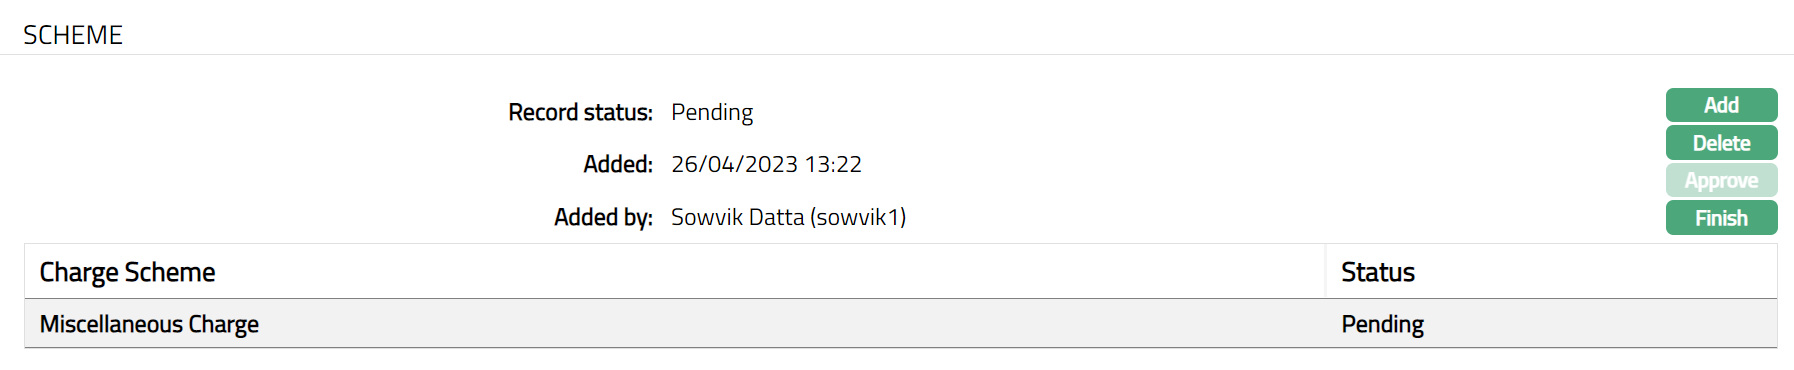
Click Save. Scheme page appears with the added details.
Functions: Add, Delete, Approve, Finish
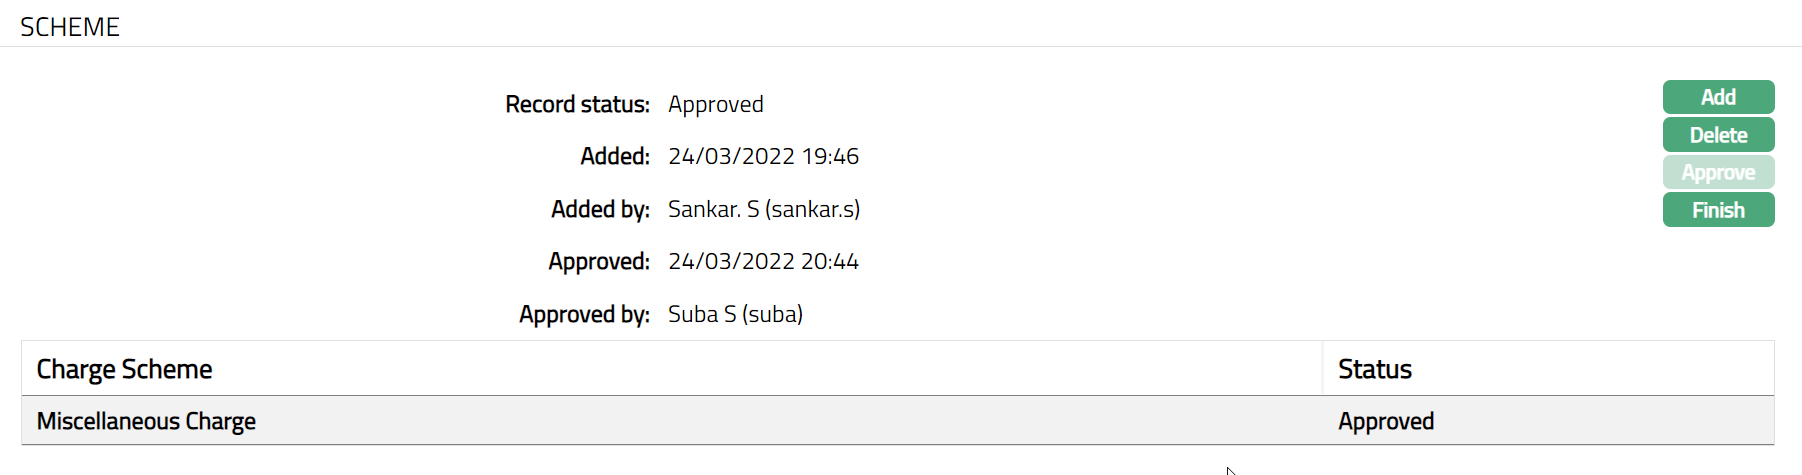
Note: On adding a new charge scheme, the status of the record by default will be Pending and a red bubble will appear on Maintain scheme button. Only on Approval, the record status gets changed to Approved and the red bubble on the Maintain scheme button disappears. Only on approval, the charge scheme attached to the combination will be considered for processing.
Functions: Add, Delete, Approve, Finish
The additional fields are as follows:
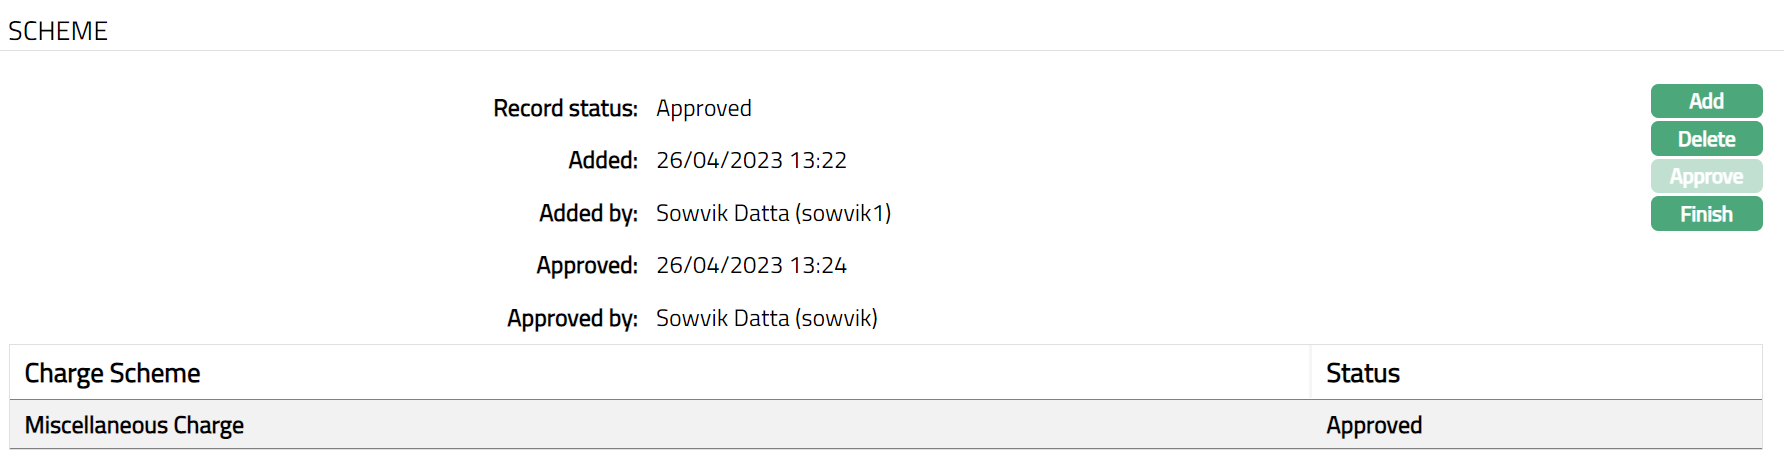
Added field denotes the date on which the record was added.
Added by field denotes the name of the user who created the record.
Approved field denotes date on which the record was approved and is displayed only for approved records.
Approved by field denotes name of the user who approved the record and is displayed only for approved records.
- Click Finish to navigate to Charge Bundle Setting page.
Maintain Band
Maintain Band option allows you to maintain multiple bands for each combination.
To add new Band
Access Charge Bundle Setting screen and click Number tab and Go to Combination for which you want to maintain a band. The Combinations that already exist are displayed.
Click Maintain Band for the required Combination. Band screen appears. For a new Combination, this will be blank.
- Click Add. Add Band page appears.

Enter Range Low, i.e., the lower limit, is defaulted to 1 for the first band which indicates number of transactions. For the succeeding bands, it is automatically set as Range high of the previous band + 1.
Enter Range high i.e., the upper limit for the Band. It is the upper ceiling value for the band.
Enter Amount. It is the amount that needs to be charged for the band. Based on the combination, the Charge currency will get displayed.
Click Save. Band page appears with the added details.
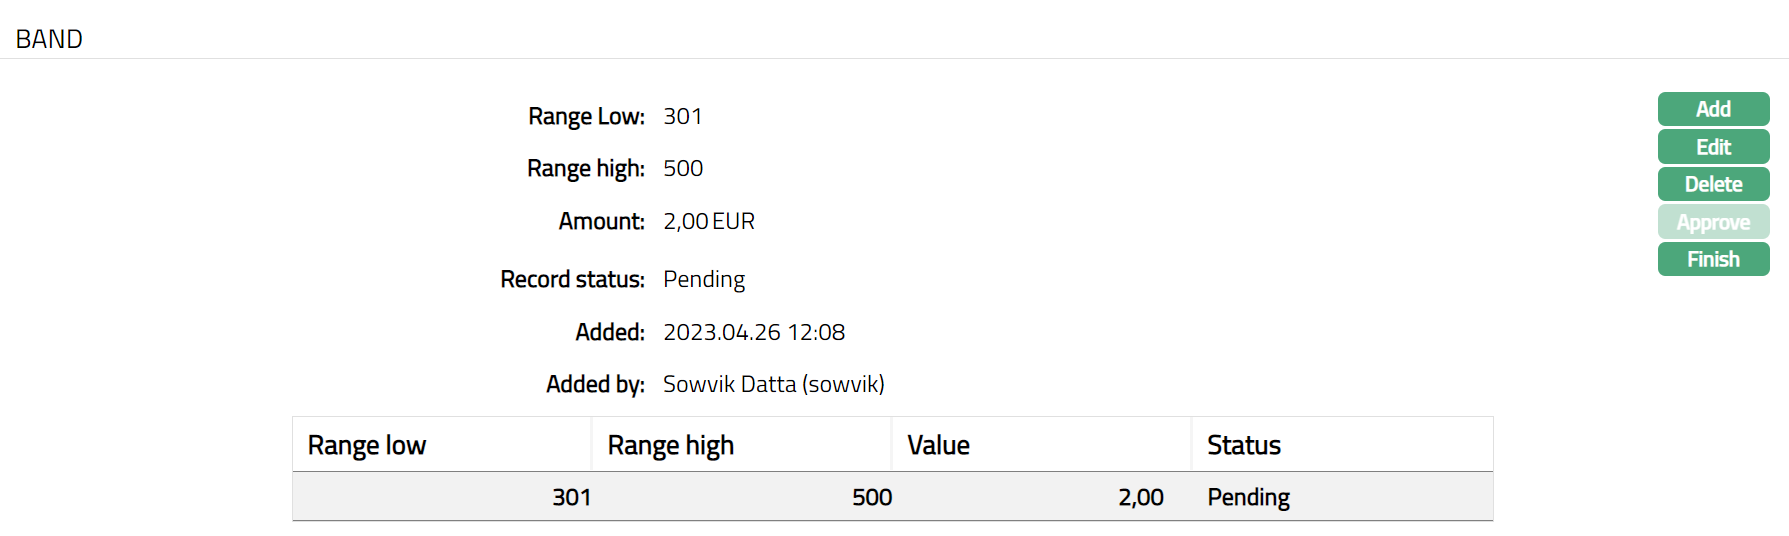
Note: On adding/editing a band, the status of the record by default will be Pending and a red bubble will appear on Band button. Only on Approval, the record status gets changed to Approved and the red bubble disappears. Only on approval, the band attached to the combination will be considered for processing.
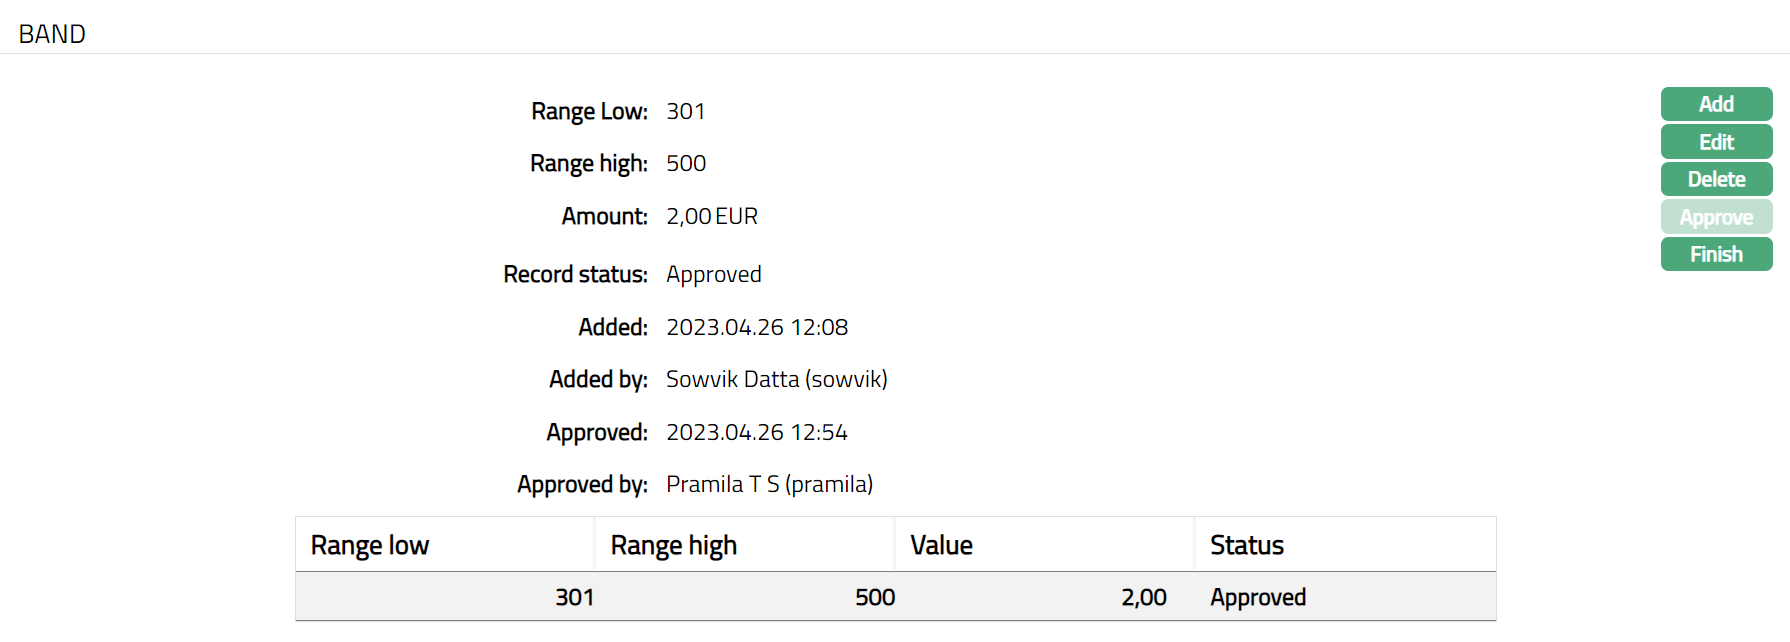
Functions: Add, Edit, Delete, Approve, Finish
The additional fields are as follows:
Added field denotes the date on which the record was added.
Added by field denotes the name of the user who created the record.
Approved field denotes date on which the record was approved and is displayed only for approved records.
Approved by field denotes name of the user who approved the record and is displayed only for approved records.
- Click Finish to navigate to Charge Bundle Setting page.
To Edit Band
Using Edit option, you can edit the band details. Range low field cannot be edited. You can edit a band only if there is a single band. If there are multiple bands only the last band can be edited. In case of multiple bands, if the range high of bands in between is required to be edited then the subsequent bands need to be deleted first and edit the required band to have logical banding. The Amount for any band is editable at any point of time.
- Click Edit. Edit Band Page appears.
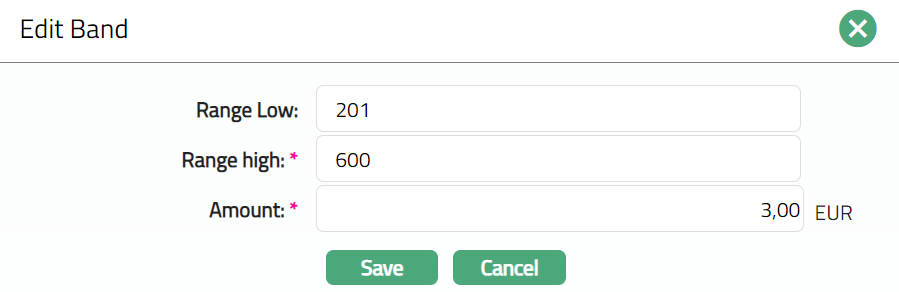
- Click Save. Band page appears with the edited details.

Note: Any change in the tab will set the record status to Pending till it is approved by another user. On approval, the status is set to Approved.
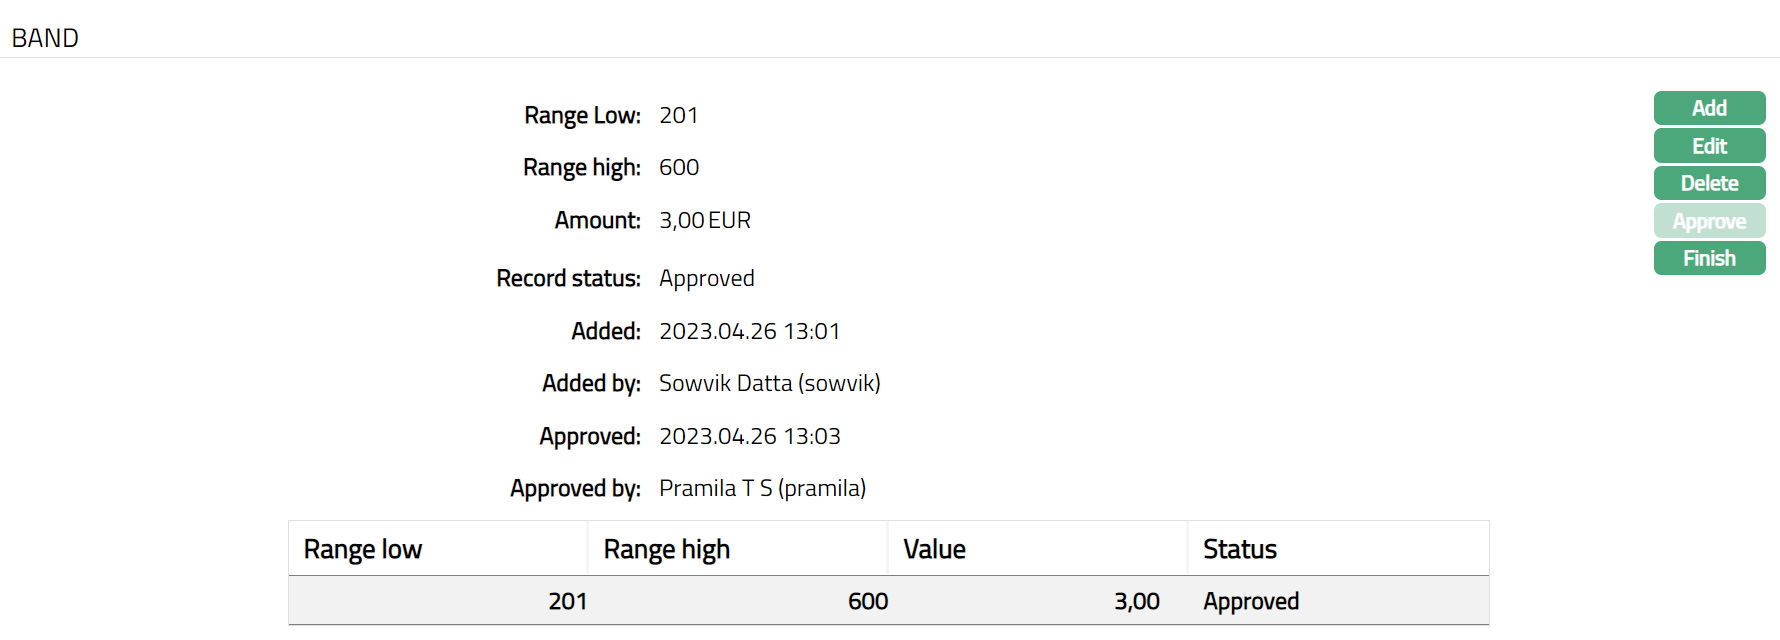
Functions: Add, Edit, Delete, Approve, Finish
Additional Fields are as follows:
Added field denotes the date on which the record was added.
Added by field denotes the name of the user who created the record.
Approved field denotes date on which the record was approved and is displayed only for approved records.
Approved by field denotes name of the user who approved the record and is displayed only for approved records.
- Click Finish to navigate to the Charge Bundle Setting page.
Value
Value tab allows you to define the parameters for charging the client for the amount of transactions that has been made. Using this tab, you can add multiple combinations and attach multiple Banded charges to the combinations and maintain multiple bands for the combinations.
To add/ edit combination.
- Access Charge Bundle Setting screen and click Value tab. The details are defaulted from the entries that you made during creation of a new Card Bundle Setting. For details refer to Charge Bundle Setting - Combination (2/4).
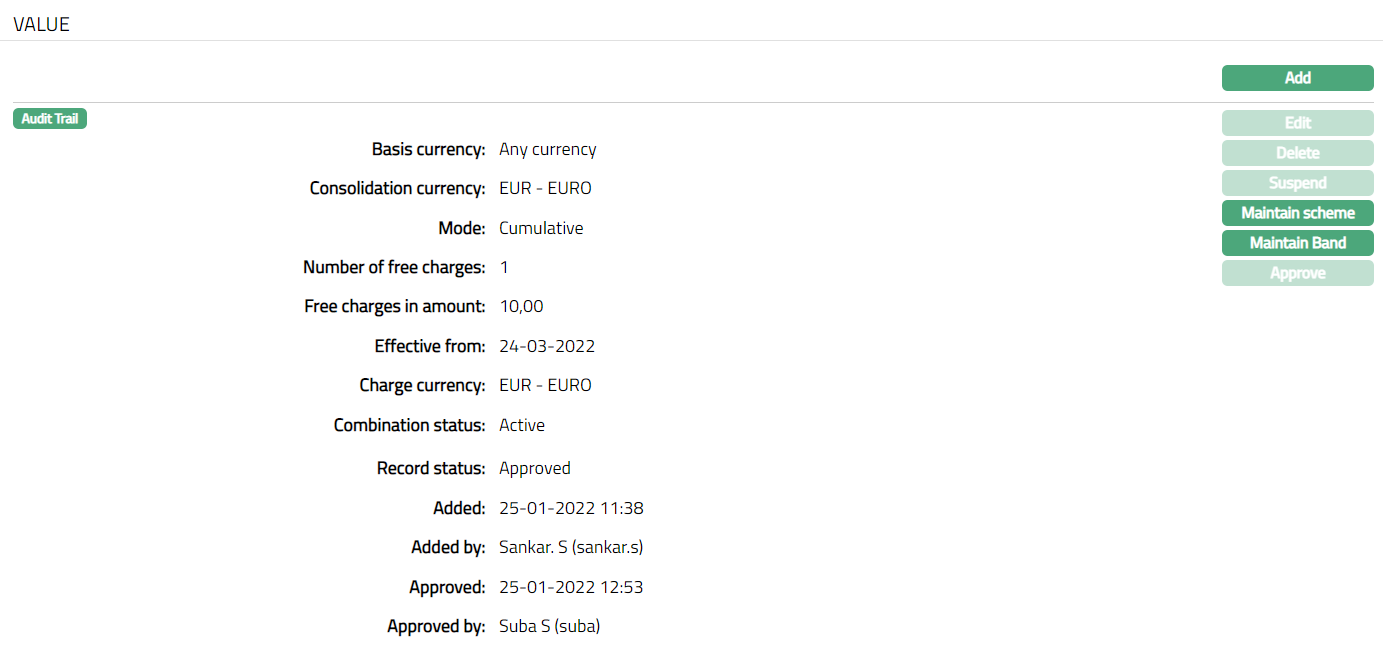
The additional fields displayed are as follows:
Combination Status: It displays the status of the combination.
Record Status field denotes the status of the record.
Added field denotes the date on which the record was added.
Added by field denotes the name of the user who created the record.
Approved field denotes date on which the record was approved and is displayed only for approved records.
Approved by field denotes name of the user who approved the record and is displayed only for approved records.
- Click Add. Add Combination page appears.
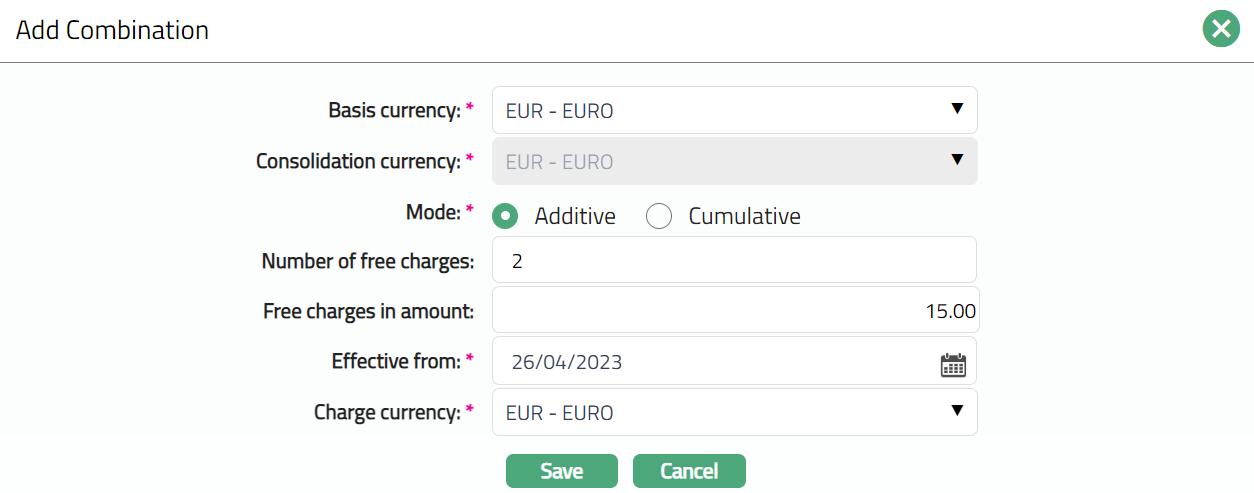
Note: Please refer to Charge Bundle Setting - Combination (2/4) section for the details regarding the fields.
- Click Save. Value page appears with the added combination details with Record status displaying as Pending.
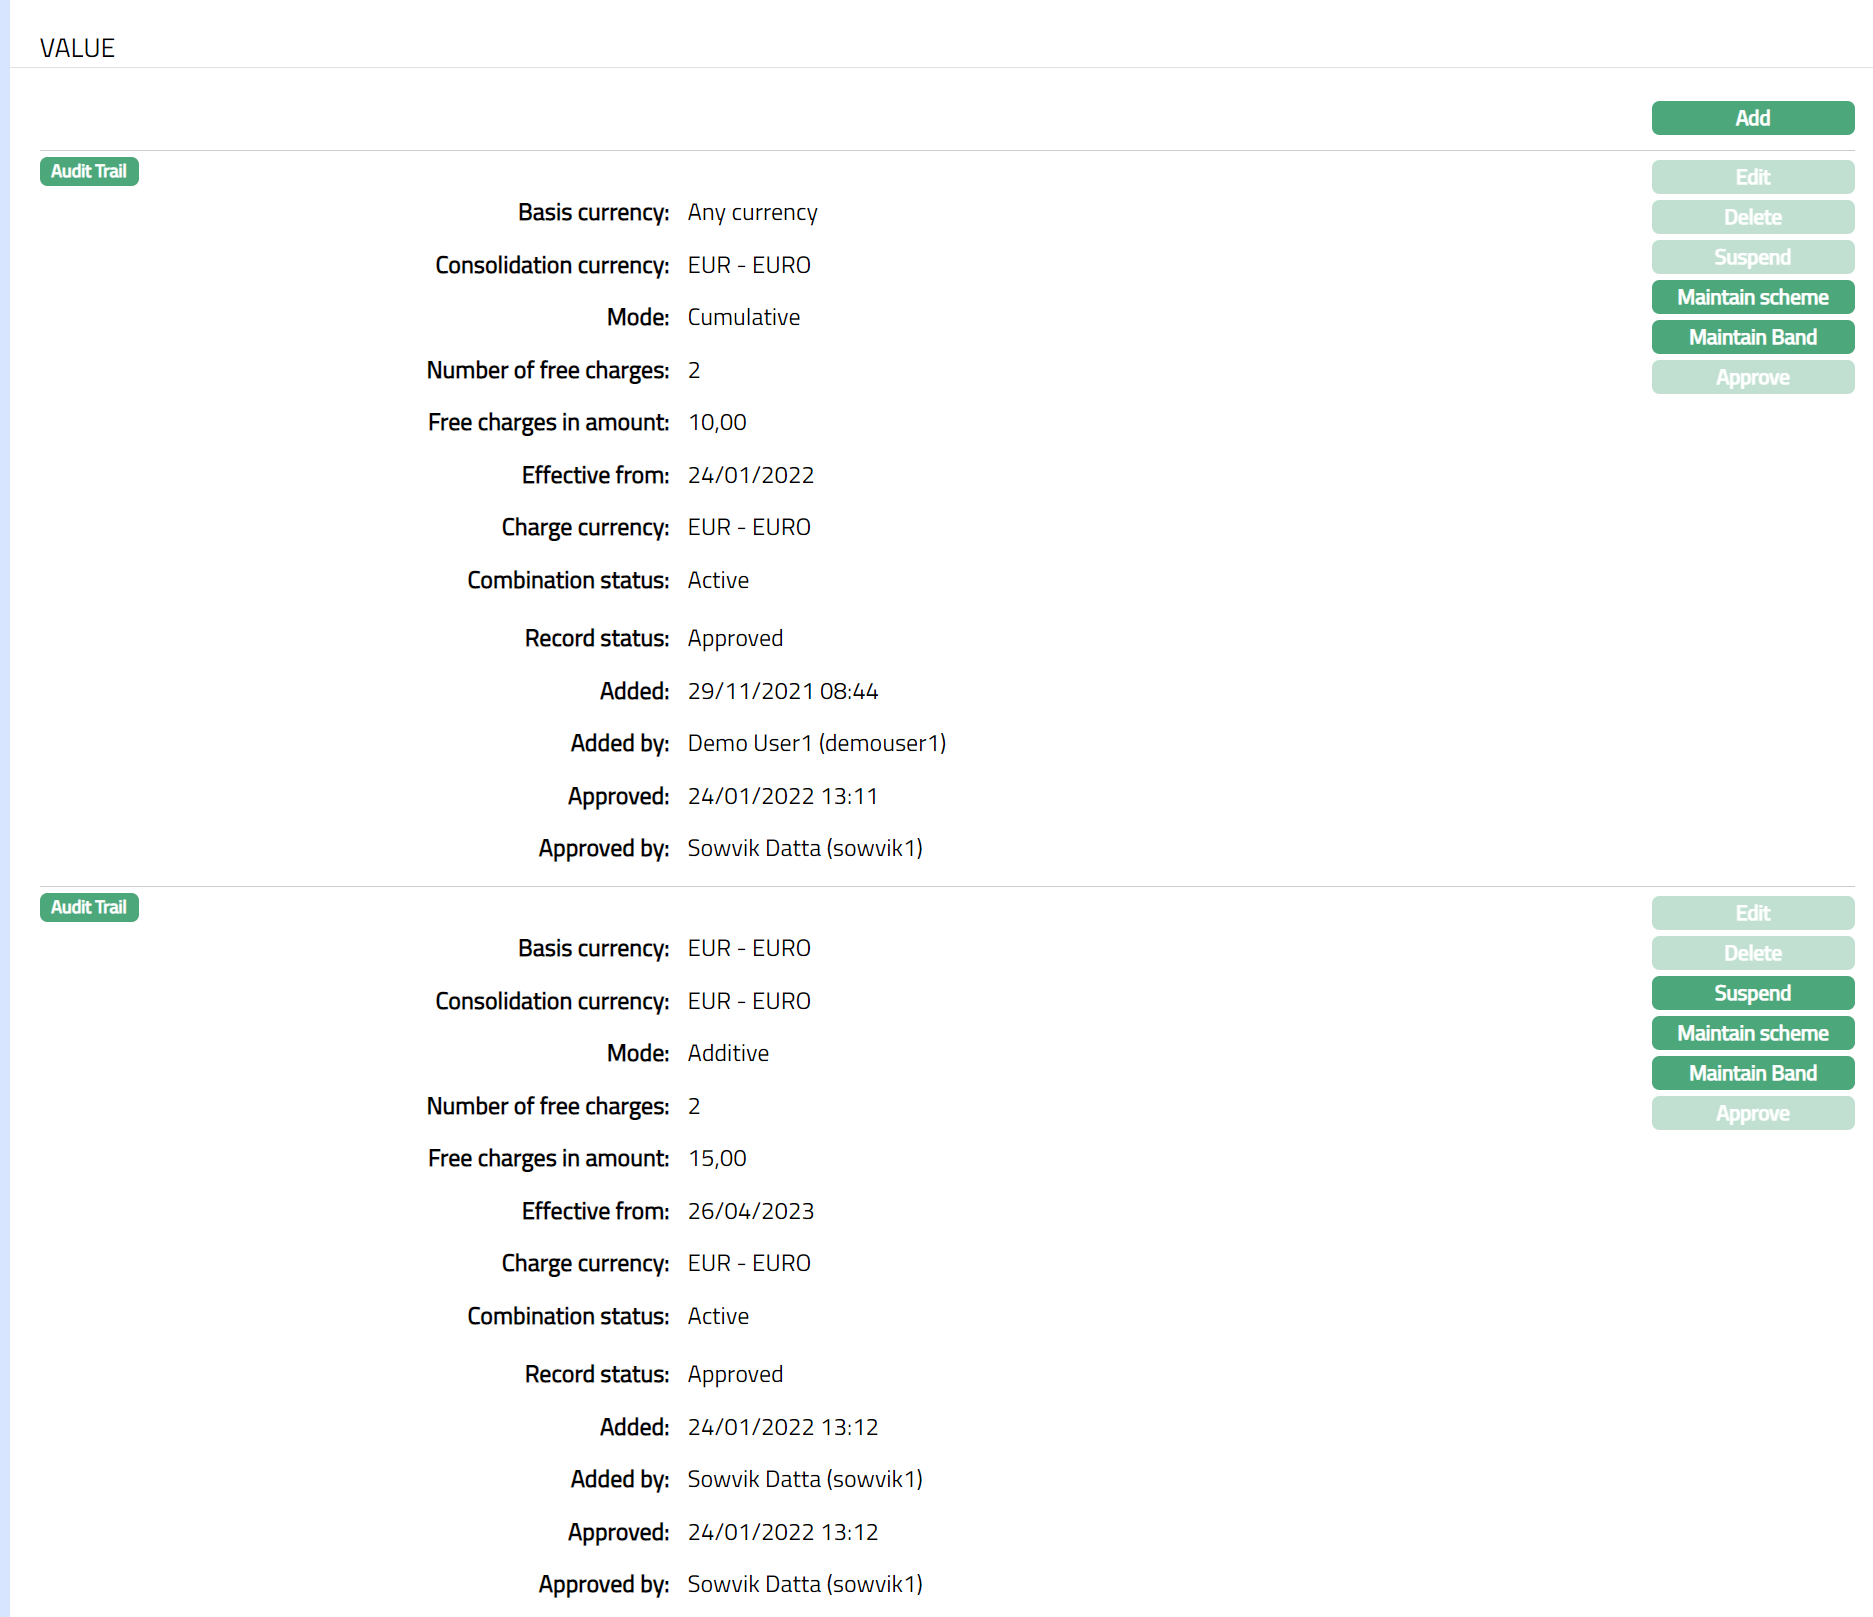
Functions: Add, Edit, Delete, Suspend, Activate, Maintain Scheme, maintain band, Approve.
Note: If a combination is added, then the Edit, Delete, Suspend, Maintain scheme and Maintain Band buttons will be enabled. On approval of the combination, the Add, Edit, Delete and Suspend button will be disabled for the first combination, but will be enabled from the second combination. For suspension of a combination Approval is required. You can Edit a combination only before Approval. Once the record is approved, Combination cannot be edited.
Status: The status of the combination is Active as soon as the combination is created.
Delete: You can delete a charge bundle combination saved in Aura by a click on Delete button. Aura will ask for confirmation, on approving which selected record will be deleted. For the first combination, the Delete button will be disabled and will be enabled only from the second combination.
Suspend: You can suspend the combination by clicking on Suspend button. When you click on Suspend button, Aura will ask for confirmation. On confirmation Aura will suspend the Combination and the combination will not be available in Aura; but Charge Bundle Setting will be available. However, you cannot suspend the first combination. Suspension of a combination is allowed only from the second combination.
Activate: You can activate the Combination by clicking on Activate button. When you click on Activate button, Aura will ask for confirmation. On confirmation Aura will activate the Combination. Once the combination is activated, it becomes available in Aura.
Approve: If you want to Approve a suspended combination, then retrieve the record and Click on Approve. Aura will ask for confirmation. Once the combination is approved, record status gets changed from Pending to Approved. Approve button will be enabled only when a combination is added/ edited/suspended. Once a combination is approved, cannot be deleted.
Validation for Approval is as follows:
- If there is any Combination of Basis Currency
Combination status -- Active
Record status -- Pending.
Result: Error Message as "Unapproved combination for the created basis currency exists" gets displayed in Aura.
- If there is any Combination of Basis Currency
Combination status -- Suspended.
Record Status -- Pending/Approved
Result: Error Message as "Suspended combination for the created basis currency exists in the system" gets displayed.
Value-Maintain Scheme
Maintain scheme option allows you to maintain multiple schemes for each combination. A list of Banded charge schemes will be displayed. Charge scheme with charge amortization as Yes will not be displayed.
To add/ edit combination.
- Access Charge Bundle Setting screen and click Value tab. Go to the combination for which you want to attach a charge scheme and click Maintain Scheme. The combination that already exists will get displayed.
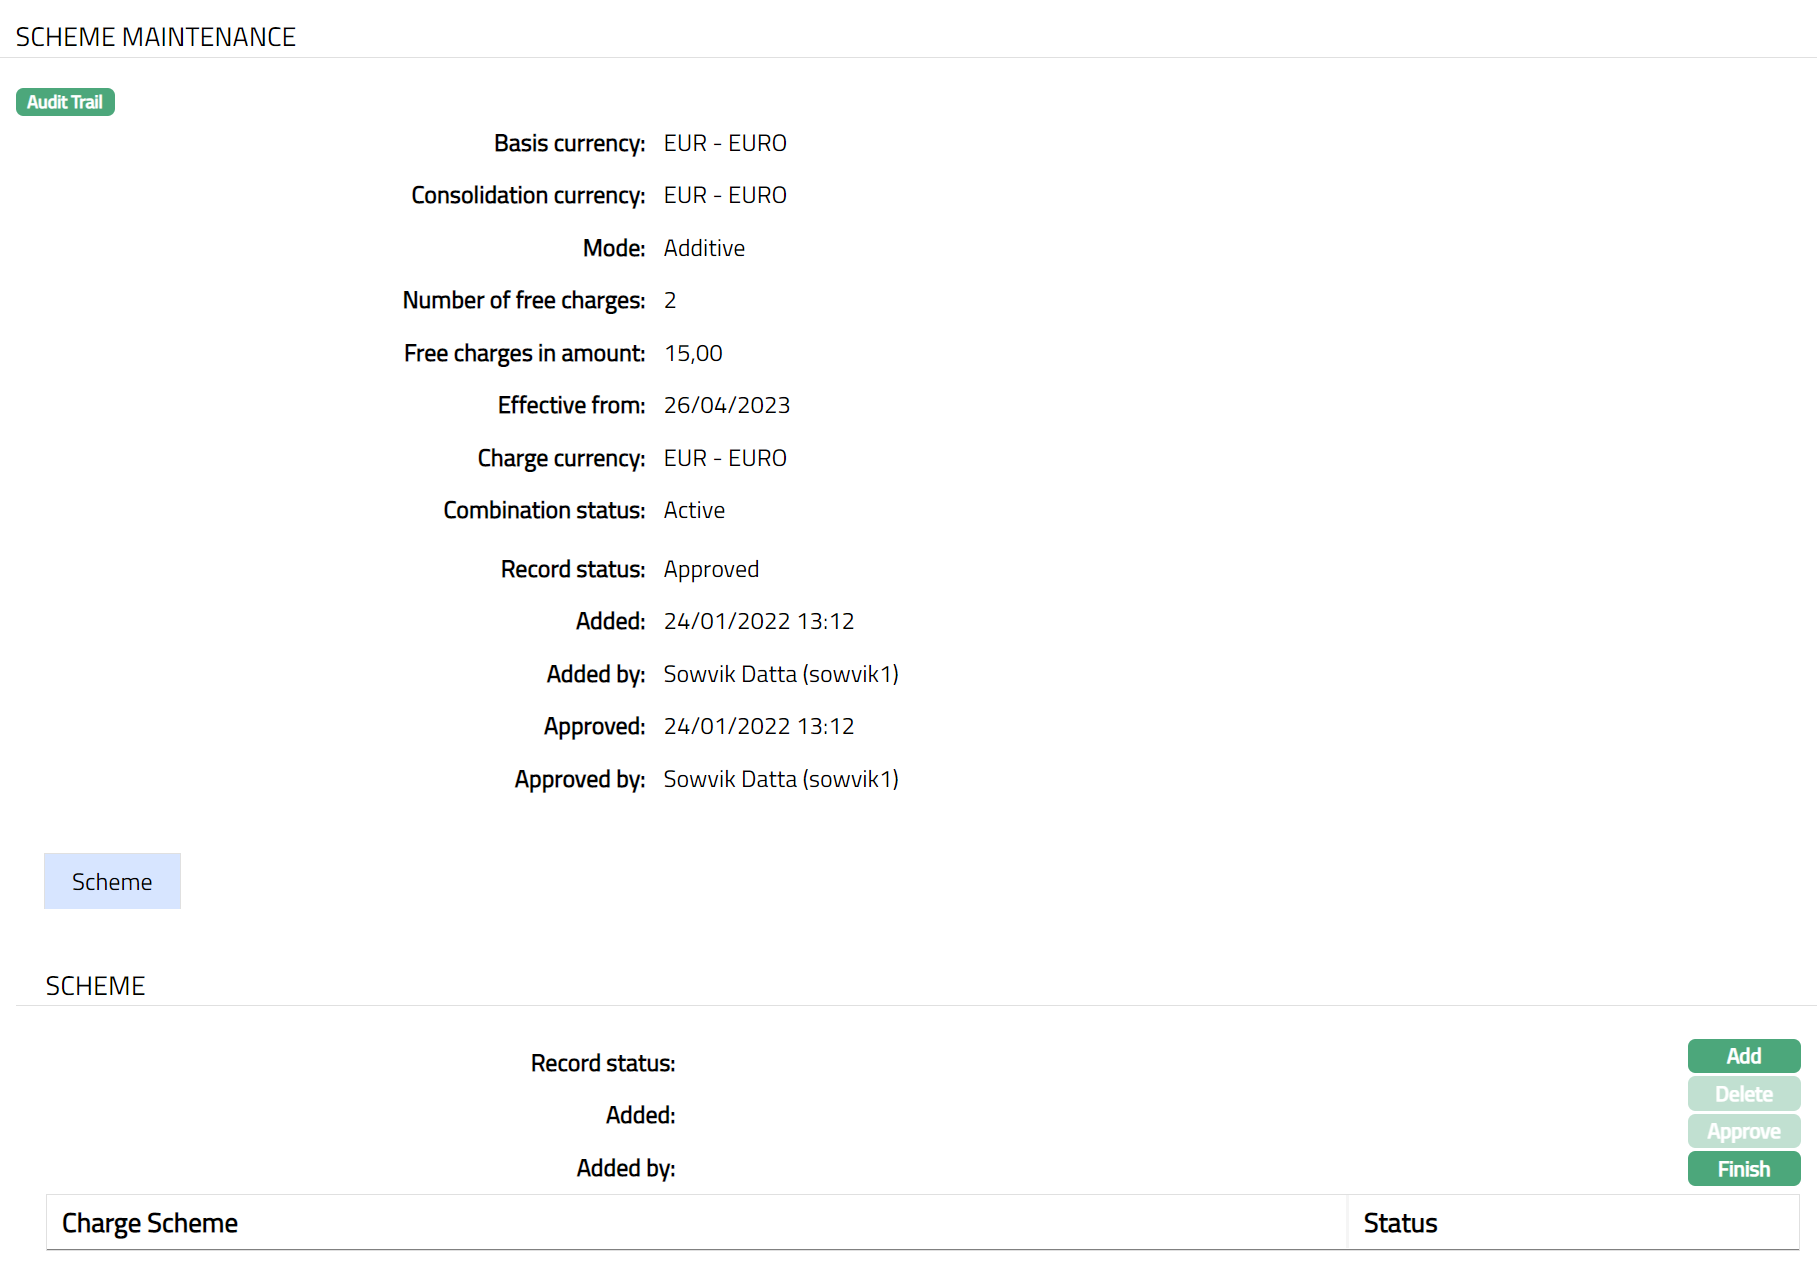
The values for Basis currency, Mode, Number of free charges, Effective from, Charge Currency, Combination Status are derived from the Combination that is maintained.
Click Add. Add Charge Scheme page appears.

Select Charge Scheme from the drop-down list of active flat charge schemes maintained under System codes > Charges > Charge Scheme. Charge Schemes maintained with Charge amortization as Yes will not be displayed in the list. If any Charge scheme is attached to other combination, those charge schemes will also be displayed in the list.
Click Save. Scheme page appears with the added details.
Note: On adding a new charge scheme, the status of the record by default will be Pending and a red bubble will appear on Maintain scheme button. Only on Approval, the record status gets changed to Approved and the red bubble on the Maintain scheme button disappears. Only on approval, the charge scheme attached to the combination will be considered for processing.
Functions: Add, Delete, Approve, Finish
The additional fields are as follows:
Added field denotes the date on which the record was added.
Added by field denotes the name of the user who created the record.
Approved field denotes date on which the record was approved and is displayed only for approved records.
Approved by field denotes name of the user who approved the record and is displayed only for approved records.
- Click Finish to navigate to Charge Bundle Setting page
Value-Maintain Band
Maintain Band option allows you to maintain multiple bands for each combination.
To add new Band
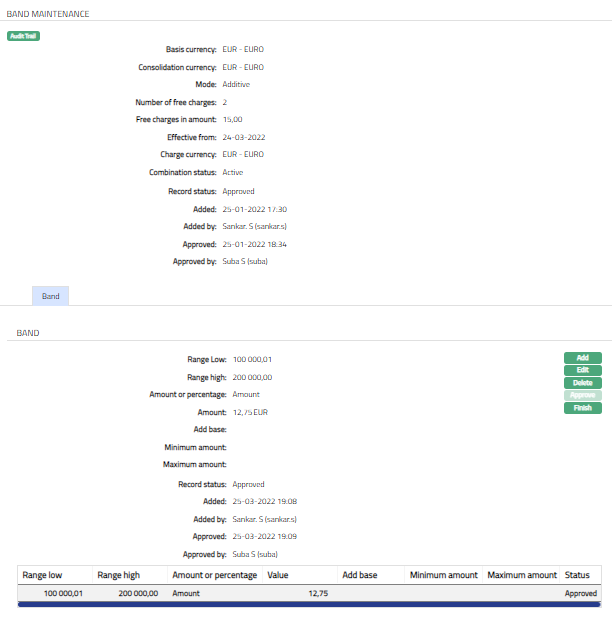
- Access Charge Bundle Setting screen and click Value tab and Go to Combination for which you want to maintain a band. The Combinations that already exist are displayed.
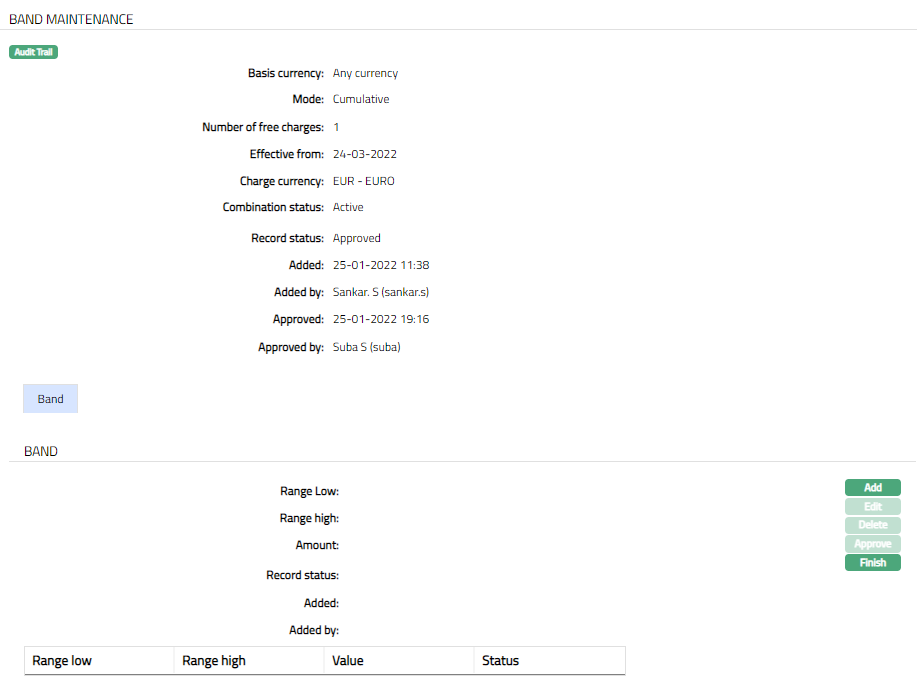
- Click Maintain Band for the required Combination. Band Maintenance screen appears. For a new Combination, this will be blank.
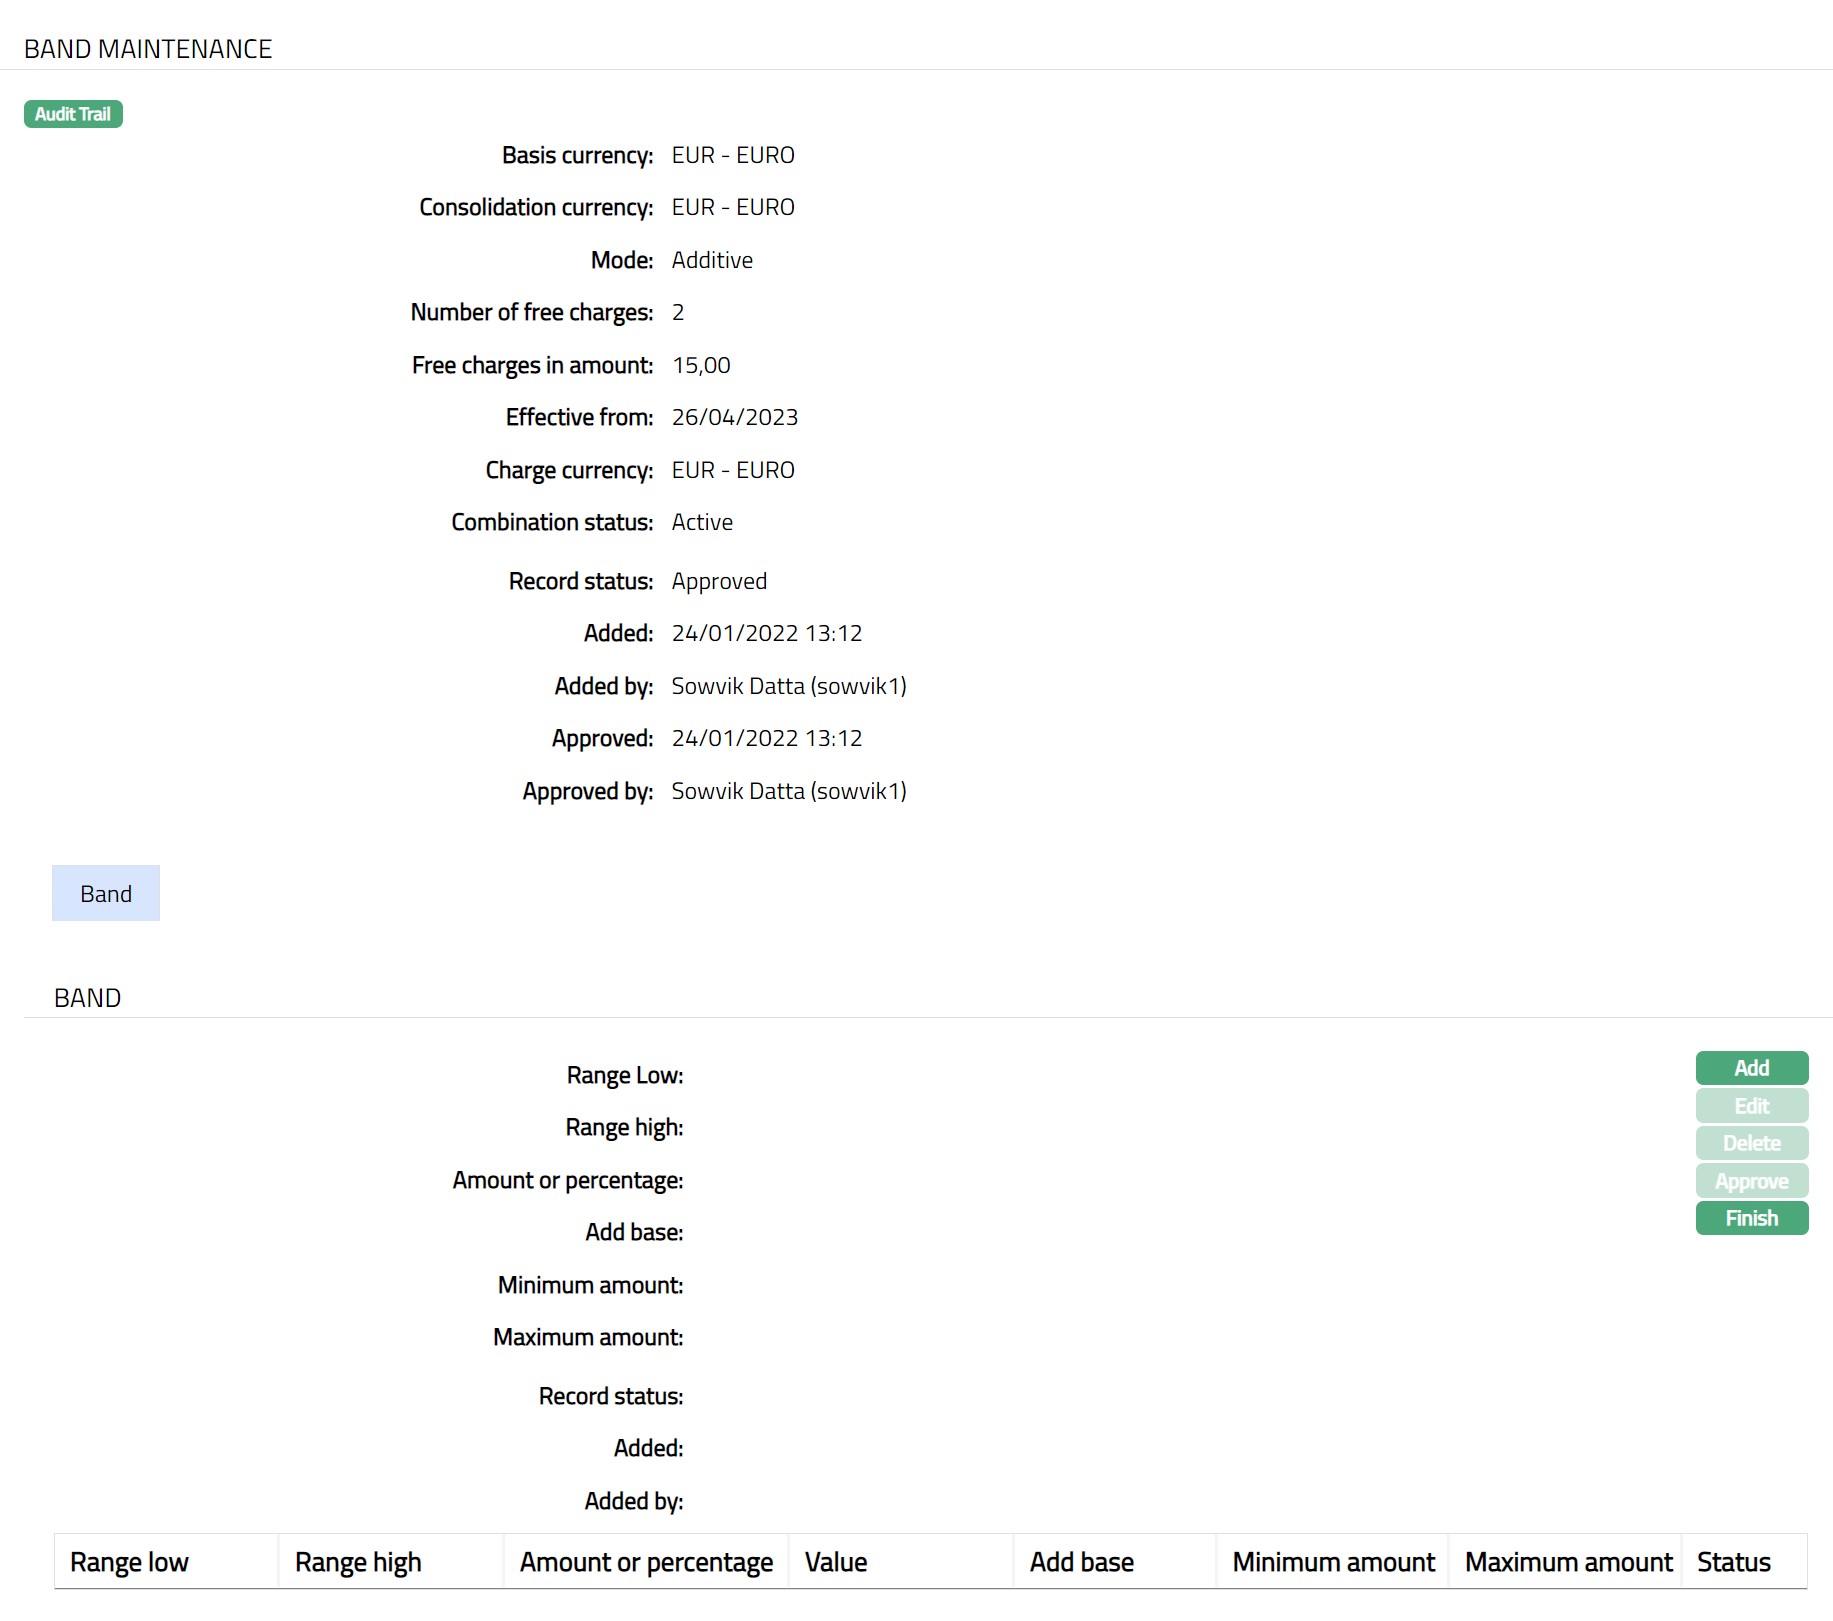
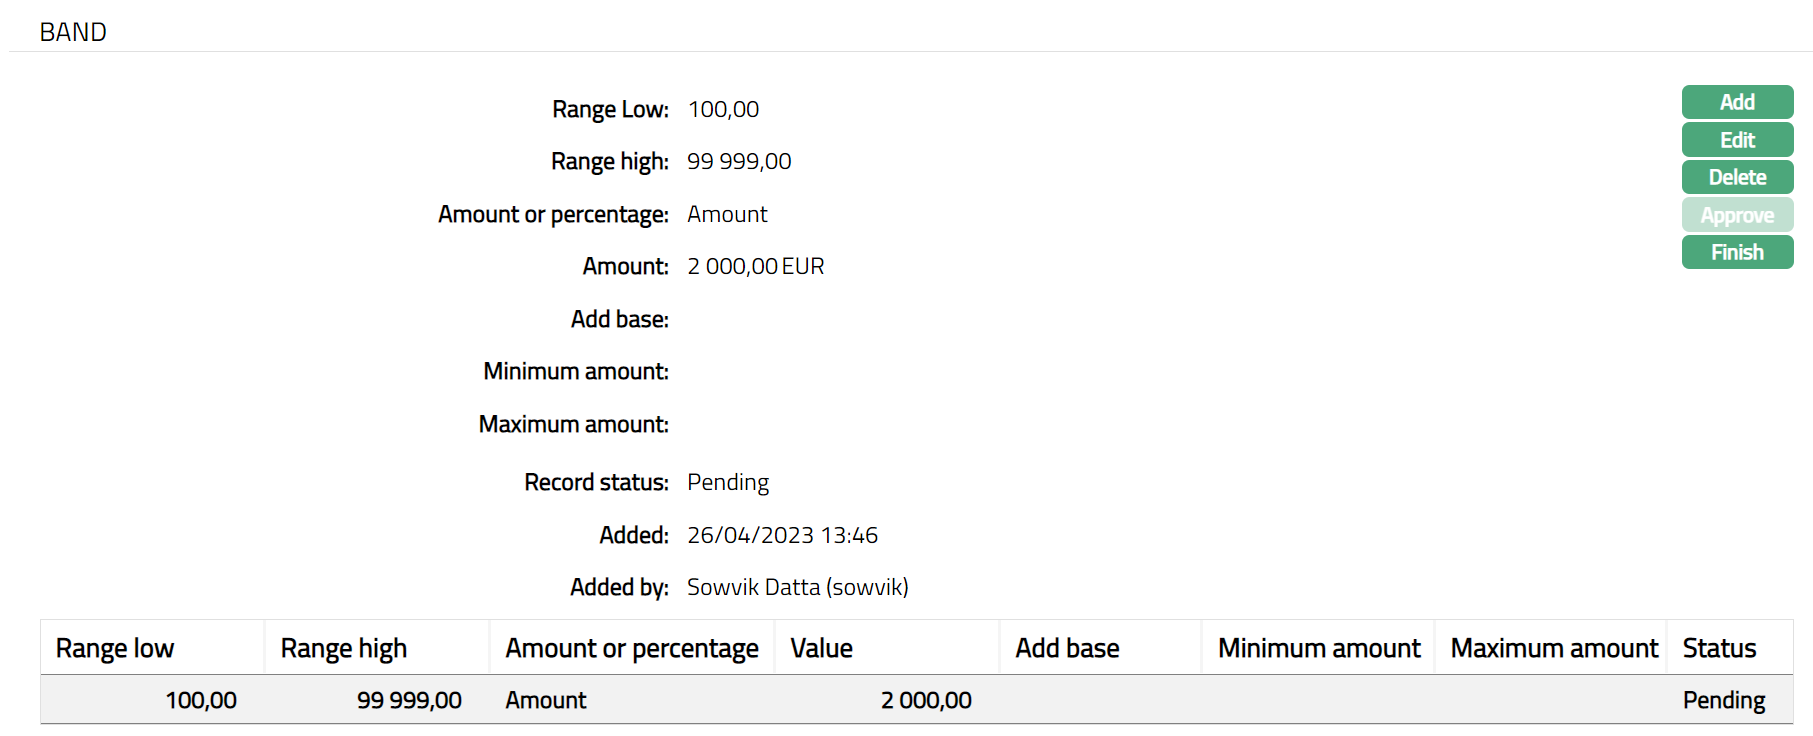
- Click Add. Add Band page appears.
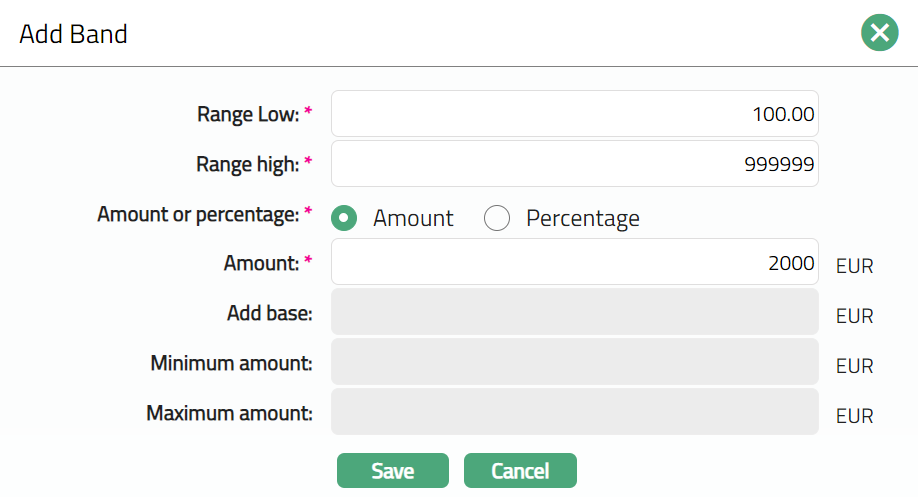
Enter Range Low, i.e., the lower limit, is defaulted to 0 for the first band which indicates value of transactions. For the succeeding bands, it is automatically set as Range high of the previous band + 1.
Enter Range high i.e., the upper limit for the Band. It is the upper ceiling value for the band.
Enter Amount or Percentage of charge. The name of the field changes depending on the radio button above.
Enter Amount. It is the amount that needs to be charged for the band. Based on the combination maintained, the charge currency is displayed.
Enter Percentage. It is the percentage that needs to be charged for the band.
Add Base enables you to add a fixed amount apart from a percentage-based charge. This field is enabled only if Percentage is selected. It provides you with the ability to define the percentage to calculate the charge and add a fixed amount to get the final amount to be charged.
Enter Minimum amount to be charged. This field will be enabled only if percentage is selected above. Aura will check if the calculated charge amount < Minimum amount, if Yes then the final charge amount will be the Minimum amount.
Enter Maximum amount to be charged. This field will be enabled only if percentage is selected above. Aura will again check whether the calculated charge amount > Maximum amount, if Yes then the final charge amount will be the Maximum amount.
For example:
Band Range is between - 0.00 to 10000.00. Percentage is 8%. Add Base = 10.00 SEK, Minimum amount = 20.00 SEK, Maximum Amount = 100.00 SEK.
Case 1:
If The Account balance = 1000.00
Percentage Charge =1000*8% = 80
Add base = 10,
Calculated Charge amount = 80+10= 90.
Case 2:
Account balance = 100.00
Percentage charge = 100 * 8% = 8
Add base = 10
Calculated Charge amount = 8 + 10 = 18, which is < Minimum amount of 20.00
Hence, the charge amount that will be booked = 20.00
Case 3:
Account balance = 10000.00
Percentage charge = 1000 * 8% = 800
Add base = 10
Calculated Charge amount = 800 + 10 = 810, which is > Maximum amount of 100.00
Hence, the charge amount that will be booked = 100.00
- Click Save. Band page appears with the added details.
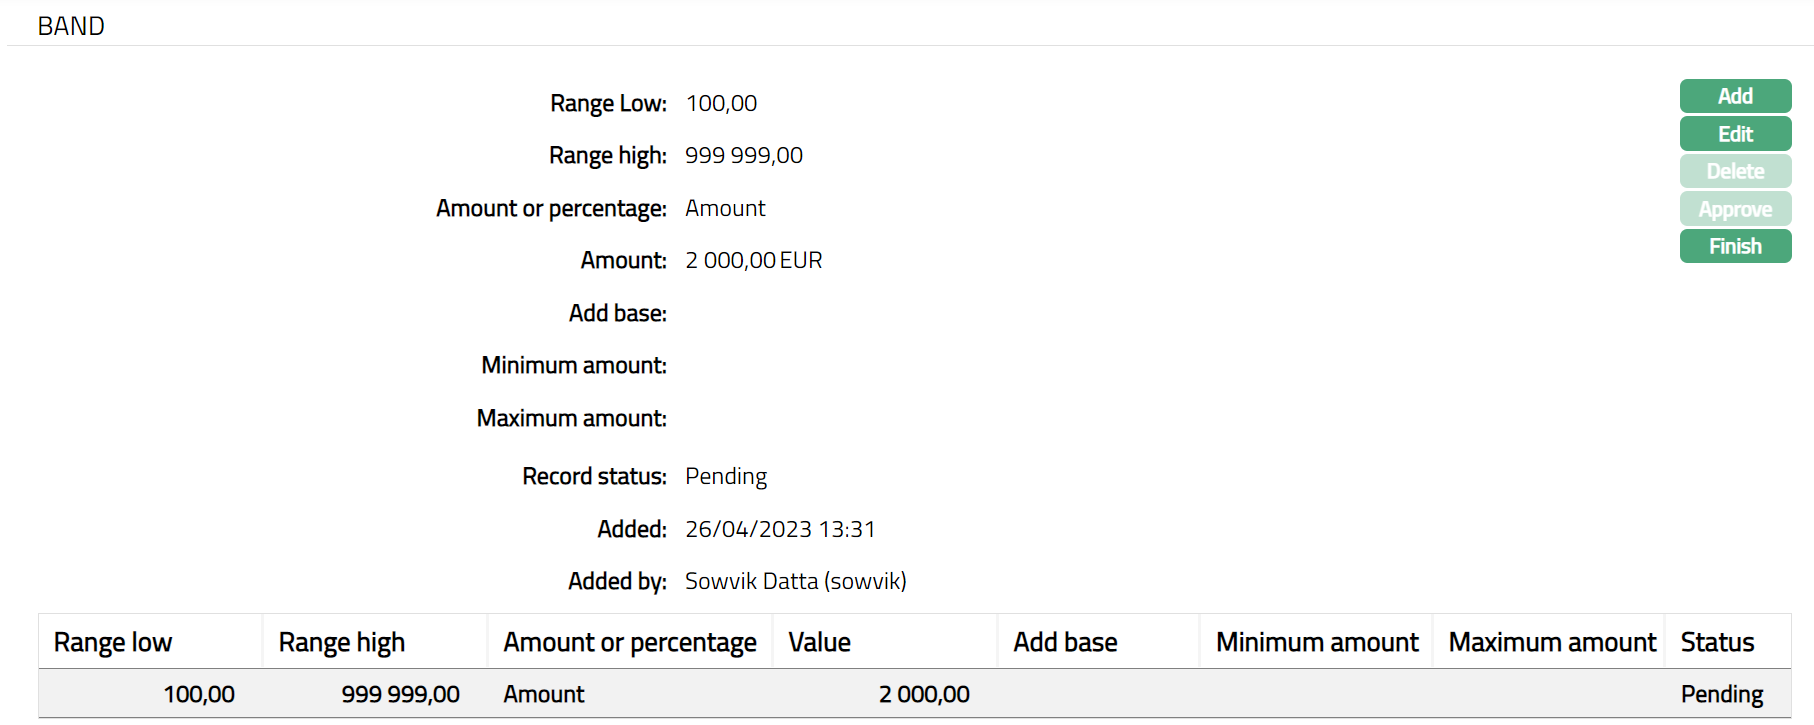
Functions: Add, Edit, Delete, Approve, Finish
NOT able to Approve Band.
Note: On adding a new band, the status of the record by default will be Pending and a red bubble will appear on Maintain Band button. Only on Approval, the record status gets changed to Approved and the red bubble on the Maintain Band button disappears. Only on approval, the band attached to the combination will be considered for processing.
The additional fields are as follows:
Added field denotes the date on which the record was added.
Added by field denotes the name of the user who created the record.
Approved field denotes date on which the record was approved and is displayed only for approved records.
Approved by field denotes name of the user who approved the record and is displayed only for approved records.
- Click Finish to navigate to Charge Bundle Setting page.

Functions: Add, Edit, Delete, Finish
To edit Band
Using Edit option, you can edit the band details. Range low field cannot be edited. You can edit a band only if there is a single band. If there are multiple bands only the last band can be edited. In case of multiple bands, if the range high of bands in between is required to be edited then the subsequent bands need to be deleted first and edit the required band to have logical banding. The Amount for any band is editable at any point of time.
- Access Charge Bundle Setting screen and click Value tab and then Maintain Band.
- Click Edit. Edit Band Page appears.

- Click Save. Band page appears with the edited details.
Functions: Add, Edit, Delete, Approve, Finish
Note: Except Add base, Minimum Amount and Maximum amount, all other fields are editable.
Note: Any change in the tab will set the record status to Pending till it is approved by another user. On approval, the status is set to Approved.
Additional Fields are as follows:
Added field denotes the date on which the record was added.
Added by field denotes the name of the user who created the record.
Approved field denotes date on which the record was approved and is displayed only for approved records.
Approved by field denotes name of the user who approved the record and is displayed only for approved records
- Click Finish to navigate to Charge Bundle Setting page.