Charge Waiver
Charge Waiver can be used to waive any charge that is not yet invoiced / due and where the due date <= upcoming Interest / Principal Schedule. If the users want to waive any charge > upcoming Interest / Principal Schedule, they will have to initiate the waiver later.
The sub-tabs in Loan Charge Waiver page are as follows:
To add new Loan Charge Waiver
- From Retail menu, click Loans and then Charge Waiver. Loan Charge Waiver page appears.

- Click Add. New Loan Charge Waiver-Profile (1/3) page appears.
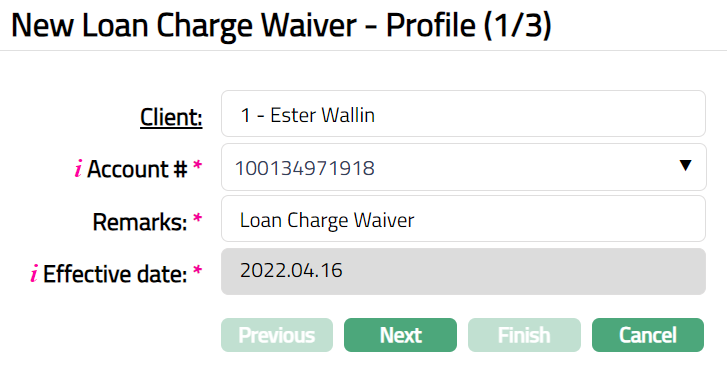
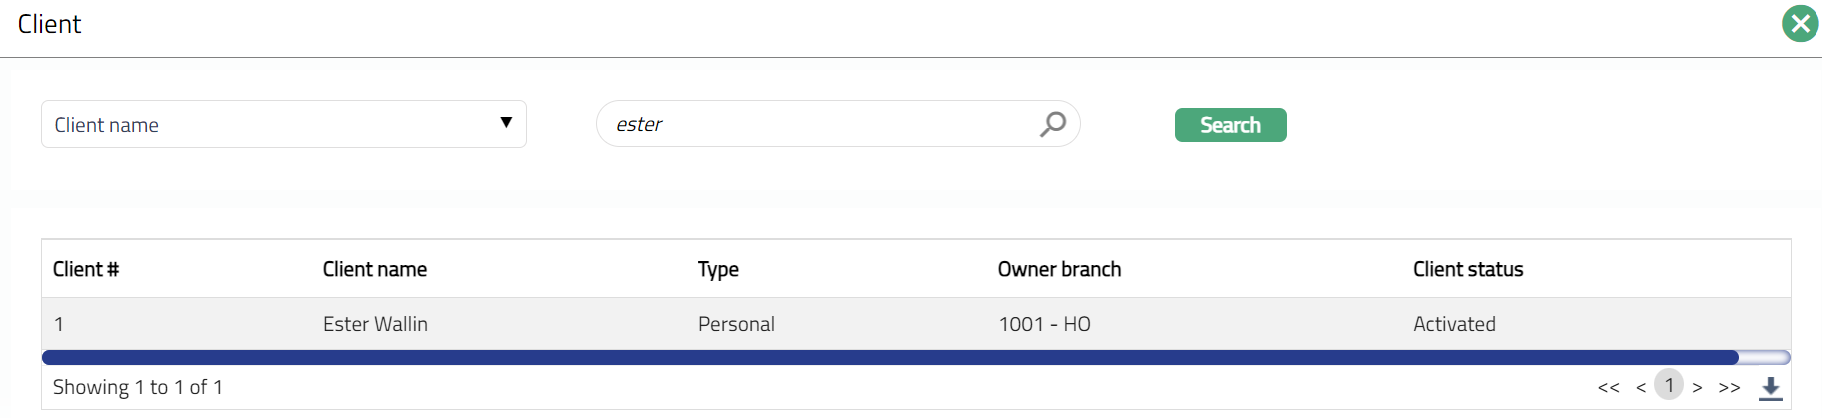
- Select Client by clicking client hyperlink. Client search page appears where you can search for a client with relevant criteria and select the required client. You can also input the client's name and select the required client from the list displayed by Aura.
Select Account # from the drop-down list of active accounts numbers to indicate the account number in which the loan account is maintained.
Enter Remarks, if there is any additional information that you wish to capture regarding the loan record.
Enter Effective date for the waiver.
Click Next. New Charge Waiver - Details (2/3) page appears.

- Select the required record by clicking Check box.
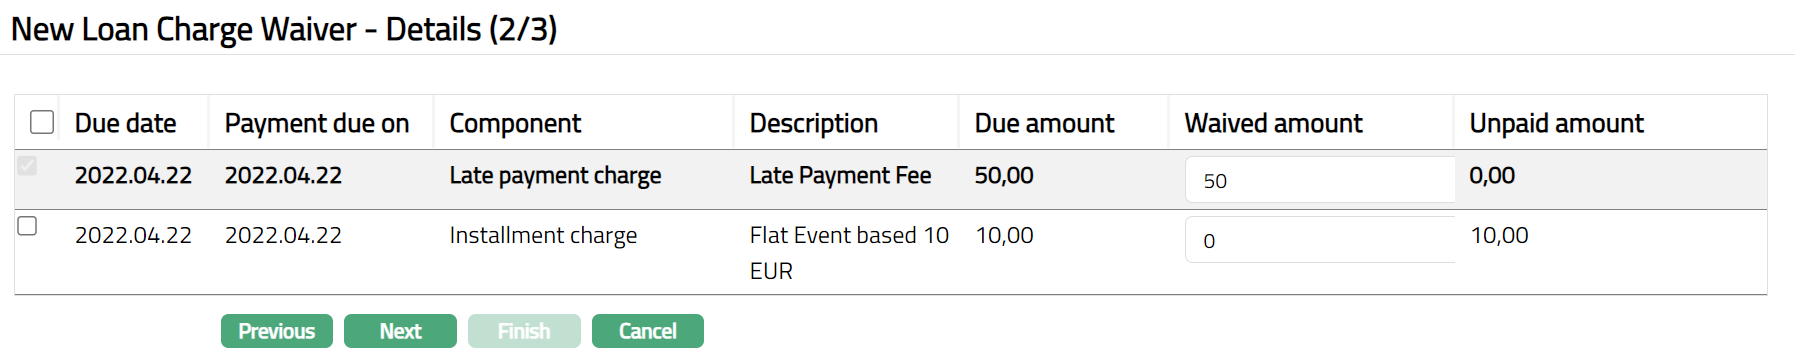
- Click Next. New Loan Charge Waiver -- Confirmation (3/3) page appears.
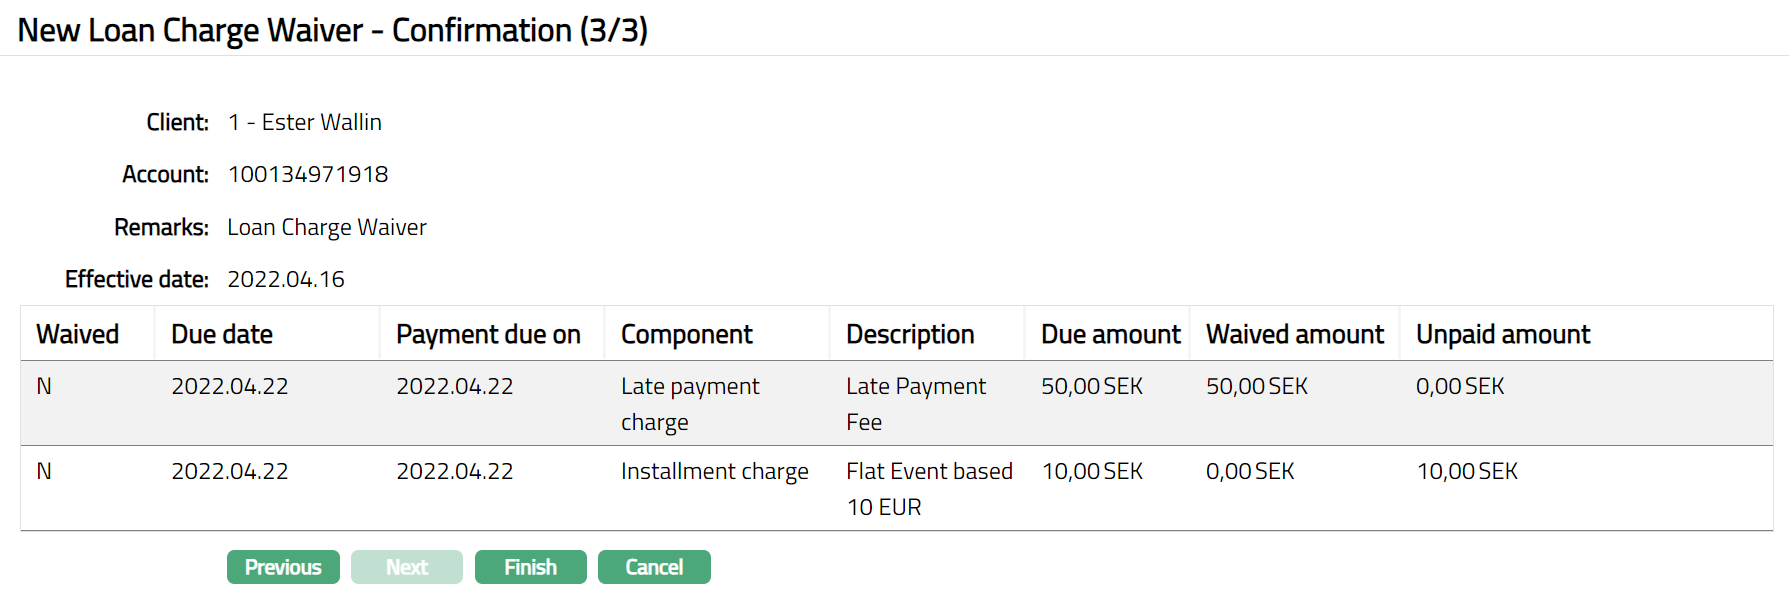
Click Finish. Loan charge waiver is saved with a system generated waiver reference no and the Loan Charge Waiver page appears showing the Profile tab by default.
Functions: Add, Search
Note: On creation of the Loan Charge Waiver, the record Status will be Pending. Only on approval, the Loan Charge Waiver will be Approved.
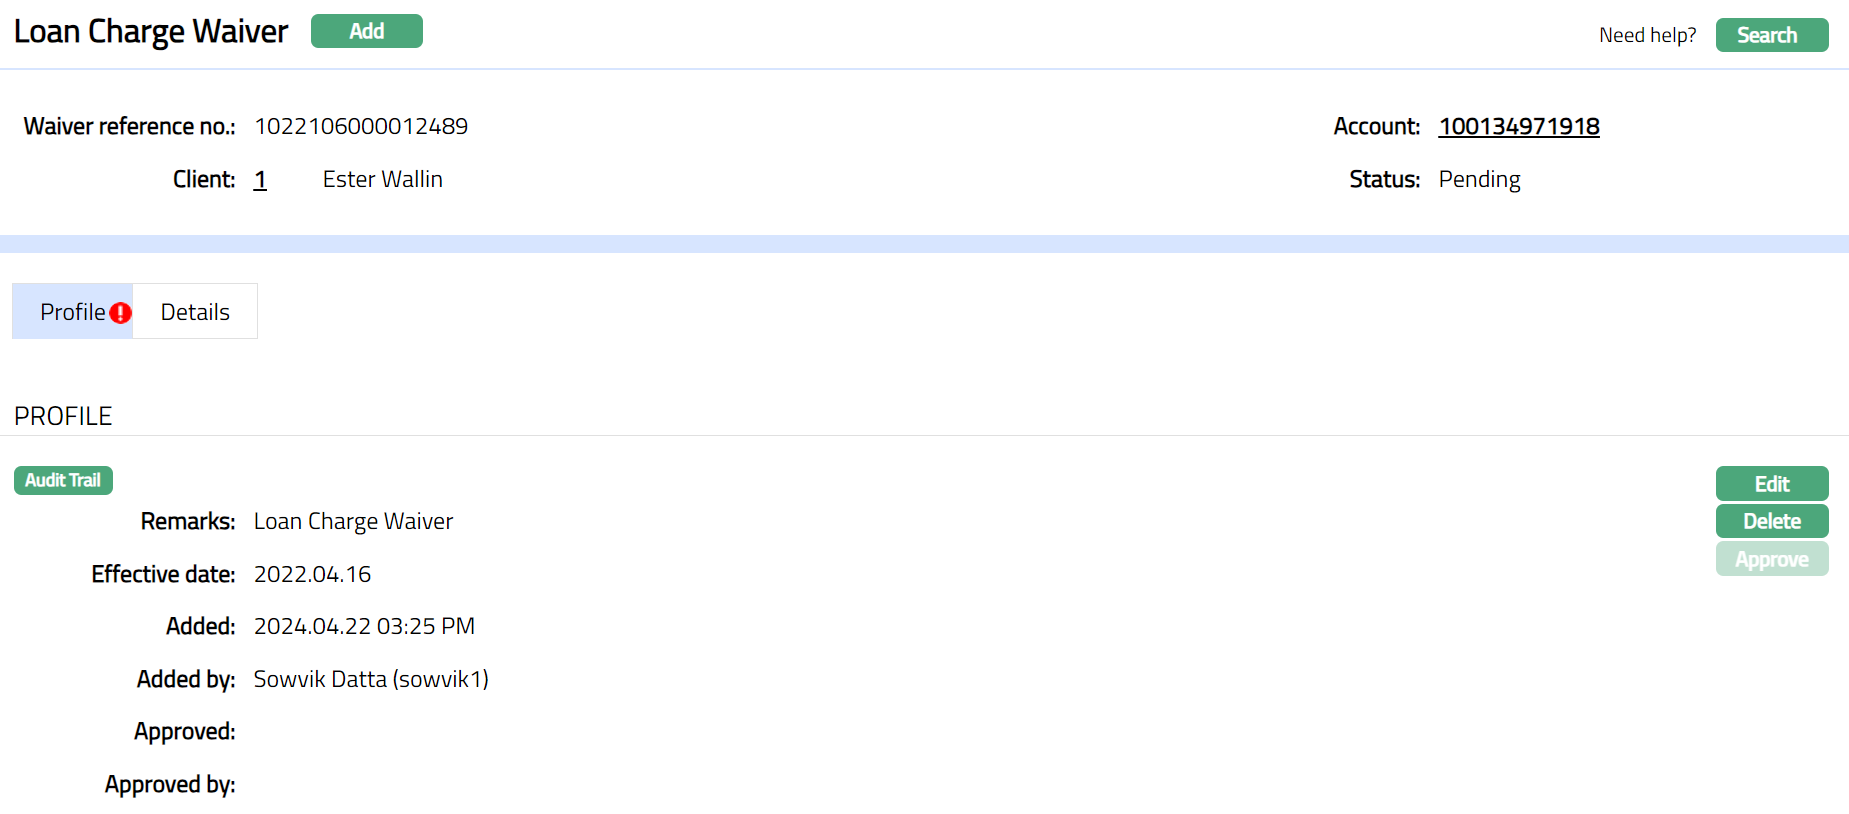
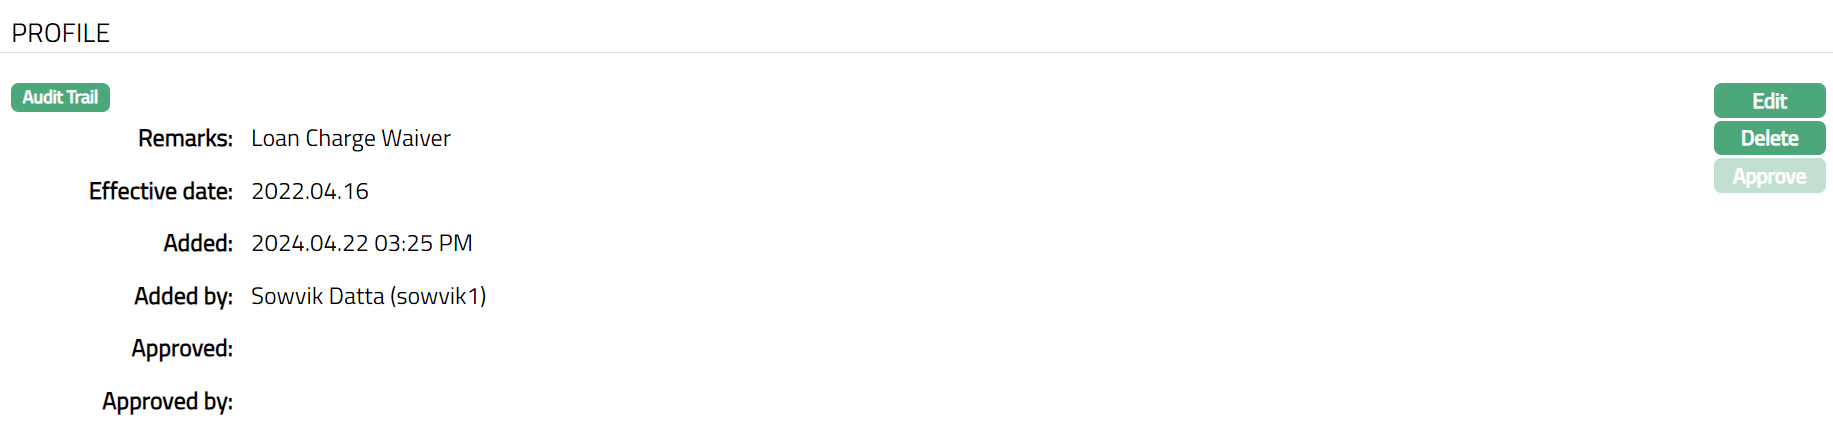
Profile
Profile tab, which is the default tab in the Loan Charge Waiver page, shows the details of the Loan Charge Waiver added in New Loan Charge Waiver - Profile (1/3).
To view / edit limit Profile.
- Access Loan Charge Waiver page and click Profile tab. It will display all the details defaulted from New Loan Charge Waiver - Profile (1/3). screen.
- Click Edit. Edit Profile page appears.
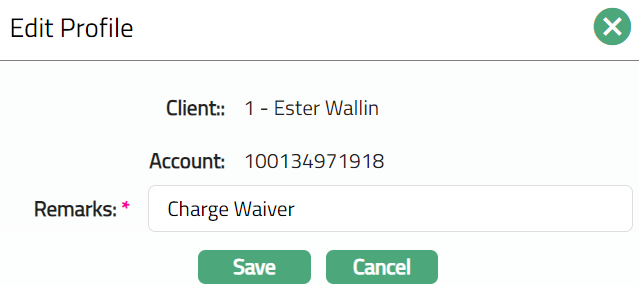
Note: Only Remarks field is editable.
- Make required changes and click Save. Profile page appears with the edited details.
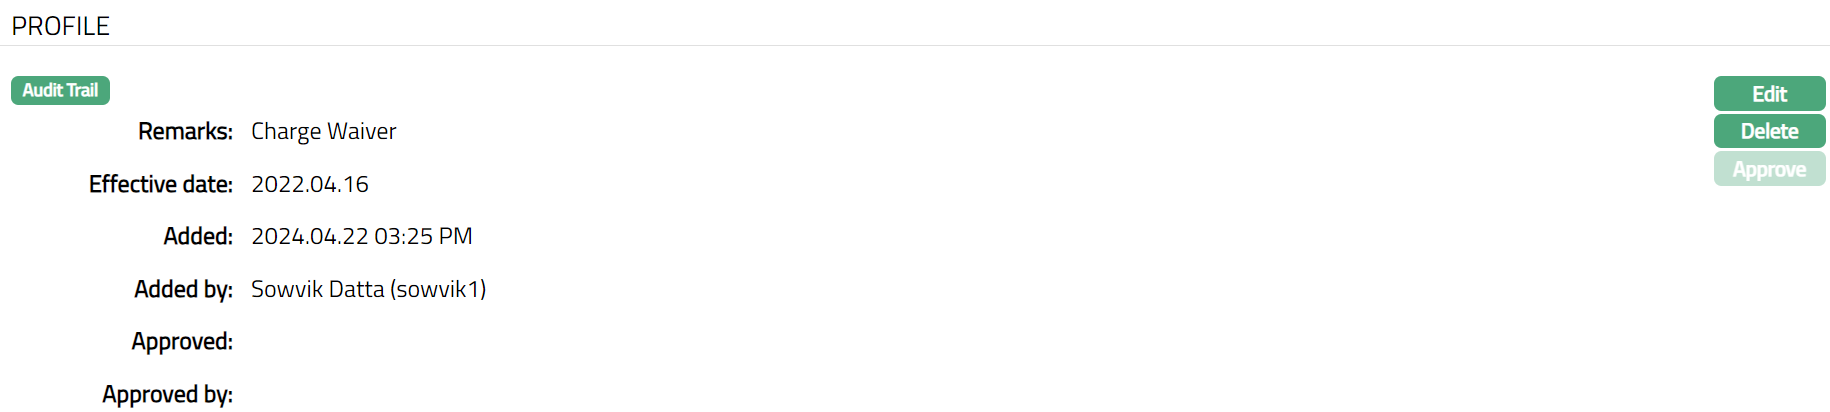
Note: Any change in the tab will set the Record status to Pending till it is approved by another user. On approval, the tab status is set to Approved. Note: Once approved you cannot edit or delete further.
 Functions: Edit, Delete, Approve.
The following fields are shown only in the View screen and are not editable:
Added field denotes the date on which the record was added.
Added by field denotes the name of the person who created the record.
Approved field denotes date on which the record was approved and is displayed only for approved records.
Approved by field denotes name of the person who approved the record and is displayed only for approved record.
Status field denotes the status of the Record.
Details
Details tab shows the details of the Loan Charge Waiver added in New Loan Charge Waiver - Details (2/3).
To view Details.
- Access Loan Charge Waiver page and click Details tab. It will display all the details defaulted from New Loan Charge Waiver - Details (2/3). screen.
