Nostro Account
Nostro Account option allows you to create and maintain multiple Nostro accounts. These accounts can be created under various Nostro Account Products that you have maintained. Based on the product defined, the account level details are defaulted, with options to modify these for specific accounts. Thus, it combines ease of maintenance with flexibility to suit the specific needs of each Nostro account.
Following are the various tabs that appear on the Nostro Account page for a Nostro account:
To add new Nostro Account
- From Retail menu, click Accounts, Nostro account and then Maintain. Nostro Account Search page appears.

- Click Add. New Nostro Account -- Account Details (1/3) page appears.
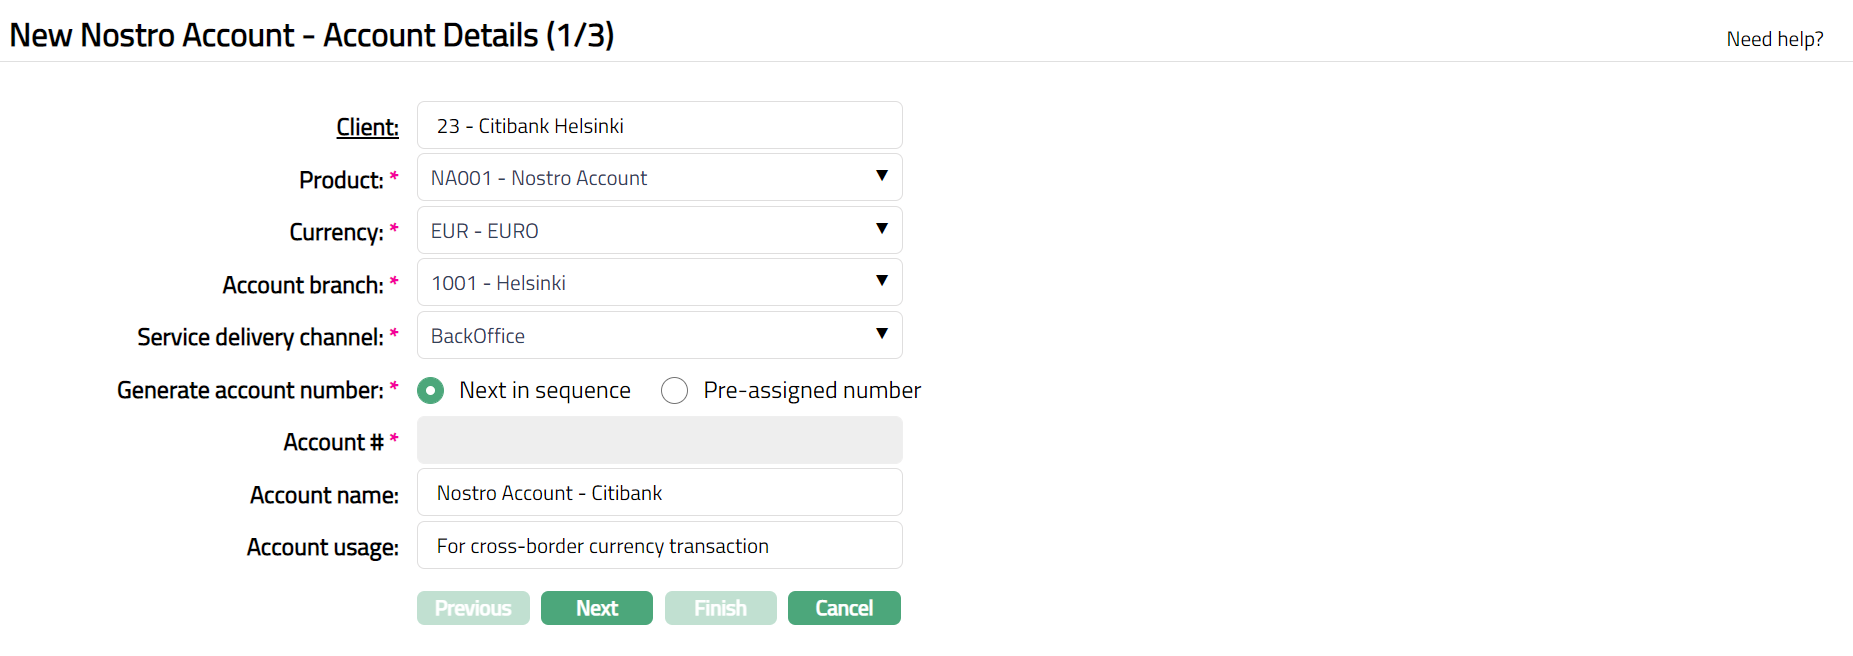
Select Client by clicking on client hyperlink. The Client search page appears where you can search for a client with relevant criteria and select the required client. You can also input the client's name and select the required client from the list displayed by Aura. The Client search page appears with the list of Active Corporate clients maintained at CRM > Clients > Maintain.
Select Product from the drop-down list of active products belonging to type Nostro account, where the client type defined for the Product is Corporate.
Select Currency from the drop-down list, which displays all the currencies maintained for the selected product.
Select Account Branch from the drop-down list of all the branches which are allowed for the product. By default, the user's logged in branch is selected. You can change as required. This is the branch in which the account is maintained.
Select Service delivery channel from the drop-down list. The service delivery channels should have been maintained under Admin > System codes > Categories > Service delivery channel.
Select Generate account number as Next in sequence or pre-assigned number. On selecting Next in sequence Aura will generate account number internally using the account number mask maintained at the Entity level. The account number is unique across the Entity.
Account # will be enabled only on selecting pre-assigned number for Generate account number. Enter the required Account #. Aura will validate the Pre - assigned number against the account number mask maintained at the Entity level and also check if it is unique
Enter Account name. This name will be used for the account.
Enter Account usage i.e. the purpose of the account.
Click Next. New Nostro Account -- Custom Field (2/3) page appears.

Note: If the custom field is mapped to Nostro account at Admin > System Codes > Custom fields > Field mapping, then an additional screen will appear before the confirmation screen. The custom fields will be mandatory or non-mandatory based on the rules set at the Field mappings. For more detail on custom field functionality please refer Admin> System codes > Field mapping manual.
Enter Initial account opening date.
Click Next. New Nostro Account -- Confirmation (3/3) page appears.
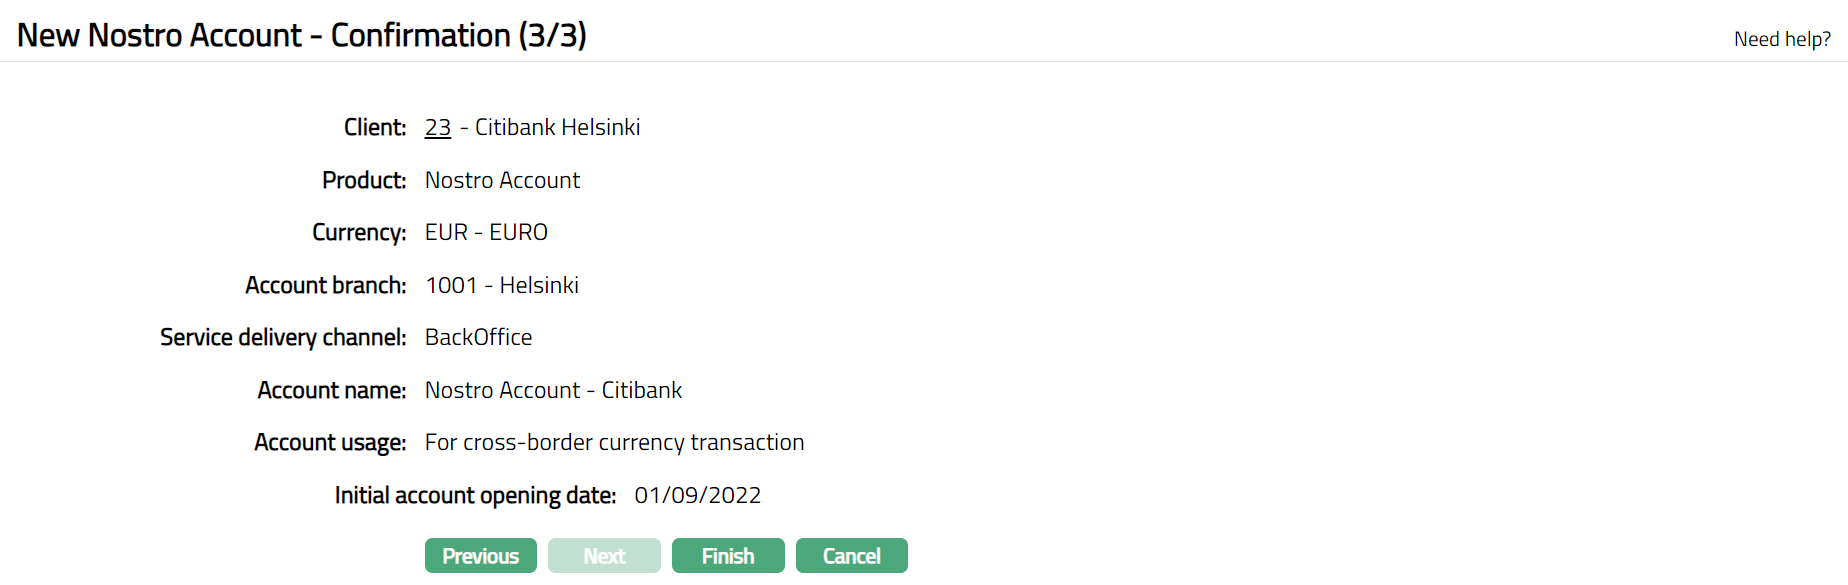
- Click Finish. Nostro Account page appears displaying the Profile tab by default..
Functions: Add, Search
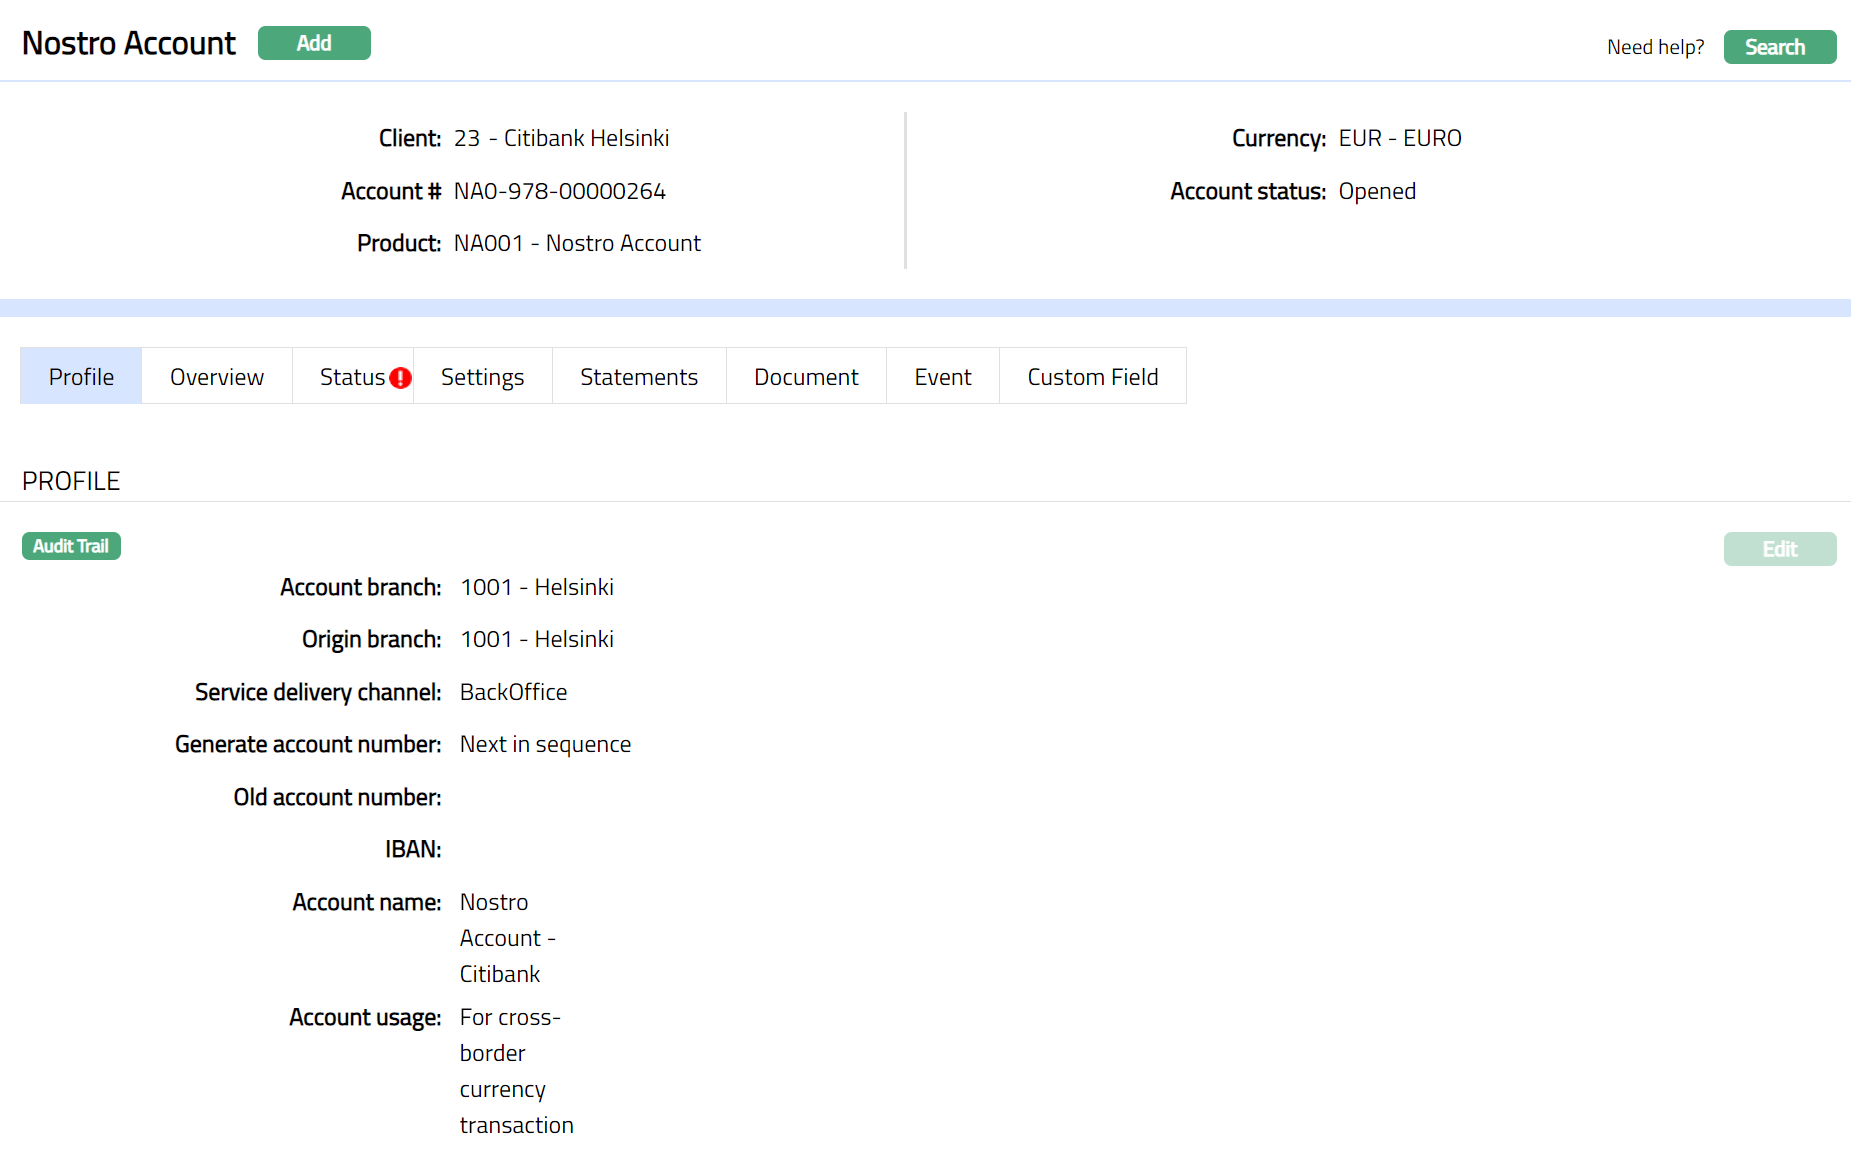
The Account status is Open, and the record status is Approved.
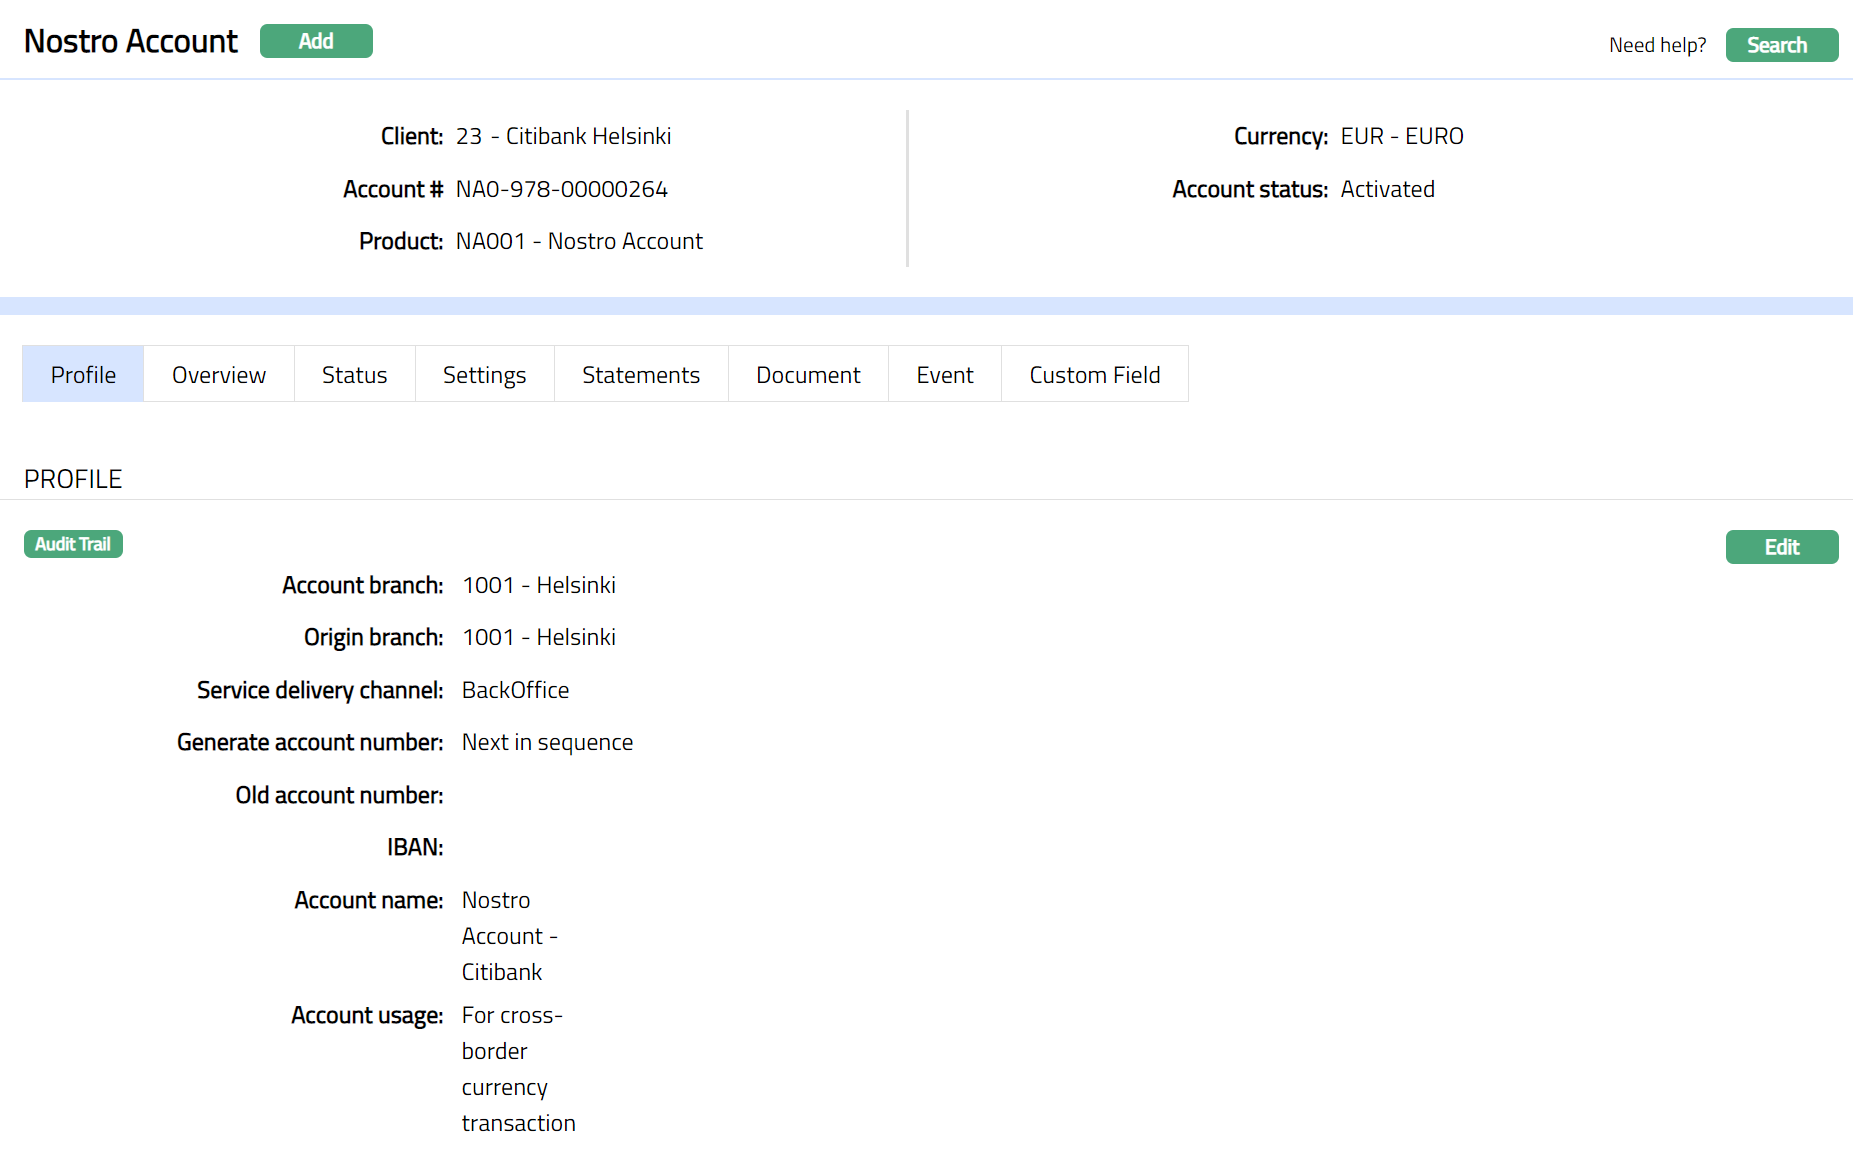
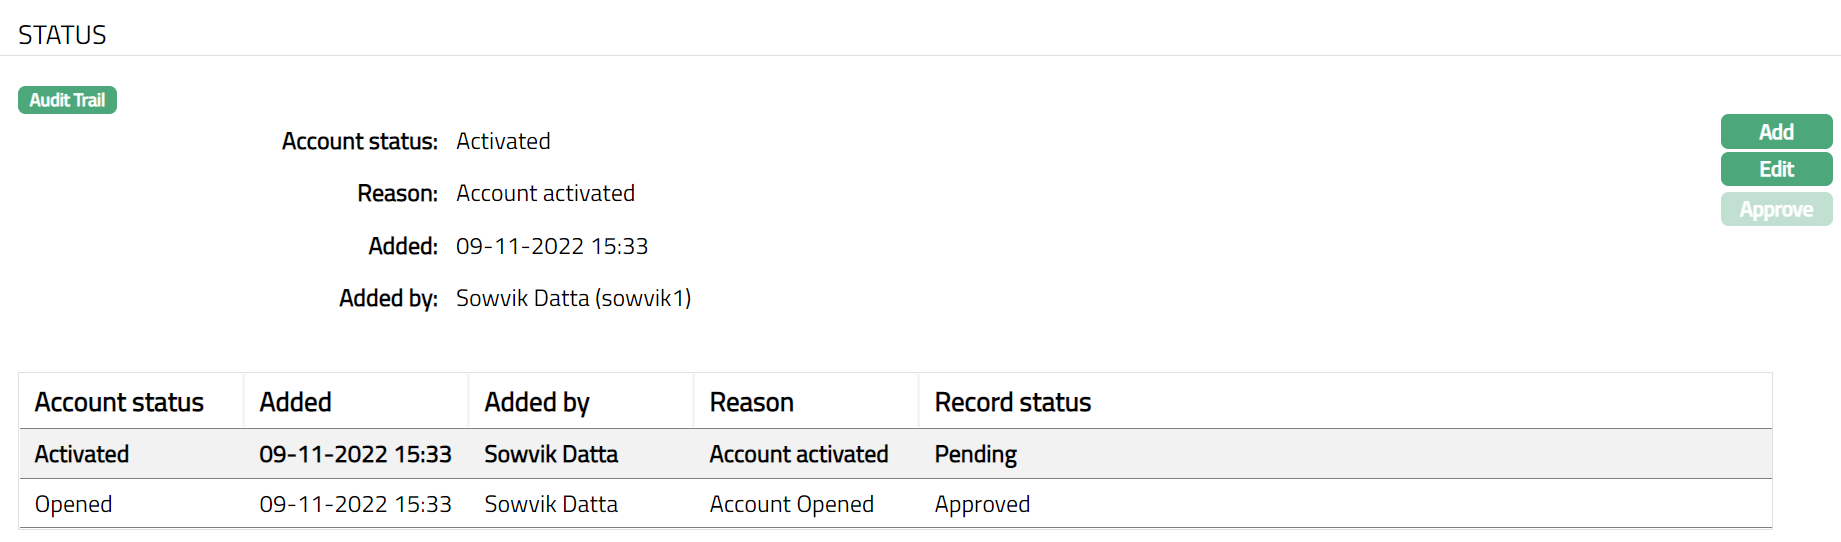
Add the Activated Account status using Account Status tab. This will make the Account Status Activated, but the record status is Pending.
Another user should approve the Activated Account status, so that the record status becomes Approved.
Only when the account status is Activated and record status is Pending, the account becomes effective.
Functions: Add, Search
Note: You need to ensure that all details in the Status tab are approved. Any changes to the Status tabs will render the status of this tab to Pending. Only when it is Approved by another user, the changes will be effective, and the Account Status changes from Opened to Activated
Profile
Profile tab, which is the default tab in the Nostro Account screen, shows the basic details of the Nostro Account created.
To view Profile
- Access Nostro Account page. Profile tab is displayed by default. The details are defaulted from Nostro Account -- Account Details (1/3).
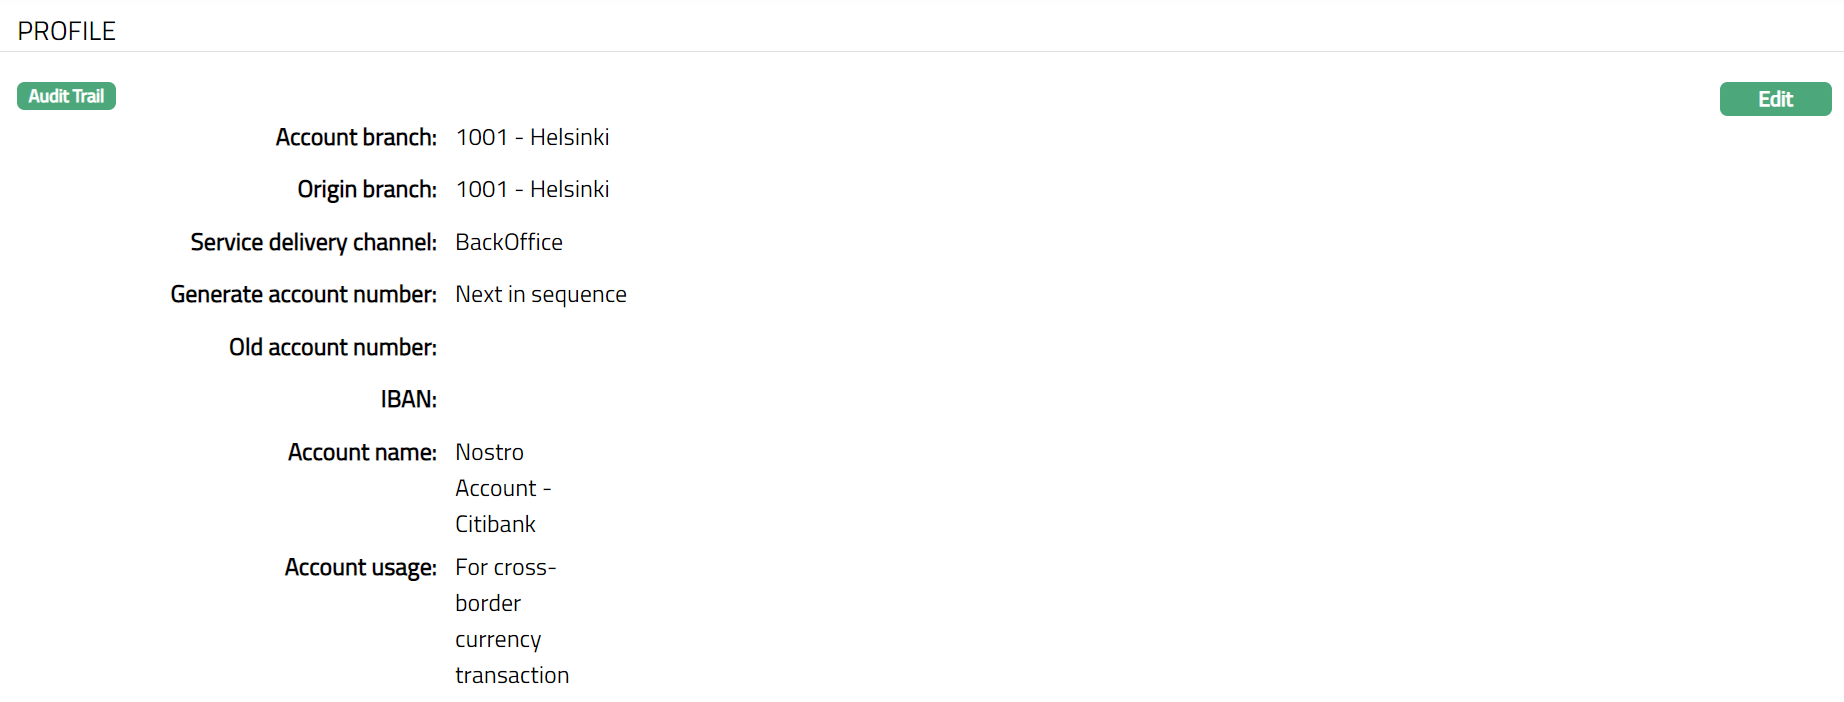
The additional fields that you can view / edit in the Profile screen are explained below:
Origin branch denotes the branch name where the Account is opened. This field is non-editable.
Old account number can be used to record the earlier account number, say, from a legacy system, for purposes of reference. You can enter the same during Edit.
IBAN for the Nostro account can be entered during Edit.
To edit Profile:
Access Nostro Account page. Profile tab is displayed by default.
Click Edit. Edit Nostro Account page appears.
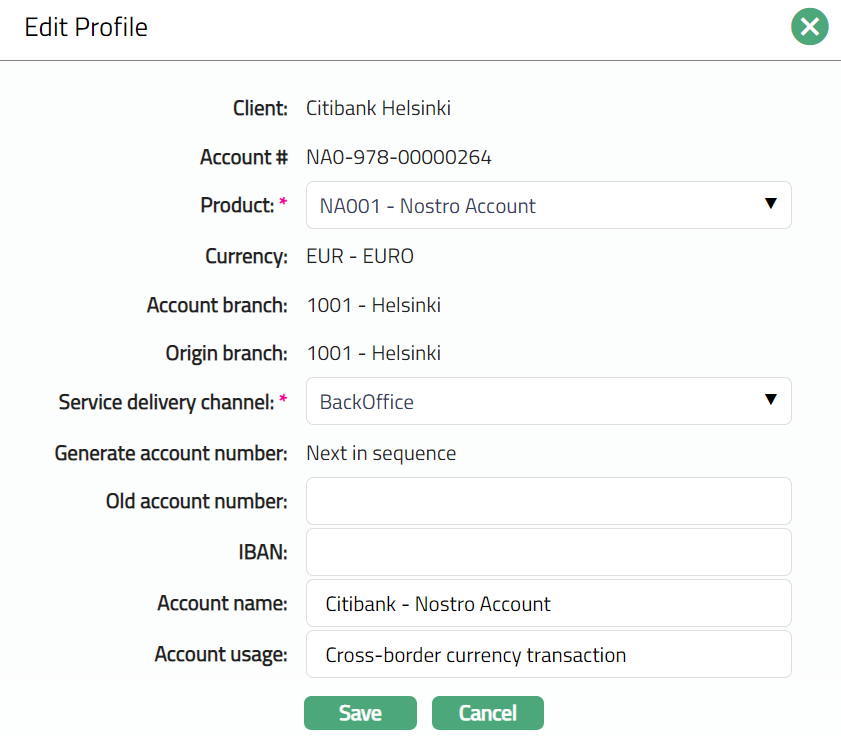
Note: The editable fields are Product, Service delivery channel, Old account number, IBAN, Account name and Account usage.
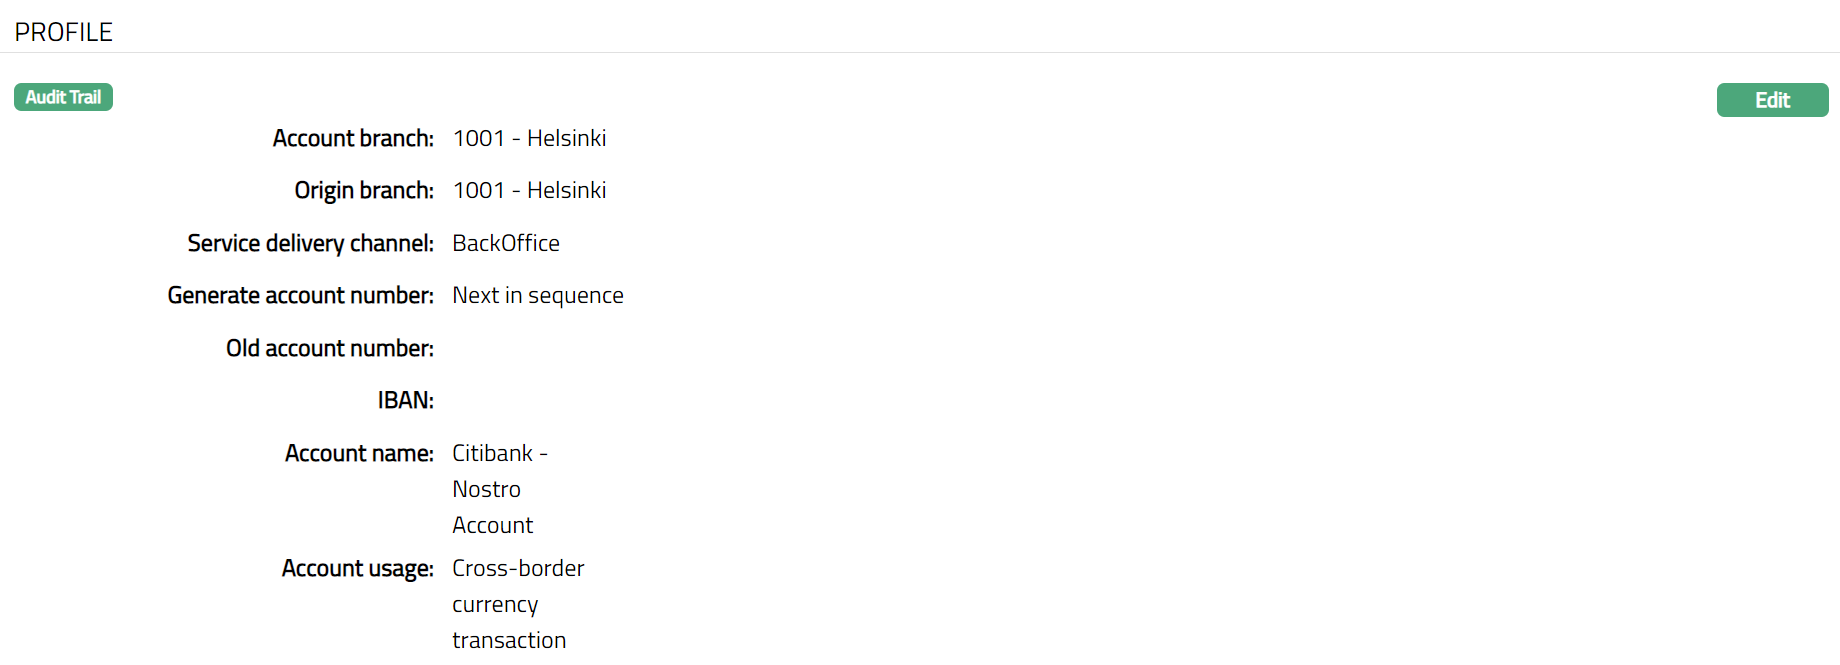
- Click Save. Profile page appears with the edited details.
 Function: Edit
Overview
Overview tab allows you to see various details of an account to get an immediate overview of the account in terms of the various balances in the account.
To view the Overview details
- Access Nostro Account page click Overview tab to view the details as per sample below.
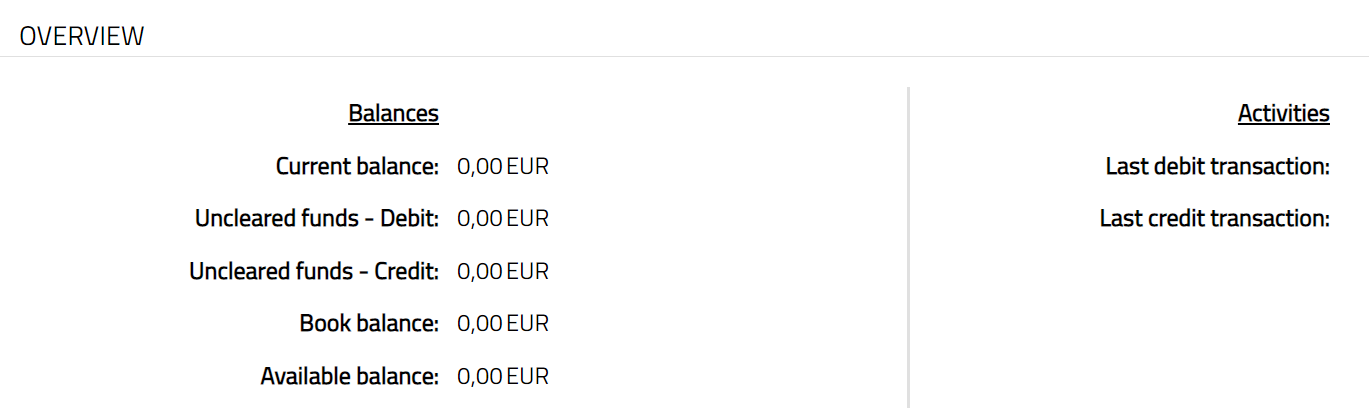
The fields available in the overview tab are:
Current balance denotes the available balance in the account.
Uncleared funds - Debit denotes the total amount that is pending to be debited from the account.
Uncleared funds - Credit denotes the total amount that is pending to be credited to the account.
Book balance will display the current book dated balance. The Book balance will be calculated as Value dated balance -- Uncleared Funds Debit + Uncleared Funds Credit. This will be shown as a negative amount in case of Debit balance and as a positive amount in case of Credit balance.
Available balance denotes the available balance in the account and is calculated as follows: opening value dated balance + credits during the day with current or past value date -- debits during the day with current or past value date + overdraft limit..
Last debit Transaction denotes the date and time for last debit transaction in the account.
Last credit transaction denotes the date and time for last credit transaction in the account.
Status
Using this tab, you can set and view the history of the account status, as well as approve the Account status records. On creating an Account, the Account status is Opened.
To add / edit Account Status
Access Nostro Account page.
Click Status tab.
Click Add. Add Status page appears.
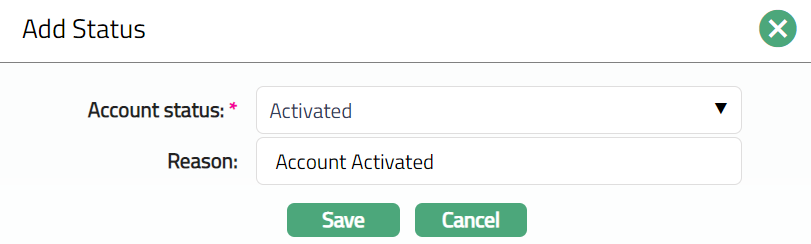
- Select Account Status from the drop-down list. Depending on the current status of the Nostro account, the possible values are:
Opened: This is the initial account status as soon as the account is created. The record status has to be manually approved by another user.
Activated: This is the status in which transactions are allowed on the account. It has to be manually set by a user different from the one who created the account. The record status has to be manually approved by another user If the Auto approval settings are made at Admin > User > Roles, then the status will be moved to Activated automatically.
Enter Reason for the status selected.
Click Save. Status page appears with the added details.
Note: Any change in the tab will set the tab Record status to Pending till it is approved by another user. On approval, the tab status is set to Approved. From the Activated status account can't be moved to any other status in this tab. However, the status can be changed to closed with Closure option.
To Edit Status
Click Edit. Edit Status page appears.
Note: Once approved you cannot Add/ Edit further.
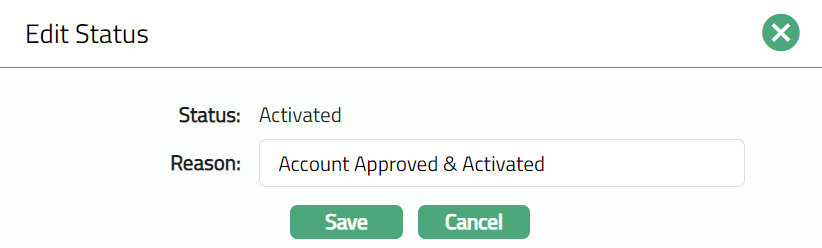
Click Save. Status page appears with the edited details.
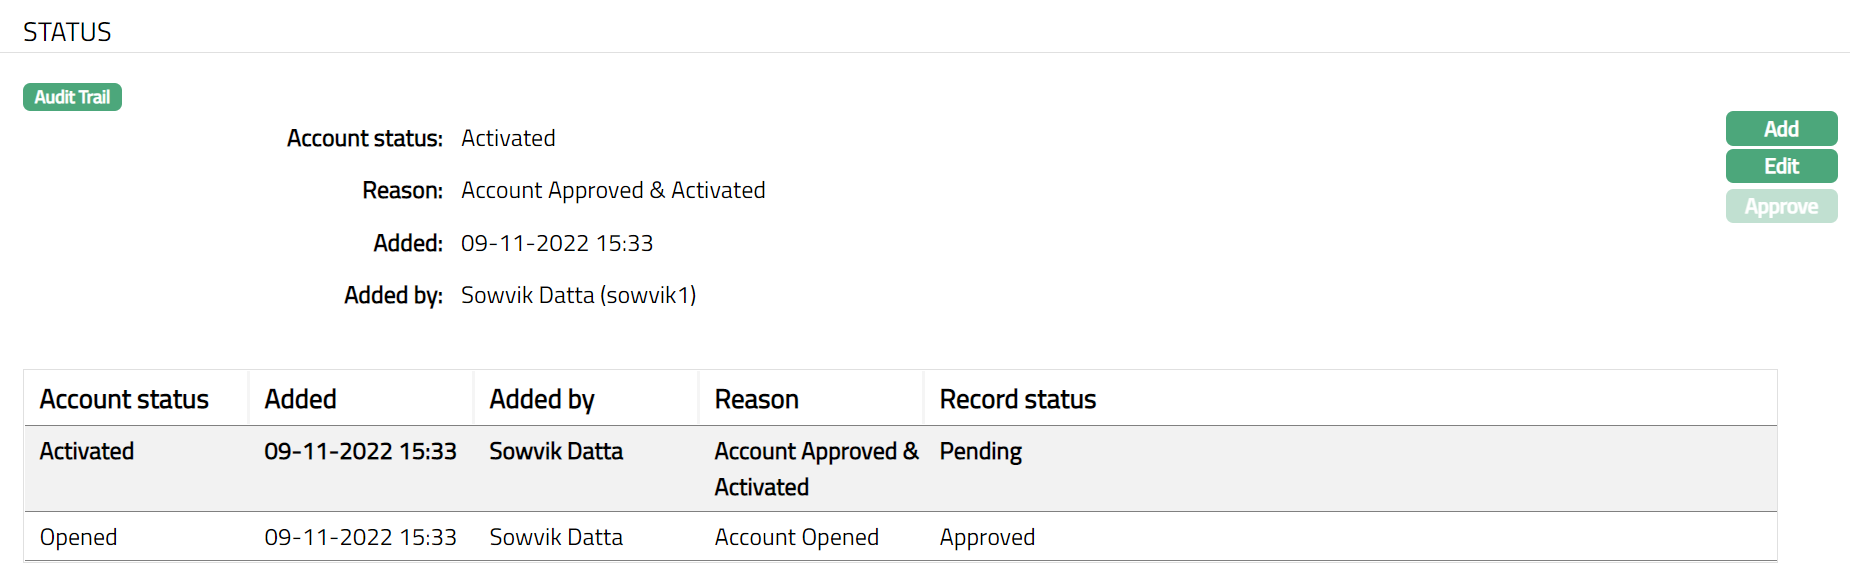
Note: Any change in the tab will set the tab Record status to Pending till it is approved by another user. On approval, the tab status is set to Approved. From the Activated status account can't be moved to any other status in this tab. However, the status can be changed to closed with Closure option.

Functions: Add, Edit, Approve
Following are the fields available on the account status view screen.
Account Status displays the status of the account. On account creation, the Account Status is Opened.
Reason displays the reason for the status selected for the account. While in case of manual status updates, this will display the reason input during the manual status change.
Status field denotes the status of the tab.
Added field denotes the date on which the record was added.
Added by field denotes the name of the user who created the record.
Approved field denotes date on which the record was approved and is displayed only for approved records.
Approved by field denotes the name of the user who approved the record and is displayed only for approved records.
Settings
This tab allows you to view and maintain certain account settings like balance check and whether to allow / disallow debit and credit.
To edit settings
Access Nostro Account page. Click Settings tab to view the details as per sample below. The details are defaulted from Product > Settings.
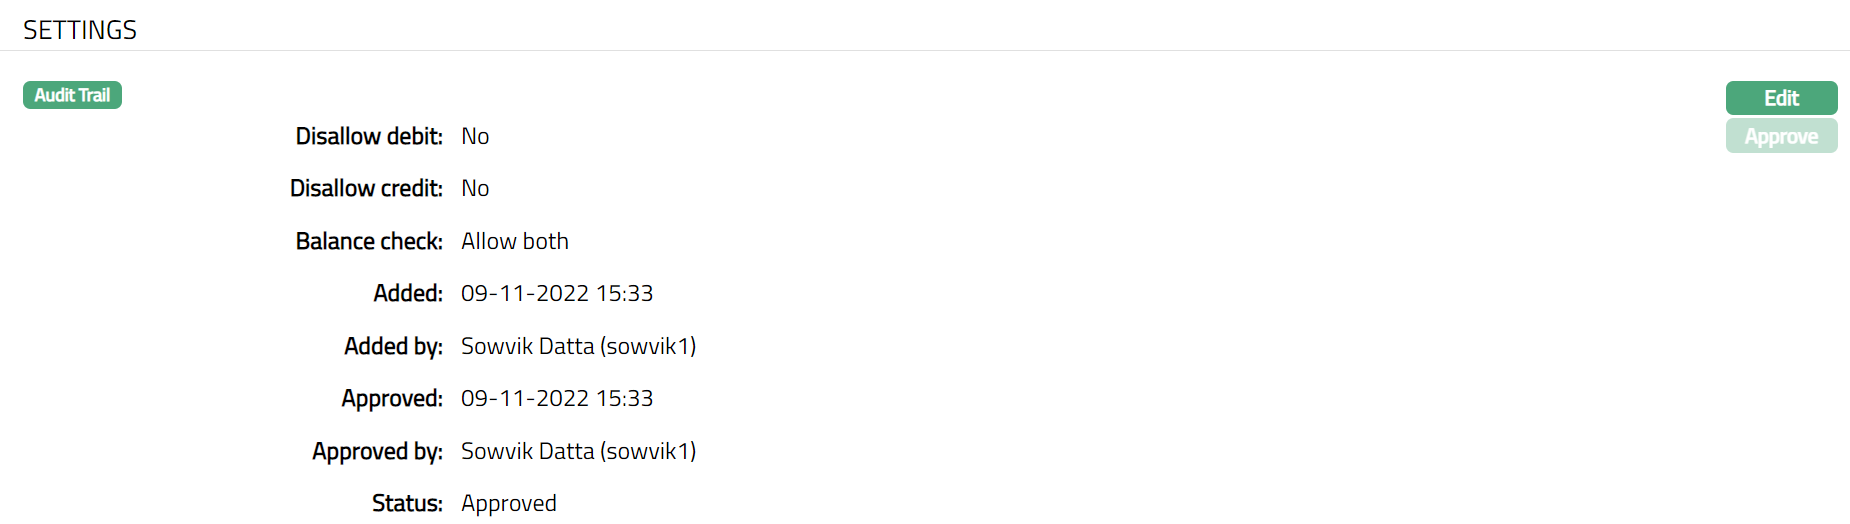
The additional fields that you can view in the Settings tab are as follows. :
Status field denotes the status of the record.
Added field denotes the date on which the record was added.
Added by field denotes the name of the user who created the record.
Approved field denotes the date on which the record was approved and is displayed only on approval.
Approved by field denotes the name of the user who approved the record and is displayed only on approval.
Click Edit. Edit Settings page appears.
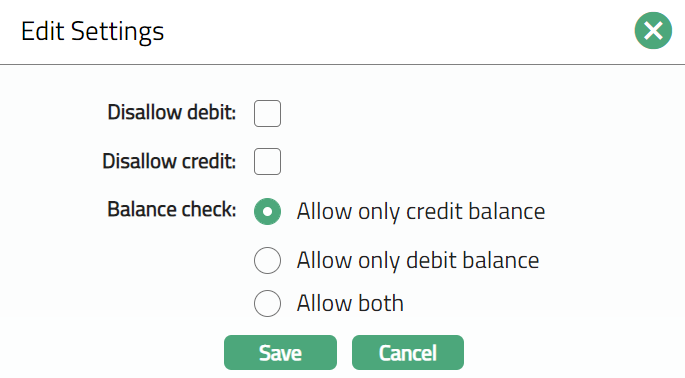
The fields that you can view / edit in this tab are explained below:
If you select Disallow debit checkbox, then Aura will not allow you to debit to this account. (However, based on Allow Forced Debit flag in the Transaction code, debits may still be done)
If you select Disallow credit checkbox, then Aura will not allow you to credit to this account. (However, based on Allow Forced Credit flag in the Transaction code, credits may still be done)
In the Balance check field, if you select Allow only credit balance, then Aura will allow only positive balance for that account. Thus, if a transaction would result in a negative balance, and if this account allows only positive balance, the transaction will result in failure. Similarly, if you select Allow only debit balance, then Aura will allow only negative balance for that account. If a transaction would result in a positive balance, and if this account allows only negative balance, the transaction will result in failure. If you select Allow both, then Aura will allow both credit and debit balance for that account.
Click Save. Settings page appears with the edited details.
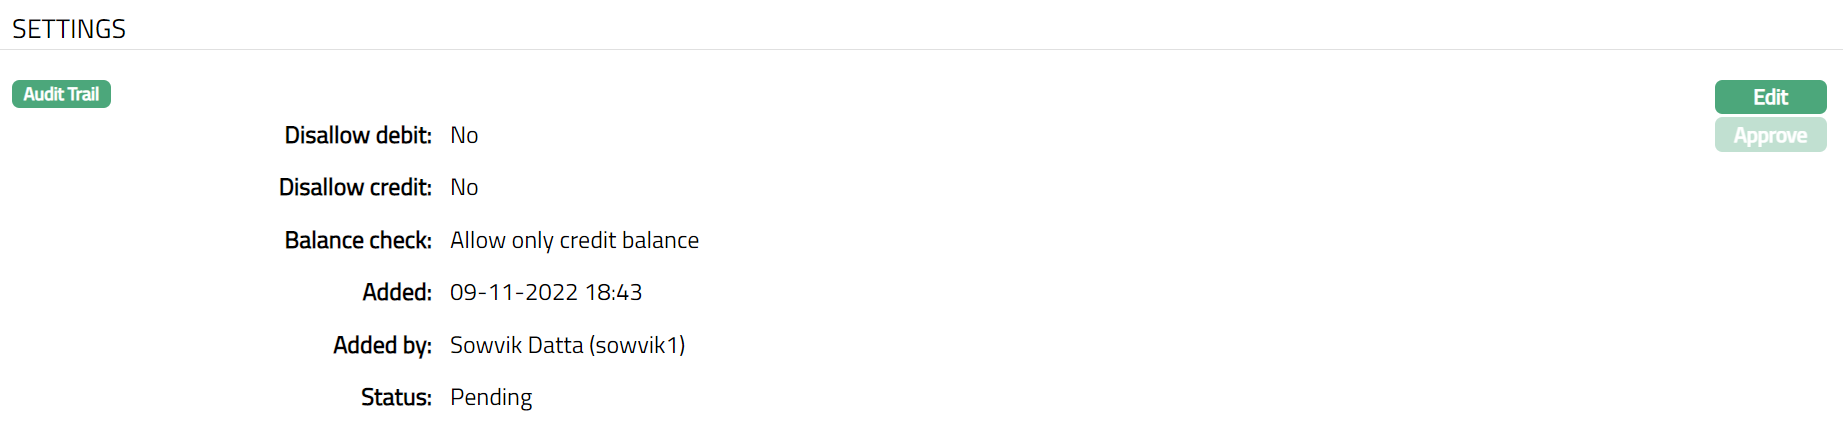
Note: Any change in the tab will set the tab status to Pending till it is approved by another user. On approval, the tab status is set to Approved.
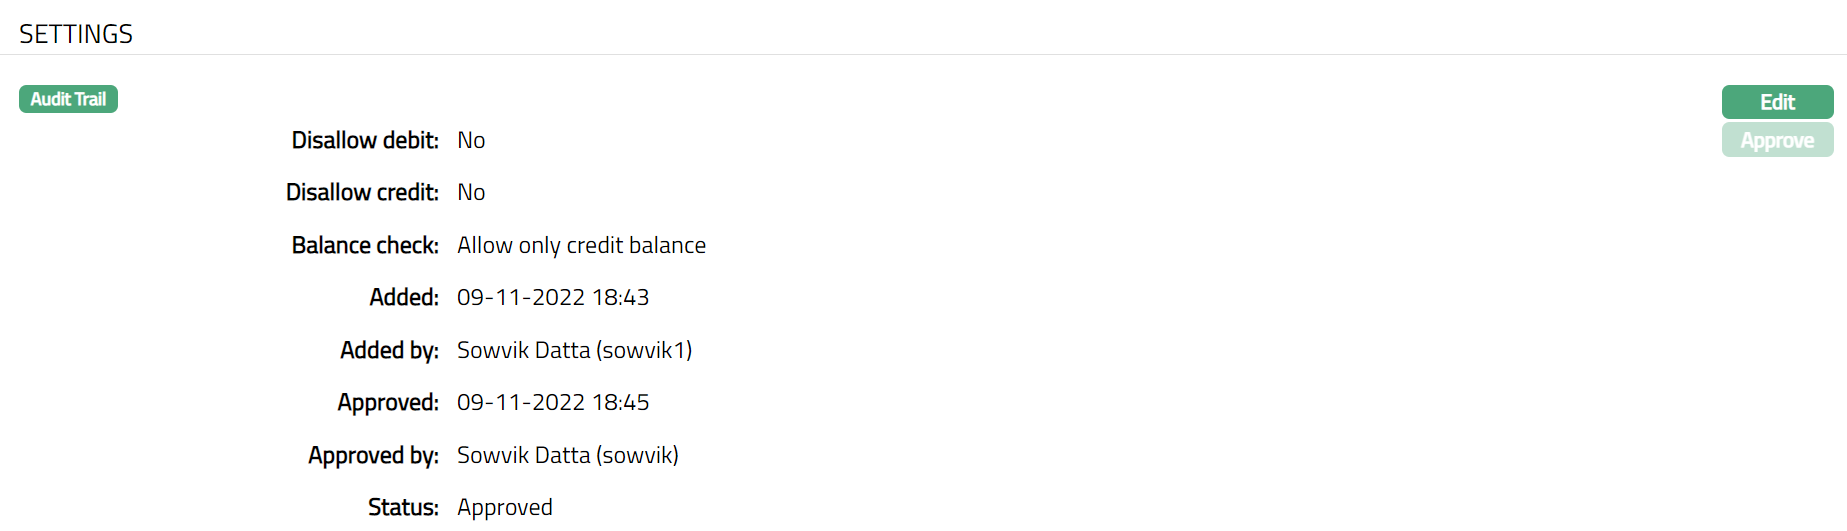
Functions: Edit, Approve
Statements
Using this tab, you can add, view and maintain the preferences for generating the statements.
To add new Statement parameter
- Access Nostro Account screen.
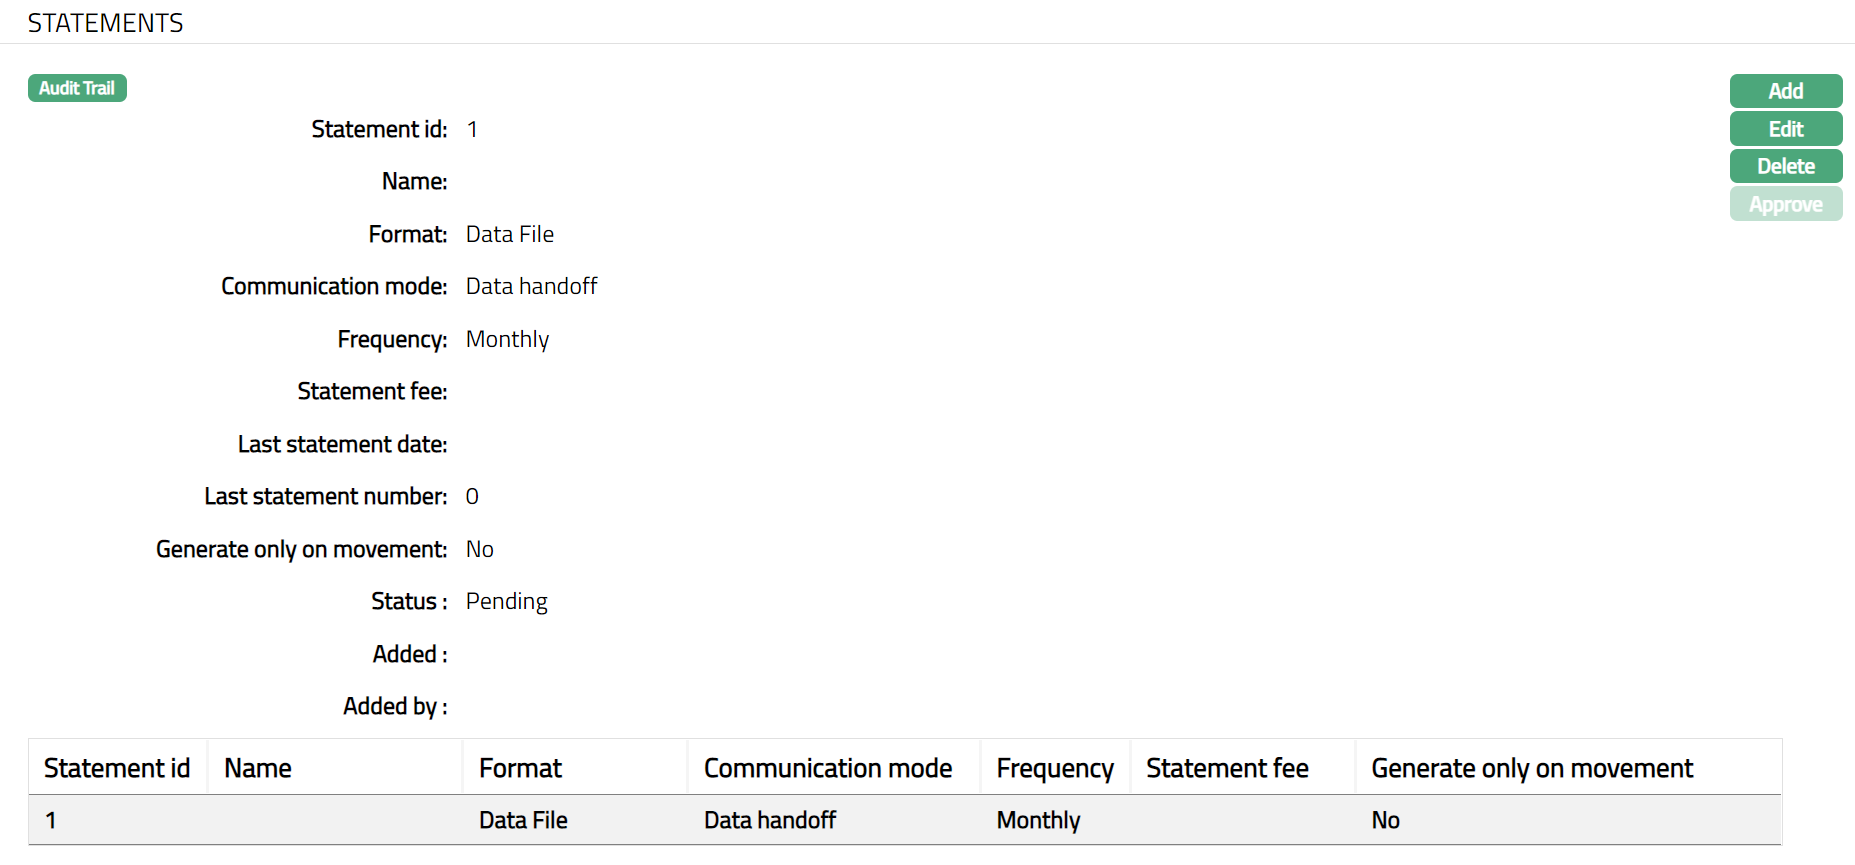
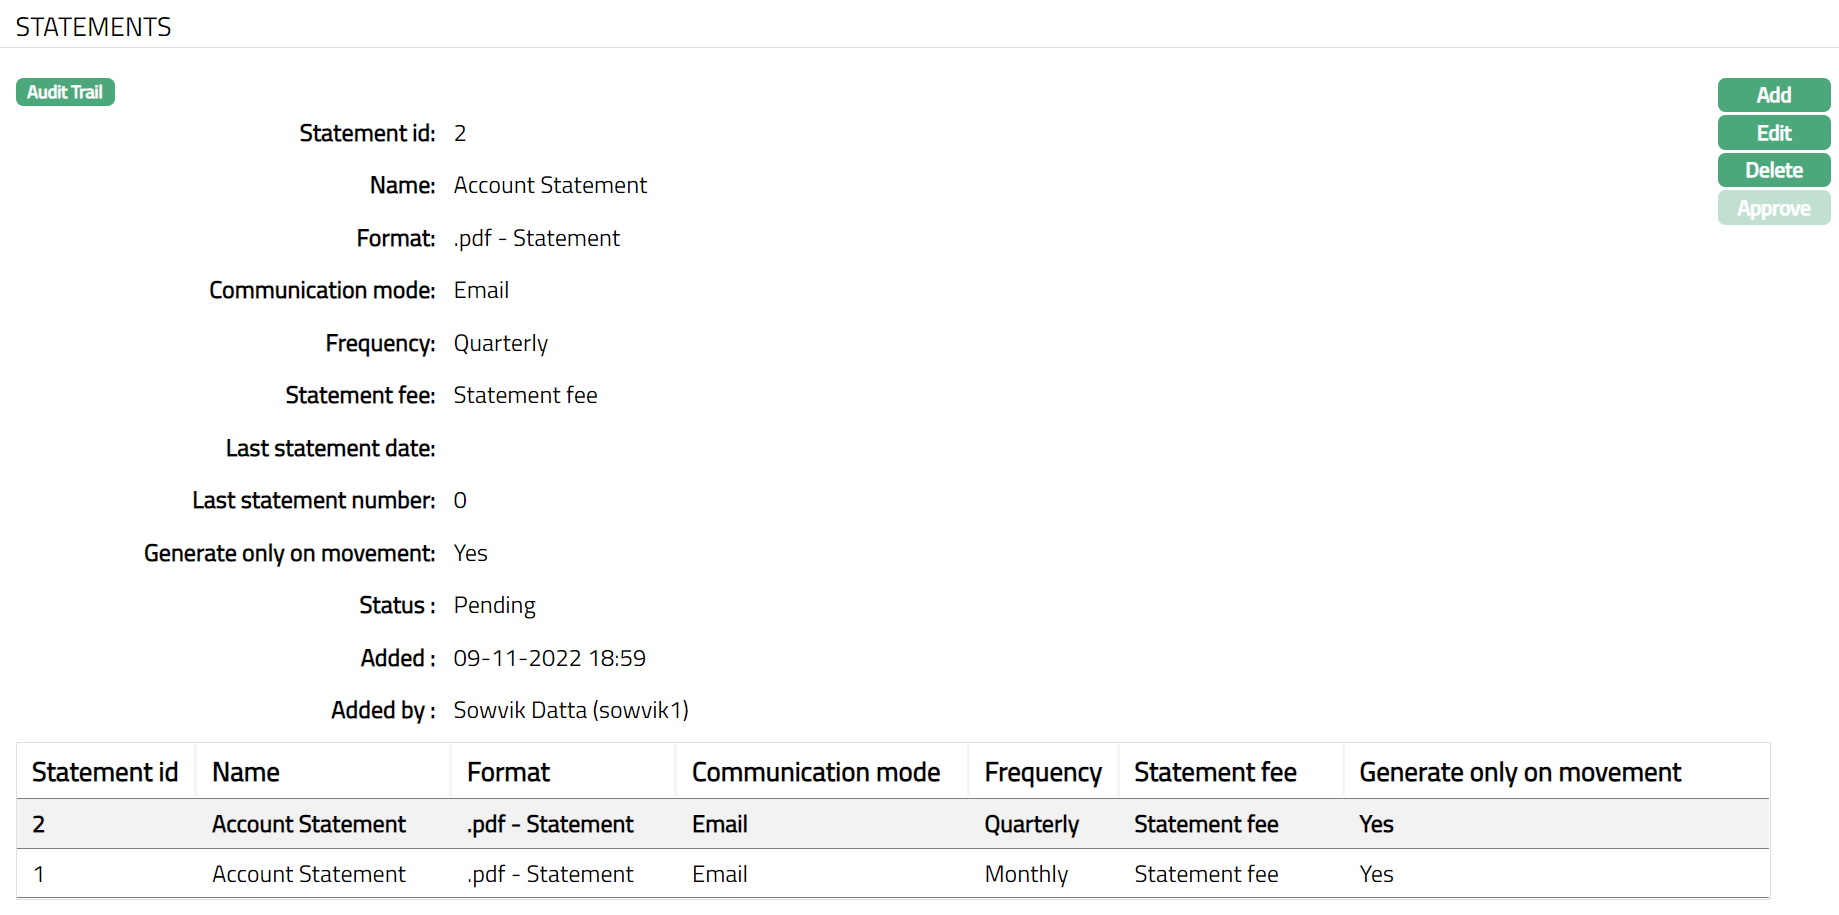
Click Statements tab to view the details as per sample below. The details are defaulted from Product > Statement Parameter based on the Product that you chose for the account during creation.
Click Add. Add Statements page appears.
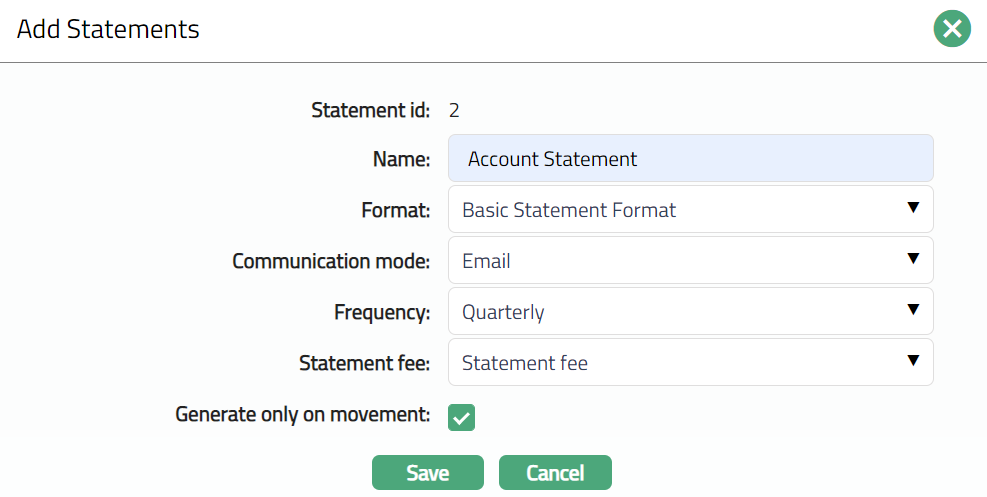
Statement id is automatically displayed by Aura.
Enter Name for the statement.
Select Format from the drop-down list of formats that have been maintained under Admin > System codes > Generic definition > Statement formats. It is the Format of the statement that is to be generated.
Select Communication mode from the drop-down list -- i.e. the manner in which you want to send the statement.
Select Frequency of the statement to be generated from the drop down. The available values are Daily, Weekly, Fortnightly, Monthly, Quarterly, Semiannual, Annual, On liquidation.
Select Statement fee from drop-down list of Event based Flat or Banded charges maintained under Admin > Pricing > Charges > Charge scheme. This is the fee that is to be collected from the client for the statement defined above. This charge may be deferred.
By default, Generate on account activity checkbox is checked. This indicates that the account statement will be generated only if there are any transactions on the account. If you would like to generate an account statement irrespective of whether there were transactions in the account or not, you may clear this checkbox.
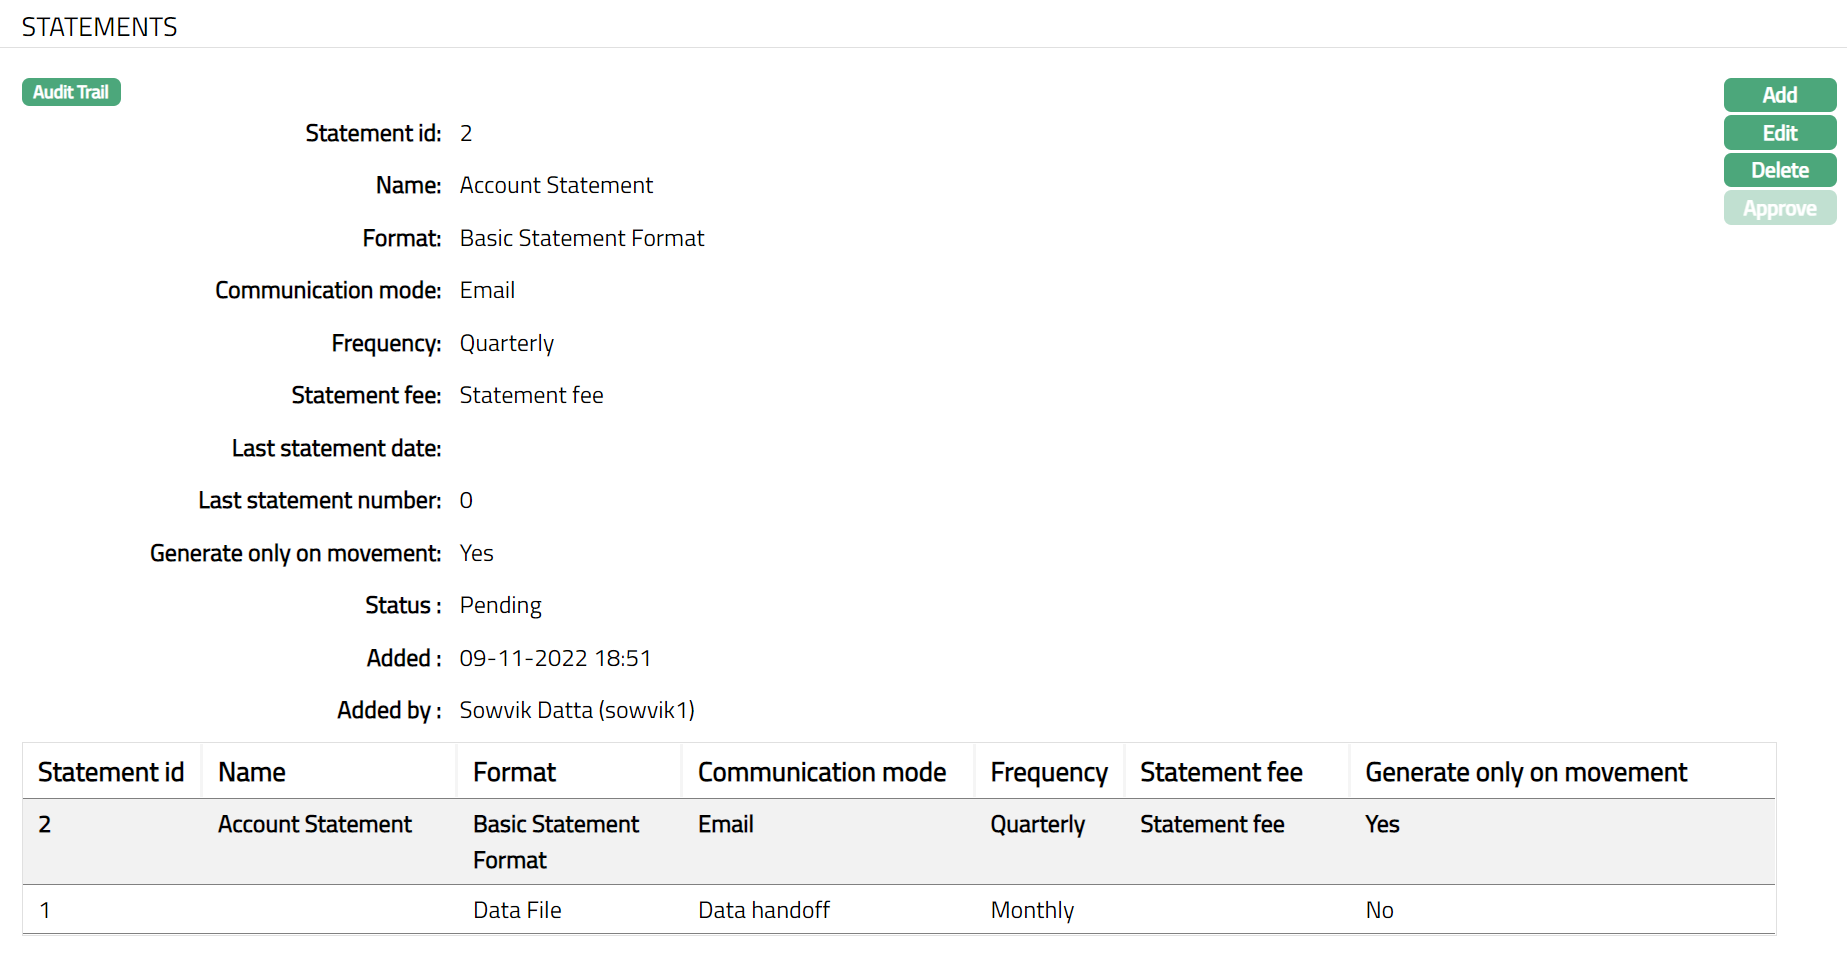
Click Save. Statements page appears with the added details.
 Functions: Add, Edit, Delete, Approve.
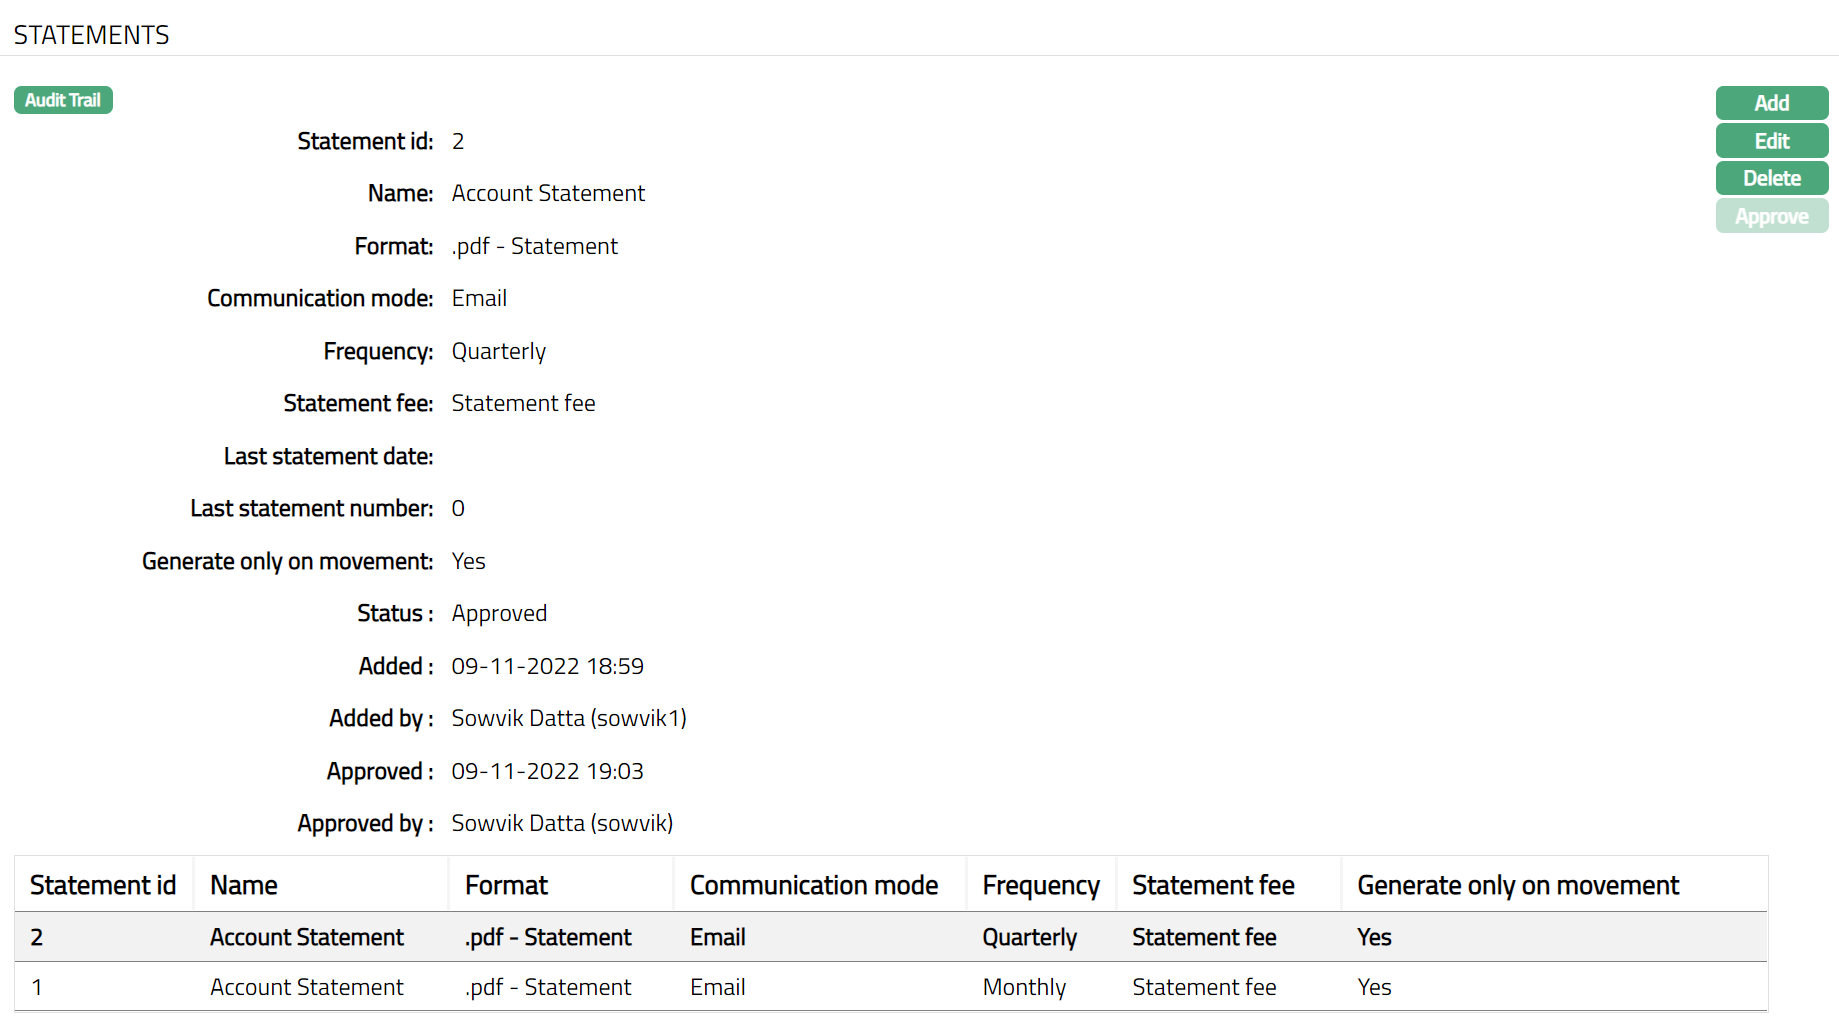
The following details are displayed when you view the Statement parameter and are not editable:
Last statement date - It denotes the date of the statement last generated.
Last statement number - It denotes the number of statements last generated.
To Edit Statements
Click Edit. Edit Statements page appears.
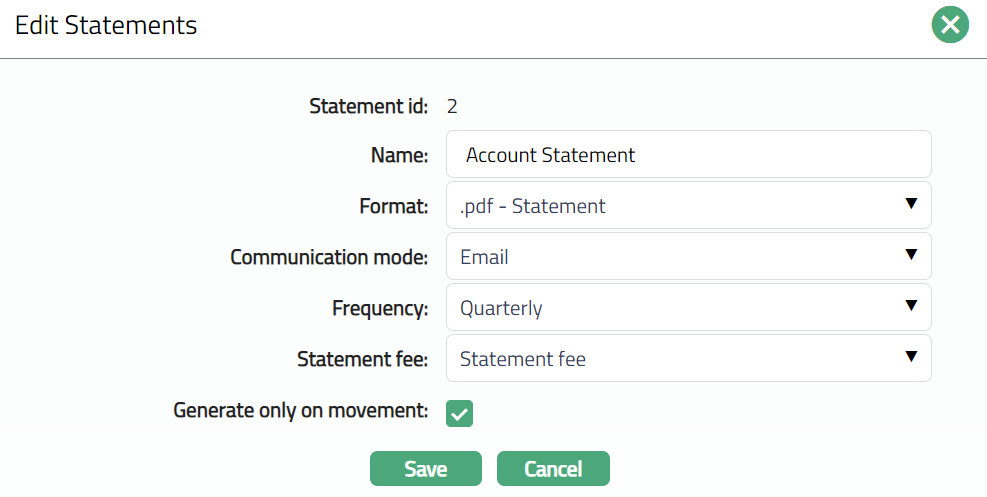
Note: Expect Statement id, all other fields are editable.
Click Save. Statement page appears with the edited details.
Note: Any change in the tab will set the tab status to Pending till it is approved by another user. On approval, the tab status is set to Approved.
Functions: Add, Edit, Delete, Approve.
The additional fields that you can view in the Settings tab are as follows:
Status field denotes the status of the record.
Added field denotes the date on which the record was added.
Added by field denotes the name of the user who created the record.
Approved field denotes the date on which the record was approved and is displayed only on approval.
Approved by field denotes the name of the user who approved the record and is displayed only on approval.
Document
[]Document tab allows you to upload documents related to the Nostro Account. These can be in the form of scanned images or files on your computer. You can categorize the documents as per Document Type and store them with a document reference number.
- Access Nostro Account screen. Click Document tab. Document page appears.

- Click New. New Document page appears.
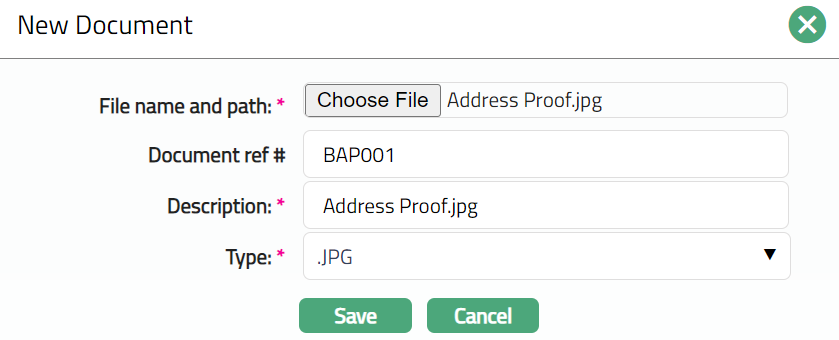
Click Choose File button to select the File name and path of the document.
Enter Document ref no. for the document. This document reference number is used in Branch view > Documents.
Based the file selected, Description field will automatically derive. If required, you can change the description.
Select Type of the Document uploaded. The document types should have been maintained using Admin > System codes > Documents > Document types. Once entered, this cannot be edited.
Click Save. The document gets uploaded, and the Document page appears with the added details.
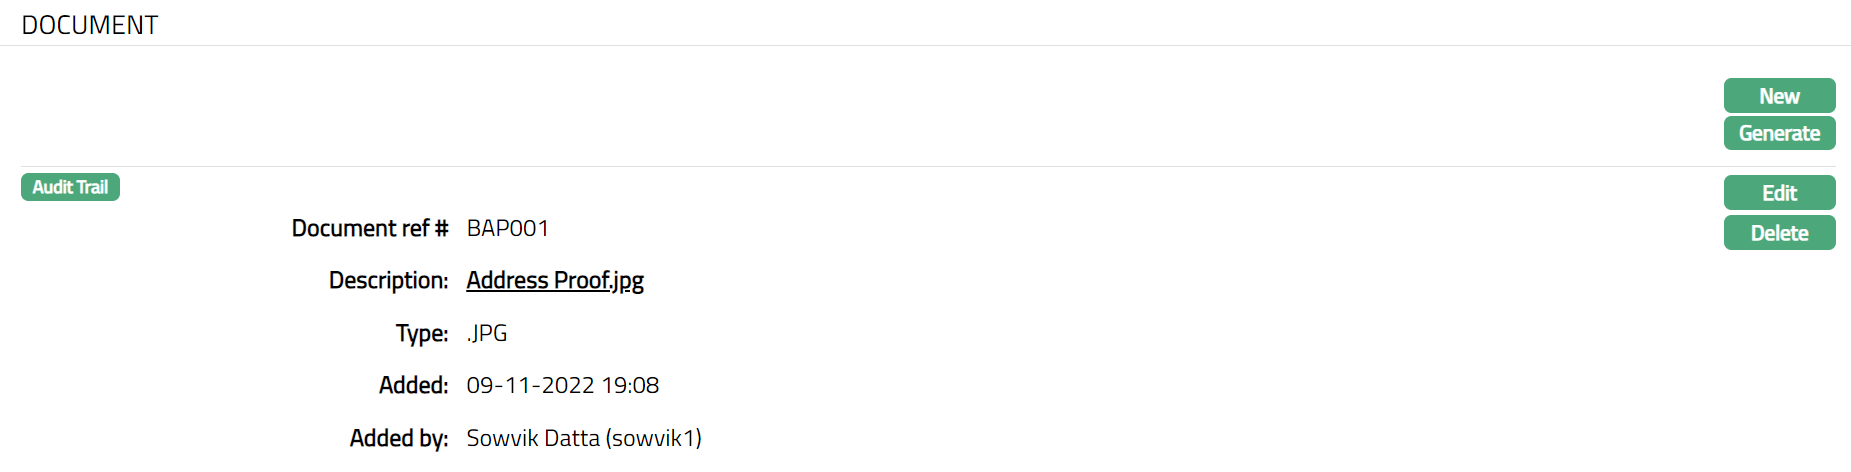
Functions: New, Generate, Edit, Delete
To Edit Document
- Click Edit. Edit Document page appears.
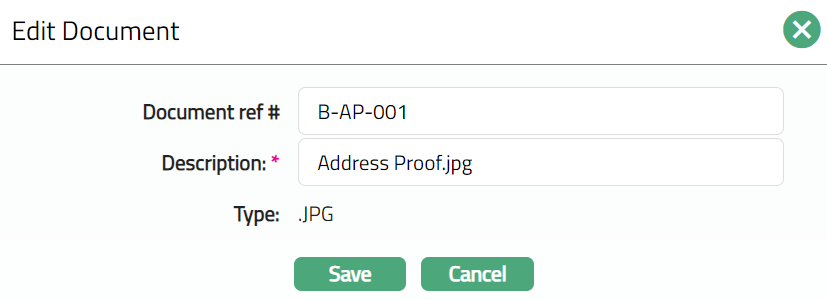
Note: Except Type field, all other fields are editable.
- Click Save. Document page appears with the edited details.

Functions: New, Generate, Edit, Delete
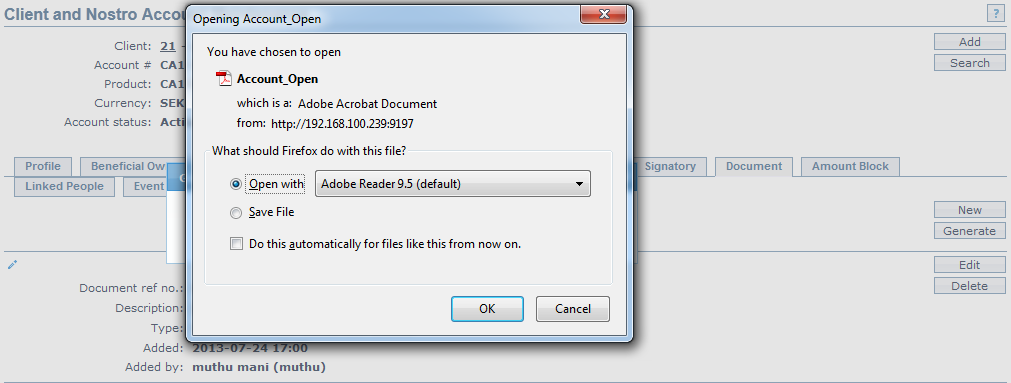
To Generate Document
- Click Generate to generate the pdf file using the template if maintained under Admin > System codes > Process > Document templates. You have to map the document template for Nostro account product under Document template settings as maintained under Retail > Settings > Product. New Document page will appear where the mapped templates will be displayed.
- Click any template from the list of templates after which the document will be generated based on the selected template as shown below.
- Click Delete to delete the document. Aura will ask for confirmation, on approval of which the document will be deleted.
Event
Events tab allows you to view the past, current and future events. This tab is non-editable.
To view the Events
Access Account page.
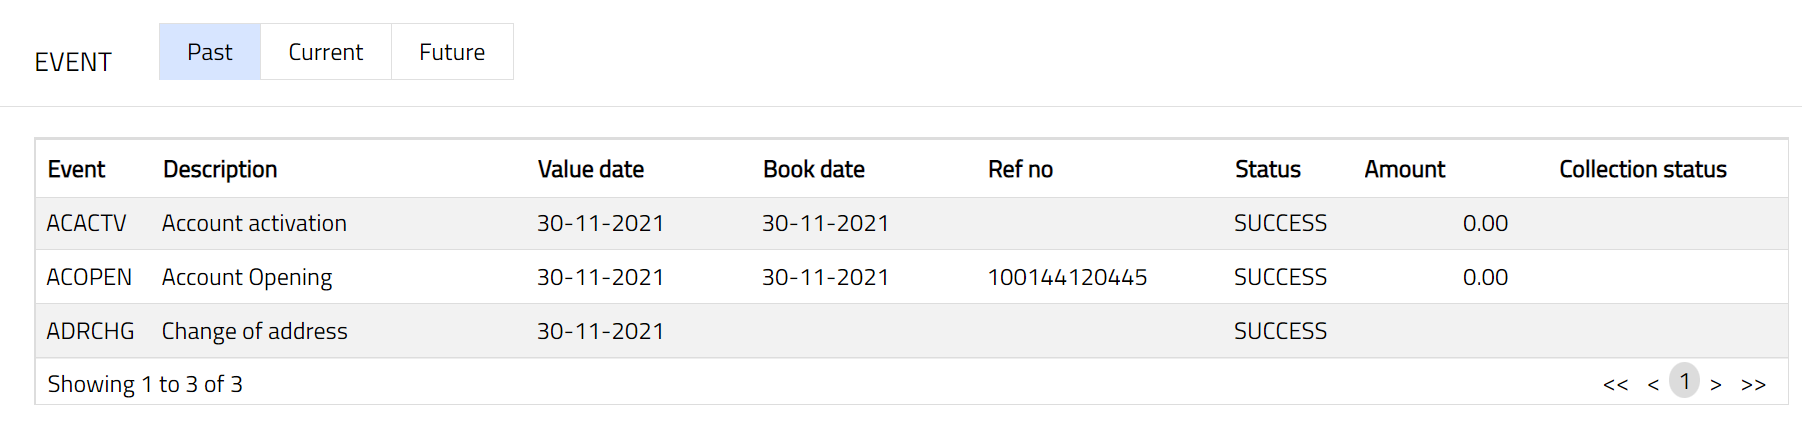
Click Event tab. There are three sub-tabs within it -- Past, Current and Future. By default, the Current tab is displayed. It shows the details of the Events that have value date = current business date. The Past tab and Future tab show details of events that have value date earlier than / later than the current business date respectively.
A sample of Past tab is shown below:
A sample of Current tab is shown below:

A sample of Future tab is shown below:
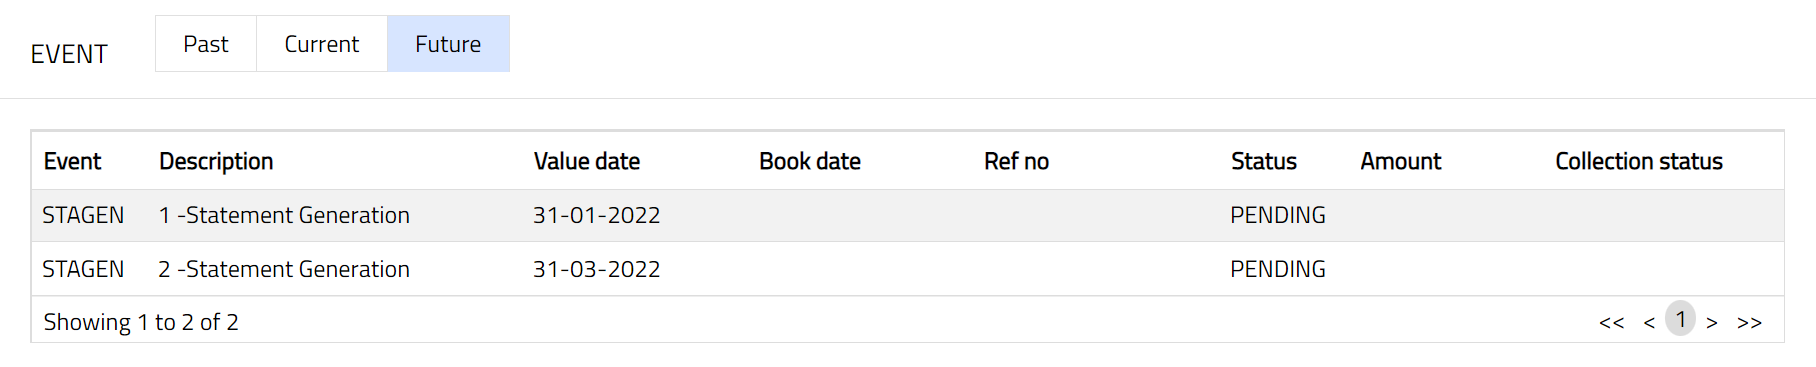
All the tabs show the following data:
Event: Code for the event.
Description: Description of the event.
Value Date: The value date for the event.
Book Date: The date of entry / input of the event.
Ref No: The transaction reference number under which the event is processed.
Status: Status of the event:
Pending: Where the event is not yet processed.
Success: Where the event has been processed successfully.
Failure: Where the event has failed during process.
Retry: Indicates a failed event where the system retries to process the event
on subsequent business days.
Amount: Indicates the amount processed by the event. Example: Interest liquidation event will have the amount of interest liquidated.
Collection Status: If the Collection status is Pending, it indicates that the deferred charges has not been collected and if the Collection Status is Success, it indicates that the deferred charges has been collected.
The Events in a Nostro account are listed below.
| Event Code | Description | Condition |
|---|---|---|
| ACOPEN | Account Opening | This event occurs when account is opened, and it occurs only once i.e. at the time of account opening. The account status will be defaulted to Opened when the Status Change event is triggered. |
| ACACTV | Account activation | This event occurs when an account is in opened status. The user can change the status manually or automatically with the auto approve option. The status of the account changes from Opened to Activated. Once the account status is changed, the account opening fee is triggered, and transaction entries are posted. |
| ACCLOS | Account closure | This event occurs when the account is closed, and it occurs only once. |
| STAGEN | Statement Generation | This event occurs when a statement is generated or pending for generation. The user can generate the statement manually or automatically as required. |
| ADRCHG | Address Change | This event occurs when the address is changed. The user can change the address as needed. |
Custom Field
This option provides you the flexibility to define fields apart from those that are already available in the standard version of Aura. Thus, it enables you to customize additional data storage and use as required to suit your specific business needs.
To Edit Custom Field.
- Access Account page. Click Custom Field tab.

The field appears only when it is created in Admin > System codes > Custom fields > Custom fields and linked to specific Accounts option in Admin > System codes > Custom fields > Field mappings.
Click Edit. Edit Custom Field page appears. In the following illustration, a custom field, Initial account opening date has been mapped to the Account as shown below.

Enter Initial account opening date.
Click Save. Custom Field page appears with the edited details.

Functions: Edit