Client Maintain
Client is the basic unit which maintains the ownership / relationship data of individuals / organizations vis-à-vis the bank. Only when a client record is created, further activities like account opening, transactions, etc. can be recorded. Client maintain allows you to maintain the details of this relationship like client #, client name, type, beneficial ownership, linked people, owner branch, status, etc.,
In Aura, there are three types of clients:
Personal -- The client is a single person
Corporate -- The client is an organization
Joint -- The client is a group of two or more people.
Depending on the type, the details that are to be maintained differ.
Client type:
Personal
Where the client is a single person, choose client type as Personal. The following are the tabs in client type -- personal.
To add Client details for a new Person,
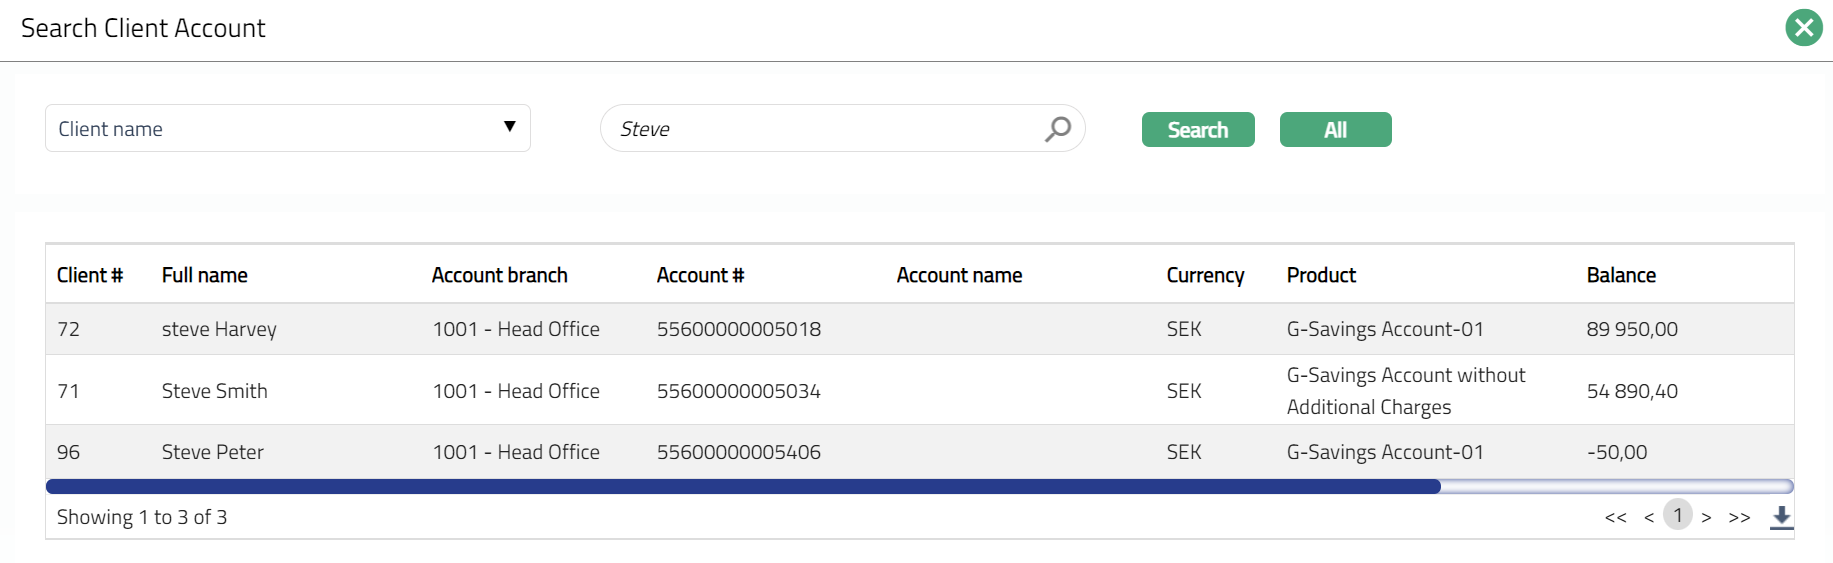
1. From CRM menu, click Clients, and then Maintain. Client Search page appears.

2. Click Add. New Client - Select Type page appears.

3. Select the Personal option for Client type field.
Notes:
- Once you select the client type and click on Next, you cannot come back to change the client type.
- Joint radio button will be enabled only if Joint client type is maintained as Allowed at Admin → Entity level. Select the Client Owner branch (the branch to which the Client belongs) from the drop-down of active branches. The branches are maintained under Admin → Branches → Maintain. By default, the user's logged in branch is displayed.
4. Click Next. New Client → Add Person (1/6) page appears

5. If you want to create a client for a person who has already been created under CRM → Person → Maintain then click on Existing person. Aura will display the Search Person window with the list of persons maintained in the system. Select the required person.
6. If you want to create a client for a person who has not yet been created under CRM → Person → Maintain, then click on New person and provide the required details. For details, you can refer to CRM → Person Maintain.
7. Enter First name of the Person.
8. Enter Middle name of the Person if any.
9. Enter Last name of the person.
10. On entering the First Name and Last Name system automatically derives Full Name of the person. You can however edit it as needed.
11. Enter Title of the person that is to be prefixed to the person's First name.
12. Select Gender of the person from the drop-down list of the Pre-shipped values. The options are Mail, Female and Not Disclosed.
13. Input Date of birth of the person. You can either enter the date manually or select using the calendar. Aura will validate the date format against the format maintained at Admin → Entities → Maintain → Regional → Date format.
14. Select Language i.e. Language of the person from the drop-down list maintained under Admin → System Codes → Generic Definitions → Languages.
15. Click Next. New Client → Person details (2/6) page appears.
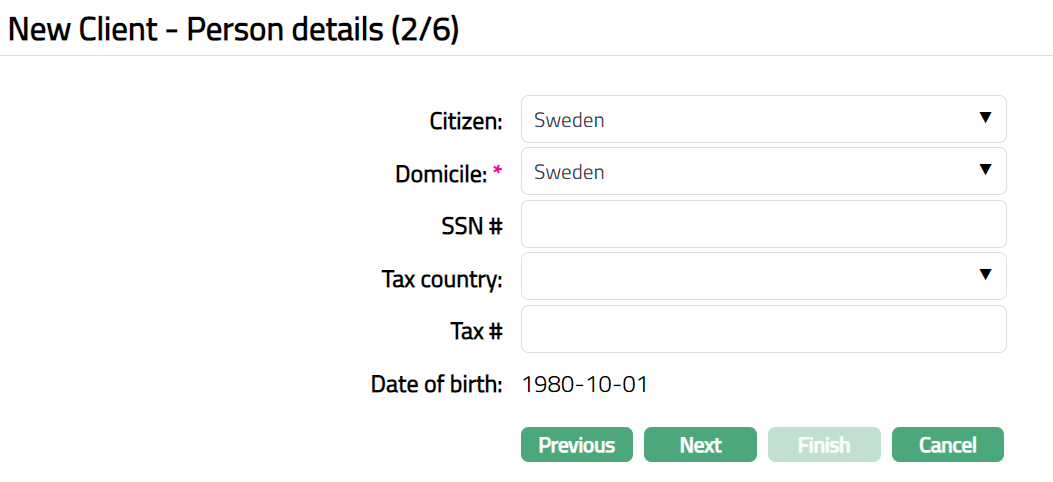
16. Select Citizen i.e. country of Citizenship of the Person from the drop-down list.
17. Select Domicile of the person i.e. country of residence from the drop-down list.
Note: The list of countries for both Citizen and Domicile are maintained under Admin → System Codes → Generic Definitions → Countries.
18. Enter SSN # of the person. It is the person's social security number i.e., a unique number provided by the person's residence country.
Note: The validation for SSN, if required, may be customized during implementation
19. Select Tax country of the person. The list of countries are maintained under Admin → System Codes → Generic Definitions → Countries.
20. Enter person's Tax #.
21. Date of birth is defaulted from New Client → Add Person (1/6) page. Note: If you want to change the Date of Birth, then you need to go to the previous page by clicking on Previous and do necessary changes.
22. Click Next. New Client → Address (3/6) page appears.
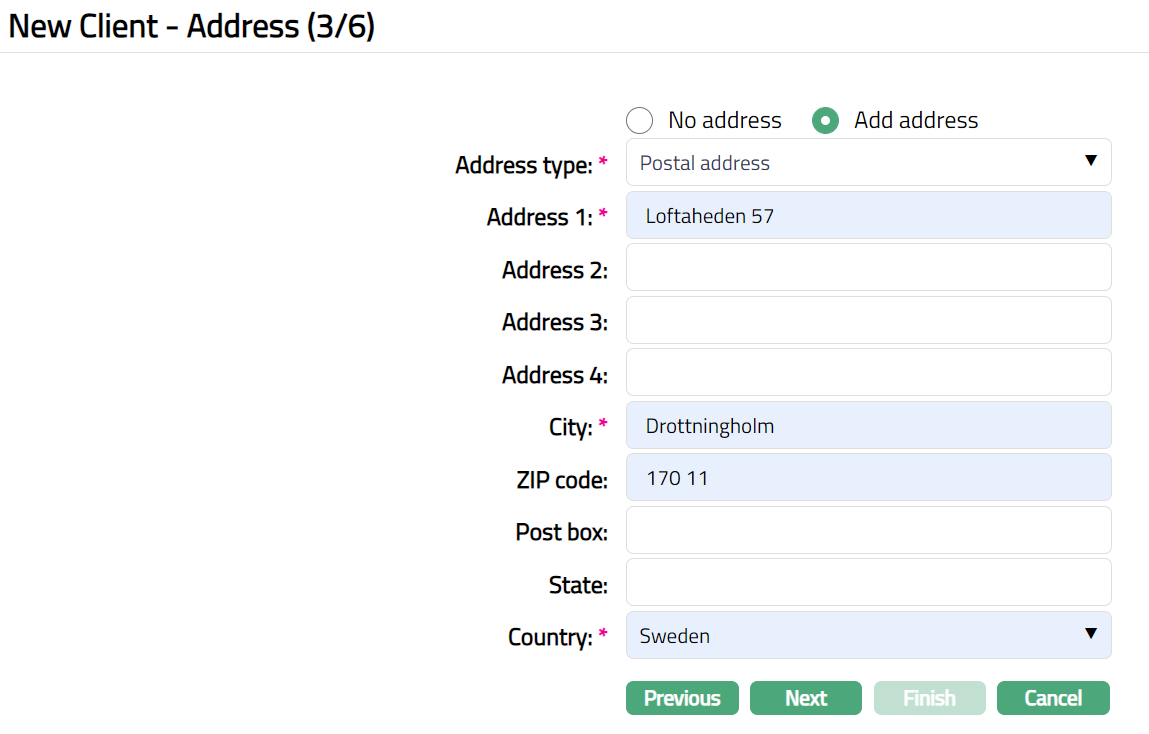
23. By default, No address is selected. If you do not want to record the address of the client at this stage, then you can select this option.
24. If you want to record the address, then click on Add address button and provide the required details.
25. Select Address type from the available drop-down list which are maintained under Admin → System Codes → Address details → Address types.
26. Enter Address 1, 2, 3, 4 of the clients as applicable.
27. Enter City of the client.
28. Enter Zip code of the client.
29. Enter Post box of the client.
30. Enter State of the client.
31. Select Country from the drop-down list which are maintained under Admin → System Codes → Generic Definitions → Countries.
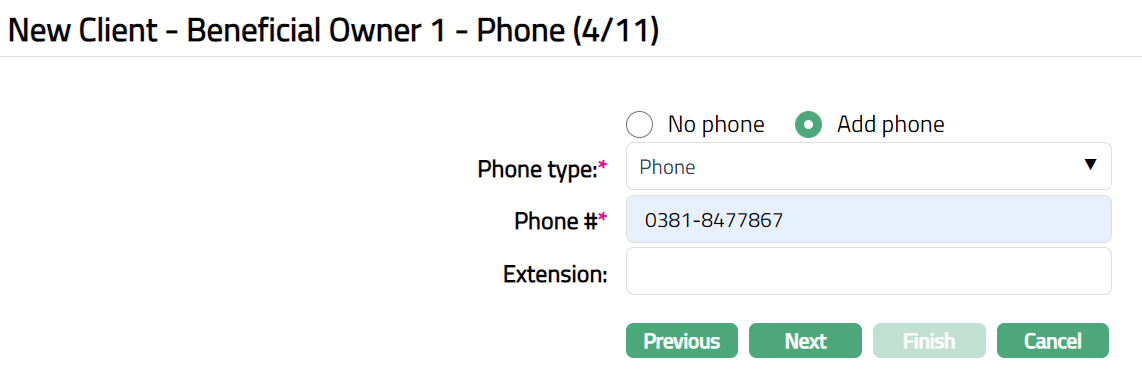
32. Click Next. New Client → Phone (4/6) page appears.
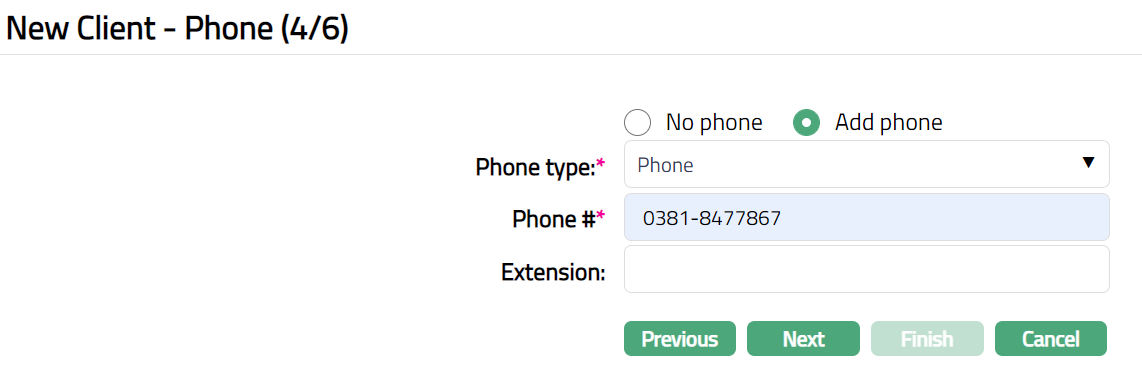
33. By default, No phone is selected. If you do not want to input the phone details at this stage, then you can select this option.
34. If you want to enter the phone details, then click Add phone button and provide the required details.
35. Select Phone type from the drop-down list maintained under Admin → System Codes → Address details → Phone types.
36. Enter Phone # of the client.
37. Enter Extension of the phone of the client as applicable.
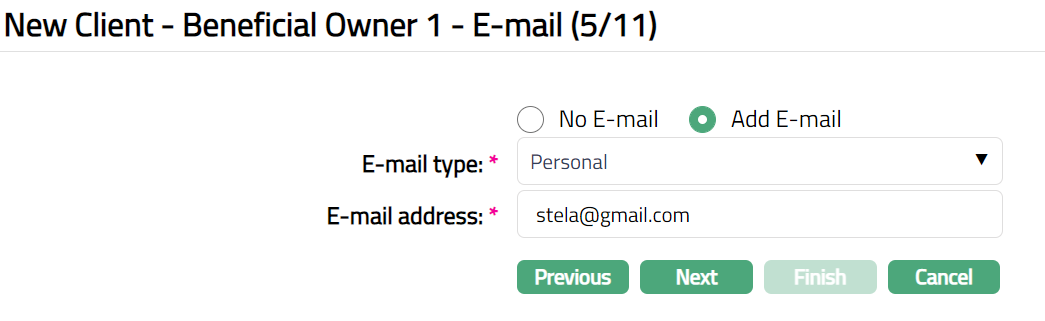
38. Click Next. New Client → E-mail (5/6) page appears.
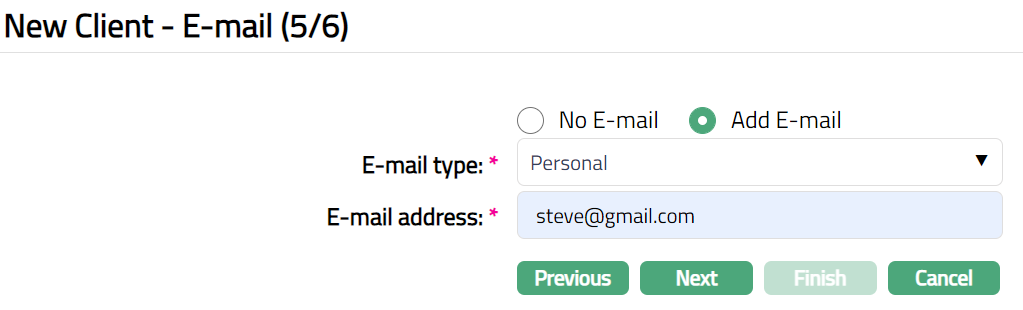
39. By default, No E-mail is selected. If you do not want to enter the E-mail details of the person at this stage, then you can select this option.
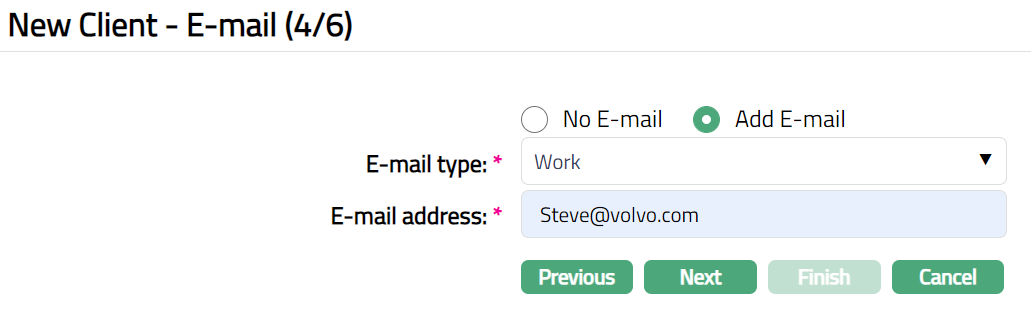
40. If you want to enter the E-mail, then click Add E-mail and provide the required details.
41. Select E-mail type from the drop-down list maintained under Admin → System Codes → Address details → E-mail types.
42. Enter E-mail address of the person.
43. Click Next. New Client → Confirmation (6/6) page appears.
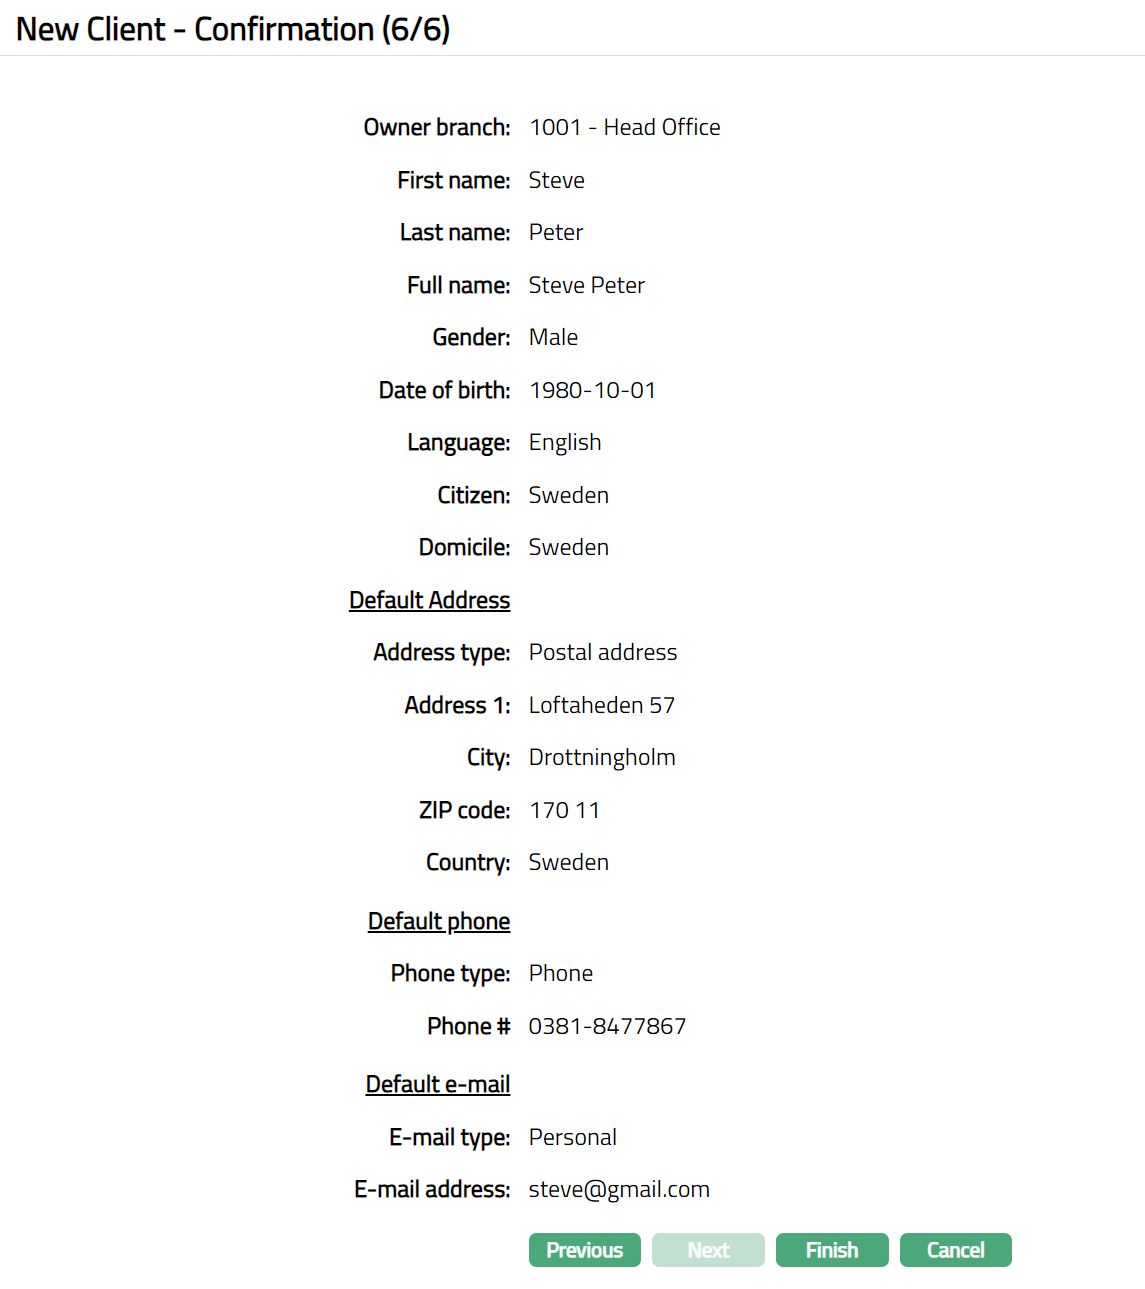
44. Click Finish. Client page appears displaying the Profile tab along with the new client detail which got added with a unique Client #.

Functions: Add, Search, Edit, Delete
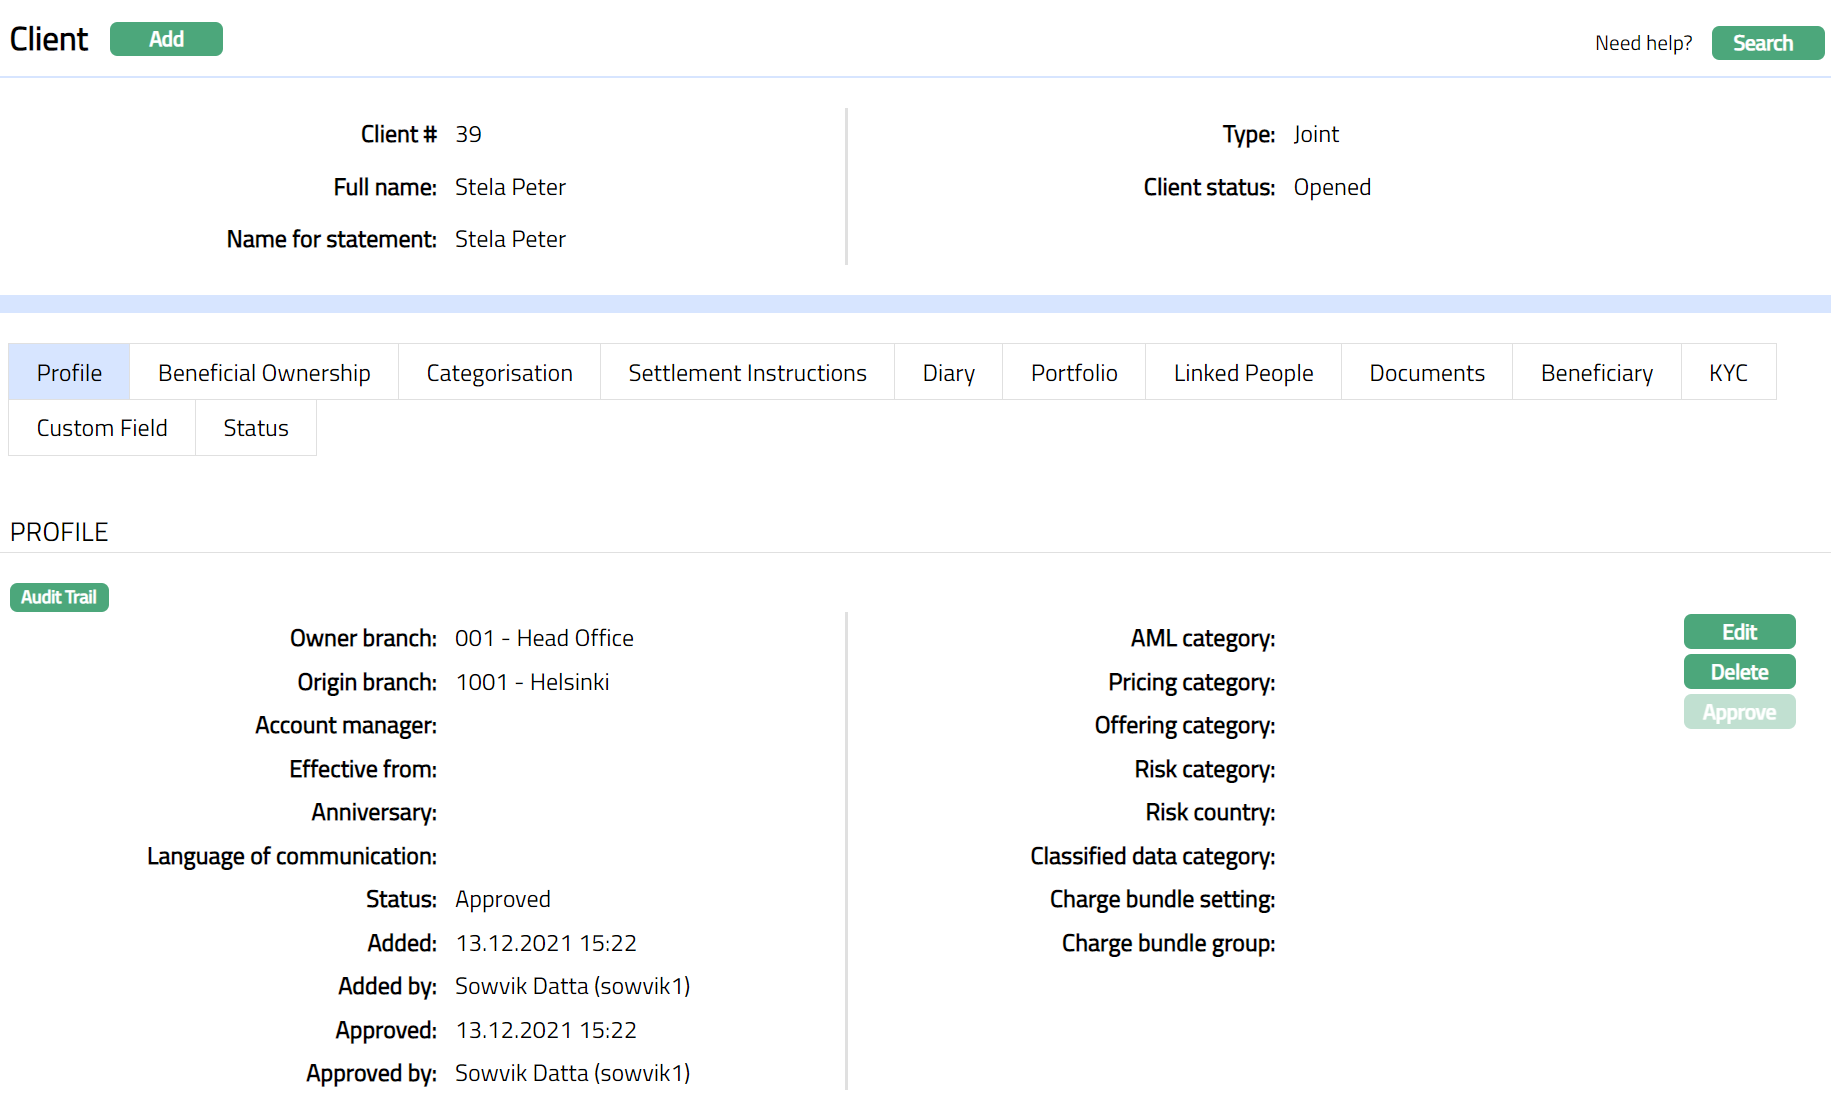
The fields that appear in the header pane for all tabs are as follows:
Client #: It displays a unique client #, which gets generated on adding a new client.
Full name: It displays the full name of the Client.
Name for the statement: It displays the name of the client which appears in the statement. By default, the Full Name of the Client gets displayed.
Type: It displays the client type.
Client Status: It displays the status of the Client. By default, the status will display as Opened.
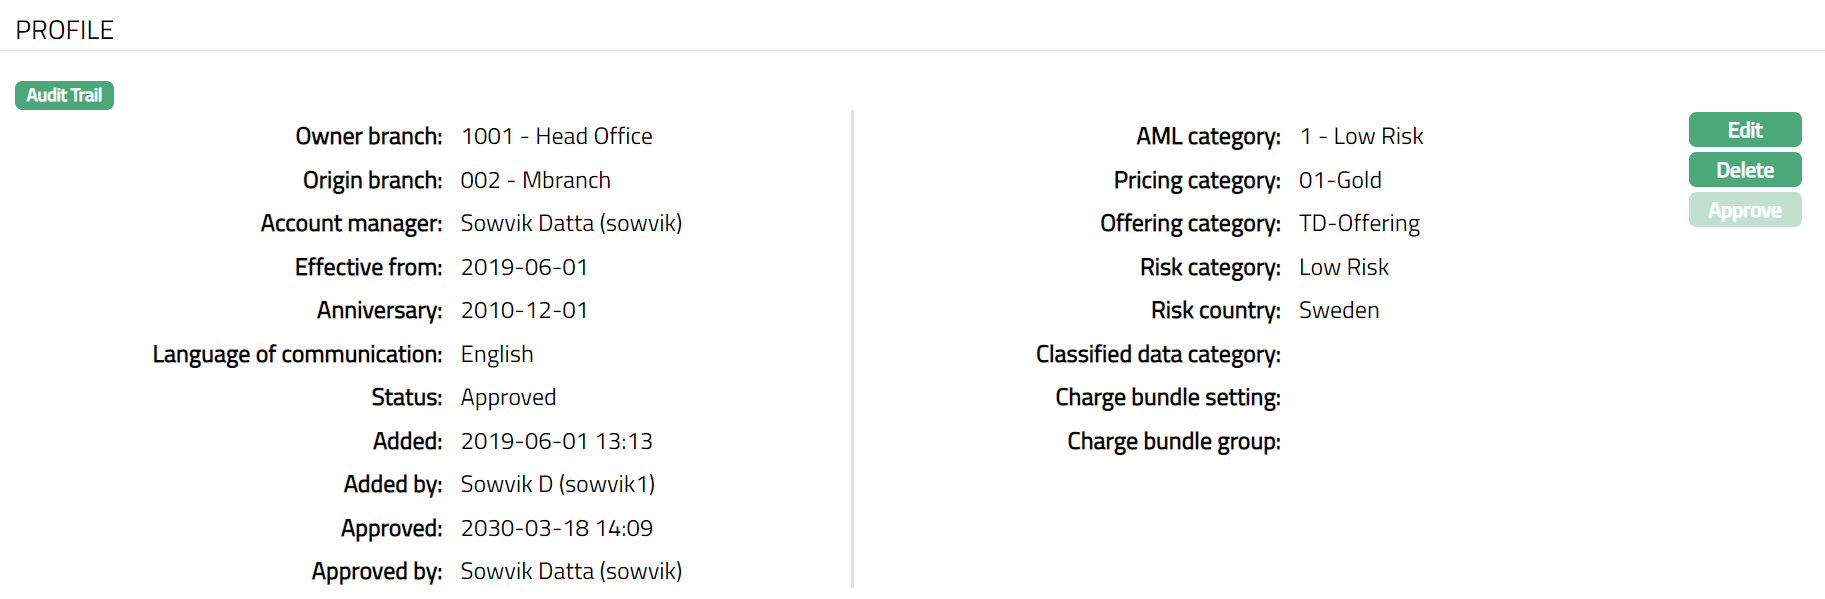
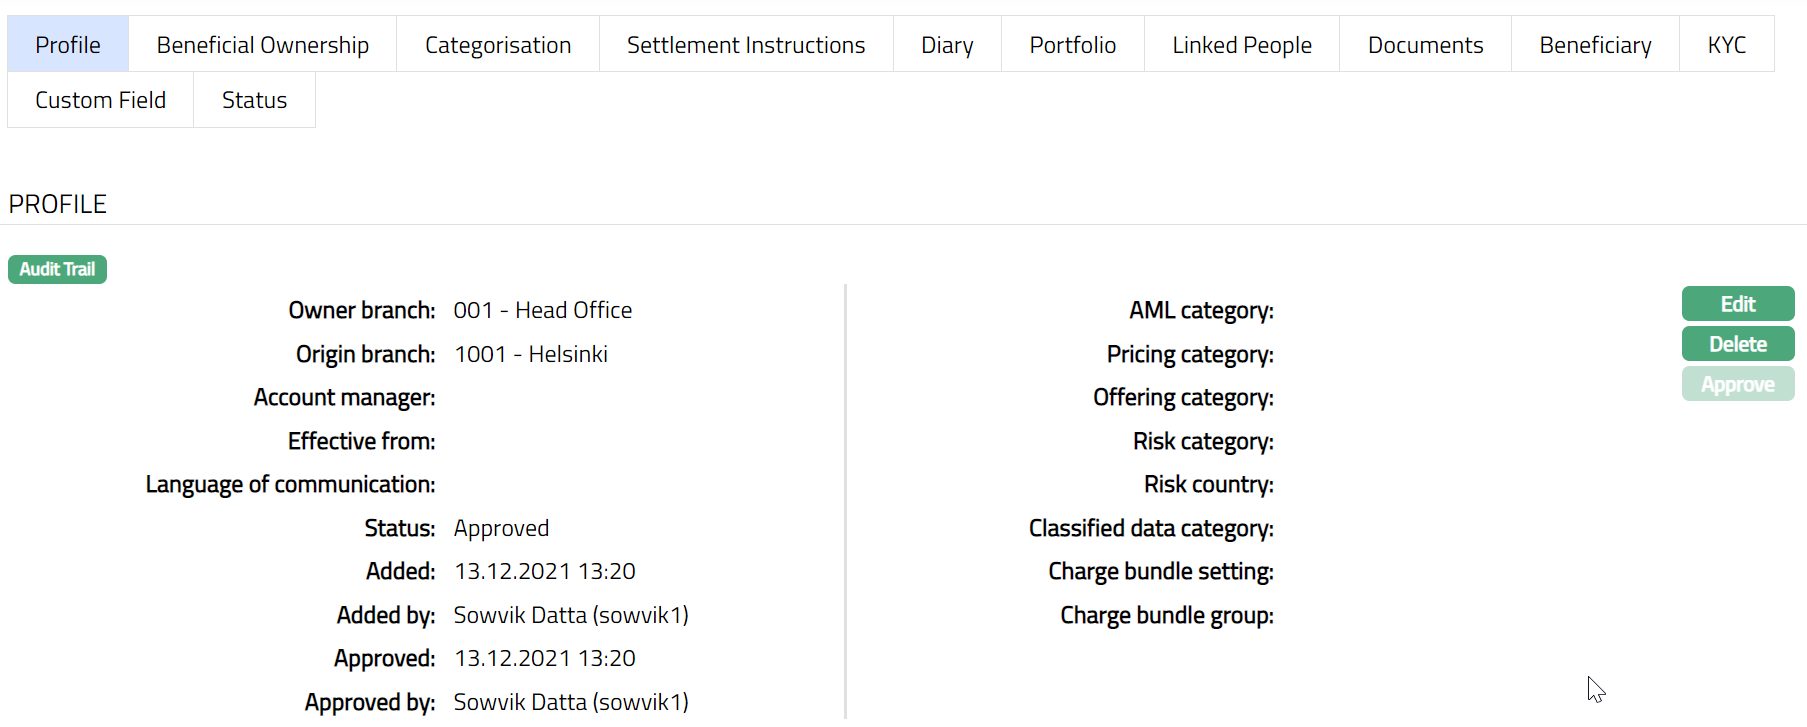
Profile
Profile tab, which is the default tab in the Client Maintain screen, shows the basic details of the personal client.
To view/edit the Client Profile,
1. Access Client page and click on Profile tab.

The additional fields that you can view in Profile tab are as follows:
Owner branch: It denotes the branch to which the Client belongs or opened the account.
Origin branch: It denotes the branch name where the Client record is created.
Account manager: It denotes the name of the Account manager through whom the Account has been opened.
Anniversary: It displays the anniversary date of the Client.
Status: It displays the status of the Client. By default, it will display ass Approved
Note: When the status is closed Aura will not allow you to open account for this client. Where the client already has accounts, any change in the status will not impact the accounts opened earlier.
Language communication: It displays the communication language of the Client, which is maintained under Admin → System codes → Generic definition → Language.
AML category: The AML (Anti Money Laundry) category allows you to categorize your Clients into various risk groups based on the KYC (Know Your Customer) checks that is defined for your bank; which is maintained under Admin → System codes → Categories → AML category.
Pricing category: The Relationship Pricing category allows you to create and maintain client categories for the purpose of differentiated pricing of services, which is maintained under Admin → System codes → Categories → Relationship pricing.
Offering category: It allows you to create and maintain client categories for the purpose of differentiated product offerings. You can thus specify that a product would be available to a client only if he belongs to the specified Offering category. The offering category is maintained under Admin → System codes → Categories → Offering.
Risk Category: It allows you to maintain risk category for the client, based on which the interest is charged to the client. The risk categories are maintained under Admin → System codes → Categories → Risk Category.
Risk country: It displays the risk country for the client. The risk countries are maintained under Admin → System codes → Generic Definitions → Countries.
Classified data category: It allows you to create and maintain client classified categories for the purpose of differentiated product offerings. You can thus specify that a product would be available to a client only if he belongs to the Classified Data Category. The classified category is maintained under Admin → System codes → Categories → Classified Data Category. Charge bundle setting: It displays the charge bundle setting, which is mapped to the charge bundle group, to which the client is mapped. The value is defaulted from Settings → Charge Bundle Group.
Charge bundle group: It displays the Charge Bundle Group to which the Client is mapped. The value is defaulted from Settings → Charge Bundle Group.
2. Click Edit. Edit Client page appears.
3. You can edit the Client details by clicking on Edit. Once you click, Edit Client page will open. You can make necessary change and click on Save to save. Note: All fields are editable.
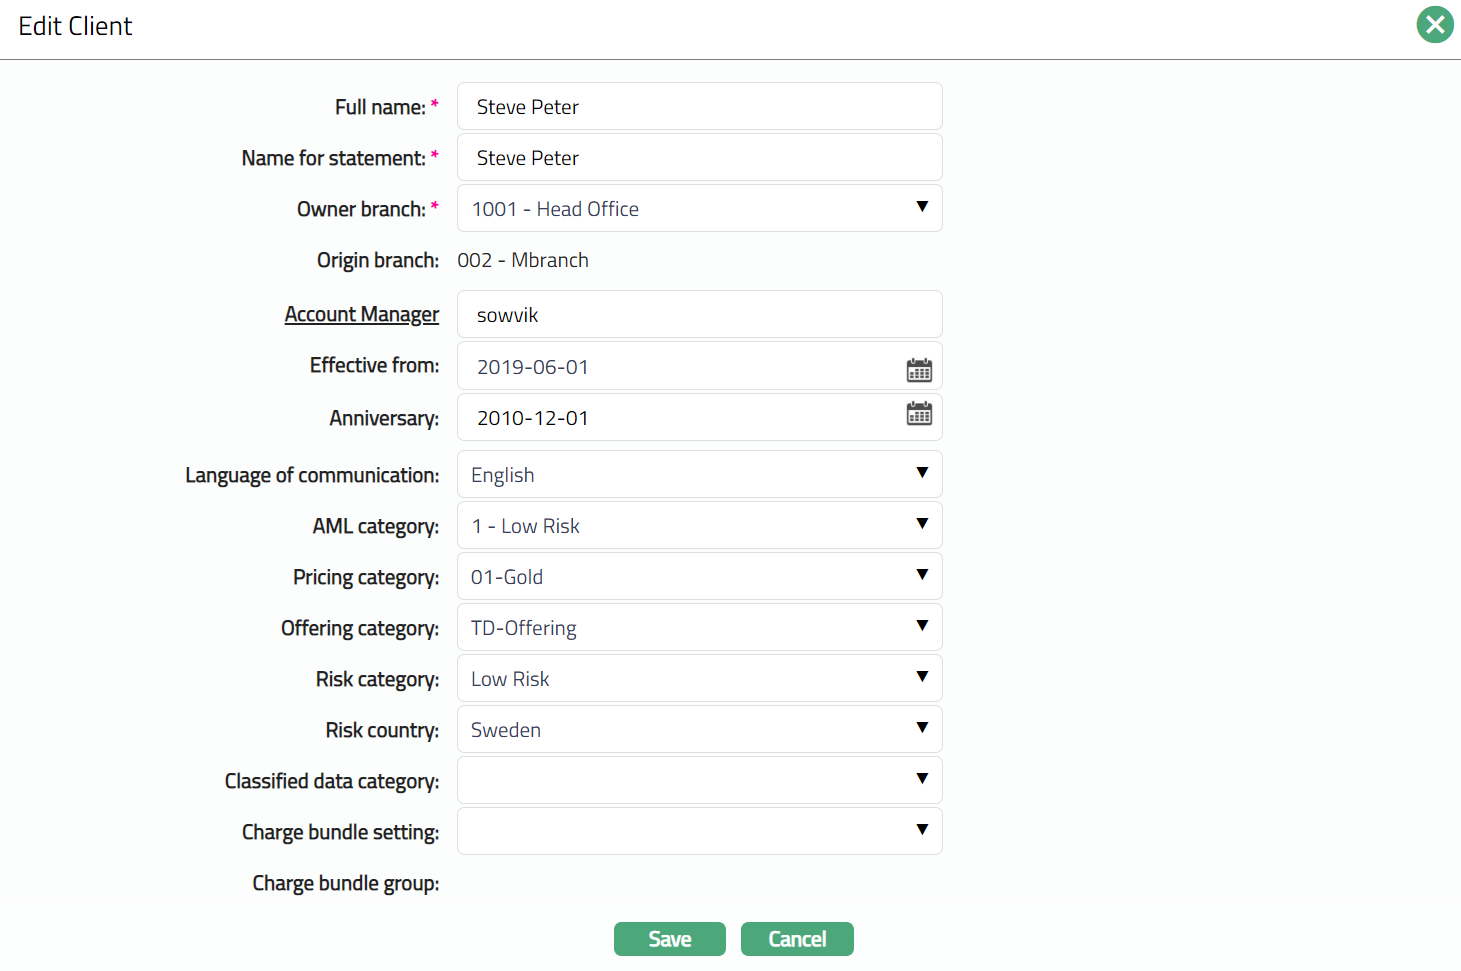
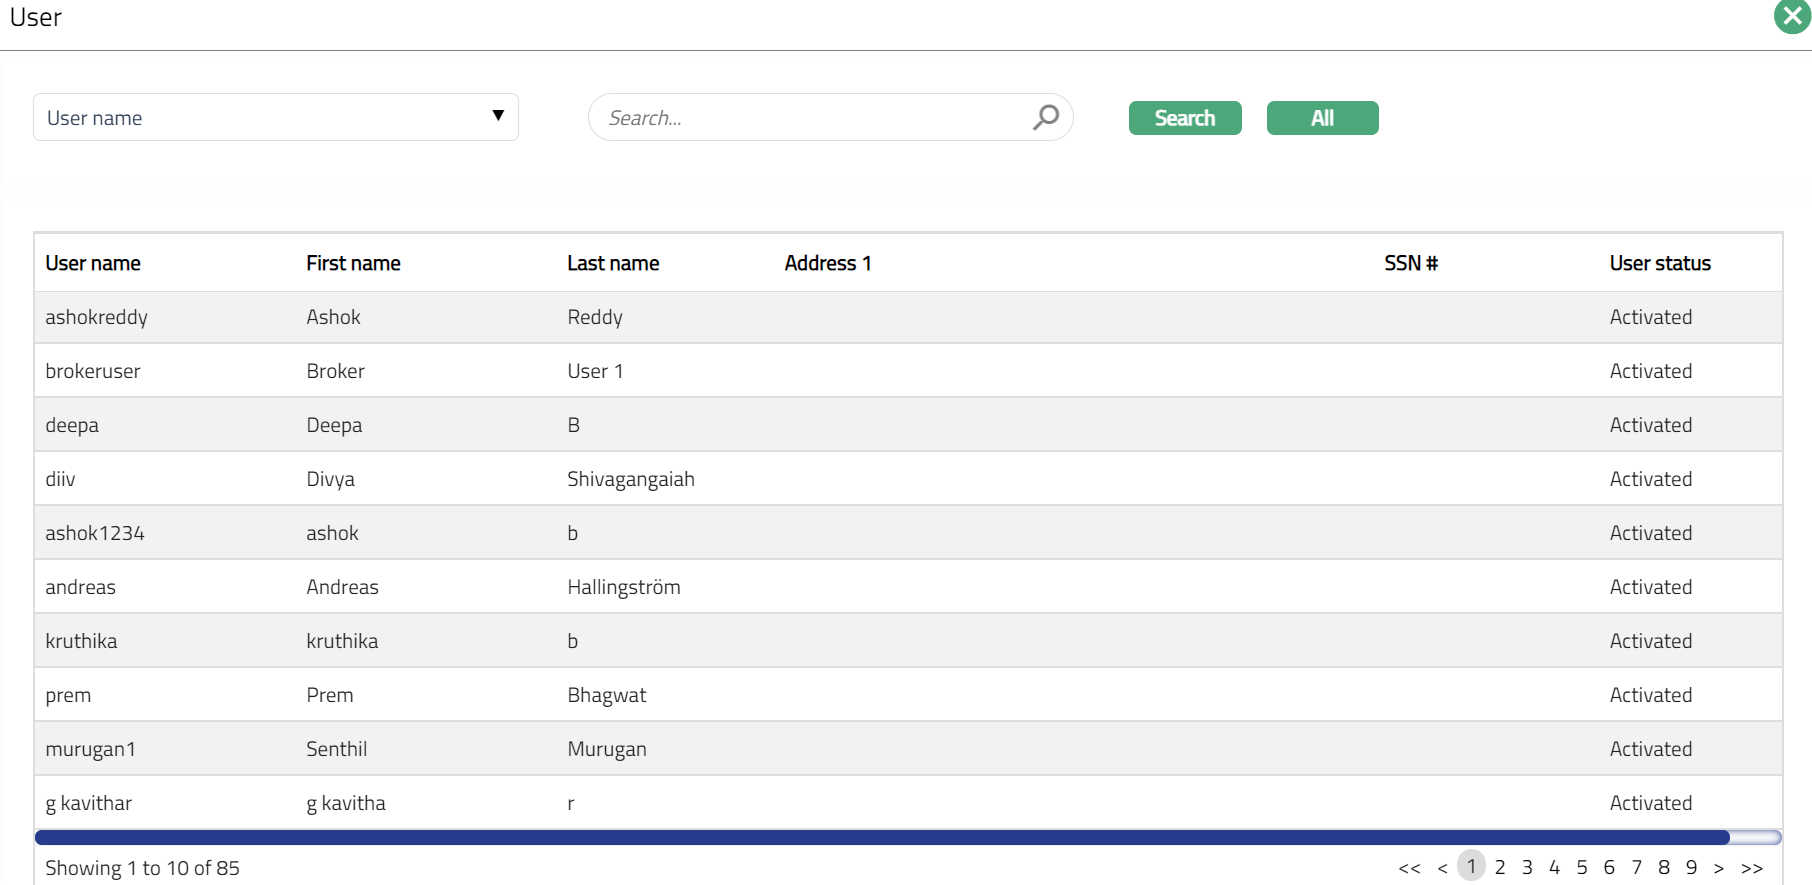
4. Account Manager: On clicking on the hyperlink, Aura will display the organisation search window with the list of Account Managers maintained in the system. Select the desired Account Manager.
5. Once you click Save, Profile page appears with the updated details.
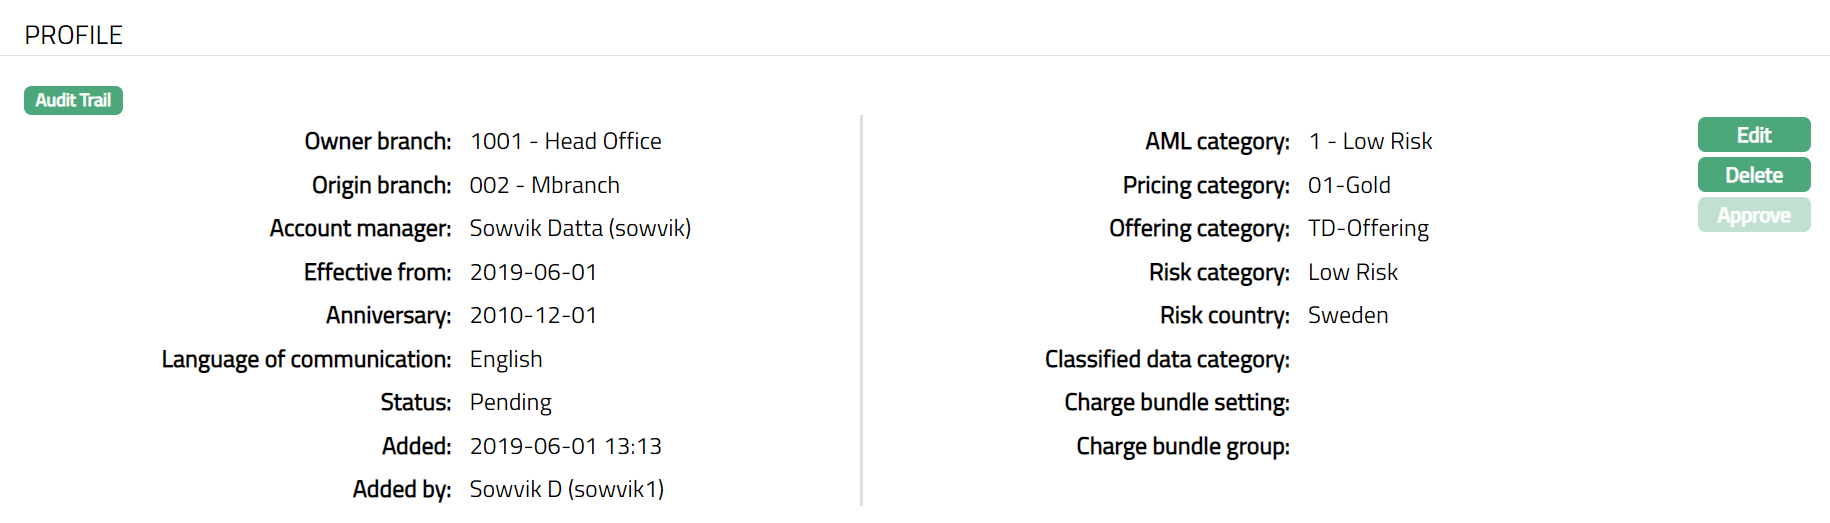
Functions: Edit, Delete, Approve
Note: On addition of a new record, the Status appears as Pending. Only on Approval by authorized person, the Status becomes Approved
The additional fields that you can view in the Settings screen are explained below:
Status field denotes the status of the tab
Added field denotes the date on which the record was added.
Added by field denotes the name of the user who created the record.
Approved field denotes date on which the record was approved and is displayed only for approved records.
Approved by field denotes name of the authorized person who approved the record and is displayed only for approved records.
Delete: You can delete Client record saved in Aura by a clicking Delete button. Aura will ask for confirmation, on approving which the selected record will be deleted
Beneficial Ownership
The Beneficial Ownership tab allows you to view the beneficial ownership details for the client. All accounts opened under this client would have the same beneficial ownership data. In case of Personal client type, you can only view the details as the client has only one person as the beneficial owner with 100% ownership. You can also see the due diligence status of the Person as maintained under CRM → Due Diligence → Person.
To view the Beneficial ownership details,
1. Access Client page and click Beneficial Ownership tab.
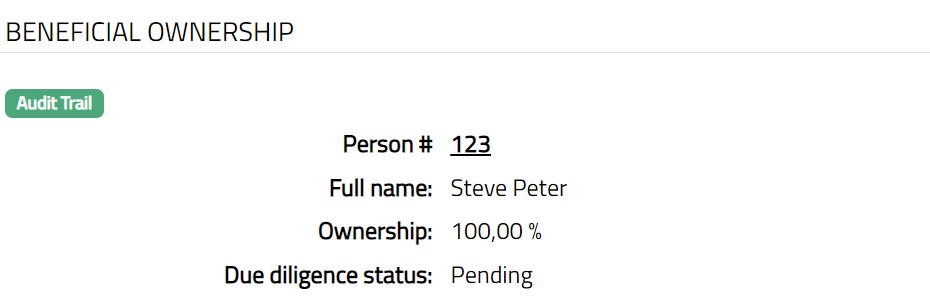
2. By default, Due Diligence Status will with appear as Pending. Once approved by Authorised personal the status will change to Approved.
Once Approved the additional fields that you will view in the Settings screen are explained below:
Status field denotes the status of the tab
Added field denotes the date on which the record was added.
Added by field denotes the name of the user who created the record.
Approved field denotes date on which the record was approved and is displayed only for approved records.
Approved by field denotes name of the authorized person who approved the record and is displayed only for approved records.
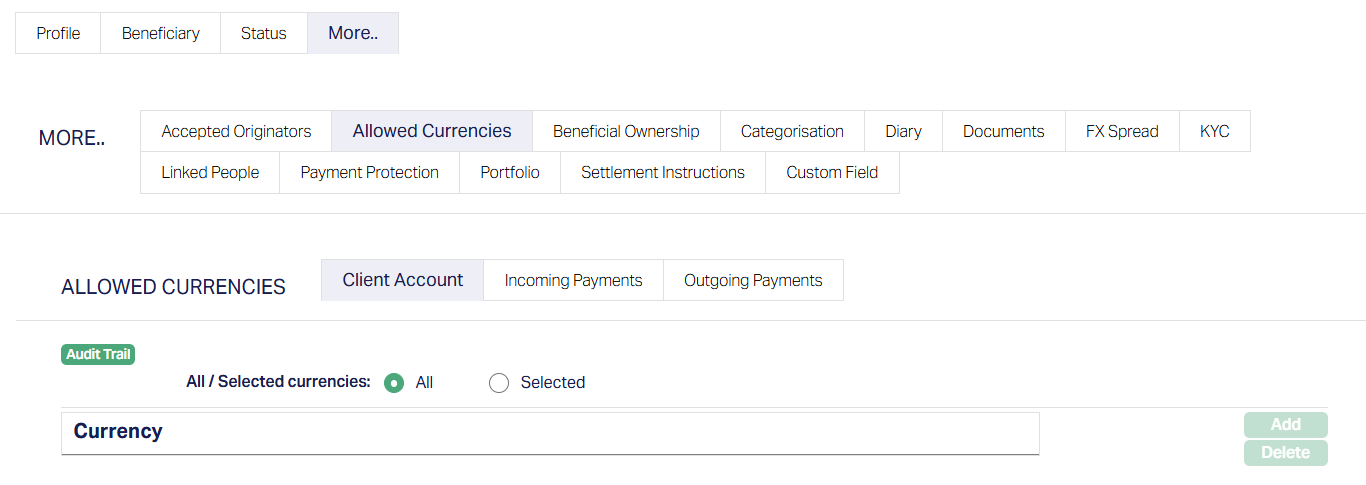
Allowed Currencies
This tab lets you define which currencies a client is allowed to use across three areas - Client Account, Incoming Payments and Outgoing Payments. This enables the bank to control and limit exposure to specific currencies, especially for clients with higher risk profiles.
The tab includes the following Sub-tabs:
Client Account
Incoming Payments
Outgoing Payments
Each sub-tab works identically and has two currency control settings radio buttons, allowing you to choose between - All and Selected currencies.

All - This is selected by default when a client is created. It means the client is permitted to transact in all currencies maintained in Aura under General Ledger → Settings → Currency. When this option is active, the Add and Delete buttons are disabled.

Selected - This option enables you to manually choose specific currencies that the client is allowed to use. When Selected is chosen - the Add and Delete buttons are enabled, and only the selected currencies will be allowed for that specific transaction type (Client Account, Incoming/Outgoing payments.)
Aura validates the Allowed Currencies for the client during the following operations:
Client Account:
When creating a client account, Aura checks whether the selected currency is part of the Allowed Currencies > Client Account list for the client. If the currency is not allowed, account creation is blocked.
Incoming Payments:
The currency of the incoming transaction is validated against the Allowed Currencies → Incoming Payments sub-tab. If the currency is not allowed, the payment will fail and an error will be logged.
This validation applies only to incoming payments into the client's account. It does not apply to internal or inwards client transfers between the client's own account.
Outgoing Payments:
The Allowed Currencies → Outgoing Payments sub-tab is used to validate the currency of external payments initiated from the client's account.
This check is only applied when funds are transferred out of the client's account to an external party. It does not apply to internal transfers or inter-account movements within the same client.
Note: If a client account has already been created in a currency that is later disallowed, Aura does not auto-close the account. The bank must decide whether to continue or close it.
To add a currency,
1. Access Client Account page and click on Allowed Currencies tab. "All" radio button is selected by default.
2. When Selected is chosen, clicking Add opens a new panel and Add Currency page appears.
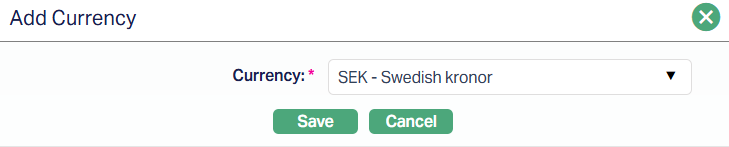
3. Select the active currency from the dropdown list maintained under General Ledger → Settings → Currency.
4. Once selected, the currency is displayed in the grid.

Functions: Add, Delete.
You can select and add multiple currencies at once using the Add button and delete them as required.
To delete a selected currency, click the Delete button next to the currency. A confirmation dialog will appear. Click Yes to remove the currency or No to cancel.
Note: The behavior of the Allowed Currencies tab is identical for all client types: Personal, Corporate, and Joint. All features - including sub-tabs and button behavior apply uniformly, regardless of client type.
Categorisation
Categorisation tab allows you to maintain categories to which the Client is linked.
To add Category,
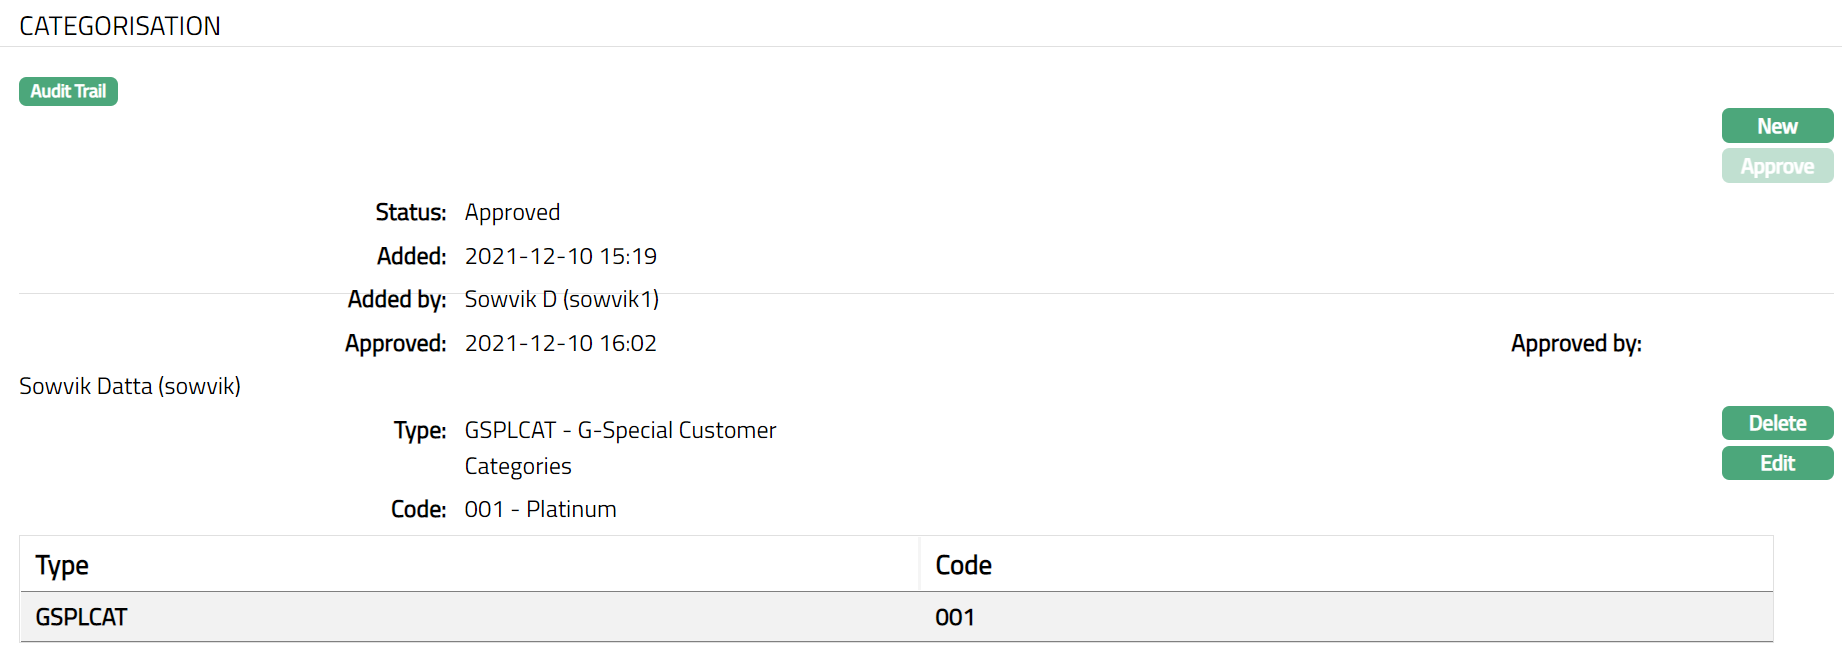
1. Access Client page and click on Categorisation tab.
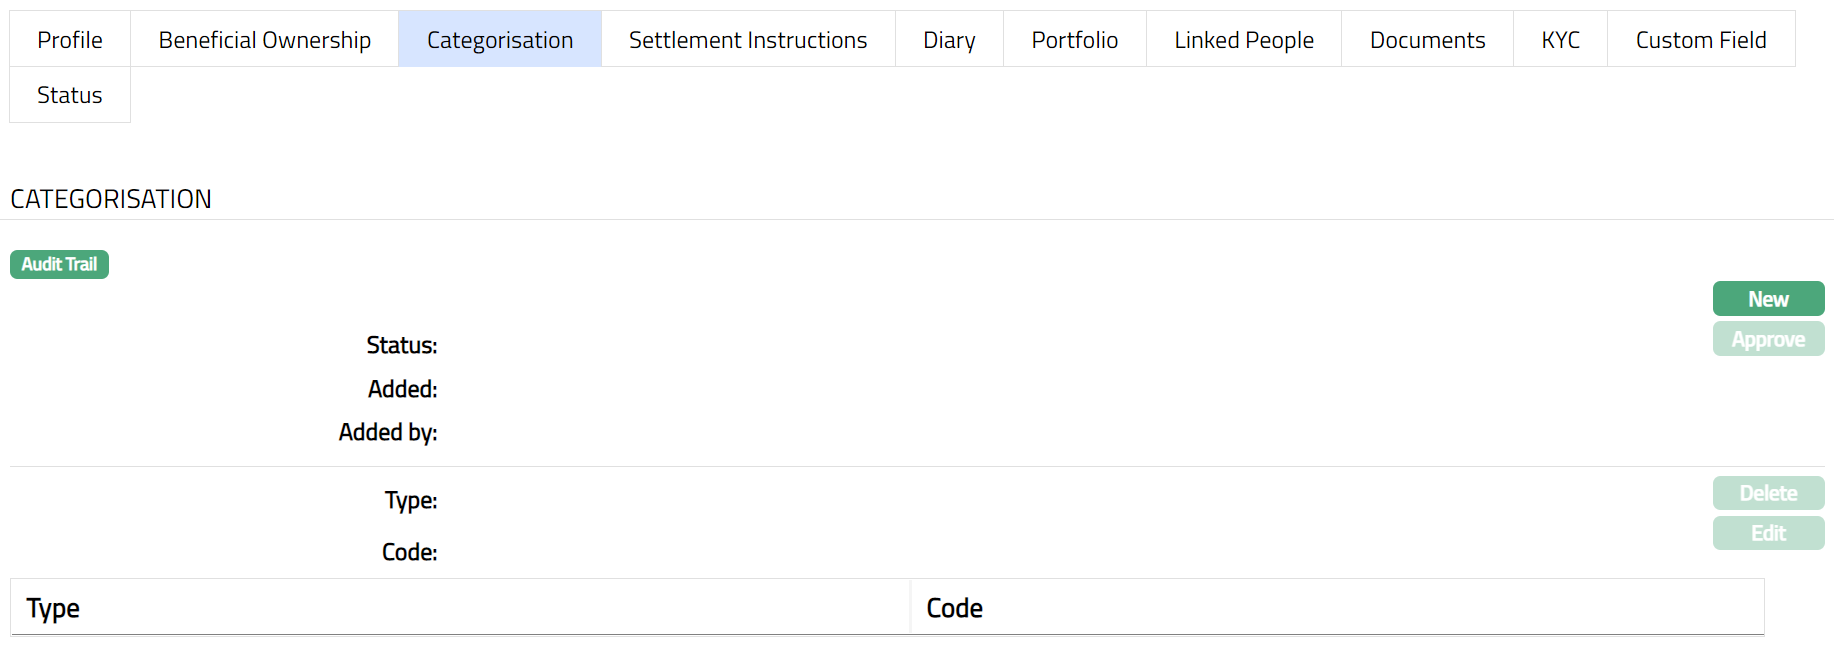
2. Click New. New Category page appears.
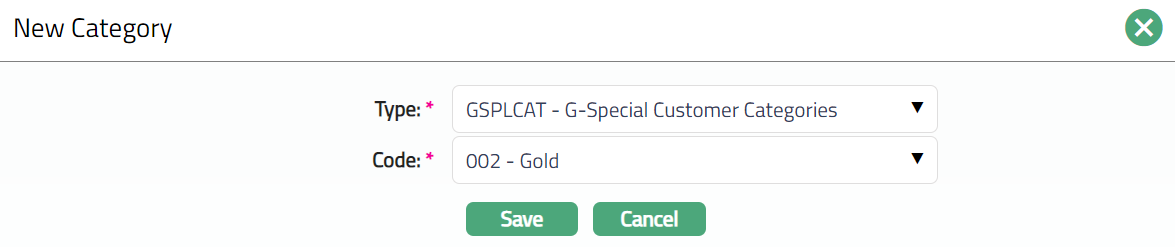
3. Select Category Type from the drop-down list maintained under Admin → Categories → Category type as applicable for Clients.
4. Select Code from the drop-down list. Aura will display all the codes maintained under the selected category type.
5. Click Save. Client page appears with the newly added category.
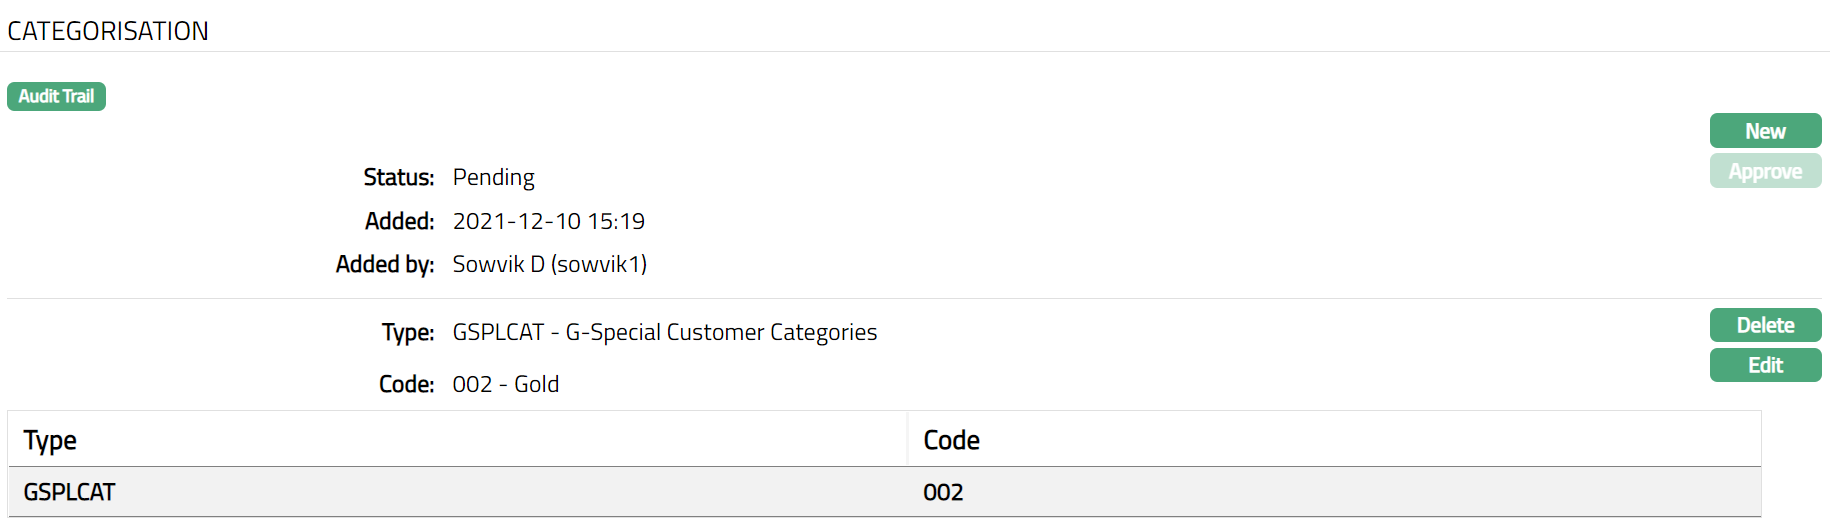
Functions: New, Edit, Delete, Approve.
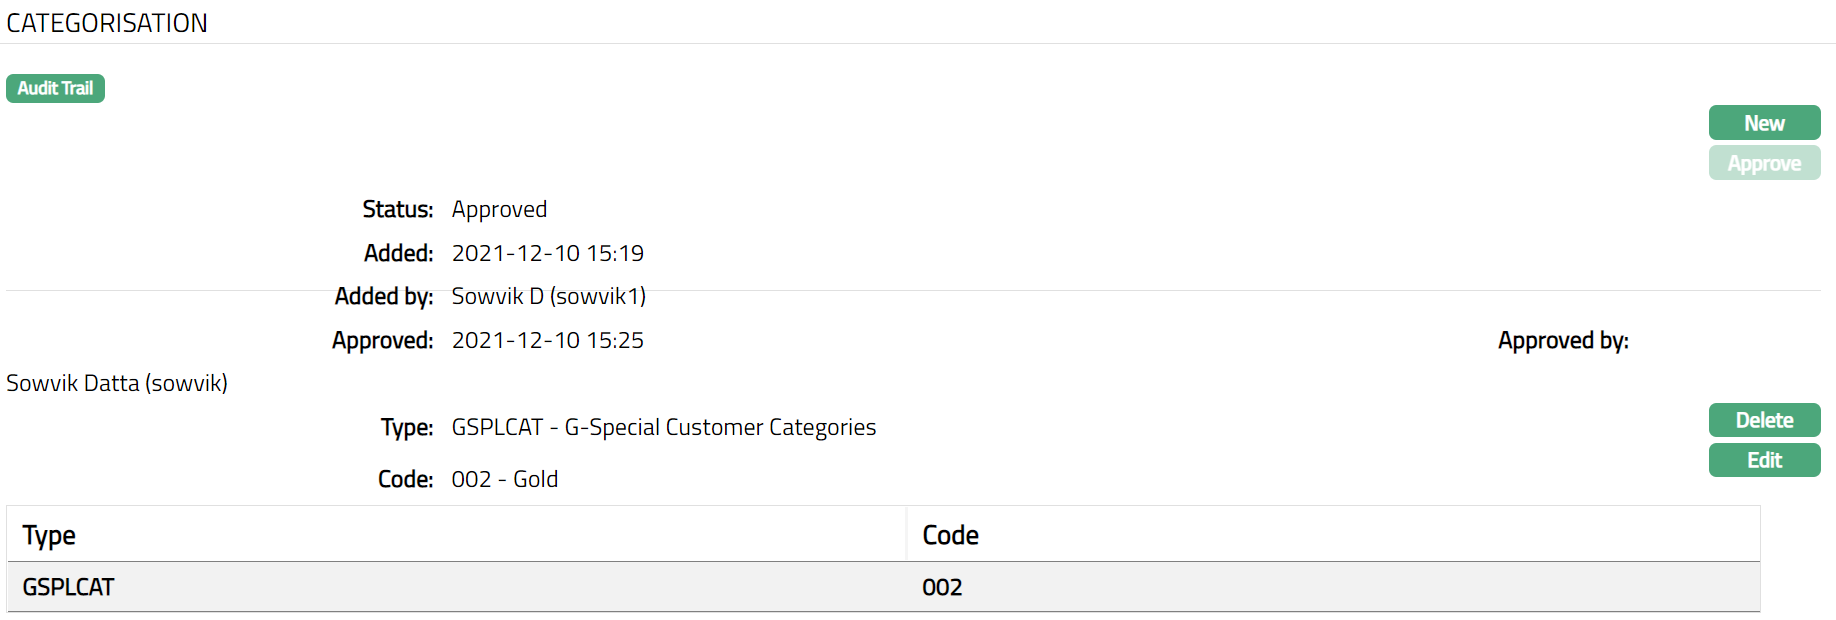
Note: On adding a new category, the Status will display as Pending. Only on Approval by authorised personal, the Status gets changed to Approved.
Delete: You can delete Category saved in Aura by a clicking Delete button. Aura will ask for confirmation, on approving which the selected record will be deleted.
The additional fields are as follows:
Status field denotes the status of the tab.
Added field denotes the date on which the record was added.
Added by field denotes the name of the user who created the record.
Approved field denotes date on which the record was approved and is displayed only for approved records.
Approved by field denotes name of the user who approved the record and is displayed only for approved records.
To Edit Category,
1. Select required Category record you wish to Edit.
2. Click Edit. Edit Category page appears.
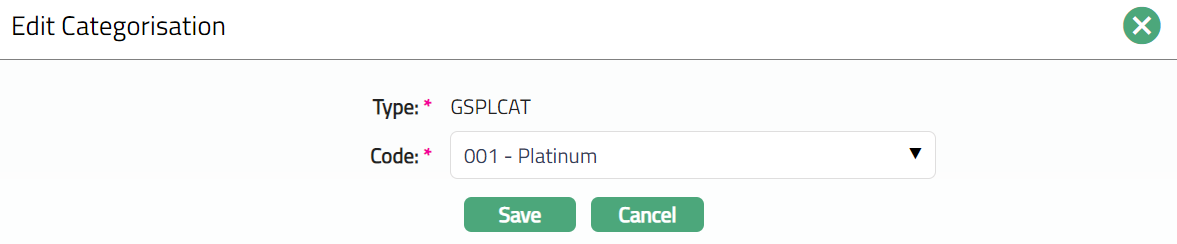
Note: You can Edit Only the Code field.
3. Make required changes and click Save. Client page appears with the updated details.
Functions: New, Edit, Delete
Settlement Instructions
Settlement Instructions tab allows you to maintain the settlement accounts for a client. Using this option, you can maintain a debit account, credit account and charge account for the client to settle the contracts. The settlement instructions is applicable for various business areas like Client Account, Foreign Exchange, Term Deposit, Nostro Account, Payments, Loan, Limits, Credit Cards and Standing Instruction and Charge bundle. The combination for which a Settlement Instructions is maintained is Client, Currency, Business area and Product.
To add Settlement Instructions,
1. Access Client page and click Settlement Instructions tab. Initially it will be blank.
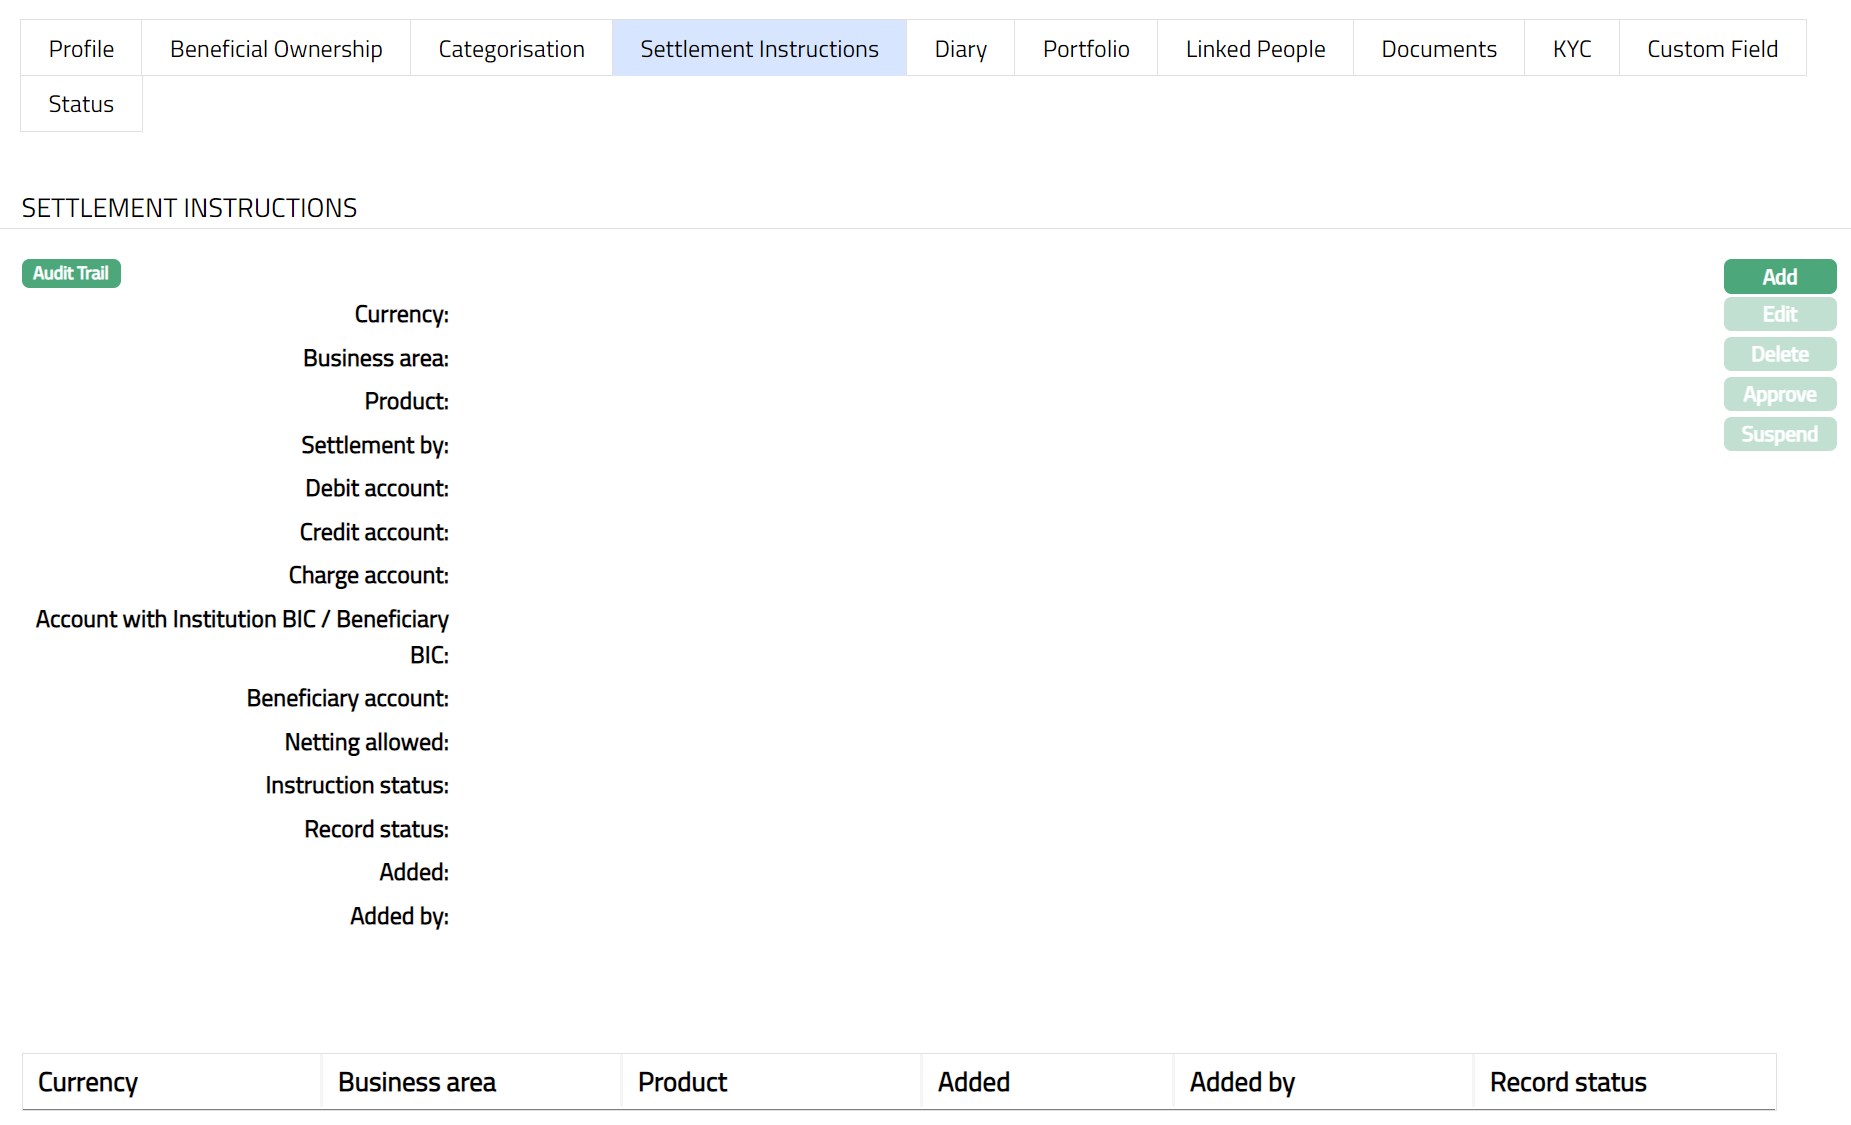
2. Click Add button. Add Settlement Instructions page appears.

3. Select Currency for the Settlement Instruction from the dropdown list of all active GL Currencies.
4. Select Business area for which the instruction is maintained from the drop-down list. These are all pre-shipped values. The options are as follows:
Any
Client Account
Foreign Exchange
Term Deposit
Nostro Account
Payments
Loan
Limits
Credit Cards
Standing Instruction
Charge Bundle
Cards
Acquiring
Peer--to-Peer
5. Select the Product from the drop-down list. If specific Business area is chosen, then the Products maintained for the chosen module will be available in the drop-down list. If Any option is chosen in Business field, then all the active products maintained in Aura are made available in the Product drop-down list.
6. Select Settlement by option through which settlement is done. Settlement can be done either by Own account or Other bank account.
Own account: Accounts in the same bank.
Other bank account: Accounts in different bank.
7. Select Debit account. The options are Account or General Ledger. By default, Account option is chosen. You can choose the Account option if you want the debits to be posted to client's account; you can choose the General Ledger option if you want the debits to be posted to an asset / liability ledger.
8. If Account option is chosen in Debit account field, Account# hyperlink appears. If General ledger option is chosen in Debit account field, the Ledger# hyperlink will appear.
9. Select Credit account. The options are Account and General Ledger. By default Account option is chosen. You can choose the Account option if you want the credits to be posted to client's account; you can choose the General Ledger option if you want the credits to be posted to an asset / liability ledger.
10. If Account option is chosen in Credit account field, Account# hyperlink appears. If General ledger option is chosen in Credit account field, the Ledger# hyperlink will appear.
11. Select Charge account. The options are Account or General Ledger. Charge Account is the account from where the charges will be taken. By default, Account option is chosen. You can choose the Account option to charge the client account and General Ledger option to post a settlement ledger
12. If Account option is chosen in Charge account field, Account# hyperlink appears. If General ledger option is chosen in Charge account field, the Ledger# hyperlink will appear.
13. If Settlement by is selected as Other Bank Account, then Account with institution BIC/Beneficiary BIC is a mandatory field. Click on the Account with Institution BIC hyperlink. The Bank Search page appears with the list of SWIFT BIC codes maintained under Admin → Management → Settlement Directory. Select the appropriate SWIFT code of the institution.
14. Enter Beneficiary account number, which should be within 34 characters. It is a mandatory field only if the Settlement account is chosen as Other Bank Account. It is the account number of the Beneficiary.
15. If Netting allowed flag is marked as yes, then any payment or receipt of funds on account of several contracts / accounts will be netted off by settling all these contracts either by single payment or a single receipt. If the Netting Allowed is marked as no, then each account / contract will be settled individually. This checkbox will be disabled if Any Client is chosen above.
16. Click Save. Settlement Instructions page appears with the added details.
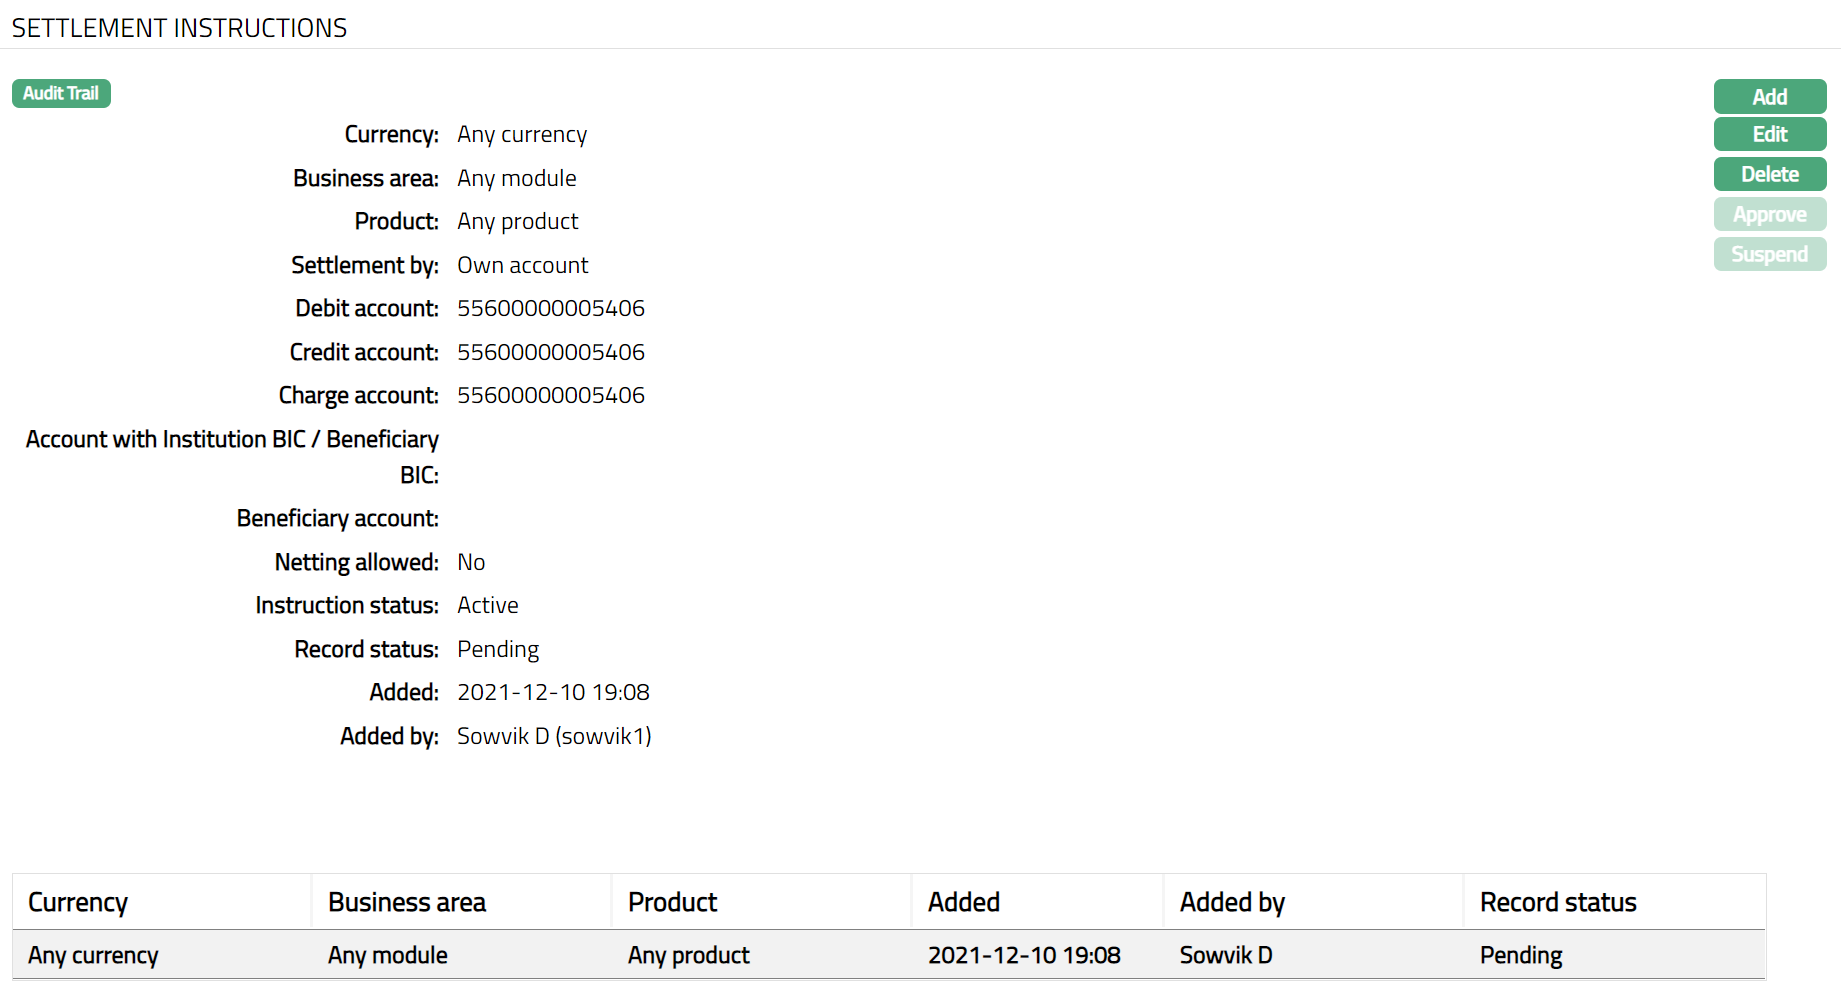

Functions: Add, Edit, Delete, Approve, Suspend
Note: On creation of a new Settlement Instruction record, the Instruction status by default will be Active, Record status will be pending. Only on Approval by authorized personal, the Record Status gets changed to Approved. If the User has auto approval, then on creation of the new settlement instruction record, the Instruction status by default will be Active, Record status will be Approved.
The order in which the combination is processed is as follows:
| Currency | Module | Product |
|---|---|---|
| Specific | Specific | Specific |
| Specific | Specific | Any |
| Specific | Any | Any |
Delete: You can delete Settlement Instruction record saved in Aura by a click on Delete button. Aura will ask for confirmation, on approving which the selected record will be deleted.
Approve: If you want to Approve a Settlement Instruction record, then retrieve the record and Click on Approve. Aura will ask for confirmation. Once the tab is approved, Record status gets changed from Pending to Approved.
Suspend: You can suspend a Settlement Instruction record by clicking on Suspend button. When you click on Suspend button, Aura will ask for confirmation. On confirmation Aura will suspend the Settlement Instruction record and Activate button will appear in place of the Suspend button.
Activate: If you want to activate a suspended Settlement Instruction record then click on Activate button. Aura will ask for confirmation. On confirmation Aura will Activate the record, and Suspend button will appear in place of Activate button.
To Edit Settlement Instruction record,
1. Access Client page, and click on Settlement Instruction tab.
2. Click Edit. Edit Settlement Instruction page appears.
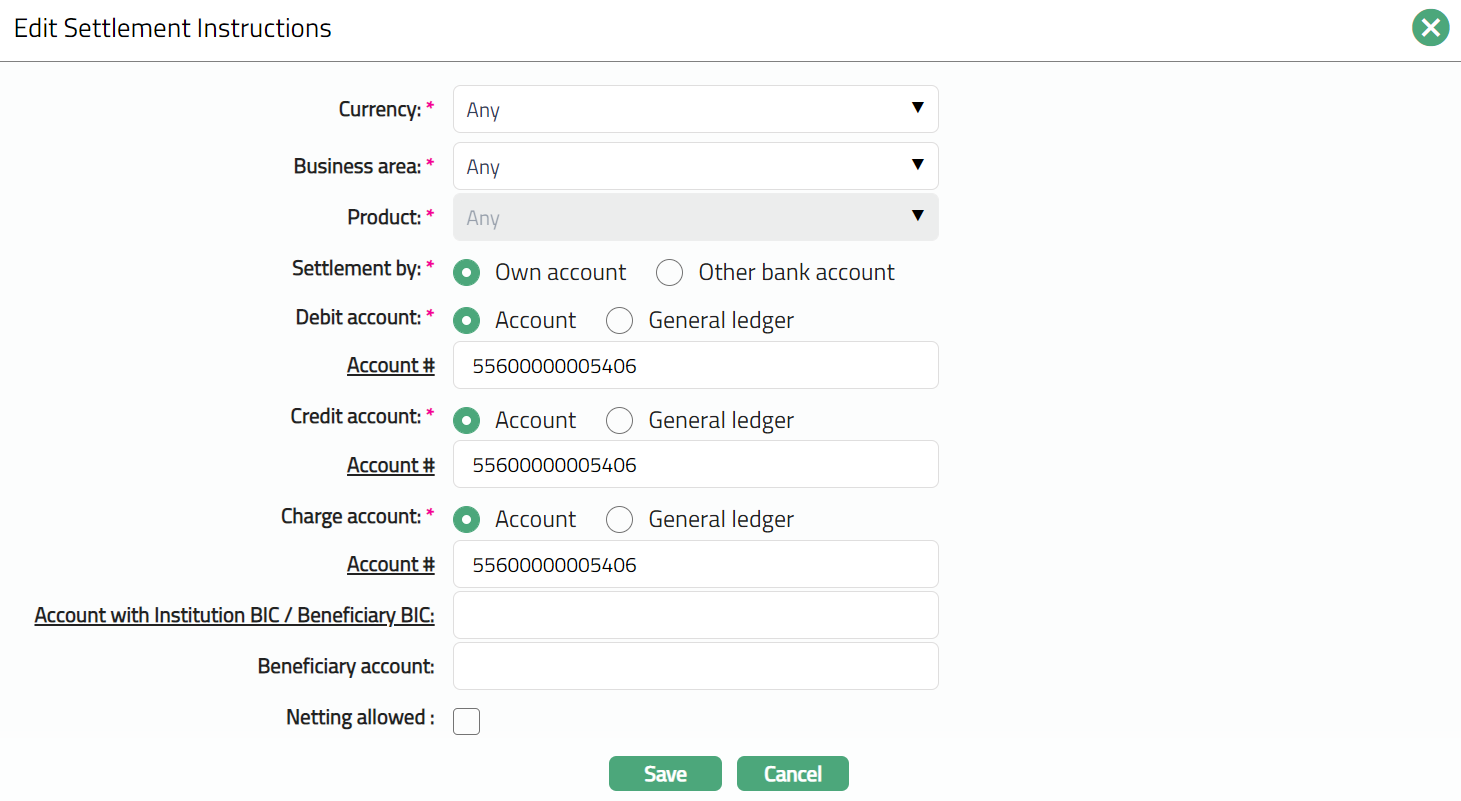
3. Make required changes and click Save. Settlement Instructions page appears with the updated details.
Functions: Add, Edit, Delete, Approve, Suspend, Activate
Note: All fields are editable.
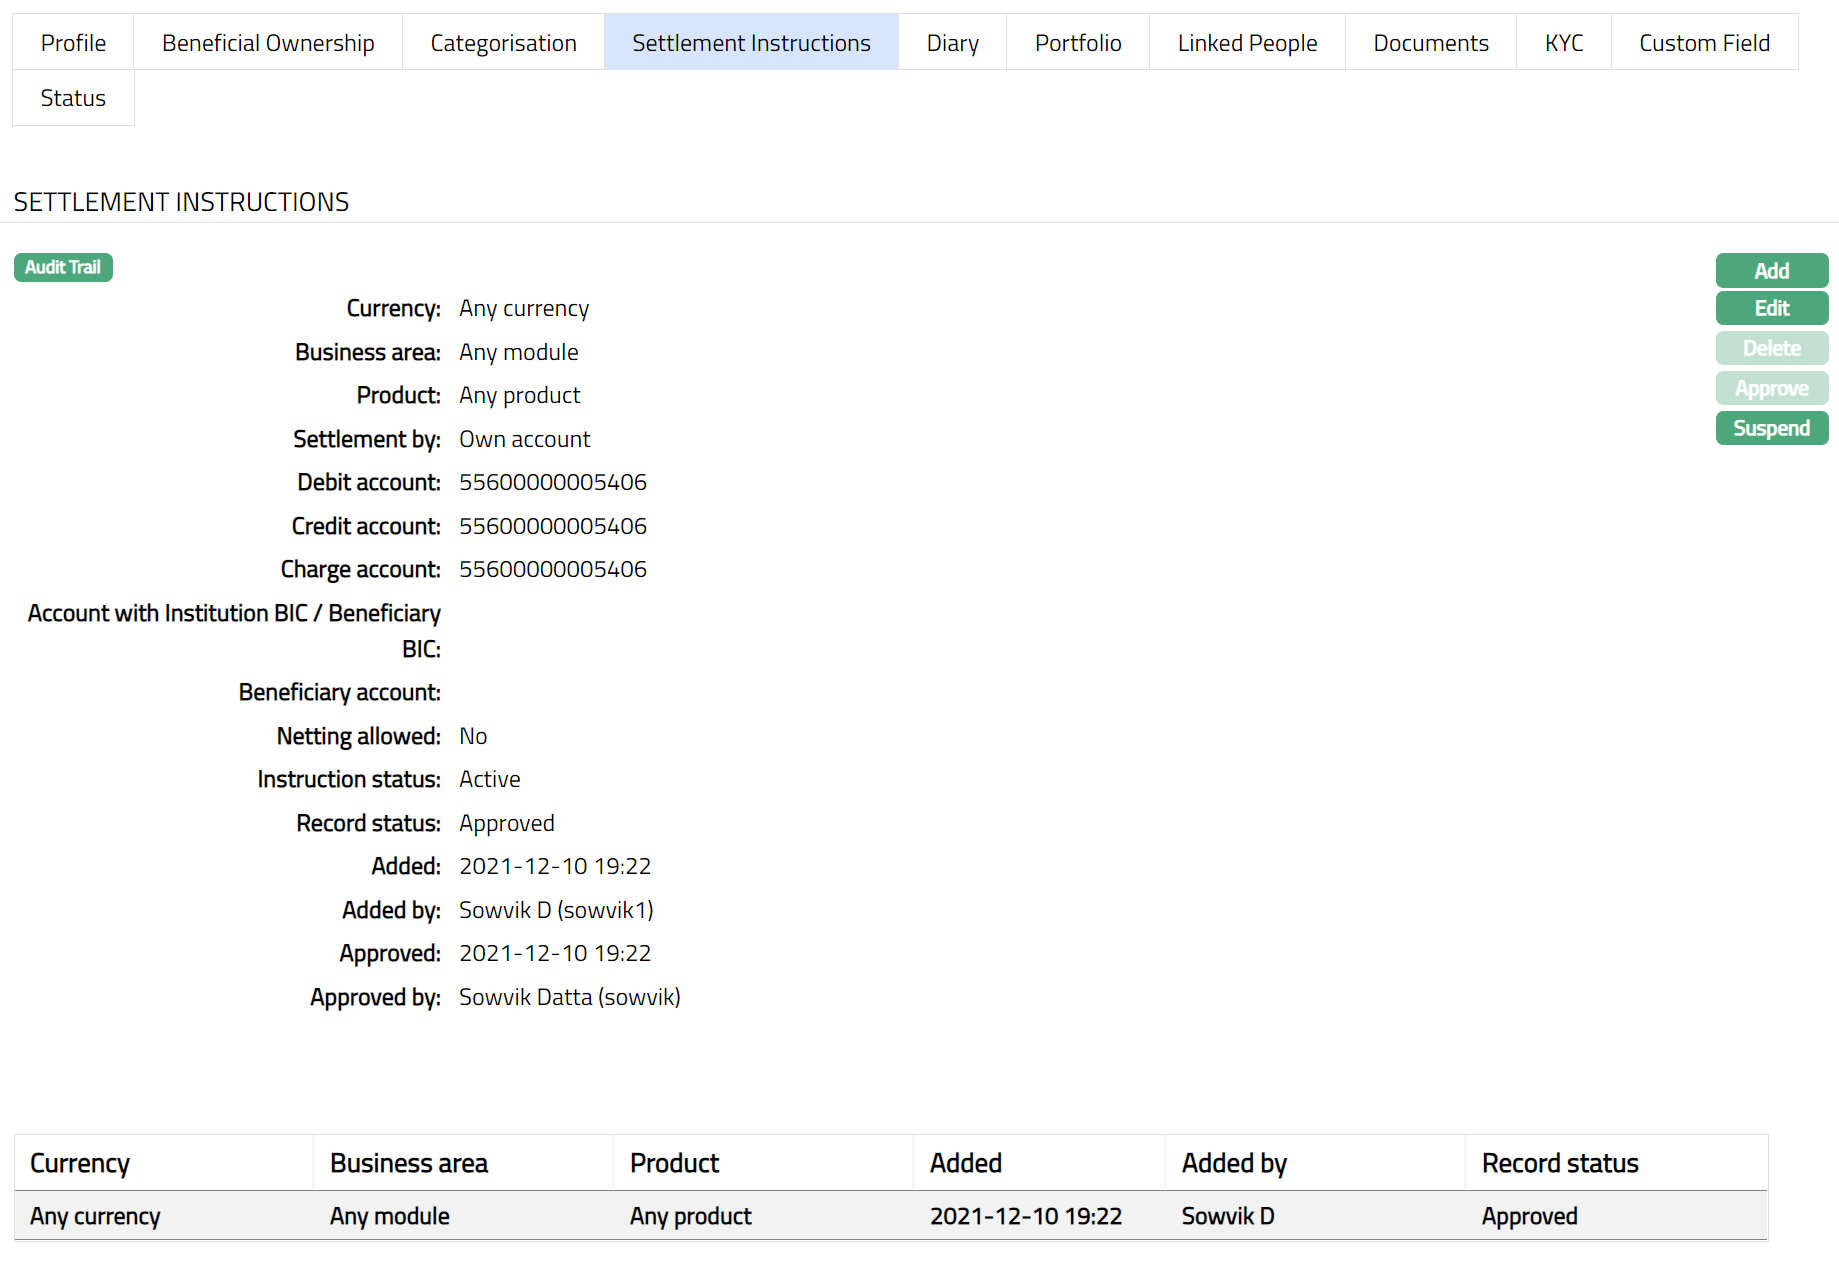
The additional fields are as follows:
Instruction Status field denotes the status of the Settlement Instruction record.
Record Status field denotes the status of the tab.
Added field denotes the date on which the record was added.
Added by field denotes the name of the user who created the record.
Approved field denotes date on which the record was approved and is displayed only for approved records.
Approved by field denotes name of the user who approved the record and is displayed only for approved records.
Diary
Diary tab allows you to maintain the diary entries for the client.
To add Diary,
1. Access Client page and click Diary tab.

2. Click Add button. New Diary page appears.
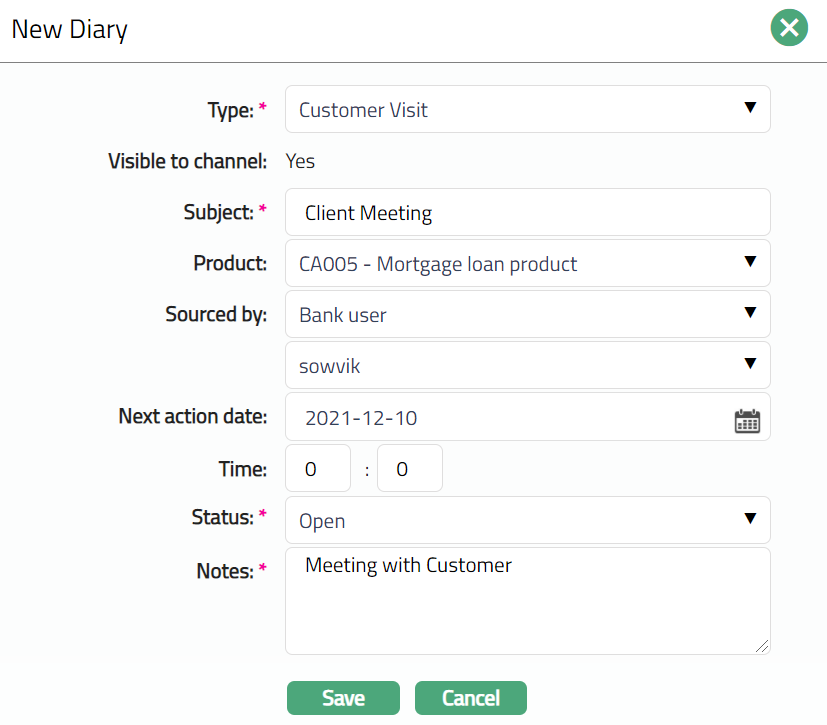
3. Select Type of the diary from the available drop-down list maintained under Admin → System codes → Documents → Diary types.
4. Based on the Diary Type maintained, the Visible to Channel will automatically be shown as Yes or No. If Yes then the details will be visible in any external channel that the Bank uses, like Internet Bank or Customer Portal, etc. If No, then the details will not be visible in such external channels.
5. Enter Subject for the diary. It is used to enter the suitable [title](javascript:TextPopup(this)) for the diary record.
6. Select Product from the drop-down list. These values appear from the list of Products maintained under Retail → Settings → Products
7. Select Sourced by from the drop-down list. Available options are Agent, Agent User, Bank User, Channel User.
8. Based on the value selected for Sourced By, the list of users matching the User Type will be displayed here. Select the required user.
9. Enter or select using the calendar icon, the Next Action date, if required
10. Enter Time for action, if required.
11. Select Status from the pre-shipped list. Available options are: Open, Not Interested, Follow-up, Closed.
12. Enter the contents for the diary in the Notes field. It is used to record the general details of the discussion so that the same may be recalled later.
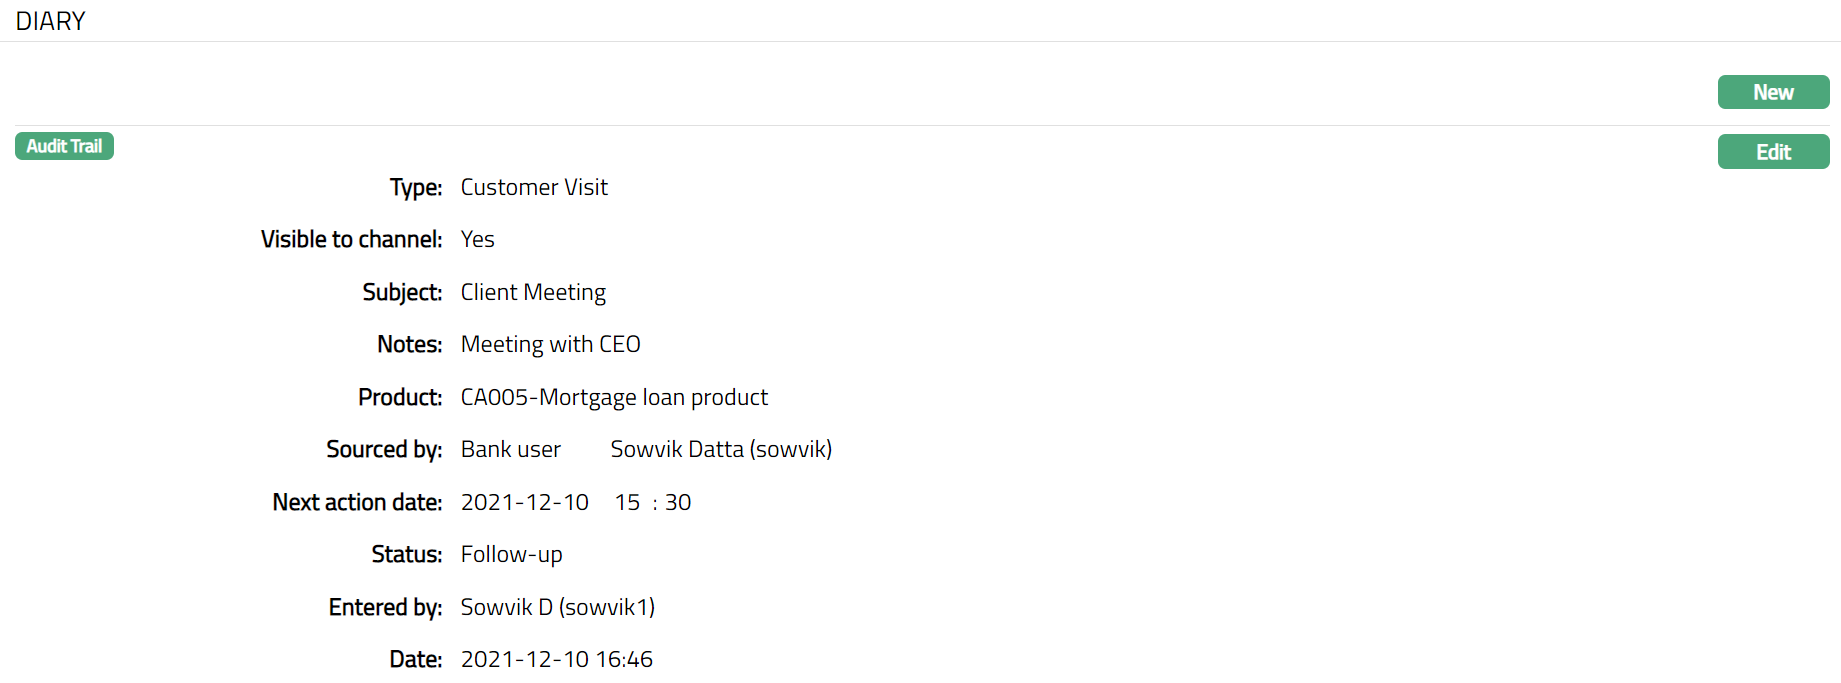
13. Click Save. Client page appears with the added details.
Functions: New, Edit
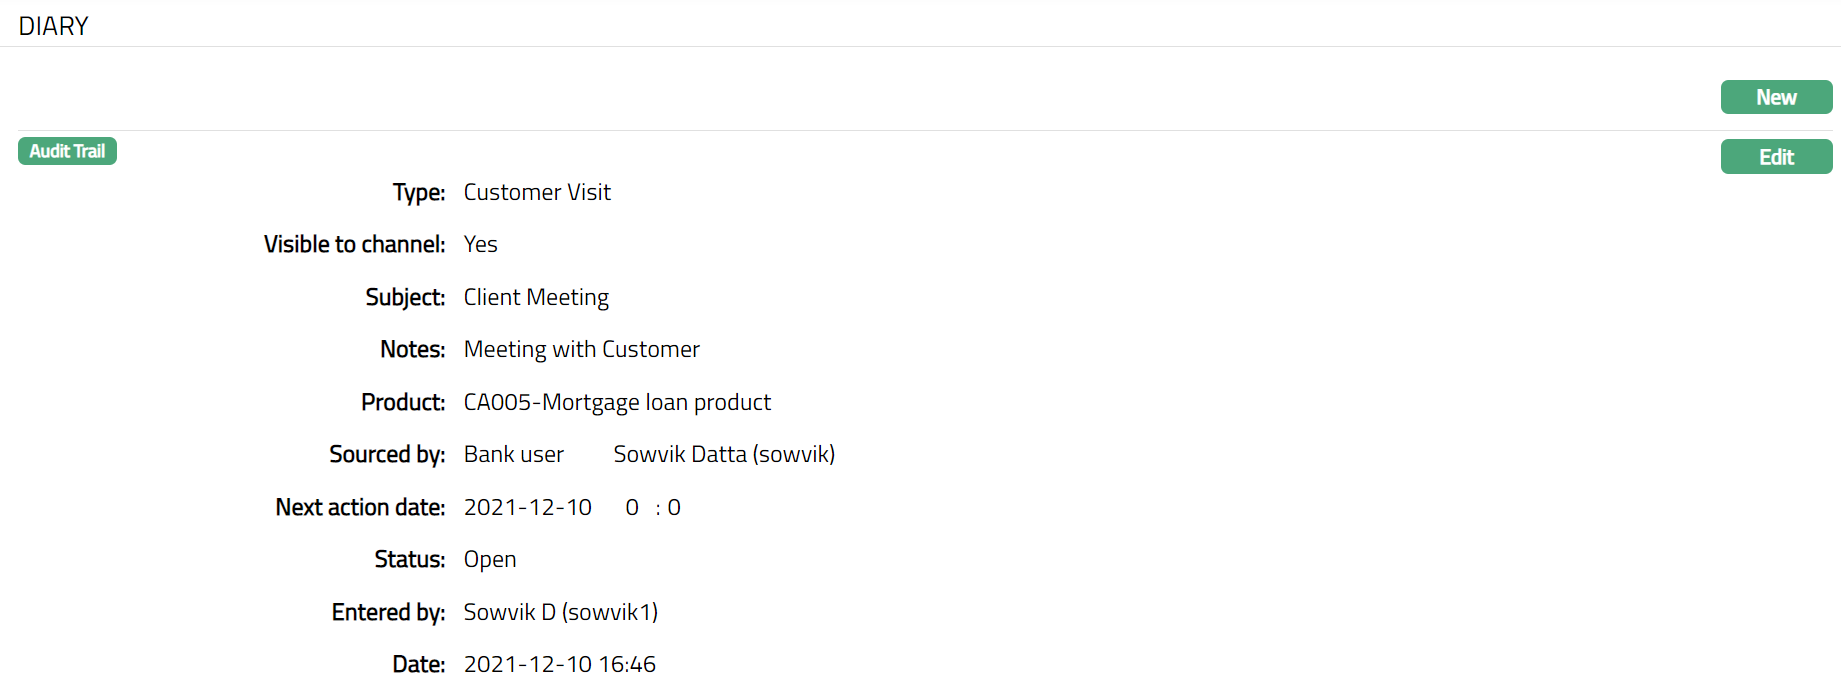
The additional fields are as follows:
Entered by denotes the name of the person who Entered/created the record.
Date: field denotes the date on which the record was added.
To edit the Diary,
1. Access Client page and click Diary and then Edit. Edit Diary page appears.
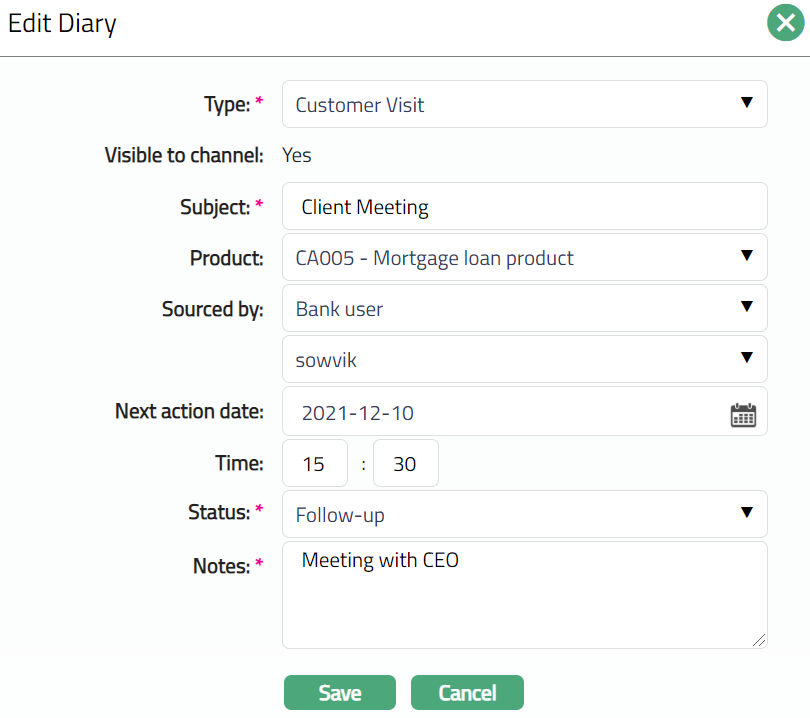
Note: Except Visible to Channel, all other fields are editable.
Make required changes and click Save.
Functions: New, Edit
Portfolio
This tab allows you to review a summary of all account balances and contracts for this client
To view portfolio,
1. Access Client page and Click Portfolio tab.
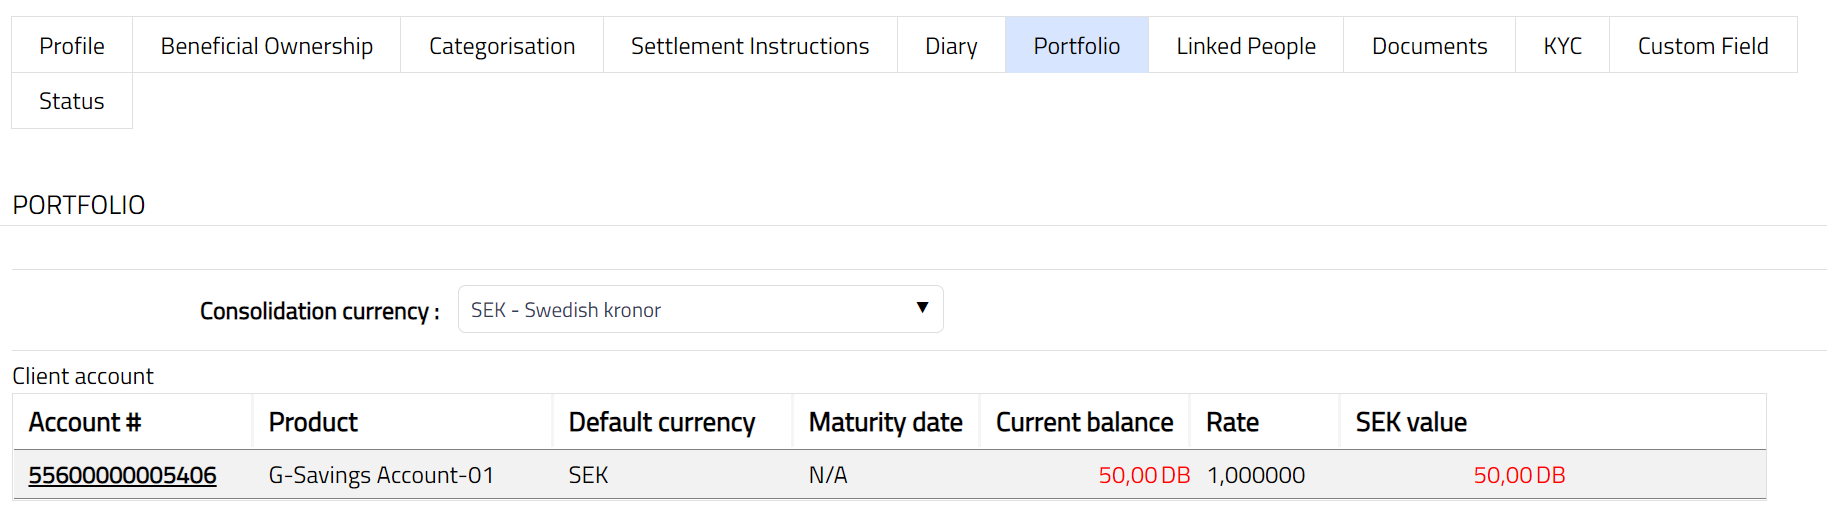
2. You will see a summary of the client's engagements with the bank -- in terms of his accounts and contracts. Only active accounts and contracts will be displayed. Closed accounts and expired contracts will not be displayed.
Note: The figures in red colour indicate that the account is in negative balance.
By default, the consolidation currency will be the base currency of the Entity. You can choose any other currency available in the dropdown. Once you switch the currency, the balances of the accounts will be converted to the consolidation currency chosen using the default mid-rate of the Central bank rate type.
The account # is a hyperlink. You can click on any of the account # hyperlink and see the corresponding account details.
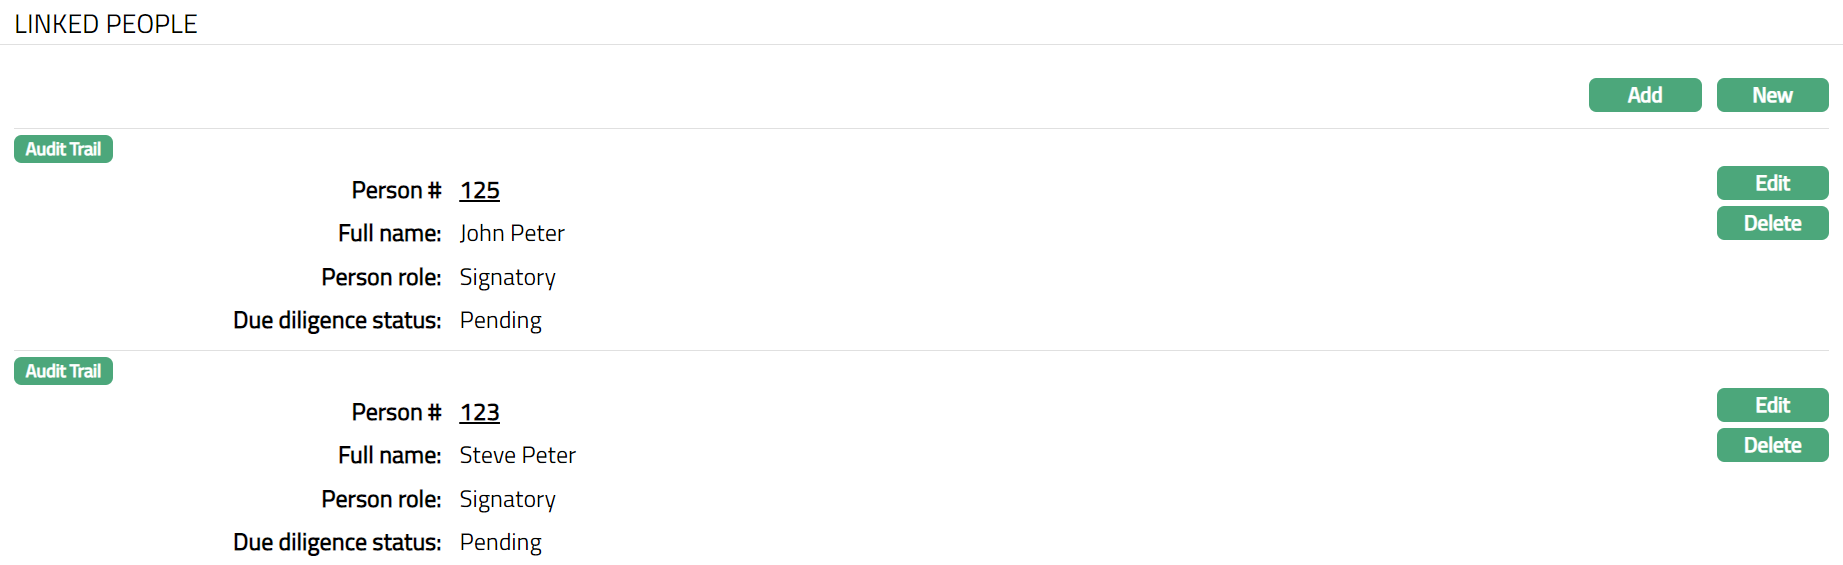
Linked people
This tab allows you to link people to the client and specify the role that the person performs in relation to this client. There are two ways of adding the linked people. One is through Add button and another is through New button.
Using the Add button, you can link an existing person to the client and using the New button a new person can be created and linked to the client.
The linked people added here, is defaulted to the account. Further if any new persons or existing persons are added to the Client then these persons are reflected on newly opened accounts, for existing accounts these persons won't be available automatically.
To add linked people,
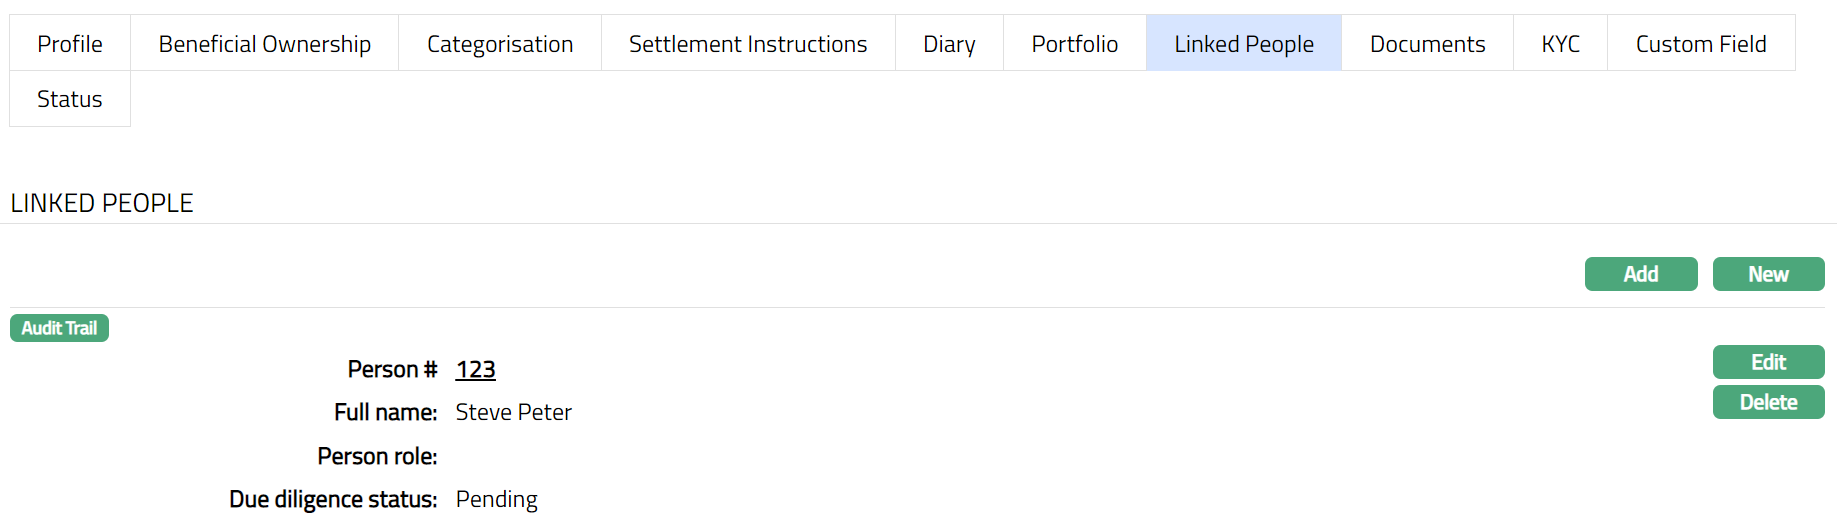
1. Access Client page and click Linked People tab.

2. Click Add. Add Linked People search page appears.
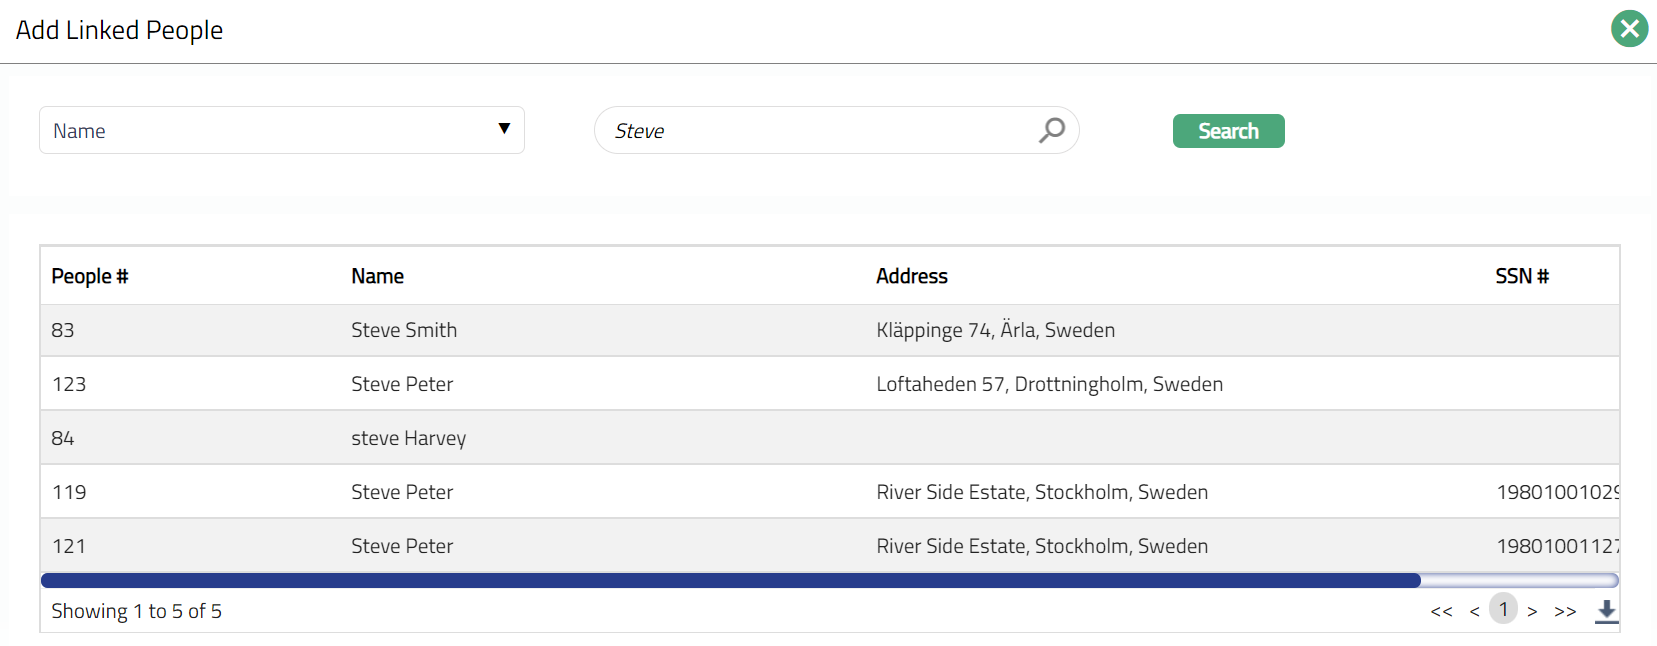
3. Search for and select the required person. Selected person will be added as a Linked person for the Client. You can also see the due diligence status of that person.
Functions: Add, Edit, Delete.
Note: On adding a People, the Due Diligence Status will display as Pending. Only on Approval by authorised personal, the Status gets changed to Approved
To Edit Linked People,
1. Access Client page and click Linked People and then Edit. Edit Linked People page appears.
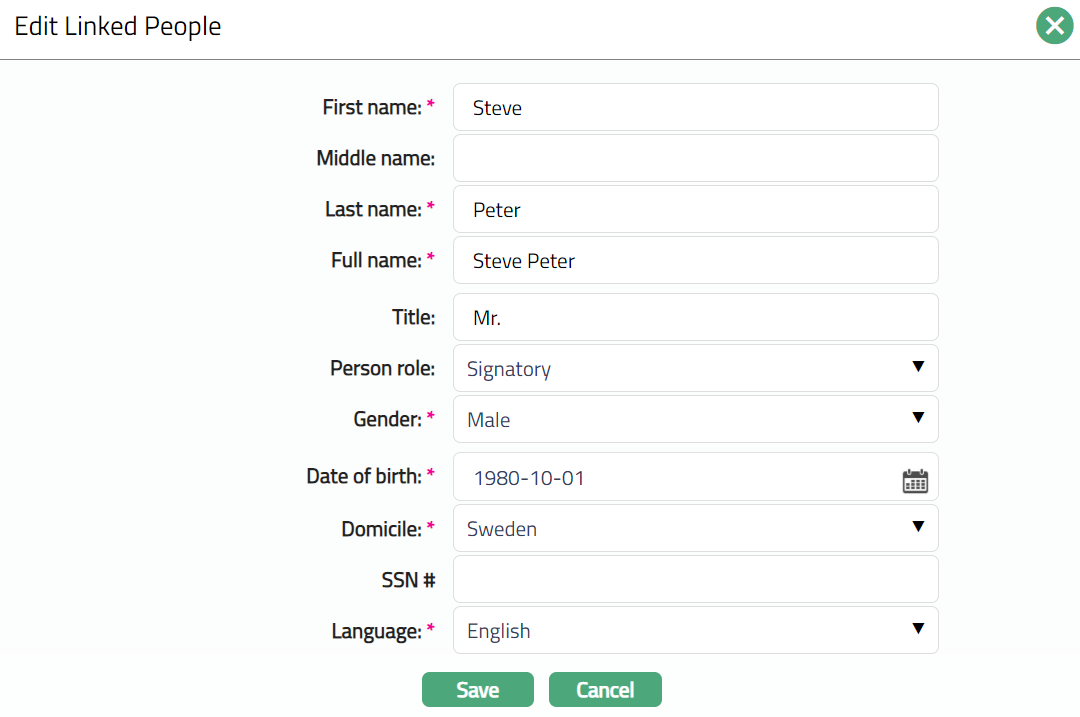
Note: All fields are editable. Any changes made here will update the Person record in CRM → Person maintain.
2. Select Role that the person will perform in relation to this client from the drop-down list of options maintained under Admin → Generic definitions → Person role. If CRM option is chosen in Applicable for field in Person Role, then only all the Person roles maintained under Admin → Generic definition → Person Role, will be available for the linked people.

Functions: Add, Edit, Delete.
To add New linked people,
1. Access Client page and click Linked People tab.
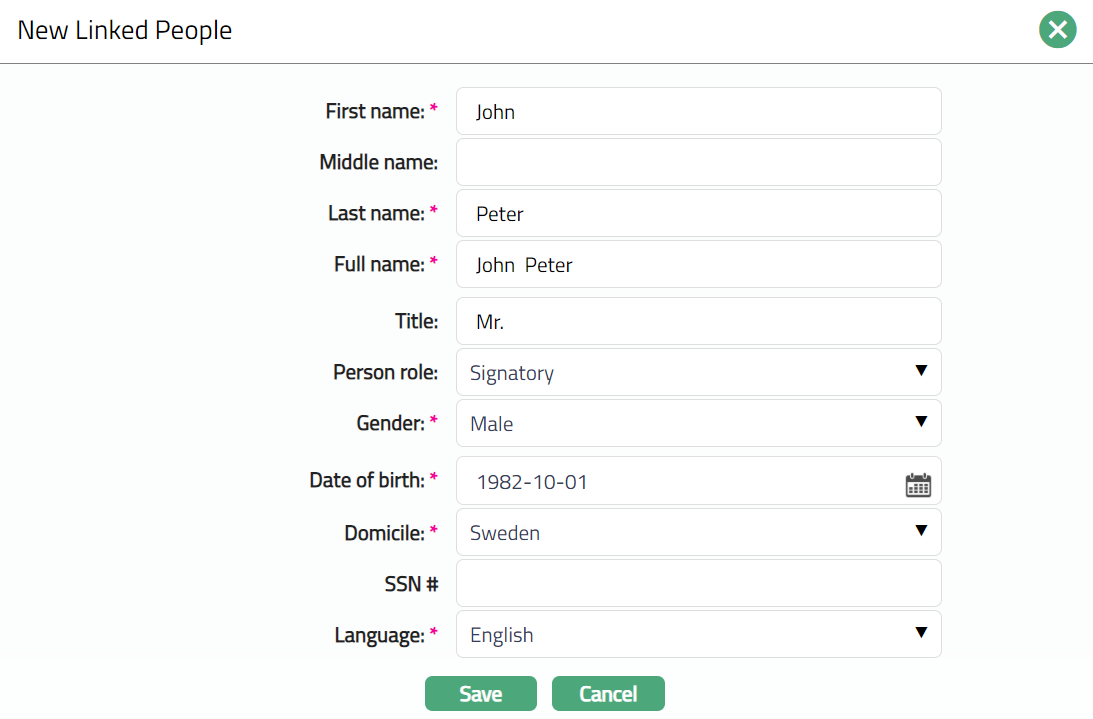
2. Enter First name of the person to be linked.
3. Enter Middle Name of the Person as applicable.
4. Enter Last name for the Person to be linked.
5. On entering the First Name and Last Name system automatically derives Full Name of the person. You can however edit it as needed.
6. Enter Title of the person that is to be prefixed to the person's First name.
7. Select Person role from the drop-down list of options. If CRM option is chosen in Applicable for field in Person Role, then only all the Person roles maintained under Admin → Generic definition → Person Role, will be available for the linked people.
8. Select Gender from the drop-down list of pre-shipped values. The options are Male, Female and Not disclosed.
9. Input Date of birth of the person. You can either enter the date manually or select using the calendar. Aura will validate the date format against the format maintained at Admin → Entities → Maintain → Regional → Date format.
10. Select Domicile of the person i.e., country of residence from the drop-down list maintained under Admin → System Codes → Generic Definitions → Countries.
11. Select Language from the drop-down list of options maintained under Admin → Generic definition → Languages. Only active languages will be available in the drop-down list.
12. Click Save. Client page appears with the New Linked People.
Functions: Edit, Delete.
Note: On adding a New People, the Due Diligence Status will display as Pending. Only on Approval by authorised personal, the Status gets changed to Approved
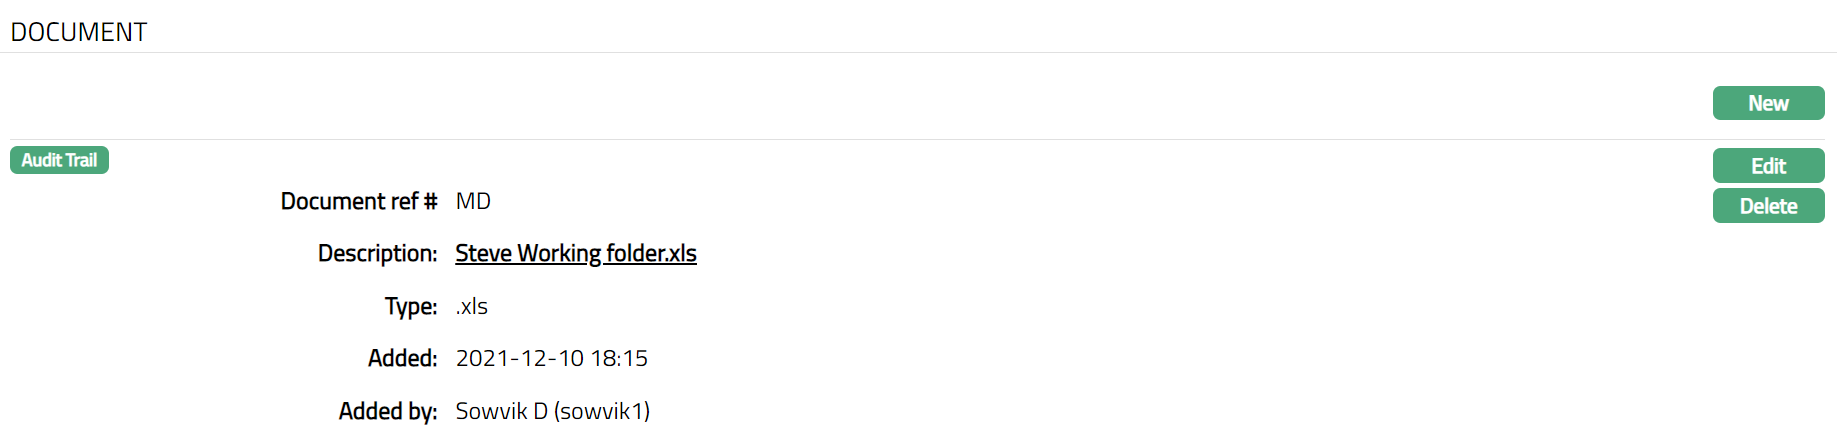
Documents
The Document tab allows you to upload documents related to the client. These can be in the form of scanned images or files on your computer. You can categorise the documents as per Document Type and store with a document reference number.
To add New Document,
1. Access Client page and click Document tab.

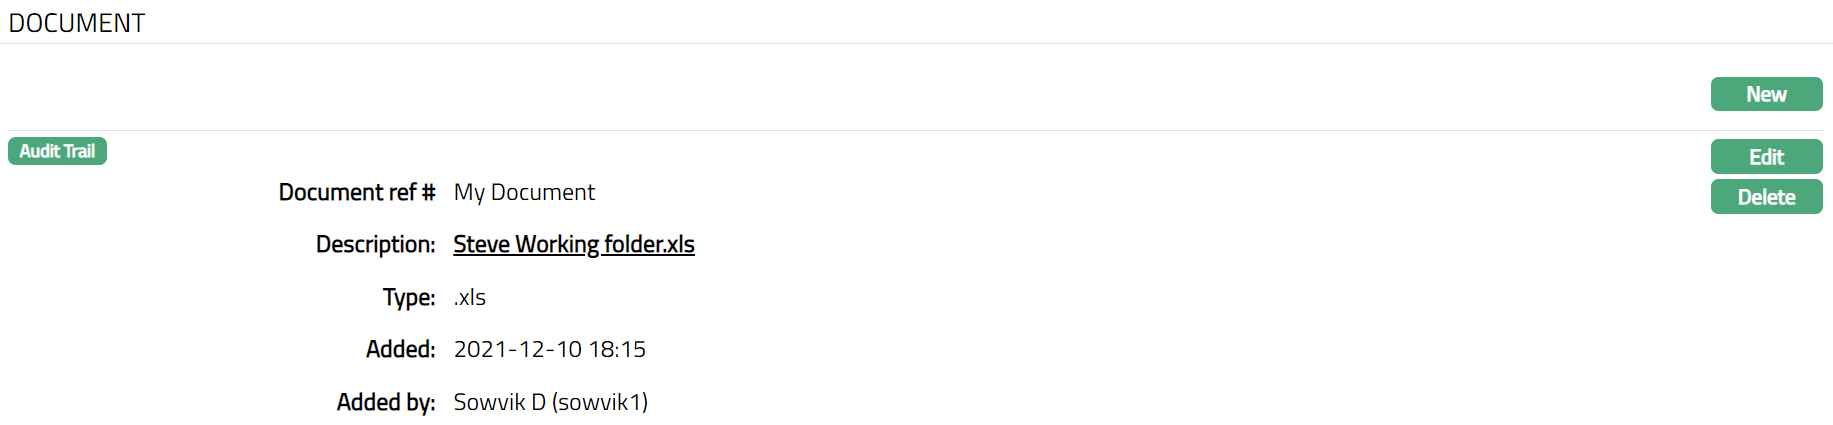
2. Click New button. New Document page appears.
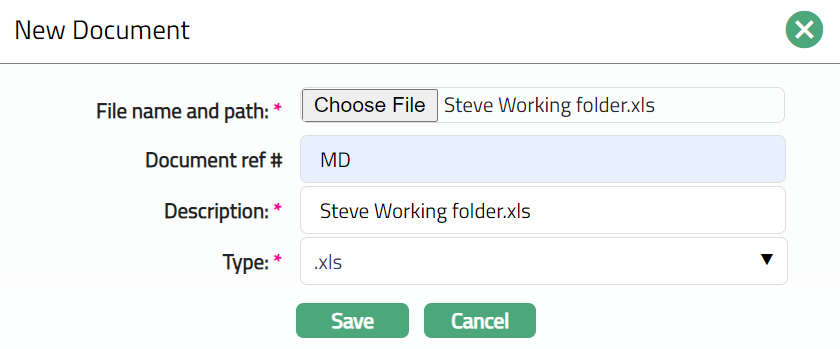
3. Click Choose File button to select File name and path of the document.
4. Enter Document ref no for the document. This document reference number is used in Branch view → Documents.
5. Based on the file selected the Description field will be derived. If required, you can change the description.
6. Select Type of the Document uploaded maintained under Admin → Documents → Document type. Once entered, this cannot be edited.
7. Click Save. Client page appears with the added details.
Functions: New, Edit, Delete.
The Additional fields are:
Added: This is the field which display the date and time when the Document is added.
Added By: This is the field which display the name of the person who added the Document.
Delete: You can delete Linked People record saved in Aura by a click on Delete button. Aura will ask for confirmation, on approving which the selected record will be deleted.
To Edit Document record,
1. Click Edit. Edit Document page appears.
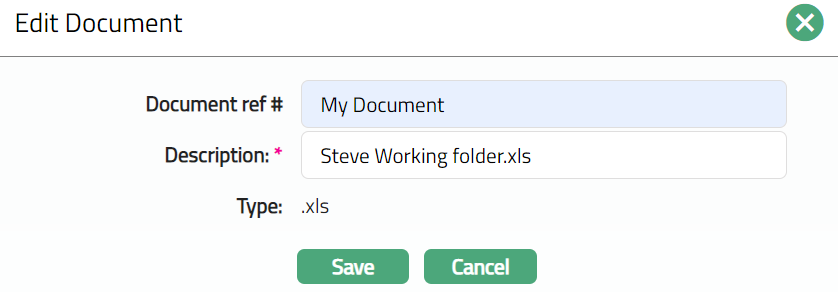
Note: Only Document Reference # & Description are editable.
2. Make required changes and click Save. Document page appears with the updated details.
Functions: New, Edit, Delete
FX Spread
The FX Spread tab allows you to define custom foreign exchange spreads for a specific client. These spreads override Aura-defined spreads maintained under Currency Exchanges Rates , giving banks the flexibility to assign preferential or risk-based spreads for specific clients and currency pairs.
This is especially useful when certain clients require custom margins for currency conversion, based on business agreements or risk management policies.
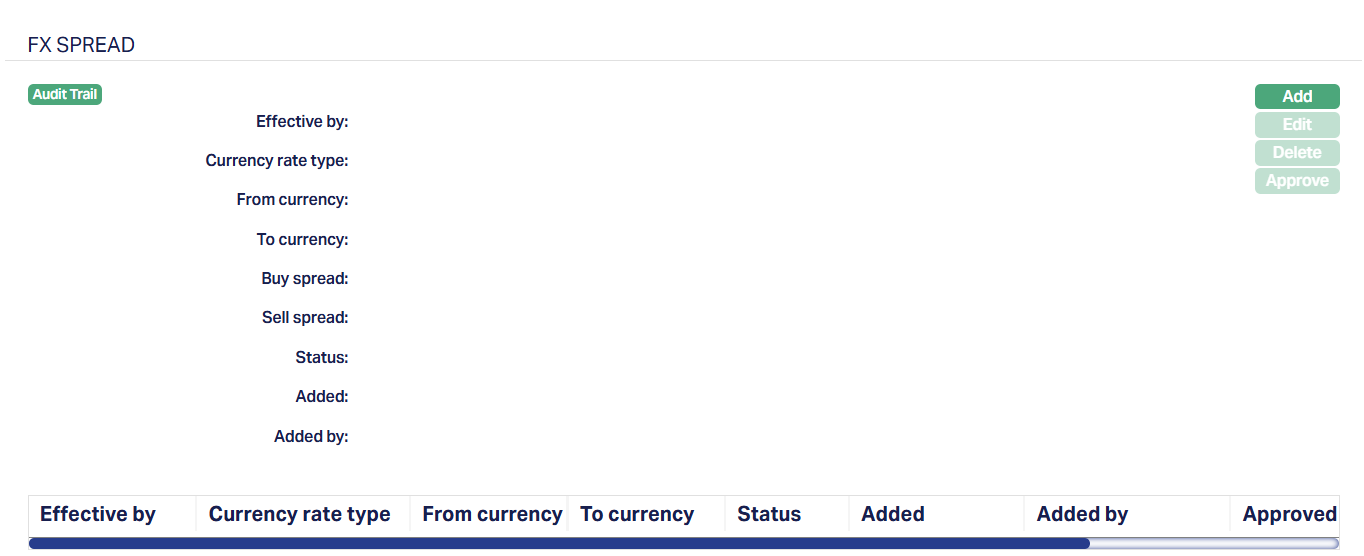
To add a new FX Spread,
1. Access Client Account page and click on FX Spread tab. As soon as the account is created, this tab will show no records, as there are no payment plans attached to the account.
2. Click Add. New FX Spread page appears.
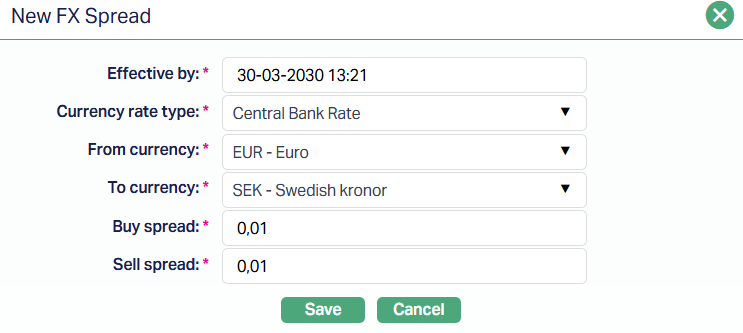
3. Effective by is the date and time from which the spread becomes effective. It defaults to the current booking date and you can change this to any future value.
4. Currency rate type specifies the rate type (e.g., Bank rate, Market Rate) for which the spread is applicable. Values are pulled from Admin → System Codes → Currency → Currency Rate Types.
5. From currency is the base currency of the pair. You can select from the drop-down list maintained under General Ledger → Settings → Currency.
6. To Currency is the counter currency of the pair. The drop-down displays the same list of currencies as From Currency except the one already selected above. It must be different.
7. Buy Spread is a positive margin (up to 6 decimal places) that will be subtracted from the mid-rate to calculate the buy rate. It is default to Zero and can only be positive.
8. Sell Spread is a positive margin (up to 6 decimal places) that will be added to the mid-rate to calculate the sell rate. It is default to Zero and can only be positive.
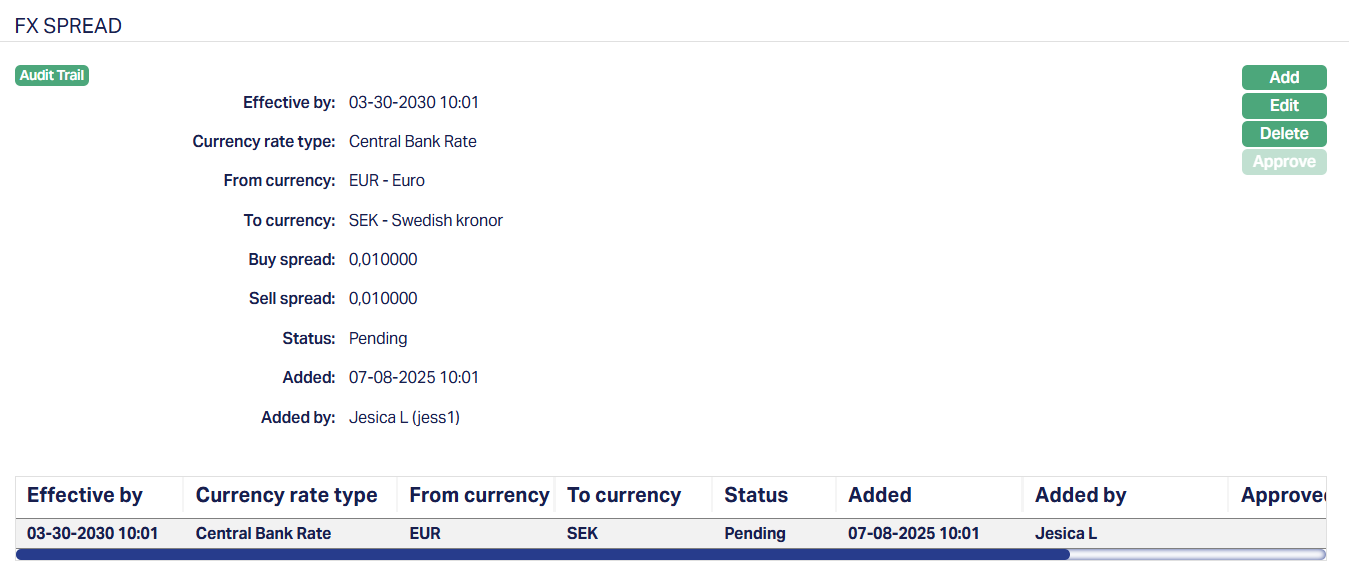
9. Click Save. The FX Spread page appears with the details you have entered; and the Status shows Pending subject to auto-approval settings.
Functions: Add, Edit, Delete, Approve
Note: Status is shown as Pending until it is approved. Once the status has been Approved, all buttons except Add are restricted. Make sure you enter and edit all the necessary fields before Approval.
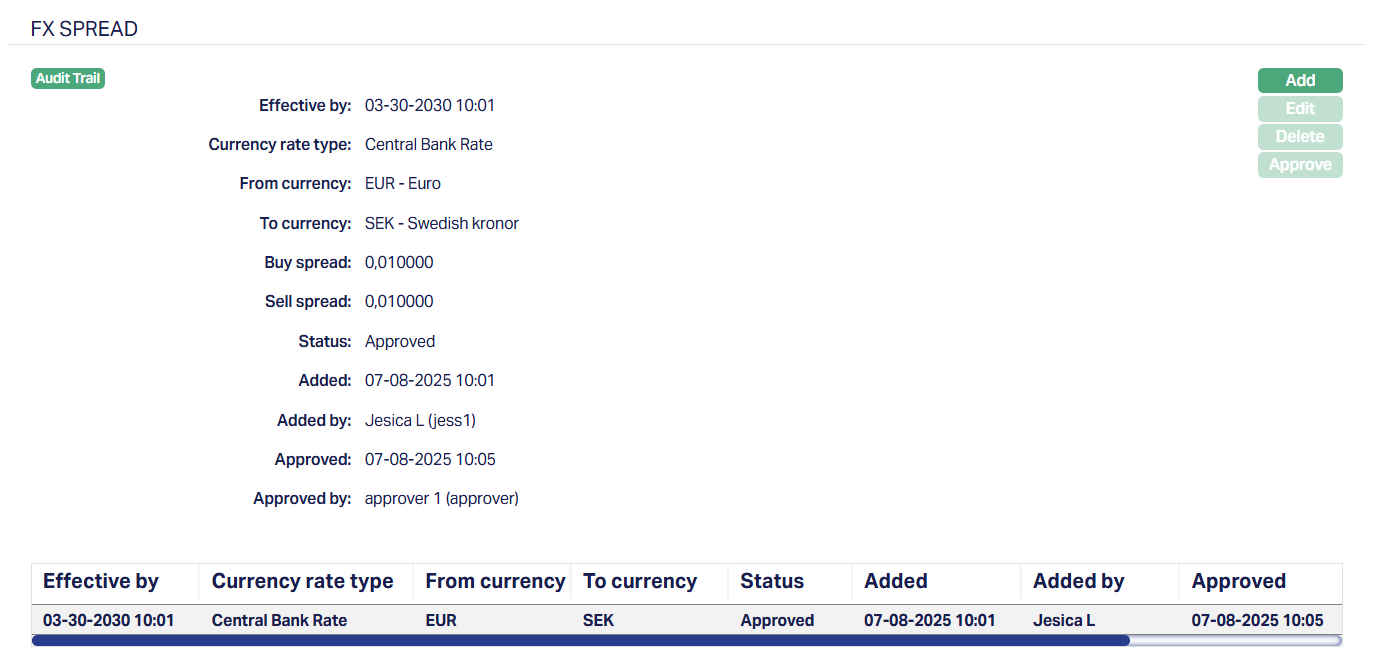
The additional fields that are shown are:
1. Status indicates the current state of the FX Spread record. It will be either: Pending - if the record is waiting for approval or Approved - if the record has been reviewed and finalized.
2. Added shows the date and timestamp when this novation record was created and Added by displays the user ID and full name of the person who created the record.
3. Approved shows the date and time when the record was approved and Approved by displays the user ID and full name of the person who approved the record.
Edit
The edit button is available only when the FX Spread status is Pending, and the current user is the one who created the plan.
To edit a FX Spread,
1. Click Edit. Edit FX Spread page appears.

All fields are editable. You can modify the fields as long as the status is still in Pending status and you are the user who created it.
2. Click Save. FX Spread page appears with the edited details.
The Delete button is also enabled only for Pending plans. It removes the record after user confirmation. Once a plan is approved, deletion is no longer allowed.
The Add button is enabled for all users, regardless of record status. However, if multiple Pending records exist, they will not be considered during currency conversion. Only the latest Approved record that is effective as of the current booking date-time will be used.
Impact of Approved FX Spread on Transactions
When you maintain and approve an FX Spread under a client, Aura applies it during transaction processing.
If an approved FX Spread exists for the specified Currency Pair and Rate Type, Aura automatically uses it in preference to the default Currency Rates. The system always selects the most recent approved record where the Effective By date is less than or equal to the current date and time. This ensures that the negotiated FX Spread for the client is reflected in real-time transactions.
If no client-specific FX Spread exists (or if there are no effective and approved records), Aura falls back to the default Currency Rates maintained under Admin → Currency Rates.
This behaviour directly impacts all transactions involving currency conversion, including Forex Contracts, Loan Disbursements, and similar modules, by ensuring that client-negociated terms are honored when available.
Comparision of FX Rate Retrieval
| Scenario | FX Rate Used by Aura |
|---|---|
| Client-specific approved FX Spread exists (Effective By ≤ current date/time) | Latest approved FX Spread maintained under the client record |
| No client-specific FX Spread exists | Default Currency Rates maintained under Admin → Currency Rates |
Beneficiary
The Beneficiary tab allows you to maintain a list of approved payees (beneficiaries) to whom the client can transfer funds or make payments.
To add the Beneficiary,
1. Access Client page and Click Beneficiary tab.

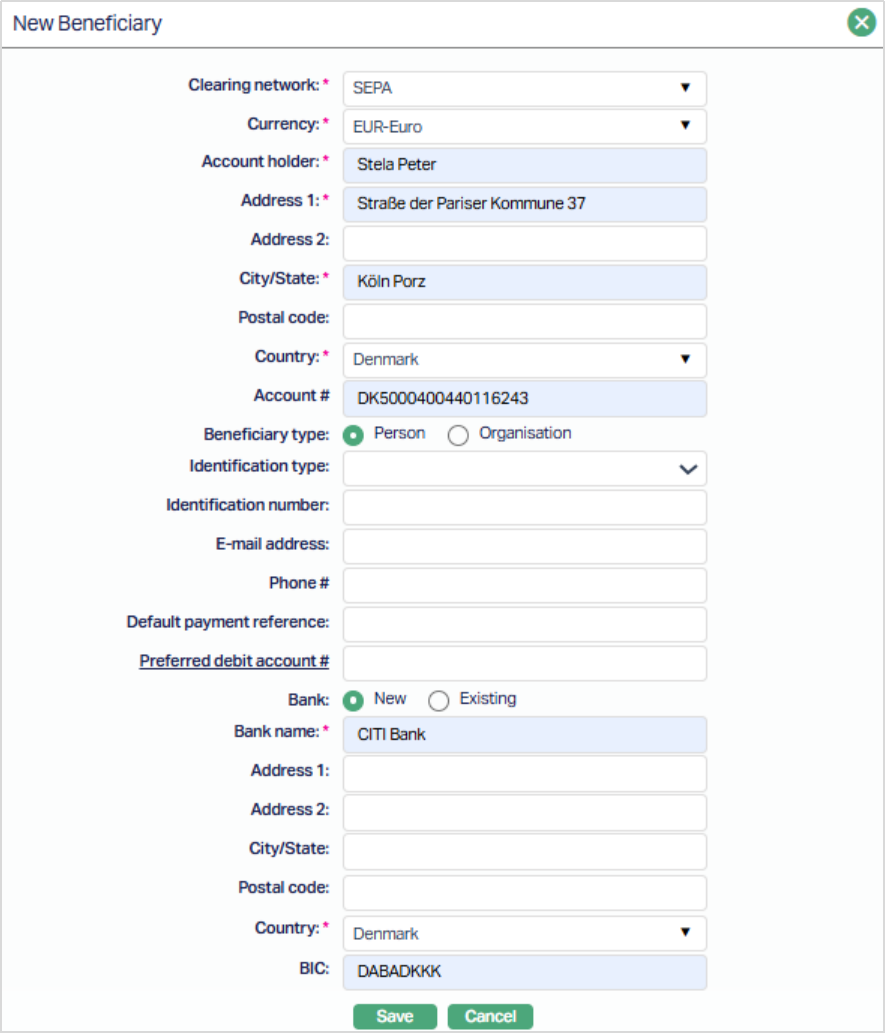
2. Click New. New Beneficiary page appears. Depending on the Country chosen, the details to be entered will change. The following screenshots show the different details for different countries:
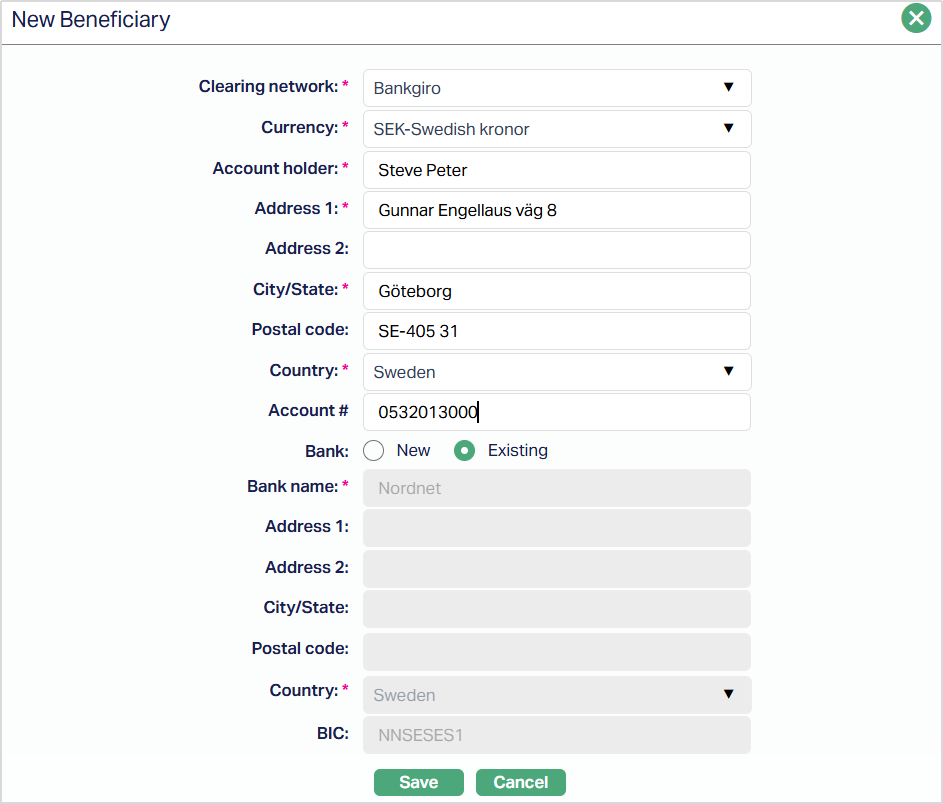
3. Select Clearing Network. You can select the Network based on the country of the client.
Note: A payment clearing network is an arrangement for the clearing of payments between banks.
4. Select Default currency based on the Clearing Network selected in which the transactions will be made, from the available drop-down list maintained under Admin → System codes → Currencies → Currencies.
5. Enter Account holder name, i.e., the beneficiary's name.
6. Enter Address 1 & 2 for the beneficiary.
7. Enter the City/State of the beneficiary.
8. Enter the Postal code of the beneficiary.
9. Select Country from the available drop-down list maintained under Admin → System Codes → Generic Definitions → Countries.
10. Enter Account # of the beneficiary. Depending on the country selected above, the field will get displayed
For SEPA, SWIFT and TARGET2 The Beneficiary Type allows you to select either Person or Organisation, and based on this selection, Aura displays the relevant fields for entry. Only the fields required for the selected Beneficiary Type are displayed and must be completed.
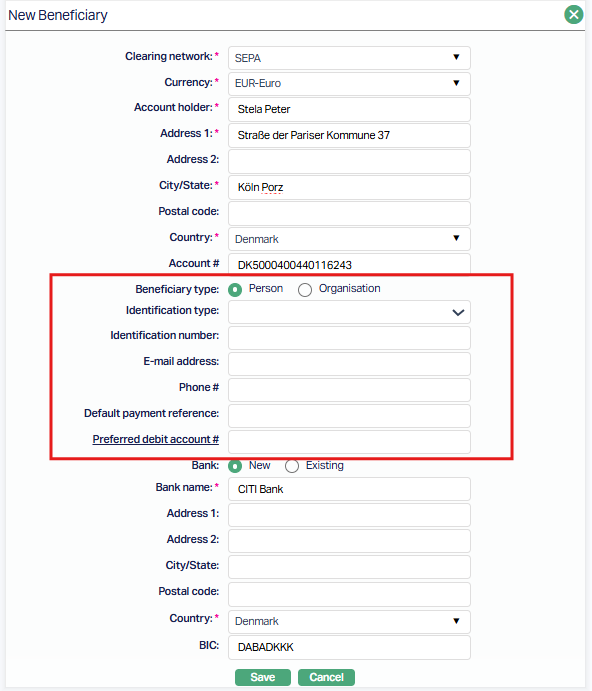
11. Indicate whether the Beneficiary type is a Person or an Organisation using the radio buttons. By default, Person is selected. This choice determines which identification types are available for selection.
12. Select the identification type relevant to the chosen Beneficiary Type. Only identification types configured in Admin → System Codes → Generic Definitions → Identification Type and applicable to the selected Beneficiary Type are displayed. This field becomes mandatory if an Identification Number is provided.
13. Enter the Identification number corresponding to the selected Identification Type. This field is conditionally mandatory when Identification Type is specified and captures the official identification of the Beneficiary.
14.Provide the Beneficiary’s e-mail address. Aura validates the format to ensure it is a proper e-mail. This field is optional.
15. Enter the Beneficiary’s phone number. Aura applies standard phone number validations. This field is optional.
16. Enter a default text string, up to 35 characters, that will be used as the payment reference for transactions involving this Beneficiary. This reference can be overwritten during payment initiation if a different reference is provided.
17. Select the Client Account to be used for debiting funds when making payments to this Beneficiary. Aura displays only active accounts in the currency chosen for this Beneficiary. The field supports auto-suggest, so typing characters filters the list to matching accounts. This selection acts as the default but can be overridden during payment initiation.
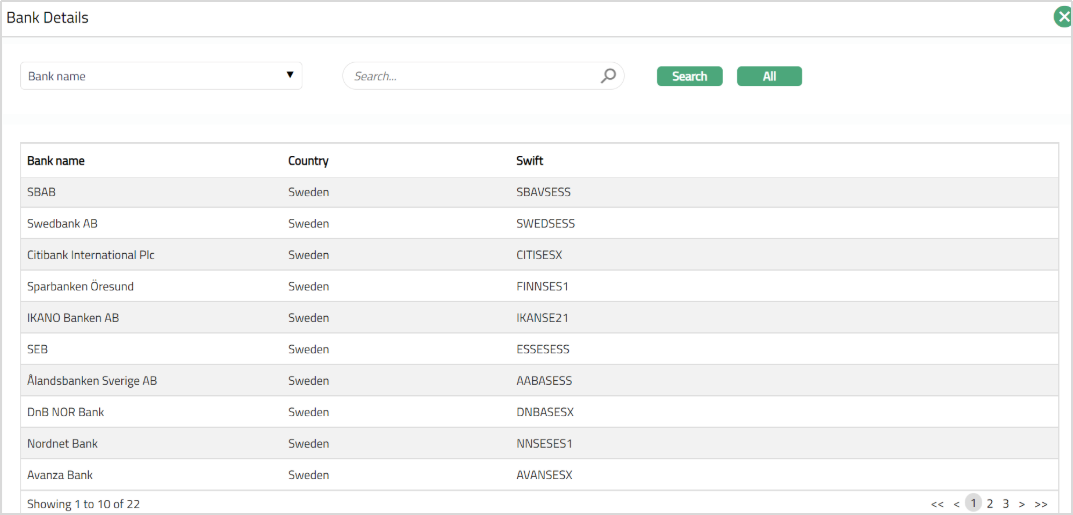
18. Select Bank details. By default, New will be selected. If you wish to add New Bank details, then click on New and enter the required details. If you already have Existing bank details then click on Existing. Once you click on existing the entire Bank details page appears. You can choose the required bank from the list from the drop-down list. The name of the Banks are maintained under Retail → Management → Settlement Directory.
19. Select name of the Bank of the Beneficiary from the drop-down list. The name of the Banks are maintained under Retail → Management → Settlement Directory.
For New bank details,
20. Enter Address 1 & 2 for the bank.
21. Enter the City/State of the bank.
22. Enter the Postal code of the bank.
23. Select Country from the available drop-down list maintained under Admin → System Codes → Generic Definitions → Countries.
24. Enter BIC of the beneficiary bank. It is the standard format approved by the International Organization for Standardization (ISO) under ISO 9362. It is a unique identification code for both financial and non-financial institutions.
25. Click Save to save the entered details. Once saved the Beneficiary Page appears with the added details.
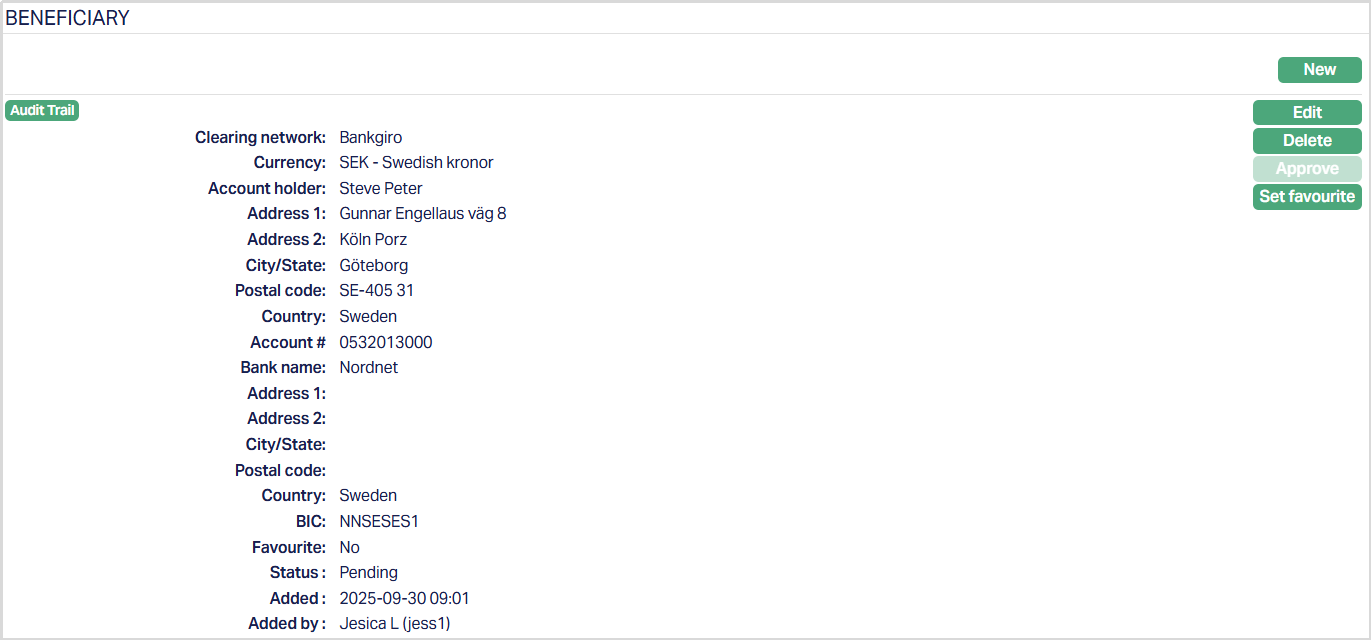
Functions: New, Edit, Delete, Approve, Set Favourite.
To Edit Beneficiary,
1. Click Edit. Edit Beneficiary page appears.
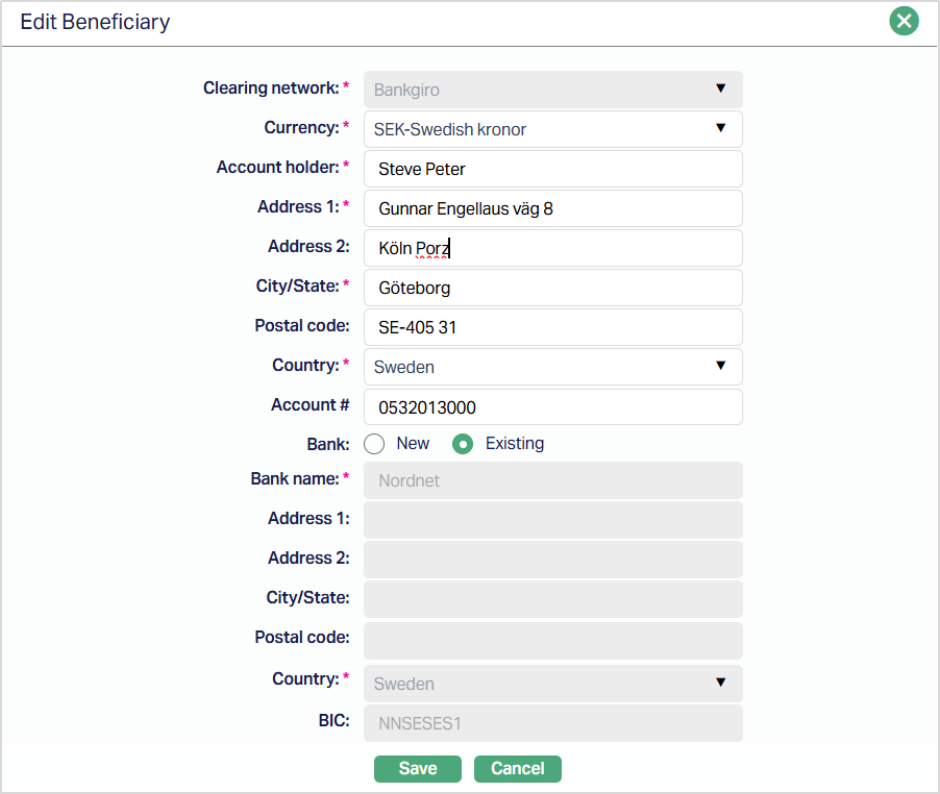
Make necessary changes and then click Save. Once saved the Beneficiary page appears with the updated details
Functions: New, Edit, Delete, Approve, Set Favourite.
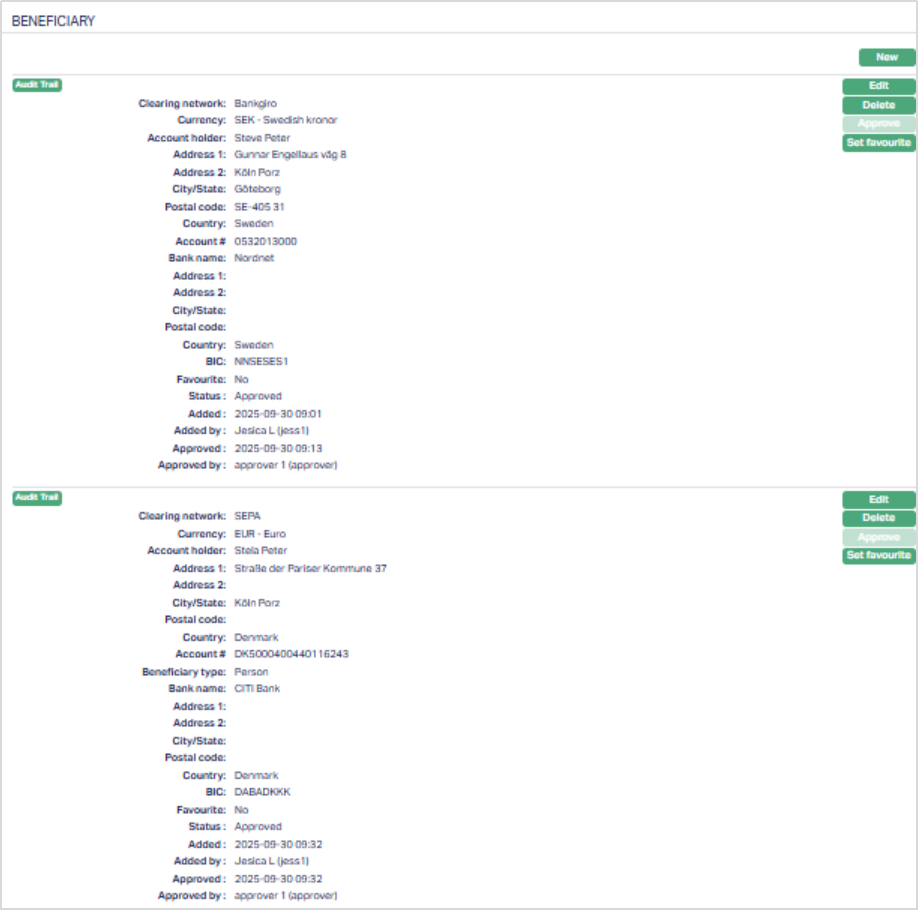
Status of the Beneficiary record is Pending till it is approved by another user. On approval, the tab status is set to Approved.
Set Favourite button
The Set Favourite button allows you to mark a Beneficiary as a Favourite for quick access. By default, when you add a new Beneficiary, the Favourite flag is set to No.
- When the value is No, the button displays Set Favourite. Clicking it updates the flag to Yes, changes the button to Remove Favourite, and does not display the Favourite value on the UI.
- When the value is Yes, the button displays Remove Favourite. Clicking it updates the flag back to No, changes the button to Set Favourite, and shows the Favourite value on the UI.
Updating the Favourite flag does not affect the record’s status or require approval, even for existing records. This behavior is similar to how Address, Phone, or Email records are marked as Valid/Invalid in Aura.
The additional fields that are shown are:
- Status indicates the current state of the record. It will be either: Pending - If the record is waiting for approval or **Approved **- If the record has been reviewed and finalized.
- Added shows the date and timestamp when the record was created and Added by displays the user ID and full name of the person who created the record.
- Approved shows the date and time when the record was approved and Approved by displays the user ID and full name of the person who approved the record.
KYC
This tab is used to maintain the details to Know Your Customer (KYC) of the Client.
It has the following sub-tabs:
Client Details
Activity
Average Planned Monthly balance
Average Planned Turnover
Client Details
Client details sub tab allows you to maintain the client details.
To edit the Client details
1. Access Client page and KYC tab and then Client details. By default, Direct marketing field mentioned as No. You can change the same to Yes during Edit.
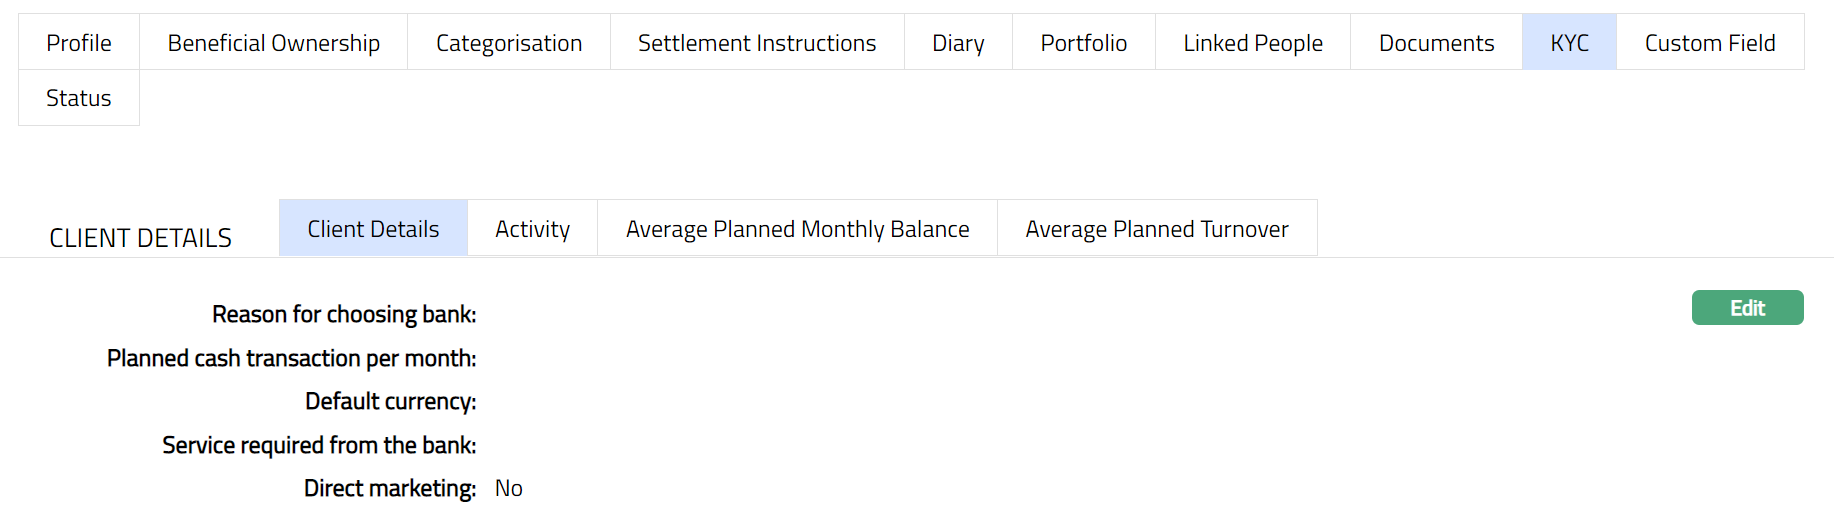
2. To Edit, Click Edit button. Edit Client Details page appears.

3. Select Reason for choosing bank from the drop-down list. The available options are Reliability, Stability, Competitive tariffs, Terms of the Bank transactions, Service quality, Confidentiality, Other.
4. Select Planned cash transaction per month from the drop-down list. The available values are:
0 -- 1000
1000 -- 5000
5000 - 10,000
10,000 - 15,000
5. Select the Default currency from the available drop-down list maintained under Admin → System codes → Currencies → Currencies. This field is mandatory only when you enter value for Planned cash transaction per month.
6. Select the Service required from the bank from the drop-down list. The available options are ATM, Direct banking, Other.
Note: When you select other as option in Service required from the bank, and then you have to record the services required in the Diary.
7. Check Direct marketing checkbox to specify whether the client is created through direct marketing.
8. Once you have made all the necessary changes Click on Save. Client page appears with the updated details.

Functions: Edit
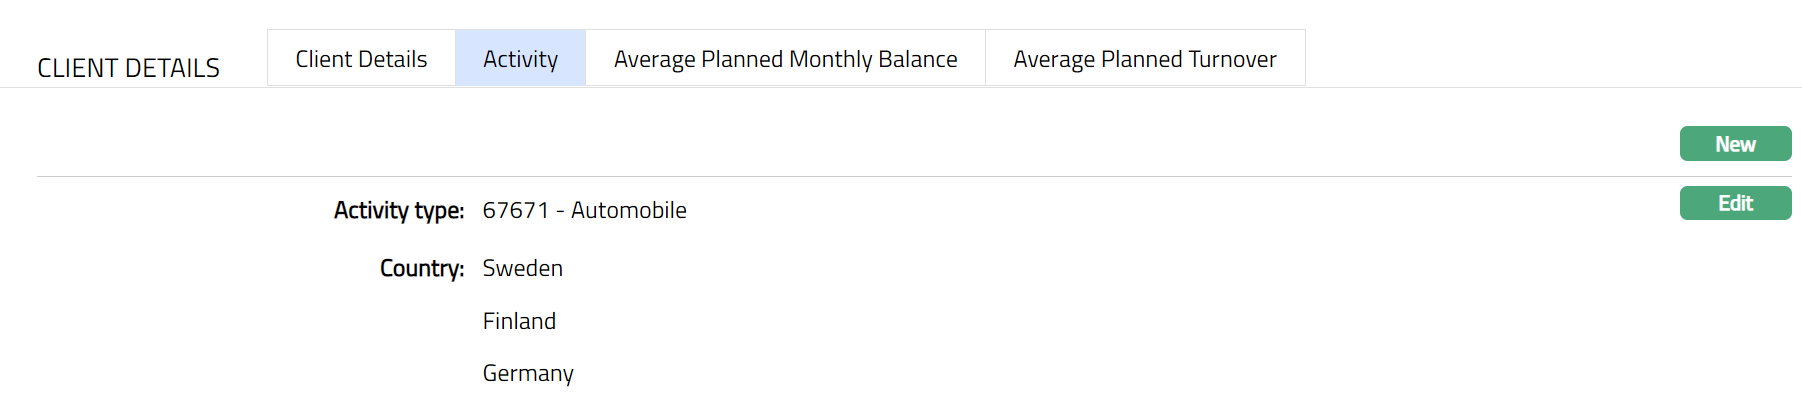
Activity
Activity tab allows you to maintain the client's activity details.
To add new activity,
1. Access Client page then KYC tab and then Activity tab.
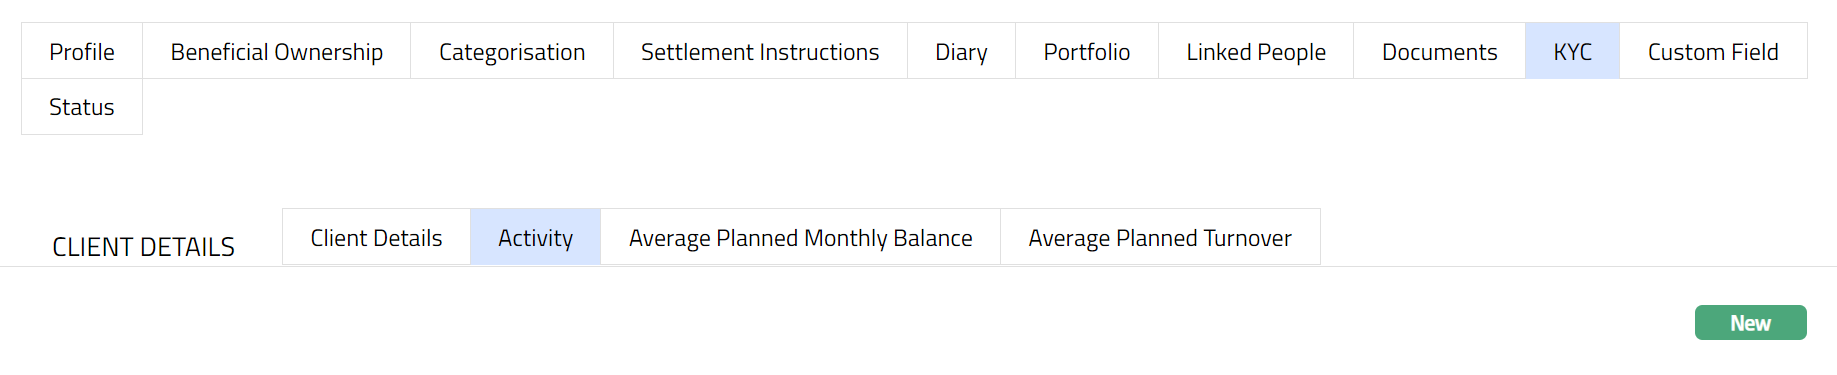
2. Click New. New Activity page appears.

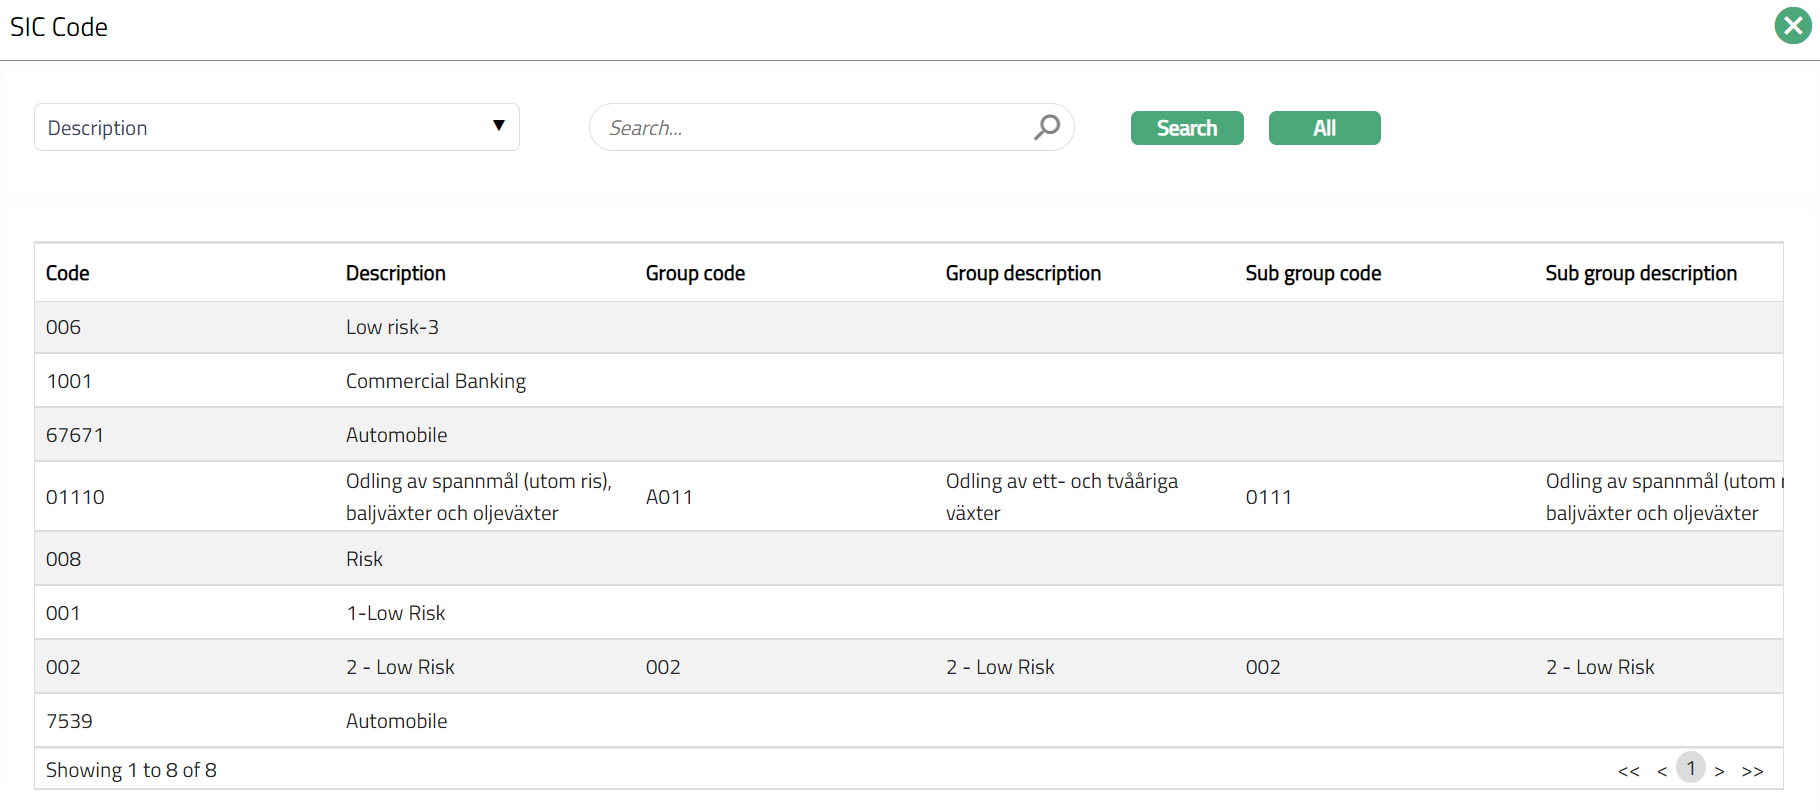
3. Select Activity type from the available drop-down list maintained under Admin → System codes → Generic definition → SIC codes.
4. Select required Country from the available dropdown list maintained under Admin → System codes → Generic definition → Countries and click on Add. Repeat the same to add more countries.
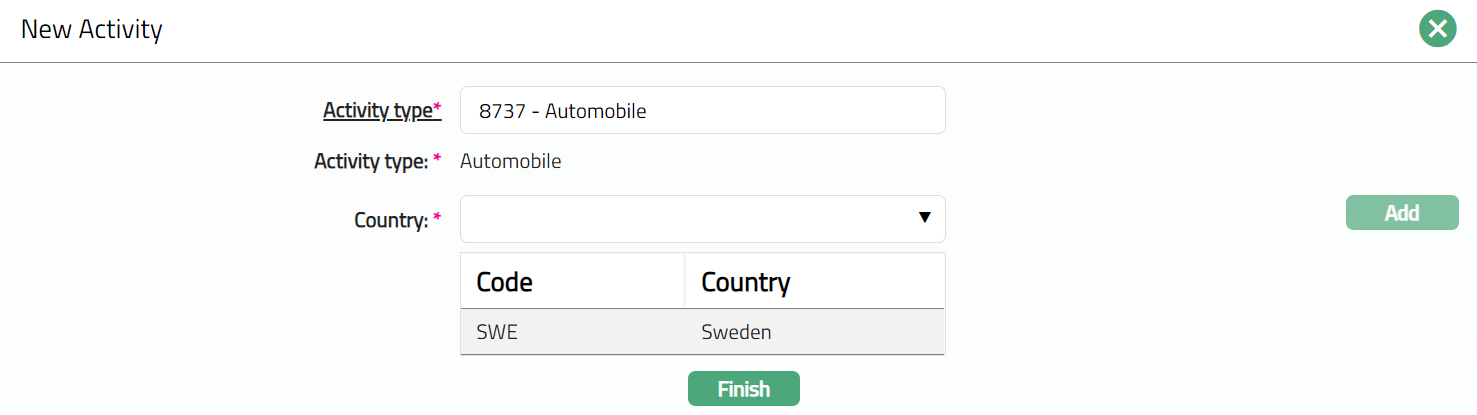
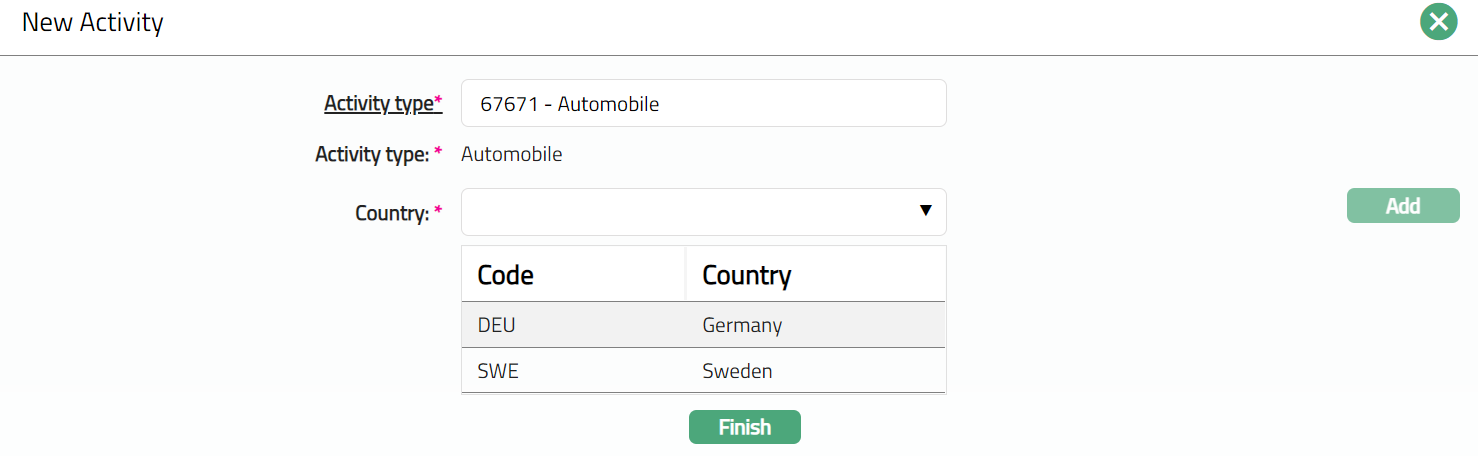
5. Click Finish to save the entered details.

Functions: New, Edit
To Edit Activity,
1. Click Edit to edit the activity. Edit Activity page appears.
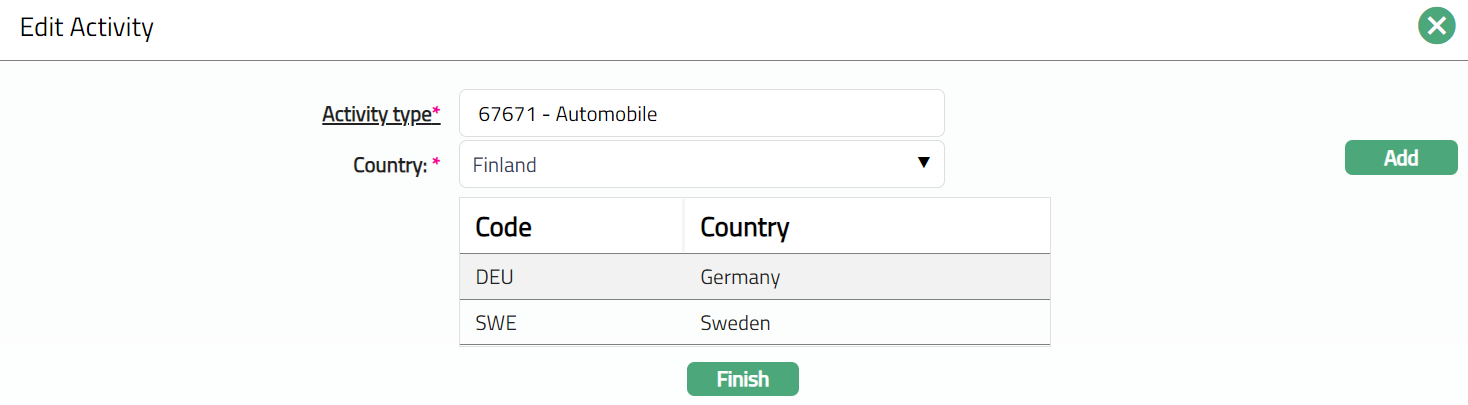
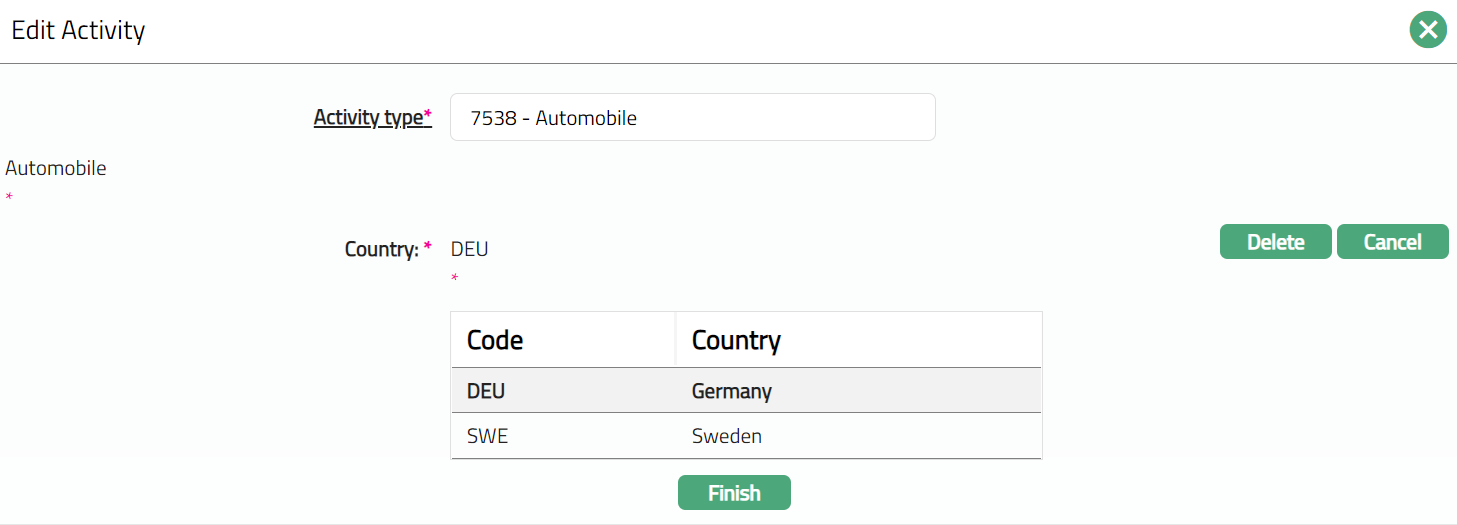
2. Both the fields are Editable.
3. You can delete a country. To do so, select the country and click Delete button.
4. Click Cancel button to cancel.
5. Click Finish to save the changes done. The Activity page appears with the updated details.
Functions: New, Edit
Average Planned Monthly Balance
Average planned monthly balance tab allows you to maintain the client's planned monthly balance details.
To add New Average Planned Monthly Balance,
1. Access Client page, KYC tab and Average planned monthly Balance

2. Click New. New Average Planned Monthly Balance page appears.

3. Select Currency in which the average monthly balance is maintained from the available drop-down list maintained under Admin → System codes → Currencies → Currency Maintain.
4. Enter Amount for average planned monthly balance.
5. Click Save to save the entered details.

Functions: New, Edit, Delete
Delete: You can delete Average Planned Monthly Balance record saved in Aura by a click on Delete button. Aura will ask for confirmation, on approving which the selected record will be deleted.
To Edit Average planned monthly Balance**,
1. Click Edit. Edit Average planned monthly Balance page appears.
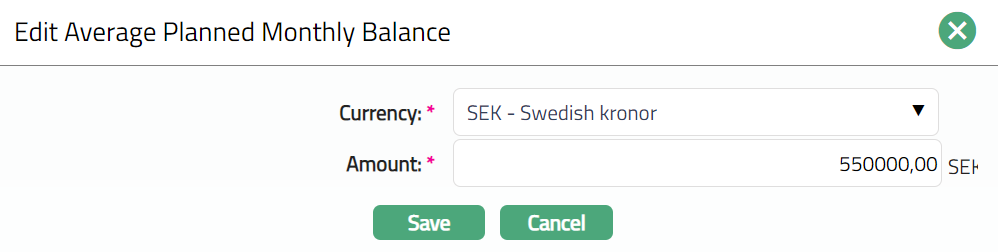
Note: Both fields are Editable.
2. Click Save to save the changes done.
3. Once Saved Average Planned Monthly Balance page appears with the updated details.

Function: New, Edit, Delete.
Average Planned Turnover
Average planned turnover tab allows you to maintain the client's average planned turnover details.
To add New Average Planned Turnover,
1. Access Client page, KYC tab and Average Planned Turnover.
2. Click New. New Average Planned Turnover page appears
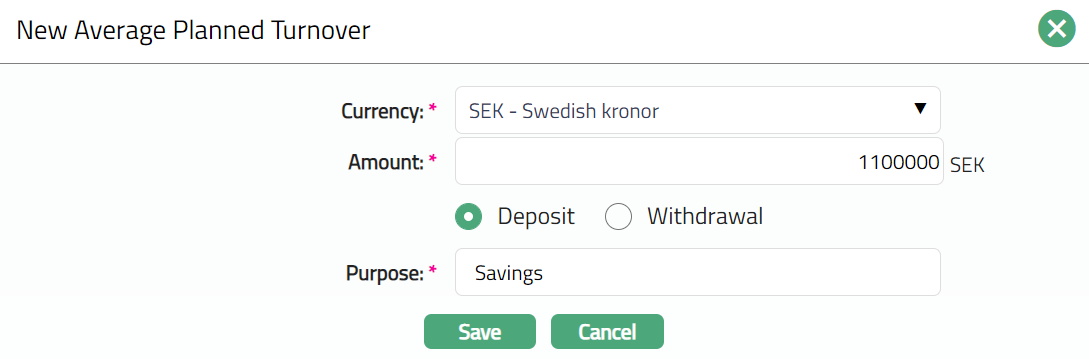
3. Select Currency in which the average turnover balance is maintained from the available drop-down list maintained under Admin → System codes → Currencies → Currencies.
4. Enter Amount for Average Planned Turnover.
5. Select Deposit or Withdrawal radio button to indicate whether the amount is for deposit or withdrawal.
6. Enter Purpose based on the radio button selected above.
7. Click Save to save the entered details.

Functions: New, Edit, Delete
Delete: You can delete Average Planned Turnover record saved in Aura by a click on Delete button. Aura will ask for confirmation, on approving which the selected record will be deleted.
To edit the Average Planned Turnover,
1. Select the required Average Planned Turnover record you wish to Edit.
2. Click Edit. Edit Average Planned Turnover page appears.
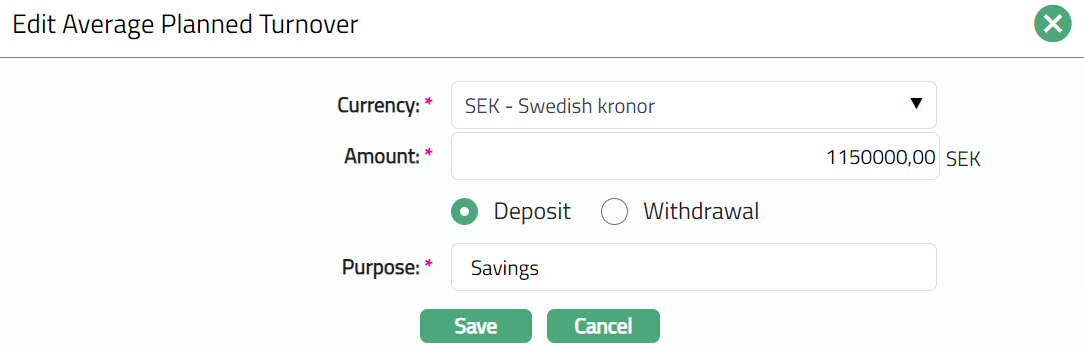
All fields are editable.
3. Make the required changes and click on Save. Once saved the Average Planned Turnover page appears with the updated details.

Functions: New, Edit, Delete.
Custom Field
This option provides you the flexibility to define fields apart from those that are already available in the standard version of Aura. Thus, it enables you to customize additional data storage and use as required to suit your specific business needs.
Once the custom field is created, these has to be mapped to Client, only then will these Custom fields appear for the users to update, and Availability must be selected as All.
To view/edit Custom Field.
1. Access Client page and click Custom Field tab.

The field appears only when it is created under Admin → System codes → Custom fields → Custom fields and linked to the specific Client option in Admin → System codes → Custom fields → Field mappings, where Availability must be selected as All, so that the custom field is made available for Personal, Corporate and Joint clients. If Availability is maintained as Selected, then the Custom Field will appear only for specific Clients.
2. Click Edit. Edit Custom Field page appears

3. Enter Additional Field.
4. Click Save. Client screen appears displaying the details of the new custom field that you added.

Functions: Edit
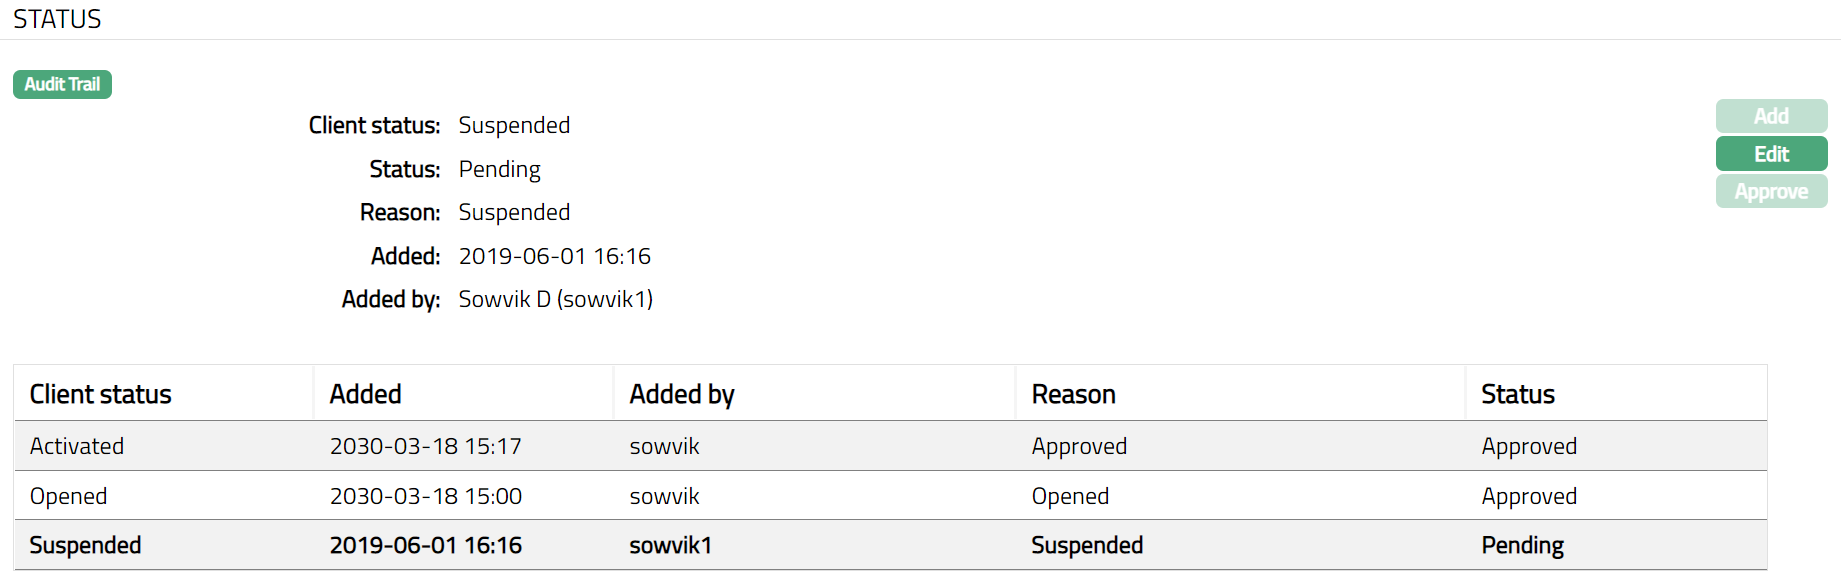
Status
Using this tab, you can add and view the history of the Client status, as well as approve the status records. On creating a Client, the status is Opened.
To add client status,
1. Access Client Maintain page and click Status tab.
2. Click Add. Add client status page appears.
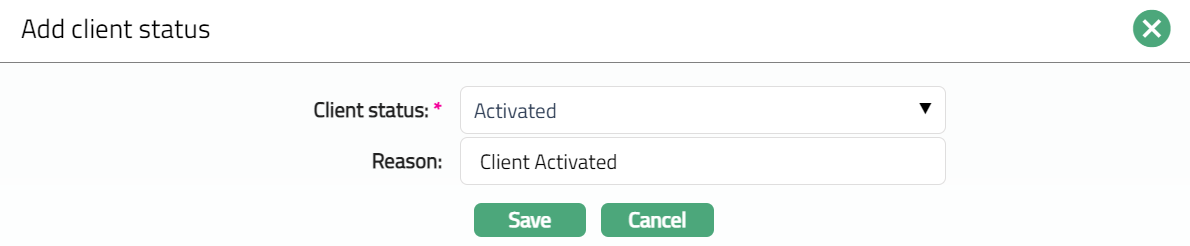
3. Select Status from the drop-down list. Depending on the current status of the client account, the possible values are:
a. Opened: This is the initial account status as soon as it is created.
b. Activated: This is the status in which transactions are allowed on the account. It has to be manually set by a user different from the one who created the account.
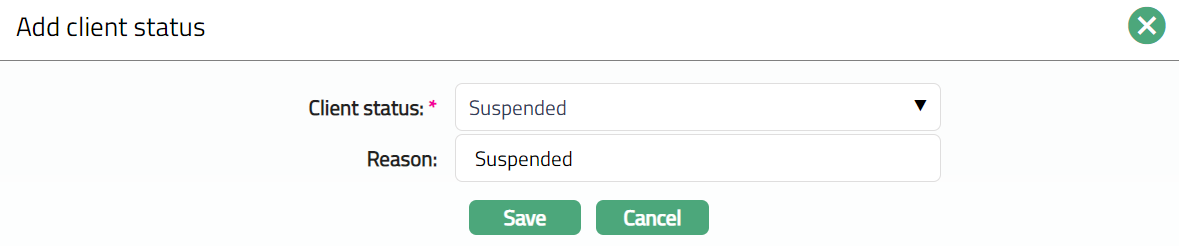
c. Suspended: If you want to suspend the client, then you can change the status of the client to suspend. A client can be suspended only, if the client is not in use and approval is required.
Aura will validate and allow you to change the status as mentioned below.
Opened to Activate
Opened to suspended.
Activate to Suspended
Suspended to Activate.
4. Enter Reason for the status selected.
5. Click Save. Status page appears with the added details.
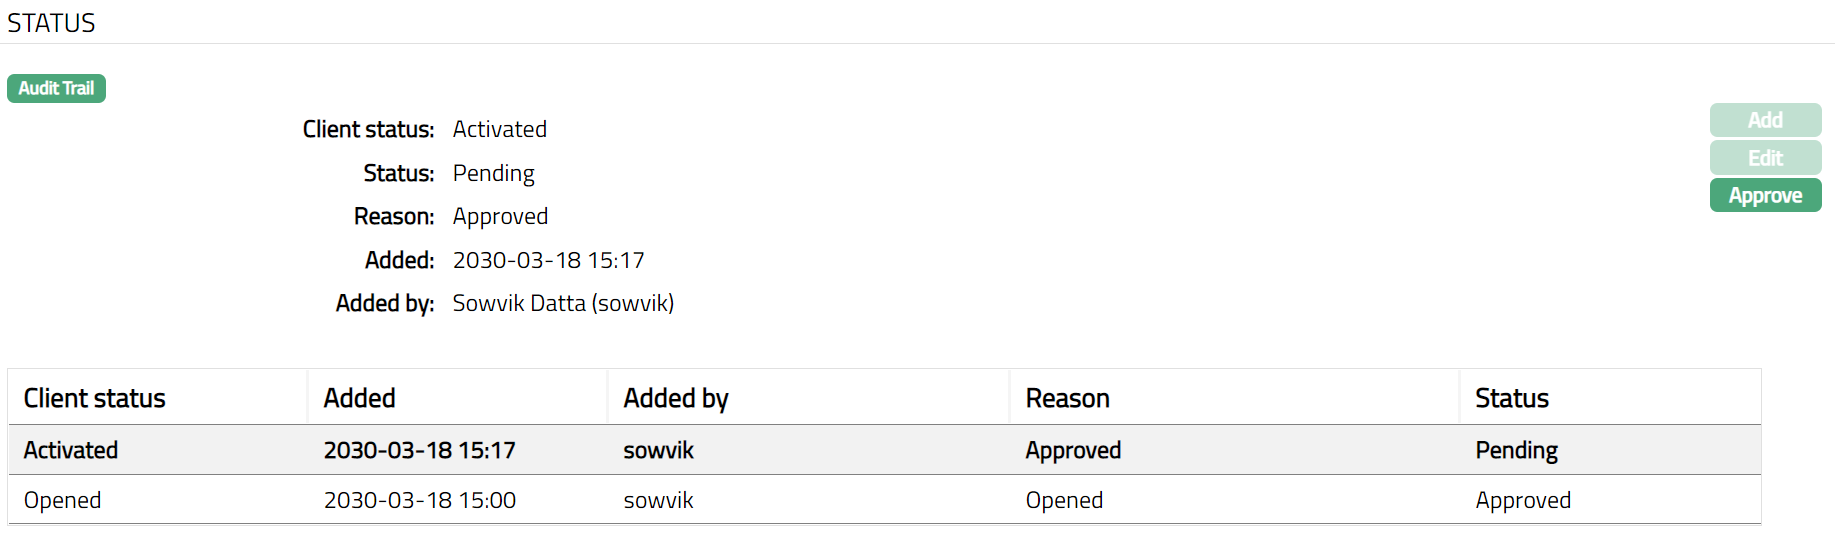
Functions: Add, Edit, Approve
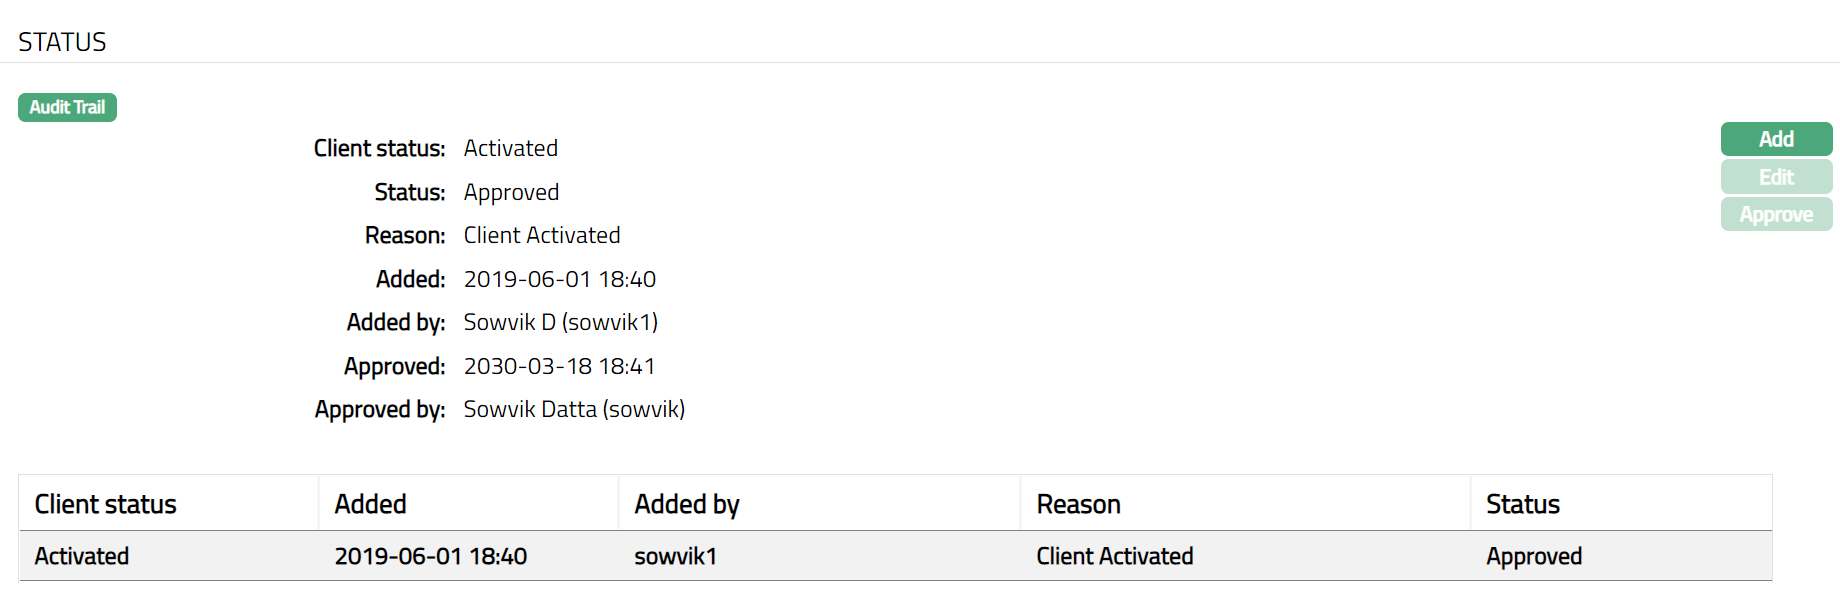
Note: On creation of a Client, the Client status by default will be Opened and Reason for record status will be Approved. The Client will not be activated unless Activated status is added to the client and is approved by another user. Only on Approval by another user, the Client Status becomes Activated, Record Status gets changed to Approved.
Functions: Add, Edit, Approve
The additional fields that you can view in the Settings screen are explained below:
Status field denotes the status of the tab
Reason field denotes the Reason for the status
Added field denotes the date on which the record was added.
Added by field denotes the name of the user who created the record.
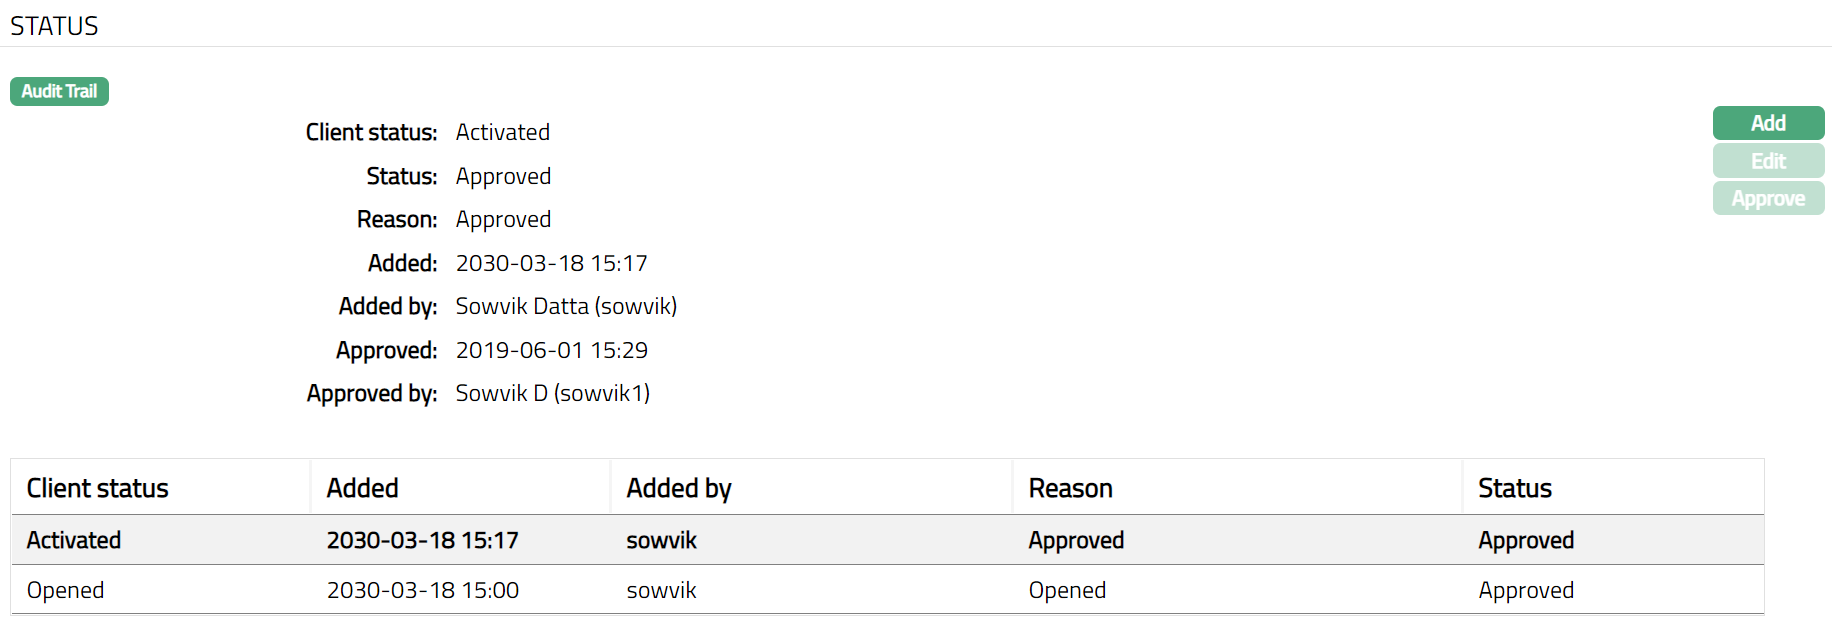
Approved field denotes date on which the record was approved and is displayed only for approved records.
Approved by field denotes name of the authorized person who approved the record and is displayed only for approved records.
Delete: You can delete the Client Status saved in Aura by a click on Delete button. Aura will ask for confirmation, on approving which the selected record will be deleted.
Approve: You can Approve the Client Status saved in Aura by a click on Approve button. Aura will ask for confirmation, on approving which the selected record will be Approved.
To edit Status,
1. Click Edit/Add. Edit/Add client status page appears.
Note: Only the Reason field is Editable.
2. Enter the required Reason and click Save. Once saved Status page appear with the updated details.
Functions: Add, Edit, Approve
Client type:
Corporate
Where the client is an organization, choose client type as Corporate. The following are the tabs in client type -- corporate.
Profile
Beneficial ownership
Categorisation
Settlement Instruction
Diary
Portfolio
Linked People
Documents
Beneficiary
KYC
Client details
Activity
Average Planned Monthly Balance
Average Planned Turnover
Custom Field
Status
To add new Corporate Client,
1. From CRM menu, click Clients, and then Maintain. Client Search page appears.
2. Click Add. New Client - Select Type page appears.

3. Select Corporate option for Client type field.
Note: Once you select the client type and click on Next, you cannot come back to change the client type.
4. Select Client Owner branch from the drop-down list of active branches. The branches is maintained under Admin → Branches → Maintain. By default, the user's logged in branch is displayed.
5. Click Next. New Client → Add Organisation (1/6) page appears.
6. If you want to create a client for an organisation which is already created under CRM → Organisation → Maintain, then click Existing organisation. Aura will display the Search Organisation window. Search and select the required organisation.

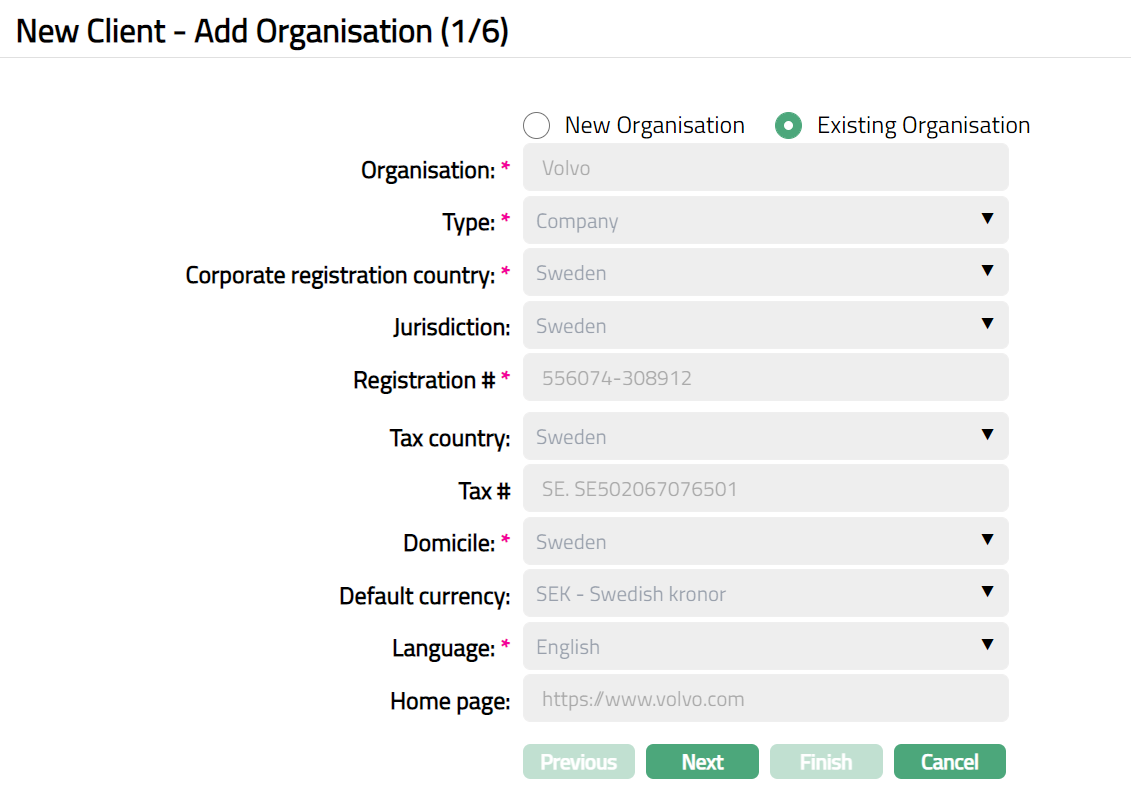
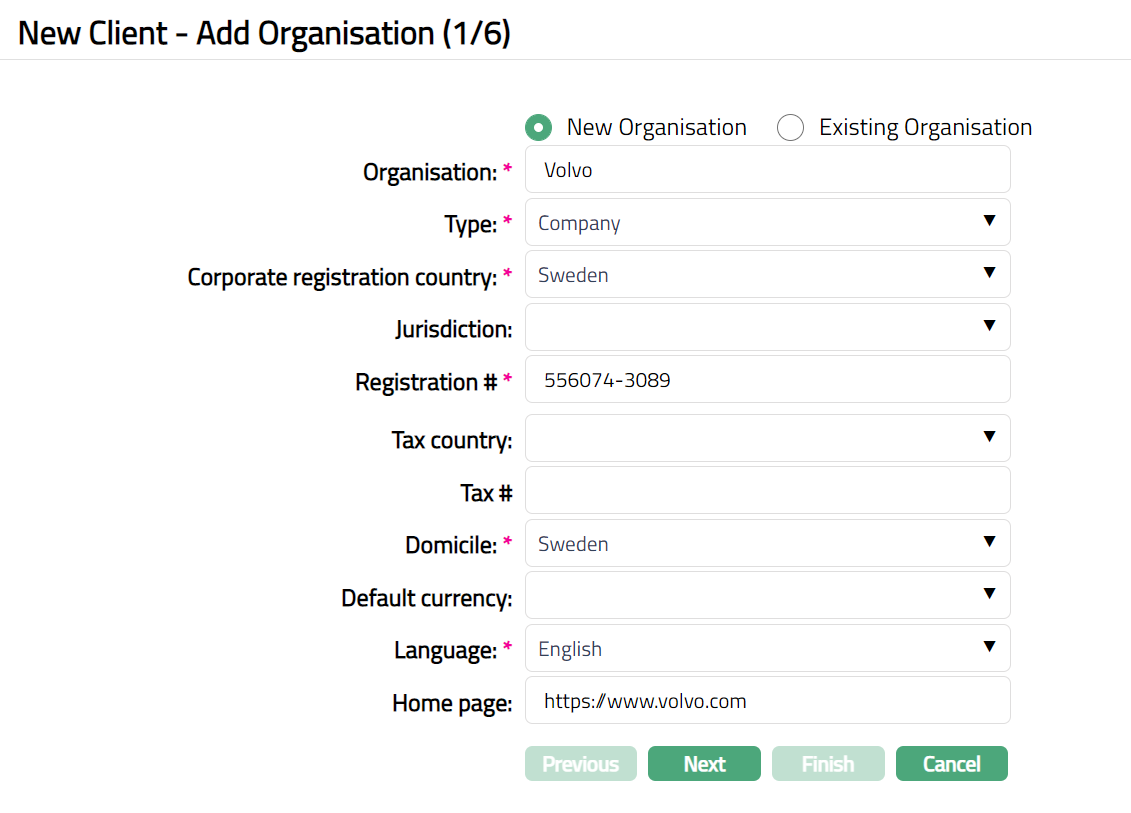
7. If you want to create a client for an organization which is not yet created under CRM → Organisation → Maintenance, then click New Organisation and provide the required details. For details, refer to CRM → Organisation Maintain.
8. Enter the name of the Organisation.
9. Select Type of the Organisation. The available options are: Bank, Trust, Company, Fund, and Foundation.
10. Select Jurisdiction in which the organisation works from the available drop-down list of countries maintained under Admin → System Codes → Generic Definitions → Countries.
11. Enter Registration # of the Organisation.
12. Select Tax country of the Organisation from the available drop-down list of countries maintained under Admin → System Codes → Generic Definitions → Countries.
13. Enter Organisation Tax # in the Tax country.
14. Select Default currency of the Organisation from the available drop-down list of active currencies maintained under Admin → System codes → Currencies → Currency Maintenance.
15. Select Language for correspondence from the available drop-down list maintained under Admin → System codes → Generic definitions → languages.
16. Enter Home page of the Organisation.
17. Click Next. New Client → Address (2/6) page appears.
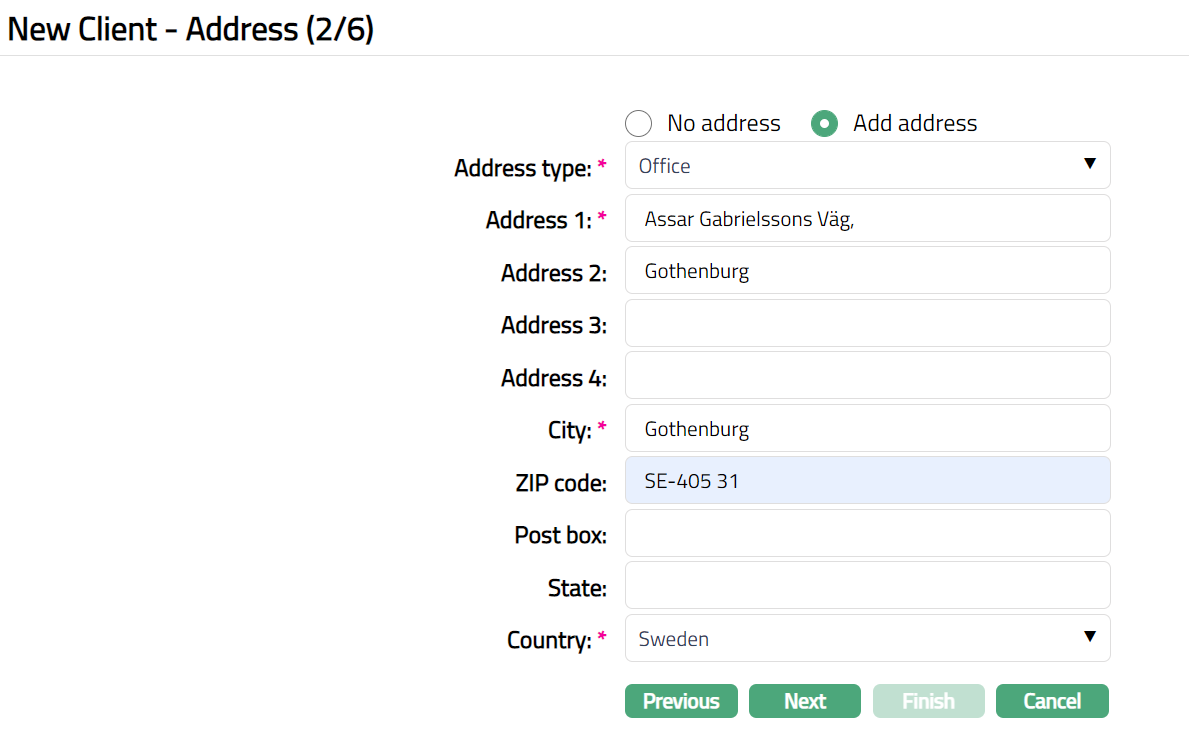
18. By default, No address is selected. If you do not want to record the address of the client at this stage, then you can select this option.
- If you want to enter the address, then click Add address button and provide the required details.
19. Select Address type from the available drop-down list maintained under Admin → System Codes → Address details → Address types.
20. Enter Address 1, 2, 3 and 4 of the client.
21. Enter City of the client.
22. Enter Zip code of the client.
23. Enter Post box of the client.
24. Enter State of the client.
25. Select Country from the drop-down list maintained under Admin → System Codes → Generic Definitions → Countries.
26. Click Next. New Client → Phone (3/6) page appears.

27. By default, No phone is selected. If you do not want to input the phone details at this stage, then you can select this option.
- If you want to enter the phone details, then click on Add phone button and provide the required details.
28. Select Phone type from the drop-down list maintained under Admin > System Codes > Address details > Phone types.
29. Enter Phone # of the client
30. Extension of the phone of the client.
31. Click Next. New Client -- Add New Client → E-Mail (4/6) page appears.
32. By default, No E-mail is selected. If you do not want to enter the E-mail details of the person at this stage, then you can select this option.
33. If you want to enter E-mail, then click Add E-mail and provide the required details.
34. Select E-mail type from the drop-down list maintained under Admin → System Codes → Address details → E-mail types.
35. Enter E-mail address of the person.
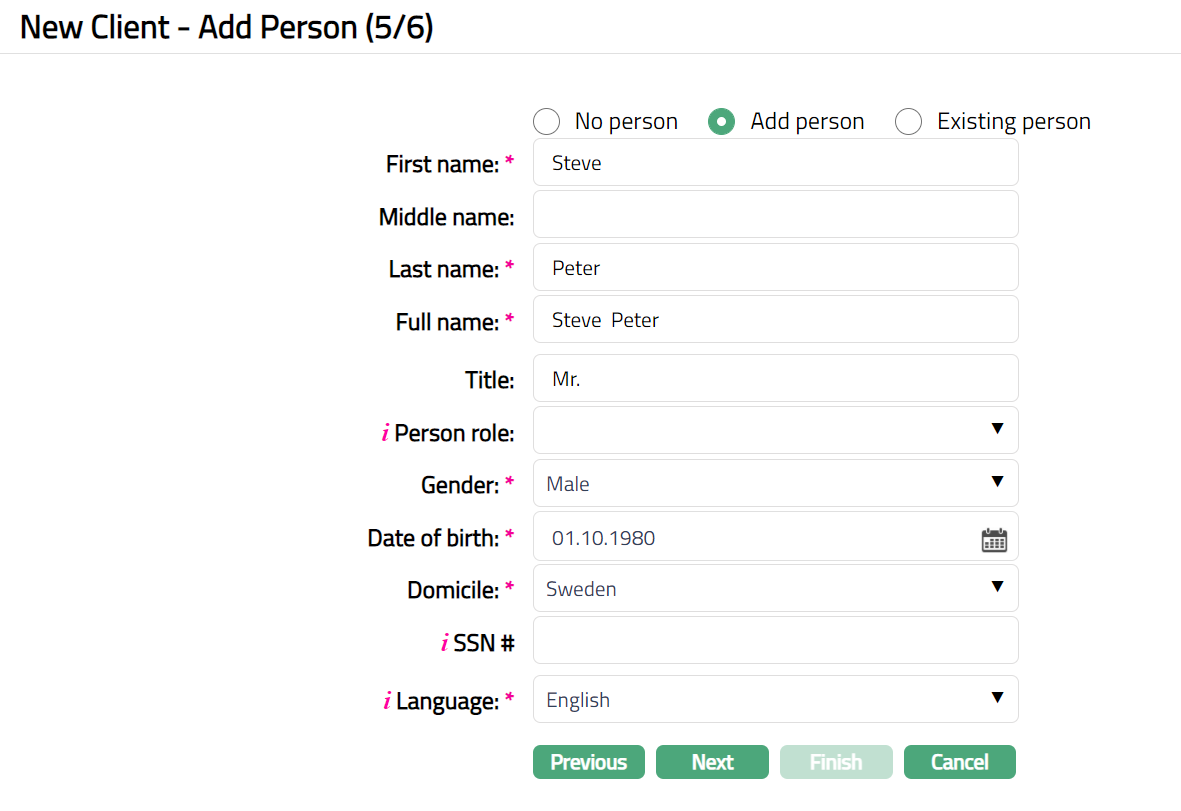
36. Click Next. New Client → Add Person (5/6) page appears.
By default, No person is selected. If you do not want to enter the details of the persons associated with the Organisation at this stage, then you can select this option.
If you want to enter the details of a person associated with the organisation who has already been created as a Person under CRM → Person → Maintain, then click on Existing person. Aura will display the Search Person window. Search for and select the required person.
If you want to enter the details of a person associated with the organisation who has not yet been created as a Person under CRM → Person → Maintain, then click on Add person and provide the required details.
1. Enter First name of the Person.
2. Enter Last name of the person.
3. On entering the First Name and Last Name system derives Full Name of the person. You can however edit it as needed.
4. Enter Title of the person that is to be prefixed to the person's First name.
5. Select the role of the person in the Organisation using Person role drop-down. System will not allow you to maintain the same role for the same organization for a person. The person role should have been maintained using Admin → System codes → Generic definitions → Person role.
6. Select Gender of the person from the drop-down list.
7. Select Language i.e. Language of the person from the drop-down list. The list of languages should have been maintained using Language Maintenance
8. Click Next. New Client → Confirmation (6/6) page appears.
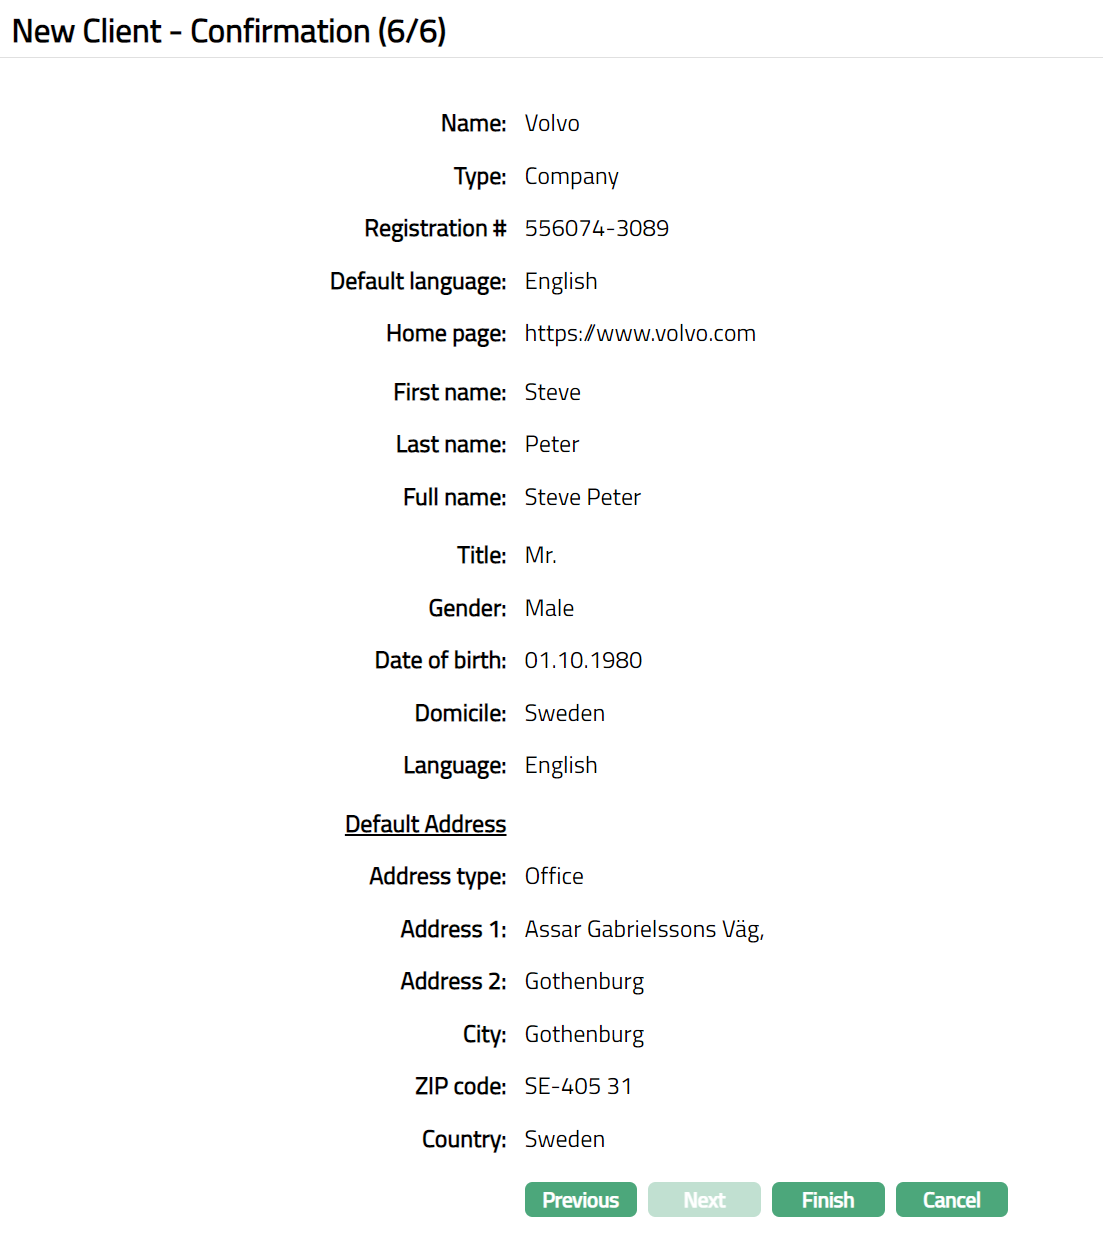
9. Click Finish to complete the addition of new client. New client detail is added with a unique Client # and Client Maintain page appears displaying the Profile tab.
Functions: Edit, Delete, Approve
Note: Details displayed for a Client Type -- Corporate are almost the same as that for a Personal client. Please refer to the relevant tabs in Client Type -- Personal for details.
Client type:
Joint
Where the client is a group of two or more persons, choose client type as Joint. The following are the tabs in client type -- Joint.
Profile
Categorisation
Settlement Instruction
Diary
Portfolio
Linked People
Documents
Beneficiary
KYC
Client details
Activity
Average Planned Monthly Balance
Average Planned Turnover
Custom Field
Status
To add new Joint Client,
1. From CRM menu, click Clients, and then Maintain. Client Search page appears. All Client types available in Aura appear on the page.
2. Click Add. New Client - Select Type page appears

3. Select Joint option for Client type field.
Note: Once you select the client type and click on Next, you cannot come back to change the client type.
4. Select Client Owner branch from the available drop-down list of active branches maintained under Admin → Branches. By default, the user's logged in branch is displayed.
5. Click Next. New Client - Beneficial Owner 1 → Add Person (1/11) page appears.


6. Similarly, you need to add the details of the Beneficial Owner-2
7. The personal details, address, phone and email details of two beneficial owners for the Joint client type can be entered during creation of the Joint client. Additional beneficial owners' details can be added during Edit. For explanation of the various fields that are to be entered, you can refer to the New Client Creation for Client Type -- Personal.
A sample of the confirmation screen after entering the details of two beneficial owners is shown below.
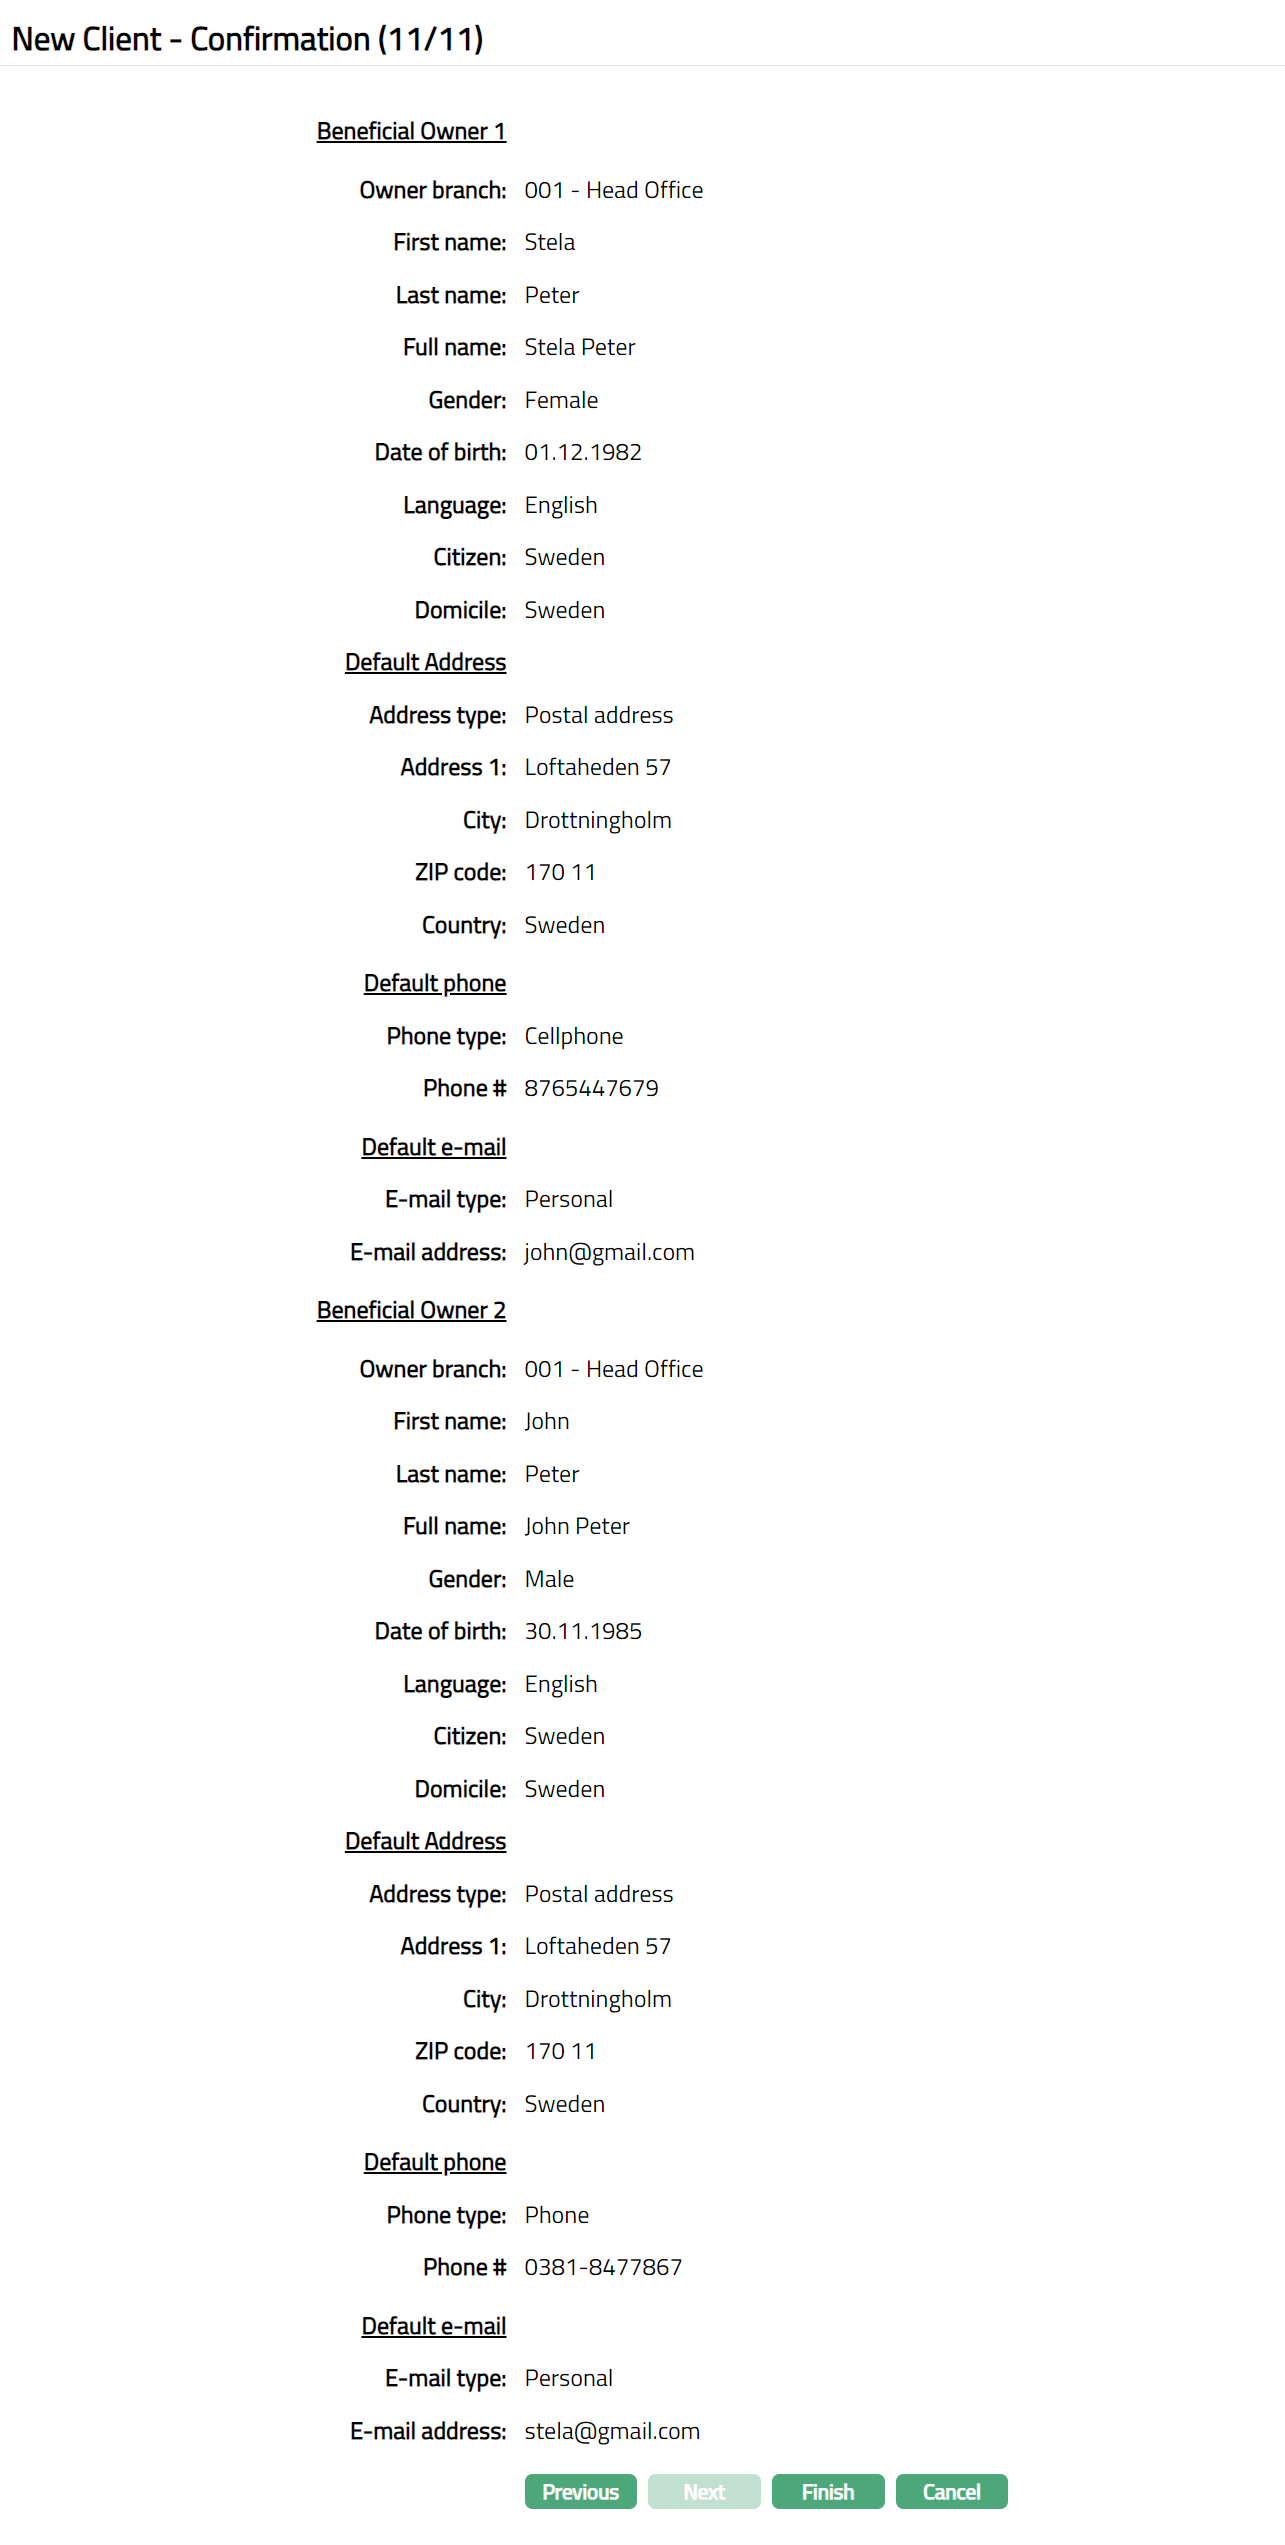
8. Click Finish to complete the addition of new client. The new client details are added with a unique Client # and you will see the Client maintain window displaying the Profile tab of the Client.
Function: Add, Search, Edit, Delete
Note: The details displayed for a Client Type -- Joint are almost the same as that for a Personal client. Please refer to the relevant tabs in Client Type -- Personal for all other details.
Note: However, the Beneficial ownership tab for a Client Type -- Joint is slightly different and is explained below.
Beneficial Ownership
Beneficial ownership allows you to maintain the details of the beneficial owners of client -- they would be the beneficial owners for all accounts associated with that client.
To Add the Beneficial Owners data,
1. Access Client page and click Beneficial Ownership tab.
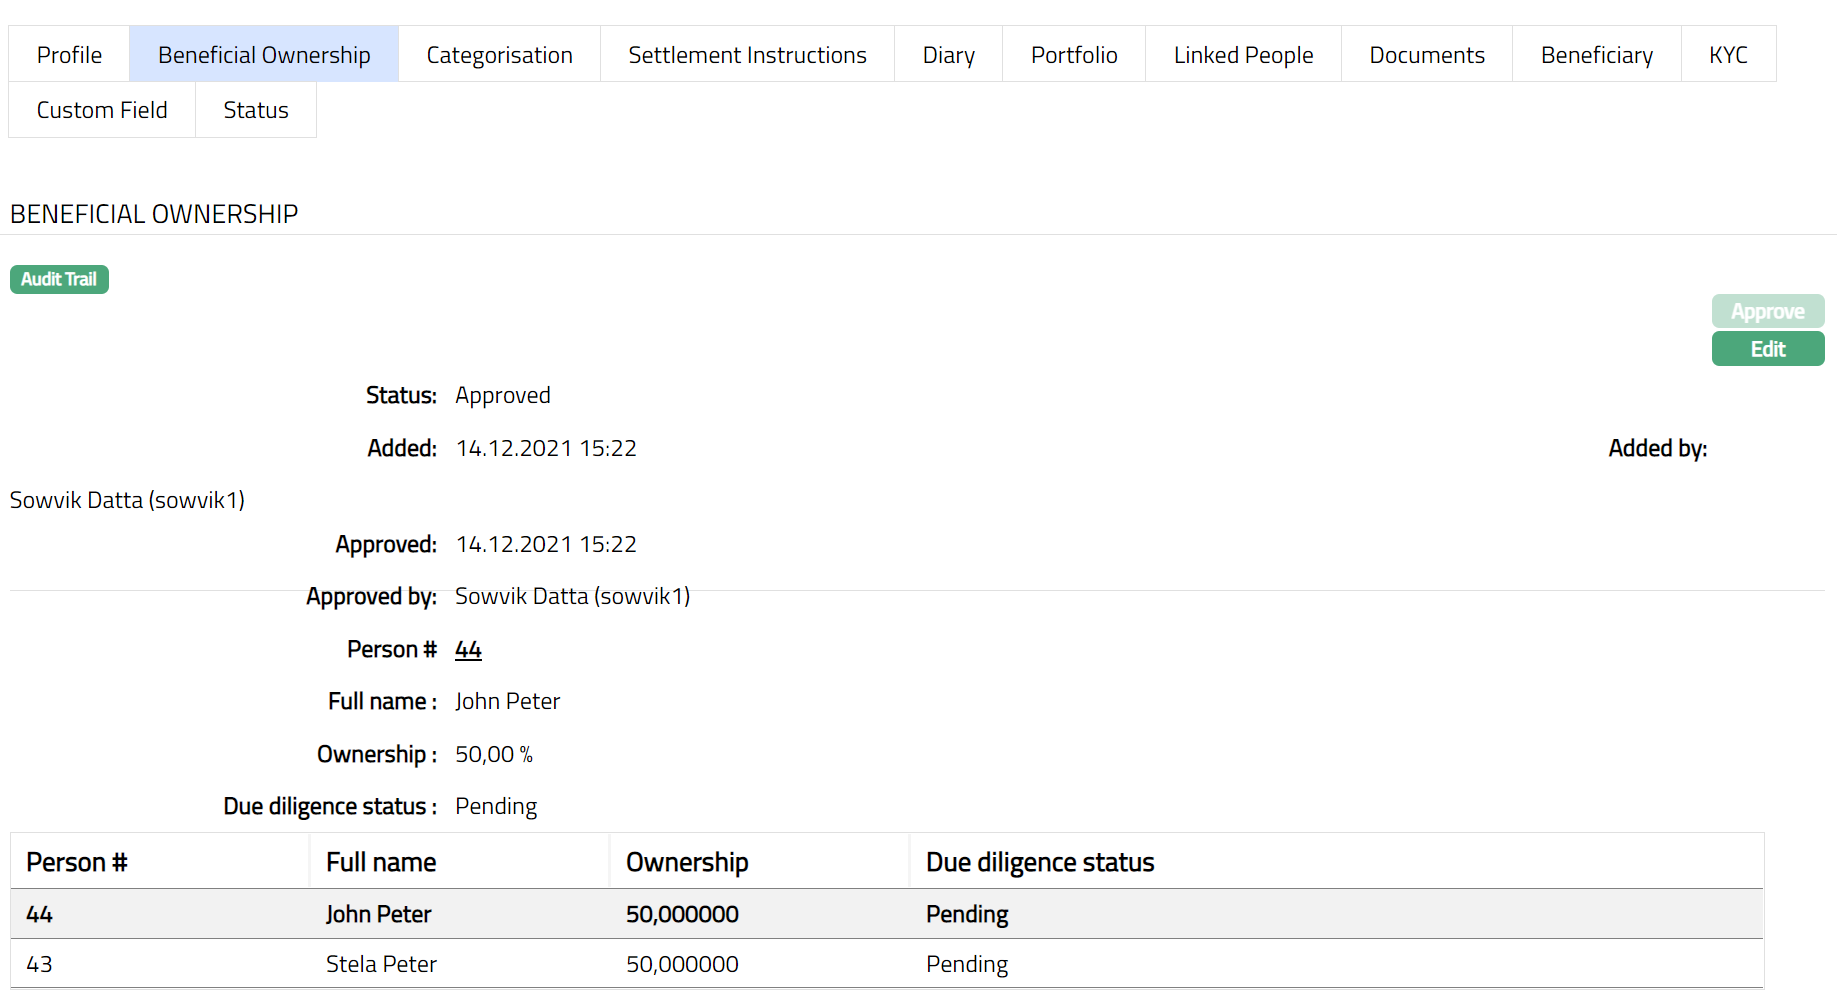
2. Details of the beneficial owners who have already been added to the Client will be shown with equal share in the ownership.
To Edit Beneficial Ownership,
1. Click on Edit. Edit Beneficial Ownership page appears.
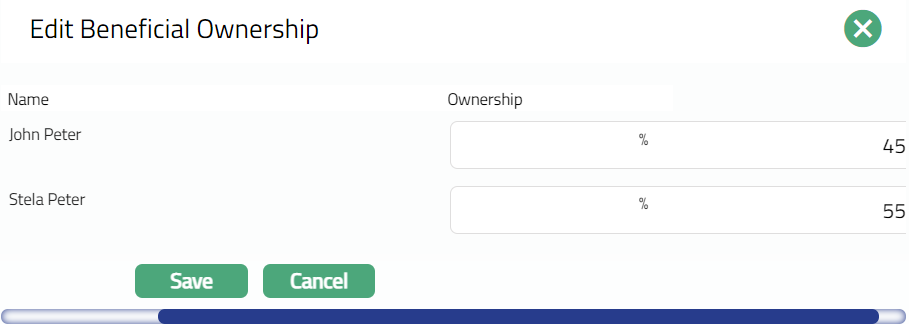
2. Once you Edit the shares % for both the Joint owners, click on save.
3. Once saved the Beneficial Ownership page appears with the edited details.
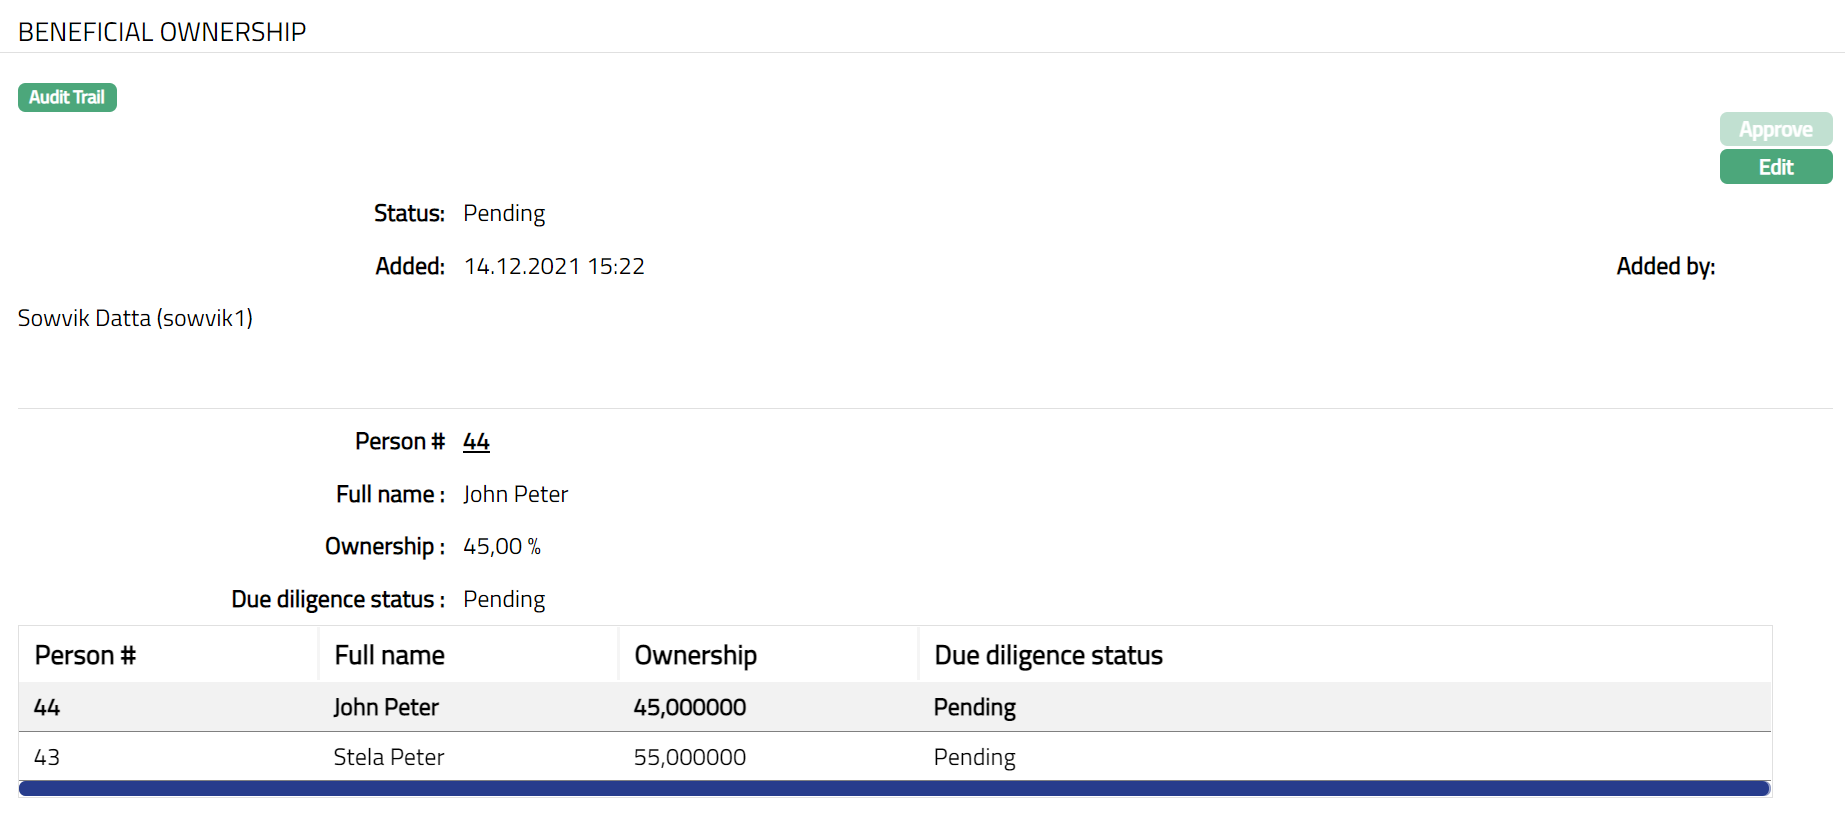
4. By default, the Due Diligence Status will with appear as Pending. Once approved by Authorised personal the status will change to Approved.
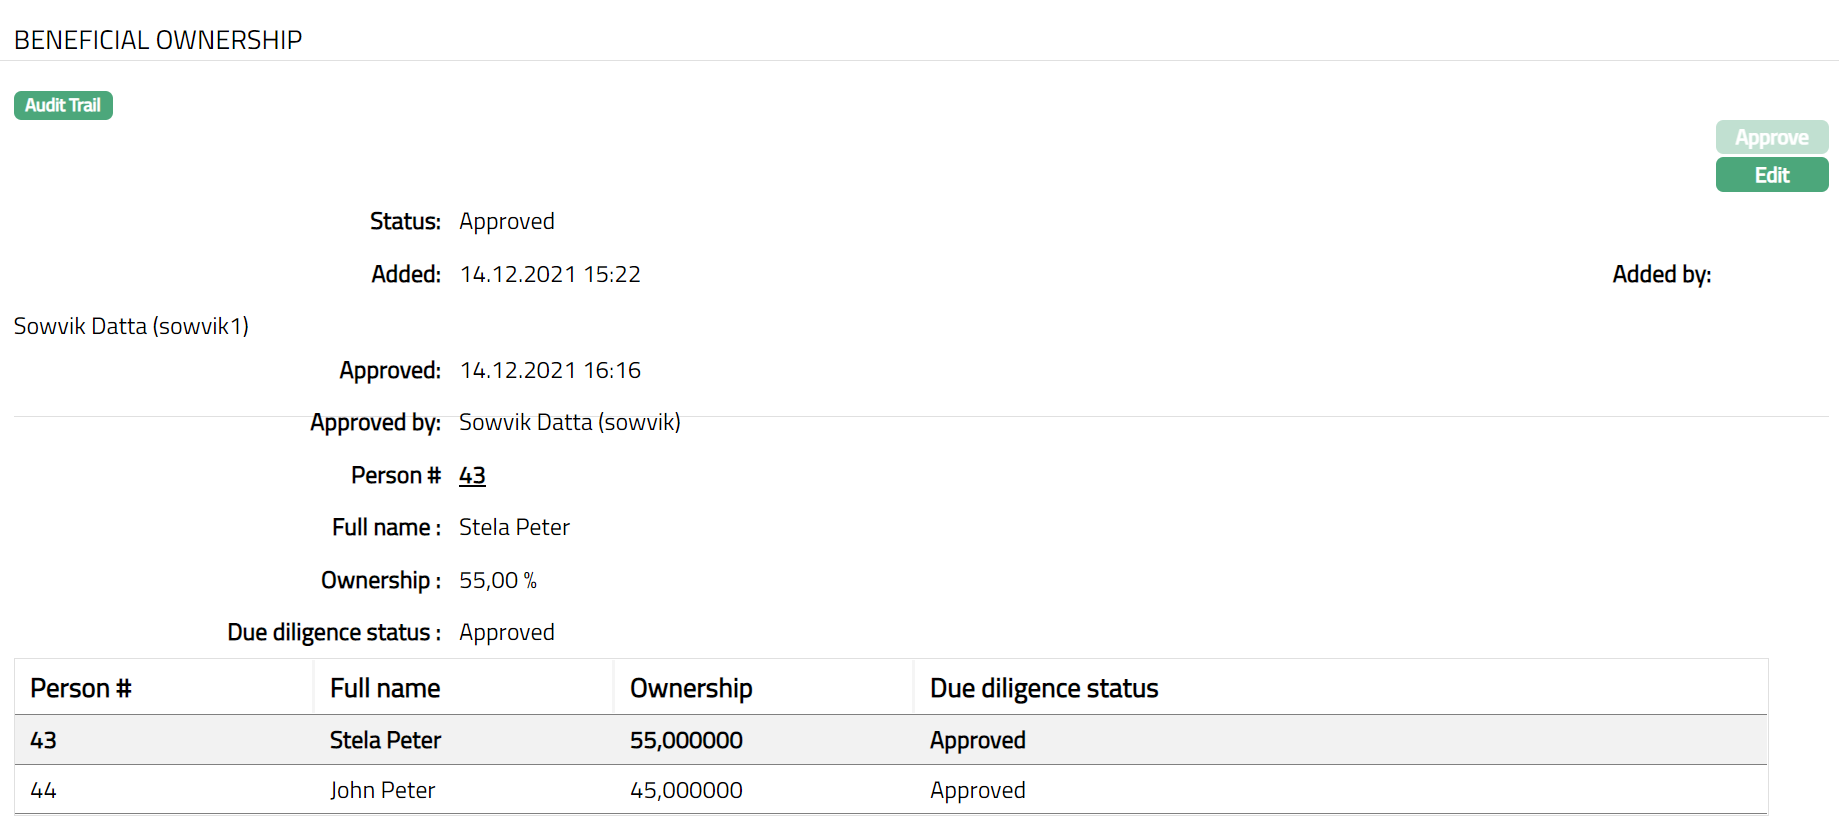
Functions: Approve, Edit
The additional fields that you can view in the Settings screen are explained below:
Status field denotes the status of the tab
Added field denotes the date on which the record was added.
Added by field denotes the name of the user who created the record.
Approved field denotes date on which the record was approved and is displayed only for approved records.
Approved by field denotes name of the authorized person who approved the record and is displayed only for approved records.