Authentication Settings
Aura provides multiple authentication methods to securely access your account. You can set up one or more methods based on your organization's access policies.
The available authentication methods are:
1. Username and Password
Standard login using credentials created within Aura.
This method is built into Aura and cannot be edited, suspended or tested.
All login, password management, and email notifications function as per Aura's default behaviour.
2. Microsoft Azure Active Directory Azure AD
Single Sign-On (SSO) using your organization's Azure AD credentials.
Provides centralized authentication while keeping user permissions managed within Aura.
Supports a Prompt field that controls how users interact during login (e.g., None, Login, Consent, Select account)
3. Google SSO
Single Sign-On (SSO) using a Google account.
Allows users to log in with their Google credentials while Aura manages authorization internally.
Includes the Prompt field with Google-specific options: None, Consent, Select account, and Select account + Consent.
Conditional fields like Tenant ID are hidden for Google SSo, as they are only relevant for Azure AD.
You can configure one or more of these authentication methods depending on your organization's security policies and user requirements. Aura intelligently determines which method to use based on the User ID during login, ensuring a seamless experience across all authentication types.
Note: For detailed rules and behaviour when logging in with external authentication methods (Azure AD or Google SSO), See here -- Authentication Behaviour
Microsoft Azure Active Directory (Azure AD)
Azure AD allows you to log in to Aura using your organizational Microsoft credentials. This Single Sign-On (SSO) method ensures secure access while keeping user authorization managed within Aura. You can configure Azure AD for individual users, set login behaviour using the Prompt field, and test the connection to ensure seamless authentication.
Once configured, you can log in using your organizational Azure credentials, while their access and permissions are still maintained within Aura.
To add an Authentication Setting for Microsoft Azure Active Directory (Azure AD),
1. From Admin menu, click Users and then Authentication Settings. Authentication Settings page appears.

2. Click Add. New Authentication Settings → General (1/2) page appears.
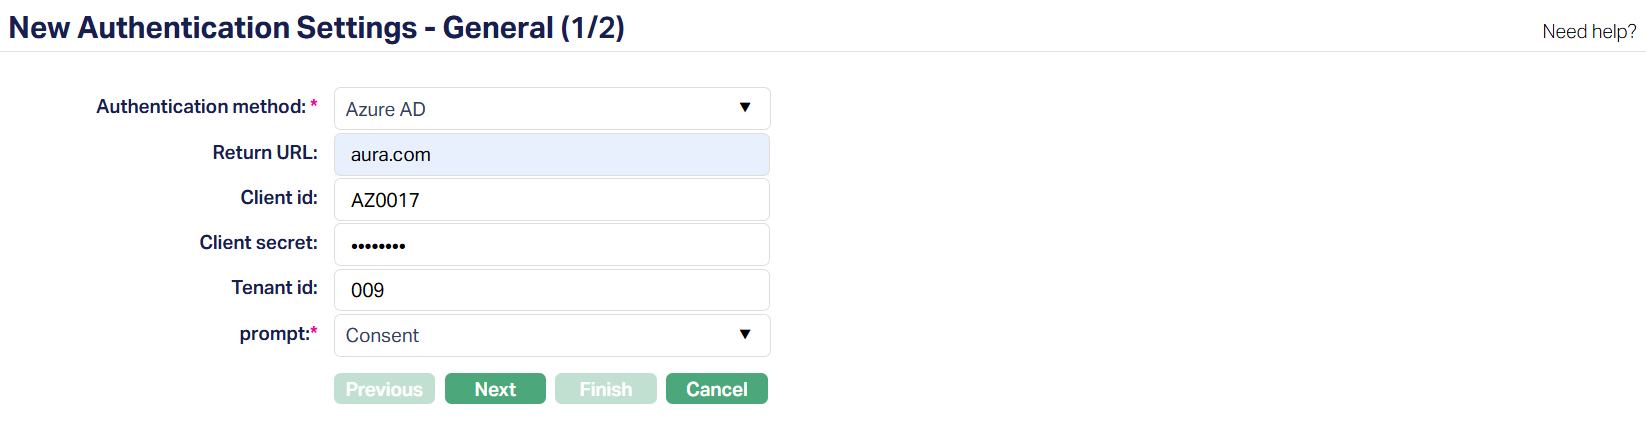
3. Select the Authentication method. The dropdown defaults to Microsoft Azure Active Directory (Azure AD). This determines the login mechanism Aura will use for the setting.
Other options include Username and Password (built-in) and, once configured, Google SSO.
Note: Aura displays only the fields relevant to the selected method.
4. Enter the Return URL registered in Azure AD. This is where Aura sends the user after they successfully authenticate with the external service. This must match the URL registered in Azure AD to ensure users return to the correct Aura environment.
5. Enter the Client ID. This uniquely identifies Aura to the external authentication service. This allows Aura to identify itself to Azure during authentication.
6. Enter the Client Secret (password) generated in Azure AD for the application. This secures the authentication process.
7. Specify the Azure AD tenant ID to which authentication requests should be sent. This ensures that the login request is directed to the correct organization's directory. This field is mandatory only for Azure AD and is hidden for other authentication methods like Google SSO.
8. Prompt - Select the type of interaction users will see during authentication. Available options for Azure AD include:
None - If the user is already authenticated with Azure AD, Aura attempts a silent login without showing the sign-in screen.
Login - Always requires the user to enter their Azure AD credentials, even if already signed in.
Consent - Displays the Azure consent screen, requiring the user to grant permissions every time.
Select Account - Prompts the user to choose from multiple signed-in Azure accounts.
The Prompt field allows you to control the authentication flow and is required for both Azure AD and Google SSO.
9. Click Next. New Authentication Settings → Confirmation (2/2) page appears.
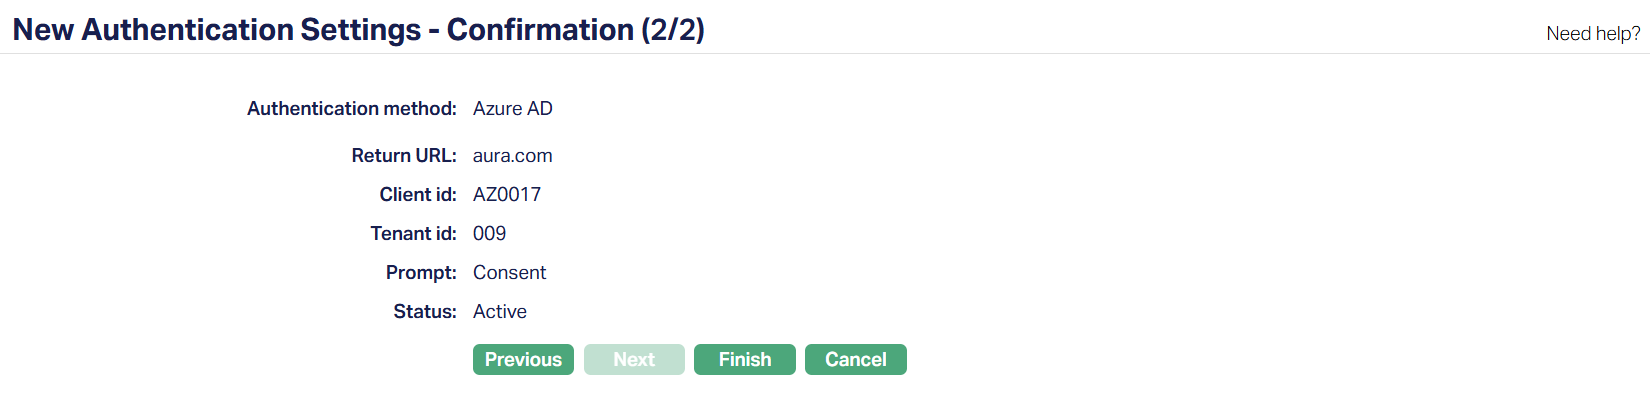
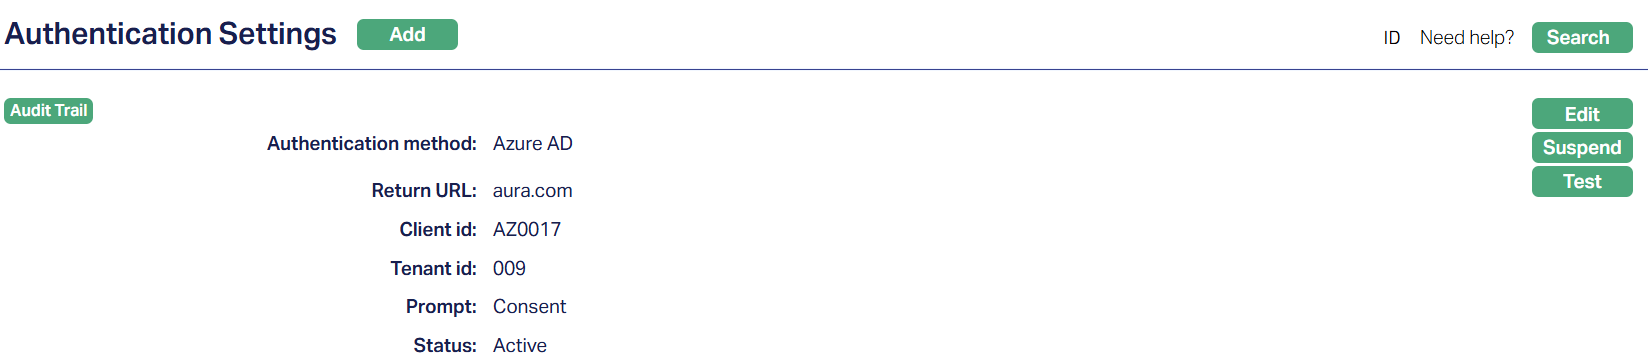
10. Click Finish. The Authentication Settings page will appear with the details you have entered.
Status of the record will be Active.
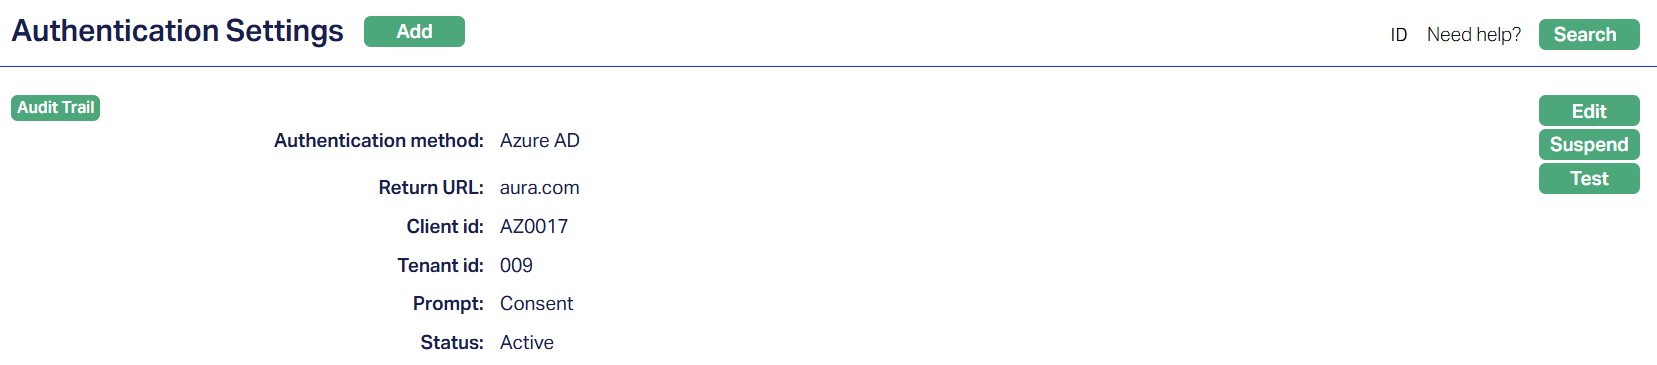
Functions: Add, Edit, Suspend, Test.
To edit an existing authentication method,
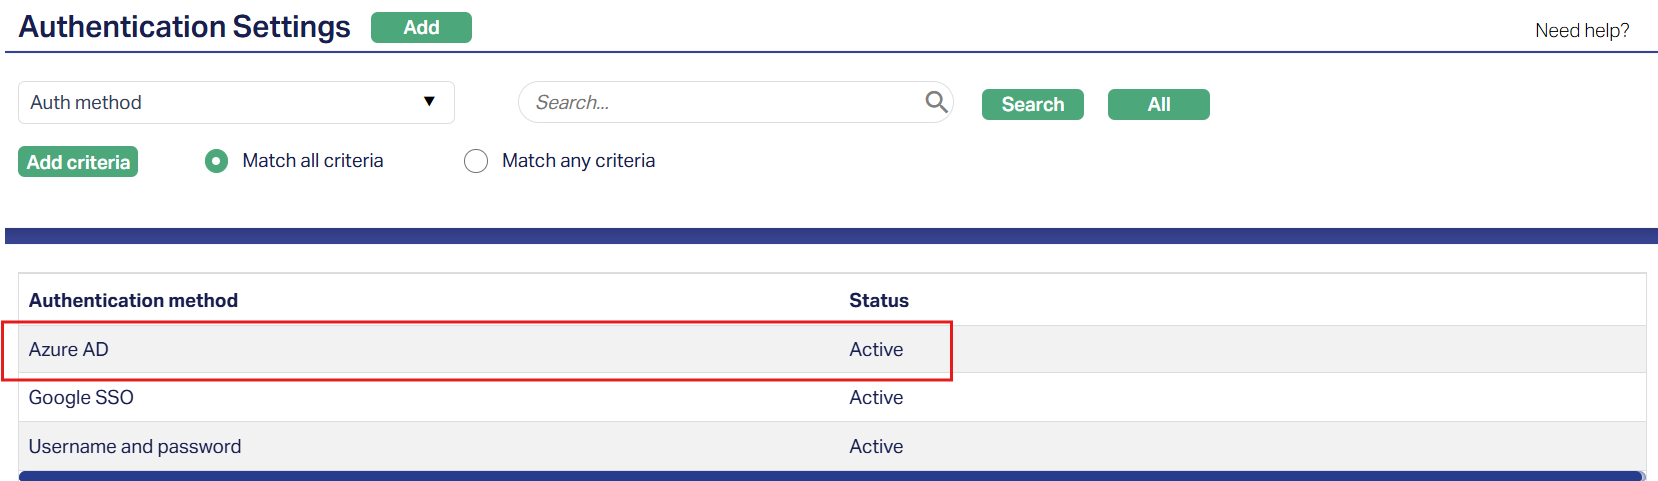
1. Access the Authentication Settings page and click on the active Authentication method you want to modify. Sample screen shown above.
2. Click Edit. Edit Authentication Settings pop-up will appear.
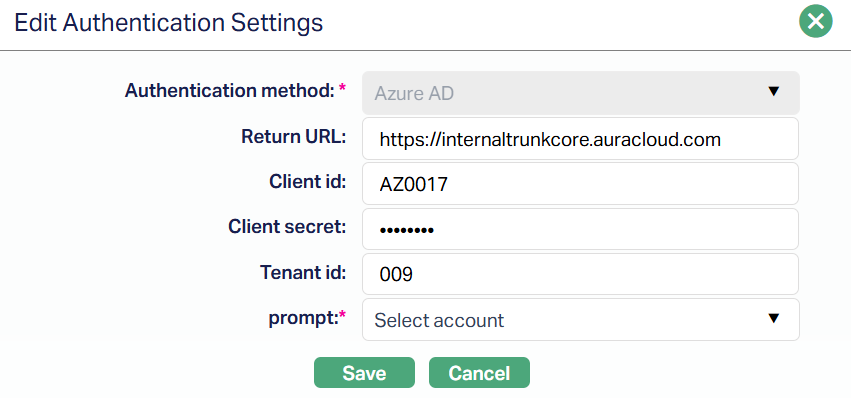
Note: All fields except the Authentication method are editable. You must re-enter the Client Secret before saving any changes.
3. Click Save. The Authentication Settings page appears with edited details.
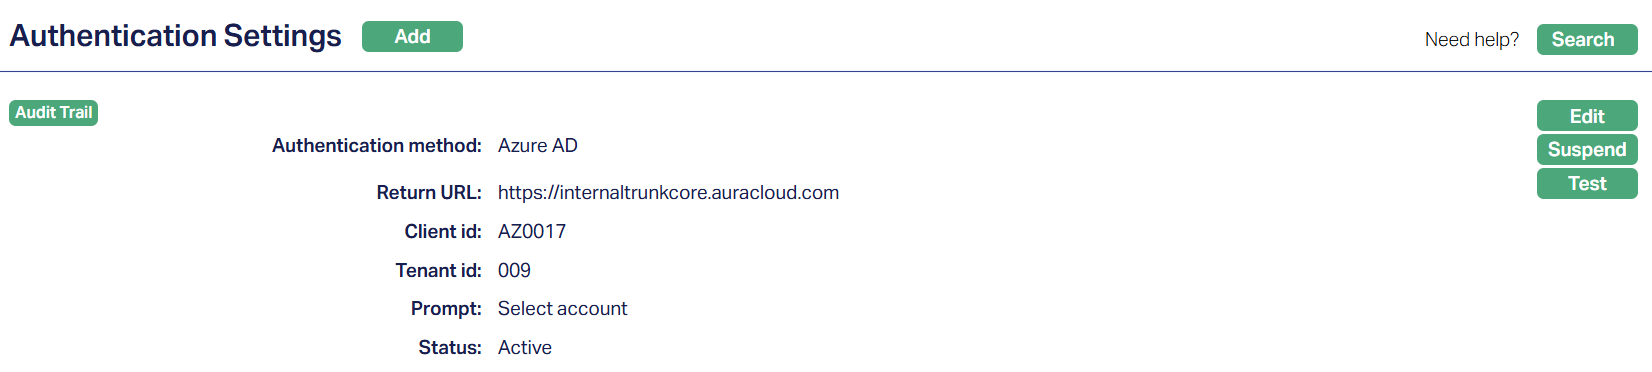
Functions: Add, Search, Edit, Suspend, Test.
Suspend: You can suspend Authentication Settings by clicking on the Suspend button. Aura will ask for confirmation when clicking the button. On confirmation, Aura will suspend the Authentication Settings and Activate button will appear in place of the Suspend button. The status of the Authentication Setting is set to Suspended. Any existing mapping will continue unaffected.
Activate: If you want to activate a suspended Authentication Setting then click on the Activate button. Aura will ask for confirmation. On confirmation, Aura will activate the Authentication Settings and Suspend button will appear in place of the Activate button. The status of the Authentication Setting is set to Active.
Test: The test button verifies if the authentication setup is working correctly by checking the provided credentials. Running a test ensures seamless login functionality.
Google SSO
Google SSO allows you to log in to Aura using your organizational Google Workspace credentials. This Sing Sign-On (SSO) method ensures secure access while keeping user authorization managed within Aura. You can configure Google SSO for individual users, set login behaviour using available parameters, and test the connection to verify a smooth authentication setup.
Once configured, you can log in using your organization Google credentials, while your access and permissions continue to be managed within Aura.
To add an Authentication Setting for Google SSO ,
1. From Admin menu, click Users and then Authentication Settings. Authentication Settings page appears.
2. Click Add. New Authentication Settings → General (1/2) page appears.
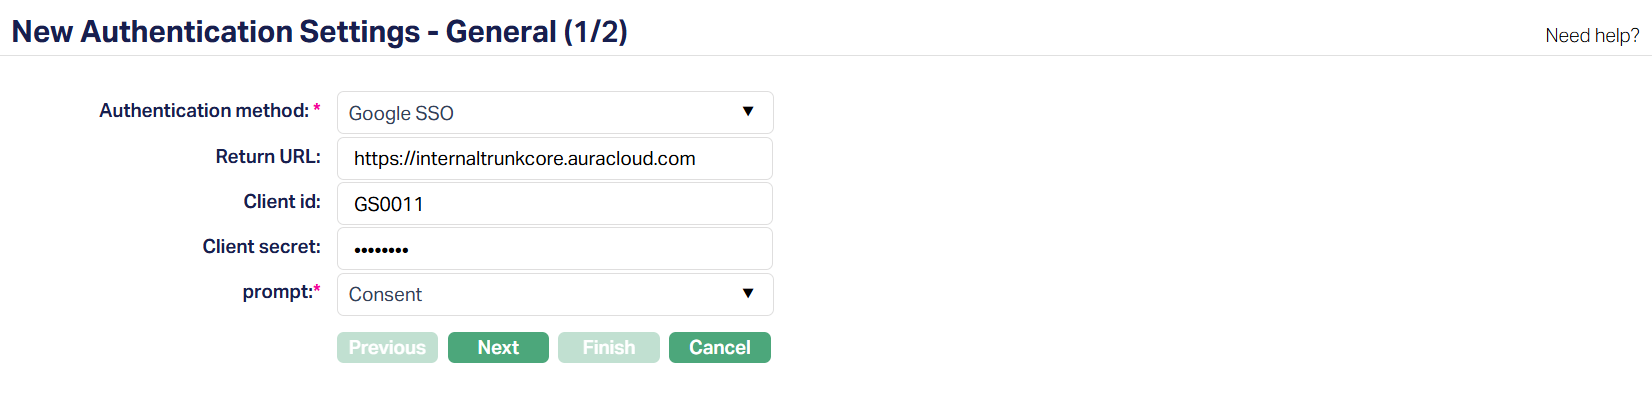
3. Select the Authentication method. The drop-down defaults to Microsoft Azure Active Directory (Azure AD). To configure Google login, select Google SSO. This determines the login mechanism Aura will use for the setting. Other options include Username and Password (built-in) and Azure AD.
Note: Aura displays only the fields relevant to the selected method.
4. Enter the Return URL registered in Google Cloud Console. This is the callback location where Google sends the user after successful authentication. The Redirect URL entered in Aura must exactly match the one configured in Google Cloud console to ensure the login flow works correctly.
5. Enter the Client ID. This is the unique identifier generated when Aura is registered as an OAuth 2.0 application in Google Cloud Console. The Client ID allows Aura to be recognized by Google Authentication.
6. Enter the Client Secret generated in Google Cloud Console. This is the secure key associated with the Client ID and must be entered exactly as provided to authenticate the connection.
7. Prompt - Select the type of interaction users will see during authentication. The available options for Google SSO are:
None - If the user is already authenticated with Google, Aura attempts a silent login without showing the Google sign-in screen.
Login - Always requires the user to enter their credentials, even if already signed in.
Consent - Displays the Google consent screen, requiring the user to grant permissions every time.
Select Account - Prompts the user to choose from multiple signed-in Google accounts.
Select Account and Consent - Combines both behaviours: the user must choose an account and re-grant consent.
The Prompt field lets you control how strict or seamless the login experience should be. It is mandatory for both Azure AD and Google SSO, but hidden for Username and Password authentication.
8. Click Next. New Authentication Settings → Confirmation (2/2) page appears.
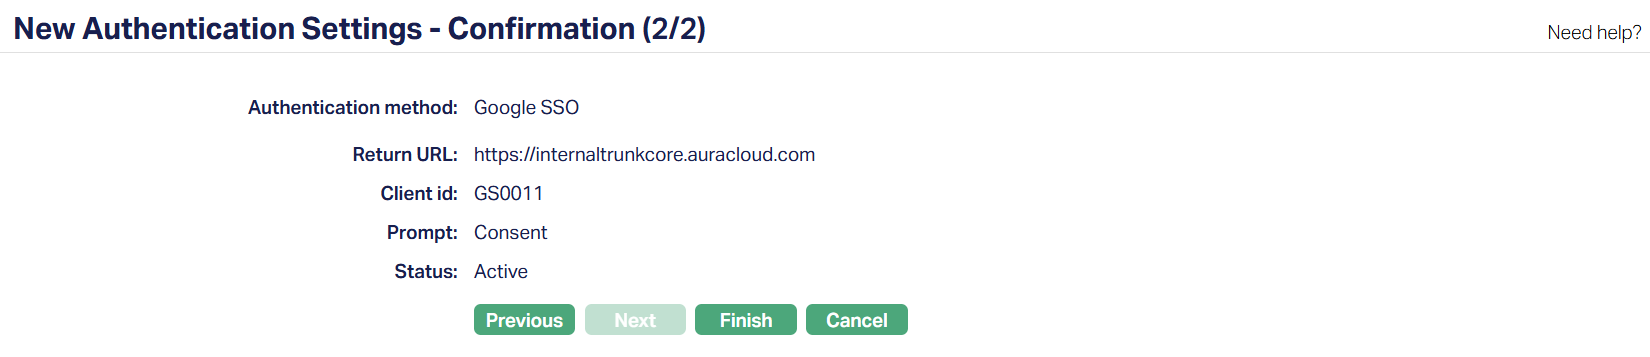
9. Click Finish. The Authentication Settings page will appear with the details you have entered.
Status of the record will be Active.

Functions: Add, Edit, Suspend, Test.
To edit an existing authentication method,
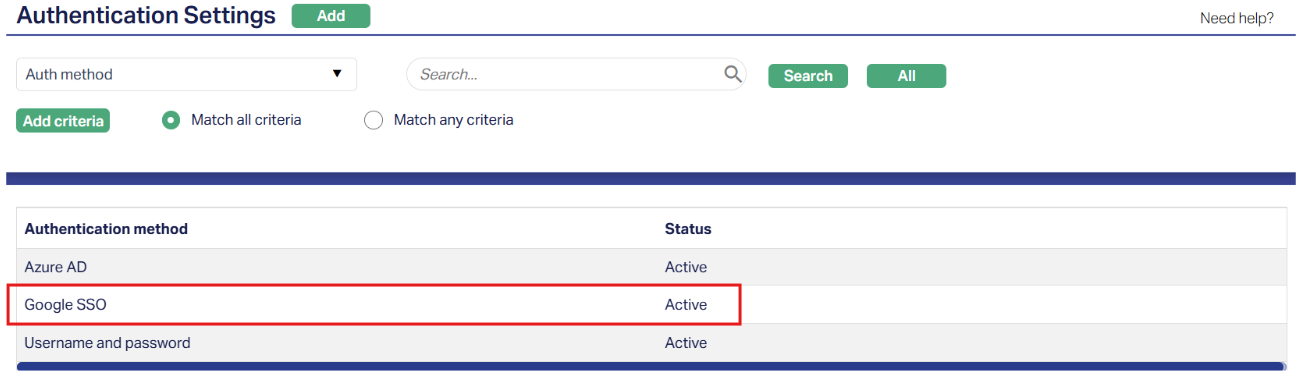
1. Access the Authentication Settings page and click on the active Authentication method you want to modify. Sample screen shown above.
2. Click Edit. Edit Authentication Settings pop-up will appear.
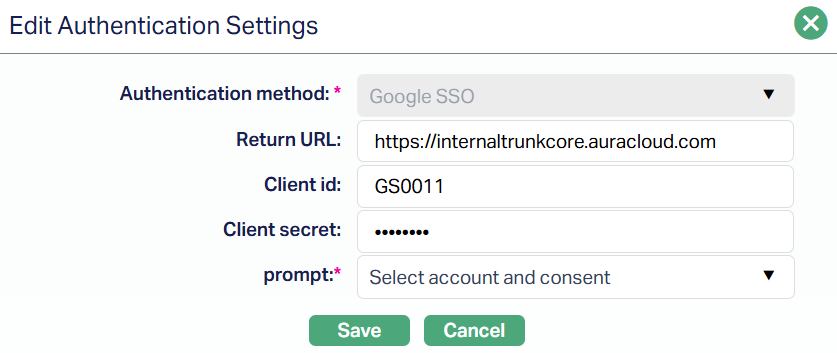
Note: All fields except the Authentication method are editable. You must re-enter the Client Secret before saving any changes.
3. Click Save. The Authentication Settings page appears with edited details.

Functions: Add, Edit, Suspend, Test.
Suspend: You can suspend Authentication Settings by clicking on the Suspend button. Aura will ask for confirmation when clicking the button. On confirmation, Aura will suspend the Authentication Settings and Activate button will appear in place of the Suspend button. The status of the Authentication Setting is set to Suspended. Any existing mapping will continue unaffected.
Activate: If you want to activate a suspended Authentication Setting then click on the Activate button. Aura will ask for confirmation. On confirmation, Aura will activate the Authentication Settings and Suspend button will appear in place of the Activate button. The status of the Authentication Setting is set to Active.
Test: The test button verifies if the authentication setup is working correctly by checking the provided credentials. Running a test ensures seamless login functionality.
Authentication Behaviour
When using external authentication methods such as Microsoft Azure AD or Google SSO, Aura leverages standard OAuth 2.0 protocols to securely validate and authorize users.
These external authentication methods allow you to log in with your organizational credentials, while Aura continues to manage user roles, permissions, and access control.
To ensure a smooth and secure login experience, the following rules apply:
Timeout Handling: The authentication process has a timeout of 36 seconds. If the login is not completed within this time frame - due to network issues, delays in the external provider, or user inaction, Aura automatically redirects you back to the login page. You will need to start the authentication process again.
This prevents incomplete or stalled authentication attempts from leaving your session in an uncertain state.Email Consistency: The email address you enter on the Aura login screen must exactly match the email used for authentication with the external provider (Google or Microsoft). If the emails do not match, Aura will not allow you to log in.
This rule ensures that the Aura user account is correctly linked to a verified external identity, preventing unauthorized access and maintaining consistent user mapping.Unique Mapping: Each Aura user account must be linked to a single external identity. Switching between different Google or Microsoft accounts for the same Aura user is not supported. If multiple users share a single external account, or if an Aura user attempts to log in with a different external account, the login will fail.
This rule ensures that each user's access, permissions, and activity are accurately tracked and managed within Aura.Username validation: During authentication, Aura validates the email provided by the external provider against the configured username for the Aura account. If the validated email does not match the Aura username, access is denied.
This additional check ensures that only the authorized user can access the system and that roles and permissions are correctly enforced.Seamless Single Sign-On Experience: When using Azure AD or Google SSO, Aura attempts to provide a seamless login experience. If you are already signed in to your external provider, Aura can perform a silent login (depending on the Prompt setting), reducing the need to repeatedly enter credentials while maintaining security.
These authentication rules are designed to align with the best practices in identity and access management. By enforcing timeout handling, email consistency, unique mapping, and username validation, Aura ensures that external authentication remains secure and compliant with organizational policies.