Placement Plan
Placement refers to the process of selling securities to investors. A Placement Plan is the overall strategy for this sale, while Placement Instructions are the specific, actionable steps to execute that plan. When an investor is ready to invest their funds into the Marketplace, the Placement Plan is used to record the details of the overall investment. Based on the Preferences that the investor indicates for Fresh Investments into specific Asset Types, the Placement Instructions are created.
The most significant input in a Placement Plan is the Amount ready to be invested. Based on this amount and the Asset Allocation Preferences for New Funds, the system creates multiple Placement Instructions – one each for each Asset Type. The details of the Allocation from the Client’s Marketplace Preferences as well as the Placement Instructions that were created can be seen from the relevant tabs.
The Placement Plan is not created for auto-investments.
The Placement Plan Maintenance page has the following tabs:
To Add a Placement Plan
1. From the Retail menu, click on Peer to Peer, Placement Plan and then Maintain. The Placement Plan search page appears.

2. Click Add. The New Placement Plan → Profile (1/2) page appears.
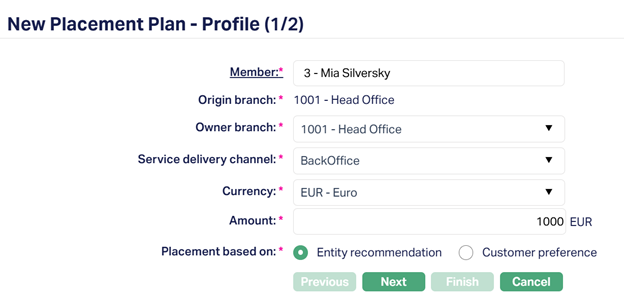
3. Select the client for the Placement Plan by clicking the Member hyperlink, which opens up a Client Search page from the list of available/existing Clients maintained in CRM → Clients → Maintain. Alternatively, you can type one or more characters in the text-box and select the client from the list provided by Aura.
4. The Origin branch (where the Client record was added/created) is auto-filled from the selected Client in the Member hyperlink.
5. Select the Owner branch (the branch to which the Client belongs or opened the account from) from the drop-down list of active branches maintained in Admin → Branches → Maintain.
Note: The Origin Branch and Owner Branch of the Client can be viewed in CRM → Clients → Maintain.
6. Select the default Service delivery channel that will be used for transactions initiated by the Backoffice. You can select the required Service Delivery Channel from the drop-down list of active channels maintained in Admin > System codes > Categories > Service delivery channel.
7. Select the Currency to be used as a default currency for the Placement Plan from the drop-down list of active currencies maintained in Admin → System codes → Currency → Currency.
8. Enter the Amount to be invested for the Placement Plan.
9. In Placement based on, select whether the Placement Plan would be based on Entity recommendation or Customer preference by selecting one of the two radio buttons.
- If Placement Based On = Entity Recommendation: The Asset Allocation will be defaulted from the details specified and maintained under Retail → Peer To Peer → Settings → Marketplace Preferences → Entity Recommendation. If relevant details are not available, an error message will be displayed.
- If Placement Based On = Customer Preference: The Asset Allocation will be defaulted from the details specified and maintained under CRM → Clients → Marketplace Investment Preferences. If relevant details are not available, an error message will be displayed.
10. Click Next. The New Placement Plan → Confirmation (2/2) page appears.
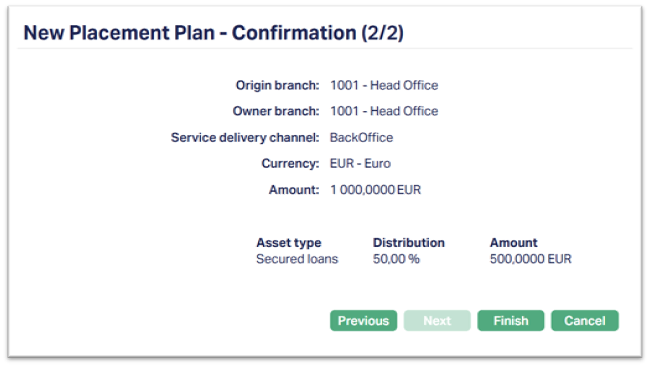
The confirmation page shows a list of the values you entered for the fields shown in the previous page.
The additional fields that appear on the confirmation page are:
- Asset type: This is the type of pre-shipped assets that is recommended/allocated to the Client for investment. The available Asset Types are Unsecured Loans, Secured Loans, Subordinate Loans and High-Risk Loans.
- Distribution: This specifies the percentage of the Amount that will be actually invested by the Placement Plan.
- Amount: This specifies the actual Amount that will be invested through the Placement Plan, and is calculated automatically by taking a percentage of the Amount allocated for the Placement Plan. The percentage amount is the Distribution value from the previous field.
All the above 3 fields are defaulted from the values entered and maintained in Retail → Peer To Peer → Settings → Marketplace Preferences → Entity Recommendation or CRM → Clients → Marketplace Investment Preferences, depending on the selected Placement Based On.
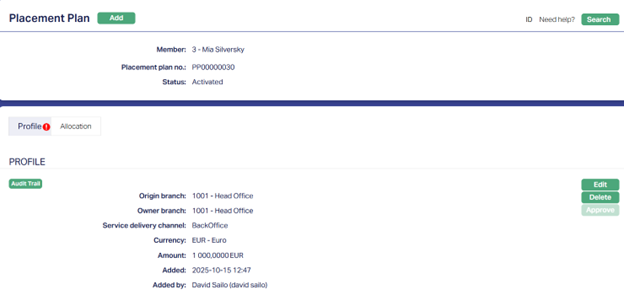
11. Click Finish. The Placement Plan maintenance page appears with the newly added details.
Functions: Add, Search, Edit, Delete, Approve.
The maintenance page of the new Placement Plan appears, with a unique auto-generated Placement plan no., the Placement Plan Status as Activated and the Record Status as Pending.
To View/Search a Placement Plan,
1. From the Retail menu, click on Peer to Peer, Placement Plan and then Maintain. The Placement Plan search page appears. Initially, no records will be displayed by default.

2. Click the Search Criteria from the drop-down list. You can search using the following search criteria:
- Currency
- Member #
- Member name
- Placement plan no.
- Status
3. Enter the relevant value in the search text-box associated with the selected Search Criteria. For example, if you select Status as a Search Criteria, then select either Pending or Approved from the drop-down list of values.
4. Click Search. Aura will display the available/existing records that match your selected Search Criteria.
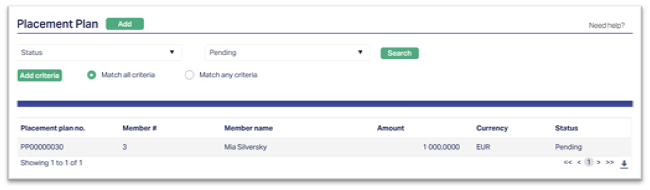
The Search results are displayed in a grid with the following fields:
- Placement plan no.
- Member #
- Member name
- Amount
- Currency
- Status
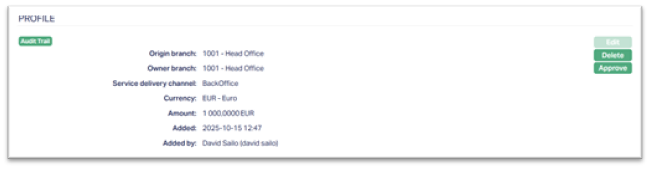
Profile
The Profile tab, which is the default tab, displays the main details of the Placement Plan entered during the addition/creation of the same.
To Edit the Profile,
1. Access the Placement Plan maintenance page. The Profile tab is opened by default.
2. Click Edit. The Edit Placement Plan → Profile page appears.
Note: You can only Edit the Profile of those Placement Plans whose Record Status are Pending. After Approval by a different user, the Profile can no longer be edited.
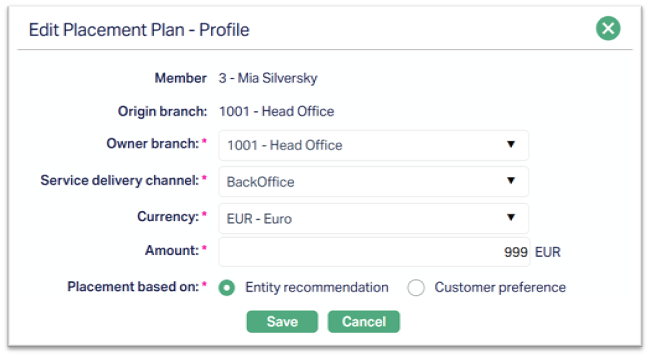
All the fields can be edited, except Member and Origin branch.
3. Make the required changes and click Save. The changes will be reflected on the page.
Functions: Edit, Delete, Approve.
Delete: You can terminate/suspend a Placement Plan by clicking the Delete button. Aura will ask for confirmation. After confirming, the Placement Plan will be deleted from the system, and any Placements/Investments will no longer be triggered by it, or linked to it.
Approve: On creation of a new Placement Plan, the Record Status will be
Pending by default and a red bubble appears on the Profile tab.
Once the record is Approved by a different user, the Record Status gets changed to Approved and the red bubble on the tab disappears.
Allocation
The Allocation tab is used to view the allocation details of the investments made or to be made through the Placement Plan. The Allocation tab is in view-only mode.
To View the Allocation Details,
Access the Placement Plan maintenance page and click the Allocation tab. The Allocation page appears.
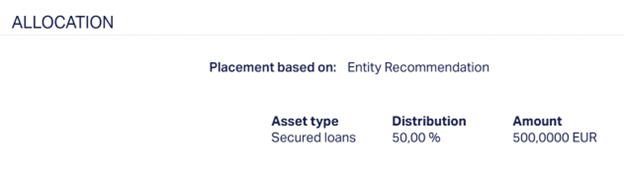
The various fields that appear on the Allocation page are:
- Placement based on
- Asset type
- Distribution
- Amount