Interface definition
This menu option allows you to set up linkages to partners / affiliates who are allowed to connect to your Aura installation. It is important that you understand fully the consequences of allowing third-parties to connect to your Aura installation and ensure that the connection is made properly so that the third-party is allowed to do only what you wish it to do.
To add new Interface definition
- From Admin menu, click System Codes, Interface definition, and then Maintain. Interface Search page appears. All Interface definitions available in Aura appear on the page.
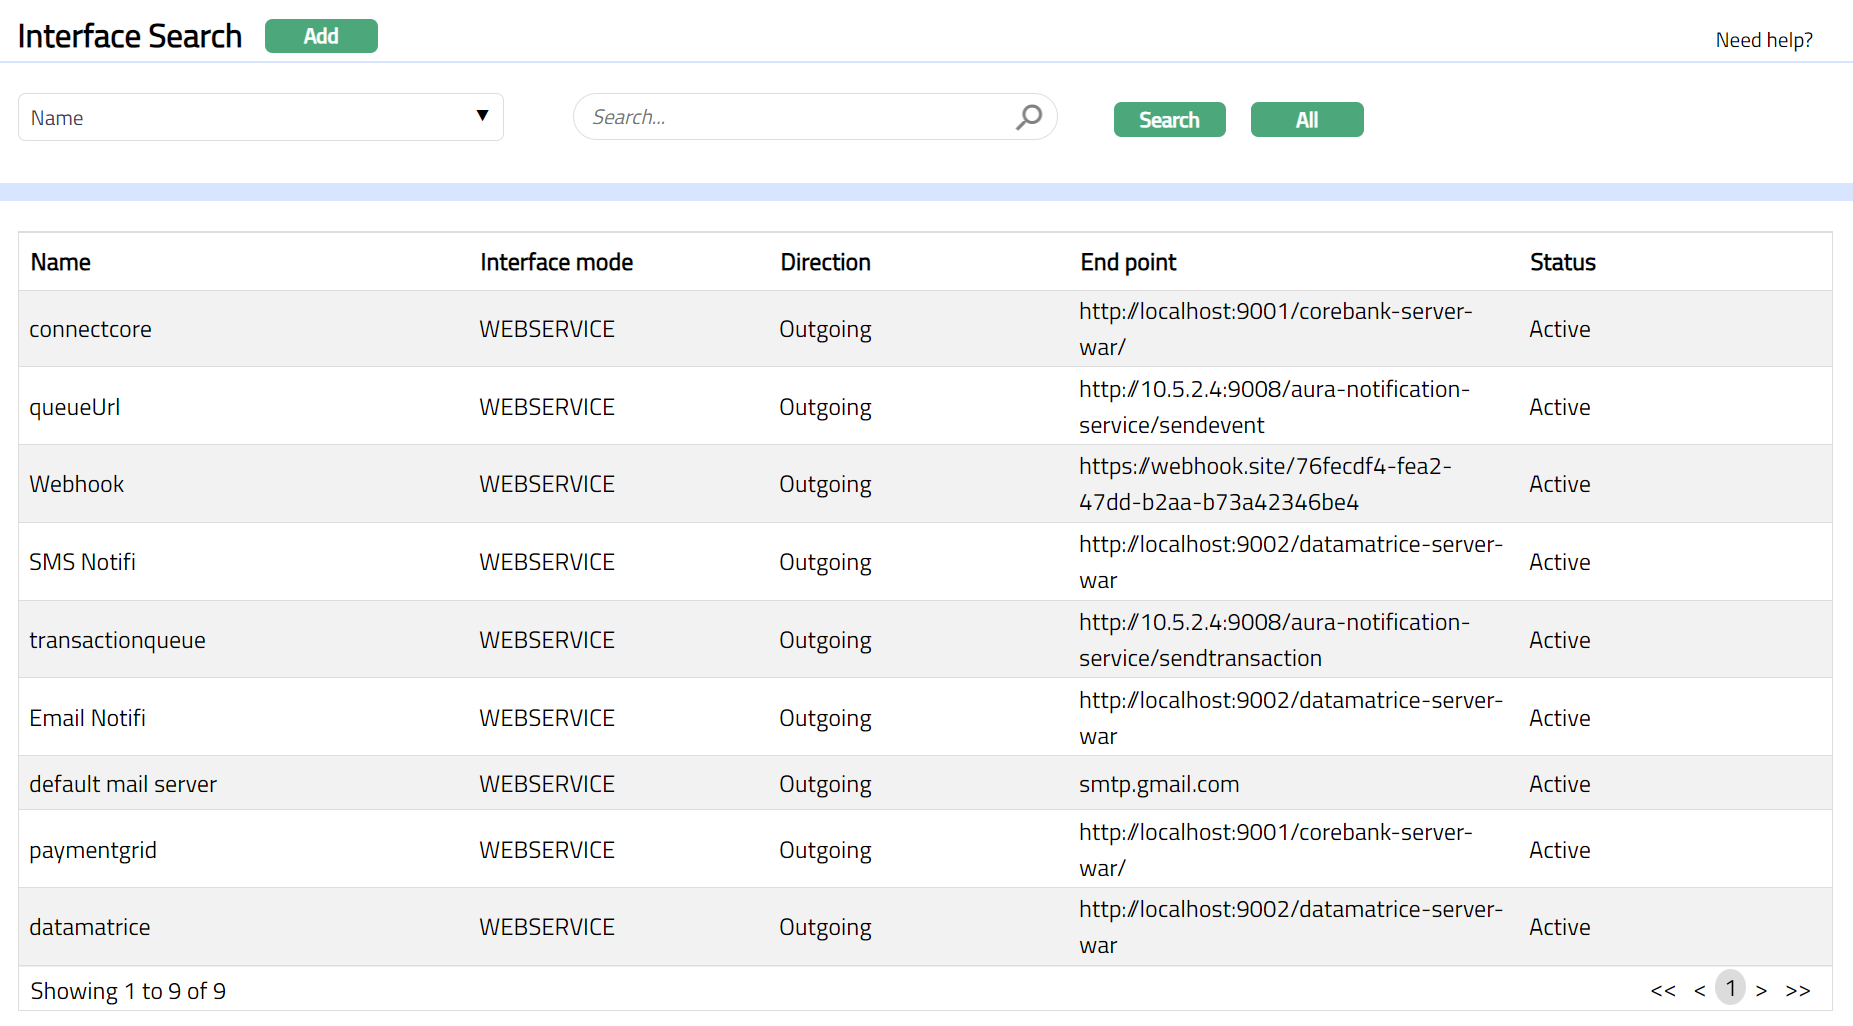
- Click Add. New Interface -- (1/2) page appears.
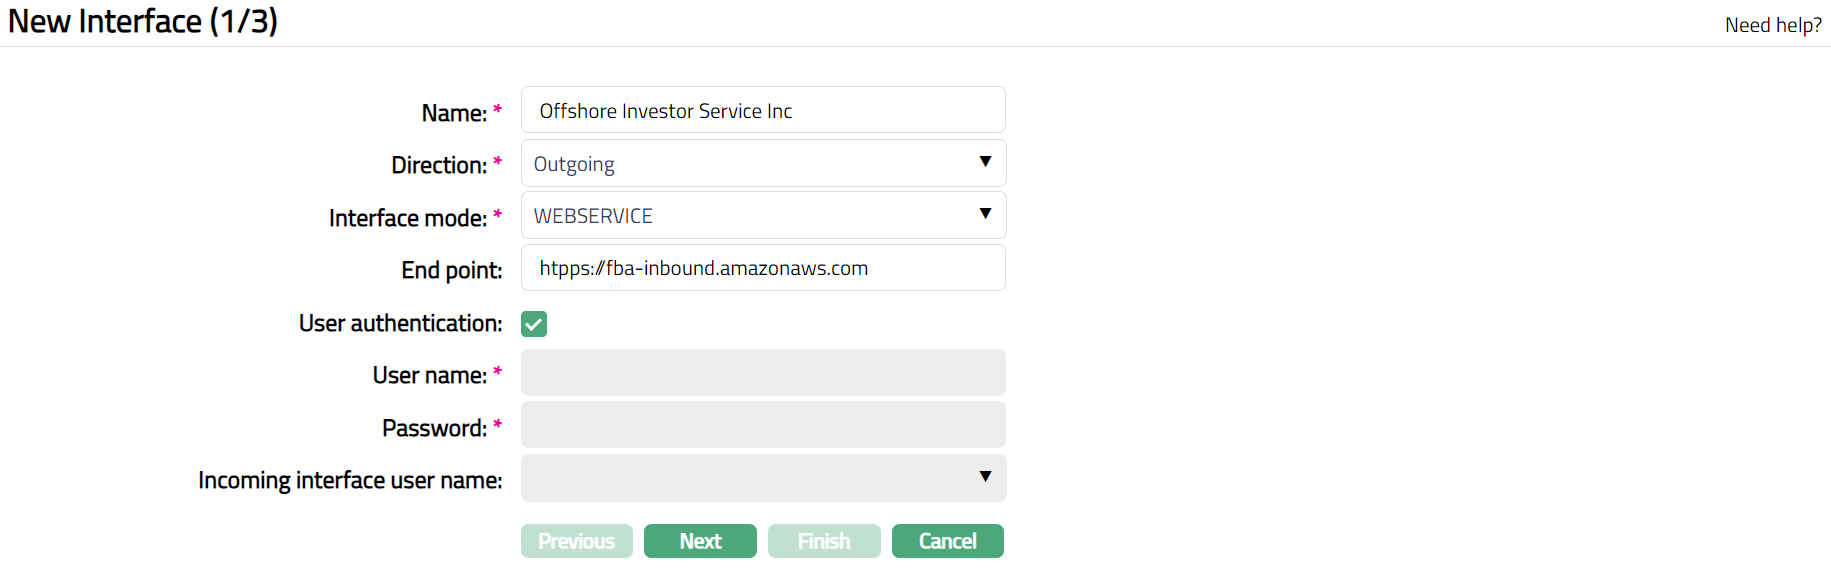
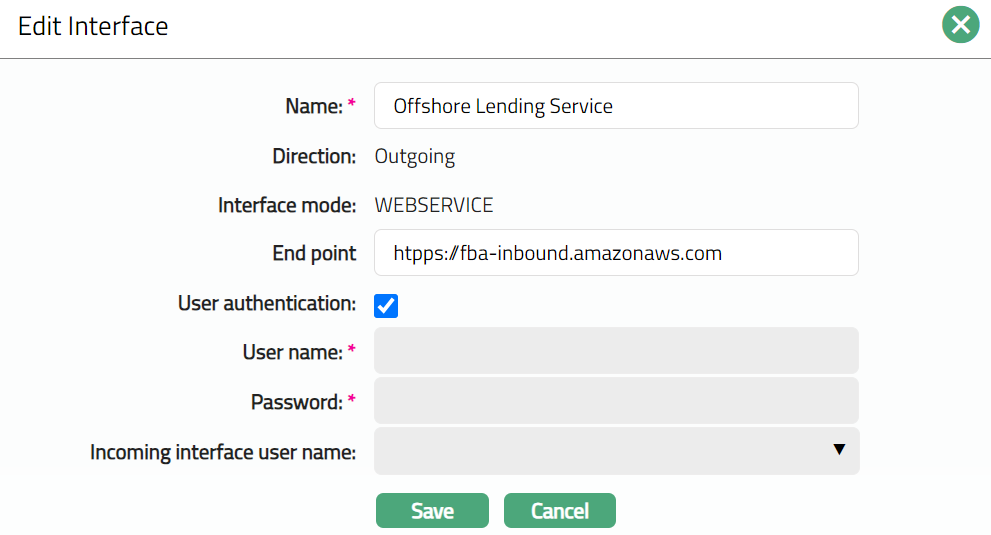
Enter Name for the Interface.
Select Direction from the drop-down list -- Outgoing for connections that Aura has to establish with an external system; and Incoming for connections that an external system has to establish with Aura.
Select Interface mode from the drop-down list. For example, WEBSERVICE
Input the specific location for accessing the service using the specific protocol and data format against End point.
If you have selected Direction Outgoing, you need to check or uncheck User authentication. If you check User authentication, it means that the Aura user should use the specific user id and password as defined under the Interface tab in User Maintenance for accessing the interface. If User authentication is unchecked, it means that the Aura user has to use the username and password specified in the next two fields,
Enter Username and Password to access the Interface, when User authentication above is unchecked.
Incoming interface username is to be input when an external system is allowed to access Aura and has to use a specific username and password for the same. These drop-down display list of users that are defined with Type as 'External' in User Maintenance.
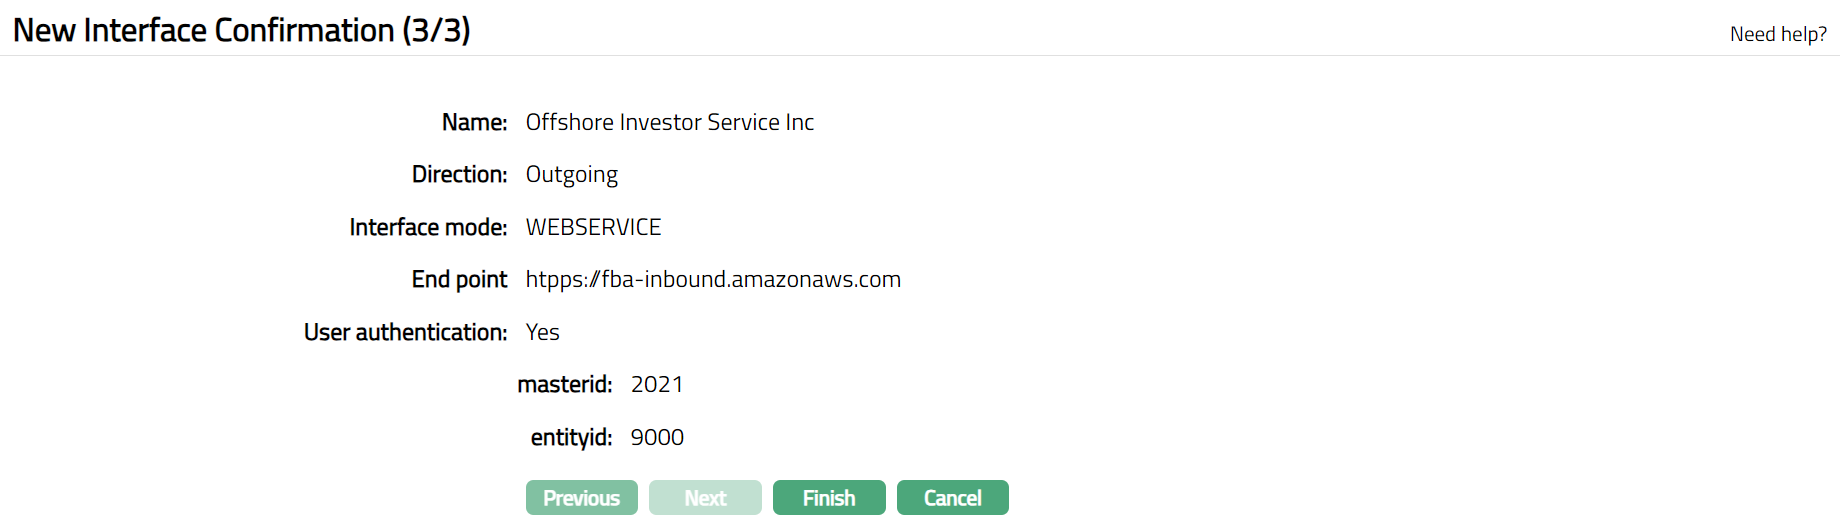
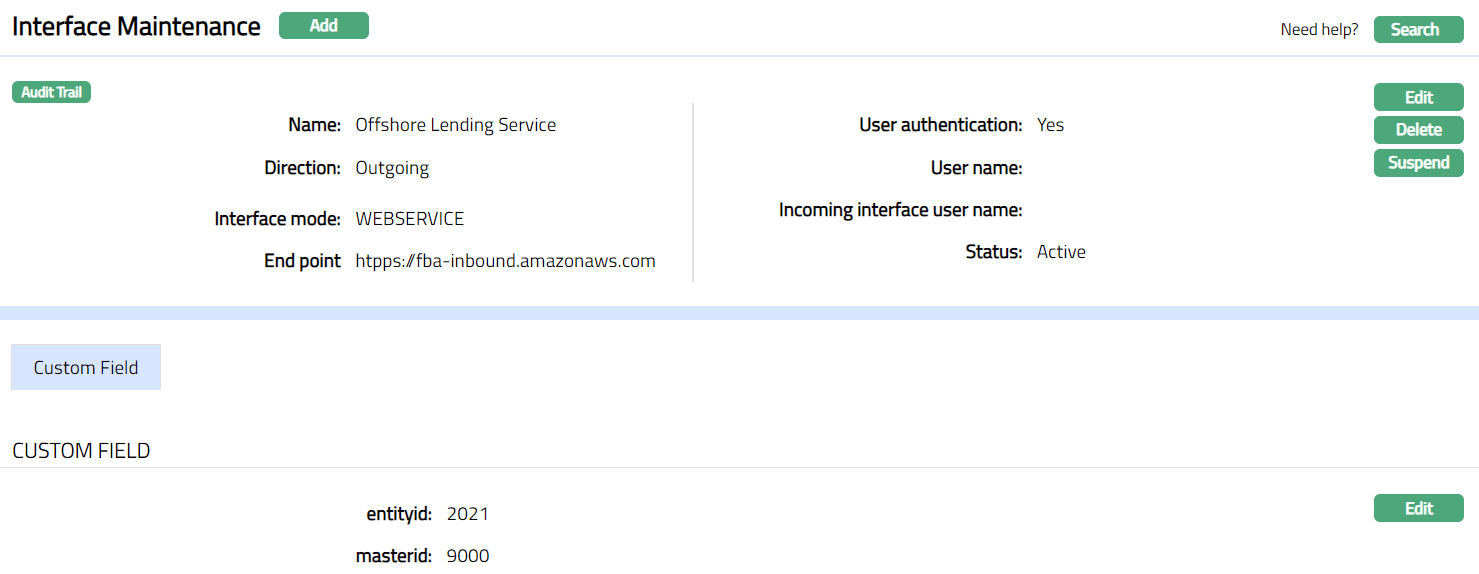
Access Custom Fields page to enter the entityid and masterid.
Click Next. Maintain Custom Field Details (2/3) page appears.

- Click Next. New Interface Confirmation (3/3) page appears displaying the details of the Interface and Custom Fields you added.
- Click Finish. Interface Maintenance page appears with the added details.
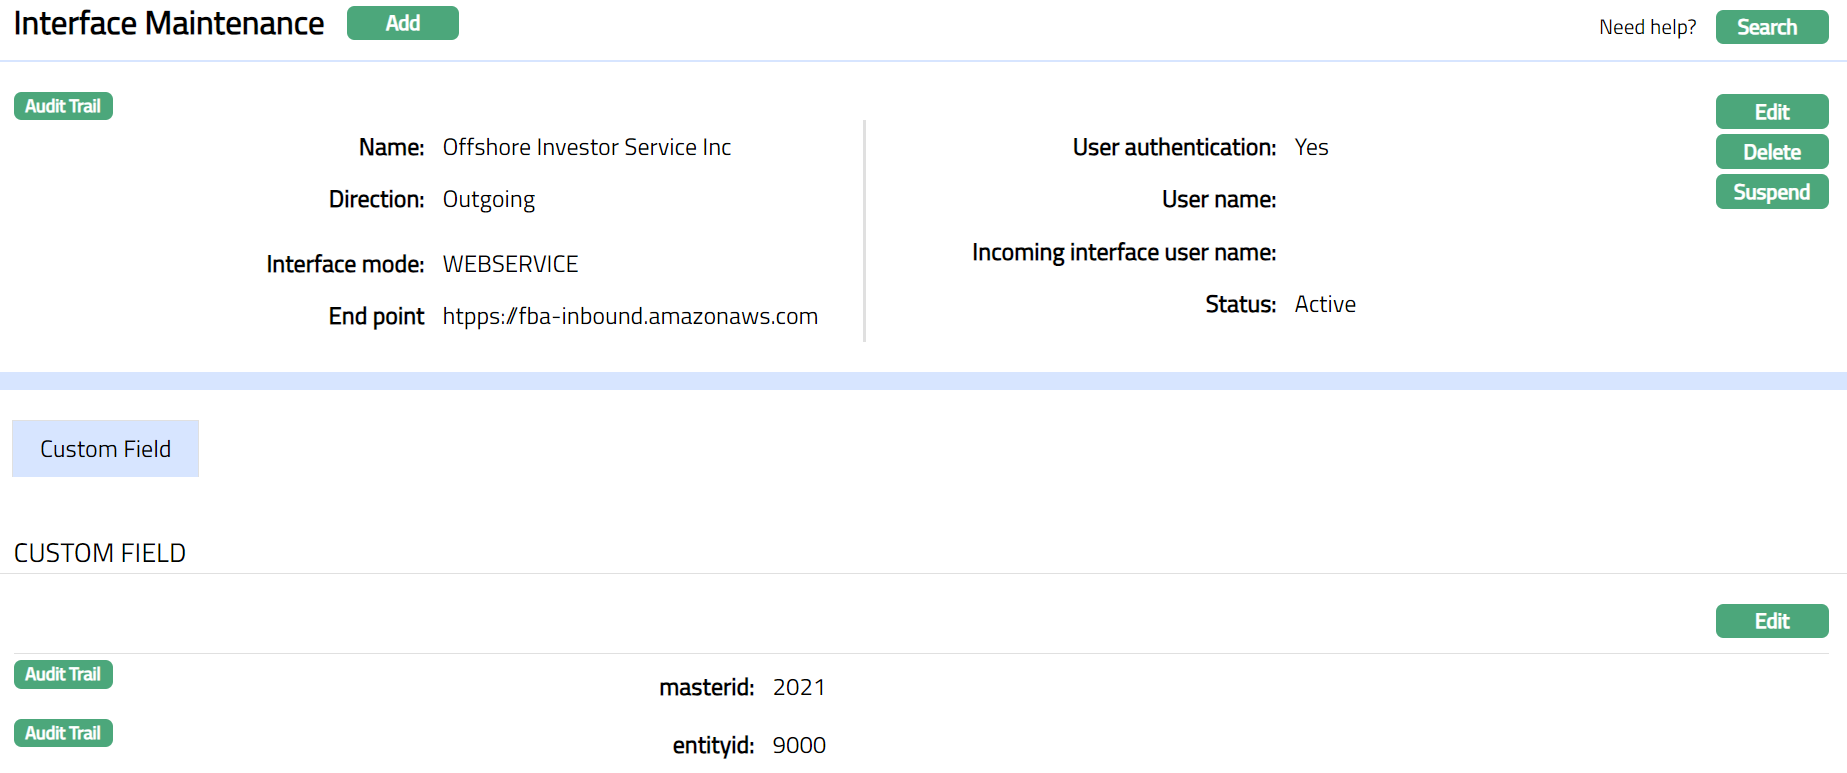
Functions: Add, Edit, Delete, Search, Suspend, Activate
Suspend: If you want to suspend an Interface record then click on Suspend button. Aura will ask for confirmation. On confirmation Aura will suspend the Interface record and Activate button will appear in place of Suspend button.
Activate: If you want to activate a suspended Interface record record then click on Activate button. Aura will ask for confirmation. On confirmation Aura will activate the Interface record and Suspend button will appear in place of Activate button.
To Edit the Interface record
Access Interface page.
Click Edit. Edit Interface page appears.
- Make required changes and click Save. The Interface Maintenance page appears with the updated details.
Functions: Add, Edit, Delete, Search, Suspend, Activate
Delete: You can delete an Interface record by clicking on Delete button. Aura will ask for confirmation, on approving which selected record will be deleted.
To Edit Custom Field
- Click Edit. Edit Custom Field page appears.

- Make required changes and click Save.
 Functions: Edit
Delete: You can delete a Custom Field record by clicking on Delete button. Aura will ask for confirmation, on approving which selected record will be deleted. Custom Field record can be deleted until it is used in Aura application.