Role Group
Role group is to combine various roles to form new role groups in Aura. A single Role or multiple Roles can be attached to a Role group.
To add new Role group
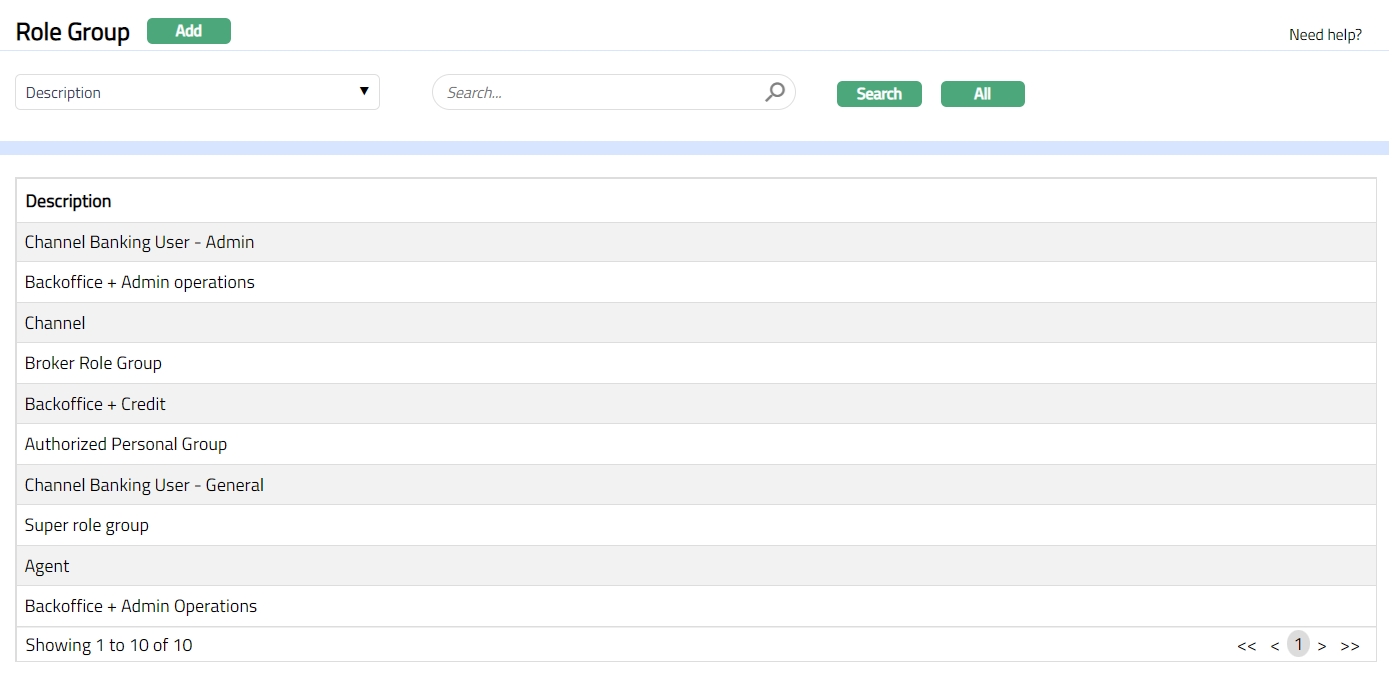
- From Admin menu, click User and then Role Group. The System will display the Role group search page. The list of all the Role groups maintained in Aura will be displayed.
- Click Add button to add a new role group, New Role Group Details Step (1/2) screen will appear.
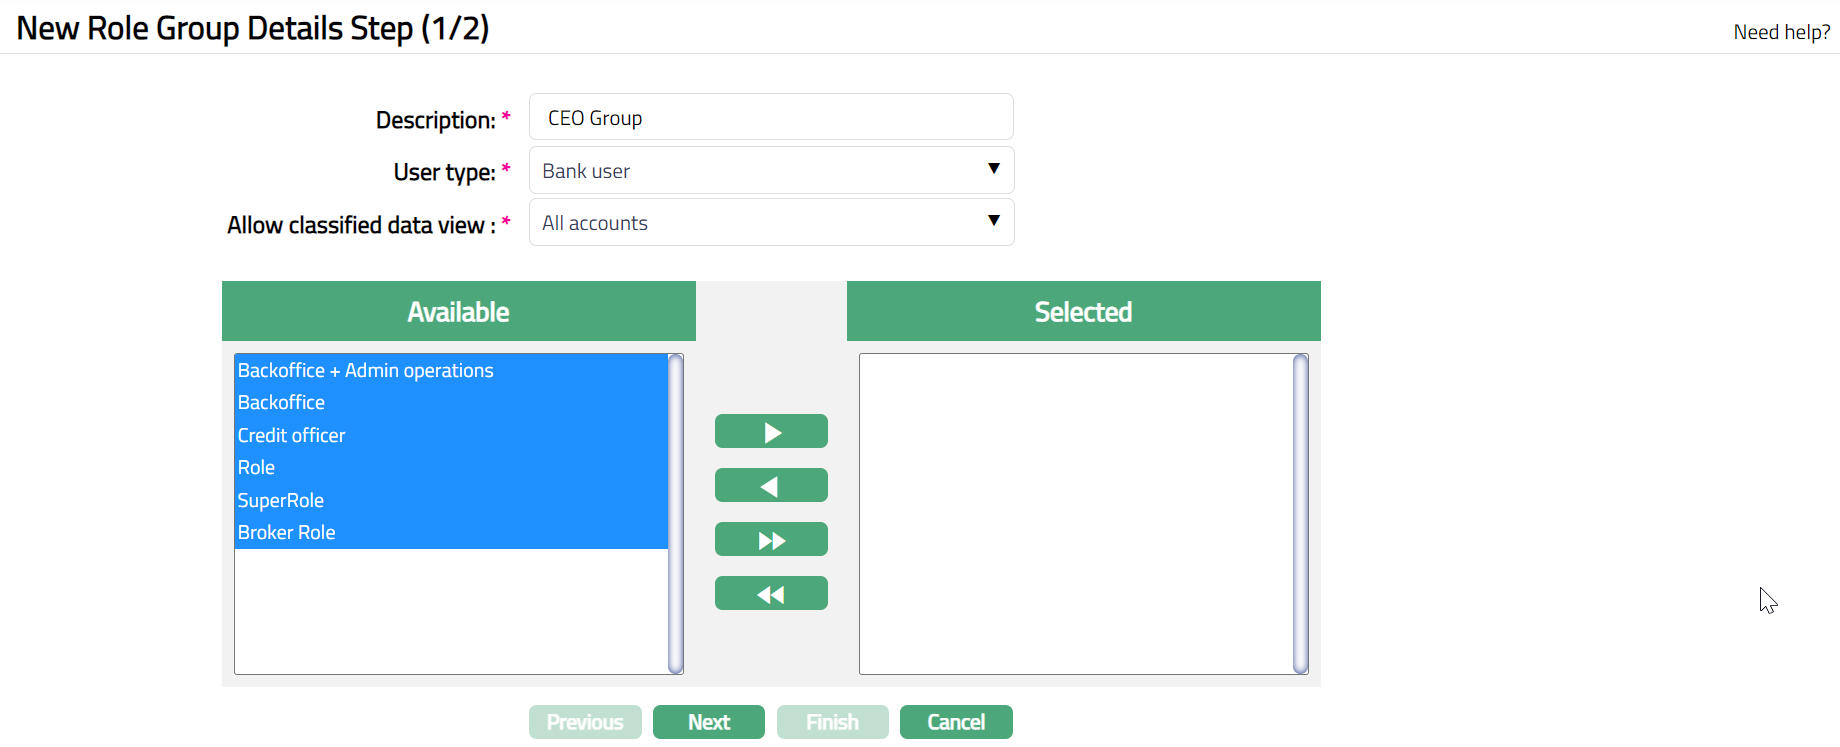

Enter Description for Role group. For example, CEO group.
Select User Type option available from the drop-down list, for example Bank user.
Select Allow classified data view option available from the drop-down list, for example All Accounts.
Click required roles from Available table. The system will display the list of roles maintained and available for selection.
Click
 to add a role i.e., move one Role at a time from Available list to Selected list.
Click
 to add all roles i.e., move all the Roles under Available list to Selected list.
Click
 to remove a role i.e., move one Role at a time from Selected list to Available list.
Click
 to remove all roles i.e., move all Roles at a time from Selected list to Available list.
- Click Next. New Role Group Confirm step (2/2) screen appears.
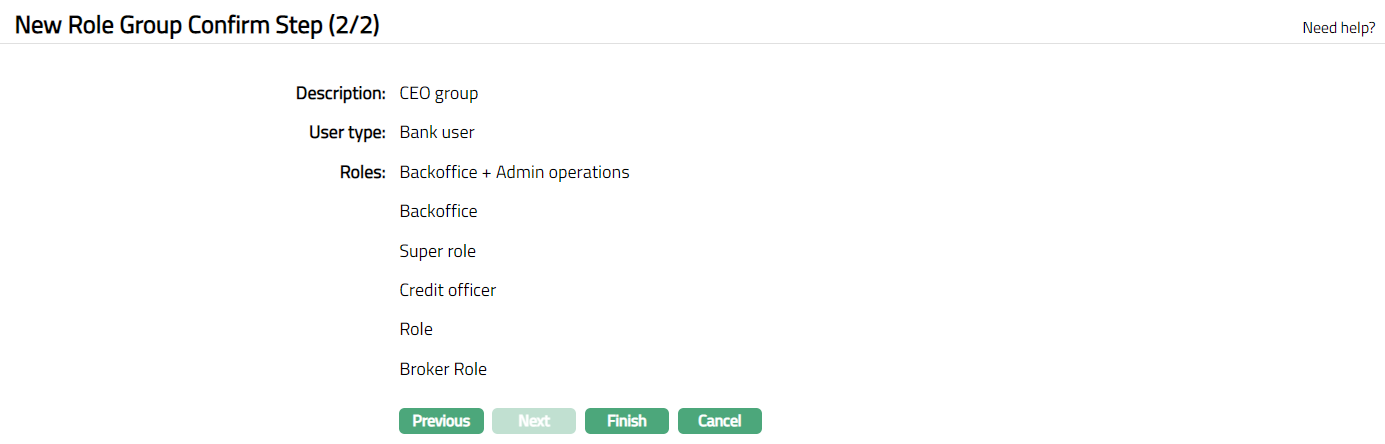
- Click Finish button to complete the addition of New Role Group.
Functions: Add, Search, Edit, Delete
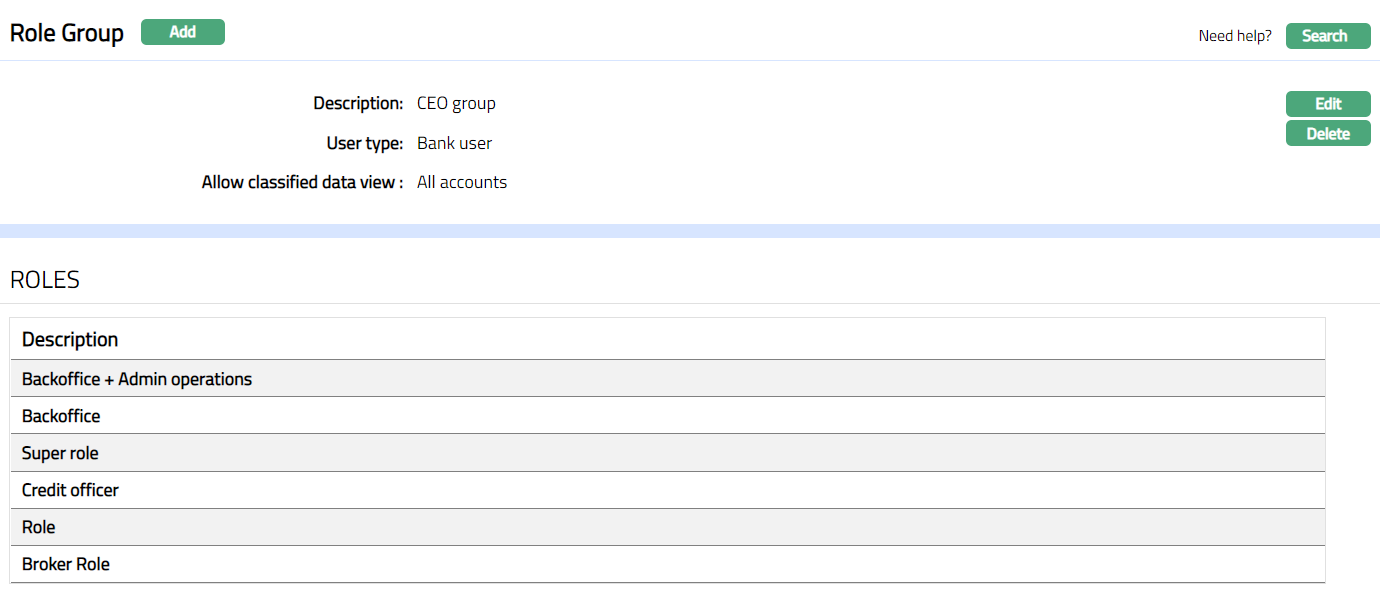
Note: The selected role or roles will be attached to the Role Group. When a User is mapped to this Role Group, she will get access to the screens as defined under the roles attached to the Role Group.
To Edit Role Group
- Click Edit. Edit Role Group page appears.
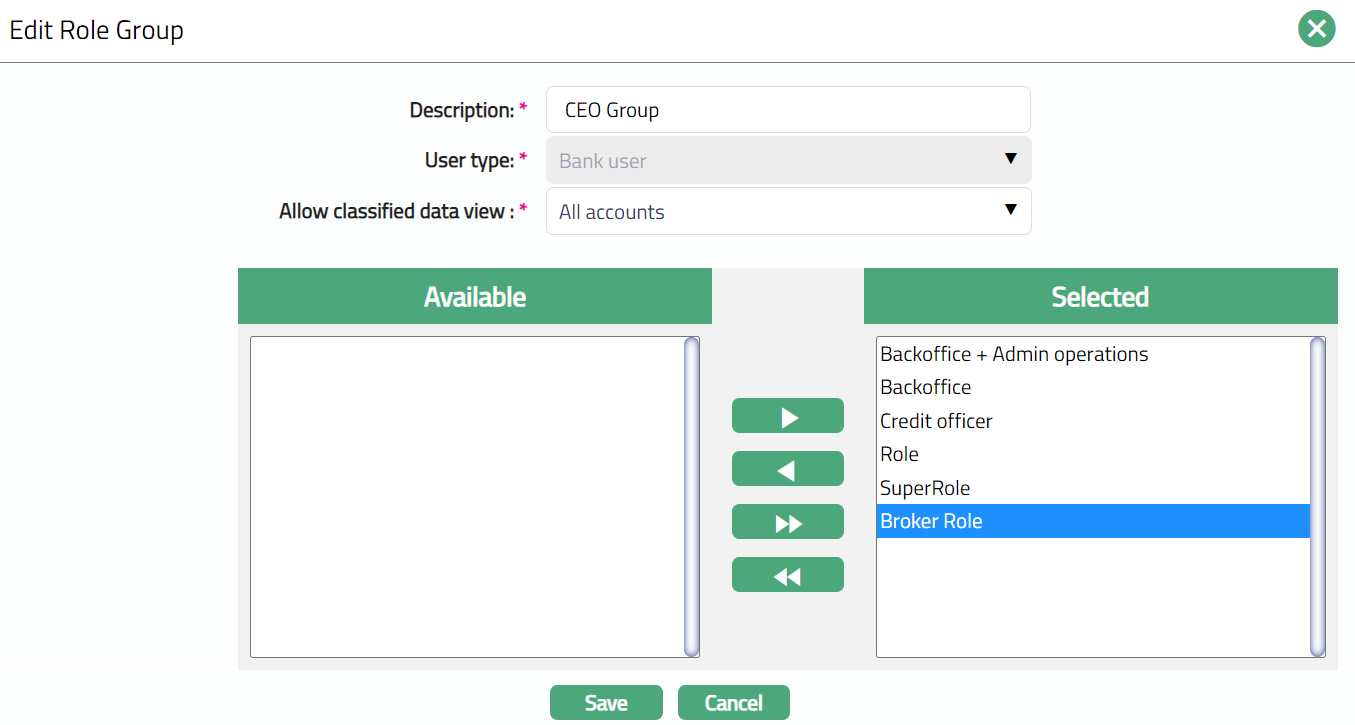
Note: Except User type field all other fields are editable.
- Click Save. Role Group page appears with the edited details.
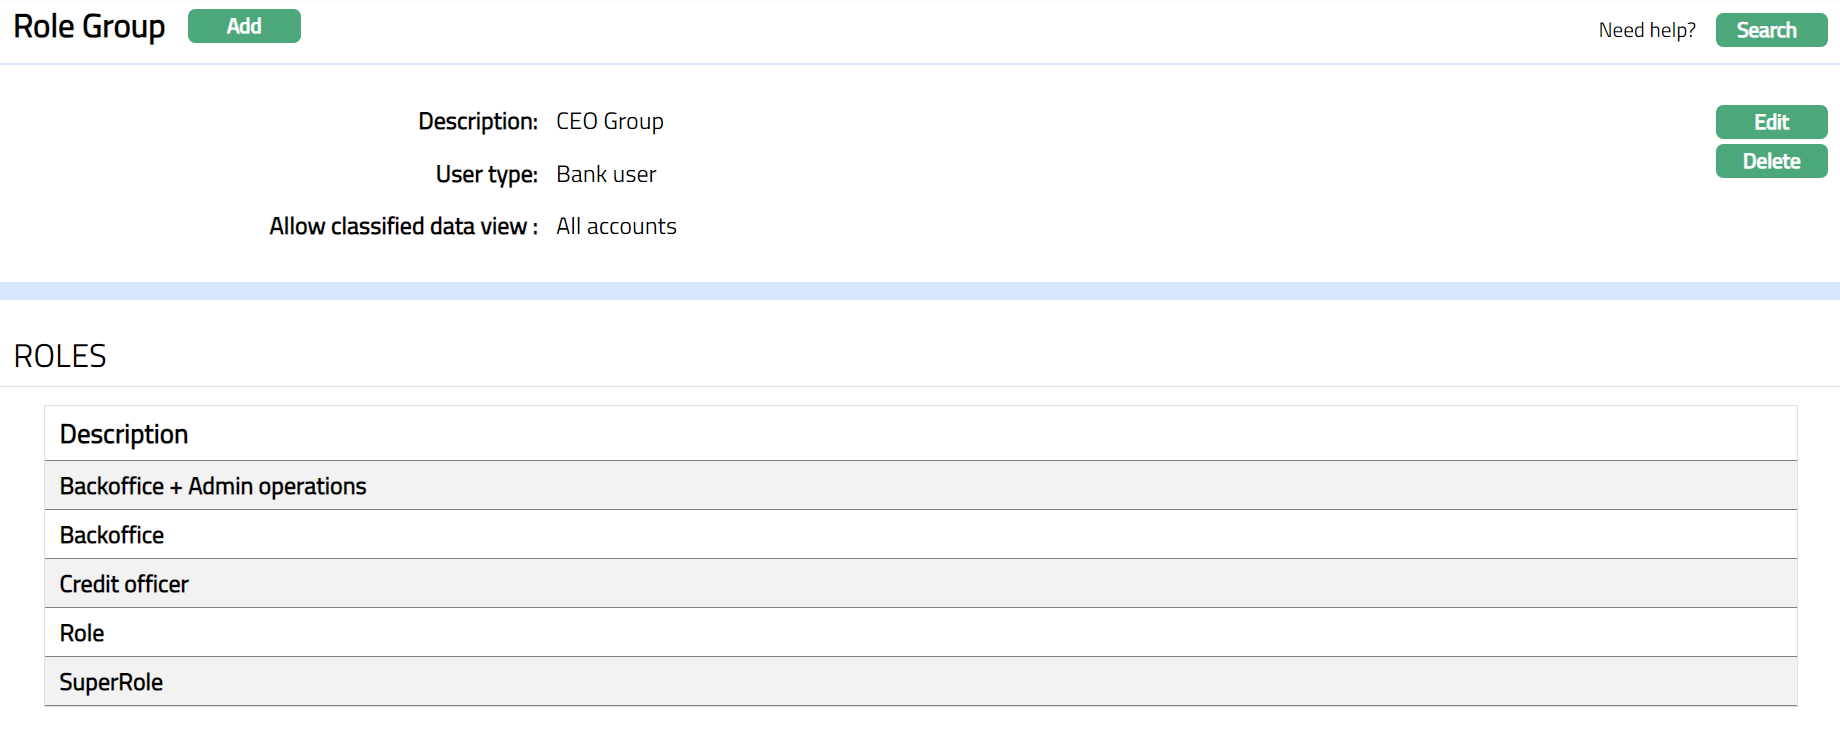 Functions: Edit, Delete
Delete: You can delete a Role Group by clicking Delete button. When you click Delete button, Aura displays an alert message. On confirmation, Aura will delete the Role Group. A Role Group can be deleted until it is mapped to the user.