Loan Account Disbursement
Loan Account Disbursement menu allows you to disburse the amount of a sanctioned loan manually. You can manually disburse the loan amount only if the loan account is created with the Disbursement option as Manual.
The following tabs are available in a Loan Account Disbursement:
To add a new Loan Disbursement
1. From Retail menu, click Loans and then click Disbursement. Loan Disbursement Search page appears.

2. Click Add. New Loan Disbursement → Profile (1/5) page appears.

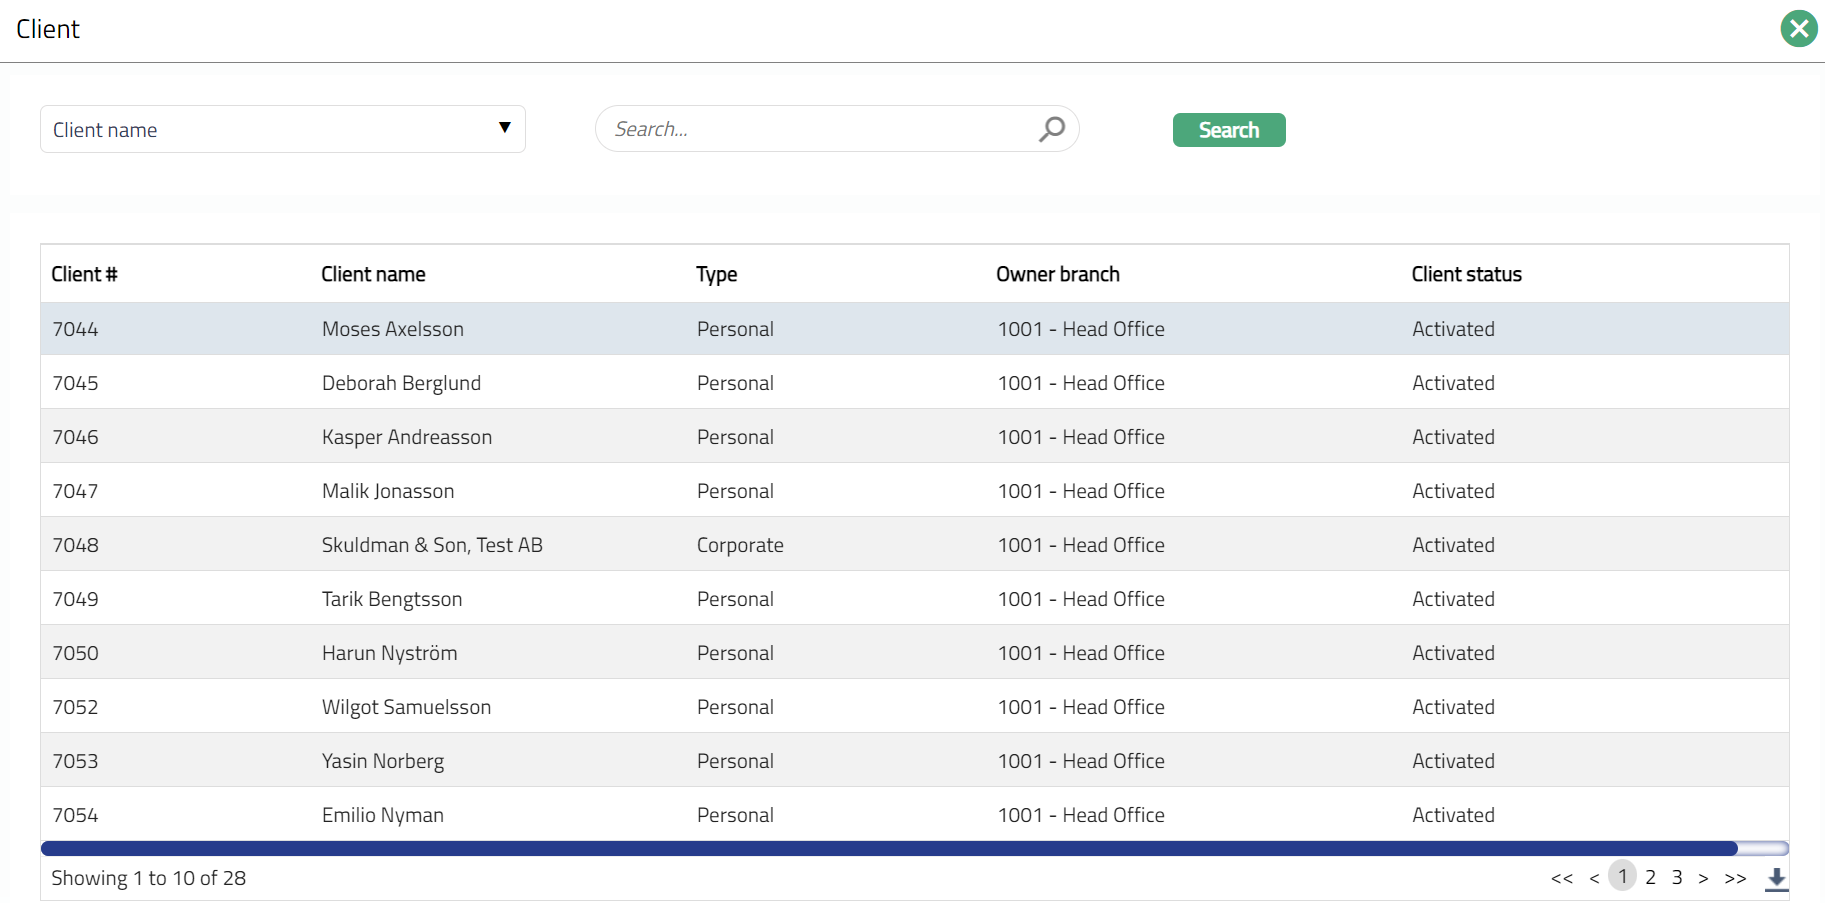
3. Click Client hyperlink. Client Search page appears with the list of Active clients maintained under CRM → Clients → Maintain. You can search for a client with relevant criteria and select the required client to whom the disbursement has to be done. Alternatively, you can type in the name of the client and choose the relevant client from the list suggested by Aura.
4. Select Account # for which you want to manually disburse the loan amount. Aura will display all activated Loan Account numbers of the selected Client where amount to be disbursed is greater than zero and disbursement mode is manual.
5. Aura displays Value date as the current date by default. You can change the date to a future value date. Future dated disbursements are allowed only until maturity date of the loan. Back dated manual disbursements are allowed only in case of Full Disbursement of Mortgage Loans where Interest Calculation Method = Amortized.
Note regarding back dated manual disbursements:
a) The Value Date should be such that the First Interest / Principal Payment Date should be > Current Booking Date
b) If the value date of the disbursement is such that the Invoice Generation Date for the first schedule falls before the Current Booking Date, the First invoice will be sent based on the second schedule date, for both the first and second schedule components. Thus, the invoice will be sent later but the payment will be due; and may result in overdue of the components in the first schedule. To manage this, either the invoice generation date related parameter should be changed so that the first invoice is sent before the due date or the Late Payment Fee / Penalty interest on Overdue Principal / Interest should be manually handled.
c) Interest accrual from the Disbursement Date to Current Booking Date minus 1 will happen during the disbursement approval; and from current booking date, accrual will happen daily as usual.
d) Impairment bookings, if any, that have already been made, will not be impacted by such back-dated disbursements.
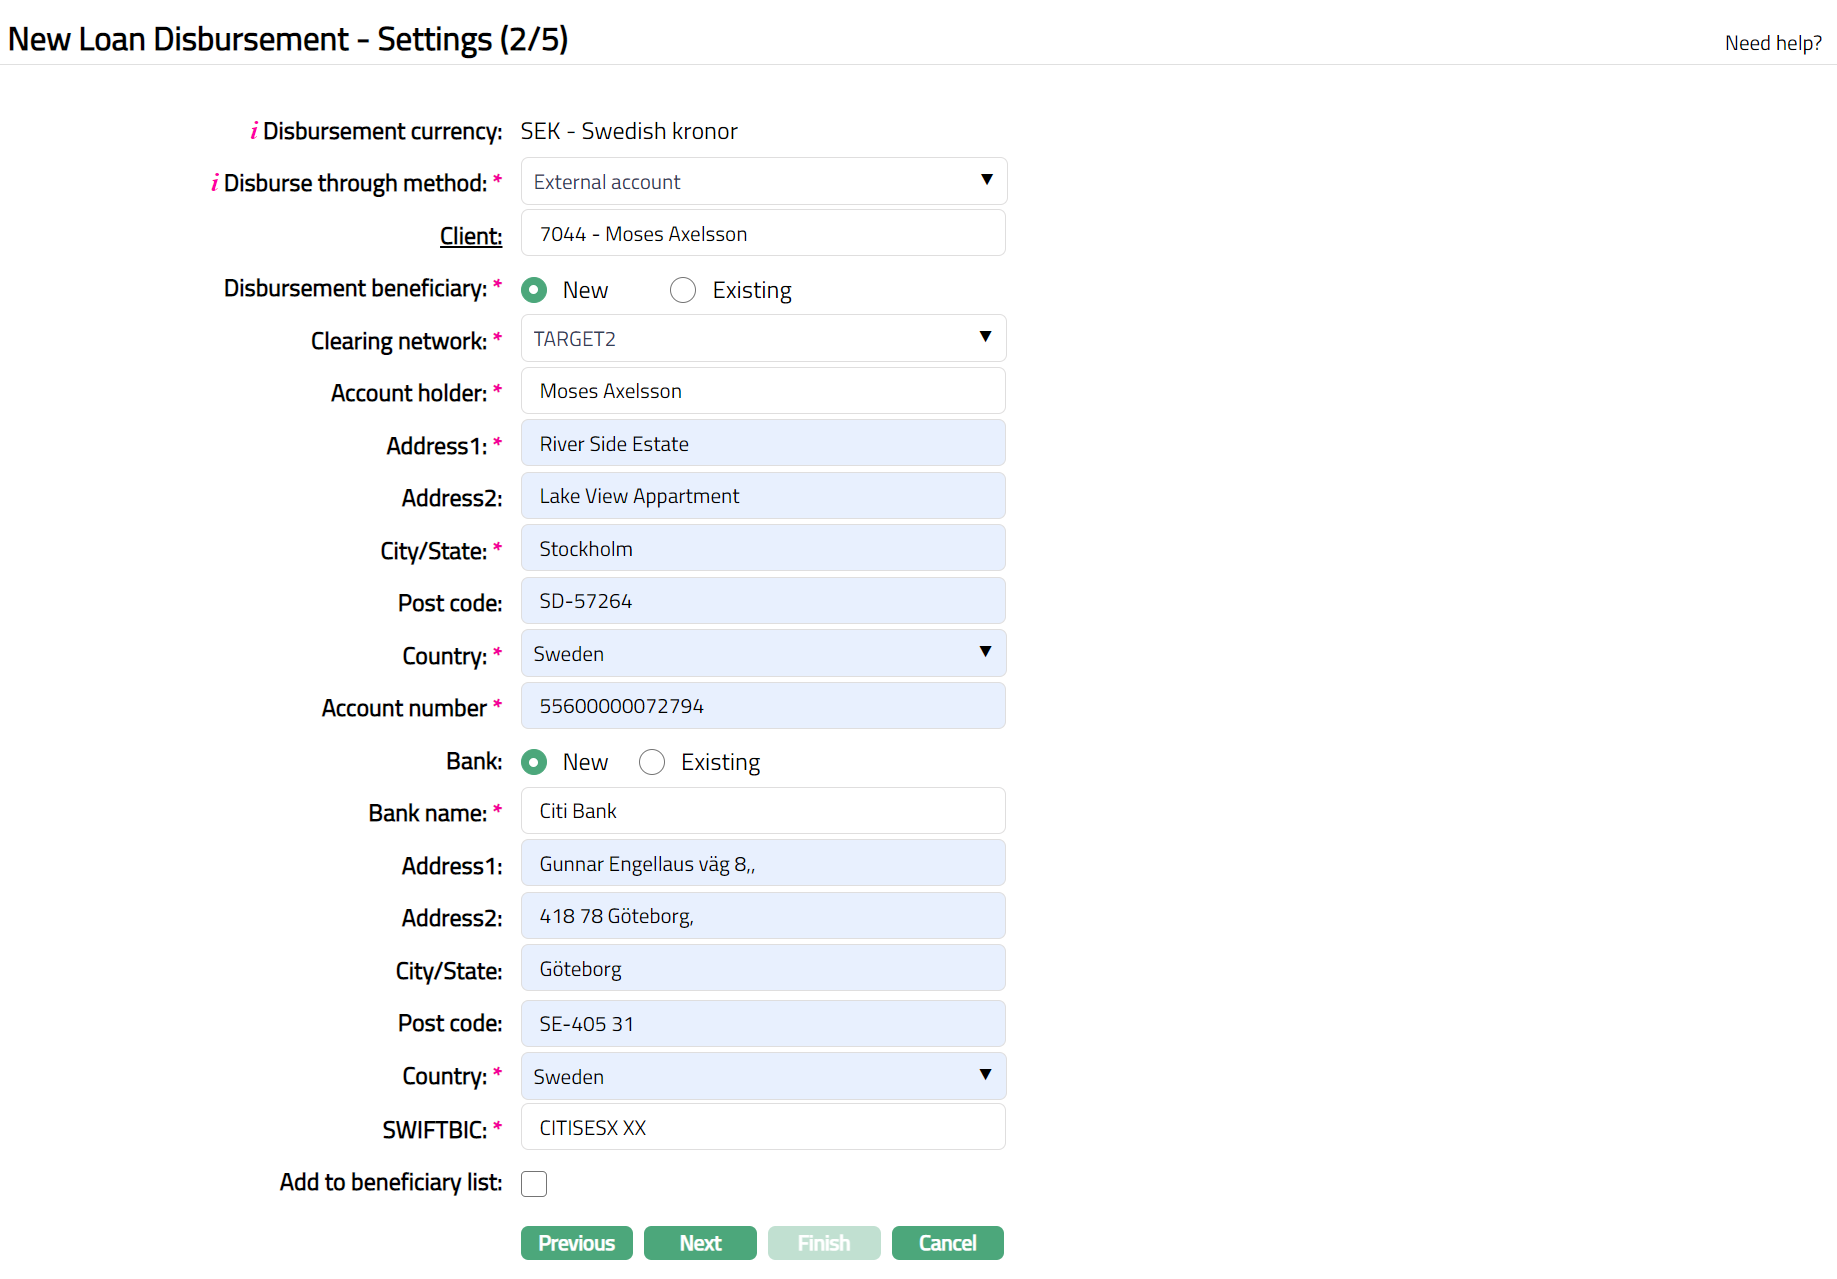
6. Click Next. New Loan Disbursement → Settings (2/5) page appears. Sample screen shot shown below.
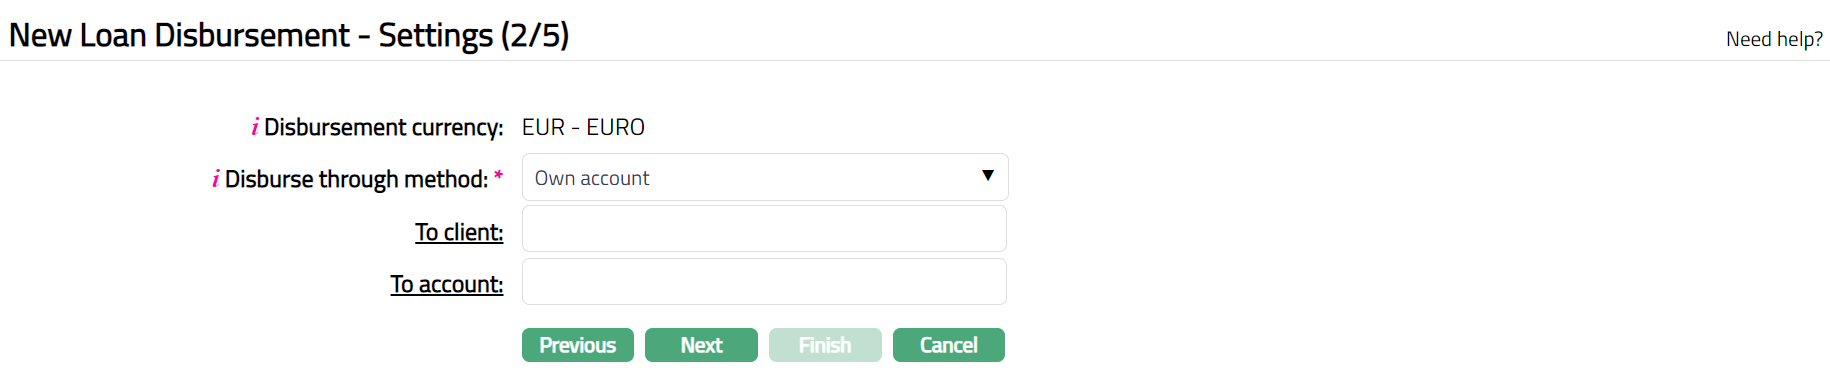
7. Disbursement Currency is defaulted from the currency that was chosen as the Disbursement currency during loan account creation.
8. Select the Disburse through method from the drop-down. This denotes the method in which the loan amount is to be disbursed. The following are the options available in Aura:
External Account -- If this option is selected, the amount will be disbursed to the specified external account.
Own Account -- If this option is selected, the amount will be disbursed to the client's account in the same bank.
Settlement GL -- If this option is selected, the amount will disburse into the Settlement GL specified for the Product; and from there the actual payment can happen, say, in the form of cash.
9. Based on the selection of Disburse Through Method the fields in New Loan Disbursement → Settings (2/5) will change as explained below:
Disbursement through External Account
If you select External account as your Disburse Through Method, based on the Clearing Network, the fields that you see will change.
For Clearing Network: SWIFT, you will see the following screen:
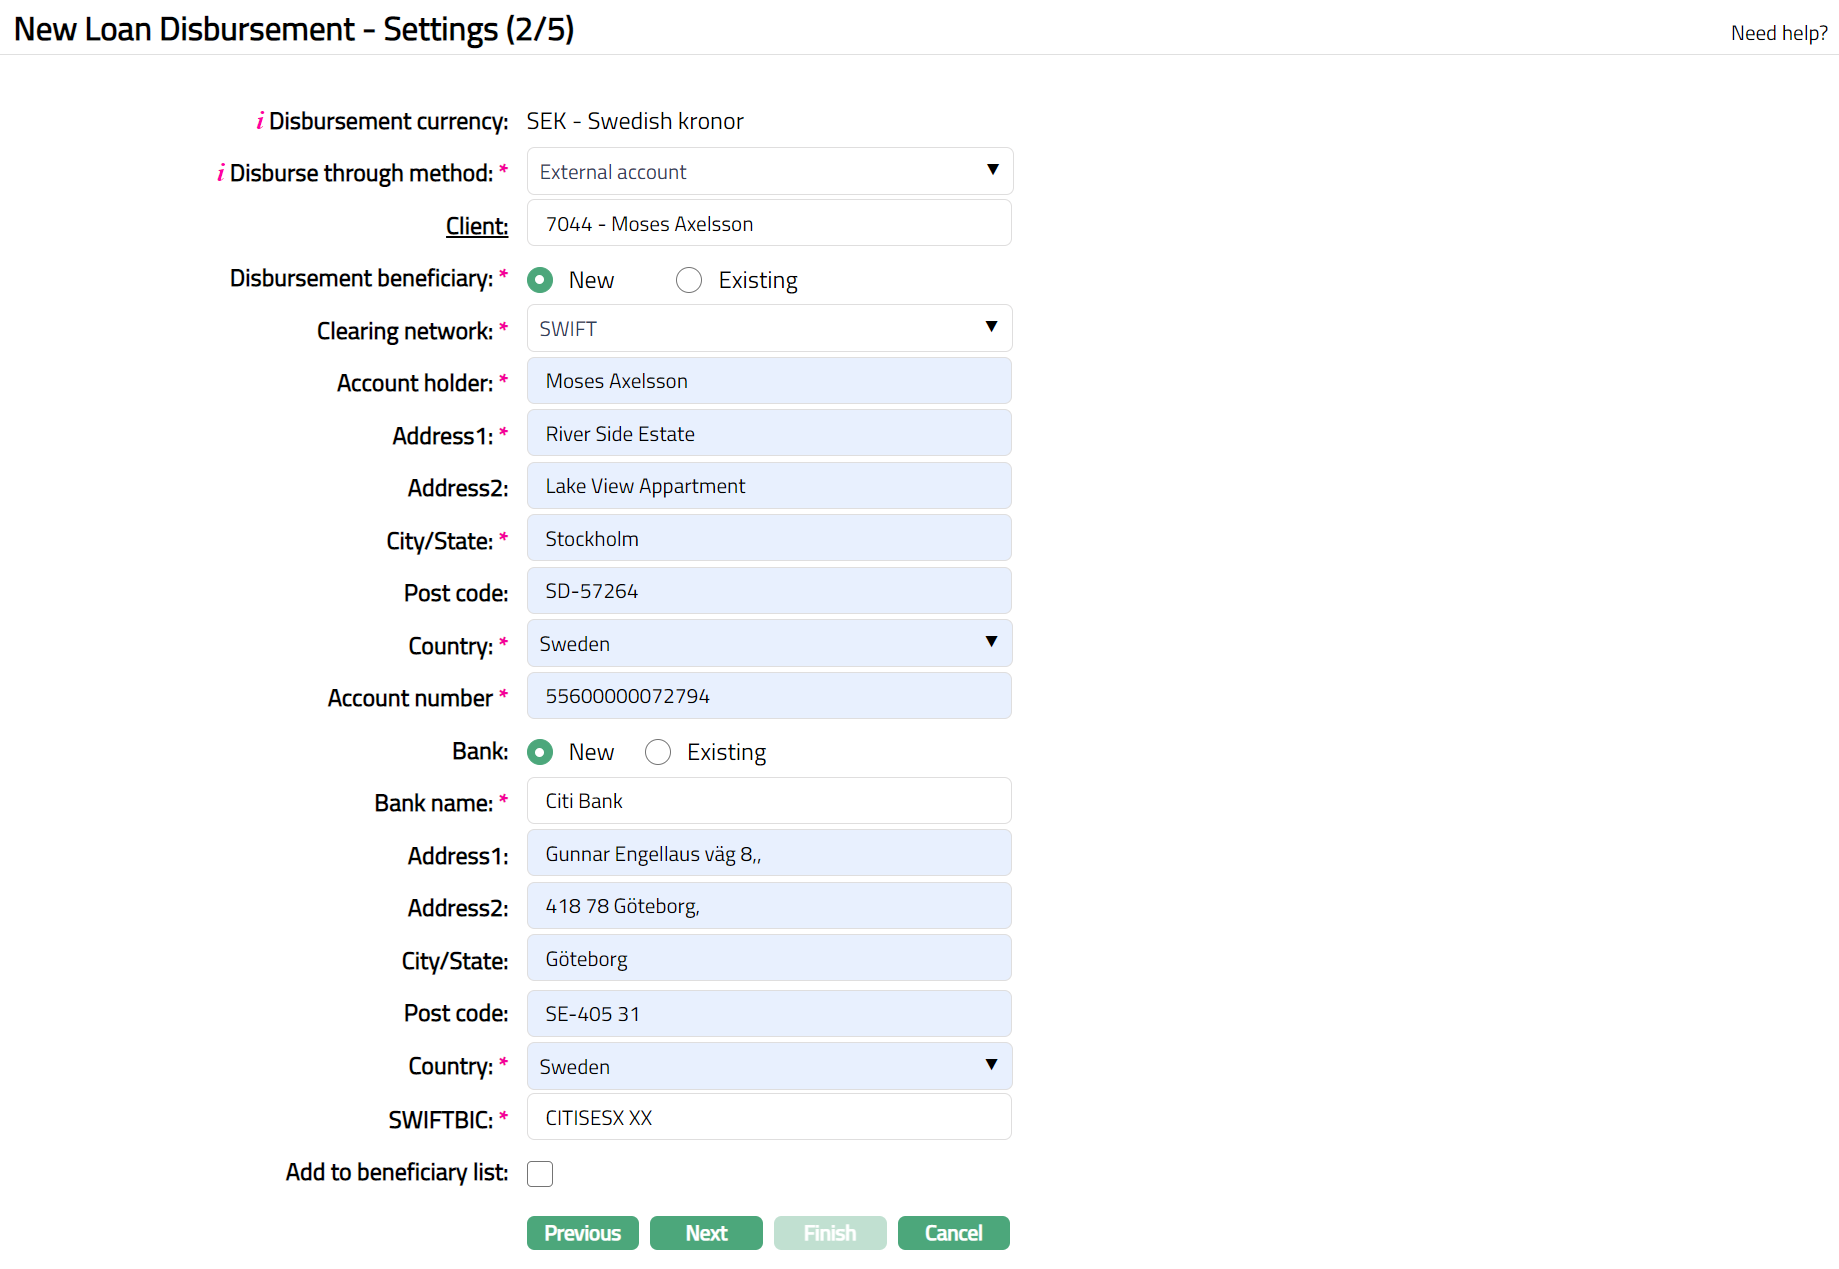
10. Select the required Client for the External Disbursement. By default, Aura will display the Borrower Client for the Loan Account as selected in Step 1. If required, you can change the Client to any other client. Click on the hyperlink to see the Client Search Page and select the required Client; or input the Client name to see a list of suggestions matching the input; and select the required Client.
11. Disbursement Beneficiary is New by default.
When New is selected you need to enter the account details to which the loan amount has to be disbursed.
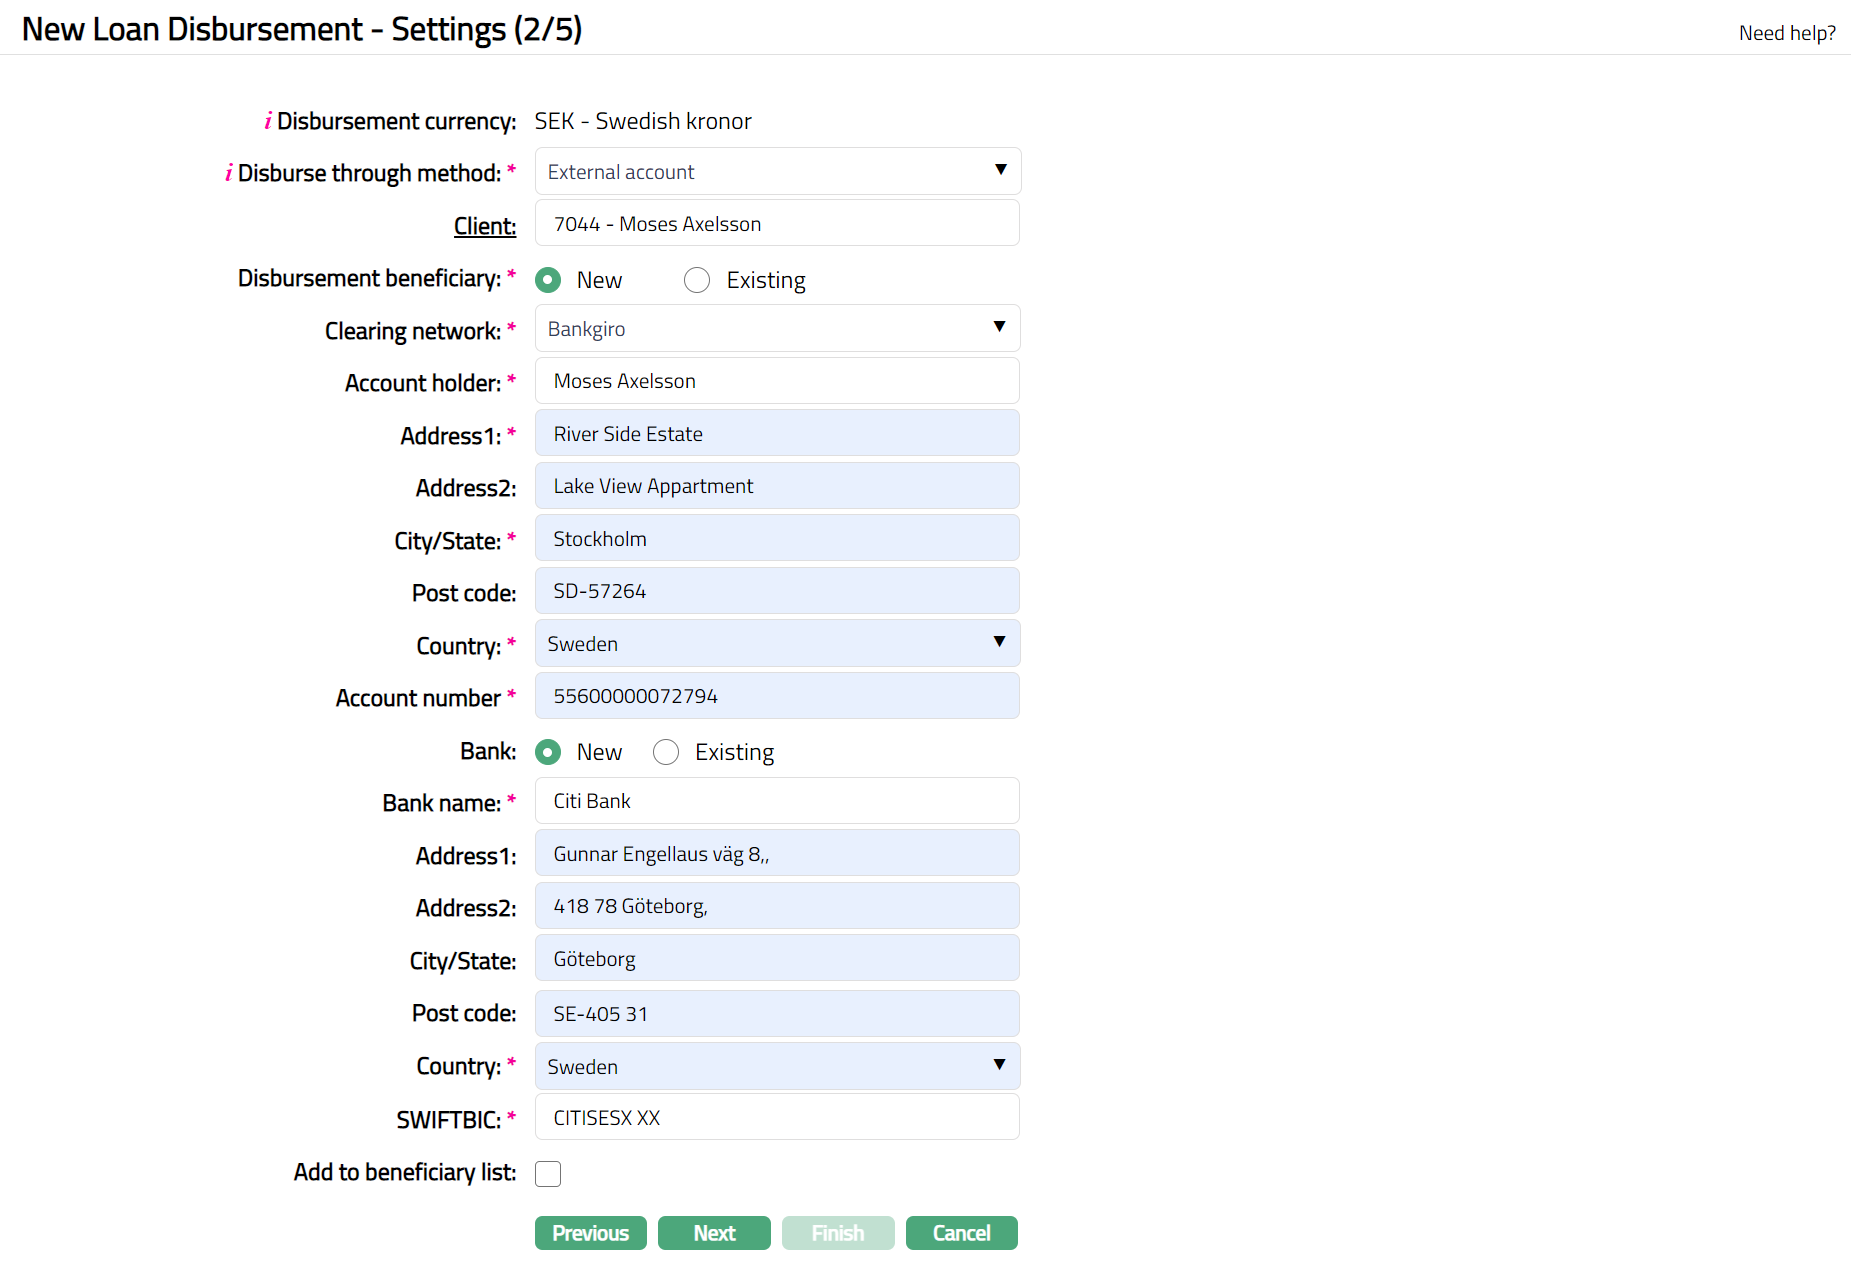
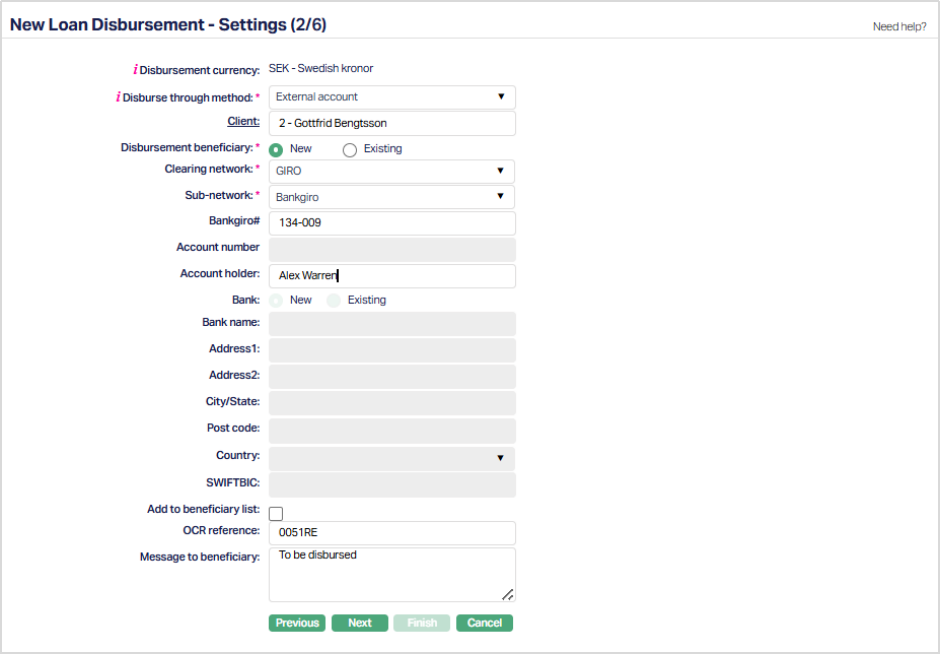
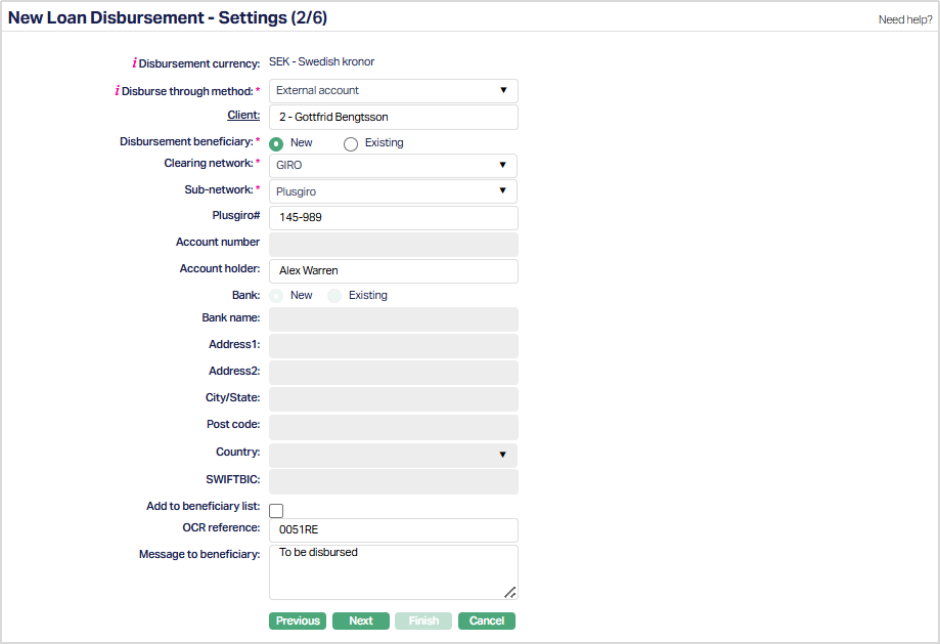
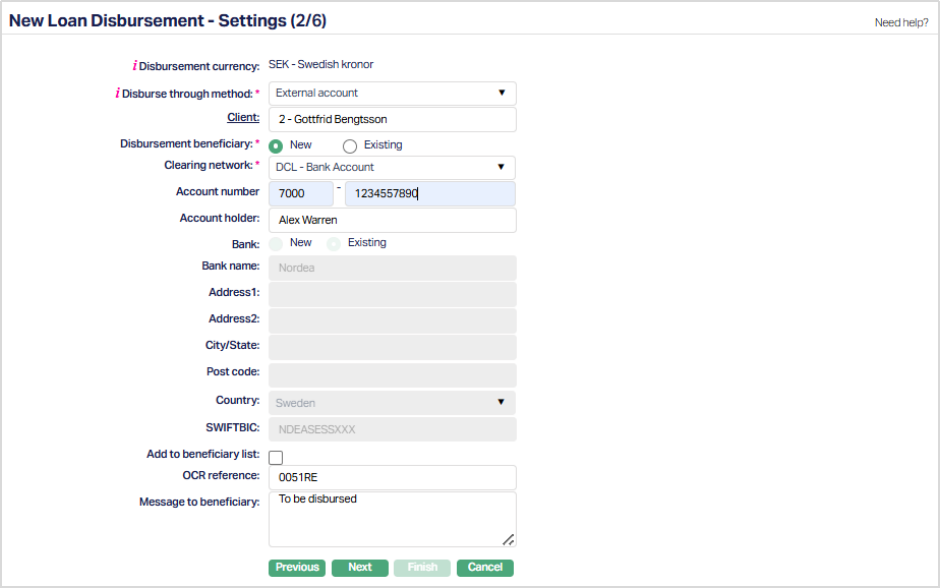
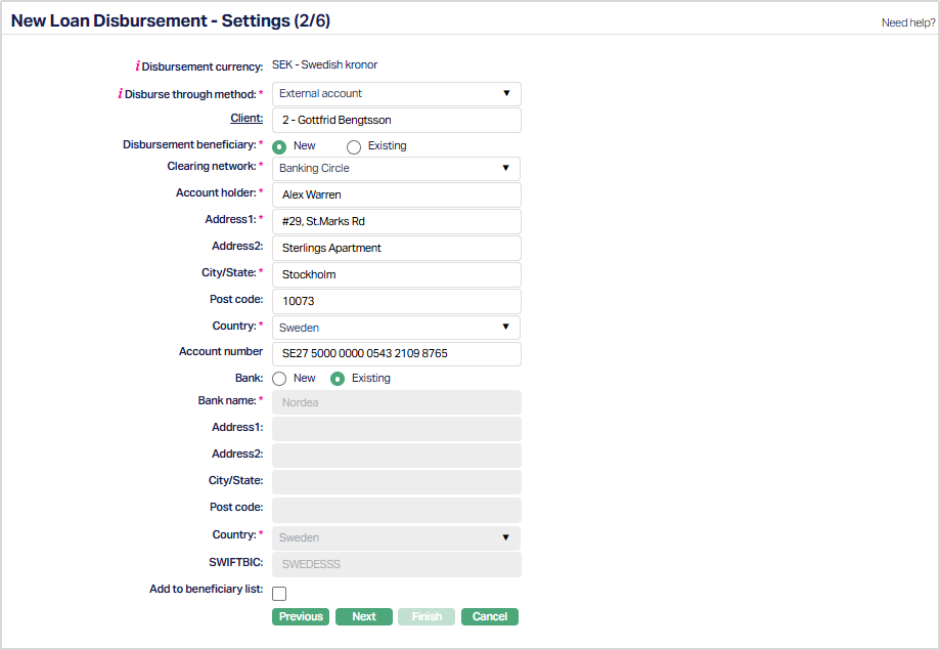
12. Select Clearing network from the available drop-down list, using which the loan amount has to be disbursed. Based on the clearing network the subsequent fields will change. The available options are SWIFT, DCL Bank Account, SEPA, GIRO, Bankgiro, TARGET 2.
Note: If you select Clearing network GIRO, then Sub- network field appears. Select the required Sub-network from the available drop-down list. The available options are Bankgiro, Plus giro. Under Sub-network if you select Bankgiro and Plus giro then Bankgiro# and Plusgiro# field appears subsequently. Sample screen shots shown below.
Clearing Network: Bankgiro
Clearing Network: TARGET 2
Clearing Network: GIRO and Sub Network: Bankgiro
Clearing Network: GIRO and Sub Network: Plusgiro
Clearing Network: DCL- Bank account
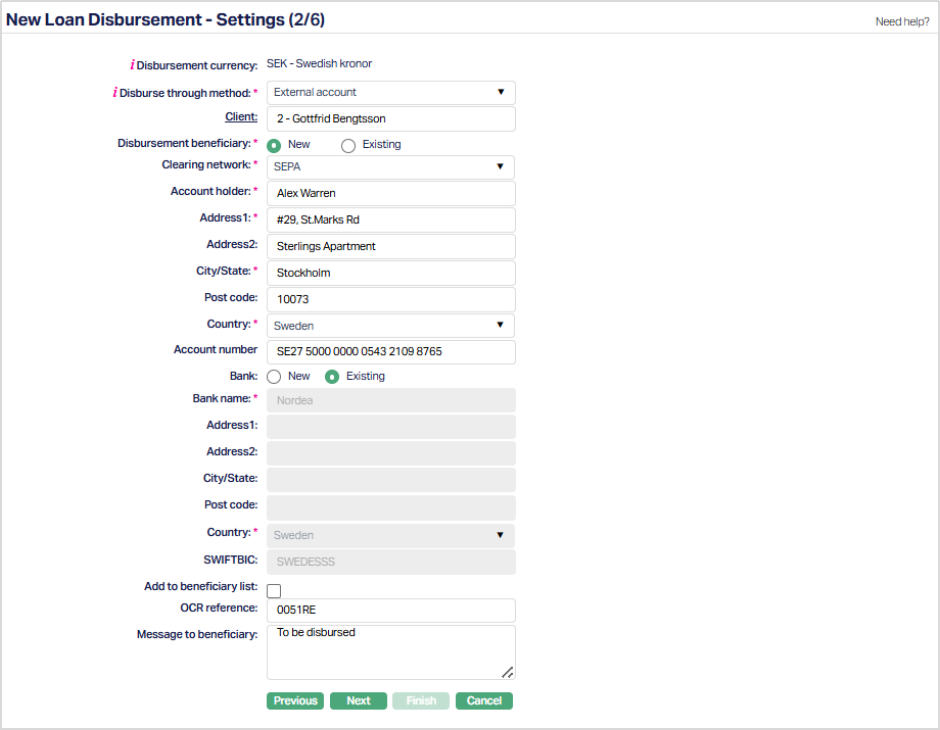
Clearing Network: SEPA
Clearing Network: Banking Circle
Clearing Network: SEPA-INST
13. Enter account holder's name in Account holder field.
14. Provide Address details of the beneficiary using the next set of fields Address1, Address2, City/State, Post code and Country.
15. In Account number field provide the Beneficiary account number
Note: If you select Existing as your Disbursement Beneficiary option, then select the account from the list of Beneficiary details maintained under CRM → Clients → Maintain → Beneficiary. The data for the following fields will be auto populated and the fields are disabled.
- Clearing network, Account holder, Address1, Address2, City/State, Post code, Country, Bank name, Country and SWIFTBIC
16. By default, New radio button will be selected for Bank. When New is selected you need to enter the bank details to which the loan amount has to be disbursed.
In Bank name provide the beneficiary bank name to which loan needs to be disbursed.
Provide Address details of the beneficiary bank using the next set of fields Address1, Address2, City/State, Post code and Country.
In the SWIFTBIC provide the BIC corresponding to the beneficiary bank
17. If you select Existing as your Bank option, then select the Bank from the list of Banks maintained under Admin → Correspondent bank management → Maintain. The data for the following fields will be auto populated and the fields are disabled.
- Bank name, Country and SWIFTBIC
18. Select Add to beneficiary list check box if required.
Disbursement through Own Account
If you select Own account as your Disburse Through Method:
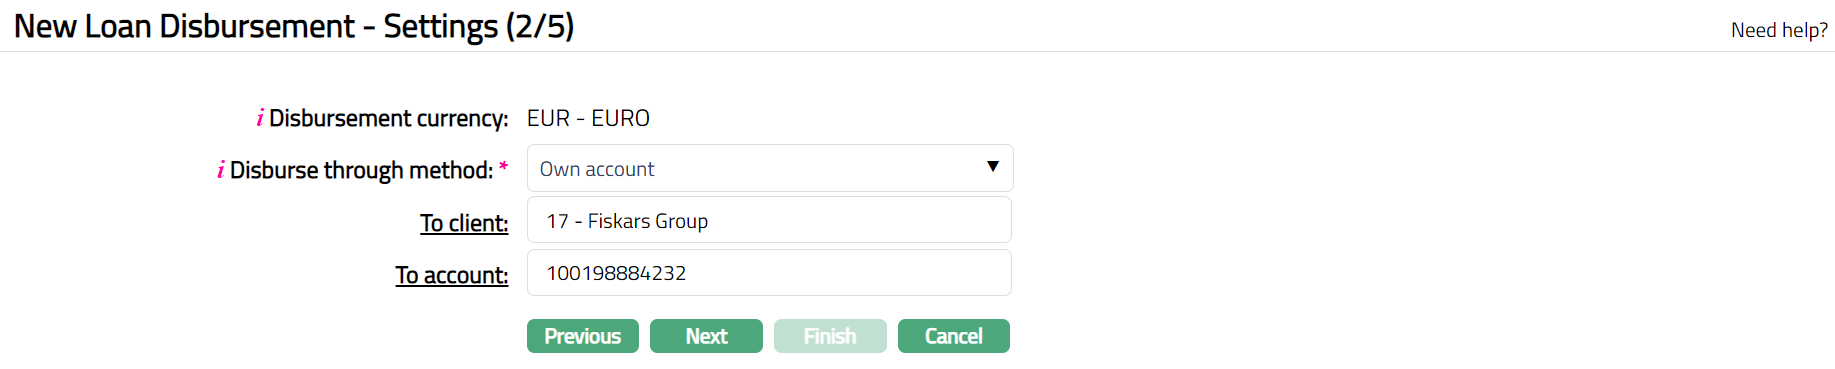
To client field is enabled. The To Client will be defaulted to the client selected in the Profile stage. However, you can change the client to another one. To change the client, click on To client hyperlink to see the Client Search page. Search for the required client using appropriate inputs and select the required client.
Click To account hyperlink to select one of the client's active Accounts maintained under Retail → Accounts → Client account → Maintain.
Disbursement through Settlement GL
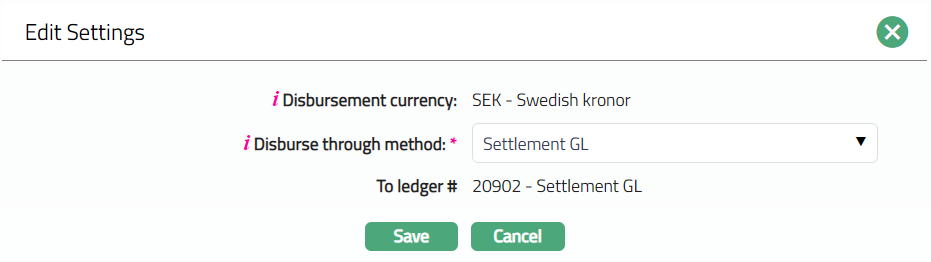
If you select Settlement GL as Disburse Through Method, then To ledger field will be displayed. Note: Settlement GL specified at the Product will be defaulted and it cannot be edited.

19. Click Next. New Loan Disbursement → Details (3/5) page appears.

20. Amount sanctioned and Amount disbursed till date will be displayed by Aura as per the selected loan account.
21. Disbursement amount will be defaulted to the remaining balance loan amount with the ability for you to make changes.
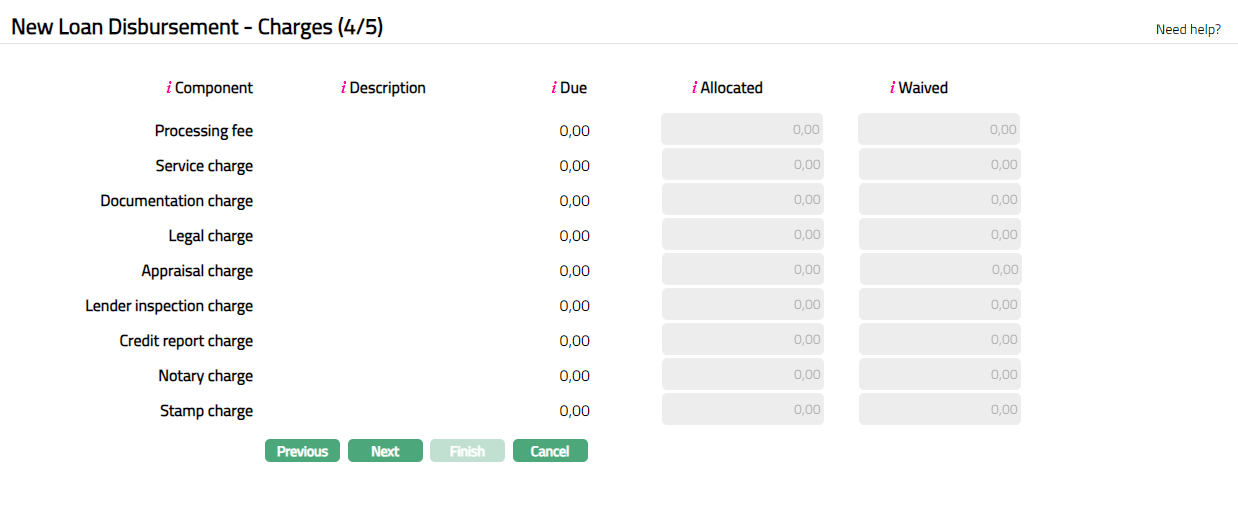
22. Click Next. New Loan Disbursement → Charges (4/5) page appears.
Sample screen for first disbursement
[Sample screen for second / subsequent disbursements:]

23. Columns available are:
a). Component - Under this column Aura displays all the default charges attached to the accounts that are applicable during disbursement. Other than the default charges, Additional charges and the Adhoc charges if applicable will also be listed here.
Note All charges that are applicable during Disbursement are shown in this screen. These could be Default Charges, Additional Charges or Adhoc Charges.
- Default Charges: For the first disbursement, all Disbursement related Default Charges are listed out irrespective of whether there are any charge amounts due on the account. For the second and subsequent disbursements, only the Additional Disbursement Charge will be shown.
- Additional Charges: Only those Additional Charges where Collection is in Advance are shown here.
- Adhoc Charges: All Adhoc charges that are attached to the Loan account through Retail → Accounts → Operations before this Disbursement (and are not yet collected / invoiced), will also be shown here.
b). Description - Displays attached charge scheme description.
c). Due - Displays Charge amount as applicable for the loan account.
d). Allocated -- By default, displays the same Due amount as Allocated. Based on waived amount, this will be recalculated as Due minus Waived. The Allocated amount cannot be updated by the user and hence, is disabled.
e). Waived -- Waived column is by default 0; but you can specify if any charge amount is to be waived. Waived amount has to always be <= Due amount. On input of Waived amount, Allocated amount will be recalculated as Due minus Waived.
Note: At the Product level if the checkbox for Net receivable during disbursement is checked, then any disbursement charges on the account will be displayed in the above step and collected during disbursement. These charges will be debited from the amount disbursed i.e., charges are subtracted from the amount disbursed, and only the net amount will be disbursed to the borrower. Accounting entries will be passed accordingly.
Also, if there is any Advance Interest Amount to be collected, the same will be deducted to arrive at the Net Disbursed Amount. The advance interest amount will be debited from the amount disbursed and accounting entries will be passed accordingly.
If Net Receivable during Disbursement is not checked, the disbursement related charges will not be deducted during disbursement but will be included in the upcoming invoice.
24. Click Next. New Loan Disbursement → Confirmation (5/5) page appears.
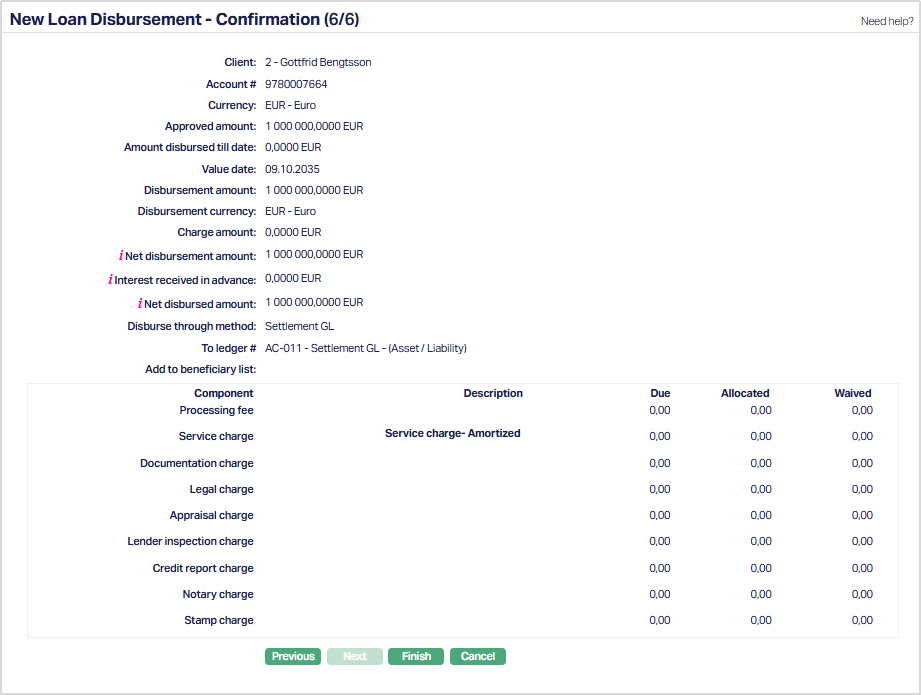
25. Click Finish. Loan Account Disbursement page appears.
Functions: Add, Search, Delete, Edit and Approve
Note:
The status of the Disbursement record is Pending as soon as the record is created. Any user other than the one who created it can approve the record. On Approval, Disbursement Status will be Processed and record status of the loan disbursement record will be Approved.
On Approval, if the value date <= Current Booking Date, the Net Disbursed Amount will be disbursed to the specified account. Payment schedule will be generated as per the loan term and payment frequency defined during loan creation. For future dated disbursements, the disbursement will happen on the specified value date.
Disbursement record cannot be approved post maturity date.
Delete: You can delete a loan disbursement record by a click on Delete button. Delete option is available only for unapproved disbursements. When you click on Delete button, Aura displays an alert message. On confirmation Aura will delete the disbursement record.
Approve: Once the disbursement record is created, any user other than the one who has created the record will have to approve the record for the disbursement of the loan amount to happen. Click on the Approve button to approve the disbursement record.
⚠ Note of Caution: Auto-Deletion of Pending Disbursement Records upon Loan Closure
If a loan account is due for closure (i.e., the first repayment due date is crossed) and no disbursement has been approved or executed, Aura automatically deletes any pending disbursement records linked to that loan.
This prevents such pending entries from appearing under Unapproved records. Aura maintains an audit trail for every such auto-deletion to ensure transparency and traceability.
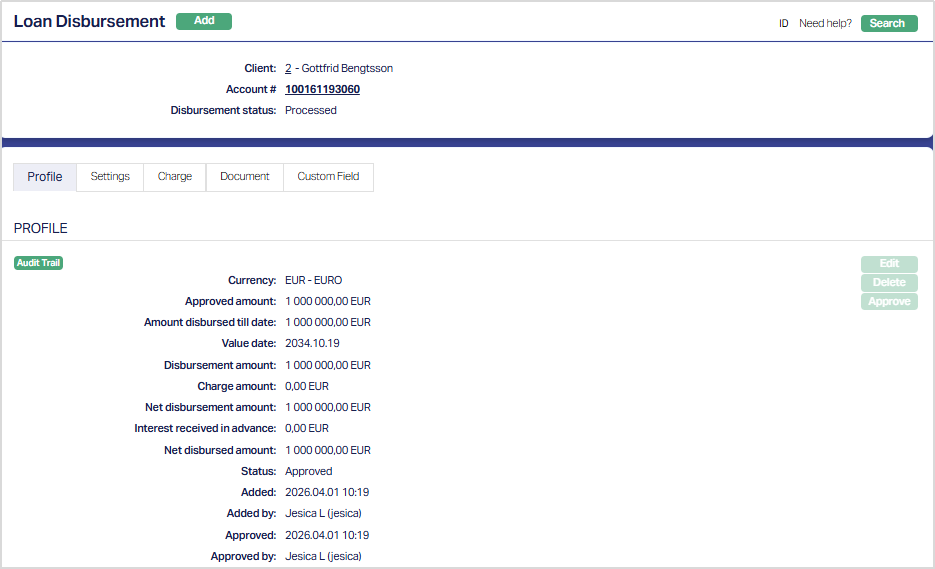
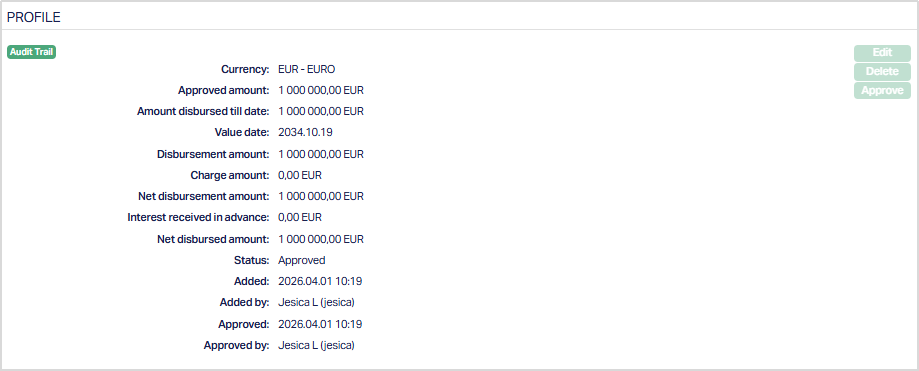
Profile
Profile tab, which is the default tab in the Loan Disbursement screen, shows the basic details of the loan disbursement record.
1. Access Loan Disbursement page. The details in the Profile tab are defaulted from the entries that you made during the loan disbursement record creation. For details refer to New Loan Disbursement → Profile (1/5).
Note: Status of the Disbursement record is Pending till it is approved by another user. On approval, the tab status is set to Approved and the red bubble disappears.
The additional fields that you can view in the Profile tab are explained below.
Charge Amount = Total amount of charges that are netted off during this disbursement
Net Disbursement Amount = Disbursement amount minus Charge amount during this disbursement
Interest received in advance = Amount of interest received in advance during this disbursement
Net Disbursed Amount = Net Disbursement Amount minus Interest Received in Advance during this disbursement
Status field denotes the status of the record.
Added field denotes the date on which the record was added.
Added by field denotes the name of the user who created the record.
Approved field denotes date on which the record was approved and is displayed only for approved records.
Approved by field denotes name of the user who approved the record and is displayed only for approved records.
2. Click Edit. Edit Loan Disbursement page appears.
Note: User can edit the record any number of times till it is approved by another user. Once disbursement record is approved, Edit is not allowed.

Note: Only Value Date and Disbursement Amount fields are editable.
3. Click Save. Profile page appears with the edited details.
Function: Edit, Approve and Delete
Note: Any change in the tab will set the tab status to Pending till it is approved by another user. On approval, the tab status is set to Approved and the red bubble disappears.
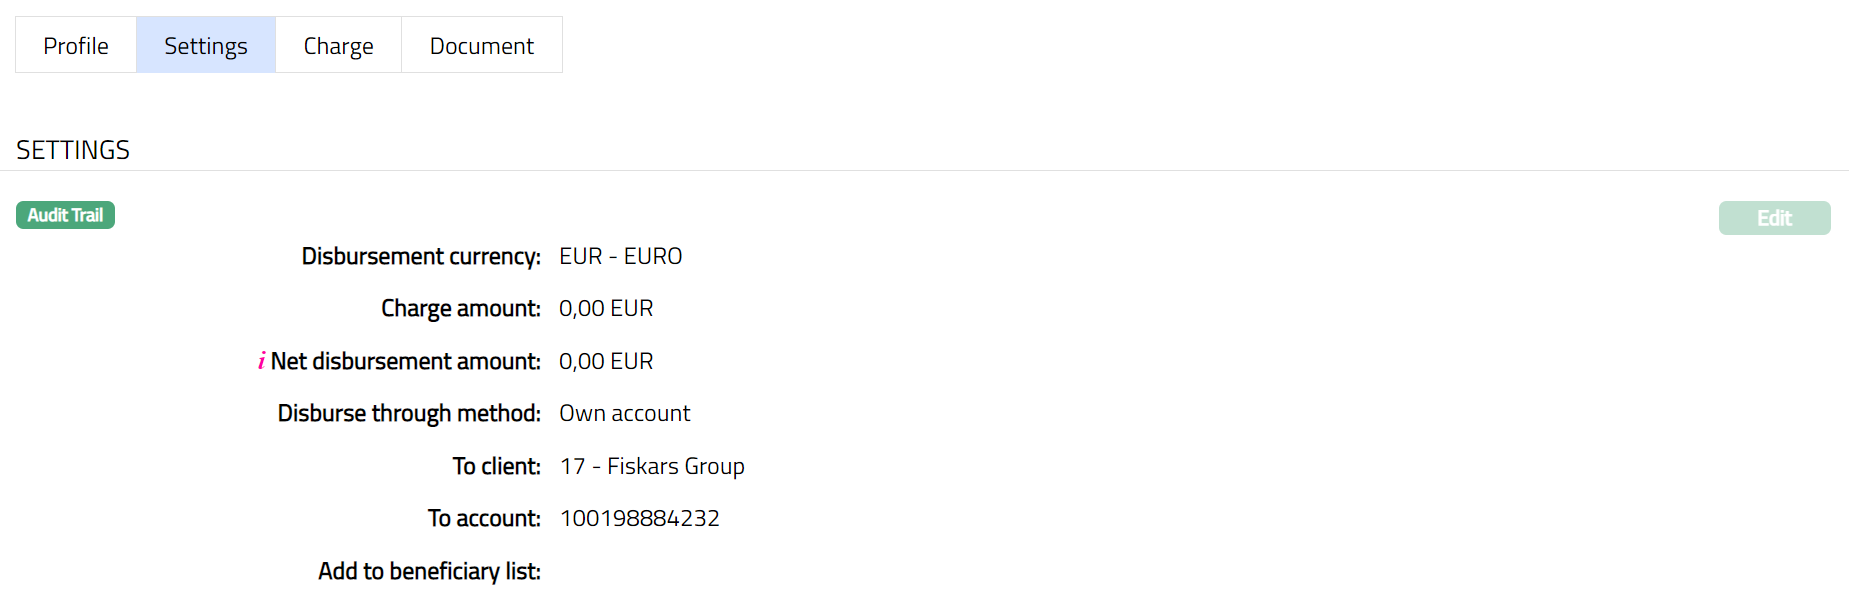
Settings
The Settings tab allows you to maintain disbursement settings like Disburse Through Method, the client and account details to which the disbursement is to be done.
1. Access Loan Disbursement page. Click Settings tab. The details are defaulted from the entries that you made during the creation of disbursement record. For details refer to New Loan Disbursement → Settings (2/5)
2. User can edit the record any number of times till it is approved by another user. Once disbursement record is approved, Edit is not allowed.
3. Click Edit. Edit Settings page appears.
Note: Based on the selection of the Disbursement Method some of the fields can be updated during edit. For details refer to New Loan → Settings (2/5).
4. Click Save. Settings tab appears with the edited details.
Function: Edit
Charge
The Charge tab allows you to view the details of charges applicable for the Loan Account. The details are defaulted from the entries that you made during the Loan Disbursement creation. For details, refer to New Loan Disbursement → Charges (4/5).
1. Access Loan Disbursement page. Click Charge tab. The details are defaulted from the entries that you made during the creation of disbursement record. For details refer to New Loan Disbursement → Charges (4/5).

Document
The Document tab allows you to view / add any relevant documents.
1. Access Loan Disbursement page. Click Document tab.

2. Click New. New Document page appears.
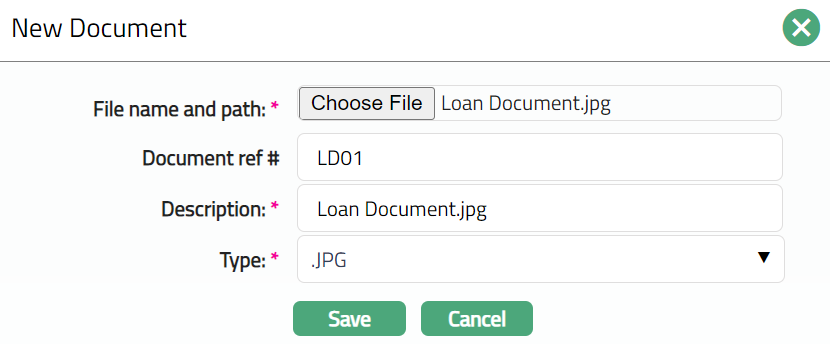
3. Select the desired file by clicking on Choose file.
4. Enter Document ref no.
5. Description will be defaulted to the name of the selected file with the ability for you to make changes.
6. Select Type of the document from the list of available drop-down as maintained under Admin → System codes → Documents → Document types.
7. Click Save. Document page appears with the added details.
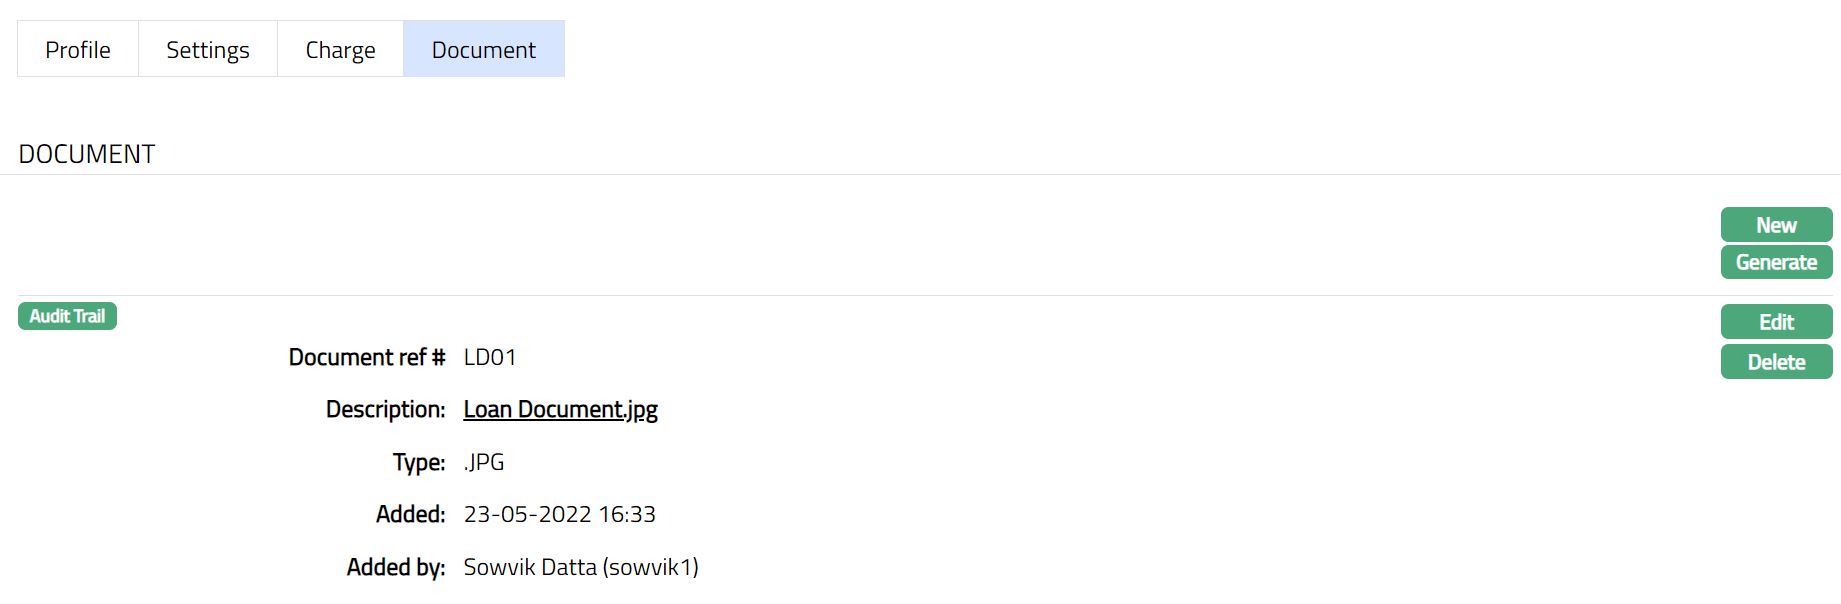
Functions: New, Generate, Edit, Delete
8. Click Generate to generate a pdf version of the document by selecting from a list of templates available, if any, for manual loan disbursement.
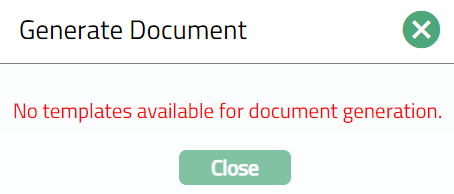
Note: There are No Templates available. Hence cannot be generated. During implementation, the templates have to be customized and mapped to the Product.
9. Click Delete to delete the document. Aura will ask for confirmation, on approving which the document will be deleted.
To Edit,
1. Access Loan Disbursement page. Click Document tab and then Click Edit. Edit Document page appears.
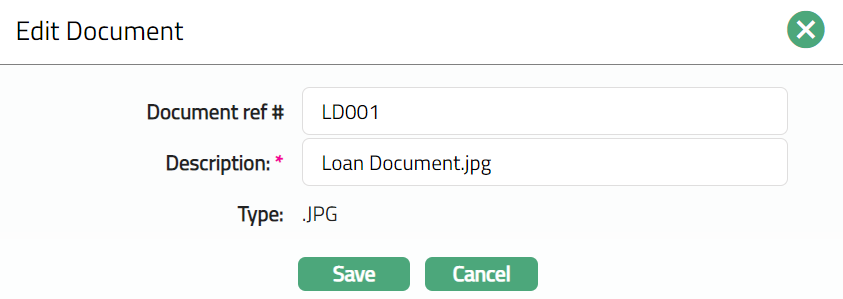
Note: Except Type Field all other fields are editable.
2. Click Save. Document page appears with the edited details.
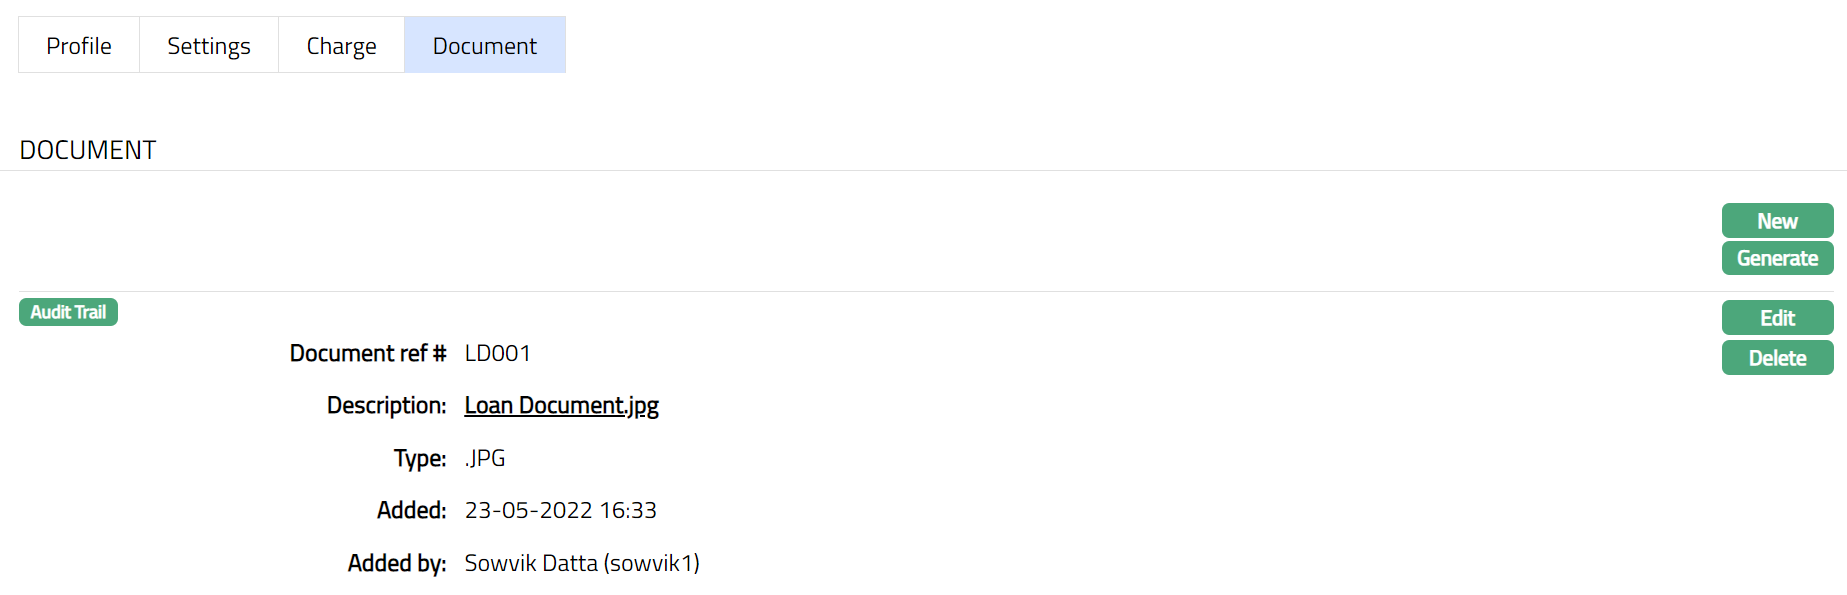
Functions: Edit, Delete
Custom Field
This option provides you the flexibility to define fields apart from those that are already available in the standard version of Aura. Thus, it enables you to customize additional data storage and use as required to suit your specific business needs.
To maintain Custom Field,
1. Access Retail menu, go to Loans. Click on Disbursement menu and select the Custom Field tab.

2. The field appears only when it is created in Admin → System codes → Custom fields → Custom fields and linked to specific Accounts option in Admin → System codes → Custom fields → Field mappings. Based on the rule set in the rule builder at Admin > System codes → Custom fields → Field mappings, certain custom maintenance will be mandatory.
3. Click Edit. Edit Custom Field page appears. In the following illustration, a custom field, OTP has been mapped to the Account as shown below.

4. Enter value for OTP. This is the custom field mapped to Loan Disbursement at Admin → System codes → Custom fields → Field mappings.
5. Click Save. Custom Field appears with the edited details.

Functions: Edit