External Manual Entry
External Manual Entry allows you to create and maintain any external account transactions for the purposes of reconciliation. Using this functionality, you can modify/delete the records only if the Reconciliation status is Not reconciled.
There is only one tab:
To add New External Manual Entry
- From PaymentGrid menu, click Nostro reconciliation, and then External manual entry. External Manual Entry search page appears.

- Click Add. New External Manual Entry -- Profile (1/2) page appears.
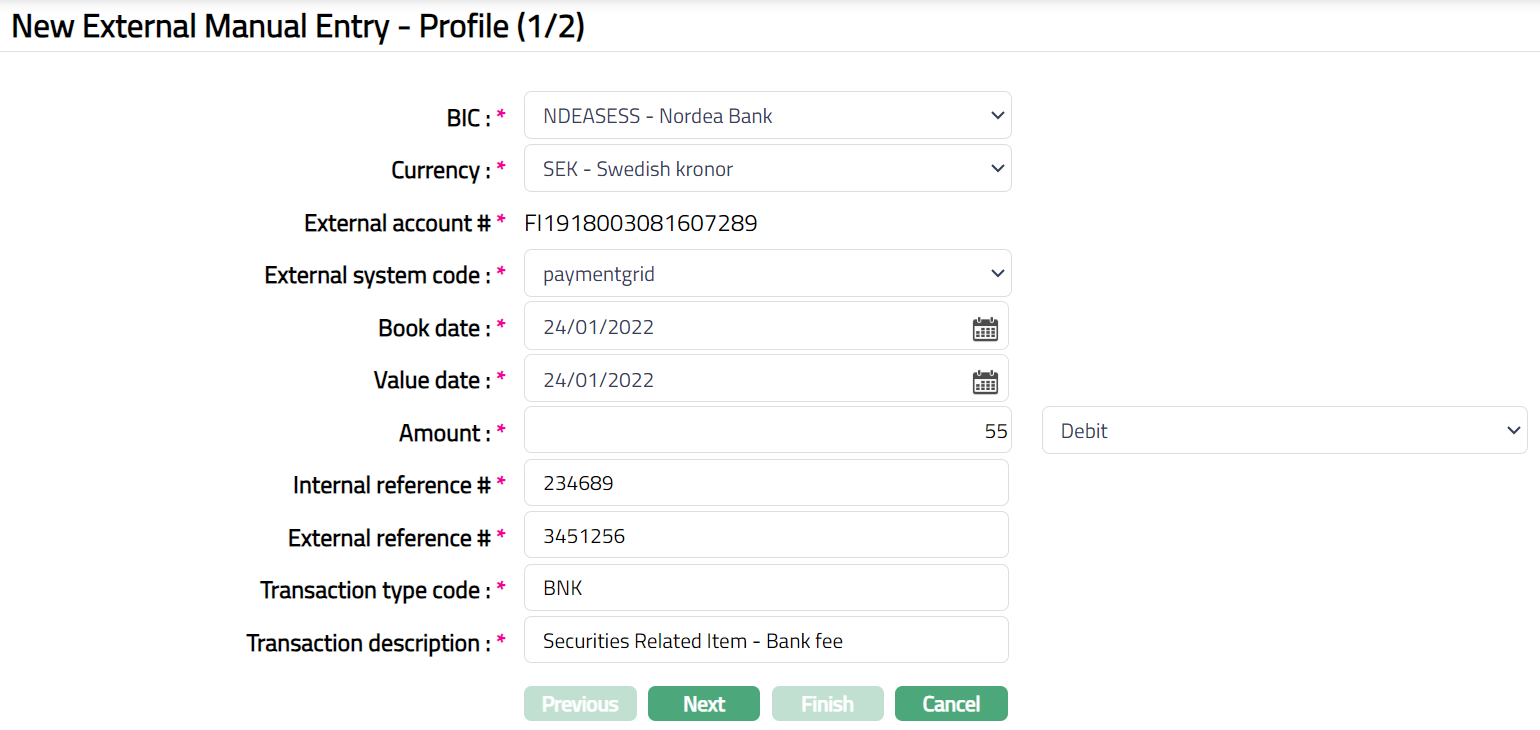
Select BIC (Business Identifier Code) code from the drop-down list of active BIC's maintained under PaymentGrid > Nostro reconciliation > Account mapping and preferences.
Currency will be enabled only on selection of BIC. Select the Currency from the drop-down list of active currencies which gets auto populated from the Account Mapping and Preferences based on selection of BIC code.
External account # gets auto populated from Account Mapping and Preferences based on selection of BIC and Currency combination.
Select External system code from the drop-down list which gets auto populated from Account Mapping and Preferences based on selection of BIC and Currency combination.
Enter / select Booking date from the calendar. It's the transaction booking date.
Enter / select Value date from the calendar. It's the transaction value date.
Enter transaction Amount and indicate the type. The available options are Debit, Credit, Reverse credit and Reverse debit. By default, debit will be selected.
Enter the Internal reference #. It specifies the internal transaction reference number. It should be a unique number.
Enter External reference #. It specifies the external transaction reference number.
Enter Transaction type code. For example: BNK, BOE, BRF, CHG, CMT, ODC etc.
Enter description for the transaction.
For Example: BNK - Securities Related Item - Bank fees. BRF - Brokerage fee. CHG - Charges and other expenses. ODC - Overdraft charge.
- Click Next. New External Manual Entry -- Confirmation (2/2) page appears.
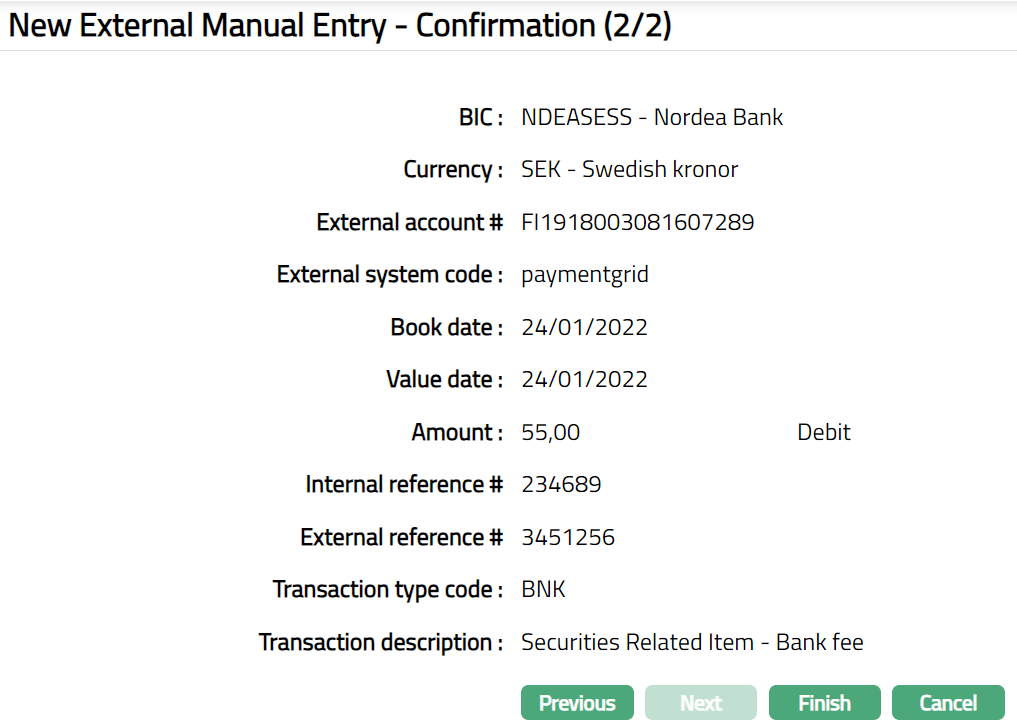
- Click Finish. External Manual Entry page appears showing the details of the record that you created, and you can see the Profile tab by default.
Functions: Add, Delete, Search, Edit, Approve
Delete: You can delete an External Manual Entry saved in CC-PG which is not yet reconciled, by a click on Delete button. CC-PG will ask for confirmation, on approving which the selected record will be deleted.
Approve: If you want to approve an External Manual Entry, then retrieve the record and click on Approve. CC-PG will ask for confirmation. Once the tab is approved, status gets changed from Pending to Approved.
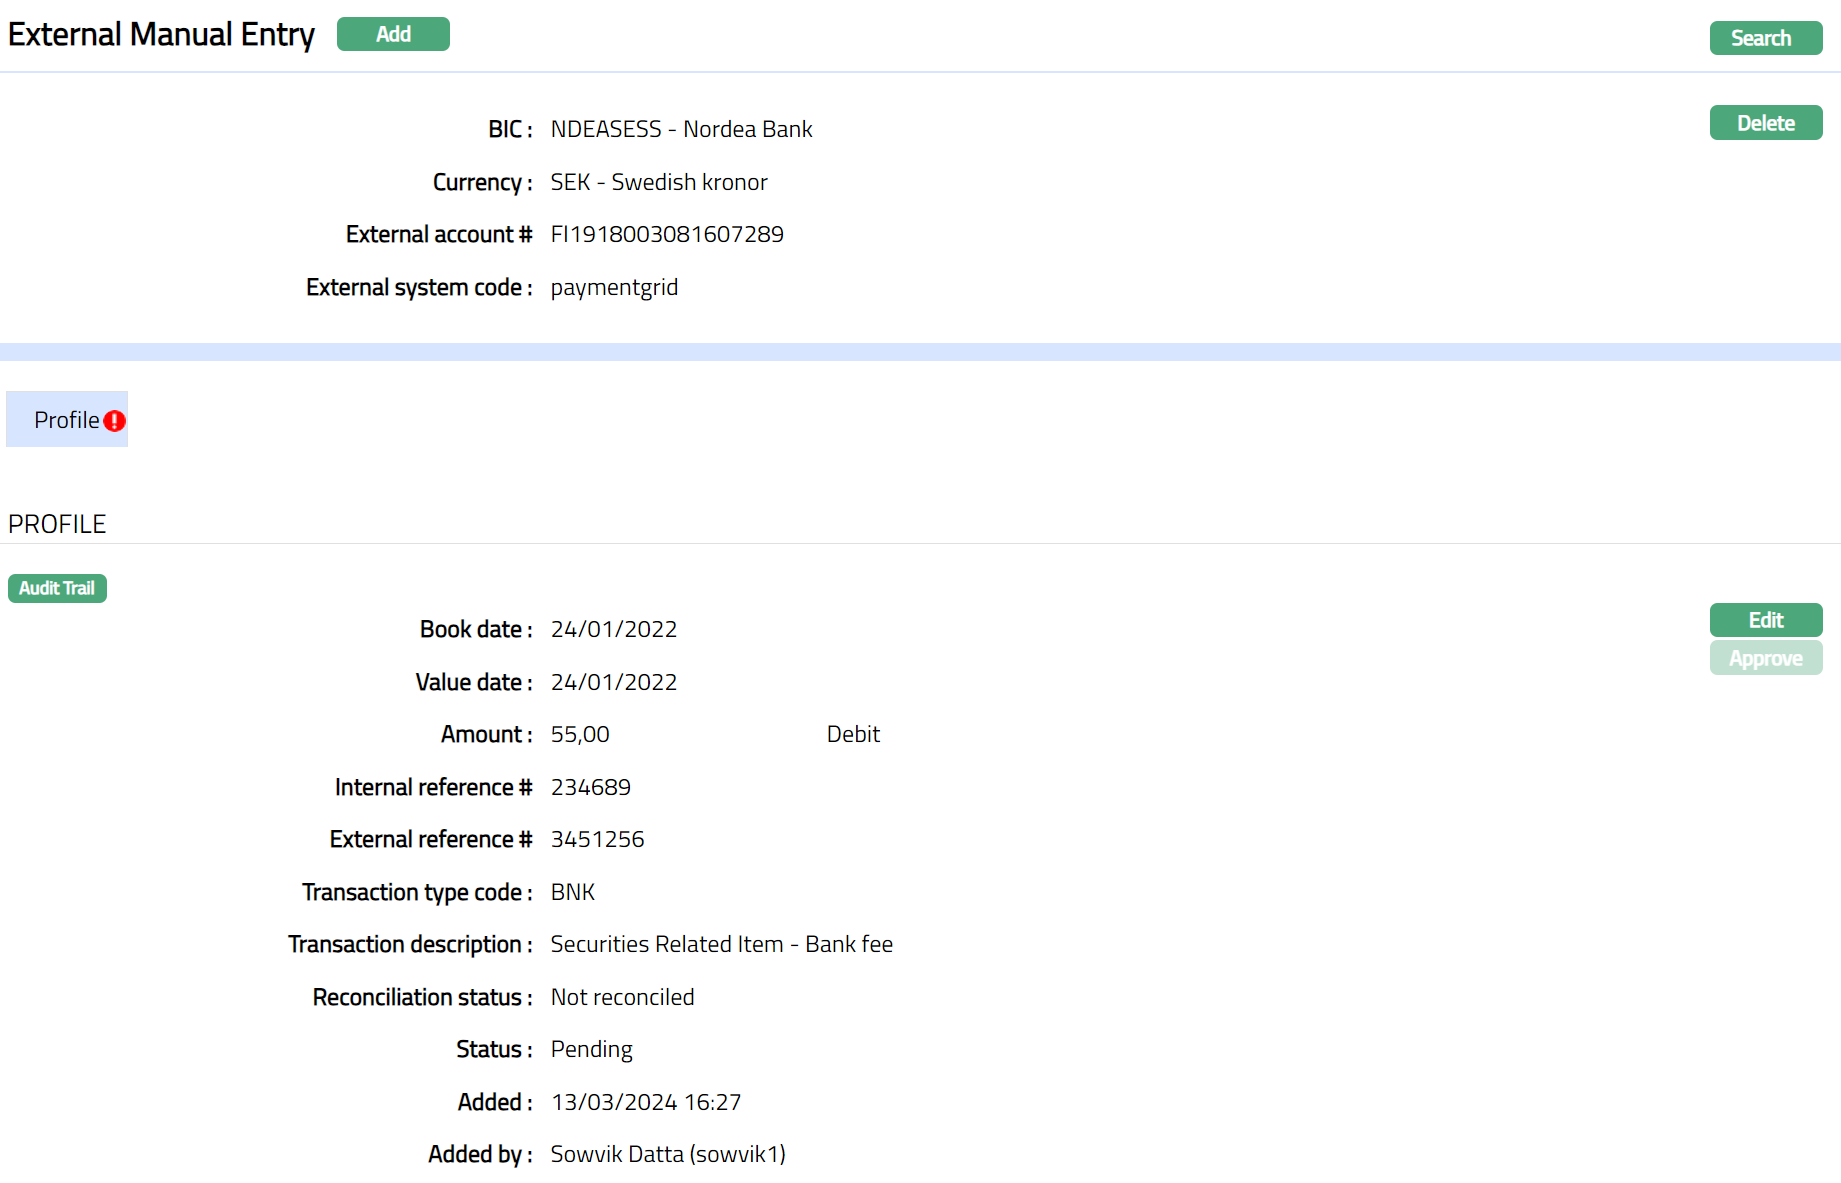
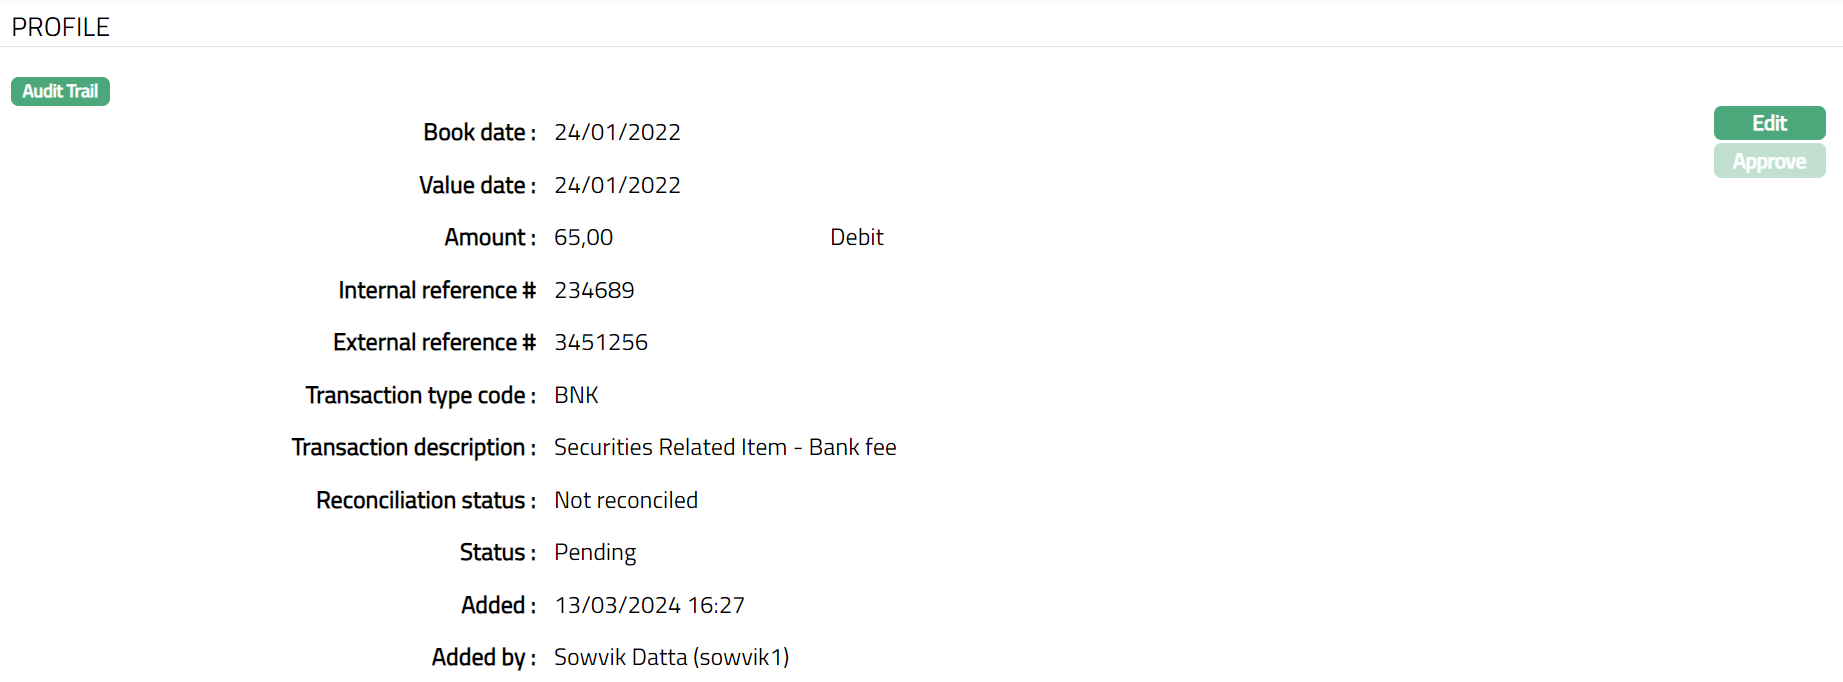
Profile
Profile tab, which is the default tab in the External Mapping Entry, shows the basic details of the manual entry maintained for the external account transactions.
To view / edit Profile.
- Access External Manual Entry page and click Profile tab to view the details as per sample below. The details are defaulted from the entries that you made in New External Manual Entry -- Profile (1/2). The Edit button will be enabled only, if the Reconciliation status is Not reconciled.

- Click Edit. Edit Profile page appears.
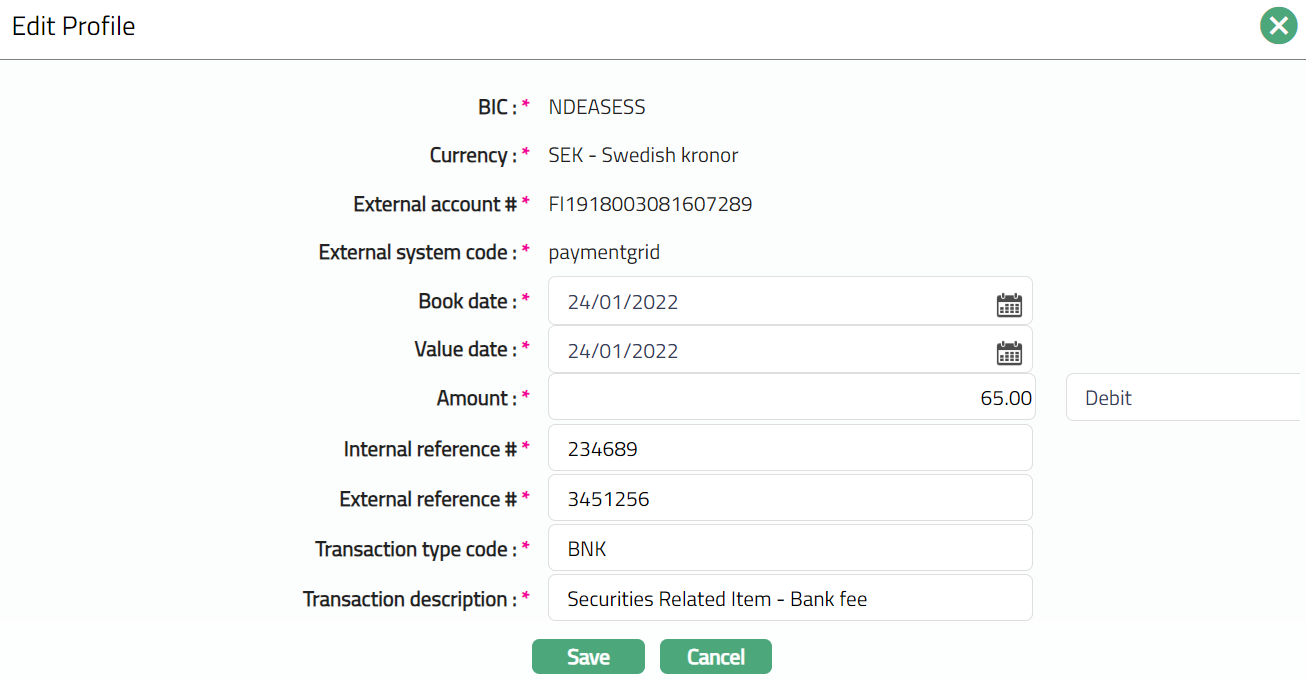
Note: Except the following fields BIC, Currency, External account # and External system code, rest all other fields are editable.
- Make required changes and click Save. Profile page appears with the edited details.
Note: On creation / edit of a new record, the Status of the record by default will be Pending, Reconciliation status by default will be Not reconciled and a red bubble appears on the Profile tab. Once the record is Approved, the record Status gets changed to Approved and the red bubble on the tab disappears. Once the record is reconciled, the Reconciliation status gets changed to Reconciled.

Functions: Edit, Approve.
The additional fields are as follows:
Reconciliation Status field displays the status of the reconciliation of entry.
Status field denotes the status of the tab.
Added field denotes the date on which the record was added.
Added by field denotes the name of the user who created the record.
Approved field denotes date on which the record was approved and is displayed only for approved records.
Approved by field denotes name of the user who approved the record and is displayed only for approved records.