Escrow Covenant Maintenance
The Escrow Covenant Maintenance page is used to create and maintain escrow covenants for clients.
An escrow covenant is a formal financial agreement that specifies the exact rules and conditions for releasing funds held in escrow. It defines when funds may be released and any prerequisites that must be satisfied first. Examples of prerequisites include waiting a set number of days, or confirming there are no outstanding financial obligations. This mechanism helps manage transactions involving secure digital assets, such as security tokens, by ensuring funds are released only according to the agreed terms.
The Escrow Covenant Maintenance page has the following tab:
To Add an Escrow Covenant,
1. From the Digital Assets menu, click Escrow Covenant, and then Maintain. The Escrow Covenant Search page appears.

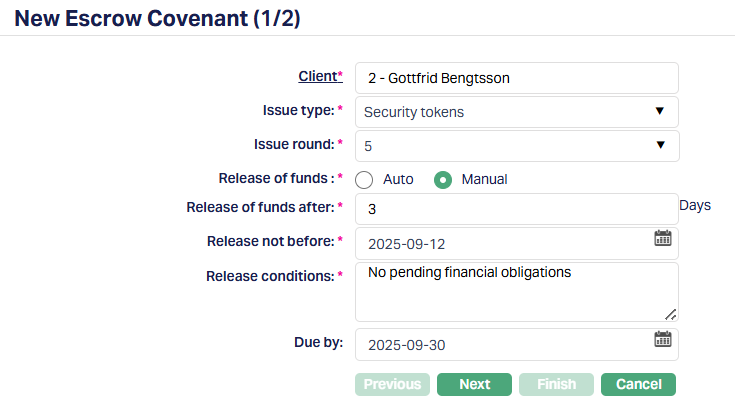
2. Click Add. The New Escrow Covenant (1/2) page appears.
3. Select the Client by clicking the hyperlink. A Client search page opens, so you can find a client maintained under CRM → Clients → Maintain, as shown below.
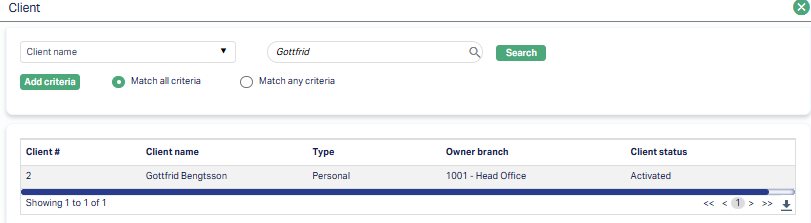
Note: To add an escrow covenant, you must choose a Client whose Client status is Activated.
The master list of Clients is maintained in CRM → Clients → Maintain.
4. Choose an Issue type from the drop-down, for example, Security tokens.
- This represents the digital asset products offered by the issuer’s bank and may vary by bank and product policy.
5. Choose the Issue round number from the drop-down, maintained in Digital Assets → Primary Issue → Maintain.
- This numeric field indicates the sequential stage of the offering (for example, first issuance, second issuance, and so on).
6. Choose the mode for the Release of funds by selecting one of two radio buttons: Auto or Manual.
If Auto is selected, Aura will release funds automatically after a predefined number of days.
If Manual is selected, you may enter the number of days after which you can manually release the funds.
7. Enter the number of days in the Release of funds after field.
8. In the Release not before field, use the calendar to select the specific date before which funds cannot be released.
9. In the Release conditions field, enter any specific conditions that must be met before funds can be released.
10. In the Due by field, use the calendar to enter the date by which the escrow covenant is due.
11. Click Next. The New Escrow Covenant Confirmation (2/2) page appears.
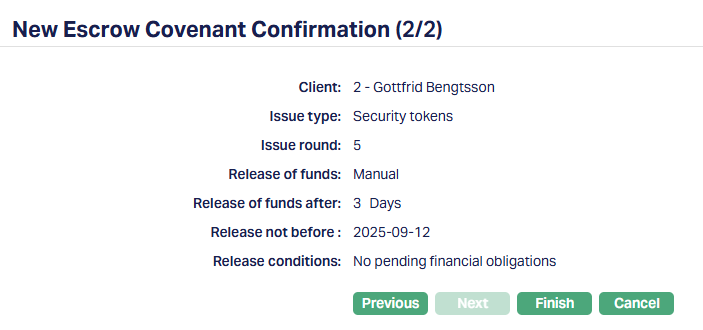
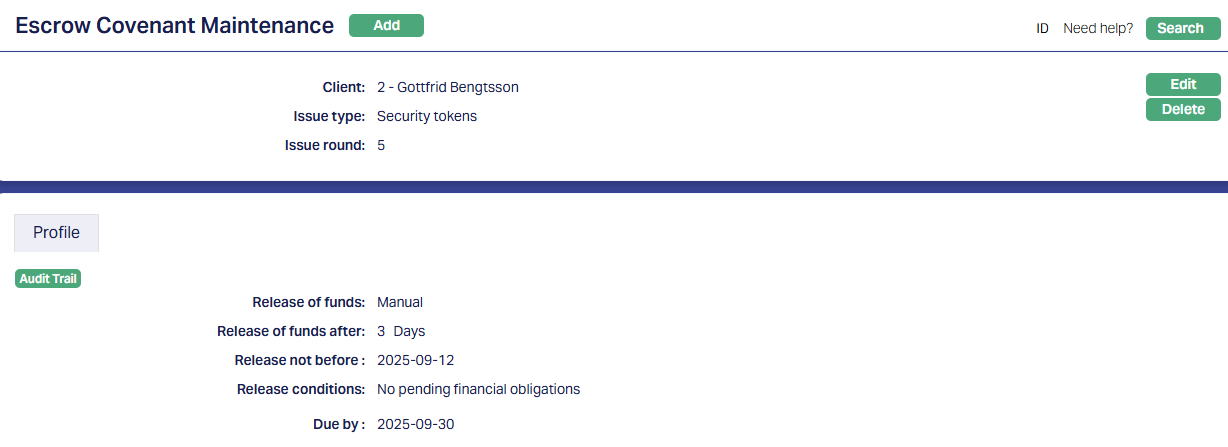
12. Click Finish. The Escrow Covenant Maintenance page appears, displaying the details you just entered.
Functions: Add, Search, Edit, Delete.
To View / Search an Escrow Covenant,
1. From the Digital Assets menu, click Escrow Covenant, and then Maintain. The Escrow Covenant Search page appears. By default, you will not see any transaction records initially.
2. In the Search for drop-down, input the required search criteria. Available options are: Client name, Issue round, Issue type, Release not before, and Release of funds.
3. Enter the search value in the textbox. For example: select Release of funds as search criteria and select Manual in the drop-down.
4. Click Search. All the records available in Aura which satisfy the search criteria will appear on the page. A sample is shown below.
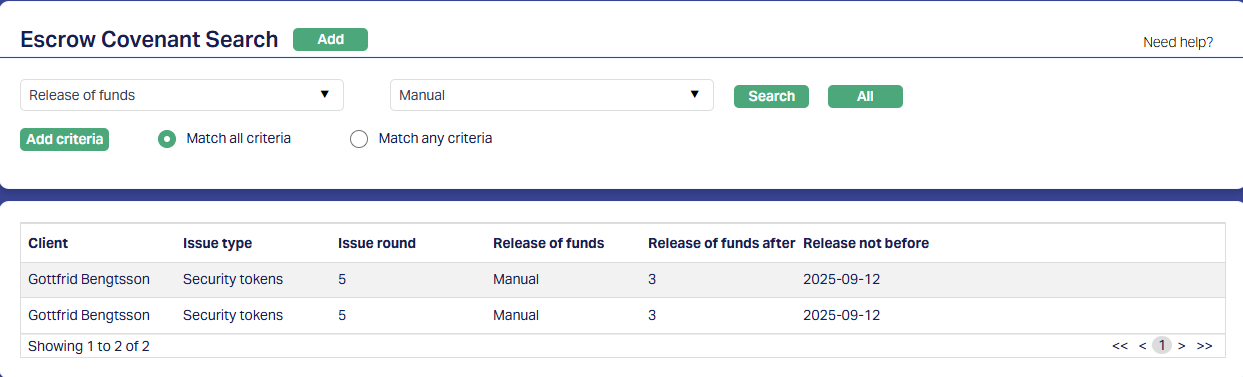
The fields available are as follows:
Client: It displays the name of the client.
Issue type: It displays the type of Issue, such as Security tokens.
Issue round: It displays the sequential stage of the issue.
Release of funds after: It displays the number of days after which the funds will be released.
Release not before: It displays the date before which the funds cannot be released.
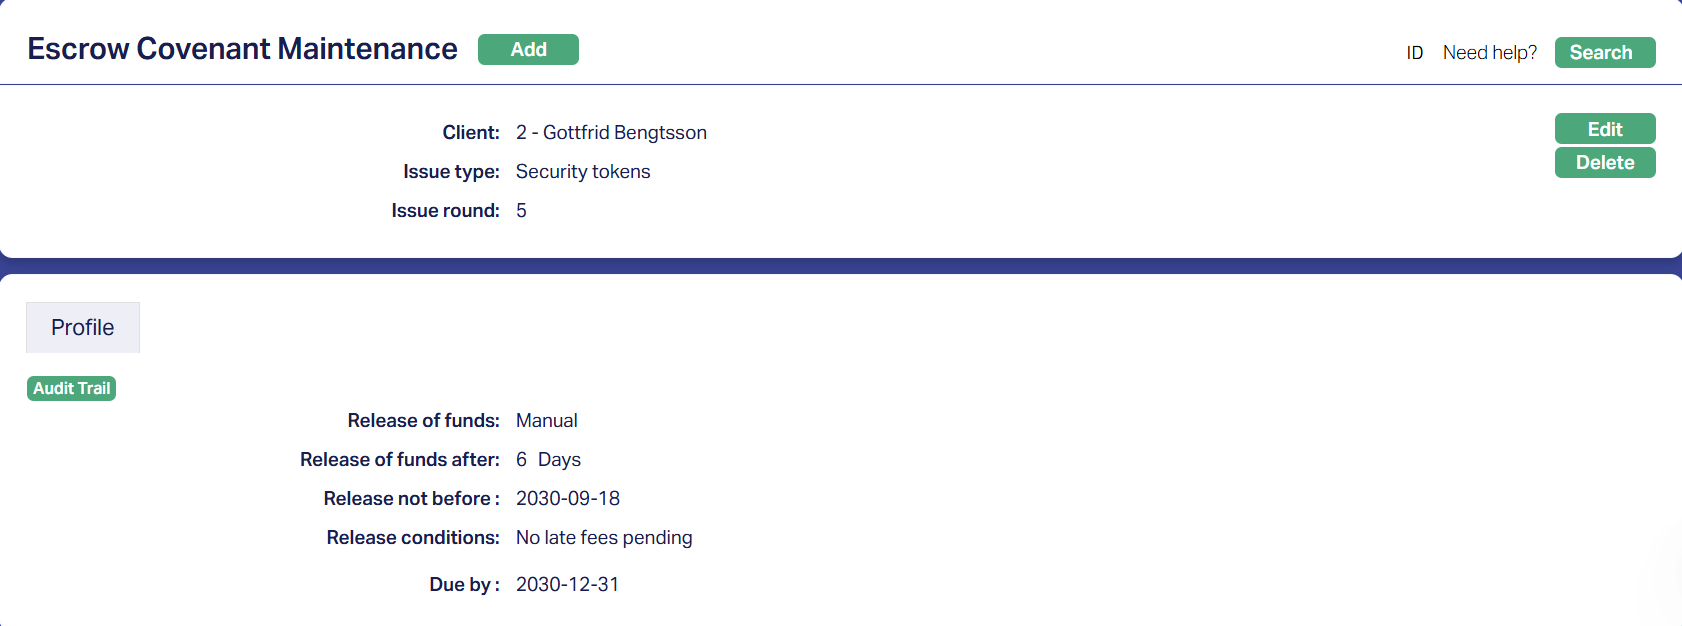
Profile
The Profile tab shows the basic details of the Escrow Covenant. The details are defaulted from the entries made during the creation of the Escrow Covenant. The Profile tab is the default and only tab.
To Edit the Escrow Covenant Maintenance details:
1. Access the Escrow Covenant Maintenance page and click the Profile tab. The Profile page appears, displaying various fields shown below.

2. Click Edit. The Edit Escrow Covenant page appears.
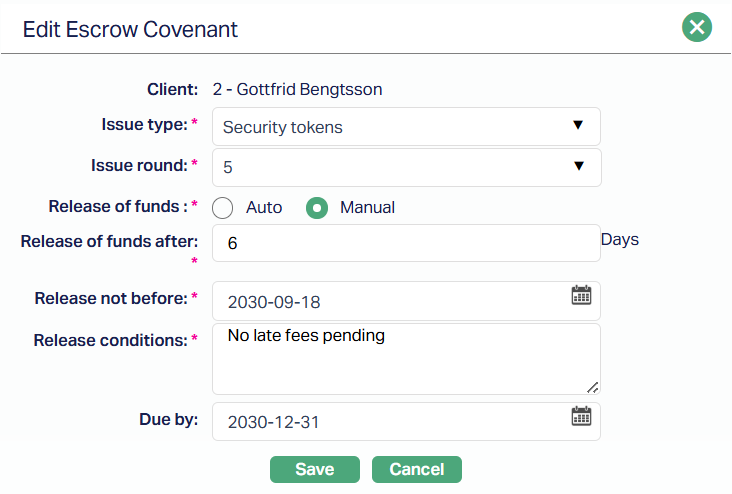
Note: You can edit all fields except Client.
3. Click Save. The Profile tab appears with the edited details.
Functions: Add, Search, Edit, Delete.
Delete: You can delete an Escrow Covenant by clicking Delete. Aura will ask for confirmation, and on approval, the Escrow Covenant will be deleted.